
AT8662 - Nicht kategorisiert Audio-Technica - Kostenlose Bedienungsanleitung
Finden Sie kostenlos die Bedienungsanleitung des Geräts AT8662 Audio-Technica als PDF.


| Produkttyp | Mikrofon-Schockmount für Gänsehalsmikrofone |
| Kompatible Mikrofonserie | Audio-Technica UniPoint® Serie (z.B. AT859QMLa, U857Q, U857QU, U857QM, U857QMU, U857QL, U857QLU, U857QSU, U859QL) |
| Durchmesser des Gänsehalses | 19 mm |
| Anschluss | XLRM 3-polig (Industriestandard) |
| Bohrung für Montage (Durchmesser) | 51 mm |
| Flanschaußendurchmesser | 71 mm |
| Position der Befestigungsschrauben | 3 Bohrungen (1,5 mm) auf einem Kreis von 58,2 mm Durchmesser, 120° versetzt |
| Material | Kunststoff (schwarz) |
| Gewicht (ca.) | 150 g |
| Farbe | Schwarz |
| Funktionen | Isoliert das Mikrofon von Körperschall, Stößen und Vibrationen; eliminiert niederfrequente Resonanzen |
| Verwendungszweck | Für Podien, Rednerpulte, Konferenztische und ähnliche Oberflächen |
| Lieferumfang | Schockmount, Befestigungsschrauben (3 Stück) |
| Hersteller | Audio-Technica |
| Modell | AT8662 |
| EAN/GTIN | Nicht angegeben (typisch für OEM) |
| Herkunftsland | Japan (hergestellt in Machida, Tokyo) |
Häufig gestellte Fragen - AT8662 Audio-Technica
Benutzerfragen zu AT8662 Audio-Technica
0 Frage zu diesem Gerät. Beantworten Sie die, die Sie kennen, oder stellen Sie Ihre eigene.
Eine neue Frage zu diesem Gerät stellen
Laden Sie die Anleitung für Ihr Nicht kategorisiert kostenlos im PDF-Format! Finden Sie Ihr Handbuch AT8662 - Audio-Technica und nehmen Sie Ihr elektronisches Gerät wieder in die Hand. Auf dieser Seite sind alle Dokumente veröffentlicht, die für die Verwendung Ihres Geräts notwendig sind. AT8662 von der Marke Audio-Technica.
BEDIENUNGSANLEITUNG AT8662 Audio-Technica
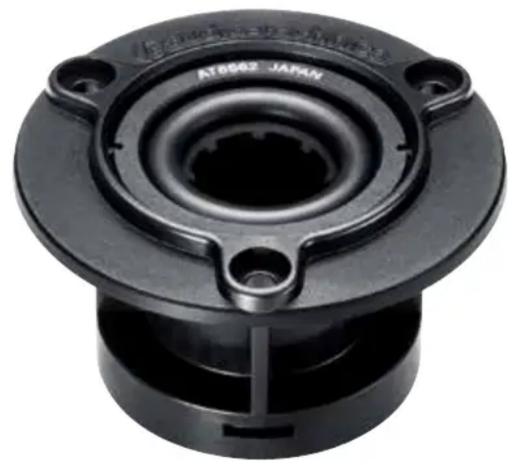
MICROPHONE SHOCK MOUNT (for Unipoint Series Gooseneck Microphones)
natural_image
Close-up of a black mechanical component with circular and flanged features, no visible text or symbols.- Intended for use with gooseneck microphones mounted on lecterns, pulpits, conference tables and similar surfaces.
- Effectively isolates microphone from noise, shock and vibration transmitted through the mounting surface.
- Eliminates pickup of low-frequency resonances caused by mechanical coupling.
DESCRIPTION
The Audio-Technica Shock Mount for Unipoint Series Gooseneck Microphones is designed to secure the Audio-Technica Unipoint series gooseneck microphones onto podiums, desktops, etc. The AT8662 effectively isolates the microphone from noise, shock and vibration transmitted through the mounting surface and eliminates pickup of low-frequency resonances caused by mechanical coupling. Ideal for use with 19mm diameter gooseneck and quick-mount type microphone using industrial standard XLRM 3-pin type connectors.
COMPATIBLE MICROPHONES
| UniPoint® Series | AT859QMLaU857Q U857QUU857QM U857QMU857QL U857QLUU857QSUU859QL |
INSTALLATION
- Locate the center of the mounting location and mark it. Allow enough clearance to accommodate the shock mount's flange on the desired surface and make certain there are no physical obstructions below the desired location.
- Using a 51.0mm hole saw, drill the large through-hole for the shock mount.
- Set the shock mount into the hole and mark the location of the three mounting screw holes. Make certain to "center" the mount in the large hole before marking the three small mounting screw locations.
- Using a 1.5mm drill bit, drill three pilot holes for the mounting screws.
- After installing the microphone, assure maximum shock mount effectiveness by providing some slack in the connecting cable.
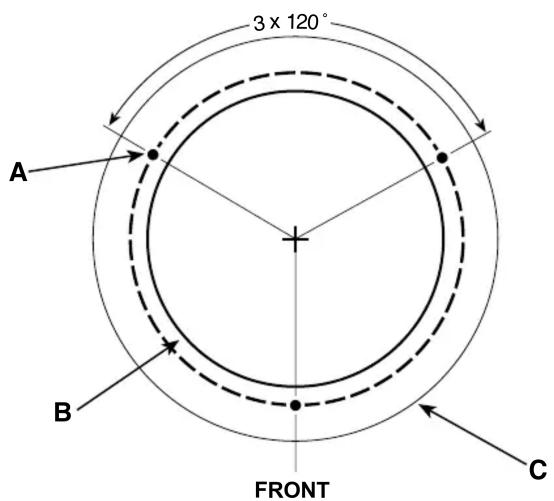
MOUNTING DIMENSIONS
A 1.5 mm pilot holes 3 places on 58.2mm circle.
B 51 mm thru-hole for mount clearance.
C Outside edge of flange, 71.0 mm diameter.
桌面式防震话筒座 (适用于 Unipoint 系列鹅颈话筒)
natural_image
Close-up of a black plastic mechanical component with mounting holes and central bore (no visible text or symbols)- 适合于讲台、论坛、会议桌面或其他同类的平面上,配置鹅颈式话筒安装使用。
- 有效隔话筒安装面上,因受撞击和震动出现的噪音。
- 消除所接收到因机械性耦合而引起的低频共振。
说明
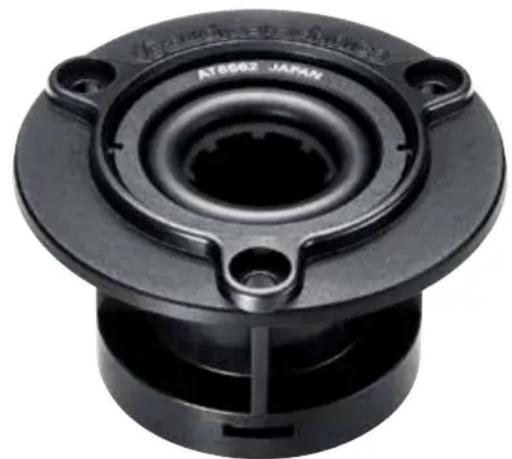
此 鐵 三角桌面防震话筒座,主要Jhpoint系列的鹅颈话筒而设计。AT8662设有防震绝缘胶,能有效减低安装面上的撞击和 震动,并消除所收到因机械性耦合而引起的低频共振 噪声。此话筒座配合19mm直径鹅颈式3针卡农公头的会议话筒后,非常适合使用在演讲、 教学、 会议、 论坛合使用。
兼容话筒型号
| UniPoint®系列 | AT859QMLa |
| U857Q U857QU | |
| U857QM U857QMU | |
| U857QL U857QLU | |
| U857QSU | |
| U859QL |
安装
- 定下和標记出话筒座的安装位置中心点。需预留足够空间给话筒座的凸缘外边,并确定在该位置上没有实质的阻碍。
- 使用一个直径 51.0mm 的开孔器,开出一个足够把话筒座套下的通孔。
- 把话筒座套下於通孔中,并标记出3个螺丝孔的位置。在标记3个螺丝孔前,请确定话筒座是放置于“中心”点中。
- 使用直径 1.5mm 的小钻咀,在3个螺丝孔位置上钻下3个导孔,再装上3枚螺丝把话筒座固定。
- 话筒座安装好後,把话筒套在防震圈的中央,并预留足够的连接线松弛度,以提供有效的防震效能。
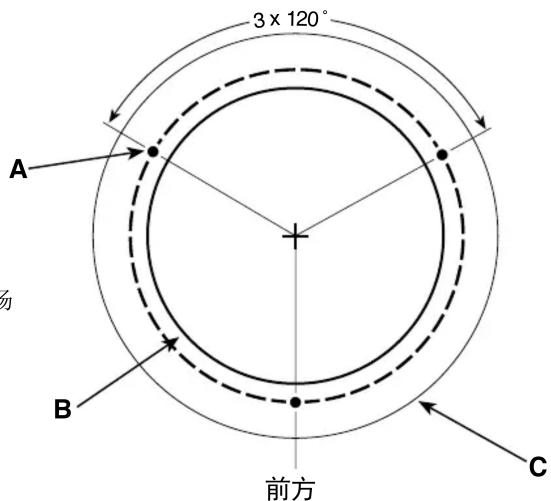
底座架尺寸
A 置于直径 58.2 mm 圆形上的 3 个直径 1.5 mm 导孔。
B 直径 51 mm 的通孔,可把话筒座套下。
C 直径 71.0 mm 的凸缘外边。

audio-technica®
鐵三角
Machida • Tokyo • Japan

Marke : Audio-Technica
Modell : AT8662
Kategorie : Nicht kategorisiert