
LDS-3281 - Fernseher DENVER - Kostenlose Bedienungsanleitung
Finden Sie kostenlos die Bedienungsanleitung des Geräts LDS-3281 DENVER als PDF.


| Produkttyp | Smart HD LED-Fernseher |
| Marke | Denver |
| Modell | LDS-3281 |
| Bildschirmdiagonale | 81 cm (32 Zoll) |
| Bildschirmauflösung | 1920 x 1080 Pixel (Full HD) |
| Bildseitenverhältnis | 16:9 |
| Empfangsstandards | DVB-T2/S2/C, H.265/HEVC |
| Anschlüsse | HDMI (4x), USB (2x), AV, Komponente, VGA, SCART, RJ45, CI, Optisch, Koaxial, Kopfhörer |
| Netzwerk | Wi-Fi, Ethernet (LAN) |
| Stromversorgung | 240 V~, 50 Hz |
| Leistungsaufnahme (max.) | 60 W |
| Energieeffizienzklasse | F |
| Gewicht (mit Standfuß) | ca. 4,5 kg |
| Abmessungen (mit Standfuß) | ca. 732 x 479 x 180 mm |
| Betriebssystem | webOS (Smart TV) |
| Besondere Funktionen | Live Playback, Aufnahme auf USB, HbbTV, Magic Remote (optional), AMD FreeSync Premium, Kindersicherung |
| Mitgeliefertes Zubehör | Fernbedienung, Standfuß, Bedienungsanleitung |
| Umgebungsbedingungen | Tropisch und gemäßigt |
Häufig gestellte Fragen - LDS-3281 DENVER
Benutzerfragen zu LDS-3281 DENVER
0 Frage zu diesem Gerät. Beantworten Sie die, die Sie kennen, oder stellen Sie Ihre eigene.
Eine neue Frage zu diesem Gerät stellen
Laden Sie die Anleitung für Ihr Fernseher kostenlos im PDF-Format! Finden Sie Ihr Handbuch LDS-3281 - DENVER und nehmen Sie Ihr elektronisches Gerät wieder in die Hand. Auf dieser Seite sind alle Dokumente veröffentlicht, die für die Verwendung Ihres Geräts notwendig sind. LDS-3281 von der Marke DENVER.
BEDIENUNGSANLEITUNG LDS-3281 DENVER

denver
SMART HD LED TV with DVB-T2/S2/DVB-C and H.265/HEVC Support
Model: LDS-3281

natural_image
Line drawing of a flat-screen monitor with two side supports (no text or symbols)User's Guide
NOTE:
Read all of the instructions before using this TV and keep the instruction manual in a safe place for future reference.
Denver.eu
CONTENTS
SPECIFICATIONS
......
SAFETY INSTRUCTIONS
2-4
DESCRIPTION OF CONTROL KEYS & CONNECTORS
5-6
OPERATION OF FUNCTION MENU
7-37
TROUBLE SHOOTING GUIDE
38
SPECIFICATIONS
| Aspect Ratio | 16:9 |
| System | PAL/SECAM BG/DK/I, DVB-T/C+T2, DVB-S/S2(Optional) |
| Base impedance | 75 Ω (Unbalance) |
| Receiving TV Band | All Channels Receiveable |
| AC Supply Voltage | 240V~ 50Hz |
Note: Part of the design and the specification may be changed without prior notice.
INFRA-RED REMOTE CONTROL
Features: Full function remote control
Effective Distance Power: 8 metres
Power Supply: DC 3V (Two batteries, size AA, recommend use alkaline type batteries)
IMPORTANT SAFETY INSTRUCTIONS
WARNING
• TO PREVENT FIRE OR SHOCK HAZARD, DO NOT USE AN EXTENSION CORD, RECEPTACLE OR OTHER OUTLET UNLESS THE BLADES CAN BE TO PREVENT BLADE EXPOSURE.
• TO PREVENT FIRE OR SHOCK HAZARD, DO NOT EXPOSE THIS APPLIANCE TO RAIN OR MOISTURE.

This lightning flash with arrowhead symbol in an equilateral triangle alerts users to the presence of uninsulated dangerous voltage within the products enclosure that may be of sufficient magnitude to constitute a risk of electric shock.
CAUTION
RISK OF ELECTRIC SHOCK DO NOT OPEN
Warning: To reduce the risk of electric shock, do not remove cover(or back). No user serviceable parts inside. Refer servicing to qualified service personnel.

The exclamation mark within an equilateral triangle alerts users to the presence of important operating and maintenance (servicing) instructions in the literature accompanying the appliance.
This appliance should not be exposed to water and no object filled with liquid such as a vase should be placed on the unit.
CAUTION
- Danger of explosion if batteries are incorrectly replaced.
- Replace with only equivalent type of battery.
- Do not expose battery to direct sunlight or any other source of heat.
- Ensure proper disposal of used batteries.
- Where the MAINS plug or an appliance coupler is used as the disconnect device, the disconnect device shall remain readily operable.
• To reduce the risk of electric shock, do not perform any servicing other than what is mentioned in the operating manual.
• There are no user-serviceable parts inside the TV; do not open the TV casing.
IMPORTANT INFORMATION
If a television is not positioned in a sufficiently stable location, it can be potentially hazardous due to falling. Many injuries, particularly to children, can be avoided by taking simple precautions such as:
• Using cabinets or stands recommended by the manufacturer of the television.
- Only using furniture that can safely support the television.
- Ensuring the television is not overhanging the edge of the supporting furniture.
- Not placing the television on tall furniture (for example, cupboards or bookcases) without anchoring both the furniture and the television to a suitable support.
- Not standing the televisions on cloth or other materials placed between the television and supporting furniture.
• Educating children about the dangers of climbing on furniture to reach the television or its controls.

Safe installation
Use the belt fixing the television to facilitate restraining the television from topping forward.

SAFETY INSTRUCTIONS
I. Read Instructions - All the safety and operating instructions should be read before the appliance is operated.
2. Retain Instructions - The safety and operating instructions should be retained for future reference.
3. Heed Warnings - All warnings on the appliance and in the operating instructions should be adhered to.
4. Follow Instructions - All operating instructions should be followed.

natural_image
Symbolic icon of a person pushing a cart (no text or symbols)- Water and Moisture - The appliance should not be used near water.
- Cart and Stands - The appliance should only be used with a cart or stand that is recommended by the manufacturer.
- Wall or Ceiling Mounting - The appliance should be mounted to a wall or ceiling only as recommended by the manufacturer.
- Ventilation - The appliance should be well situated so that its location or position does not interfere with its proper ventilation.
- Heat - This appliance should be placed away from heat sources such as radiators, heat registers and stoves.
- Power Sources - The appliance should only be connected to a power supply as described in the operating instructions or as marked on the appliance.
II. Grounding or Polarization - Precautions should be taken.
-
Power Cord Protection - Power supply cord should be routed so that it is not likely to be walked on, pinched by items placed upon it against the cord and its end.
-
Cleaning - The appliance should be cleaned only as recommended by the manufacturer.
-
Power Line - An outdoor antenna should be located away from power lines.
-
Outdoor Antenna Grounding - If an outside antenna is connected to the receiver, the antenna system must be grounded so as to provide against voltages and built-up static charges.
-
Non-use Periods - The power cord of the appliance should be unplugged from the outlet when left unused for a long period of time.
-
Object and Liquid Entry - Care should be taken so that objects did not fall, and liquids are not spilled into the enclosure through openings.
-
Conditions requiring Service - The appliance should be serviced by qualified service personnel when:
• The power-supply cord or the plug has been damaged.
- Objects have fallen on or liquid has been spilled into the appliance.
• The appliance has been exposed to rain.
• The appliance does not appear to operate normally or exhibits a marked change in performance.
- The ventilation should not be impeded by covering the ventilation opening with items, such as newspapers, table-cloths, curtains, etc.
No naked flame sources, such as lighted candles, should be placed on the apparatus.
The apparatus shall be connected to mains socket outlet with a protective earthing connection.
The appliance coupler regard as disconnection device, the disconnect device shall remain readily operable.
- The equipment may be used in tropical and moderate climates.
SAFETY INSTRUCTIONS

Warning
High voltages are used in the operating of this product. Do not remove the back cover of the cabinet. Refer servicing to qualified service personnel.


Warning
To prevent fire or electrical shock hazard, do not expose the main unit to rain or moisture.


Warning
Do not drop or push objects into television cabinet slots or openings. Never spill any kind of liquid on the television receiver.

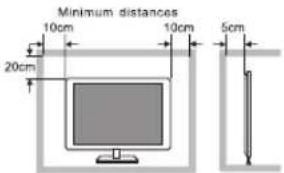
Caution
If the television is to be built into a compartment or similarly enclosed, the minimum distances must be maintained. Heat built up can reduce the service life of your television, and can also be dangerous.

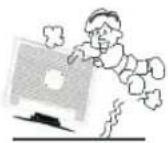
Caution
Never stand on, lean on, push suddenly the product or its stand. You should pay special attention to children.


Caution
Do not place the main unit on an unstable cart stand, shelf or table. Serious injury to an individual, and damage to the television, may result should it fall.

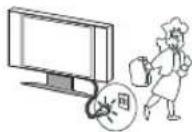
Caution
When the product is not used for an extended period of time, it is advisable to disconnect the AC power cord from the AC outlet.

natural_image
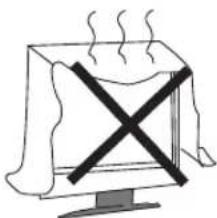
Simple line drawing of a computer monitor with a crossed X symbol on its screen (no text or labels)Caution
Avoid exposing the main unit to direct sunlight and other sources of heat. Do not position television receiver directly on other products which give off heat. E.g. Video cassette players, audio amplifiers. Do not block the ventilation holes in the back cover. Ventilation is essential to prevent electrical failure. Do not squash power supply cord under the main unit.


natural_image
Simple line drawing of a computer monitor with motion lines indicating speed or vibration (no text or symbols)Caution
The panel used in this product is made of glass. It can break when the product is dropped or applied with force. Individuals should execute caution when dealing with broken glass should the panel break.

DESCRIPTION OF CONTROL KEYS & CONNECTORS
CONTROL KEYS:
| BUTTON NAME | BUTTON ICON TYPE | BUTTON INSTRUCTION | ||||
| 1 | 2 | 3 | 4 | 5 | ||
| SOURCE BUTTON | SOURCE |  | [KSX3] | INPUT | INPUT | To display source menu. |
| MENU BUTTON | MENU | MENU |  | MENU | MENU | To select menu. |
| VOLUME UP BUTTON | VOL+ | [2783] | [CC20] | ▲VOL | VOL+ | To increase the sound volume level |
| VOLUME DOWN BUTTON | VOL- | [DSK7] |  | VOL▼ | VOL- | To decrease the sound volume level |
| PROGRAM UP BUTTON | CH+ | [CS6A] | [800A] | ▲CH | CH+ | To select the next higher programme number. |
| PROGRAM DOWN BUTTON | CH- | [DSX8] | [2SWY] | CH▼ | CH- | To select the next lower programme number. |
| STANDBY BUTTON | POWER | [0AA6] | [OKD2] | STANDBY | STANDBY | Switch ON/OFF the TV when at standby mode. |
NOTE:
I. All these control buttons designs are common use for our TV models, and please refer to that under your real product.
2. This control keys quantity can be different according to models, and please refer to your real product in hand.
CONNECTORS:
| PORT NAME | PORTS ICON TYPE | PORT INSTRUCTION | |||
| AV IN | 1 |  |  | ||
| 2 |  |  | |||
| 3 |  |  | |||
| 4 |  |  | |||
| COMPONENT IN | 1 |  |  | ||
| 2 |  | ||||
| AV OUT | 1 |  | AV OUT | ||
| 2 |  | ||||
| TERMINAL ANTENNA(75 OHM) | TV signal input port | ||||
| TERMINAL ANTENNA(75 OHM) | Satellite signal input port | ||||
DESCRIPTION OF CONTROL KEYS & CONNECTORS
CONNECTORS:
| PORT NAME | PORTS ICON TYPE | PORT INSTRUCTION | ||
| VIDEO OUT |  | Video output port | ||
| OPTICAL OUT |  | Optical output port | ||
| COAXIAL OUT |  | Coaxial output port | ||
| AUDIO OUT |  | Audio output port | ||
| LINE OUT |  | Audio output port | ||
| EARPHONE OUT | [xxx1] | [xxx0] | Earphone output port | |
| VGA IN |  |  | RGB signal input port | |
| VGA AUDIO IN | [xxx1] | [xxx0] | VGA audio input port | |
| HDMI IN | 1 | [xxx1] | [xxx0] | HDMI signal input port |
| 2 | [xxx1] | [xxx0] | ||
| 3 | [xxx1] | [xxx0] | ||
| 4 | [xxx1] | [xxx0] | HDMI 4 | |
| USB IN | 1 | [xxx1] | [xxx0] | USB input port |
| 2 |  |  | ||
| SCART | SCART | SCART signal input port | ||
| RJ45 IN |  | RJ45 input port | ||
| TF IN | [xxx1] |  | TF card input port | |
| PCMCIA(CI/CI+) IN | [xxx1] | [xxx0] | [xxx0] | PCMCIA(CI/CI+) card input port |
| DC IN | [GBXY] | DC +12V input port | ||
| AUDIO IN | [xxx1] | Audio input port | ||
NOTE:
I. All these terminal connection icons are commonly used for our TV models, and please select designated ports.
- This connection ports quantity can be different according to models, and please refer to your actual product.
OPERATION OF FUNCTION MENU
I. HOW TO OPERATETV
I.1 Pairing the Magic Remote
LEARN MORE ABOUT MAGIC REMOTE
You can select the functions you want easily and conveniently by moving and clicking the cursor on the TV screen, just as you would use a mouse on a computer screen.
- You can purchase the Magic Remote separately if it is not provided. PAIRING THE MAGIC REMOTE
You must pair the Magic Remote with the webOSTV to use it. Pair the Magic Remote prior to use as follows:
-
Turn on the TV. After about 20 seconds, point the remote toward the TV and then press the Wheel (OK).
-
The remote control will automatically be registered, and the pairing completion message is displayed on the TV screen.
- If the Magic Remote failed to register, turn the TV off and back on, and then try to register again. RE-REGISTERING THE MAGIC REMOTE
If the Magic Remote's pointer does not appear on the TV, you must re-register it.
I. Hold the remote control towards the TV and long-press GUIDE button until the instruction appears.
- The previously registered remote control is deregistered and then registered again.
1.2 Using the Magic Remote

- POWER: ON/OFF.
- Q : Search.
- SUBTITLE: Enable/disable subtitles.
- Pulsanti numerati (0-9): Number selection key.
- LIST: The QUICK ACCESS edit screen appears.
- AD : Turn the AD switch on or off.
- VOL +/-: Volume +/-
- GUIDE: You can check the programme.
- MUTE
- ▶ : Start.
- Back: Move to the previous step.
- ▶/▶/▲/▼: RIGHT/LEFT UP/DOWN buttons to navigate the on-screen menus.
◎: Select current option thats highlighted. - TEXT: Open the TEXT.
- MOVIES: Search Movies
- APP: Direct access to APP
- : each color corresponds to a different function within the teletext
- REC: Launch Record.
- □ : launch live playback .
- T.OPT: Open the function menu of TEXT.
20.EXIT: Open the TEXT. - HOME: Displays the Home menu.
- ||: Pause.
- CH+/-: Select the next channel / previous
- • • •: displays additional keys on remote control
- IMPOSTAZIONI: access to setting
- INPUT: signal source
- TV/RAD: passes the radio active
OPERATION OF FUNCTION MENU
1.3 To View More Features of the Remote Control
You can control more features or external devices connected to your TV by using the buttons displayed on your TV screen.
-
Press the ... button on the remote control.
-
Using the remote control, select your desired button on More Actions displayed on your TV screen.
①You can capture your TV screen.
• Some models may not be supported.
- You can view/delete screen-captured images in the Photo & Video app.
- You can copy screen-captured images to USB storage device in the Photo & Video app. (Some models may not be supported.)
②Launch TV Scheduler.
③The information of the TV programme you are watching and the external input is displayed on the screen.
④You can set the picture/sound mode for watching sports games.
⑤You can set features related to the programme you are watching
• Available features may vary depending on the broadcast signal.
- The types of buttons appearing on the More Actions vary, depending on the region and the type of connected device.

1.4 Launching Apps through QUICK ACCESS
Using Apps Quickly and Easily with QUICK ACCESS
Press and hold a number button on the remote control to open an app or to activate an external input registered to the button.
Setting QUICK ACCESS
- Launch the app or select the programme or input you wish to assign.
- Press and hold the number button (1\~9) you want to register.
- When the registration pop-up window appears, select Yes. If you press and hold a number button that has already been registered, the registered function will be performed.
- To see the items that can be registered, select a number that has not been registered in the QUICK ACCESS edit mode.
- If you are in a mode where QUICK ACCESS cannot run, no action will be performed.
- If you delete a registered app, QUICK ACCESS will be deregistered as well.
OPERATION OF FUNCTION MENU
Checking and Editing QUICK ACCESS
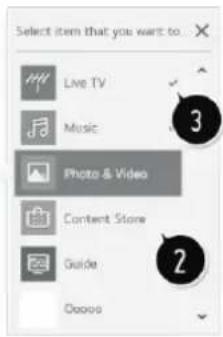
Press and hold the 0 button on the remote control. The QUICK ACCESS edit screen appears.
①Selecting a number that has already been registered allows deregistering it.
②When you select a number that has not been registered, items that can be registered will be shown.
③An item that has been registered to a different number is indicated with a check mark.
④You can view a brief instruction for this function.
![Edit Quick 4 ? Select the [OK] button to register... 1 2 3 4 5 6 7 8 9](/content/2026/05/825796/images/712c39b685d8c47ee05028a84be90f2357de1510fcfbc7568c8242e777aa1e86.jpg)
2.ENJOY LIVE TV
2.1 Making the Most of live Menu
Using Live Menu
You can use the relevant features with ease when watching TV broadcasts. Press the LIST button on the remote control.
Or press the Wheel (OK) button on the remote control and select Programmes.

natural_image
Nighttime aerial view of illuminated hot air balloons with no visible text or symbols① Programmes : View a list of broadcast content that is currently being broadcast.
② Guide : You can view programmes and the schedule of each programmes. To see the details, click the Enjoy Live TV → Viewing Guide in User Guide.
③ TV Scheduler: You can enter the time and date of a programme to schedule watching or recording it at the set time.
To see the details, click the Enjoy Live TV → Using TV Scheduler in User Guide.
④ Recordings: You can check the recordings stored in the storage device and play the recordings. To see the details, click the Enjoy Live TV → Playing Recorded TV Programs in User Guide.
- The menu appears only if an external storage device is connected and the recorded video can be viewed.
- The programmes displayed in Programme List are a configuration of programmes provided by the broadcast service provider. Therefore, if the broadcast service provider has changed its programme configuration without notice, the programmes displayed in Programme List may differ from the actual TV programmes.
- Because programme information displayed in programme List includes information provided by external Electronic Programme Guide (EPG) providers, it may differ from the actual TV programmes.
- You must complete the settings of the network, region, and auto-programme to receive normal live broadcast service.
- The configurable items differ depending on model.
OPERATION OF FUNCTION MENU
2.2 Viewing Guide
Viewing TV Guide
You can view programmes and the schedule of each programmes. Press the remote control's LIST button, and select the Guide tab on the left side of the screen.
①Click on each area, and you can move to the app.
②You can view information on the programme and broadcaster.
③You can view information about the programme you are currently watching as well as the focused program
④Select the ☐ button or the title of the desired programme. You can view more information on the programme and perform Watch/Record (only available on certain models) or Reminder/Scheduled Recording (only available on certain models), etc.
⑤You will be taken to the programme list for the current date and time.
⑥Launch Programme Manager.
⑦You can change the size of the programme list to adjust the number of programmes displayed on the screen.
⑧Sets the filter.
⑨You can turn on/off Mini TV.
- Programme information is not displayed for programmes with no provided broadcast information.
- Some models may not be supported.
- The configurable items differ depending on model.
2.3 Checking Programme Info
Viewing Programme Information During watch the Live broadcast, press the Wheel (OK) button. The Programme Banner appears.
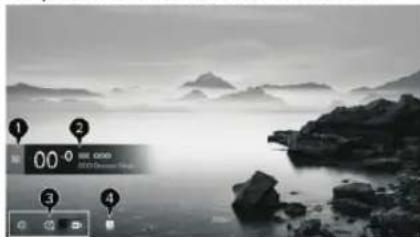
①Live PlaybackMove to the Programmes. To see the details, click the Enjoy Live TV Making the Most of Live Menu in User Guide.
②It displays the information about the programme you are watching. Select a programme banner to enter the detailed information pop-up to see the detailed programme information or run additional features related to the banner.
You can view broadcast information about other programmes using the ▲ / ▼ buttons. You can view broadcast information about the programme you are currently watching using the ◀ / ▶ buttons.
Press the ● button on the remote control to move the banner's position.
- The features can be controlled only within the detailed information pop-up.
③It displays content related to Recording/Live Playback. To see the details, click the Enjoy Live TV Live Playback in User Guide.
④If the programme you are watching includes information such as Subtitle or Audio Language, you can set these features.

: You can set Subtitle.

: You can set Audio Language.
- Only available with digital broadcasts.

: You can set Multi Audio.
- Only available with analogue broadcasts.
• Available features may vary depending on the broadcast signal.
OPERATION OF FUNCTION MENU
2.4 Using Live Playback (Real-time Playback)
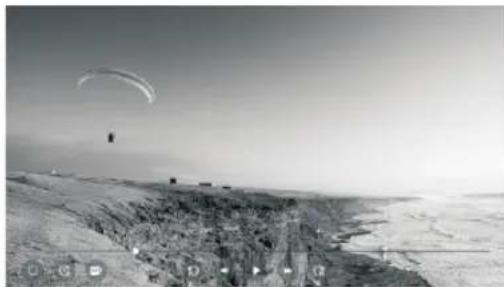
It is a function you can use to temporarily save the programme you are currently watching to a USB HDD, so you can play back any scenes you might miss while watching TV. This function allows you to continue watching from where you were previously if you go out for a while.
- Input the USB HDD in the USB port.
- Press the Wheel (OK) button on your remote control.
- Press the Start Live Playback button at the bottom of the screen.
natural_image
Black-and-white landscape photo showing a paragl over a flat, rocky terrain with distant buildings (no visible text or symbols)- During watch the live broadcast, select a point on the progress bar which you want by the pointer. You can also control to use this feature. Select a previous point than
• The Live Playback function can be used only for broadcast programmes you view through the antenna input terminal. However, you cannot use this option while listening to a radio programme.
- Select a device to be used with Live Playback when two or more USB HDDs are connected to the TV.
- You cannot use a USB stick. Connect a USB HDD with 80 GB or more of total storage.
- If there is not enough remaining space in the USB HDD device, Live Playback may not work properly. To use Live Playback function, you need the USB HDD which has at least 2.3 GB.
- With the Live Playback function, you can play a programme back for up to two hours depending on remaining USB HDD capacity. This time may vary depending on your region. The vide
• The videos saved in Live Playback mode are deleted if you turn off the TV without recording them.
- Changing between programmes during Live Playback will delete the data of the previous programme.
- Some models may not be supported.
2.5 Recording
Using the Recording Functions
-
Connect a USB HDD or USB stick to a USB port. It is recommended that you record to a USB HDD.
-
During watch the Live broadcast, press the Wheel (OK) button.
-
Press the ● button at the bottom of the screen.
-
If you want stop the recording, press the ■ button.
Matters That Require Attention of Recording
- While recording, press the Wheel (OK) button to display information about the recording.
- The duration of the recording can be set before the recording starts.
- If multiple USB storage devices are connected, the last recorded storage device is selected automatically.
• The available capacity of the USB HDD partition must be at least 1 GB.
• There must be at least 4 GB of partition size on USB stick.
- The recordable time may vary depending on the capacity of your USB storage device.
- Upon the initial attempt to record to the USB memory, the TV will perform a performance test. Start recording after the test has been completed normally.
- Because of the content protection technology used, the recorded video cannot be played on PCs or other TV models.
Also, the video cannot be played if the TV's video circuit is replaced.
- Do not remove the USB cable while recording.
- If you force your TV to power off while recording, the recorded content may not be saved. Ideally, you should stop the recording and check that the programme has been recorded before turning the TV off.
- Recording quality depends on the performance of the USB storage device.
- If a USB storage device is faulty, recording may not be completed properly.
• The USB storage device may not work or function properly when a USB hub or extension cable is used.
- Recording may be interrupted if the remaining storage capacity is insufficient. Use of a storage device with sufficient space for recording is recommended.
- During recording, you can watch the other programmes or use the other functions. However, you can only use the programme you are recording and free programmes while recording a scrambled programme.(Some models may not be supported.)
natural_image
Black-and-white aerial view of a coastal landscape with a paraglard and distant figures (no visible text or symbols)OPERATION OF FUNCTION MENU
- You cannot change programme modes while recording.
- When connected to one satellite signal :
If you start recording a programme while watching another programme in a different mode, the programme will change to the programme being recorded. - When connected to two satellite signals:
Even if you start recording a programme while watching another programme in a different mode, the programme will not change to the programme being recorded. - The configurable items differ depending on model.
- Some functions may not be available while recording is in progress.
- Analog broadcast recording feature is only available to some models.
- Only broadcast programmes you view through the antenna input terminal can be recorded.
- Bluetooth and the USB port may not work properly when recording with a USB storage device.
- Recordings that are less than 10 seconds long will not be saved.
- You can save up to 600 pieces of content on a single partition.
• Some models may not be supported
2.6 Using TV Scheduler
Using the TV Scheduler
You can enter the time and date of a programme to schedule watching or recording it at the set time.
-
Press the remote control's LIST button, and select the TV Scheduler tab on the left side of the screen
-
Select the at the top right.
① You can change the alignment order or apply the filter.
② You can set the Delete Mode.
③ You can set the New Scheduled Recording.
④ You can set the New Reminder.
⑤Launch Guide.
Programme Scheduling

You can select a show to schedule it for watching or recording.
-
Press the remote control's LIST button, and select the Guide tab on the left side of the screen.
-
Select the programme you want.
If you want to record a live broadcast, click the Record or Watch button. In case of an upcoming programme click the Scheduled Recording or Reminder button.
- Scheduled recording does not guarantee exact recording time of the programme because the programme will be record as the information of broadcaster.
• Applies to Digital broadcasting.
Manual Scheduling
You can select the date, time and programme to watch or record the programmes.
-
Press the remote control's LIST button, and select the TV Scheduler tab on the left side of the screen.
-
Select the at the top right.
-
Select the 📄 or the 🔒 at the top right.
-
Select CREATE MANUALLY.
-
Set the date, time, and programme to record or watch.
• The length of the scheduled recording should be at least 1 minute.
Recording a Series
The series recording function is used to automatically record every episode of the programme that you choose.
If a programme is a series, you can record the series with Scheduled Recording in Guide or with Record when watching TV.
You can view the recording progress of a series on the details screen in Series Recordings.
You can play series recordings in the Recordings app.
Check your region and network condition to use these functions.
If the scheduled series recording and another scheduled recording are at the same time, or if there is a problem with the broadcast information, the series may not be recorded in the order of episodes.
Series recording may not be available depending on the episode type of the programme provided by the broadcaster. The configurable items differ depending on model.
OPERATION OF FUNCTION MENU
2.7Play Recorded TV Programs
Managing Recordings
You can view and play recordings stored on storage devices by using the Recordings app.
-
Press the remote control's LIST button, and select the Recordings tab on the left side of the screen.
-
Select the at the top right.
①Select the storage device to play, the type of recording, the sorting method, and the view type.
②Select and delete the desired content.
③Display detailed information about the content.
You can change the title of the content in the detailed information pop-up.
④Launch Search.
- You can only play recordings made on the current TV in Recordings.

- When playing an HFR (High Frame Rate) recording, the motion of the screen may differ from that of the original recording.
• Some models may not be supported.
Playing Recordings
You can access and operate basic features such as playback and pause on the playback screen.
-
Select your desired recording from the Recordings app.
-
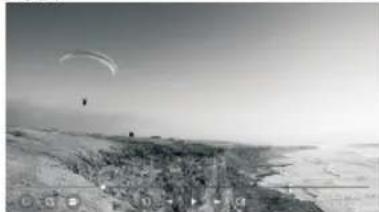
You can control the playback of your desired recording by pressing the Wheel (OK) button during
playback.
①You can operate basic playback-related features.
②You can do the settings related to play on repeat of the video.
③This switches you to a screen where you can set up additional features.
Setting up Additional Features
-
Press the Wheel (OK) button during the playback of the desired recording.
-
Select on the screen
①Return to Recordings.
②Display recordings list below thumbnail image while recordings playback.
③Turn subtitles on or off.
④Select audio language that can be outputted.
⑤You can set continue watching to resume playing from the last viewed scene.
⑥Returns to the basic operation screen.
- The configurable items differ depending on model.


2.8 Watching Internet Channel
You can watch real-time broadcasts through this service over the Internet.
You can see information on new Internet Channels or manage the channels you like in LG Channels.
-
Press the ⚙ button on the remote control.
-
Select ⏻→Channels.
-
Set LG Channels to On.
-
You can watch an Internet Channel in TV.
-
While watching an Internet Channel, click the button on the Remote control.
OPERATION OF FUNCTION MENU
- You can start the LG Channels. You can use the 'Interactive Channel' service that enables users to conveniently enjoy content related to the current channel without having to switch apps. You can use the 'Interactive Channel' by pushing the buttons on your remote control or clicking your screen according to the instructions that appear on the Internet channel screen.
• Some models may not be supported.
- Some Internet channels may not support this service.
- Some content can cause a switch from TV app to a different app.
• The TV should be connected to a network with Internet access.
- You cannot receive the service if you change the Services Country.
• Live Playback and recording are not available for internet programmes.
- Internet programmes.services may be stopped or changed without prior notice by the broadcasting company.
In the → Ⓞ →General→ Location, the Broadcast Country and the Services Country must be the same. If you change any of them, you cannot use the service.
2.9 TELETEXT
To Use Teletext
Teletext is a free service provided by the TV station that offers text-based information about TV programmes, news and weather. The teletext decoder of this TV can support the SIMPLE, TOP and FASTEXT systems.
-
Press the ... button on the remote control.
-
Select Teletext.
-
The TELETEXT window appears.
-
To view TV broadcasts and TELETEXT at the same time, press the •• button on the remote control and select Teletext.
Colour button
To select the preceding or following page.
Number button
Enters the page number to move to ☐ (Programmes) ∧/√ Button To select the preceding or following page.
• Some models may not be supported.
Special Teletext Function
-
Press the ⋯ button on the remote control.
-
Select Teletext Option.
-
Select the TELETEXT menu.
Index
Select each index page.
Time
When viewing a TV programme, select this menu to display the time at the top right hand corner of the screen. In the teletext mode, press this button to select a sub page number. The sub page number is displayed at the bottom of the screen. To hold or change the sub page, press the ⬤ / ⬤, ◀ / ▶ or Number buttons.
Hold
Stops the automatic page change which will occur if a teletext page consists of 2 or more sub pages. The number of sub pages and the sub page displayed is, usually, shown on the screen below the time. When this menu is selected the stop symbol is displayed at the top left-hand corner of the screen and the automatic page change is inactive.
Reveal
Select this menu to display concealed information, such as solutions to riddles or puzzles.
Update
Displays the TV picture on the screen while waiting for a new teletext page. The display will appear at the top left hand corner of the screen. When the updated page is available then display will change to the page number. Select this menu again to view the updated teletext page.
Language
Sets Teletext language.
OPERATION OF FUNCTION MENU
• In Digital Mode Only
To Set Teletext Language
-
Use the Teletext language function when two or more Teletext languages are broadcast. Press the button on the remote control.
-
Select ⏻ → General → Language → Primary Teletext Language/Secondary Teletext Language.
• In Digital Mode Only
- If Teletext data in a selected language is not broadcast, the default language will be displayed. - If you select the wrong local country, teletext may not appear correctly on the screen and some problems may occur during teletext operation.
2.10 CI Information
You can view information about the currently connected CI.
→ Ⓞ → Programmes → CI Information
If you use a CI module or CAM module,
If you use a CI module or CAM module,
• This function enables you to watch some encrypted services (pay services).
• If you remove the CI Module, you cannot watch pay services.
- CI (Common Interface) functions may not be possible depending upon the country broadcasting circumstances.
- When the module is inserted into the CI slot, you can access the module menu.
• To purchase a module and smart card, contact each service provider.
- When the TV is turned on after inserting a CI Module, you may not have any video and audio output in scrambled programme.
- When using a CAM (Conditional Access Module), please make sure it meets fully the requirements of either DVB-CI or CI plus.
• An abnormal process of CAM (Conditional Access Module) may cause a bad picture.
- If the TV does not display any video and audio when CI+ CAM is connected, please contact to the Antenna/Cable/Satellite Service Operator. (Some models may not be supported.)
- While the TV supports paid broadcasting programmes based on the European standard DVB-CI+, some programmes might not be available for watching if some operators of the programmes use a proprietary CAS system.
2.11 HbbTV
Learn More about HbbTV
HbbTV (Hybrid Broadcast Broadband TV) is a new broadcasting standard that enables super-teletext type services, delivered by a broadcast TV programme, to be integrated or linked to online services delivered over broadband to a connected Smart TV. Consumers are therefore able to access various online services such as catch-up TV, Video on Demand (VOD), programme related applications and other rich information services in addition to traditional digital teletext services, all directly on to the TV in a seamless experience. HbbTV services can be activated in a number of ways, the most popular being pressing the . Users typically explore services with the traditional navigation keys (including the OK button and the , , , , ). The current version of the HbbTV specification also includes support for "adaptive streaming" of video over a broadband connection thus guaranteeing the best possible image quality for the viewer. For more information about HbbTV, visit www.hbbtv.org
• Some models may not be supported.
To Use HbbTV
→⋮→Programmes→HbbTV
Sets HbbTV to On.
Enjoy a wide variety of content from HbbTV enabled services.
• Service features may be limited when the TV is not connected to the internet.
- The functionality and quality of the HbbTV service may vary depending on the quality of your broadband connection.
- HbbTV services are not guaranteed to be available for all programmes – only those that your broadcaster chooses to support.
• Some models may not be supported.
- When Live Playback is in operation, HbbTV is disabled.
OPERATION OF FUNCTION MENU
While using HbbTV service, navigation keys and the Wheel (OK) button may be disabled if the Magic Remote's pointer is activated on the screen. In this case, press the left, right, up and down keys in order to deactivate the pointer. (This only applies to models that support the Magic Remote.)
3. CONNECTING EXTERNAL DEVICES
3.1 Using Home Dashboard
Using Home Dashboard
You can select or control a device (mobile, external device, Home IoT Devices, etc.) connected to the TV. Press the button on the remote control and select Home Dashboard. You can also press and hold
the □-button on the remote control.
①You can check and select the smart device connected with the ThinQ app. Please refer to Connecting External Devices Connecting Smart Devices in User Guide for more information on the action.
②You can play sound from a smart device connected via Bluetooth. Please refer to Connecting External Devices Playing Sound from a Smart Device through the Tv's Speakers in User Guide for more information on the action.
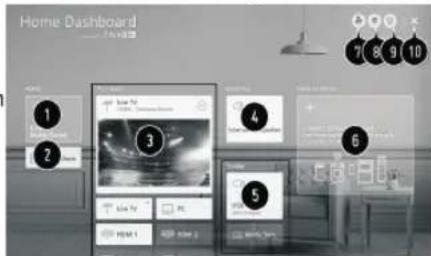
③You can check and select the external device connected through the external input port or network.
④The currently selected output speaker is displayed, and you can navigate to the output speaker settings screen.
⑤You can view and select the connected storage device.
⑥You can check and control the device connected via the Home IoT. Please refer to Connecting External Devices Connecting Home IoT Devices in User Guide for more information on the action.
⑦You can easily control your device by presetting the desired operations.
⑧Sign In: You can log in/out to and from the ThinQ account you created on mobile. Edit: You can edit the name of the device connected to Inputs or Home IoT Devices or configure the related settings.
⑨It refreshes the device list.
⑩Exit the Home Dashboard.
• Available settings vary depending on the model or region.
3.2 Connecting Home IoT Devices
You can check and control the status of the connected Home IoT Devices.
-
Install ThinQ app on your smartphone.
-
Log in to your ThinQ account, and register your own ThinQ device.
-
Press the button on the remote control and select Home Dashboard.
-
Press the ⚙ at the top right to select the Sign In.
5.Log in to your ThinQ account. A list of the registered ThinQ devices will appear.
- If you are in an area where the ThinQ app is not in service, ThinQ device connection will not be supported. - If you are controlling the external device from your mobile app, you might not be able to control the device from your TV. Quit the mobile app to control it from your TV.

①You can easily control your device by presetting the desired operations.
②You can log in/out to and from the ThinQ account you created on mobile.
③Edit List: You can rename, Show/Hide or change the order of the devices connected to Home IoT Devices. Notification: If you turn it On, you can receive notifications about the status of the Home IoT Devices. Delete: You can delete the connected device. You can only delete certain devices from the TV.
④You can check the connection guide for Home IoT Devices. You can connect and display the devices registered to your ThinQ account. Once the device is connected, the card will be changed to a smaller size and appear at the bottom of the device connection list.
·Available settings vary depending on the model or region.
· IoT devices that can be connected to a TV are subject to change without notice.
- Connectable ThinQ devices and available functions may differ between mobile and TV.
OPERATION OF FUNCTION MENU
3.3 Connecting Smart Devices
Connecting Smart Devices
You can use a variety of features by connecting the TV to a smart device.
Connecting Your Smart Device to a TV Using the ThinQ App
- Download the ThinQ app from the app store of your smart device. You can download the app easily by scanning the QR code.
Android

IOS

-
Connect your TV and smart device to the same Wi-Fi network. You can check the Wi-Fi network of TV at ⏻→⋮→Connection → Network Connection Settings → Wi-Fi Connection.
-
Run the ThinQ app installed on your smart device.
-
Follow the instructions from ThinQ app to connect your smart device to the TV. When your account information of ThinQ is linked to the TV, you can manage the IoT devices linked to your account using Home Dashboard of the TV.
Controlling Your TV with the ThinQ App
You can tap the buttons on your smart device's screen to control the TV.
① When watching a broadcast, you can control the programme, volume, etc. or select the external input with voice commands instead of using the remote control.
②You can use the same functions as the Magic Remote's pointer and arrow keys.
- Some controls may be limited in external input mode.
- The app's screen and functionality are subject to change without prior notice.
• Available features may differ depending on your country and OS.
3.4 Connecting USB

Connecting USB
Connect a USB storage device (USB HDD, USB stick) to the USB port on the TV to enjoy the content files stored on the USB storage device on your TV.
Tips for Using a USB Storage Device
- A USB storage device that has a built-in automatic recognition programme or uses its own driver might not be recognisable.
- Some USB storage devices may not be supported or may not work properly.
- If you use a USB extension cable, the USB storage device may not be recognised or may not work properly.
- Please use only USB storage devices formatted with the FAT32 or NTFS file system provided by Windows OS.
- It is recommended that you use an external USB HDD with a rated voltage of 5 V or less and a rated current of 500 mA or less. If you use a device requiring a higher voltage/current than the rated voltage/current, it may not operate properly due to lack of current.
- It is recommended that you use a USB hub or USB storage device with a power supply.
- We recommend using a storage device with a capacity of 32 GB for the USB memory and 2 TB or less for the USB hard disk.
- If a USB HDD with power-saving function does not work, turn the hard drive off and on again to make it work properly. See the owner's manual for the USB HDD for more information.
OPERATION OF FUNCTION MENU
- Data on a USB storage device may be damaged, so it is recommended that you back up any important files.
- Users are responsible for data management. The manufacturer bears no responsibility.
- Press the button on the remote control. To remove the USB storage device, press the Eject button, which appears at the top when you focus on the USB storage device you want to remove. If you disconnect the USB storage device without selecting Eject, an error may occur in your TV or storage device.
- When you connect a USB storage device of a file system not supported by the TV to the USB IN port, the format message appears. To use the connected USB storage device, you should format the device first. After format, all the data of USB storage device will be deleted and formatted as NTFS or FAT32 file system.
- Press and hold the ⏻ button on your remote control. Select the connected USB from Home
Dashboard → Storage and select the Format button to format the USB storage device. - When connecting a USB storage device, a random file/folder can be created to provide Smart TV services such as the saving and retrieving of thumbnail images.
3.5 Viewing Photos and Videos
You can view photos and videos using the Photo & Video app.
-
Press the Ⓜ button on the remote control.
-
Run the Photo & Video app.
-
Select your desired storage device.
-
Select and view your desired photo or video.
①Select your desired type of content and viewing method.
②Select and delete the desired content. You cannot delete files that are shared from other devices.
③Select the content you want to play.
- You can only select the same type of content as you first selected.
④You can copy content to a USB storage device.
- Some models may not be supported.
⑤Launch Search.
- Certain content may not be displayed on the list if the number of all content exceeds 40,000.
Using Photo Player
Selecting a photo in the Photo &
Video app runs the photo player. You can view your saved photos.

①Returns to the entire content list.
②You can play background music by running the music player.
③You can zoom in/out of the photos.
④Starts the slide show.
⑤Rotates photos.
⑥360-degree photos can be viewed in 360 degrees. Using the 360° VR Play on a normal photo may distort the image. Some models may not be supported
⑦ You can set the size of a photo or change the speed and effect of a slide show. Some models may not be supported. File Format format Resolution
Supported Photo Files

| File Format | Format | Resolution |
| jpeg, jpg, jpg | JPEG | Minimum : 64 x 64 Maximum Normal Type: 15360 (W) x 8640 (H) Progressive Type: 1920 (W) x 1440 (H) |
| png | PNG | Minimum : 64 x 64 Maximum : 5760 (W) x 5760 (H) |
| bmp | BMP | Minimum : 64 x 64 Maximum : 1920 (W) x 1080 (H) |
| File Format | Format | Resolution |
| jpeg, jpg, jpg | JPEG | Minimum : 64 x 64 Maximum Normal Type: 15360 (W) x 8640 (H) Progressive Type: 1920 (W) x 1440 (H) |
| png | PNG | Minimum : 64 x 64 Maximum : 5760 (W) x 5760 (H) |
| bmp | BMP | Minimum : 64 x 64 Maximum : 1920 (W) x 1080 (H) |
OPERATION OF FUNCTION MENU
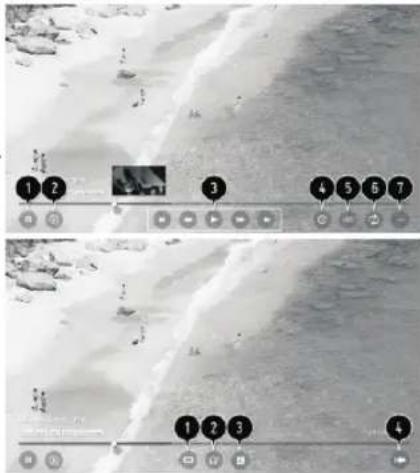
Using Video Player
Selecting a video in the Photo & Video app runs the video player. You can view your saved videos.
①Returns to the entire content list.
②You can select other content by displaying the playlist while watching a video.
③You can control basic video playback functions.
④You can do the settings related to play on repeat of the video.
⑤You can set additional options.
Setting Additional Options
①You can change subtitle settings.
②You can set audio tracks.
③You can set continue watching to resume playing from the last viewed scene.
④Returns to the basic operation screen.
Supported Video Files
Maximum Data Transfer Rate:
Full HD video
H.264 1920 × 1080@60P BP/MP/HP@L4.2 Maximum 40Mbps
HEVC 1920 × 1080@60P Main/Main10@L4.1 Maximum 40Mbps
Supported External Subtitles
smi, srt, sub (MicroDVD, SubViewer 1.0/2.0), ass, ssa, txt (TMPlayer), psb (PowerDivX), dcs (DLP Cinema)
Supported Embedded Subtitles Format:
Matroska (mkv) : Sub Station Alpha (SSA), Advanced Sub Station Alpha (ASS), SRT MP4 : Timed Text Supported Video Codecs
| Extension | Code | |
| atf wmv | Video | VC-1 Advanced Profile (except for WMVA). VC-1 Simple and Main Profiles |
| Audio | WMA Standard (except for WMA V1/W MA Speech) | |
| atl | Video | Kiad IGMAC is not supported; H.264/AVC, Motion Jpeg. MPEG-4 |
| Audio | MPEG-3 Layer I, II, MPEG-1 Layer III (MP3), Dolby Digital, LPCM, ADPCM | |
| mpd mdy mov | Video | H.264/AVC, MPEG-4, HEVC, AVL |
| Audio | Dolby Digital, Dolby Digital Plus, AAC, MPEG-1 Layer III (MP3), Dolby AC-4 | |
| 3ip 3ip2 | Video | H.264/AVC, MPEG-4 |
| Audio | AAC, AMR-NB, AMR-WB | |
| mwv | Video | MPEG-3, MPEG-4, H.264/AVC, VP8, VP9, HEVC, AVL |
| Audio | Dolby Digital, Dolby Digital Plus, AAC, PCM, MPEG-1, Layer I, II, MPEG-3 Layer III (MP3) | |
| to up to mts | Video | H.264/AVC, MPEG-2, HEVC |
| Audio | MPEG-1 Layer I, II, MPEG-1 Layer III (MP3), Dolby Digital, Dolby Digital Plus, AAC, PCM, Dolby AC-4 | |
| mpg mpeg det | Video | MPEG-1, MPEG-2 |
| Audio | MPEG-1 Layer I, II, MPEG-1 Layer III (MP3) | |
| vob | Video | MPEG-1, MPEG-2 |
| Audio | Dolby Digital, MPEG-1 Layer I, II, DVD-LPCM |
Dolby AC-4 : Some models may not be supported.
Cautions for Video Playback
- Some user-created subtitles may not work properly.
- A video file and its subtitle file must be in the same folder. For subtitles to be displayed properly, make sure that the video file and the subtitle file have the same name.
- Subtitles on a Network Attached Storage (NAS) device may not be supported depending on the manufacturer and model.
- Streams that include Global Motion Compensation (GMC) and Quarterpel Motion Estimation (Qpel) are not supported.
OPERATION OF FUNCTION MENU
- Only Window Media Audio V7 and later are supported.
• The AAC main profile is not supported.
• Video files created by some encoders may not be played.
• Video files in a different format than specified may not be played properly.
• Video files stored on a USB storage device that does not support High Speed may not be played properly.

3.6 Listening to Music
Playing Music
You can listen to music by using the Music app.
-
Press the ⏻ button on the remote control.
-
Run the Music app.
-
Select your desired storage device.
You can select your desired songs from all of your storage devices and add them to My Playlist.
- Select your desired music content and enjoy it.
①Select the desired type of content list.
②Select and delete the desired content.
You cannot delete files that are shared from other devices.
③Select content and add it to My Playlist.
④You can copy content to a USB storage device. Some models may not be supported.
⑤Open the music player.
⑥Launch Search.

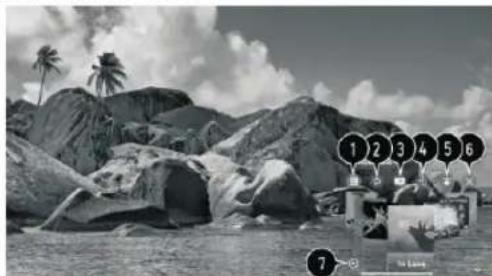
Using the Music Player
You can play music conveniently by selecting the music files saved in the Music app or by selecting the music player icon during content playback in apps such as Photo & Video.
①You can play music from the selected storage device.
②You can set repeat playback and random playback.
③The configurable items differ depending on model.
: You can turn the screen off while listening to music or display the music player in full-screen mode.
: You can listen to music with the screen turned off.
④You can change the position of the music player.
⑤You can minimize the music player.
⑥This feature closes the music player.
⑦Lyrics are available for music files that provide them. In some music files, you can choose a lyric section and move the playback position.
• The lyrics feature is only supported on some devices.
- The lyrics may not be displayed in sync depending on the lyrics data in the music file.
- Reopen your music player by pressing the VOLUME key on your remote control.
- You may not be able to use the music player for some features.
natural_image
Black-and-white beach scene with large rocks, palm trees, and a small building on the water (no visible text or symbols)OPERATION OF FUNCTION MENU
Audio Format

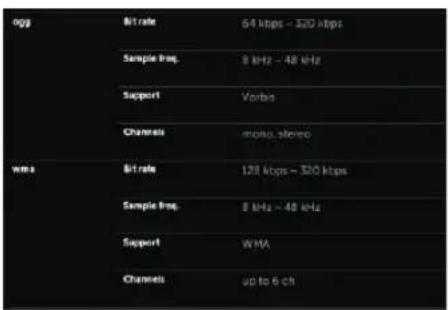

The number of supported programmes may vary depending on the sample frequency.
3.7 Share Computer Content
Watch content saved in your PC on the TV.
You can enjoy videos/music/photos stored on your PC on the TV when these devices are connected to the same network.
Browse the content on your PC to watch on TV (Windows 10)
-
Connect your TV and PC to the same network.
-
Right-click the file you want to play and select "Cast to Device".
-
Select the name of the TV you want to watch from the displayed list, and playback will start on that TV.
- Even when multiple TVs or devices are connected, the selected file is only played through one device. The playback rate may vary depending on the network connection.
• To play on other operating systems or devices, refer to the manual of the operating system/device.
Browse and watch the content stored on the PC using the TV (Windows 10)
- Connect your TV and PC to the same network.
2.Open the "Start" menu on your PC screen, search for "media streaming options" and then select the result that appears.
-
Select the "Turn on media streaming" button in the window that opens.
-
Allow all of the "media streaming options".
-
Select "OK" to save the settings.
-
Select the connected PC in the Home Dashboard app on the TV, and then select and play the file you want.
To play on other operating systems or devices, refer to the manual of the operating system/device.
Matters That Require Attention of Content Share
- Check your network settings if the content share option does not work properly.
- May not work properly on a wireless network. It is recommended that you connect to a wired network.
- May not work properly depending on the network environment.
- If multiple TVs are connected to one device, the content may not be played properly depending upon server performance.
- To watch a 1080p video through the content sharing function, a router using the 5 GHz frequency is required. If you use the existing 2.4 GHz router, the video may be laggy or not play properly.
OPERATION OF FUNCTION MENU
- The Content Share function may not be supported for a router that does not support multi-cast. For more information, refer to the user guide that came with your router or contact the manufacturer.
- Captions are only supported on some connected devices.
• We recommend using the SmartShare PC software when viewing video subtitles. - When a subtitle file is added later, disable the shared folder and then enable it again.
• The DRM files in the connected device will not play.
• Even for the file format supported by the TV, the supported file format may differ depending on the connected device environment. - If there are too many folders or files in a folder, it may not work properly.
• The information on the file imported from the connected device may not be displayed correctly. - Depending on the encoding, some streams may not play in content sharing mode.
3.8Watching Computer Screen on TV
To See the PC Screen on the TV
Connect Wireless
-
Enable Screen Share mode on the PC. Your TV will be displayed in the list of available devices.
-
Select your TV and request connection.
-
After the connection is established, the TV will display the screen of the connected device.
- It is recommended that you always update your device to be connected to your TV to the latest OS version for a reliable connection.
- It is recommended that you use this function at close range.
- Start Screen Share faster by having your mobile device or PC connected to the same network as the TV.
- Though it can be connected without a wireless router, connecting your device to a 5 GHz router is recommended because the performance can be affected by the surrounding wireless environment.
- The response rate may vary depending on the user's environment.
- It's differ from Windows version. For more information on the device you want to connect to, refer to its user guide.
- If connection fails repeatedly, turn off the TV and the device you want to connect to, then turn them back on and try again.
Connect wired
Connect the PC with TV by HDMI cable.
4.MAKING THE MOST OF SMART TV
4.1 Surfing the Internet on TV
Using the Web Browser
You can enter the website when you input the web address on the URL bar. If you input the search word,
it will find the information about search word base on the search engine.
-
Press the ⏰ button on the remote control.
-
Run the Web Browser application.

4.2 Live Plus
Using the Live Plus Function
Live Plus provides an enhanced viewing experience related to the content you're watching including looking at additional information, participating in events, interacting with advertisements, etc.
Press the 🎨 button on the remote control.
Select Ⓞ → General → Additional Settings.
Set Live Plus to On.
• Some models may not be supported.
- You can use the Live Plus function only with Magic Remote.
- This service is only provided for select content with contracted partners.
OPERATION OF FUNCTION MENU
5. SETTINGS
5.1 Quick Settings
To Use Setting Function Quickly
Set of light-weight controls quickly and simply such as Picture Mode, Sound Out, Sleep Timer and so on.
Press the ⚙ button on the remote control.
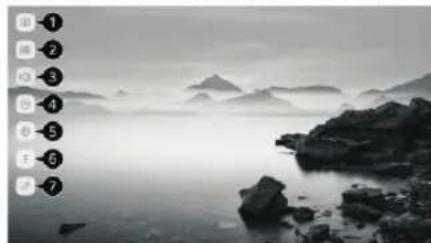
①You can set Picture Mode.
②You can set Sound Mode.
③You can choose Sound Out.
④You can set Sleep Timer.
⑤Move to the Connection screen.
⑥You can set more options.
⑦You can add/delete the quick setting items or change their order.
After entering each item, press and hold the Wheel (OK) button on the remote control to go to the corresponding menu.
natural_image
Black-and-white landscape photo of misty mountains and rocky shoreline (no text or symbols)5.2Picture
5.2.1 Picture Mode
Selecting Picture Mode
→Picture → Picture Mode
Select the picture mode that is best suited to your viewing environment, preferences or video type.
Select a picture mode. By adjusting and setting each item in more detail based on the mode, your video is better optimised for its characteristics.
- The configurable items differ depending on model.
When You Use Normal Signals
Vivid
Sharpens the image by increasing the contrast, brightness and sharpness.
Eco/APS
The Energy Saver feature changes settings on the TV to reduce power consumption.
- The configurable items differ depending on model.
Cinema
Suitable picture for movies.
Sports / Football / Cricket
Suitable picture for sports games. Sharpens the image of rapid movements such as kicking or throwing a ball.
• The name of the sport may differ depending on region.
Game
Suitable picture for gameplay.
When You Use the HDR Signals
Vivid
Sharpens the image by increasing the contrast, brightness and sharpness.
Standard
In a normal viewing environment, it opens a screen that can properly show the expressiveness and brightness of HDR.
Cinema
Suitable picture for HDR video signal.
Game
Suitable picture for gameplay.
- Depending on the input signal, the available picture modes may be different.
- When watching online service content, the Picture Mode may be changed to match the content being shown.
- Picture Mode change may modify Energy Saving settings and it can affect energy consumption. You can adjust their settings manually in the Energy Saving menu.
OPERATION OF FUNCTION MENU
5.2.2 Advanced Controls
Setting the Advanced Control Options
→Picture →Picture Mode Settings →Advanced Control
Dynamic Contrast
Corrects the difference between the bright and dark sides of the screen for optimal results depending on the brightness of the picture.
Dynamic Colour
Adjusts the Colour and saturation of the picture to make the image more Colourful and lively.
Gamma
Adjusts the medium brightness of the picture.
Select Low for a bright picture, select High1 or High2 for a dark picture or select Medium for medium brightness.
Live Theatre or Expert (Bright Room)/Expert (Dark Room) can be selected from 1.9/2.2/2.4/BT.1886.
• High2/BT.1886 expresses the gradation in ITU-R BT.1886, which is an international standard.
- Depending on the input signal or the selected picture mode, the available options may differ.
5.2.3 Aspect Ratio Settings
→Picture →Aspect Ratio Settings →Aspect Ratio
You can change the screen size according to the type of content you are watching.
16:9
Displays an aspect ratio of 16:9.
Original
Changes the aspect ratio to 4:3 or 16:9 depending on the input video signal.
4:3 Displays an aspect ratio of 4:3.
Vertical Zoom
You can adjust the vertical dimension of the screen and align the screen vertically by using Adjust Zoom Ratio and Adjust Screen Position.
4-Way Zoom
You can adjust the horizontal/vertical/diagonal dimensions of the screen and align the screen horizontally/vertically by using Adjust Zoom Ratio and Adjust Screen Position.
- The configurable items differ depending on model.
• The picture may get distorted while zooming in or out.
- Selecting a different screen size from the original size may cause the image to look different.
- Depending on the combination of picture format and screen size, the edges may be hidden or shown in black, or both sides of the picture may flicker. Also, when selecting an item shown on the broadcast screen, the outline may not be aligned correctly.
- Depending on the input signal, the available screen sizes may be different.
View Screen with Just Scan
→Picture →Aspect Ratio Settings →Just Scan
If you turn this feature On, you can view the content in the aspect ratio that is in the broadcast signal or content source. If the edge of the screen is not clean, please turn it Off.
If set to Auto, the feature switches between On or Off status depending on the information contained in the video signal.
• The items that can be selected may vary depending on the current input.
Energy Saving
To Use Energy Saving Feature
→Picture →Energy Saving
Reduces power consumption by adjusting screen brightness.
Off
Turns off the Energy Saving mode.
Minimum / Medium / Maximum
Applies the pre-set Energy Saving mode.
Screen Off
Screen is turned off and only sound is played.
Press any button except the power and the volume buttons to turn the screen back on.
- If you use Energy Saving function, brightness of your TV will be affected.
OPERATION OF FUNCTION MENU
5.2.4 Eye Comfort Mode
To Use Eye Comfort Mode Feature
→ ⏻→Picture → Additional Settings → Eye Comfort Mode
The colour temperature will be adjusted to reduce eye fatigue.
On
The colour temperature of your TV screen is adjusted.
Off
Turns off the Eye Comfort Mode
• Some models may not be supported.
5.2.5 AMD FreeSync Premium
Using AMD FreeSync Premium
→Picture →Additional Settings →AMD FreeSync Premium
This reduces screen cracking and video lagging during game play.
• To use the AMD FreeSync Premium feature, the HDMI ULTRA HD Deep Colour of the corresponding terminal must be set to On or 4K/8K.
- When operating AMD FreeSync Premium, minor brightness change may occur depending on the frequency of the external device.
• Some models may not be supported.
5.3 Sound
5.3.1 Sound Mode Settings
→ ⏻ → Sound → Sound Mode → Settings
Sound Mode
You can select the most suitable sound mode for each genre.
Standard : Optimises the sound for all types of content.
Cinema : Optimises the sound for cinemas.
Clear Voice III / Clear Voice IV : Boosts voice clarity.
Sports / Football / Cricket : Optimises the sound for sports games.
Music: Optimises the sound for music.
Game : Optimises the sound for gameplay.
Balance
You can adjust the volume of the left and right speakers.
ULTRA Surround
Enjoy an immersive soundscape with the virtual multi-programme surround sound effect.
- This option can be enabled if Sound Mode is set to Standard.
Equalizer
You can set the desired sound by adjusting the equalizer directly. (100 Hz/300 Hz/1 kHz/3 kHz/10 kHz)
- This option can be enabled if Sound Mode is set to Standard.
Reset
You can reset the sound effect settings.
- This option can be enabled if Sound Mode is set to Standard.
• This setting is only available for Internal TV Speaker.
- The configurable items differ depending on model.
5.3.2 Sound Out
Setting Sound Out
→ Ⓞ → Sound → Sound Out
- When Instant Game Response is set to On, audio delays may occur if you set Sound Out to WiSA Speakers/Optical/HDMI ARC.
Switch to Internal TV Speaker or change → Sound → Additional Settings HDMI Input Audio Format to PCM.
Internal TV Speaker
Audio is played through the TV's internal speakers.
OPERATION OF FUNCTION MENU
- Press ⚡ to view the connected devices or the devices that can be connected to connect any one of them.
• Sound Sync devices will automatically try to connect to the recently used devices when you turn the TV on.
- We recommend that you connect an audio device that supports Sound Sync, using TV mode or Sound Sync mode on device.
- If the device fails to connect, check the power of the device to connect to and check if the audio device is working properly.
- Depending on the type of the Bluetooth device, the device may not connect correctly or an abnormal behavior may occur such as unsynchronized video and audio. (The mobile-only headsets may not work.)
- Sound may stutter or sound quality may be reduced if: the Bluetooth device is too far from the TV; there are obstacles between the Bluetooth device and the TV; or
used together with radio equipment such as a microwave oven or wireless LAN.
- If you continue to experience problems, we recommend using a wired connection. (Optical digital, HDMI (ARC) port)
WiSA Speakers
WiSA Speakers is a speaker that uses the technology to transmit a multi 5.1 channel sound wirelessly. You can wirelessly connect the TV to the WiSA Speakers to enjoy high-quality sound. Select ☐ to adjust detailed settings for WiSA Speakers.
- Some models may not be supported.
• To use the WiSA speakers, you need to connect the exclusive dongle.
- Connection issues between the WiSA Dongle and WiSA Speaker may occur in environments with wireless interference. In this case, contact the speaker manufacturer.
- For more information on the purchase of WiSA authorized products, check on www.wisaassociation.org.
Optical
You can connect an audio device that supports Optical to the optical digital audio output port to enjoy your TV's sound in richer quality and greater convenience.
- Only available for models with an optical digital port.
- For some devices, you can adjust the volume using the TV remote control.
HDMI ARC
Sound from the TV can be output through an external audio device connected via a HDMI (ARC) port.
- Select HDMI ARC to automatically turn on SIMPLINK. Once SIMPLINK is turned off, the output speaker settings automatically revert to the default settings for uninterrupted audio output.
Wired Headphones
- Playing Audio through the TV's Internal Speakers
- Some models may not be supported.
- If you connect the wired headphones while the TV is powered on, it automatically detects the wired headphones and redirects audio through them.
Playing Audio through the TV's Internal Speakers and External Audio Device Simultaneously Audio can be played through the multiple devices simultaneously.
Optical + Internal TV Speaker
Audio is played through the TV's built-in speakers and the audio device connected to the digital optical audio output port simultaneously.
Wired Headphones + Internal TV Speaker
Audio is played through the TV's internal speakers and the Wired Headphones simultaneously.
- Some models may not be supported.
- If you connect the wired headphones while the TV is powered on, it automatically detects the wired headphones and redirects audio through them.
5.3.3 TV Installation Type
TV Installation Type
→ ∙→ Sound → Additional Settings → TV Installation Type This mode optimises the sound based on the TV setup.
Stand
Select this if the TV is installed in stand-type.
Wall-mounted
Select this if the TV is installed in wall-mounted type.
• This setting is only available for Internal TV Speaker.
5.3.4 Volume Mode
→ ⊙ → Sound → Additional Settings → Volume Mode
OPERATION OF FUNCTION MENU
Auto Volume
Click On to adjust the volume automatically for different broadcasting companies so you can always listen to programmes at the desired volume, even after switching the programmes.
Volume Increase Amount
Select Low/Medium/High to adjust the volume range. Higher values increase increments.
• This setting is only available for Internal TV Speaker.
5.3.5 DTV Audio Setting
→ ⊙ → Sound → Additional Settings → DTV Audio Setting
When different audio types exist in an input signal, this function allows you to select the audio type you want.
If set to Auto the search order is AC4 → HE-AAC → Dolby Digital Plus → Dolby Digital → MPEG and output is produced in the first Audio Format found.
- The following search order may change depending on the country: AC4 → HE-AAC → Dolby Digital Plus → Dolby Digital → MPEG.
- If the selected Audio Format is not supported, another Audio Format may be used for output.
- Some models may not be supported.
5.3.6AV Sync Adjustment
Adjusting AV Synchronization
→Sound →Additional Settings →AV Sync Adjustment
Adjusts the synchronization of the sound from the speaker that is working. The closer to >, the slower the audio output.
Bypass, Outputs the broadcast signals or the sound from external devices without any audio delay. The audio may be output before the video because of the time the TV takes to process the video input.
• Available options vary by Sound Out setting.
5.3.7 HDMI Input Audio Format
HDMI Input Audio Format
→○→Sound →Additional Settings →HDMI Input Audio Format
You can set the audio format for each HDMI input. When the voice delivered through the HDMI port is not synchronized, set it to PCM
5.3.8Sound Sync
→ ⊙ → Sound → Additional Settings → Sound Sync
Connect the Sound Sync device to the optical digital input port and set Sound Out to Optical.
By setting this feature to On, you can adjust the volume of the connected Sound Sync device using a TV remote control.
- If the auto-power feature of the sound bar that supports Sound Sync is set to On, the sound bar will be
turned on or off together when the TV is turned on or off.
5.3.9 Digital Sound Out
→○→Sound → Additional Settings → Digital Sound Out You can configure the Digital Sound Out settings.
- This setting is only available when ⏻→ ⓘ → Sound → Sound Out is set to Optical/HDMI ARC.
- When Pass Through is enabled, sound effects may not be output.
- The codec output with a device may differ from input signals. Dolby Atmos: Some models may not be supported.

5.4Programmes
5.4.1 Auto Tuning
Automatically Setting Up Programme
→Programmes →Programme Tuning →Auto Tuning
Automatically tunes the programmes.
-
Select Country where the TV is used. Programme settings change depending on the country you choose.
-
Initiate Auto Tuning.
-
Select programme tuning modes.
-
Set Auto Tuning following screen instructions.
- If Input Source is not connected properly, programme registration may not work.
• Auto Tuning only finds programmes that are currently broadcasting.
- If Safety is turned on, a pop-up window will appear asking for password.
OPERATION OF FUNCTION MENU
Set Cable Setting
When searching for programmes using FULL setting it can take a long time.
The following values are needed in order to search all available programmes quickly and correctly. The commonly used values are provided as "default".
The configurable items differ depending on Type.
Frequency (kHz)
Enter a user-defined frequency.
Symbol Rate (kS/s)
Speed at which a device such as modem sends symbols to a programme.
Modulation
Loading of audio or video signals onto carrier.
Network ID
Unique identifier allocated for each user.
Start Frequency (kHz)
Enter a user-defined start frequency range.
End Frequency (kHz)
Enter a user-defined end frequency range.
Set Satellite Setting
You can add/delete/set the satellite you want.
If the programme mode is set to Satellite
Satellite
Select your desired Satellite.
LNB Frequency
Select one value from 9750/10600, 9750/10750, 9750, 10600, 10750, 11300, 5150, MDU1, MDU2, MDU3,
MDU4, MDU5. If you select 9750/10600, 9750/10750(MHz), 22kHz Tone is disabled. If you cannot find the
LNB frequency value from the list, select User and manually enter the frequency.
Some models may not be supported.
Transponder
Select the transponder you want to tune.
22kHz Tone
When using 22kHz Tone switch, select 22kHz or 0 Hz. If you use 22kHz Tone, Unicable and Motor Type are disabled.
LNB Power
To enable the power supply for the LNB, select On. If you select Off, Motor Type is disabled.
DiSEgC
When using DiSEqC, select one option from A\~D/ToneA\~B. If you use DiSEqC, Unicable and Motor Type are disabled.
Unicable
Select On to use Unicable and set the Unicable in the Unicable Settings menu. When Unicable is enabled, 22kHz Tone, DiSEqC, Motor Type are disabled.
Motor Type
Select Motor Type to use Motor and set the Motor in the Motor Setting menu. When Motor is enabled, 22kHz Tone, DiSEqC, Unicable are disabled.
If you set satellite to others, you must add a transponder using Transponder Edit.
When selecting 22kHz Tone and DiSEqC, you must connect them in the same position as displayed on the OSD.
If you delete a Satellite, all programmes stored in the Satellite are deleted.
Set Motor Setting
DiSEqC 1.2: Control motor to change satellite dish position.
Drive Direction
Select the direction in which you want to move the motor.
Drive Mode
Two modes are available: Step and Continuous.
Step: The motor moves based on the value you enter (from 1 to 128).
Continuous: The motor moves continuously until you press the Stop.
Test Transponder
Select the test Transponder you want to tune.
Set Limit
Set the motor movement to east or west to have the motor move only within the direction set.
On: You can limit the movement to the current direction by selecting the West/East.
Off: You can cancel the limit you set.
OPERATION OF FUNCTION MENU
Go to 0
You can move the motor to Zero.
USALS : Set your current location (Longitude/Latitude).
5.4.2 Manual Turning
→ Ⓞ →Programmes →Programme Tuning (Programme Tuning & Settings) → Manual Tuning
This function is for manually searching and saving programmes. For digital broadcasting, signal strength and signal quality can be checked.
5.4.3 Editing Transponder
→ Ⓞ → Programmes → Programme Tuning & Settings → Manual Tuning
You can add / modify / delete a transponder.
If the programme mode is set to Satellite
If the System Operator provides 'user home TP edit' feature, it will show the on the screen.
So that you can set the desired Transponder as Home by pressing the Ⓜ.
(This feature is available on certain service provider only.)
5.4.4 Regional Programme
Regional Programme
→Programmes →Programme Tuning (Programme Tuning & Settings) →Regional Programme
You can add / modify / delete a transponder.
Set region programme and watch region programme at a specific time.
Only applicable in Austria/Germany.
(Austria) If the programme mode is set to Satellite
To set Service Operator of Satellite, AKTIV must be selected.
To turn on Regional Programme, set Service Operator to AKTIV.
(Germany) If the programme mode is set to Satellite
To set Service Operator of Satellite, DIVEO must be selected.
To turn on Regional Programme, set Service Operator to DIVEO.
Some models may not be supported.
5.4.5 Programme List Update
→ Ⓞ→Programmes → (Programme Tuning & Settings) → Programme List Update
If the programme mode is set to Cable
It updates the changed Programme List information by based on country broadcasting circumstance.
After updates, the Programme List may be changed. If not want, select Off.
If the programme mode is set to Satellite
It updates the changed Programme List information by based on country broadcasting circumstance and satellite.
It updates the Programme List when the TV turn off all the time. After updates, the Programme List may be changed. If not want, select Off.
If the programme mode is set to Antenna
It updates the changed Programme List information by based on country broadcasting circumstance.
It updates the Programme List when the TV turn off. After updates, the Programme List may be changed. If not want, select Off.
Some models may not be supported.
5.4.6 Signal Test
→ ⓘ→Programmes → Programme Tuning (Programme Tuning & Settings) → Signal Test
Shows the MUX and Service information etc.
·Signal test is only available in Antenna or Cable mode.
• Some models may not be supported.
5.4.7 Programme Manager
Edit Programmes
You can edit the selected programmes from all the stored programmes or add/delete them to/from the favourite programmes.
Edit All Programmes List
→Programmes →Programme Manager →EditAll
Programmes
You can lock or unlock the selected programmes from all the stored programmes, or you can set them to be skipped when switching programmes.
①Set the sorting option.
②Lock/Unlock: Lock the selected programmes or unlock the locked programmes.
OPERATION OF FUNCTION MENU
Skip / Restore : Set the selected programmes to be skipped when switching programmes, or disable the skipping option of the programmes previously set to be skipped.
Move : Move the selected programmes.
Edit Programme Numbers : Change the numbers of the selected programmes.
Delete : Delete the selected programmes.
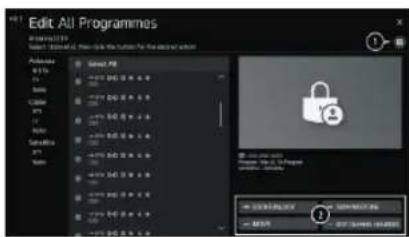
• Available features may vary depending on the broadcast signal.
- For a model that supports satellite programmemes, you can manage the satellite programmes in Edit Satellite Programmes (Advanced).
Edit Favourite Programmes List
→ ⓘ → Programmes → Programme Manager → Edit Favourites
You can add/delete desired programmes to/from the favourite programmes, change their positions, etc.
①Select the desired programmes from the all programmes list and press the button to add them to the favourite programmes list.
② Delete the selected programmes from the favourite programmes list.
③Move : Select one or more programmes in the Preferred
Programmes list, press the Move button, and then select the position to move it to. The selected programmes will move to the position you selected. Change Group Name : Change the name of the favourite programmes list.
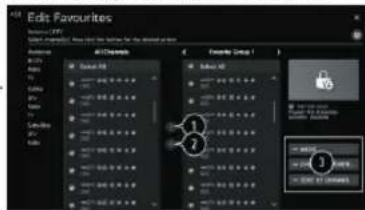
Sort by Programme : Sorts the list of favourite programmes by programme.
5.4.8 Multi Feed
→ Ⓞ→ Programmes → Multi Feed
You can watch the desired angle on the TV through the broadcast that filmed from various angles.
- Some models may not be supported.
5.4.9 Learn More about HbbTV
HbbTV (Hybrid Broadcast Broadband TV) is a new broadcasting standard that enables super-teletext type services, delivered by a broadcast TV programme, to be integrated or linked to online services delivered over broadband to a connected Smart TV.
To see the details, click the Enjoy Live TV → HbbTV in User Guide.
- Some models may not be supported.
5.4.10 CI Information
This function enables you to watch some encrypted services (pay services).
To see the details, click the Enjoy Live TV CI Information in User Guide.
5.4.11 Save CI Password
→ ⏻→Programmes → Save CI Password
Input the Pin Code in Save CI Password. You don't need to input the Pin Code after save it.
- You can see the Save CI Password when insert a CI CAM (Conditional Access Module) which is supported Pin Code.
- If CI CAM has a Pin code, you can see the Reset CI Password.
5.4.12 Copy Programmes
→ ⏰ → Programmes → Copy Programmes
Export your TV's programme list information to a connected USB storage device or Import your Tv's programme list information from a connected USB storage device.
• For Satellite models
Channels
You can watch real-time broadcasts through this service over the Internet.
You can see information on new Internet Programmes or manage the programmes you like in Channels.
To see the details, click the Enjoy Live TV Watching Internet Channel (Channels) in User Guide.
- Some models may not be supported.
OPERATION OF FUNCTION MENU
5.5Connection
5.5.1 TV Name
→ ⊙ → Connection → TV Name
You can use the screen keyboard to set the name for the smart TV to be used on the network.
- Up to 25 characters can be entered in case of English alphabet.
5.5.2 Network Connection Settings
Network Connection Settings
→ ⊙ → Connection → Network Connection Settings
If you configure settings for the network, you can use various services such as online contents and applications.
Setting a Wired Network
Select Wired Connection (Ethernet).
If the router connected to the network supports the DHCP feature, connecting the TV and router by wire will automatically connects to the network. If the automatic setup is not supported, you can select Edit to manually set up the network connection.
Setting a Wireless Network
Select Wi-Fi Connection.
If you have set the TV up for a wireless network, you can check and connect to the available wireless Internet networks.
Add a hidden wireless network
If you input the name of network directly, you can add a wireless network.
Connect via WPS PBC.
If the wireless router you want to connect to has a Wi-Fi Protected Setup-Push Button Configuration (WPS-PBC) feature, you can easily connect to the wireless router by pressing the WPS-PBC button on the router. Press the wireless router's WPS-PBC button and then press the TV's [Connect] button.
Connect via WPS PIN.
This is a method to connect to an access point using a Wi-Fi Protected Setup-Personal Identification Number (WPS-PIN). Select the access point you want to connect to. Enter the PIN displayed on the access point's Wi-Fi device.
Advanced Wi-Fi Settings
Once you connect to a wireless network, you can view connection information such as detailed IP address information. In addition, you can change the IP address and DNS server address you want to connect to by pressing the Edit button.
• The IPv6 setup does not support Edit.
- For more information on how to connect to the network, see Getting Started with webOS TV Connecting to the Network in User Guide.
5.5.3 Device Connection Settings
→ Ⓞ → Connection → Device Connection Settings
You can link the information about the devices connected to the TV and configure settings related to operations.
SIMPLINK (HDMI-CEC)
With a single remote control, you can easily manage various devices such as a soundbar or set-top box connected to a TV with HDMI.
To see the details, click the How to Operate TV → Connecting to SIMPLINK (HDMI-CEC) in User Guide.
- Up to three devices can be connected and used simultaneously.
Auto Power Sync
If Auto Power Sync is set to On, turning on a SIMPLINK-linked device will turn the TV on. When you turn off the TV, the device will also be turned off.
Wireless Keyboard
This feature enables you to connect a wireless keyboard to your TV.
Turn on the device, set it to pairing mode, and then click Connect on your TV screen. If there is a wireless keyboard previously connected, it will be automatically reconnected to your TV once your TV turns on. To disconnect the existing connection, click Disconnect.
• Supported keyboard
Rolly Keyboard
- This feature is only available for models with built-in Bluetooth dongles.
Universal Control Settings
OPERATION OF FUNCTION MENU
If you set up the universal remote control, you can control peripheral devices connected to the TV with the Magic Remote instead of their own remote controls. For more information, see How to Operate TV Using Universal Remote Control in User Guide.
The configurable items differ depending on model.
5.5.4 Mobile Connection Management
→ ⊕ → Connection → Mobile Connection Management
You can set to use a smart device connected to the TV to control the TV or manage the connection history. TV On With Mobile
If Turn on via Wi-Fi or Turn on via Bluetooth is set to On, you can turn on your TV using an application that supports TV On With Mobile.
• The TV should be connected to a network.
• The TV and the device to be used should be connected to the same network.
- The Turn on via Wi-Fi feature must be used in an app on a smart device that supports the feature.
• The Turn on via Bluetooth feature can only be used with certain LG Electronics smartphones.
• The TV must be plugged in.
• To connect for the first time, make sure the device to be used is ready to connect.
• Some models may not be supported.
Screen Share
You can delete the connection history of the device that was connected to the TV through Screen Share.
5.6 General
5.6.1 Language
Configuring Language Settings
→ Ⓞ → General → Languag
You can choose the menu language displayed on the screen and the audio language of the digital broadcast.
Menu Language
You can select one of the menu languages to be displayed on the screen. The language for the speech recognition will be automatically set to the selected language for the menu.
• The speech recognition is only applied to some models.
Primary Audio Language / Secondary Audio Language
You can choose the language you want when watching a digital broadcasting programme, which includes multiple audio languages. For programmes that do not support multiple languages, the default will be used.
• Applies to Digital broadcasting.
Keyboard Languages
Select the language to use the on-screen keyboard.
To Set Teletext Language
Sets Teletext language.
To see the details, click the Enjoy Live TV → TELETEXT in User Guide.
• In Digital Mode Only
5.6.2 Location
→ ⓣ → General → Location
You can change the location setting of your Smart TV.
Address Setting
You can set the Region and City of your TV.
Broadcast Country
You can set the broadcast country on your TV.
Service Area Postcode
This function is used to set the broadcast location of the TV by entering your postcode.
Services Country
If you don't set the Set Automatically, you can select the country manually.
You must set the country manually when you are not connected to the network.
The configurable items differ depending on model.
5.6.3 Time
→○→General→Time
You can check the time or configure related settings.
Set Automatically
The TV time is automatically set to the time of digital broadcasting information sent from the broadcasting
OPERATION OF FUNCTION MENU
station or the time sent from the server.
Time / Date / Time Zone
You can manually set the time and date if the automatically set current time is incorrect.
- If you set the time manually with the antenna connected, schedule information, programme guide, etc. may not function correctly.
Custom Time Zone
When select the Custom in Time Zone, Custom Time Zone menu is activated.
Timers
Sleep Timer
Sets the TV to turn off at a specified time.
If you do not want to use Sleep Timer, select Off.
Power On Timer Set
Power On Timer to On. The TV is turned on and displays the set channel at the set time.
• Time : Set the time at which to turn the TV on.
- Timer Repeat: Set the day of the week. Set the option to None to operate the feature only once.
- Input: Set an external input to display when the power is turned on.
- Timer Programme: Set a channel to display when the power is turned on. This option can be set only when Input is set to TV.
• Volume : Set audio volume to use when the power is turned on.
Power Off Timer
Set Power Off Timer to On.
The TV is turned off at the set time.
• Time : Set the time at which to turn the TV off.
- Timer Repeat: Set the day of the week. Set the option to None to operate the feature only once.
4 Hours Auto Power Off
If you do not press any button for 4 hours after the TV is turned on by a feature such as Power On Timer, the TV will be turned off automatically.
To ensure the TV does not automatically turn off, set 4 Hours Auto Power Off to Off.
• Some models may not be supported.
- To use Power On Timer/Power Off Timer, set the time correctly.
- If Timer Repeat of Power On Timer/Power Off Timer is set to None. If the time set in the Power On Timer is passed while watching TV, the power will turn on automatically when it reaches the set time and the TV is turned off on the next day or later.
If the time set in the Power Off Timer is passed while TV is in standby, the power will turn off automatically when it reaches the set time while watching TV on the next day or later.
5.6.4 TV Rating Locks
Enabling TV Rating Locks
This function operates according to information from the broadcasting station. Therefore if the signal has incorrect information, this function does not operate. Prevents children from watching certain adult's TV programmes, according to the ratings limit set. Enter a password to watch a blocked programme. Rating differs by country.
-
Press the ⏻ button on the remote control.
-
Select Ⓞ → General → Safety.
-
Set Safety to On.
-
Select TV Rating Locks.
Supported only in the digital mode.
- The initial password is set as "0000". When France or Norway is selected for Country, the password is not "0000" but "1234".
5.6.5 Enabling Programme Locks
Blocks the programmes that contain inappropriate contents for children. The programmes can be selected but the screen is blank and the audio is muted. To watch a locked programme, enter the password.
-
Press the ⚙ button on the remote control.
-
Select Ⓞ → General → Safety.
-
Set Safety to On.
-
Select Programme Locks.
-
Select the Programmes to lock.
-
Select Lock / Unlock.
OPERATION OF FUNCTION MENU
- The initial password is set as "0000". When France or Norway is selected for Country, the password is not "0000" but "1234".
5.6.6 Application Locks
You can lock or unlock the application.
-
Press the button on the remote control.
-
Select Ⓞ → General → Safety.
-
Set Safety to On.
-
Select the Application Locks.
-
Select the Applications to lock.
• The initial password is set as "0000".
When France or Norway is selected for Country, the password is not "0000" but "1234".
- The lock function is not immediately available for the currently running application.
5.6.7 Input Locks
Enabling Input Locks
You can lock or unlock the Inputs.
-
Press the ⏻ button on the remote control.
-
Select Ⓞ → General → Safety.
-
Set Safety to On.
-
Select Input Locks.
-
Select the Inputs to lock.
- The initial password is set as "0000". When France or Norway is selected for Country, the password is not "0000" but "1234".
5.6.8 Reset Password
General ⚙ → ⏰ → Safety → Reset Password
Set or change the password for the TV.
- The initial password is set as "0000". When France or Norway is selected for Country, the password is not "0000" but "1234".
Resetting a Lost Password
If you lose the password you set, you can reset it as follows:
-
Press the ⚙ button on the remote control.
-
Select Ⓞ → General → Safety.
-
Press ⊕ (Programmes) ∧ → ⊕ (Programmes) ∧ → ⊕ (Programmes) ∨ → ⊕ (Programmes) ∧ on the remote control. The master password input window will appear.
4.Enter the numbers "0313" in the master password input window, then press Enter. The password will be reset.
5.6.9 Account Management
Managing Your LG Account
In Account Management, you can use your email address to create a new LG account.
For more information, see Getting Started with webOS TV Account Management in User Guide.
5.6.10 Home Settings
Home Settings
→ ⓘ → General → Home Settings
Home Auto Launch
You can set Home to launch automatically when turning on the TV.
Home Promotion
You can turn on or off the advertisements on the Home screen.
• The configurable items differ depending on model.
5.6.11 Settings Help
→ Ⓞ → General → Additional Settings → Settings Help If you select the setting menus, you will see the hints of the settings. Turn on/off description box in Settings.
5.6.12 Menu Transparency
→ ⓘ → General → Additional Settings → Menu Transparency
By setting this feature to On, you can make some of the menus (e.g. Live Menu, Search, etc.) transparent.
5.6.13 Screen Saver
→General →Additional Settings →Screen Saver
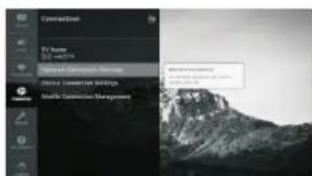
OPERATION OF FUNCTION MENU
When the currently displayed app has not received any user input for an hour, it will be replaced by a Screen Saver.
- Setting the Screen Saver feature to Off, maintains the same display for an extended period, which may compromises quality. The compromised screen may not be recoverable.
5.6.14 No Signal Image
→:→General → Additional Settings → No Signal Image You can turn on or off the image displayed when there is no signal.
On
The default image is displayed if there is no signal.
Off
The No Signal message is displayed if there is no signal.
5.6.15 ECO Mode
→ Ⓞ→General → Additional Settings → Eco Mode
Set power options to reduce energy consumption.
Auto Power Off
Set the TV to turn off automatically when there has been no user input for a specified amount of time. HDD Eco Mode
If you set the mode to On, the USB HDD connected to the TV will go into power-saving mode when it has been left unattended for an extended period of time.
- The configurable items differ depending on model.
5.6.16 Live Plus
Live Plus is a service that provides various information on the programme you watch.
To see the details, click the Making the Most of Smart TV→Live Plus in User Guide.
Some models may not be supported.
5.6.17 Quick Start+
→ ⓣ →General →Additional Settings →Quick Start+
This setting puts your TV in standby mode when it's turned off so it will start up more quickly the next time it's turned on.
Set Quick Start+ to On.
• Some models may not be supported.
- Turning this option on may increase energy consumption.
5.6.18 Standby Light
→ Ⓞ →General →Additional Settings →Standby Light
You can turn the standby light on or off.
• Some models may not be supported.
5.6.19 Advertisement
→General →Additional Settings →Advertisement
If your TV is connected to the Internet, webOS may use a frequency capping cookie to keep track of the number of times an ad is shown on your TV.
This information is used to help limit the number of times the same ad is displayed. You can clear this cookie or turn it on or off at any time by going to the Advertisement setting on your TV.
No personally identifiable information is tied to this cookie.
• Some models may not be supported.
5.7 Accessibility
5.7.1 Audio Guidance
→ ⊙ → Accessibility → Audio Guidance
If Audio Guidance is set to On, audio guides will be provided in various situations, such as when you change programmes, adjust the volume or change settings and input signals.
Speed
Adjust the speed of spoken guide.
Volume
Adjust the volume of spoken guide.
Pitch
Adjust the tone of spoken guide.
This feature is available on certain languages only.
Some models may not be supported.
OPERATION OF FUNCTION MENU
The configurable items differ depending on model.
For visually impaired users.
Setting the Audio Guidance to On automatically switches the TV Power Sound (only available on certain models) to On as well.
5.7.2 Audio Description
→①→Accessibility →Audio Description The contents on the screen will be described with voice for visually impaired viewers. You can use this function if the broadcasting company supports Audio Description for the visually impaired. Some models may not be supported.
5.7.3 Audio Type
® ® Accessibility Audio Type Audio commentary or subtitles are provided for those who are hard of hearing or visually impaired.
Normal
Selects default Audio.
Audio Description
For the visually impaired Selects the preferred default Audio combined with Visual Impaired Audio. Spoken Subtitle
For the visually impaired, selects the preferred Visual Impaired Audio only.
Any Supplementary Audio
Displays all supplementary audio.
Some models may not be supported.
5.7.4 High Contrast
→ Ⓐ → Accessibility → High Contrast When this feature is set to On, it adjusts the background of some of the menus on the screen and font colours to highlight the contrast between the light and dark areas.
5.7.5 Grayscale
→ Ⓐ → Accessibility → Grayscale Change the colour of the menu on the screen to black and white tone to make its ambiguity very clear. Set to On.
5.7.6 Invert Colours
※ : Accessibility Invert Colours To enhance the visibility of the menus on the screen, you can invert and calibrate certain colours in some menus. Set to On.
5.7.7 Hard of Hearing
- Press the ⚙ button on the remote control.
- Select ⏻ → Accessibility. Set Subtitles to On.
- Set Subtitles to On.
4Set Hard of Hearing to On.
A caption will be provided for the hearing-impaired. - When the Hard of Hearing is turned On, it will be prioritized over the general captions.
• Some models may not be supported.
5.7.8 Subtitles
→ Ⓞ → Accessibility → Subtitles View subtitles when the TV station provides subtitled programming. Change Subtitles to On and select subtitle setting.
• Some models may not be supported.
• Applies to Digital broadcasting.
5.8 Support
5.8.1 Software Update
→→Support → Software Update Uses software update to check and obtain the latest version.
• The configurable items differ depending on model.
• The latest version can be obtained via digital broadcast signals or internet connections.
- Changing the programme while downloading the software via digital broadcast signal interrupts the download process. Returning to the initial programme allows downloading to resume.
- If software is not updated, certain functions may not work properly.
• In some countries, Allow Automatic Updates is not displayed if you are not connected to the Internet.
OPERATION OF FUNCTION MENU
5.8.2 TV Information
→ ⓘ → Support → TV Information
You can view information including Model, Serial Number, Device Name.
5.8.3 Notifications
→ ⊙ → Support → Notifications
You can view all notifications from TV apps and service at the same time. You can view and delete each notification message. For notifications that support shortcuts, you can go directly to that app or website.
5.8.4 Additional Settings
→ ⊙ → Support → Additional Settings
User Agreements
These are the terms and conditions for privacy for the use of Smart TV-related services.
Legal Notice
It's a legal notice for services provided via TV.
Open Source Software Notice
You can view the instructions for each item.
5.8.5 Reset to Initial Settings
→ ⊙ → Support → Additional Settings
Return TV to its initial settings. This will revert all settings to their default values. After reset, the TV will automatically turn off and on.
- If Safety is set to On, you should type the password to Reset to Initial Settings.
- Do not turn off the power during initialization.
• We recommend that you reset the TV to Reset to Initial Settings before you sell it or transfer it to a third party.
TROUBLE SHOOTING GUIDE
Many apparent malfunctions are caused slight misadjustments of the regular controls of your unit or equally simple causes. If any difficulty arises through normal use of your unit, check the list of common problems in the list below.
If the problem persists, unplug your unit and contact your dealer.
| SYMPTOM | METHODS OF CHECKING OR ADJUSTING |
| No picture or sound | Check the AC plug is in the socket. Check house circuit breaker is in the ON position. |
| Picture normal but no sound | Check that the volume is not at its minimum setting or on MUTE. |
| Remote control not working | Check that TV set power is ON.Check batteries are operational and inserted correctly.Make sure infrared receiving window on TV is not exposed to strong lighting or blocked in any way. |
| Cannot receive any TV signal | Ensure SOURCE switch is set to TV.Check aerial location and connection.Re-check your tuning method. |
| No program signals output from external source | Check SOURCE button to make sure it is in the correct position for reception. |
| Contrast and brightness problems | Make necessary adjustments to relevant settings. |
| Intermittent poor contrast and colour fading on all channels | Check aerial positioning |
| Dotted lines or stripes appear on screen | There may be Interference from another electrical product. Move appliance if it persists. |
| Snow on screen | Check aerial for broken circuit, loose connection or any visible damage. |
| Double images or 'ghosting' | Check aerial location and direction - strong winds may cause it to move.Also check whether mountains or tall buildings may be the problem. Minor adjustment of the direction of your antenna should keep the ghosting to a minimum. |
Note: External rooftop/antenna adjustment should be left to a suitably qualified person.
ALL RIGHTS RESERVED, COPYRIGHT DENVER A/S

Denver.eu



Electric and electronic equipment and included batteries contains materials, components and substances that can be hazardous to your health and the environment, if the waste material (discarded electric and electronic equipment and batteries) is not handled correctly.
Electric and electronic equipment and batteries is marked with the crossed out trash can symbol, seen below. This symbol signifies that electric and electronic equipment and batteries should not be disposed of with other household waste, but should be disposed of separately.
As the end user it is important that you submit your used batteries to the appropriate and designated facility. In this manner you make sure that the batteries are recycled in accordance with legislature and will not harm the environment.
All cities have established collection points, where electric and electronic equipment and batteries can either be submitted free of charge at recycling stations and other collection sites, or be collected from the households. Additional information is available at the technical department of your city.
Please enter: Denver.eu and then click the search ICON on topline of website.
Write modelnumber:LDS-3281.
Now enter product page, and red directive is found under downloads/other downloads.
Operating Frequency Range: 43.5MHz \~ 858MHz
Max Output Power: 60W
DENVER A/S
Omega 5A, Soeften
DK-8382 Hinnerup
Denmark
Denver.eu

ENERG

LDS-3281
Denver
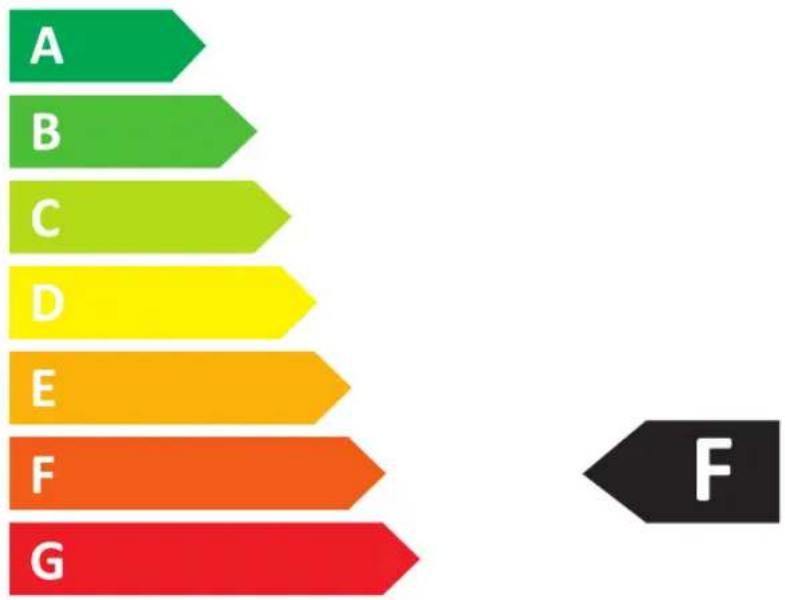
bar
| Category | Value | |---|---| | A | 10 | | B | 20 | | C | 30 | | D | 40 | | E | 50 | | F | 60 | | G | 70 |30 kWh/1000h

2019/2013



- SMART HD LED TV with DVB-T2/S2/DVB-C and H.265/HEVC Support
- User's Guide
- CONTENTS
- SPECIFICATIONS
- SAFETY INSTRUCTIONS
- DESCRIPTION OF CONTROL KEYS & CONNECTORS
- OPERATION OF FUNCTION MENU
- TROUBLE SHOOTING GUIDE
- INFRA-RED REMOTE CONTROL
- IMPORTANT SAFETY INSTRUCTIONS
- WARNING
- CAUTION
- RISK OF ELECTRIC SHOCK DO NOT OPEN
- IMPORTANT INFORMATION
- Safe installation
- NOTE:
- HOW TO OPERATETV
- I.1 Pairing the Magic Remote
- To View More Features of the Remote Control
- Launching Apps through QUICK ACCESS
- Setting QUICK ACCESS
- Checking and Editing QUICK ACCESS
- 2.ENJOY LIVE TV
- Making the Most of live Menu
- Viewing Guide
- Checking Programme Info
- Using Live Playback (Real-time Playback)
- Recording
- Using TV Scheduler
- Using the TV Scheduler
- 2.7Play Recorded TV Programs
- Playing Recordings
- Setting up Additional Features
- Watching Internet Channel
- TELETEXT
- To Use Teletext
- Colour button
- Number button
- Special Teletext Function
- Index
- Time
- Hold
- Reveal
- Update
- Language
- CI Information
- HbbTV
- To Use HbbTV
- CONNECTING EXTERNAL DEVICES
- Using Home Dashboard
- Connecting Home IoT Devices
- Connecting Smart Devices
- Connecting USB
- Viewing Photos and Videos
- Using Photo Player
- Supported Photo Files
- Using Video Player
- Setting Additional Options
- Supported Video Files
- Full HD video
- Supported External Subtitles
- Supported Embedded Subtitles Format:
- Listening to Music
- Using the Music Player
- Audio Format
- Share Computer Content
- Browse the content on your PC to watch on TV (Windows 10)
- Browse and watch the content stored on the PC using the TV (Windows 10)
- Matters That Require Attention of Content Share
- 3.8Watching Computer Screen on TV
- 4.MAKING THE MOST OF SMART TV
- Surfing the Internet on TV
- Live Plus
- SETTINGS
- Quick Settings
- 5.2Picture
- Picture Mode
- Advanced Controls
- Aspect Ratio Settings
- Energy Saving
- Off
- Screen Off
- Eye Comfort Mode
- On
- AMD FreeSync Premium
- Sound
- Sound Mode Settings
- Sound Mode
- Balance
- ULTRA Surround
- Equalizer
- Reset
- Sound Out
- Internal TV Speaker
- WiSA Speakers
- Optical
- HDMI ARC
- TV Installation Type
- TV Installation Type
- Stand
- Wall-mounted
- Volume Mode
- Volume Increase Amount
- DTV Audio Setting
- 5.3.6AV Sync Adjustment
- HDMI Input Audio Format
- 5.3.8Sound Sync
- Digital Sound Out
- 5.4Programmes
- Auto Tuning
- Manual Turning
- Editing Transponder
- Regional Programme
- Programme List Update
- Signal Test
- Programme Manager
- Multi Feed
- Learn More about HbbTV
- CI Information
- Save CI Password
- Copy Programmes
- 5.5Connection
- TV Name
- Network Connection Settings
- Device Connection Settings
- Mobile Connection Management
- Language
- Location
- Time
- TV Rating Locks
- Enabling Programme Locks
- Application Locks
- Input Locks
- Reset Password
- Account Management
- Home Settings
- Settings Help
- Menu Transparency
- Screen Saver
- No Signal Image
- ECO Mode
- Live Plus
- Quick Start+
- Standby Light
- Advertisement
- Accessibility
- Audio Guidance
- Audio Description
- Audio Type
- High Contrast
- Grayscale
- Invert Colours
- Hard of Hearing
- Subtitles
- Support
- Software Update
- TV Information
- Notifications
- Additional Settings
- Reset to Initial Settings
- ENERG
Marke : DENVER
Modell : LDS-3281
Kategorie : Fernseher