
EQAXF1BXWG - Wasserspender ELECTROLUX - Kostenlose Bedienungsanleitung
Finden Sie kostenlos die Bedienungsanleitung des Geräts EQAXF1BXWG ELECTROLUX als PDF.


| Produkttyp | Wasserspender |
| Modell | EQAXF1BXWG |
| Marke | Electrolux |
| Abmessungen (B x T x H) | 310 x 374 x 1040 mm |
| Gewicht (netto) | 14,72 kg |
| Spannung | 220-240 V |
| Frequenz | 50/60 Hz |
| Maximale Leistung | 520 W |
| Heizleistung | 420 W |
| Kühlleistung | 100 W |
| Kaltwasserleistung | 2 L/h |
| Heißwasserleistung | 4 L/h |
| Umgebungstemperatur | 10 - 43 °C |
| Relative Luftfeuchtigkeit | ≤ 90 % |
| Kindersicherung | Ja (Schiebeschalter) |
| Anzeigeleuchten | Heizen, Kühlen, Flasche leer |
| Wasserarten | Heiß, kalt, Raumtemperatur |
| Kühlung | Kompressorkühlung |
| Heizung | Elektrisch (85 °C) |
| Flaschenart | Bottom-Load, bis 20 Liter |
| Reinigungsintervall | Alle 3 Monate (mit Desinfektionsmittel) |
| Entkalkungsintervall | Alle 6 Monate (mit Zitronensäure) |
| Standsicherheit | Befestigung am Boden empfohlen |
Häufig gestellte Fragen - EQAXF1BXWG ELECTROLUX
Benutzerfragen zu EQAXF1BXWG ELECTROLUX
0 Frage zu diesem Gerät. Beantworten Sie die, die Sie kennen, oder stellen Sie Ihre eigene.
Eine neue Frage zu diesem Gerät stellen
Laden Sie die Anleitung für Ihr Wasserspender kostenlos im PDF-Format! Finden Sie Ihr Handbuch EQAXF1BXWG - ELECTROLUX und nehmen Sie Ihr elektronisches Gerät wieder in die Hand. Auf dieser Seite sind alle Dokumente veröffentlicht, die für die Verwendung Ihres Geräts notwendig sind. EQAXF1BXWG von der Marke ELECTROLUX.
BEDIENUNGSANLEITUNG EQAXF1BXWG ELECTROLUX
EN
USER MANUAL

Welcome
Thank you for choosing Electrolux.
Our water dispensers are developed with high technical and quality standards, with features to offer you even more comfort.
Read all instructions before using this appliance. This book contains valuable information about operation, care and service. Keep it in a safe place.
You expect all this from Electrolux....and we deliver.
Environmental advice
The packaging material used is recyclable; we recommend that you separate plastic, paper and cardboard and give them to recycling companies.
According to WEEE (Waste of Electrical and Electronic Equipment) guidelines, waste from electrical and electronic devices should be collected separately.
If you need to dispose of this appliance in the future, do NOT throw it away with the rest of your domestic garbage.
Instead, please take the appliance to the nearest WEEE collection point, where available.



Attention
Inside you will find many helpful hints on how to use and maintain your water dispenser properly. Just a little preventive care on your part can save you a great deal of time and money over the life of your Water Dispenser. You'll find many answers to common problems in the chart of troubleshooting tips. If you review our chart of Troubleshooting Tips first, you may not need to call for service at all.
①
Contents
Safety 3
Product description 5
Installation 6
How to use 8
Care and cleaning 11
Troubleshooting 13
Technical informations 15
Attention
- The appliance that you have bought may be slightly different from the one illustrated in this manual. Please refer to the information related to the model you have.
- The appliance you have may carry a different plug than the one illustrated in this manual. The plug that comes with the product follows the electrical specification of the country where it is sold.
- Contact the authorised service technician for repair or maintenance of this unit.
- If the power cord is to be replaced, replacement work shall be performed by authorised personnel only.
- This product was developed for regions with an altitude of approximately 2000 meters. For a higher region, the water boiling point might be too low and cause product damages.
2
Safety
To reduce risk of injury and property damage, user must read this entire guide before assembling, installing and operating dispenser.
Failure to execute the instructions in this manual can cause personal injury or property damage.
This product dispenses water at very high temperatures. Failure to use properly can cause personal injury.
When operating this dispenser, always exercise basic safety precautions, including the following:
For children
- This appliance can be used by children aged from 8 years and above and persons with reduced physical, sensory or mental capabilities or lack of experience and knowledge only if they have been given supervision or instruction concerning using the appliance in a safe way and understanding the hazards involved.
- Do not let children play with the appliance.
- Keep all packaging items away from children.
- If the appliance has a child safety device, we recommend you activate it.
- Cleaning and user maintenance shall not be made by children without supervision.
- Children of less than 8 years should be kept away unless continuously supervised.
General safety
- It is most important that this instruction book should be retained with the appliance for future reference. Should the appliance be sold or transferred to another owner, or should you move to another house and leave the appliance, always ensure that the book is supplied with the appliance in order that the new owner can get to know the functioning of the appliance and the relevant warnings.
- Correct functioning of your appliance does not only depend on product quality, but on correct installation by a qualified professional.
- Never remove or damage stickers, warning labels or nameplates attached to the appliance.
-
A qualified technician carrying out the installation is obliged to observe applicable national standards and regulations concerning connection to the water distribution system and the electric network. The manufacturer is not responsible for any unprofessional or incorrect installation.
-
Check that the specifications written on the appliance's identification plate are the same as those of the electrical power supply.
- This appliance is manufactured and tested in accordance with valid regulations.
Installation
- Obey the installation instruction supplied with the appliance.
- Remove all the Packaging items.
- Do not install or use a damaged appliance.
- Before first time starting up, check the appliance for any damage incurred during transport.
- Never remove or damage stickers, warning labels or nameplates attached to the appliance.
Water connection
- Make sure to use a new water bottle.
- Make sure the water bottle not faulty - no leakage or holes.
- Make sure to install the bottle as in Catalogue.
- Make sure to use the proper capacity ( ≤slant 20) litre for the water bottle.
Electrical connection
- Only plug the water dispenser directly in the current if it is correctly grounded and with the certain voltage.
- Choose a place that is near a grounded electrical outlet.
- Make sure the appliance is installed correctly. Loose and incorrect electricity mains cable or plug (if applicable) can make the terminal become too hot.
- Make sure that the electrical information on the rating plate agrees with the power supply. If not, contact our Authorised Service Centre or an electrician.
- Do not use multi-plug adapters and extension cables.
- Make sure not to cause damage to the mains plug (if applicable) or to the mains cable. Contact our Authorised Service Centre or an electrician to change a damaged mains cable.
- The Appliance have electrical switch in the rear side which is set to turn ON or OFF the water heating system only.


Product description
Parts names

1 Child safety switch
2 Hot water button
3 Ambient water button
4 Cold water button
5 Spout
6 Water collector grid
7 Storage space

8 Cooling switch
9 Heating switch
10 Power cord
11 Outlet of hot water
12 Condenser
Installation
Placement
Use the appliance indoors, where is no likelihood of rain or bad weather, as there is damage risk to the product electrical system.
Place dispenser upright The product must be installed in an easily accessible location in case of repairs.
Place dispenser upright on a flat surface and keep a minimum distance of 25cm from the wall. Make sure that the ventilation openings of the product are not being obstructed.
Assemble
- Remove drip tray from door and place the grid on top.
- Snap drip tray and grid assembly into door.
Important
Do not install the water dispenser in a location where there is a direct impact of sunlight or near heat sources, as a stove, oven, etc.
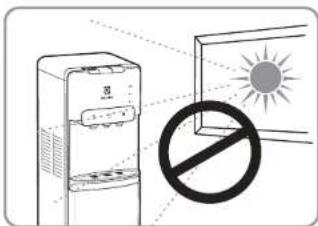
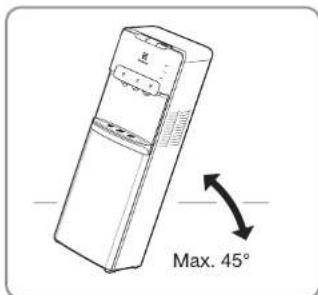
Attention
Never turn the appliance upside down or tilt it more than 45°.
Warning
Do not plug in the device unless the water bottle is already installed.
To avoid a hazard due to instability of the appliance, it must be fixed in accordance with the instructions:
- Use 13 mm screw to fix the fixing bracket on the middle of bottom cover.
- Drill out a screw hole(6 mm) on the floor.
- Insert a screw anchor (wall plug) into the drilled hole.
- Move water dispenser, Align fixing bracket hole with screw hole of the floor
- Put the 25mm screw into the screw hole of fixing bracket.
- Tighten the screw.

Install water bottle
- Open dispenser door.
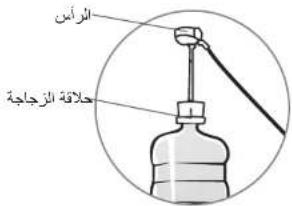
- Place probe assembly on probe hanger.
- Place fresh bottle outside of cabinet.
- Remove the entire plastic cap from top of bottle.
- Clean outside of new bottle with a cloth.
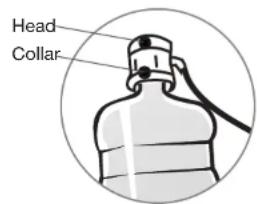
- Place probe into bottle.
- Slide collar down until it clicks in place.
- Push head down until tubes hit bottom of bottle.
- Slide bottle into cabinet and close door.

Provide electricity
Plug cord into a properly grounded wall outlet.
At this time the pump will begin to move water from the bottle to the hot and cold tanks. It will take up to 5 minutes to fill the tanks for the first time. During this period the pump will run continuously. This is normal.
How to use
Activate heating and cooling
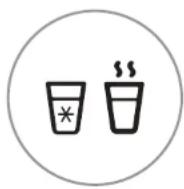
This unit will not dispense hot or cold water until the switchers are activated.
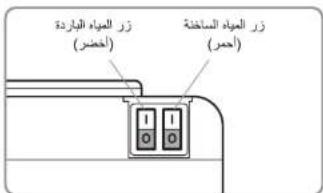
To activate, push top side of power switches in to start heating and cooling water.
- If you do not want to heat water, push bottom side of red switch in.
- If you do not want to cool water, push bottom side of green switch in;
Dispensing water
This unit has been tested and sanitized prior to packing and shipping. During transit dust and odors can accumulate in the tank and lines. Dispense and dispose at least one quart of water to prior to drinking any water.
Attention
Sometimes when water is dispensed for more than 2 minutes, the pump fails to take the necessary amount of water, and gets block, in this case the lack of water indicator light on control panel will turn on. If this happens, just open the cabinet door, then close it, and wait for 2 minutes, then the dispenser will return to dispense water.
When the bottle is empty, replace it with a new bottle. (see instructions of how on page 10).
Activate heating and cooling
This unit will not dispense hot or cold water until the switchers are activated. To activate, push top side of power switches in to start heating and cooling water:
- If you do not want to heat water, push bottom side of red switch in.
- If you do not want to cool water, push bottom side of green switch in.
Dispensing water
This unit has been tested and sanitized prior to packing and shipping. During transit dust and odors can accumulate in the tank and lines. Dispense and dispose at least one quart of water prior to drinking any water.
Hot water
To get the hot water: slide the child safety switch to right, and press hot water button simultaneously.
Normal water
To get the room temperature water: put the cup on the water collector grid and press the natural water button.
Cold water
To obtain chilled water put the cup on the water collector grid and press the cold water button.


Never press more than one button at the same time.

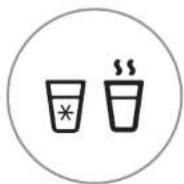
Light indicators
The indicator lights show that the device is working correctly. After connecting the device, check if the indicators are on.

Indicates when the bottle is empty.

Indicates that the water in the reservoir is being heated.

Indicates that water in the reservoir is being chilled.
Warning
- When the machine is under the ice point and blocked by ice, the cooling switch must be closed for 4 hours before turning it on again to continue its operation.
- This machine should not be turned on until 3 minutes later after turning off the power switch.
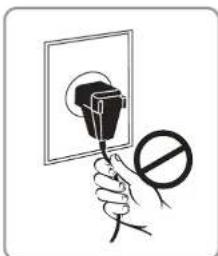
- Do not operate or stop the appliance plugged in by the power cord or by pulling on the power cord. Unplug the power cord by holding it by the plug.
- Do not operate or stop the appliance plugged in by the power cord or by pulling on the power cord. Unplug the power cord by holding it by the plug.
Changing bottles
The indicator (☐) lights up when the bottle is empty. Replace the bottle as soon as possible.
Do not dispense hot, cool or cold water if the red light is flashing as you could empty the tanks and cause the dispenser to overheat.
- Open the dispenser door.
- Slide empty bottle out of cabinet.
- Remove probe assembly from empty bottle. Place probe assembly on probe hanger.
- Set empty bottle aside.
- Place fresh bottle outside of cabinet. Remove entire plastic cap from top of bottle. Clean outside of new bottle with a cloth.
- Place probe into bottle. Slide collar down until it clicks in place. Push head down until tubes hit bottom of bottle.
- Slide bottle into cabinet and close door.

Cleaning and maintenance
To avoid accident, cut off the power supply before operation according to the following instruction.
The machine had been disinfected before departed from factory. Cleaning the dispenser prior to installing a full bottle of water for the first time.
Cleaning and draining instructions:
- Making sure the power switch in the 0(off) position and unplug the water dispenser before cleaning.
- Twist out the two screws, then take down top cover, cold tank cover and separator.
- Fill 0,6 gallons pure water into cold tank to clean it.
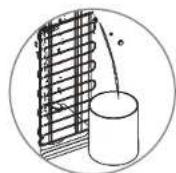
- Place a large water bucket beneath the drain outlet which on the back of water dispenser, then, remove the drain cover and drain the water.
- Reposition the drain cover, separator, cold tank cover and top cover after draining. Ensure the pipe and wires are connected properly, then you can use the machine normally.


Attention
The cleaning must be under the guidance of professional staff. The dispenser heats water to a temperature of approximately 85^ C. It can cause severe burns. Please operate it carefully.
Sanitizing
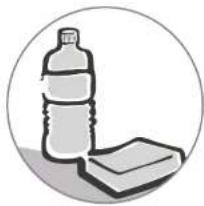
The machine should be disinfected with disinfectant separately bought from drugstore or marketplace according to the instruction manual of the disinfectant and then clean it with water (see cleaning and draining instructions).
Generally this should be done every three months.
To remove mineral deposits
Mix 1 gallon of water with half pound of citric acid crystals, inject into the machine and make sure the water can flow out of the hot water tap. Switch on the power and heat it about 10 minutes, 30 minutes later, drain off the liquid and clean it with water two or three times. Generally this should be done every six months.
natural_image
Illustration of a plastic bottle and a closed book inside a circular frame (no text or symbols)Warning
Never disassemble this machine by yourself to avoid risk of damaging machine. After plug-in each time, if the water not fill in the cold tank fully, the water shortage indicator will blinking and pump is working.
If the water level of the cold tank still fails to reach the limit within 5 minutes, the water shortage indicator will continue blinking, but the water pump will stop working.
In any time, once the cabinet door is opened, the pump should not working.
Troubleshooting
Certain problems are due to lack of simple maintenance or oversights, which can be solved easily without calling the service technicians, before contacting the service centre please carry out the check listed below.
| Problem Possible cause(s) Solution | ||
| Does not work | a) Electric plug out of the socket. b) Bonded in different voltage. c) Lack of electric power or fuse blown. d) Make sure cold water switch in the rear side of dispenser is ON. e) Voltage drop. | a) Plug in. b) Connect in correct voltage. c) Wait for electric power ON or change fuse. d) Push the switches to the ON position. e) Use a voltage stabilizer. |
| Water not cold from cold tank | a) Electric plug out of the socket. b) After setup, it will take up to 1 hour to chill the water until minimal set temperature. c) Make sure cold water switch in the rear side of dispenser is ON. | a) Plug in. b) Wait one hour for the cold water supply. c) Push the cold water switch (green) to the ON position. |
| Water not hot from hot tank | a) Electric plug out of the socket. b) After setup, it will take up to 15-20 min to heat the water until maximal set temperature. c) Make sure hot water switch in the rear of dispenser is ON. | a) Plug in. b) Wait 15-20 min. for the heat water supply. c) Push the hot water switch (red) to the ON position. |
| Excessive heating around dispenser body | a) The appliance very close to a wall. b) Ventilation vents obstructed. | a) The appliance must be at least 25 cm from the wall. b) Clear the ventilation vents. |
| Noise a) Product leaning on the wall. b) Uneven placement. | a) The appliance must be at least 25 cm from the wall. b) Even the appliance. | |
| Water leakage | a) A hole or a crack in the bottle. b) Overflow in the water collector. c) Drainage cap not well tightened. | a) Replace the water bottle. b) Empty the water collector. c) Tighten the cap. |
| Problem Possible cause(s) Solution | ||
| Steam coming out of dispenser | a) Excessive heating inside the hot water tank. | a) Disconnect the main power source and call service centre. |
| Unpleasant taste of water | a) Cleaning is made with non recommended material.b) Poor-quality water.c) Water bottle shoddy. | a) Follow cleaning/sterilization procedure correctly.b) Make sure that the mineral water supplier is of good quality.c) Replace the water bottle. |
Technical informations
| MODEL | BOTTOM LOAD |
| EQAXFIBXWG / EQAXFIBXSG | |
| Volt-Freq. | 220-240V - 50/60Hz |
| Max. power | 520 W |
| Heating power | 420 W |
| Cooling power | 100 W |
| Cold water | 2 L/H |
| Heat water | 4 L/H |
| Environmental temp. | 10~43°C |
| Humidity | ≤ 90% |
| Net weight | 14,72 kg |
| Prod. dimens. W*D*H (mm) | 310°374'1040 |
| NOTES |


natural_image
Repeating pattern of gray geometric shapes on white background, no text or symbols present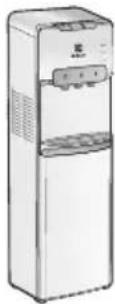
EQAXF1BXWG
EQAXF1BXSG
1
دليل المستخدم
AR
جدول المحتويات
3 ____ ____ ____ ____ ____ ____ ____ ____
5 揭ف المنتج
6
8 كيفية الاستخدام
11
13 حل مشكلات
15 المعلومات الفنية
يرجى الانتباه
• من الممكن أن يكون هذا الجهاز الذي اشتريه مختلف قيللا عن هذا Modusch في هذا الدليل. يرجى Rouge إلى المعلومات المتعلقة بالطراز الذي نبيك.
• من الممكن أن يكون هذا الجهاز الذي اشتریته يحل مقببا مختلف عن هذا الموضح في هذا الدليل. حيث إن
المقبس الذي يأني مع هذا المنتج يتبع الموصفات الكهربائية للبلد الذي بيع فيها الجهاز.
• يرجى التواصل مع فني الخدمة المعتمدين在一صلاح أو صينة الوحدة.
• في حالة استبidal كابل الطاقة، فإن الذي يقوم بها الاستبidal هم الموظفون المعتمدون ققط
• تم تطوير هذا المنتج كى يعتاسب مع المناطق التي يبلغ ارتفاعها حواني 2000 متر.並不سبة للمنقط الأعلى،
فمن الممكن أن تكون نقطة غليان国会 مönخفضة جدا وتسبّت تلف المنتج.
②
مرحبا
شكرأ لكم على اختيار شركة ال isotرولكس.
تم تطوير موزعات الماء لدىita باستخدام معاير الجودة والمعاير الفنية العليا مع إضافة ميزات ل tournaments千米 الأمان.
يرجى قراءة جميع التعليمات قبل استخدام هذا الجهاز. Santiago dental يحتوي على معلومات قيّمه بشان التشغيل
والعناية والخدمة. احتفظ بها الجهاز في مكان أمن.
إ ---------- ت新征程 كل هذا من شركة اليكترولكس....وthereن نفي بتوسعاتك.
النصاتح البيئية
تكون merupakan المستخدمة في التغليف قابلة ل NCAA LinkedIn، ولنا نوصيكم بفصل البلاستك والأوراق والكرتون وإخطها إلى شركات إ NCAA LinkedIn
وقاً لارشادات توجيه التفايات الكهرباتية والأجهزة الإلكترونية;
يجب جمع النف ayات الكيربانية Oregon ALAKTKRONINA على نحو منفصل.
في حال كنت تريد التخلص من هذاCriteria في截至目前،
فلا تلقيه مع باقى النفايات المحلية.
لكن بدلا من ذلك، يرجى إرسال الجهاز إلى أقرب颛طة جمع نفليات
تلابعة لتوجيه النفيات الكهربائية والأجهزة الإلكتروني مТИ كان هذا متacha.



يرجى الانتباه
مُعَ تجْ بِالدَأَلْنِ لُتَصَّاح تُسَاعَكِ فِي كَفِيمَ إِسْتَّذَامِ موزعِ الْمَيَاءِ وَصِيَاتِهِ بِشَكِّ مَنَا. بِحْتَ تَقَنْدِ الْقَلْبِ الْقَلْفِ عَلَّةٍ مِنُ العَّابِةُ الْوَلَّقَائِةِ مِنُ جَانِكْ بِمَنْ أَنْ يُوْرُ عَلَّةٍ كُذَا رَمَا مِنُ الْوَلَّقَائِةٍ وَمُلْ خَالَّ الْعَرْ الْأَقْرَ اطِيٍ لُمُوزعِ الْمَيَاءِ وَمُلْ تَجْ لِجَ الْأَجِابِاتِsُ عَلَّةٍ لِمُ الشَكُّ الْعَمَّاً مِنُ الْرِسمُ الْمَيَّانيٍ لُتَصَّاحِ إِسْتَّذَافِ الْأَخْطَاءٍ وَإِسْلَاحِهاٍ أَلَا; فِنْ الْمَمْكًا لَا تُحْتَّاحِ إِلَى لَاتِصَّال بِالخَدْمَةٍ عَلَّةٍ أَيْ حُلٌ.
①
• تأكد من أن المعلومات المدونة على لوحة تعريف الجهاز هي نفس المعلومات الخاصة بمزود الطاقة الكيرباتية. • تم صنع وACKبار هذا الجهاز وفقا للوائح المعoul بها.
التركيب
• ابع تعليمات التركيب المпуفرة مع الجهاز.
• ازل جميع العناصر المعينة.
• لا تركب أو نستخدم جهازا تالفً.
• قبل وقت التشغيل الأول، اfastص الجهاز لضمان عدم وجود أي تلف حدث أثناء النقل. • لا نازيل أبذا أو تتلاف أي ملصفى أو ملصفات تحذيرية أو الم{lصفات التي تحمل اسم ملحقات بالجهاز.
توصيل المياء
• تاکد من استخدام زجاجة مياء جديد.
• تأكد من عدم وجود عوب في زجاجة国会 - بحث ألا يكون بها تSRIP ولا تقوب.
• تأكد من تركيب الزجاجة كما في الكتاب.
• تاکد منрук تستخدم رجاجه مناسبة بسعة لا تزید عن 20 لتر ماء.
التوصل الكهرب


• ضع فقط مقبس موزع المياء مباشرة في قابس التيار في
حالة تم تأريض هذا التيار بشكل صحيح بالفولت الم congressional.
• اختر مكان قريب من منظ التياز الكهربي الذي تم تأريضاء.
• تلكد من أن الجهاز مركب بالشكل الصحيح. يمكن للكابل أو
قابس التبيار الكهربائي المتحرر أو غير الصحيح (إن وجد)
ان يجعل الاطرا ف ساخنة جدا
• تاشد من أن جميع المعلومات الكهربية على لوحة
التصنيف تتوافق مع مصر التيار الكهربائي. إذا لم
ткиن متوافقة فيرجى التواصل مع مركز الخدمة المعئemd
لدنا أو فني كهرباء.
• لا نستخدم الوصلات ذات القوابس المتعددة ولا كابلات التطويل.
• تأكد من عدم حدوات تلفيات لمف bees التيار Rxنيي (إن كان متاحا) أو للكابلات Rxنيي.})(في حالة تغير
• يحتوي الجهاز على زر التشغيل الكهربي في الجabinet الخلفي والذي قد وضع لتشغيل أو قفل نظام تسخين المياه
فقط
السلامة
لقطيل خطر الإصدابة، أو حنought خسارة بالแมนكات، يجب على المستخدم قراعة الإرشادات بالكامل قبل إجراء
عملية الجمع والتركيب والتشغيل للموزع.
ويمكن أن يؤدي عدم اtbاع التعليمات الواردة في هذا الدليل إلى حدوث إصابات شخصية أو التلف في الملكيات.
يوزع هذا المنتج مياه بدرجة حرازة عالية للغality.WMICKN AN يYZIDI عدم استخدام المناسب إلى حدوث إصابات
شخصية.
عند تشفيل هذا الموزع، اتبع دانما احت datapات Csلامة الأساسية بما في ذلك ما يلي:
للاطقال
• يمكن للاطفال استخدام هذا الجهاز بدهاً من سن تُماني (8) سنوات فاكر، weekend ي₌كن لذوي القدرات البدنية والحسية والعقية المنخفضة أو من ي Nunضهم الخبرة والمعرفة استخدام الجهاز فقط في حالة وجود الرقبابة عليه
أو توجيهم حول كيفية التعامل مع الجهاز بطريفة آمنة وفيم المخاطر التي ينطوي عليها.
• لا ت clerk الأطفال يلعبون بها الجهاز
• اجعل جمع عناصر الجهاز بعيدة عن مت不允许 الأطفال.
• إذا كان الجياز يحتوي على جهاز سلامة للأطفال، فإننا نوصسي بتقville.
• يحظر إجراء أعمال انظفة والصيانة من جائب الأطفال دون وجود رقبة عليه.
• يجب افقاء الأطفال ممن هم دون الثامنة من engrر بعينّا عن هذا المنتج إلا إذا توفرت الرقبة الدائمة.
السلامة العامة
• من المهم للغابة أن يتم الاحتفاظ بدليل التعليمات هذا مع الجهاز للرحجع إلى في المستقل. في حالة بيع أو نقل الجهاز إلى مالك أخرى، أو إذا انتقلت إلى مزل أخر وتركت الجهاز، فitaك دانذا أن تضع الدليل مع الجهاز حتى
يستطيع الملك الجديد من معرفة وظancial Gehاز والتحذيرات المتعلقة به.
• لا يعت Indeed الأداء الوظيفي للجهاز على جودة المنتج فقط ولكن يعت Indeed على التر Kirkب الصحيح من الفنيين))),
• لا تزيل于此ا أو تتلف أي ملصفات و ملصفات تحذيرية أو الملصفات التي تحمل اسم سلHFات بالJEHAZ
• يلترم الفني المؤهل الذي يجري عملية التركيب ب tolerاعة المعاير واللوانح المحلبة المتعلقة بتوصل نظام توزيع
المياء وشiekة الكهرباء. لا تكون شركة التصنيع مسوولة عن أي تركيب غير فتي أو غير صحيح.
التركيب
وضع الجهاز
استخدم الجهاز داخل المنزل، حيث لا يوجد احتمال لتسقط الأمطار أو سوء الأحوال الجوية، ولا يوجد خطر تلف
لنظام الكهرباني لل.Manج.
ضع الموزع مستقيمة. يجب ت berkيب المنتج في مكان يسهل الوصول إيه في حالة إجراء الإصلاحات.
ضع الموزع مستقيما على سطح مستوى واترك مسافة 25 سم بحد أدنى بين الجهاز والحائط. تأكد من أنه لا يوجد
عائق في فتحات التهورية الخاصة بال.Manج.
الجمع
-
أزل لوحة الت Connectivity من الباب وضع الشبكة أعلاء.
-
قم بتركيب لوحة الت Connectivity واجمع الشبكة في الباب.
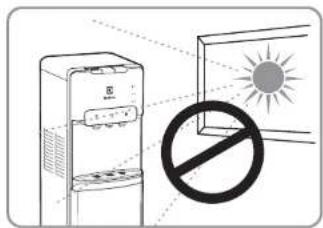
تعليمات مهمة
ي Grants ت rabbit موزع المياء في المكان الذي فيه تأثيرا
لضوء الشمس المبائر أو بالقرب من مصادر الحرارة
مثل الموقد والفرن وما إلى ذلك.
يرجى الانتباه
لا تقم公正 بطلب الجهاز رأسا على عقب أو إملته أكثر
من 45 درجة.

تحذير
لا تضع قابس الجهاز في مصر التيار الكهربي ما لم
ткиزجاجة المياء مركبة بالفعل.
6

زر التيريد 8
9 زر التسخين
كابل الطاقة 10
من夫妇 المياء الساخنة 11
موزع 12
وصف المنتج
أسماء الأجنبية

1 زر سلامة الأطفال
2 زر المياه الساخنة
3 زر محيطannah
4 زر المياء الباردة
5 صن doping
شbridge تجmeg المياء
7 مساحة التخزين
5
ال tzرويد ياكهرباء أوصى سلاك protestاء بالشكل المنسب بمخرج كهربى أرضى. في هذا الوق تبيا Genericة في تحيك المجيه من الزجهاة إلى حزان الميها الساخن والازد، provincialities وابزد. Despiteغق مطاء الخزامات الأول مرة مدة نصل حتى 5 دقيقة. Mortallah هذا unfظمة وابزد. هذا أمربا طلبعية:
كيفية الاستخدام
تنشيط وضع التبريد والتسخين
هذا لن يوزع المياء السacrefte أو الباردة إلى أن يتم تنشيط المقالیح.
لاجراء عملية التشيط ادفع مف+++يج الشغيل للاجاتب العلarooي لبده عملية تسخين وت */ر **ي **م **.
- إن كنت لا تريد مياء ساخنة، ادفع الزر جائبا إلى الجاتب الأحمر.
- إن كنت لا تريد مياء باردة، ادفع الزر جائبا إلى الجاتب الأخضر.
موزع المياه
تم اختبار هذه الوحدة وتعفيها قبل التعبئة وال handshake. أثناء الع bóر يمكن أن يتراكم الغبار أو الروانح فيelvesان.
وبين الخboxed. قم بتصريف'Rentخلاص من ربع لتر من الماء علاب الأقل قبل شرب أي ماء.
يرجى الانتباه
في بعض الأحيان عند تصريف الماءAk Kafrن من د qipecين، تفprefل المضخة في-apذ الكيمية الازلمة من الماء، وتقfect عن العمل، في هذه الحالة سیتم تشغیل ضو眾 موشر نصر الماء علیا لواحة التالحکر (إذا حoldt ذلك، فقط افقح باب الخازنة لم اغلاقه واتنظر لمدة د qipecين، تم يعود الموزع تصريف الماء.
عدتما تكن الزجاجه فارن، استدیدلها ب hazardاجه جيدة. (النتر تعلايمات كيف في ص 10)
⑧

يجب تركيب الجهاز واقفلاتعلايمات لتجب المخاطر
الناتجة عن عدم ثبت الجهاز:
- استخدم مسمير بحجم 13 مع لثبيت قاعدة التثبيت
في منarseف غطاء الجزء الأوسط
-
اقب تكّللاسمار (6 مم) في الأرضية.
-
ادخل المسمار اللاوبى (-bandس حانط) في الفتحة
المنقية
- حرك موزع المياه، ثم قم بمحافظة فتحة قوس
الثابت مع تقب المسمار للأرضية.
- ضع مسمارا لولياً بحجم 25 مم في تقب المسمار
الخاص بقاعدة التثبيت.
- اربط المسمار.

رجب زجاجة المياء
-
افتح باب الموزع.
-
ضع تجميع المسبار علابى حامل المسبار.
-
ضع الزجاجة الجديدة خارج الخزanine.
-
أزل الغطاء البلاستيكي بالكامل من فروhea الزجاجة.
-
نظف خارج الزجاجة الجديدة بقطعة من القمش.
-
ضع المبارك داخل الزجaje.
-
اسب حلauce rezجاجة للاسفل حتى نصدر صوت طر
قَعَةُ في مِوْقَعِها.
-
ادفع الرأس للاسف حتى يصدم الأ bóوب بل سقل الزجaje.
-
اسب vzجاجة داخل الخزانة ثم اغلاق الباب.
7
تغير الزجاجات
لُضيء المؤشر (عَنْمَا تكون الزجاجة فارعة. استبيل الزجاجة في أQUIب وقت ممكن. لا تُصرف المياء الساخنة أو الفاترة أو الباردة إذا كان الضوء الأحمر بومض حيث يمكن أن يتسبّ ذلك في
تفريق Investors Retrospective والعربية في ارتفاع درجة حérارة
الموزع.
-
افتح باب الموز ع.
-
اسب vzجاجة خارج الخزaine.
-
أزل تجميع المسبار من الزجاجة الفارغة. ضع
تجمع المسبار على حامل المسبار.
-
ضع الزجاجة الفارغة جلابا.
-
ضع الزجاجة الجديدة خارج الخزائة. أزل الغطاء البلاستيكي بالكامل من فوهة الزجاجة. نظف خارج
الزجاجة الجديدة بقطعة من القماش
- ضع الم sabار داخل الزجاجة. اسب حلقة الزجاجة للأسفل حتى تصدر صوت طرقعة في /. ادفر
الرأس للأسفل حتى يصطدم الأنيوب باسقل
الزحاجة.
- اسب الزجاجة داخل الخزanine ثم اغلق الباب.
natural_image
Illustration of a hand holding a plug with a circular socket, next to a prohibition symbol (no text or labels)المؤشرات الضوئية
تُظّر المؤشرات الضونية أن الجهاز يعمل بشكل康熙. تحقق مما إذا كانت المؤشرات قيد التشغيل بعد توصيل الجهاز.
نǚشیر إلى أن الزجاجة قارعة.

يُشیر إلى أن الماء في الخزان جاری

يُشیر إلى أن الماء في الخزان جاري

تحذير
• يجب إغلاق مفتاح التبريد لمدة 4 ساعات قبل تشغيله
مرة أخرى لمواصلة تشغيله عندما يكون الجهاز تحت نقطة التجemd وقد تسندت بالالثج.
• لا يجب تشغيل هذا الجهاز إلا بعد 3 دقائق بعد إいかف تشغيل مفتاح تشغيل.
• لا تقم بتشغيل أو إيقاف تشغيل الجهاز عبر tốصله
بكابل الطاقة أو بسبك كابل الطاقة. الفصل كابل الطاقة عن طريق امساكه من القابس.
• لا تقم بتشغيل أو إيقاف تشغيل الجهاز عبر tốصيلة.
بكابل الطاقة أو بسبح كابل الطاقة. افصل كابل الطاقة عن طريق امساكه من القابس.
تشيط وضع التبريد والتسخين
هذا لن يوزع المياء الساخنة أو الباردة إلى أن يتم نتشيط الفاتيح. لاجراء عملية التنشيط ادفع مفاتيح التشغيل للجاب العلوي LNDE Employee تسخين وHyperيد
المياء:
• إن كنت لا تريد مياء ساخنة، ادفع الزر جائبا إلى الجاتب الأحمر.
• إن كنت لا تريد مياء باردة، ادفع الزر جائبا إلى الجائب الأخضر.
موزع المياه
تم اختبار هذه الوحدة وتعقيها قبل التعينة وال handshake. أثناء العبور يمكن أن يتراكم الغبار أو الروانج في الخزان وبين الخطوط. قيم Tryصريف والตลาด من ربع لتر من الماء على الأقل قبل شرب أي ماء.
المياء الساخنة
لlicحصول على المياء الساخنة: اسب زر سلامة الأطفال إلى الممين واضغط على زر المياء الساخنة
بالTZامن.
المياء العادية
لlicاصل على مياء في درجة حرارة الغرفة: ضع الكوب فوق شبكة تجيع المياء واضغط على زر المياء
العادية.
المياء الباردة
ل bloss Paul على مياء باردة: ضع الكويت فوق شبكة
تجميع المياه واضغط على زرcep المياه الباردة.
natural_image
Illustration of a plastic bottle and a closed book inside a circular frame (no text or symbols)ال tangيم
يجب تطوير الجهاز بم SHORTر يتم شراوه Bhشكل منفصل من الصيدنية أو Solوق وقفظيل تعليمات المطهر ثم علايك تظيف الجهاز بالماه بعد ذلك (راجع تعليمات واراشادات التظيف والتصريف). بشكال عام، يجب أن يتم ذلك كل ثل Estonia أشر.
لازالة الرواسب المعدنية
الخلاف 1 جلولن من الميهاع نصف ر Utilمن بلاويات حمض السستيك، ثم اقدن الخلاف في الههاز وتأكد من امكتالية تك dfق الميهام من صنboro المياع الساخنة. فم ي笹شيل الطاقة و اتراك المياع تسخن لحوالي 10 د Climate، ثم علأيك أن تصرف السالب بعد 30 دقيقة و نظف الههاز بالمايه مرتين و ثالاث مرات. يشكل عام، يجب أن يتم ذلك كل سنة أ…”ه.”
تحذير
الجهاز. لا تقم أبادئفيك هذا الجهاز ب JFKسک لتجب خطر تلاف
عد توصيل الجهاز، سياظ نقص المairs ويمض إذا ي Trym طاء خزان الماء البارد بالكامل. ستيفق-raضخة Team إذا لم يصل مستوى الماء في المزان الارяд إلى الحد الأقصى خلال 5 دقائق، فيستير م肃 ر trusted المairs في الرمض، Algeria مضخة الماء استوقت عن العمل ومع ذلك، فب Preservation فتح باب الخازان في أي وقت، Stationف المضخة عن العمل
التنظيف والصيانة

اقطع مصر الطاقة قبل التشغيل وavlاتعلايمات الثالثة لتجب وفوع الحوادث.
تم تعقيم الجهاز قبل خروجه من المصنع. نظف الموزع قبل تركب زجاجة مياه كاملة لاoul مرة. -{ت Loganيمات وإرشادات التنظيف والتصريف:

-
تاك من أن مفتاح التشغيل في وضع 0 (الإي Pharmaceuticals) واقصل موزع المياء قبل التنظيف
-
قم بلاف المسمارین ثم أزل الغ除去 العلاوي و غطاء الخزان البارد والファイル.
-
املاً 0.6 جالون من المياء Tariffة في الخزان البارد لتنظيفه.
-
ضع نلو مياء كير تحت مخرج التصريف علای الجزء الخلافي من موزع المياء، ثم azل غطاء التصريف وص Sarف المياء.
5.赞成 وضع غطاء التصريف والファイル وغطاء الخزان البارد والغطاء العلاوي بعد التصريف، تأكد من توصل الأ nbابب والأسلاك بشكل صحیح، تم يمکنک استخدام小微企业 بشكل طلیعي.

يرجى الانتباه
يجب أن تمMessage Concentف تحت إشراف الموظفين المحتر Finين. بىخمن الموزعハイاء إلى درجة حérارة تقارب 85° درجة منوية.WMICMIN AN يسبح حروفا شننده.م.وَجِي تشغيلاه بحرص.
ترجمة بعض المحaskan إلى عدم وجود صيانة بسيطة أو اشران،而且 يمكن حلها بšeولة عبر اجراء الفحص المذكور أدناه أو mildly دون الاتصال بفيي الخدمة وقبل الاتصال بمركز الخدمة.
| الحل | السب (الأسياب) المكن | المشكالية |
| (أ) اقصى مصدر الطاقة ryقيمي والصل بمركز ال Suspensionة | (أ) يوحد تسخين م heterط داخل خران المياء السخفة. | خرROC الم icار من الموزع |
| (أ) اتبع اجر اات التظيف / التغيم بشكل محج. | (أ) قد%-بكون الجهز . أ. ب) قد%-كون الميد، Over-jعند / Over-نظيف. ج) قد%-tkون رجاجة الميد، ورئند. | هاستاق المياه کریه |
| (ب) ناك من ان مورد المياء المعدنية بورد سياHA دات نوعية-jعند. | (ب) قد%-كون الميد، Over-jعند / Over-نظيف. ج) قد%-tkون رجاجة الميد، ورئند. | |
| (ج) استئيل رججنة الشام. |
| الحل | السب (الأسب) المكمن | المشكلة |
| (أ)成分 التل chassis الكهربائي بالمغىب.ب)成分 ال Printز بالغولية della Preschحة.ج)تنتط حى تعود الطاقة الكهربائية أو است Istanbul.الثوز.د)تادع المفtrieح إلى وضع النشّيل.ه)استثمّد مبّتك الجيد. | (أ) قي كون التل chassis الكهربائي خارج المغىب.ب) قي كون موصّل بفولية م Concent Allocation.ج) قي كون يسب للفس الطاقة الكهربائية أوالثوز محتراق.د) تاكى من تشعلق مقاح المياء الارядة في الحابالخالاني من الموزع.ه) قي كون سبّن بالغاس الجيد. | الجهاز لا بóngل |
| (أ)成分 التل chassis الكهربائي بالمغىب.ب)تات typ stresses不同程度 إمّداد المواه الارядة.ج)تالغز ال现已اء الارядة (الخض) إلى وضعالتشّعيل. | (أ) قي كون القيام الكهربائي خارج المغىب.ب) قي كون الاعاد واترّكِيّات مستغ ₹قَرَد الّاماءما يسب إلى مسعة واحدة حتى نُصل إلى درجةالحرارة انتّباً المُسندد.ج) تاكى من تشعلق مقاح المياء الارядة في الحابالخالاني من الموزع. | لا تائى مياء باردة منالخزان الشænd |
| (أ)成分 التل chassis الكهربائي بالمغىب.ب)تات typ stresses不同程度 إمّداد المواه الالسازدة.ج)تادع ال现已اء الساخدة (احصر) إلى وضعالتشّعيل. | (أ) قي كون الفياس الكهربائي خارج المغىب.ب) قي كون الاعاد واترّكِيّات مستغ ₹قَرَد الّاماءمن 15 إلى 20 تقيقة حىتى نُصل إلى درجةالحرارة القصوي المُسندد.ج) تاكى من تشعلق مقاح المياء الساخدة فيالجابب الخالاني من الموزع. | لا تائى مياء مHALثة منالخزان السænd |
| (أ)بحى أن يكون الج Moz علای جد 25 sym علای.أ) الأ峪 من النخاط.ب)نظف قتحات التهوية. | (أ) قي كون الجهاز قبِج جدا من الحاط.ب) قي كون بسب النساد فحcastات التهوية. | ش 输入 مفرط حول Tourism الموزع |
| (أ)بحى أن يكون الج Moz علای جد 25 sym علای.أ) الأ峪 من النخاط.ب)성ع الجهاز يشكلم مستو. | (أ) المッチ مكتى علای الحاط.ب) وضعية انجهاز غير مشارية. | ضوضاء |
| (أ)استبيل حزحaste الميا.ب)أفرع دجام الميا.ج)أغالات الطاء حبنا. | (أ) يجح تبّت أو شق في الزحاجة.ب) يجح فلض في حاجيم الميا.ج) ---------- عطاء التصريف غير مغلاق بشكل جيد. | تسريب الميا. |
المعلومات الفنية
ملاحظات
| الجمل السقلي EQAXF1BXWG / EQAXF1BXSG | الطراز |
| 60/50 - 240 - 220 هورتر | الloyات - التردد |
| 520 واط | الطاقة التصوى |
| 420 واط | طاقة التسخين |
| 100 واط | طاقة الت Binaryد |
| 2 تلتر /正面ة | المياد الباردة |
| 4 تلتر /正面ة | ال之意، السخنقة |
| *43 ~ 10 درجة مسوية | درجة المحراリア الابنية |
| %90> | الزطوبة |
| 14.72 كجم | الوزن mental |
| 1040*374*310 | ابعاد المنج العض * الفمق * اTPLOL (سم) |

natural_image
Repeating pattern of gray geometric shapes on white background, no text or symbols present
- Welcome
- Environmental advice
- Attention
- Contents
- Safety
- For children
- General safety
- Installation
- Water connection
- Electrical connection
- Product description
- Placement
- Assemble
- Important
- Warning
- How to use
- Activate heating and cooling
- Dispensing water
- Hot water
- Normal water
- Cold water
- Light indicators
- Changing bottles
- Cleaning and maintenance
- Troubleshooting
- جدول المحتويات
- يرجى الانتباه
- مرحبا
- النصاتح البيئية
- كيفية الاستخدام
Marke : ELECTROLUX
Modell : EQAXF1BXWG
Kategorie : Wasserspender