
MagiColor 8650DN - Drucker KONICA MINOLTA - Kostenlose Bedienungsanleitung
Finden Sie kostenlos die Bedienungsanleitung des Geräts MagiColor 8650DN KONICA MINOLTA als PDF.


| Produkttyp | Farb-Laserdrucker |
| Modell | MagiColor 8650DN |
| Marke | Konica Minolta |
| Drucktechnologie | Laserdruck |
| Druckfarbe | Farbe |
| Maximale Auflösung | 1200 x 1200 dpi |
| Druckgeschwindigkeit (Farbe) | bis zu 45 Seiten/min |
| Druckgeschwindigkeit (Schwarzweiß) | bis zu 45 Seiten/min |
| Duplexdruck | Automatisch |
| Netzwerkfähigkeit | Ja, Ethernet |
| Papierformat | A3, A4, A5, B4, B5 |
| Papierzuführung | 2 x 500 Blatt Universalzufuhr, 150 Blatt Mehrzweckzufuhr |
| Abmessungen (B x T x H) | 650 x 720 x 650 mm |
| Gewicht | etwa 85 kg |
| Stromverbrauch (Druck) | etwa 900 W |
| Stromverbrauch (Bereitschaft) | etwa 100 W |
| Tonerkapazität (Schwarz) | bis zu 20.000 Seiten |
| Tonerkapazität (Farbe) | bis zu 15.000 Seiten pro Farbe |
| Bildtrommel Lebensdauer | bis zu 50.000 Seiten |
| Empfohlenes monatliches Druckvolumen | bis zu 10.000 Seiten |
| Garantie | 1 Jahr |
Häufig gestellte Fragen - MagiColor 8650DN KONICA MINOLTA
Benutzerfragen zu MagiColor 8650DN KONICA MINOLTA
0 Frage zu diesem Gerät. Beantworten Sie die, die Sie kennen, oder stellen Sie Ihre eigene.
Eine neue Frage zu diesem Gerät stellen
Laden Sie die Anleitung für Ihr Drucker kostenlos im PDF-Format! Finden Sie Ihr Handbuch MagiColor 8650DN - KONICA MINOLTA und nehmen Sie Ihr elektronisches Gerät wieder in die Hand. Auf dieser Seite sind alle Dokumente veröffentlicht, die für die Verwendung Ihres Geräts notwendig sind. MagiColor 8650DN von der Marke KONICA MINOLTA.
BEDIENUNGSANLEITUNG MagiColor 8650DN KONICA MINOLTA
magicolor 8650

A02E-9561-01A
1800843-001B
User's Guide
natural_image
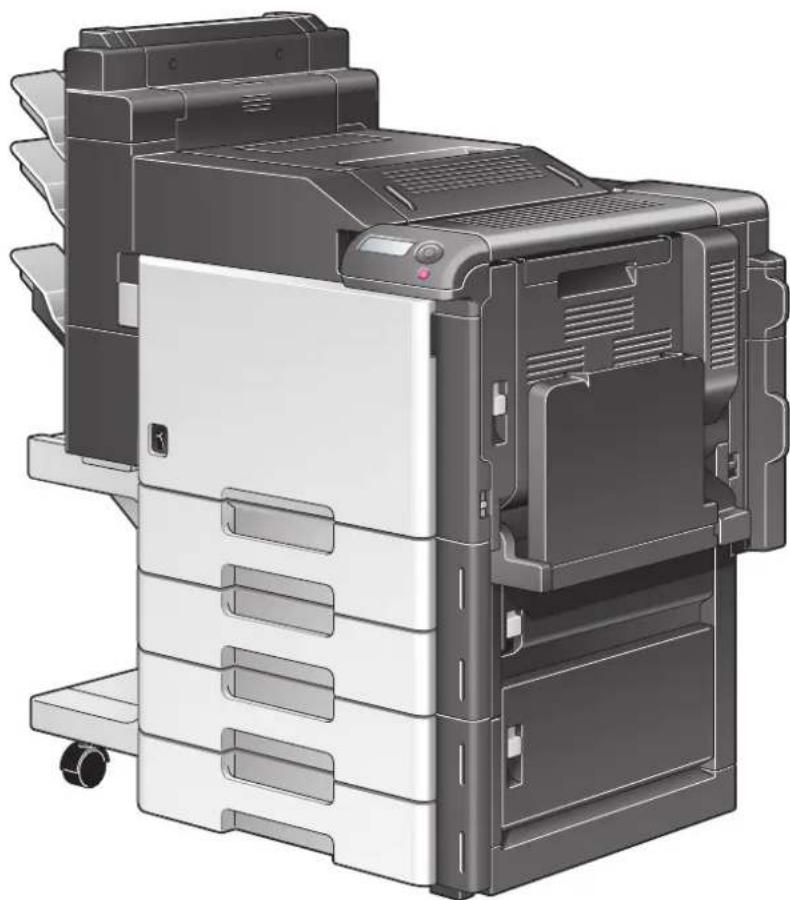
Illustration of a multi-layered printer with visible internal structure and mounting base (no text or symbols)Contents
1 l n t r o d u c t i o n
1.1 Energy Star® 1-1
What is an ENERGY STAR® Product? 1-1
1.2 Trademarks and copyrights.... 1-2
License information.... 1-2
OpenSSL statement.... 1-3
NetSNMP License 1-4
Kerberos.... 1-6
Copyright.... 1-6
For EU member states only.... 1-7
1.3 SOFTWARE LICENSE AGREEMENT 1-8
1.4 About Adobe Color Profile.... 1-9
1.5 ICC Profile for TOYO INK Standard Color on Coated paper (TOYO Offset Coated 2.0) 1-11
1.6 DIC STANDARD COLOR PROFILE LICENSE AGREEMENT 1-12
1.7 Explanation of manual conventions 1-14
Safety advices.... 1-14
Sequence of action 1-14
Tips.... 1-14
Special text markings.... 1-15
1.8 Descriptions of paper 1-16
1.9 User manuals.... 1-16
Printed manual 1-16
Documentation CD manual 1-16
2 Before using the machine
2.1 Part names and their functions.... 2-3
2.1.1 Options.... 2-3
2.1.2 Outside of machine 2-5
2.1.3 Inside of machine 2-9
2.1.4 Finisher FS-S519/Output tray OT-602/Punch kit PK-515 2-10
2.1.5 Saddle stitcher SD-505/Mailbin kit MT-502 2-12
2.1.6 Finisher FS-609/Punch kit PK-501 2-14
2.1.7 Control panel.... 2-16
2.1.8 Display panel 2-16
2.2 Power supply 2-17
2.2.1 Turning on the machine.... 2-17
2.2.2 Turning off the machine 2-18
2.2.3 Automatically clearing settings (System Auto Reset).... 2-18
2.2.4 Automatically conserving energy (Low Power mode) 2-19
2.2.5 Automatically conserving energy (Sleep mode) 2-19
2.2.6 Manually switching to Power Save mode 2-19
2.2.7 Power supply.... 2-19
2.3 Paper 2-20
2.3.1 Possible paper sizes 2-20
2.3.2 Paper types and paper capacities 2-21
2.3.3 Special paper 2-22
2.3.4 Precautions for paper 2-23
2.3.5 Paper storage.... 2-23
2.3.6 Auto tray switch feature 2-23
2.3.7 Order for selecting paper trays 2-24
2.4 Loading paper 2-25
2.4.1 Loading paper into the tray 1 (bypass tray).... 2-25
2.4.2 Loading paper into tray 2/3/4/5.... 2-29
2.4.3 Loading paper into the tray 4 (LCT).... 2-30
2.5 Printer controller.... 2-32
2.5.1 Role of the printer controller.... 2-32
2.5.2 Printing flow 2-33
2.6 Operating environment 2-34
2.6.1 Compatible computers and operating systems 2-34
Windows.... 2-34
Macintosh 2-34
2.6.2 Compatible interfaces.... 2-35
Ethernet interface 2-35
USB interface.... 2-35
Connection diagram 2-35
2.6.3 Printer drivers applicable to operating systems 2-36
2.7 Setting up the system.... 2-37
2.7.1 Network connection 2-37
2.7.2 Local connection 2-37
2.8 Contents of CD-ROM 2-38
2.9 Authentication Method.... 2-39
2.9.1 User authentication and account track 2-39
2.9.2 When user authentication and account track are synchronized 2-40
2.9.3 When user authentication and account track are used separately 2-40
2.10 User Box functions 2-41
2.10.1 Available User Box functions.... 2-41
Saving documents.... 2-41
Using document data 2-42
2.10.2 Set-up for User Box functions.... 2-42
User box registration 2-42
2.10.3 User authentication.... 2-43
Machine authentication 2-43
Account track 2-44
2.10.4 Limitation on user box registration.... 2-45
Public/personal/group user boxes 2-45
2.10.5 Authentication and accessible user boxes.... 2-45
When user authentication and account track settings are not specified 2-45
When only user authentication settings are specified.... 2-46
When only account track settings are specified.... 2-46
When user authentication and account track settings are specified
and synchronized 2-47
When user authentication and account track settings are specified
but not synchronized.... 2-48
3 Network settings
3.1 Specifying general settings for TCP/IP-based communication.... 3-3
TCP/IP Settings 3-3
3.2 Using PageScope Web Connection 3-5
3.2.1 TCP/IP Settings 3-5
3.2.2 PSWC Settings 3-5
3.2.3 TCP Socket Setting 3-6
3.2.4 SSL/TLS Setting 3-6
3.3 Logging in to Administrator mode of PageScope Web Connection.... 3-7
3.4 Specifying network print settings 3-9
3.4.1 Specifying LPR/Port9100 print settings 3-9
TCP/IP Settings 3-9
LPD Setting.... 3-9
RAW Port Number 3-9
3.4.2 Specifying SMB print settings.... 3-10
TCP/IP Settings 3-10
Print Setting.... 3-11
Direct Hosting Setting 3-12
WINS Setting 3-13
3.4.3 Specifying IPP print settings 3-14
TCP/IP Settings 3-14
IPP Setting.... 3-15
IPP Authentication Setting 3-16
3.4.4 Specifying IPPS print settings.... 3-16
TCP/IP Settings.... 3-17
IPP Setting.... 3-17
SSL/TLS Setting 3-17
IPP Authentication Setting 3-17
3.4.5 Specifying Bonjour print settings 3-18
Bonjour Setting.... 3-18
3.4.6 Specifying AppleTalk print settings.... 3-19
AppleTalk Setting 3-19
3.4.7 Specifying Web Service Function settings.... 3-20
TCP/IP Settings.... 3-20
Web Service Common Settings 3-21
Printer Settings.... 3-22
4 Installing the printer driver for Windows
4.1 Connection methods selectable in each operating system.... 4-3
Network connection (Ethernet) 4-3
USB interface 4-3
4.1.1 Windows 2000/XP/Server 2003 4-3
4.1.2 Windows Vista 4-4
4.1.3 Windows NT 4.0 4-5
4.2 Installation using the wizard (Windows XP/Server 2003) 4-6
4.2.1 Network connection (LPR/Port9100) 4-6
TCP/IP setting for this machine 4-6
RAW port number setting for this machine 4-6
LPD setting for this machine 4-6
Printer driver installation using the Add Printer Wizard.... 4-6
4.2.2 Network connection (SMB) 4-8
TCP/IP setting for this machine 4-8
SMB setting for this machine.... 4-8
Printer driver installation by specifying printers using the Add Printer Wizard 4-8
4.2.3 Network connection (IPP or IPPS) 4-10
Specifying the TCP/IP setting for this machine.... 4-10
Specifying the IPP settings for this machine.... 4-10
Printer driver installation using the Add Printer wizard 4-10
4.2.4 Local connection.... 4-12
4.3 Installation using the wizard (Windows Vista) 4-13
4.3.1 Network connection (LPR, Port9100, or SMB) 4-13
Specifying the TCP/IP setting for this machine.... 4-13
RAW port number setting for this machine 4-13
LPD setting for this machine 4-13
SMB setting for this machine.... 4-13
Printer driver installation by searching printers using the Add Printer Wizard 4-14
Printer driver installation by creating a port using the Add Printer Wizard 4-15
4.3.2 Network connection (IPP or IPPS) 4-17
Specifying the TCP/IP setting for this machine.... 4-17
Specifying the IPP settings for this machine.... 4-17
Printer driver installation using the Add Printer wizard 4-17
4.3.3 Network connection (Web Service print) 4-18
TCP/IP setting for this machine 4-18
Web Service settings for this machine 4-18
Printer installation from the Network window.... 4-19
Printer driver installation by specifying the IP address using the Add Printer Wizard 4-19
4.3.4 Local connection 4-21
4.4 Installation using the wizard (Windows 2000).... 4-22
4.4.1 Network connection (LPR/Port9100) 4-22
TCP/IP setting for this machine 4-22
RAW port number setting for this machine 4-22
LPD setting for this machine 4-22
Printer driver installation using the Add Printer Wizard 4-22
4.4.2 Network connection (SMB) 4-23
TCP/IP setting for this machine 4-23
SMB setting for this machine 4-23
Printer driver installation using the Add Printer Wizard 4-24
4.4.3 Network connection (IPP or IPPS).... 4-25
Specifying the TCP/IP setting for this machine 4-25
Specifying the IPP settings for this machine 4-25
Printer driver installation using the Add Printer wizard.... 4-25
4.4.4 Local connection 4-26
4.5 Installation using the wizard (Windows NT 4.0).... 4-27
4.5.1 Network connection (LPR) 4-27
TCP/IP setting for this machine.... 4-27
LPD setting for this machine 4-27
Printer driver installation using the Add Printer Wizard 4-27
4.6 Uninstalling the printer driver 4-29
5 Installing the printer driver for Macintosh
5.1 Selectable connection methods.... 5-3
5.2 Installing the printer driver on Macintosh OSX 10.2/10.3/10.4.... 5-4
5.2.1 Installing the printer driver 5-4
5.2.2 Selecting and connecting the printer (OS 10.4).... 5-5
Specifying the Bonjour settings for this machine 5-5
Adding a printer (Bonjour settings).... 5-5
Specifying the AppleTalk settings for this machine.... 5-5
Specifying the AppleTalk settings for the computer 5-5
Adding a printer (AppleTalk settings).... 5-6
Specifying the TCP/IP setting for this machine (LPR settings).... 5-6
LPD setting for this machine (LPR settings) 5-6
Specifying the TCP/IP setting for the computer (LPR settings) 5-6
Adding a printer (LPR settings).... 5-7
Specifying the TCP/IP setting for this machine (IPP settings).... 5-7
IPP setting for this machine.... 5-7
Specifying the TCP/IP setting for the computer (IPP settings).... 5-7
Adding a printer (IPP settings) 5-8
5.2.3 Selecting and connecting the printer (OS 10.2 and 10.3).... 5-8
Specifying the Bonjour settings for this machine (Rendezvous settings).... 5-8
Adding a printer (Rendezvous settings).... 5-8
Specifying the AppleTalk settings for this machine.... 5-9
Specifying the AppleTalk settings for the computer 5-9
Adding a printer (AppleTalk settings).... 5-9
Specifying the TCP/IP setting for this machine (LPR settings).... 5-9
LPD setting for this machine (LPR settings) 5-9
Specifying the TCP/IP setting for the computer (LPR settings) 5-10
Adding a printer (LPR settings).... 5-10
Specifying the TCP/IP setting for this machine (IPP settings).... 5-10
IPP setting for this machine.... 5-10
Specifying the TCP/IP setting for the computer (IPP settings).... 5-11
Adding a printer (IPP settings).... 5-11
5.3 Mac OS 9.2.... 5-12
5.3.1 Installing the printer driver.... 5-12
5.3.2 Selecting and connecting the printer 5-12
Specifying the AppleTalk settings for this machine 5-12
Specifying the AppleTalk settings for the computer 5-12
Selecting a printer (AppleTalk settings).... 5-12
Specifying the TCP/IP setting for this machine (LPR settings) 5-13
LPD setting for this machine (LPR settings).... 5-13
Specifying the TCP/IP setting for the computer (LPR settings) 5-13
Adding a printer (LPR settings) 5-13
5.4 Uninstalling the printer driver.... 5-14
5.4.1 For Macintosh OS X 5-14
5.4.2 For Macintosh OS 9.2 5-14
6 Print functions of the printer drivers for Windows
6.1 Printing operations.... 6-3
6.2 Initializing the PCL/PS printer driver 6-4
6.2.1 How to display the Properties screen.... 6-4
6.2.2 Configure tab.... 6-5
6.2.3 Settings tab 6-6
6.2.4 Registration of the default settings 6-7
6.3 Common settings for the PCL/PS drivers.... 6-8
6.4 Parameter details for the PCL/PS drivers.... 6-9
6.4.1 Basic tab 6-9
6.4.2 Layout tab 6-11
6.4.3 Finish tab.... 6-13
6.4.4 Cover Mode tab 6-14
6.4.5 Stamp/Composition tab 6-16
Editing watermark 6-18
Editing copy protect 6-19
Editing date/time and page number.... 6-21
6.4.6 Quality tab 6-22
6.4.7 Other tab 6-23
7 Print functions of the printer driver for Macintosh
7.1 Printing operations for OS X 7-3
7.2 Default settings for the OS X printer driver 7-4
7.2.1 Options.... 7-4
7.2.2 Registration of the default settings 7-5
7.3 Common settings for the OS X printer driver 7-6
7.4 How to add a custom size for the OS X printer driver 7-7
7.5 Parameter details for the OS X printer driver 7-8
7.5.1 Page Attributes.... 7-8
7.5.2 Copies & Pages 7-9
7.5.3 Output Method 7-10
Checking the Output Method setting details 7-11
7.5.4 Layout/Finish 7-13
7.5.5 Paper Tray/Output Tray.... 7-15
7.5.6 Cover Mode/Transparency Interleave 7-16
7.5.7 Per Page Setting 7-18
7.5.8 Stamp/Composition 7-19
Editing copy protect 7-20
Editing date/time 7-22
Editing page number 7-23
Editing header/footer.... 7-24
7.5.9 Quality 7-25
7.6 Printing operations for OS 9 7-26
7.7 Default settings for the OS 9 printer driver 7-27
7.7.1 Options 7-27
7.7.2 Registration of the default settings.... 7-28
7.8 Parameter details for the OS 9 printer driver.... 7-29
7.8.1 Page Attributes.... 7-29
7.8.2 Setting Custom Page Size 7-30
7.8.3 General 7-31
7.8.4 Layout (Pages per sheet).... 7-31
7.8.5 Printer specific options (Finishing Options 1 to 5).... 7-32
8 Function detail description
8.1 Proof print.... 8-3
8.1.1 Setting up the printer driver.... 8-3
For Windows....8-3
For Macintosh OS X 8-4
8.1.2 Recalling a job from the control panel.... 8-5
8.2 Secure print.... 8-6
8.2.1 Setting up the printer driver 8-6
For Windows....8-6
For Macintosh OS X 8-8
8.2.2 Recalling a job from the control panel.... 8-9
When "SecurePrintAccess" is set to "Mode 1" 8-10
When "SecurePrintAccess" is set to "Mode 2" 8-11
8.3 Save in User Box.... 8-12
8.3.1 Setting up the printer driver 8-12
For Windows....8-12
For Macintosh OS X 8-14
8.3.2 Recalling a job from the control panel.... 8-15
8.4 Save in Annotation User Box 8-17
8.4.1 Setting up the printer driver 8-17
For Windows....8-17
For Macintosh OS X 8-19
8.4.2 Recalling a job from the control panel.... 8-20
8.5 Save in Encrypted PDF Box 8-22
8.5.1 Specifying Encrypted PDF file 8-22
8.5.2 Recalling a job from the control panel.... 8-23
8.6 Printing on a machine with the user authentication set up.... 8-24
8.6.1 Setting up the printer driver 8-25
For Windows....8-25
For Macintosh OS X 8-27
8.7 Printing with the machine enabling the Account Track function.... 8-29
8.7.1 Setting up the printer driver 8-29
For Windows....8-29
For Macintosh OS X 8-31
8.8 Touch and Print.... 8-32
8.8.1 Touch and Print operation procedure 8-33
Recalling a job from the control panel.... 8-34
8.9 Specifying a user-defined encryption passphrase.... 8-35
8.9.1 Settings of this machine 8-35
8.9.2 Setting up the printer driver 8-36
For Windows....8-36
For Macintosh OS X 8-37
8.10 ICC profile settings.... 8-39
8.10.1 Setting up the printer driver 8-39
For Windows....8-39
For Macintosh OS X 8-40
8.11 Registering ICC profiles in the printer driver.... 8-41
8.11.1 Setting up the printer driver 8-41
For Windows 8-41
For Macintosh OS X 8-43
8.12 Banner paper printing function 8-45
8.12.1 Copy paper.... 8-45
Applicable paper 8-45
8.12.2 Printer drivers and supported operating systems 8-45
8.12.3 Setting up the printer driver 8-45
8.12.4 Printing 8-46
9 Settings for control panel
9.1 Control panel 9-3
9.1.1 Basic operations.... 9-3
Basic menu operations.... 9-3
Operations for changing numeric values 9-5
9.2 List of "Utility" menu parameters 9-7
Main Menu....9-7
Job Operation Menu 9-7
Paper Setting Menu.... 9-8
User Setting Menu.... 9-9
System Setting Menu.... 9-11
Admin. Settings Menu 9-13
Banner Printing Menu.... 9-15
9.3 Parameters.... 9-16
9.3.1 Job Operation Menu 9-16
User name input items 9-16
Account name input items 9-16
Document selection items.... 9-16
Printing items 9-17
9.3.2 Paper Settings Menu.... 9-17
9.3.3 User Settings Menu 9-18
Print Reports 9-18
Consumables 9-18
System Settings 9-18
Printer Settings 9-19
Font List.... 9-20
9.3.4 System Settings Menu 9-21
System Settings 9-21
Network Settings.... 9-22
Printer Settings 9-24
System Connection 9-24
9.3.5 Admin. Settings Menu.... 9-25
Security Settings 9-25
User Box Settings 9-27
AuthDeviceSetting.... 9-28
Expert Adjustment.... 9-29
Option Settings 9-30
Firmware Update.... 9-30
10 PageScope Web Connection
10.1 Using PageScope Web Connection.... 10-3
10.1.1 Operating environment.... 10-3
10.1.2 Accessing PageScope Web Connection 10-3
10.1.3 Web browser cache 10-4
With Internet Explorer.... 10-4
With Netscape Navigator 10-4
With Mozilla Firefox 10-4
10.1.4 Structure of pages.... 10-5
10.2 Logging on and logging off.... 10-7
10.2.1 Login and logout operations.... 10-7
When user authentication and account track settings are not specified 10-7
When user authentication and account track settings are specified.... 10-8
10.2.2 Logout.... 10-9
10.2.3 Login 10-10
Options that can be selected when logged on to PageScope Web Connection.... 10-10
Logging on as a public user 10-10
Logging on as a registered user 10-11
Logging on to Administrator mode 10-12
10.3 Overview of User mode.... 10-13
10.3.1 Information.... 10-13
10.3.2 Job 10-14
10.3.3 Box 10-15
10.3.4 Direct Print.... 10-16
10.4 Overview of Administrator mode 10-17
10.4.1 Maintenance 10-17
10.4.2 Security.... 10-19
10.4.3 Box 10-20
10.4.4 Print Setting.... 10-21
10.4.5 Network 10-22
10.5 Box settings 10-24
10.5.1 Changing user box settings or deleting a user box.... 10-24
Open User Box 10-24
10.5.2 Creating a new user box.... 10-26
Create User Box 10-26
10.5.3 Changing system box settings or deleting system boxes.... 10-28
Open System User Box.... 10-28
10.5.4 Creating a new system user box 10-30
Create System User Box 10-30
10.6 Importing or exporting setting information.... 10-31
Import/Export 10-31
10.7 Specifying the date and time on this machine.... 10-32
10.7.1 Manual Setting.... 10-33
10.7.2 TCP/IP Settings 10-33
10.7.3 Time Zone 10-33
10.7.4 Time Adjustment Setting 10-34
10.8 Limiting users using this machine (Machine authentication).... 10-35
10.8.1 User Auth/Account Track 10-36
10.8.2 User Registration.... 10-37
10.8.3 Account Track Registration 10-39
10.9 Limiting users using this machine (Active Directory).... 10-40
10.9.1 TCP/IP Settings 10-40
10.9.2 External Server Registration 10-41
10.9.3 User Auth/Account Track 10-42
10.9.4 Default Function Permission.... 10-43
10.9.5 Date/Time Setting.... 10-43
10.10 Limiting users using this machine (Windows domain/workgroup).... 10-44
10.10.1 TCP/IP Settings 10-44
10.10.2 External Server Registration 10-45
10.10.3 User Auth/Account Track 10-46
10.10.4 Default Function Permission.... 10-46
10.10.5 Client Setting 10-47
10.10.6 WINS Setting 10-48
10.11 Limiting users using this machine (NDS).... 10-49
10.11.1 External Server Registration 10-50
10.11.2 User Auth/Account Track 10-51
10.11.3 Default Function Permission 10-51
10.11.4 NetWare Setting 10-52
10.12 Limiting users using this machine (LDAP) 10-53
10.12.1 TCP/IP Settings.... 10-53
10.12.2 External Server Registration.... 10-54
10.12.3 User Auth/Account Track 10-55
10.12.4 Default Function Permission 10-55
10.12.5 LDAP over SSL.... 10-56
External Server Registration.... 10-56
Action for Invalid Certificate 10-56
10.13 Creating a certificate for this machine for SSL-based communication.... 10-57
10.13.1 Create a self-signed Certificate.... 10-58
10.13.2 Request a Certificate.... 10-60
10.13.3 Install a Certificate.... 10-62
10.13.4 Set an Encryption Strength.... 10-64
10.13.5 Set Mode using SSL.... 10-65
10.13.6 Remove a certificate.... 10-66
10.14 Using SSL communication between Vista and this machine with Web Service Function 10-67
10.14.1 Using SSL for communication from Vista to this machine with Web Service Function 10-67
10.14.2 Using SSL for communication from this machine to Vista with Web Service Function 10-68
10.14.3 TCP/IP Settings.... 10-68
10.14.4 SSL/TLS Setting 10-68
10.14.5 Web Service Common Settings 10-68
10.14.6 Action for Invalid Certificate 10-69
10.15 Performing IP address filtering 10-70
10.15.1 TCP/IP Settings.... 10-70
10.15.2 IP Filtering 10-71
10.16 Communicating using IPv6.... 10-72 TCP/IP Setting.... 10-73
10.17 Communicating using IPsec 10-75
10.17.1 TCP/IP Settings.... 10-75
10.17.2 IPsec.... 10-76
10.17.3 IKE Setting.... 10-77
10.17.4 SA Setting 10-78
10.17.5 Peer 10-79
10.18 Monitoring this machine using the SNMP manager 10-80
10.18.1 TCP/IP Settings.... 10-80
10.18.2 NetWare Setting 10-81
10.18.3 SNMP Setting.... 10-82
10.19 Providing notification of the status of this machine (E-mail) 10-84
10.19.1 TCP/IP Settings.... 10-84
10.19.2 E-mail TX (SMTP) 10-85
10.19.3 Status Notification Setting 10-87
10.19.4 SMTP over SSL/Start TLS.... 10-88
E-mail TX (SMTP) 10-88
Action for Invalid Certificate 10-89
10.19.5 SMTP Authentication 10-90
10.19.6 POP before SMTP 10-90
POP before SMTP 10-90
E-mail RX (POP) 10-91
10.19.7 POP over SSL 10-92
E-mail RX (POP) 10-92
Action for Invalid Certificate 10-92
10.19.8 APOP Authentication.... 10-93
10.20 Providing notification of the status of this machine (TRAP).... 10-94
10.20.1 TCP/IP Settings 10-94
10.20.2 NetWare Setting 10-95
10.20.3 TRAP Setting 10-96
10.20.4 Status Notification Setting.... 10-96
10.21 Using the TCP Socket/OpenAPI/FTP server function.... 10-97
10.21.1 TCP/IP Settings 10-97
10.21.2 SSL/TLS Setting 10-97
10.21.3 TCP Socket Setting 10-98
10.21.4 OpenAPI Setting 10-99
10.21.5 FTP Server Setting.... 10-100
10.22 Other items on the Maintenance tab 10-101
10.22.1 Using the timer function 10-101
Power Save Setting 10-101
10.22.2 Resetting setting information.... 10-102
Network Setting Clear 10-102
Reset.... 10-103
10.22.3 Registering the header or footer 10-104
Header/Footer Registration 10-104
10.23 Other items on the Security tab 10-106
10.23.1 Specifying the auto logout time.... 10-106
Auto Logout 10-106
10.23.2 Specifying the Administrator password.... 10-107
Administrator Password Setting.... 10-107
10.24 Print Setting tab settings 10-108
10.24.1 Specifying initial settings for the print function 10-108
Basic Setting.... 10-108
10.24.2 Specifying settings for PCL/PS/XPS print 10-110
PCL Settings.... 10-110
PS Setting.... 10-111
XPS Settings.... 10-112
10.24.3 Specifying the interface timeout.... 10-113
Interface Setting 10-113
11 Troubleshooting
11.1 When an error code appears 11-3
11.2 When the message "Misfeed detected. XXXX Remove paper." appears 11-4
11.2.1 Paper misfeed indications 11-4
11.2.2 Clearing a paper misfeed in the fusing unit 11-7
11.2.3 Clearing a paper misfeed in the main unit.... 11-10
11.2.4 Clearing a paper misfeed in the automatic duplex unit.... 11-13
11.2.5 Clearing a paper misfeed in the tray 1 (bypass tray).... 11-15
11.2.6 Clearing a paper misfeed in the paper transport section 11-17
11.2.7 Clearing a paper misfeed in tray 2.... 11-19
11.2.8 Clearing a paper misfeed in tray 3.... 11-22
11.2.9 Clearing a paper misfeed in paper feed cabinet (tray 4/5) 11-24
11.2.10 Clearing a paper misfeed in the tray 4 (LCT).... 11-26
11.2.11 To clear a banner paper misfeed.... 11-28
11.2.12 Clearing a paper misfeed in finisher FS-519 11-32
11.2.13 Clearing a paper misfeed in the mailbin 11-35
11.2.14 Clearing a paper misfeed in the saddle stitcher.... 11-37
11.2.15 To clear a paper misfeed in finisher FS-609.... 11-38
11.3 When the message "Staple Jam Detection" appears.... 11-41
11.3.1 Clearing jammed staples in finisher FS-519.... 11-41
11.3.2 Clearing jammed staples in the saddle stitcher 11-43
11.3.3 To clear jammed staples in finisher FS-609.... 11-44
11.4 When the message "Replenish paper" appears.... 11-47
11.5 When the message "Memory Overflow" appears 11-47
11.6 When the message "Replace XXX soon." appears 11-47
11.7 When the message "Please replace XXXX." appears.... 11-48
11.8 When the message "Remote Operation Please do not turn off power." appears 11-48
11.9 Simple troubleshooting.... 11-49
11.10 Main messages and their remedies.... 11-52
12 Replacing consumables
12.1 Replacing the toner cartridge 12-3
12.1.1 To replace the toner cartridge.... 12-4
12.2 Replacing the waste toner box 12-6
12.2.1 To replace the waste toner box.... 12-7
12.3 Replacing an imaging unit.... 12-9
12.3.1 To replace the imaging unit.... 12-11
12.4 Replacing the staple cartridge.... 12-15
12.4.1 To replace the staple cartridge in the finisher FS-519 12-15
12.4.2 To replace the staple cartridge in saddle stitcher.... 12-17
12.4.3 To replace the staple cartridge for finisher FS-609.... 12-19
12.5 Emptying the punch scrap box 12-22
12.5.1 To empty the punch scrap box in the finisher FS-519.... 12-23
12.5.2 To empty the punch scrap box in the finisher FS-609.... 12-24
13 Care of the machine
13.1 Cleaning 13-3
13.1.1 Housing 13-3
13.1.2 Control panel.... 13-3
13.1.3 Electrostatic charger wire.... 13-4
13.1.4 Print head 13-5
13.2 When the message "Time for periodic device check." appears.... 13-6
14 Specifications
14.1 Specifications 14-3
14.1.1 Main unit.... 14-3
14.1.2 Automatic duplex unit 14-5
14.1.3 Paper feed cabinet PC-106.... 14-5
14.1.4 Paper feed cabinet PC-205.... 14-5
14.1.5 Paper feed cabinet PC-406.... 14-6
14.1.6 Finisher FS-519 14-6
14.1.7 Punch kit PK-515 14-7
14.1.8 Saddle stitcher SD-505 14-7
14.1.9 Output tray OT-602 14-7
14.1.10 Mailbin kit MT-502.... 14-8
14.1.11 Finisher FS-609 14-8
14.1.12 Punch kit PK-501 14-9
14.2 Consumable and replacement part life expectancy charts 14-10
14.2.1 Consumable life expectancy.... 14-10
14.2.2 Replacement part life expectancy.... 14-10
15 Authentication unit (Biometric type AU-101)
15.1 Safety information 15-3
15.1.1 Important information 15-3
15.1.2 For safe use 15-3
15.1.3 Regulation notices.... 15-3
USER INSTRUCTIONS FCC PART 15 - RADIO FREQUENCY DEVICES
(For U.S.A. Users) 15-3
15.2 Product features.... 15-4
15.3 Part names and their functions.... 15-4
15.4 Using authentication unit (Biometric type) AU-101 15-5
15.4.1 Positioning your finger 15-5
15.4.2 Machine settings 15-7
15.4.3 Registering users.... 15-10
Setup 15-10
Registering users.... 15-11
15.5 Care of authentication unit (Biometric type) AU-101 15-17
Care of the housing 15-17
Care of the cover 15-17
15.6 Specifications.... 15-18
15.7 Troubleshooting.... 15-19
16 Authentication unit (IC card type AU-201)
16.1 Safety information 16-3
16.1.1 Important information 16-3
16.1.2 For safe use 16-3
16.1.3 Regulation notices.... 16-3
USER INSTRUCTIONS FCC PART 15 - RADIO FREQUENCY DEVICES
(For U.S.A. Users) 16-3
INTERFERENCE-CAUSING EQUIPMENT STANDARD (ICES- 003 ISSUE 4)
(For Canada Users).... 16-4
16.2 Product features.... 16-4
16.3 Part names and their functions.... 16-4
16.4 Using authentication unit (IC card type) AU-201 16-5
16.4.1 Positioning the IC card 16-5
16.4.2 Multifunctional product settings 16-5
16.4.3 Registering users.... 16-7
Setup 16-8
Registering users.... 16-9
16.5 Care of authentication unit (IC card type) AU-201.... 16-15
16.6 Specifications.... 16-16
16.7 Troubleshooting.... 16-16
17 Installing options
17.1 Introduction.... 17-3
17.2 Installing the mount kit MK-713 17-4
17.3 Installing the authentication unit (biometric type) AU-101 17-6
17.3.1 Authentication unit (biometric type) components.... 17-6
17.3.2 Installing the authentication unit (biometric type) 17-7
17.4 Installing the authentication unit (IC card type) AU-201 17-10
17.4.1 Authentication unit (IC card type) components 17-10
17.4.2 Installing the authentication unit (IC card type) 17-11
18 Appendix
18.1 Configuration page.... 18-3
18.2 PPD driver (for Linux and applications).... 18-4
18.2.1 PPD driver types 18-4
18.2.2 About the PPD driver for Linux.... 18-4
To register the PPD driver for Linux.... 18-4
To set up the PPD driver for Linux 18-4
To register the PPD driver for OpenOffice 18-4
To print with OpenOffice 18-5
18.2.3 About the PPD driver for applications.... 18-5
To print 18-5
18.3 NetWare.... 18-6
18.3.1 Connection methods selectable for NetWare 18-6
18.3.2 NetWare Setting.... 18-6
For Remote Printer mode with NetWare 4.x bindery emulation 18-7
For the print server mode with NetWare 4.x bindery emulation 18-7
For NetWare 4.x Remote Printer mode (NDS).... 18-8
For NetWare 4.x/5.x/6 Print Server mode (NDS).... 18-8
For NetWare 5.x/6 Novell Distributed Print Service (NDPS) 18-9
18.3.3 NetWare Status 18-10
18.3.4 Windows Client Setting.... 18-10
18.4 Tray Mapping Setting.... 18-11
18.4.1 Tray mapping setting procedure.... 18-11
18.4.2 Creating tray mapping definition PRN file.... 18-11
18.4.3 Sending the PRN file 18-13
18.4.4 Restarting this machine.... 18-13
18.4.5 Troubleshooting 18-13
18.4.6 Returning the tray mapping setting to the default.... 18-14
19 Index


- magicolor 8650
- User's Guide
- Contents
- l n t r o d u c t i o n
- Before using the machine
- Network settings
- Installing the printer driver for Windows
- Installing the printer driver for Macintosh
- Print functions of the printer drivers for Windows
- Print functions of the printer driver for Macintosh
- Function detail description
- Settings for control panel
- PageScope Web Connection
- Providing notification of the status of this machine (TRAP).... 10-94
- Using the TCP Socket/OpenAPI/FTP server function.... 10-97
- Other items on the Maintenance tab 10-101
- Other items on the Security tab 10-106
- Print Setting tab settings 10-108
- Troubleshooting
- When an error code appears 11-3
- When the message "Misfeed detected. XXXX Remove paper." appears 11-4
- Replacing consumables
- Care of the machine
- Specifications
- Authentication unit (Biometric type AU-101)
- Authentication unit (IC card type AU-201)
- Installing options
- Appendix
- Index
Marke : KONICA MINOLTA
Modell : MagiColor 8650DN
Kategorie : Drucker