MTX-2010 - Detektor BlendMount - Kostenlose Bedienungsanleitung
Finden Sie kostenlos die Bedienungsanleitung des Geräts MTX-2010 BlendMount als PDF.


Benutzerfragen zu MTX-2010 BlendMount
0 Frage zu diesem Gerät. Beantworten Sie die, die Sie kennen, oder stellen Sie Ihre eigene.
Eine neue Frage zu diesem Gerät stellen
Laden Sie die Anleitung für Ihr Detektor kostenlos im PDF-Format! Finden Sie Ihr Handbuch MTX-2010 - BlendMount und nehmen Sie Ihr elektronisches Gerät wieder in die Hand. Auf dieser Seite sind alle Dokumente veröffentlicht, die für die Verwendung Ihres Geräts notwendig sind. MTX-2010 von der Marke BlendMount.
BEDIENUNGSANLEITUNG MTX-2010 BlendMount
Guidelines on Using a Voltmeter to Locate Power and Ground
- First set your voltmeter to the continuity setting (should beep when you touch the red and black probes together, telling you they are shorted).
- Find a ground on the car somewhere, like a bolt under the dash, or a metal cross member.
- Put the black probe on that ground, and touch the back of each exposed wire connector in the mirror harness with the red probe.
- For each wire that beeps, that means that wire is grounded. Turn the ignition to the on position, then back to off, and make sure it beeps regardless of the ignition position.
- Put the voltmeter into VDC mode, to measure DC volts, turn the ignition to the on position.
- Put the black probe on the ground wire found in #4.
- Touch each of the wires in that harness with the red probe, and note which one(s) gives you +12-14 volts, turn the ignition off to verify that the volt readings go down to zero or close to zero.
- That should define which two ports in that harness into which you would plug the MirrorTap, the black Prong into #4 above, and the Red to #7.
"Power Up" Your Radar Detector by TAPPING Into Your Rear View Mirror's Wire Harness
text_image
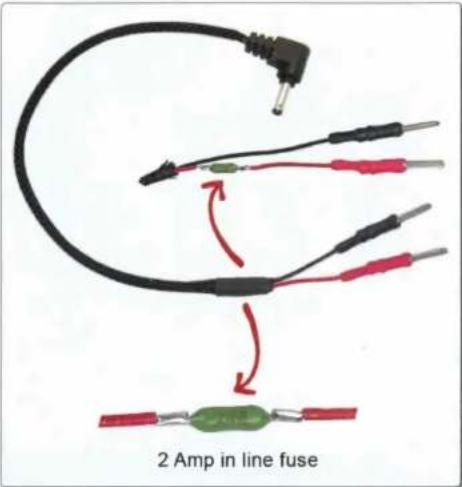
2 Amp in line fuse
Innovative Design And Precision Manufacturing
Manufactured in USA
©2016 J28 Design Inc.
WWW.MIRRORTAP.COM


text_image
MIRRORAP POWER CORDSMTX Series
12 Volt Radar Detector Power Cord
With In Line Fuse
text_image
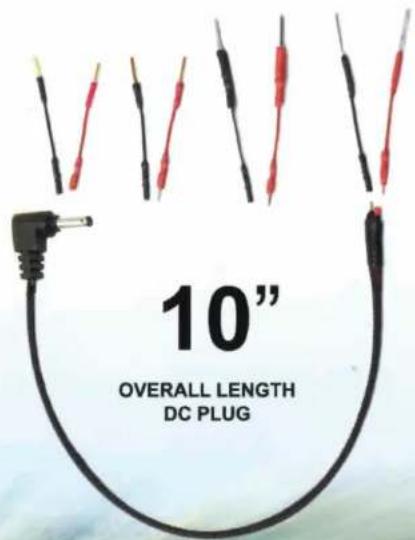
10" OVERALL LENGTH DC PLUGMTX-2010

MTX Series
You will need to identify the Ground wire and the +12 volt switched wire in your mirror's wire harness. This can be done by using a voltmeter. If you are unable to use a voltmeter we recommend taking your vehicle to a stereo install shop.
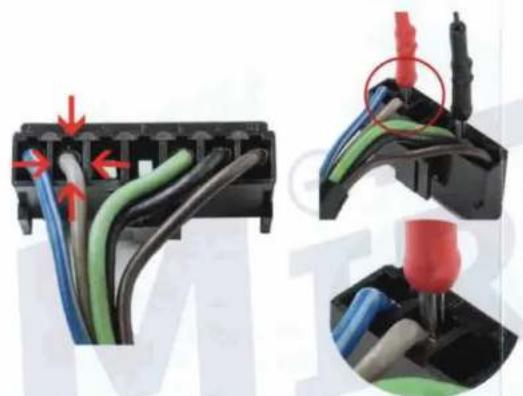
1 - Auto dimming rear view mirrors have a molex plug that supplies power and ground to the mirror. This plug may be on the back side of the mirror or within a plastic housing on the windshield. Each wire enters the molex plug via a rectangular port as shown by the red arrows below. When inserting the Taps (prongs) into the rectangular port of the molex plug, you may have to try inserting the Tap in all four sides of the rectangular port to determine the best wedge fit. DO NOT use excessive force trying to insert the Taps.
2 - This kit has 4 different size sets of Taps. Each set consists of a Red and Black Tap. The Red Tap is for the +12 volt switched and the Black Tap is for Ground. Determine which Tap size provides the best wedge fit for +12 volt and ground. Use a volt meter to determine the +12 volt switched and ground wires in the molex plug.
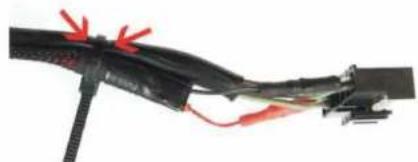
3- Take note of the +12 volt switched and ground wire colors and positions in the molex plug (take picture if needed). Make sure the ignition is turned off. Remove the 2 Taps from the molex plug and connect them to the cord assembly as shown below. Use the piece of black electrical tape or heat shrink tubing to cover and help secure the connection between the Taps and cord assembly. Re-insert the Taps into the Molex plug. Be sure to use the provided cable tie to secure the cable assembly to the wire harness of the rear view mirror.
natural_image
Close-up of a black electrical connector with multiple colored wires and red connectors, showing wiring details (no text or symbols visible)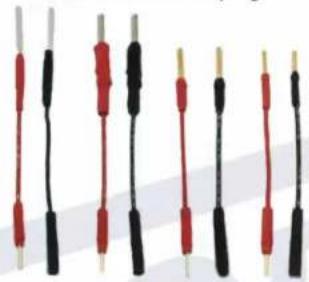
natural_image
Six black and red electrical terminal cables with leads, arranged in a row (no text or symbols visible)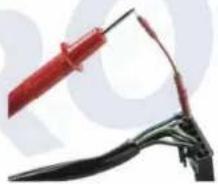
natural_image
Close-up of a pair of pliers with red and black metal tips (no visible text or symbols)

natural_image
Close-up of a black cable with red clamps and wires, no visible text or symbolsMultiple Patents Pending
J28 DESIGN INC. will not be held responsible for any damage to, interference with, or malfunction of your vehicle's electrical system resulting from installation or use of the MirrorTap. Consult with your vehicle's dealer for any questions about your vehicle's electrical system. If you do not agree to these terms, do not use this product and return it for a full refund.