
VL200 - Beleuchtung GODOX - Kostenlose Bedienungsanleitung
Finden Sie kostenlos die Bedienungsanleitung des Geräts VL200 GODOX als PDF.


| Produkttyp | LED-Videoleuchte |
| Marke | Godox |
| Modell | VL200 |
| Leistung | 200 W |
| Farbtemperatur | 5600 K |
| CRI | ≥ 95 |
| Helligkeitsregelung | Stufenlos dimmbar (0-100%) |
| Stromversorgung | AC 100-240 V, 50/60 Hz |
| Abmessungen (ca.) | 200 x 150 x 150 mm |
| Gewicht (ca.) | 1,5 kg |
| Gehäusematerial | Kunststoff / Metall |
| Lichtquelle | LED-Chips |
| Abstrahlwinkel | ca. 120° |
| Fernsteuerung | Manuelle Bedienung |
| Kühlung | Aktiver Lüfter |
| Geräuschpegel | ca. 25 dB |
| Reinigung | Mit einem trockenen, fusselfreien Tuch |
| Sicherheitshinweise | Nicht in feuchter Umgebung verwenden, Gerät nicht öffnen |
| Ersatzteile | Keine vom Hersteller vorgesehen |
| Reparatur | Nur durch autorisierten Fachservice |
| Lieferumfang | LED-Leuchte, Netzkabel, Bedienungsanleitung |
| Hersteller | Godox |
Häufig gestellte Fragen - VL200 GODOX
Benutzerfragen zu VL200 GODOX
0 Frage zu diesem Gerät. Beantworten Sie die, die Sie kennen, oder stellen Sie Ihre eigene.
Eine neue Frage zu diesem Gerät stellen
Laden Sie die Anleitung für Ihr Beleuchtung kostenlos im PDF-Format! Finden Sie Ihr Handbuch VL200 - GODOX und nehmen Sie Ihr elektronisches Gerät wieder in die Hand. Auf dieser Seite sind alle Dokumente veröffentlicht, die für die Verwendung Ihres Geräts notwendig sind. VL200 von der Marke GODOX.
BEDIENUNGSANLEITUNG VL200 GODOX
Godox 神牛
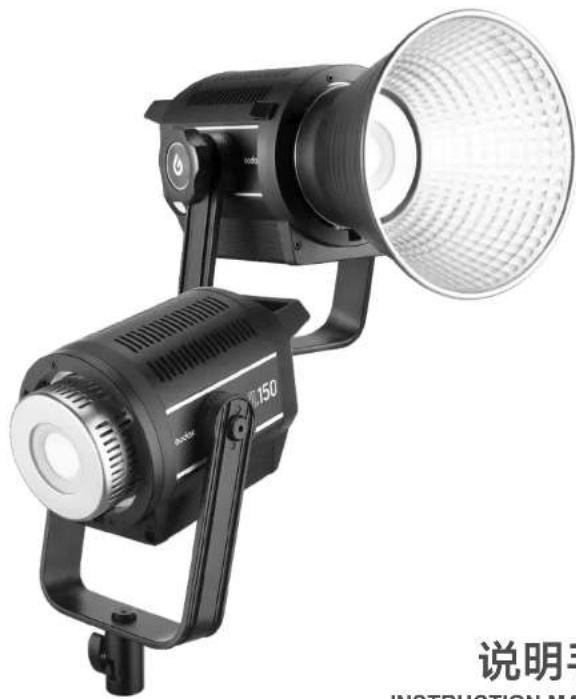
LED摄影灯/LED Video Light VL150 VL200 VL300
natural_image
Black and white photo of a 150-lit streetlight with adjustable lens, no visible text or symbols on the device itself.深圳市神牛摄影器材有限公司
GODOX Photo Equipment Co., Ltd.
地址/Add:深圳市宝安区福海街道塘尾社区解川工业区厂房2栋1层至4层、4栋1层至4层
1st to 4th Floor, Building 2/1st to 4th Floor, Building 4, Yaochuan Industrial Zone, Tangwei Community, Fuhai Street, Bao'an District, Shenzhen, China
电话/Tel:+86-755-29609320(8062) 传真/Fax:+86-755-25723423
邮箱/E-mail: godox@godox.com http://www.godox.com
705-VL0000-00 Made In China
CE RoHS
说明手册
INSTRUCTION MANUAL
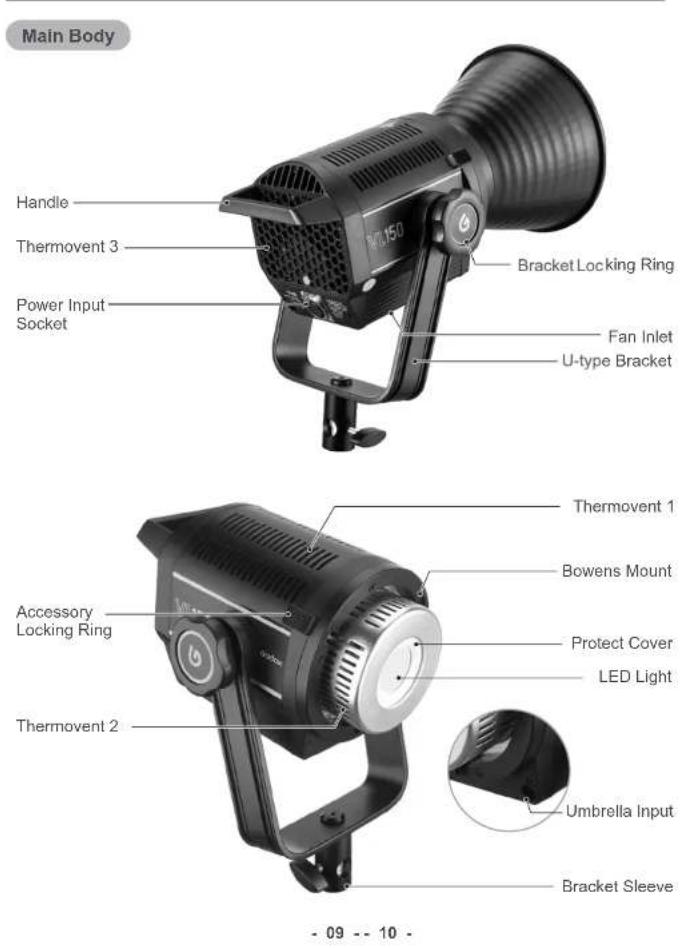
Body
- 09 -- 10 -
LCD Panel
text_image
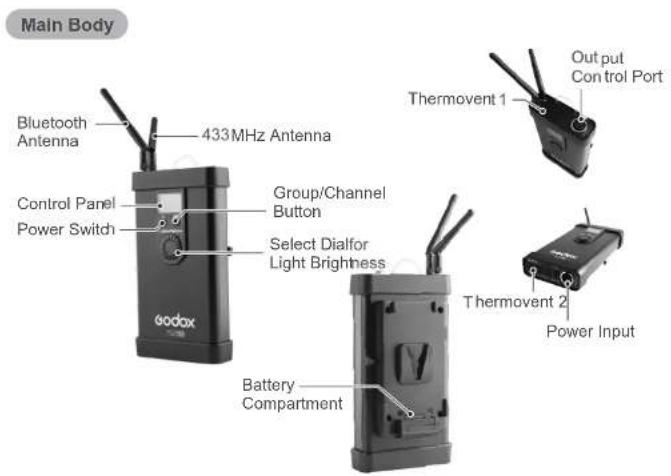
Main Body Bluetooth Antenna 433MHz Antenna Control Panel Power Switch Group/Channel Button Select Dialfor Light Brightness Theta Thetavent 1 Output Control Port Thermovent 2 Power Input Battery CompartmentIncluded Items
-
LED video light
-
Remote control
-
Portable bag
-
Controller 3. Adapter 4. Power cord 5. Connect cord
-
Reflector for Bowens mount LED light 8. Lamp cover
-
Instruction manual

natural_image
Collection of electronic devices and tools including a 350D camera, radio, cable, and a box (no visible text or symbols)Power Supply
- Firstly, plug the two ends of connect cord separately into the controller's output control port and the light's power input socket. A "click" will be heard once finished.
- Plug the output end of adapter's connect cord into controller's power input end.
- Use the power cord to connect the power supply.
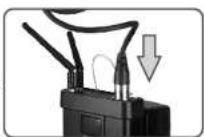
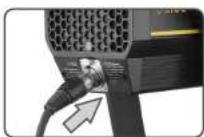
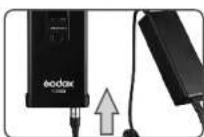
Note: If using V-port battery, please insert the battery into the LED light and power it on for usage.
Operation
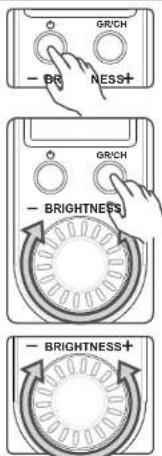
- Power on/off: long press the Power Switch of controller to power the LED light on or off.
- Choose group/channel: press GR/CH button for once, and turn the Select Dial for Light Brightness to change the channel value. Then, press GR/CH button again, and turn the Select Dial for Light Brightness to change the group value (the group figure will be displayed recurrently). Press GR/CH button to exit.
- Light brightness adjustment: turn the select dial for light brightness to change the value from 0% to 100%.
- Power option: press the GR/CH button and power the light on to enter power option mode. Turn the brightness select dial to choose power from 300, 250 and 200. The power is 300W by default. Exit from this mode automatically without operation for 5 seconds.
Note: This function is used for the situation that the battery enter to protection states and cannot word due to some v-port battery doesn't output the corresponding power in strong power output. When enter this mode, the output power of the light can be decreased and the battery can be loaded instead of being protected (this function only applies to VL300).
Wireless Control
(433MHz wireless & smartphone APP through Bluetooth)
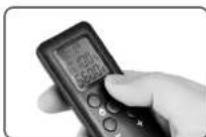
- With 433 MHz wireless system, VL series have remote grouping and control function. Up to 6 groups of LED lights can be controlled. 16 channels are available with strong anti-interference capability. Please set the channels and groups of LED light to the same as those of RC-A5II remote control before usage.
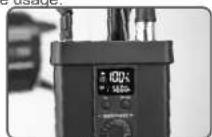
Adjusting Channel/Group of the Controller
- Press the GR/CH button and the channel icon blinks. Turn the select dial for light brightness to choose a channel ID (1 to 16).
- Press the GR/CH button twice and the group icon blinks. Tum the select dial for light brightness or color temperature to choose a group ID (A to F).
Adjusting Channel/Group of the Remote Control - Press the CH/GRP button and the group icon blinks. Press the "-" or "+" button to choose a group ID (A to F).
- Press the CH/GRP button twice and the channel icon blinks. Press the "-" or "+" button to choose a channel ID (1 to 16).
Adjusting Light Brightness with the Remote Control - Press the "-" or "+" button to adjust the light brightness.
Note: The wireless signal can be received only when the controller is power on.
- Godox VL series LED lights can also be controlled by smartphone APP through Bluetooth
with 6 groups and 16 channel.
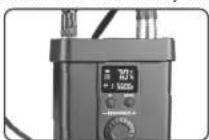
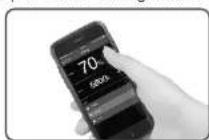
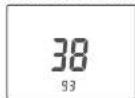
- Bluetooth connection: power the LED light on and long press the GR/CH button until a Bluetooth ID is displayed on the controller. Then, open the "GodoxPhoto"APP, click the Bluetooth and choose the corresponding Bluetooth ID of the controller. Finally, enter the password (the initial password is "000000"), and the Bluetooth is successfully connected. Note: The channels and groups of LED controller and APP should be adjusted to the same.
- LED control: please find more details in the "GodoxPhoto" APP of smartphone: Setting--Help--LED.
Technical Data
| VL Series LED Light | VI150 | VI200 | VI300 | |
| Power Supply | DC Power supply | AC100V-240V(50/60HZ)/2A(DC16.8V 10A) | AC100V-240V(50/60HZ)/3.9A(DC33V 7A) | AC100V-240V(50/60HZ)/4.3A(DC33V 10A) |
| Lithium battery | V-port battery(separately sold) | |||
| Power | 150W | 200W | 300W | |
| Color Temperature | 5600±200K | |||
| 100% Light Brightness (LUX, 1m)(=) | Included Reflector | 61000 | 75000 | 77000 |
| Bare Light | 6400 | 7800 | 10800 | |
| CRI (=) | 96 | |||
| TLCI (=) | 95 | |||
| Light Brightness Range | 0%-100% | |||
| Operation Temperature | -10°C~40°C | |||
| Channel | 16 | |||
| Group | 6 groups (A, B, C, D, E, F) | |||
| Dimension | 30x14x18cm | 30x14x18cm | 34x14x18cm | |
| Net Weight | Light: 1.97KgController: 0.86KgAdapter: 0.72Kg | Light: 2.23KgController: 1.19KgAdapter: 0.96Kg | Light: 2.64KgController: 1.26KgAdapter: 1.14Kg | |
Note: The illumination value will be different when changing different accessories.
FCC Warning
This device complies with part 15 of the FCC Rules. Operation is subject to the following two conditions: (1) This device may not cause harmful interference, and (2) this device must accept any interference received, including interference that may cause undesired operation.
Any Changes or modifications not expressly approved by the party responsible for compliance could void the user's authority to operate the equipment.
Note: This equipment has been tested and found to comply with the limits for a Class B digital device, pursuant to part 15 of the FCC Rules. These limits are designed to provide reasonable protection against harmful interference in a residential installation. This equipment generates uses and can radiate radio frequency energy and, if not installed and used in accordance with the instructions, may cause harmful interference to radio communications. However, there is no guarantee that interference will not occur in a particular installation. If this equipment does cause harmful interference to radio or television reception, which can be determined by turning the equipment off and on, the user is encouraged to try to correct the interference by one or more of the following measures:
- Reorient or relocate the receiving antenna.
- Increase the separation between the equipment and receiver.
- Connect the equipment into an outlet on a circuit different from that to which the receiver is connected.
- Consult the dealer or an experienced radio/TV technician for help.
\*RF warning:
This equipment complies with FCC radiation exposure limits set forth for an uncontrolled environment. This equipment should be installed and operated with minimum distance 20cm between the radiator & your body.