LiteDome - Beleuchtung Photoflex - Kostenlose Bedienungsanleitung
Finden Sie kostenlos die Bedienungsanleitung des Geräts LiteDome Photoflex als PDF.


Benutzerfragen zu LiteDome Photoflex
0 Frage zu diesem Gerät. Beantworten Sie die, die Sie kennen, oder stellen Sie Ihre eigene.
Eine neue Frage zu diesem Gerät stellen
Laden Sie die Anleitung für Ihr Beleuchtung kostenlos im PDF-Format! Finden Sie Ihr Handbuch LiteDome - Photoflex und nehmen Sie Ihr elektronisches Gerät wieder in die Hand. Auf dieser Seite sind alle Dokumente veröffentlicht, die für die Verwendung Ihres Geräts notwendig sind. LiteDome von der Marke Photoflex.
BEDIENUNGSANLEITUNG LiteDome Photoflex
natural_image
Black and white studio photo of a 3D studio lighting module with no visible text or symbols on the main body.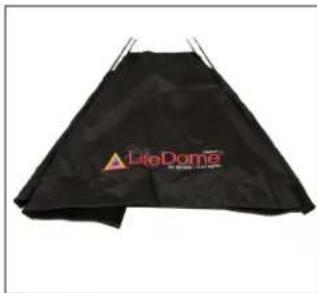
natural_image
Black plastic bag with 'LiteDome' branding and a red triangular logo, no visible text or symbols on the bag itself.Figure 1.

natural_image
Close-up of a black mechanical component with a metallic tip, no visible text or symbols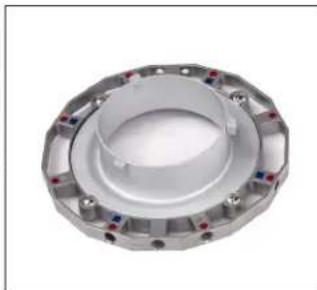
natural_image
Circular mechanical component with flanged ends and central hub (no text or symbols visible)Figure 2. Figure 3.
natural_image
Person assembling a mechanical component with a tool, no visible text or symbols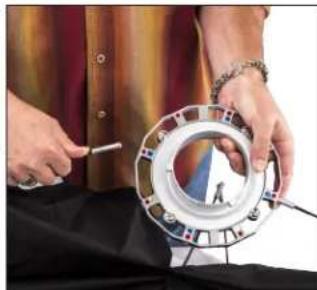
natural_image
Person holding a circular mechanical component with a small inset image (no visible text or symbols)Figure 5.
Figure 4.
natural_image
Person holding a white object over a black tray, possibly a container or tray, with no visible text or symbols.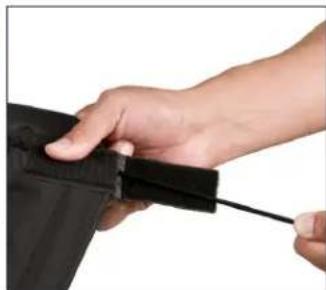
natural_image
Close-up of a hand holding a black rectangular object with a cable, against a white background (no text or symbols visible)Figure 7.
Figure 6.

natural_image
Close-up of hands tying a black zipper on a dark garment (no text or symbols visible)
natural_image
Close-up of hands holding a black fabric or material sample (no visible text or symbols)Figure 8.
Figure 9.
LiteDome Family
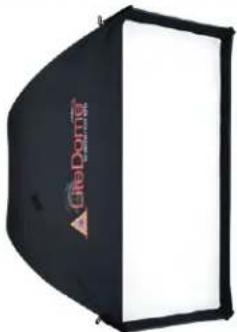
They are the worlds' most popular softboxes! This white interior soft box is designed for strobe lights and ideal for portrait and still life applications. With available accessory grids for additional directional light control, these softboxes will give you just the right kind of light.
Before assembling your LiteDome, make sure all the components are present:
- (1) LiteDome softbox
-
(1) Connector (Included with extra small LiteDome only. Connectors for other models sold separately)
-
(4) Tension Rods
-
(1) Inner Baffle (medium, large and extra large only)
-
(1) Front Diffuser (excluding the extra small model)

natural_image
Black and white photo studio umbrella with 'SIMONEE' branding, no visible text or symbols on the umbrella itselfAssemble the Softbox to the Connector Figures 1-9
- Place the softbox with all four rods into their sleeves on a flat, clean surface.
- If closed, open all four Quick Release Corners (QRC) ^® . Pull Velcro ^® tab open at each corner so that rods extend freely. (Not available on extra small or small LiteDome.)
- Notice that the connector has nine receptacle holes, three of which are "tapped" (except with the extra small LiteDome that comes with a four hole Basic Connector). The small, medium, large and extra large LiteDome only use four of the eight octoconnector rod holes. (The remaining four holes are for use with the OctoDome®, Photoflex's eight rod softbox.) Current model OctoConnectors use circle icons () for OctoDomes and squares icons ( ) for rectangular Softboxes.
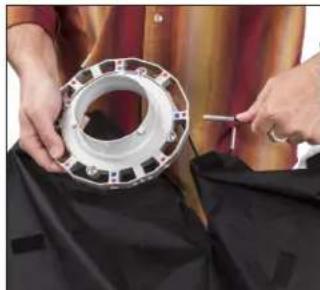
- Position the connector at the center of the softbox and insert the first rod into one of the rod receptacles.
NOTE: If you are planning on using the ShoeMount hardware (AC-B222SM) with this assembly, make sure that one of the large tapped holes is centered between two inserted rods.
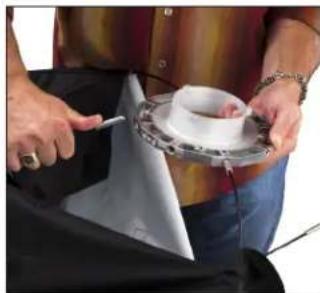
- Insert the second rod into the hole diagonally opposite the first hole.
- Insert the third and fourth rods.
- Push the rod into place with your thumb.
- While pushing the rod into place, pull the QRC flap over rod tip and secure.
- Repeat this process with remaining corners.
NOTE: For proper dome shape to be achieved all rods must be pushed in completely.
natural_image
Close-up of hands adjusting a black suit with a white cup and metal ring (no visible text or symbols)Figure 10.
natural_image
Close-up of hands holding a cup of dark liquid next to a black cloth (no text or symbols visible)Figure 11.

natural_image
Person using a power tool to lift a black athletic bag with 'LiteDom' branding (no text on bag or background)Figure 12.
natural_image
Black studio lighting equipment with a red laser beam and 'Era-Dorte' branding (no text or symbols on the device itself)Figure 13.
natural_image
Close-up of a hand holding a white object over a human foot, no visible text or symbolsFigure 14.
natural_image
Empty rectangular frame with black border and white interior (no text or symbols)Figure 15.
natural_image
Close-up of a hand holding a black cable against a white background (no text or symbols visible)Figure 16.
natural_image
Simple black-and-white sketch of a blank rectangular frame with no text or symbolsFigure 17.
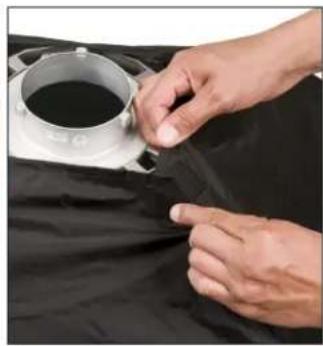
Attaching Rear Flaps (optional) Figure 10-11
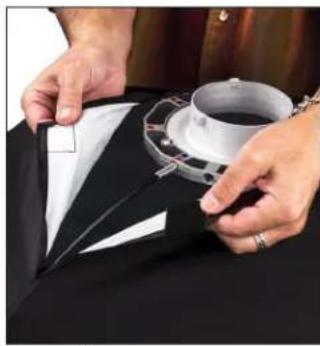
- The rear flaps can be closed by pulling them toward the connector and attaching with the Velcro that is sewn into each flap. The softbox is built and ready to attach to your strobe light head. Finally, with the softbox face down, press firmly on the connector to be sure that all the rods are seated properly.
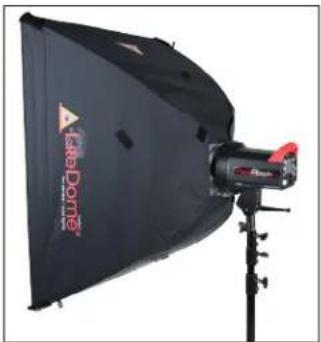
Attaching Your Light Head to the Connector and LiteStand® Figures 12-13
In most cases, the softbox connector is designed to connect with your strobe light head in the same manner as your light head's accessories.
- Connect the light to the softbox connector making sure that your lights locking mechanism is securely attached. Figure 12
- Carefully lift the softbox and light assembly and position it over your LiteStand. Line up the LiteStand's riser (stud) with the stand receptacle hole on your light head. Place the light head on the LiteStand and secure the light's tilt bracket to securely attach the light to the stand. Figure 13
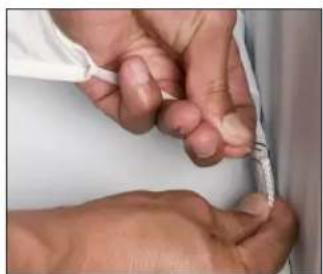
Installing the Internal Baffle and Diffusion Face Figures 14-17
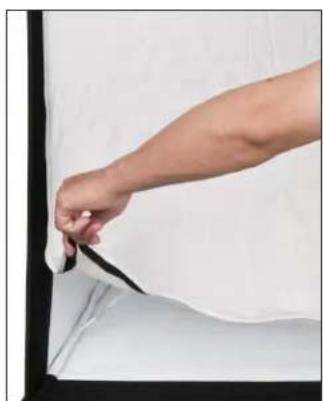
- The inner baffle has elastic bands with metal clips at each of the four corners. The interior of the LiteDome softbox has four white Nylon loops. Secure one metal clip to each of these loops (Not available on the extra small or small LiteDomes) Figure 14
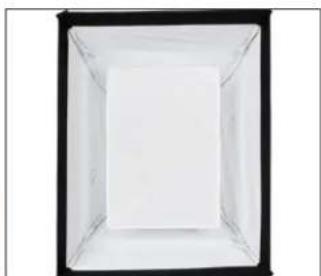
- Here is an example of the inner baffle correctly installed. Figure 15
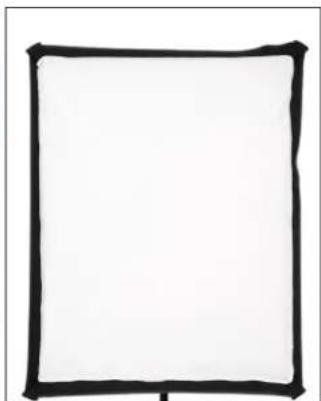
- The face diffuser is rimmed with Velcro that attaches to its counterpart lining the front of the LiteDome. Find the long edge of the diffuser and line it up with the long edge of the LiteDome front. Starting at one corner, press the face diffuser into place. Work your way around the rim of the softbox until the diffuser is in place. Figure 16
- Congratulations! Your softbox is now fully constructed! Figure 17
Customer Support (800) 486-2674 E-mail: sales@photoflex.com
Corporate Office (831) 786-1370 • FAX (831) 786-1372 97 Hangar Way, Watsonville, CA 95076
©2013 Photoflex, Inc. ALL RIGHTS RESERVED. LiteDome ^® , QRC ^® , LiteStand ^® , Photoflex ^® and the Photoflex logo are trademarks or registered trademarks of Photoflex and/or its affiliates in the U.S. and other countries. Third party trademarks are the property of their respective owners.
PHOTOFLEX® 6 YEAR WARRANTY
- Warranties only cover manufacturer's defects and workmanship.
• We reserve the right to inspect all merchandise returned (end users and dealers) for warranty fulfillment. - For returns contact Photoflex first to obtain a return authorization number and instructions for return.
• Freight must be paid both ways by the customer or dealer. - Warranties are valid only from date of original purchase.
- Warranties are cannot cover damage caused by accidents, improper care or use.