
PGA 56 - Mikrofon SHURE - Kostenlose Bedienungsanleitung
Finden Sie kostenlos die Bedienungsanleitung des Geräts PGA 56 SHURE als PDF.


Benutzerfragen zu PGA 56 SHURE
0 Frage zu diesem Gerät. Beantworten Sie die, die Sie kennen, oder stellen Sie Ihre eigene.
Eine neue Frage zu diesem Gerät stellen
Laden Sie die Anleitung für Ihr Mikrofon kostenlos im PDF-Format! Finden Sie Ihr Handbuch PGA 56 - SHURE und nehmen Sie Ihr elektronisches Gerät wieder in die Hand. Auf dieser Seite sind alle Dokumente veröffentlicht, die für die Verwendung Ihres Geräts notwendig sind. PGA 56 von der Marke SHURE.
BEDIENUNGSANLEITUNG PGA 56 SHURE
PG ALTA ^M SERIES
WIRED MICROPHONE
PGA 56 USER GUIDE
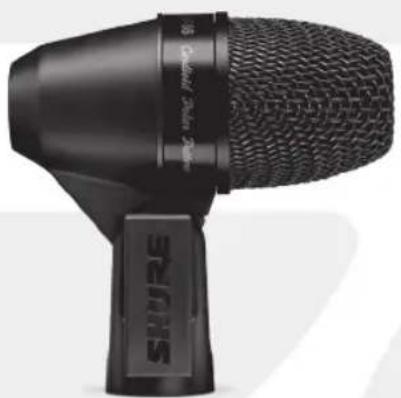
natural_image
Close-up of a black audio recording device with mesh grille and 'SHURE' branding (no visible text or symbols on body)PG Alta Microphones
Congratulations on the purchase of a new Shure PG Alta series microphone. The PG Alta series delivers professional quality audio at an affordable price, with solutions for capturing nearly any source, including voice, acoustic instruments, drums, and amplified electric instruments. Suitable for live and studio applications, PG Alta microphones are built to last, and meet the same rigorous quality testing standards that make all Shure products trustworthy and reliable.
General Rules for Use
- Do not cover any part of the microphone grille with your hand, as this will adversely affect microphone performance.
- Aim the microphone toward the desired sound source (such as the talker, singer, or instrument) and away from unwanted sources.
- Place the microphone as close as practical to the desired sound source.
• Work close to the microphone for extra bass response. - Use only one microphone to pick up a single sound source.
- For better gain before feedback, use fewer microphones.
- Keep the distance between microphones at least three times the distance from each microphone to its source ("three to one rule").
- Place microphones as far as possible from reflective surfaces.
- Add a windscreen when using the microphone outdoors.
- Avoid excessive handling to minimize pickup of mechanical noise and vibration.
Proximity Effect
Directional microphones progressively boost bass frequencies as the microphone is placed in closer proximity to the source. This phenomenon, known as proximity effect, can be used to create a warmer, more powerful sound.
Applications And Placement
The following table lists the most common applications and placement techniques. Keep in mind that microphone technique is largely a matter of personal taste; there is no one "correct" microphone position.
| Application Suggested Microphone Placement | Tone Quality |
| Tom-Toms One mic on each tom, or between each pair of toms, 2.5 to 7.5 cm (1 to 3 in.) above drum heads.Aim each microphone at top drum heads. On double head toms, you can also remove bottom head and place a mic inside pointing up toward top drum head. | Medium attack; full, balanced sound. |
| Snare Drum 2.5 to 7.5 cm (1 to 3 in.) above rim of top head of drum. Aim mic at drum head. | Most “snap” from drumstick. |
NOTE: Before each use, make sure the grille is tightly secured on the microphone, as vibration and accidental hits with drumsticks may loosen it, resulting in signal loss.
Avoiding Pickup of Unwanted Sound Sources
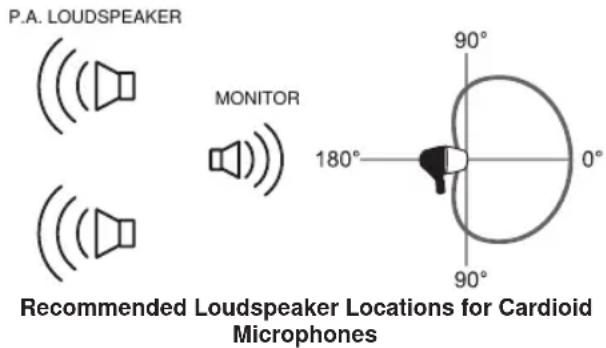
Place the microphone so that unwanted sound sources, such as monitors and loudspeakers, are directly behind it. To minimize feedback and ensure optimum rejection of unwanted sound, always test microphone placement before a performance.
text_image
P.A. LOUDSPEAKER MONITOR Recommended Loudspeaker Locations for Cardioid MicrophonesUsing the Quick-Release Lever
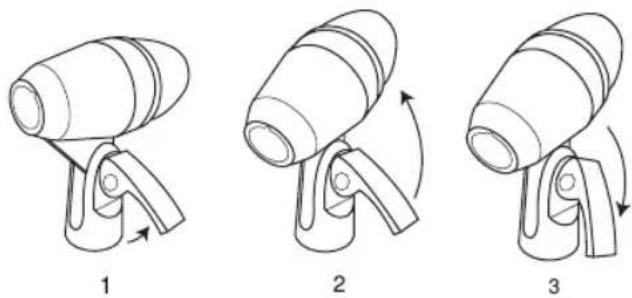
This microphone features a quick-release lever to easily adjust position.
- Pull the lever open
- Move the microphone into the desired position
- Press the lever back towards the microphone to tighten
natural_image
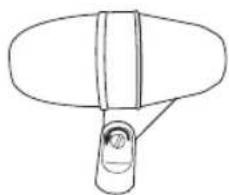
Simple line drawing of a mechanical component with a handle and central shaft (no text or symbols)Note: To adjust the tension on the lever, pull it open and use a flat head screwdriver to tighten or loosen the bolt on the opposite side.
Optional Accessories and Replacement Parts
| Microphone Drum Mount A50D | |
| 7.6 m (25 ft.) Cable (XLR-XLR) C25J | |
| Grille RPMP56G | |
| PGA56 Replacement Grille RPM152 |
Certifications
This product meets the Essential Requirements of all relevant European directives and is eligible for CE marking.
The CE Declaration of Conformity can be obtained from: www.shure.com/europe/compliance
Authorized European representative:
Shure Europe GmbH
Headquarters Europe, Middle East & Africa
Department: EMEA Approval
Jakob-Dieffenbacher-Str. 12
75031 Eppingen, Germany
Phone: 49-7262-92 49 0
Fax: 49-7262-92 49 11 4
Email: EMEAsupport@shure.de
Specifications
Type
Dynamic (moving coil)
Frequency Response
50 to 15,000 Hz
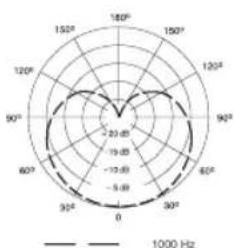
Polar Pattern
Cardioid
Output Impedance
200 Ω
Sensitivity
at 1 kHz, open circuit voltage
-57 dBV/Pa ^1 (1.45 mV)
Polarity
Positive pressure on diaphragm produces positive voltage on pin 2 with respect to pin 3
Weight
287 g (10.12oz.)
Connector
Three-pin professional audio (XLR), male
Environmental Conditions
| Operating Temperature | -20° to 165°F (-29° to 74°C) |
| Relative Humidity | 0 to 95% |
1 Pa=94 dB SPL
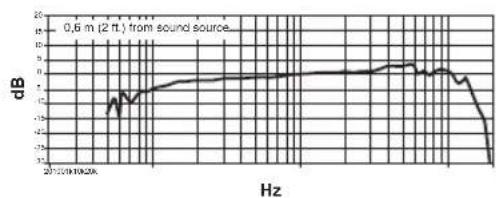
Typical Frequency Response
radar
| Angle (°) | Value | |---|---| | 0 | 20.85 | | 30 | -19.85 | | 60 | -19.85 | | 90 | -5.49 | | 120 | 120 | | 150 | 150 | | 180 | 180 | | 210 | 210 |Typical Polar Pattern
text_image
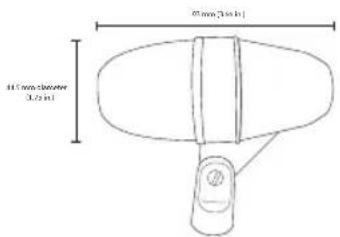
40 mm x 20 mm 3.75 mmOverall Dimensions