VZ-Rock - Régulateur VariZoom - Kostenlose Bedienungsanleitung
Finden Sie kostenlos die Bedienungsanleitung des Geräts VZ-Rock VariZoom als PDF.


Benutzerfragen zu VZ-Rock VariZoom
0 Frage zu diesem Gerät. Beantworten Sie die, die Sie kennen, oder stellen Sie Ihre eigene.
Eine neue Frage zu diesem Gerät stellen
Laden Sie die Anleitung für Ihr Régulateur kostenlos im PDF-Format! Finden Sie Ihr Handbuch VZ-Rock - VariZoom und nehmen Sie Ihr elektronisches Gerät wieder in die Hand. Auf dieser Seite sind alle Dokumente veröffentlicht, die für die Verwendung Ihres Geräts notwendig sind. VZ-Rock von der Marke VariZoom.
BEDIENUNGSANLEITUNG VZ-Rock VariZoom
VariZoom
VZ-ROCK (v2015) OPERATING INSTRUCTIONS
\*\*\*PLEASE READ BEFORE USING\*\*\*
Thanks for purchasing our new deluxe variable-rocker LANC control, the VZ-ROCK. Before you begin using your controller, here are a few important guidelines to follow:
-ONLY PLUG INTO LANC COMPATIBLE CAMERAS
-NEVER EXPOSE THE UNIT TO WATER OR LIQUIDS, AND NEVER EXPOSE IT TO EXCESSIVE HEAT, PRESSURE OR SHOCK – DOING SO MAY RESULT IN DAMAGE NOT COVERED BY THE FACTORY WARRANTY (2 YEARS)
-DO NOT ATTEMPT TO OPEN THE UNIT. DOING SO MAY VOID YOUR FACTORY WARRANTY.
-DO NOT SUBJECT THE VARIABLE ZOOM ROCKER OR THE LANC CABLE TO UNNECESSARY STRESS. ABUSE OF THE ZOOM ROCKER OR LANC CABLE MAY RESULT IN DAMAGE NOT COVERED BY YOUR WARRANTY!
Your VZ-ROCK controller is equipped with the following features: pressure-sensitive variable speed zoom control; manual focus control; manual iris control (when available), record start/stop; power ON/OFF; LED indicator; data on/off; autofocus on/off.
HOW TO USE THE VZ-ROCK
-
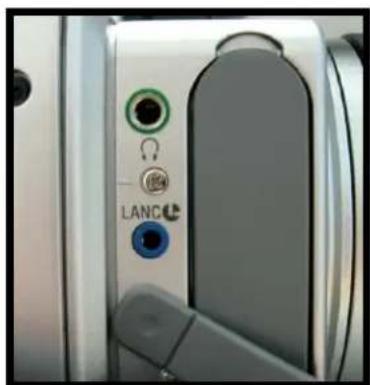
Plug the controller into the "remote" jack on your Sony, Canon, JVC, Black Magic or compatible Panasonic camcorder, . If you are not sure about the location of the remote jack, consult the camcorder owner's manual.
-
You can attach the controller to your tripod handle, monopod, shoulder support, or stabilizer with the adjustable clamp (do not overtighten). The controller doesn't require any external power or setup. Once connected, the VZ-ROCK is ready to perform.
text_image
LANC-
The rocker switch at the bottom is for zooming. Since it is a variable rocker, the farther you press it right the faster it will zoom in (telephoto), and the farther you press it left the faster it will zoom out (wide). You should practice a bit before shooting so that you acquire a good sense of the rocker's characteristics.
-
The small button marked with a red "R" is the record start/stop button. The button marked ON will toggle the camera between standby and full power modes. Hold the button in for 2
seconds and release to put the camera into standby mode *. To power the camera up from standby mode, simply press the ON button (most camcorders will go into auto standby after a few minutes in record pause mode*). Pressing the "ON" button will bring the camcorder back to full operating mode whether you put it into standby manually or if it happens automatically.
- You can also control the focus of your lens manually using the VZ-ROCK. With most camcorders, you can toggle between Auto and Manual modes using the autofocus button ** (marked "A"). Once you are in Manual Focus mode, you can use the switch on the controller marked "FOCUS" to precisely adjust the focal plane. Pressing the down arrow will bring the focal plane closer while pressing the up arrow will move the focal plane farther away.
- Depending on your camera, you may also have access to iris control with the "F+" and "F-" buttons. Not all cameras support this feature, but to test it you must put your camera in manual iris mode.
- Finally, the LED indicator light will turn red (or blink) to indicate a variety of camcorder functions such as record, low battery, etc. (the pattern will vary slightly between different camcorders, but will remain consistent when used with the same camcorder). You are ready to begin using the VZ-ROCK. Enjoy! (When not in use, disconnect the ROCK.)
Troubleshooting: 1) Zoom Creeping (unwanted zooming): Recalibrating the zoom center is easy. With the controller connected to your camera, loosen the brass set screw on the underside of the rocker with a 5/64" hex key (alan wrench), holding the rocker firmly in place. On the backside of the rocker is a hole with a slotted shaft, and this is where you adjust the zoom center with a flat screwdriver. Turn it slightly left and right and you'll see the camera zoom in and out – find the centermost point between the zoom in/out start positions, then tighten the brass set screw (don't overcrank it). Watch the video here: https://www.youtube.com/watch?v=2ntdG3cu5Lg 2) Controller not responding: Unplug the unit and plug it back in after a few seconds.
512-219-7722 / www.varizoom.com
** Please note that the "A" autofocus, F+ / F-, ON and Data buttons may not work with certain cameras