
One 2 RGB - Tastatur Ducky - Kostenlose Bedienungsanleitung
Finden Sie kostenlos die Bedienungsanleitung des Geräts One 2 RGB Ducky als PDF.


| Produkttyp | Mechanische Gaming-Tastatur |
| Modell | One 2 RGB |
| Marke | Ducky |
| Tastenanzahl | 104 (Full-Size) |
| Schalter | Cherry MX (Blau, Braun, Rot, Schwarz, Silber) |
| Hintergrundbeleuchtung | RGB pro Taste, individuell einstellbar |
| Abmessungen (B x H x T) | 442 x 41 x 140 mm |
| Gewicht | ca. 1200 g |
| Anschluss | USB Typ C, abnehmbares Kabel (1,8 m) |
| Tastenlayout | ISO (DE) oder ANSI verfügbar |
| Tastenkappen | PBT Doppelshot, abnehmbar |
| N-Key Rollover | Ja (Full N-Key über USB) |
| Mediensteuerung | via Fn-Tasten (Lautstärke, Wiedergabe) |
| Makros | Programmierbar (Ducky Macro 2.0), integrierter Speicher |
| Polling Rate | 1000 Hz (einstellbar) |
| Handballenauflage | Nicht enthalten |
| Kompatibilität | Windows, macOS, Linux, PS4/PS5 (eingeschränkt) |
| Stromversorgung | USB, 5 V, 500 mA |
| Reinigung | Tastenkappen abnehmbar; Gehäuse mit weichem Tuch reinigen |
| Sicherheit | CE, FCC zertifiziert |
| Ersatzteile | Tastenkappen und USB-Kabel separat erhältlich |
| Reparierbarkeit | Schalter fest verlötet; Reparatur nur durch Fachpersonal |
Häufig gestellte Fragen - One 2 RGB Ducky
Benutzerfragen zu One 2 RGB Ducky
0 Frage zu diesem Gerät. Beantworten Sie die, die Sie kennen, oder stellen Sie Ihre eigene.
Eine neue Frage zu diesem Gerät stellen
Laden Sie die Anleitung für Ihr Tastatur kostenlos im PDF-Format! Finden Sie Ihr Handbuch One 2 RGB - Ducky und nehmen Sie Ihr elektronisches Gerät wieder in die Hand. Auf dieser Seite sind alle Dokumente veröffentlicht, die für die Verwendung Ihres Geräts notwendig sind. One 2 RGB von der Marke Ducky.
BEDIENUNGSANLEITUNG One 2 RGB Ducky

Ducky Channel

natural_image
Abstract geometric logo with interlocking colored cubes (no text or symbols)ONE
Series
User Manual

Ducky Channel
ONE
ONE

One 單色LED燈版本

One 非背光版本

One 2 單色LED燈版本

One 2 非背光版本

One 2 RGB LED燈版本
目錄
Ducky One 單色LED燈規格 1
Ducky One 非背光規格 2
Ducky One 2 單色LED燈規格 3
Ducky One 2 非背光規格 4
Ducky One 2 RGB LED規格 5
USB輸出字元加速功能 6
單色燈光操作模式 7
RGB 燈光操作模式 8
單色記憶區域背光 9
RGB 記憶區域背光 11
行動電源Demo模式 13
店家橱窗Demo模式 13
鍵盤供應電力調整 14
回復出廠設定 14
Windows Lock功能 14
滑鼠控制功能 15
DIP指撥開關功能 16
Ducky Macro V2.0 17
Ducky Macro V2.0 基本快捷键功能 18
Ducky Macro V2.0 設定區域的範圍 20
Ducky Macro V2.0 Windows常見功能快捷鍵 21
Ducky Macro V2.0 設定邏輯圖 22
Ducky Macro V2.0 使用範例 23

Ducky Channel
ONE
ONE
One Single color LED version
One Non-backlit version
One 2 Single color LED version
One 2 Non-backlit version
One 2 RGB LED version
CONTENT
Ducky One Single Color LED Specs 25
Ducky One Non-backlit Specs 26
Ducky One 2 Single Color LED Specs 27
Ducky One 2 Non-backlit Specs 28
Ducky One 2 RGB LED Specs 29
USB Repeat Acceleration 30
Single Color LED Backlit Modes 31
RGB LED Backlit Modes 32
Single Color LED Zone Customization Modes 33
RGB LED Zone Customization Modes 35
Demo Mode 37
Display Mode 37
Keyboard Power Mode 38
Reset Back to Factory Defaults 38
Windows Key Lock Feature 38
Mouse Function 39
DIP Switch Functions 40
Ducky Macro V2.0 41
Ducky Macro V2.0 Hotkeys Function 42
Ducky Macro V2.0 Setting Section 44
Ducky Macro V2.0 Windows Common Function Keys 45
Ducky Macro V2.0 Implication Diagram 46
Ducky Macro V2.0 Set Up Example 47
Ducky One

單色LED燈
型號:DKON1608S / DKON1687S
■ 結構:機械式結構
■ 軸:Cherry MX 機械軸
■ 錱帽材質:PBT 或 ABS
■印字技術:二色成形或雷射雕刻
■ 產地:台灣
100%
■ 尺寸:440×140×41 mm
■重量:1300g
80%
■ 尺寸:356.6×133×41mm
■ 重量:1100g
確切規格每個地區可能會有所不同,詳細請詢問各地代理商。

Ducky One

非背光
型號:DKON1608 / DKON1687
■ 結構:機械式結構
■ 軸:Cherry MX 機械軸
■ 錯帽材質:PBT 或 ABS
■印字技術:
二色成形或雷射雕刻或热昇華
■產地:台灣
100%
■ 尺寸:440×140×41mm
■重量:1300g
80%
■ 尺寸:356.6×133×41mm
■ 重量:1100g
確切規格每個地區可能會有所不同,詳細請詢問各地代理商。

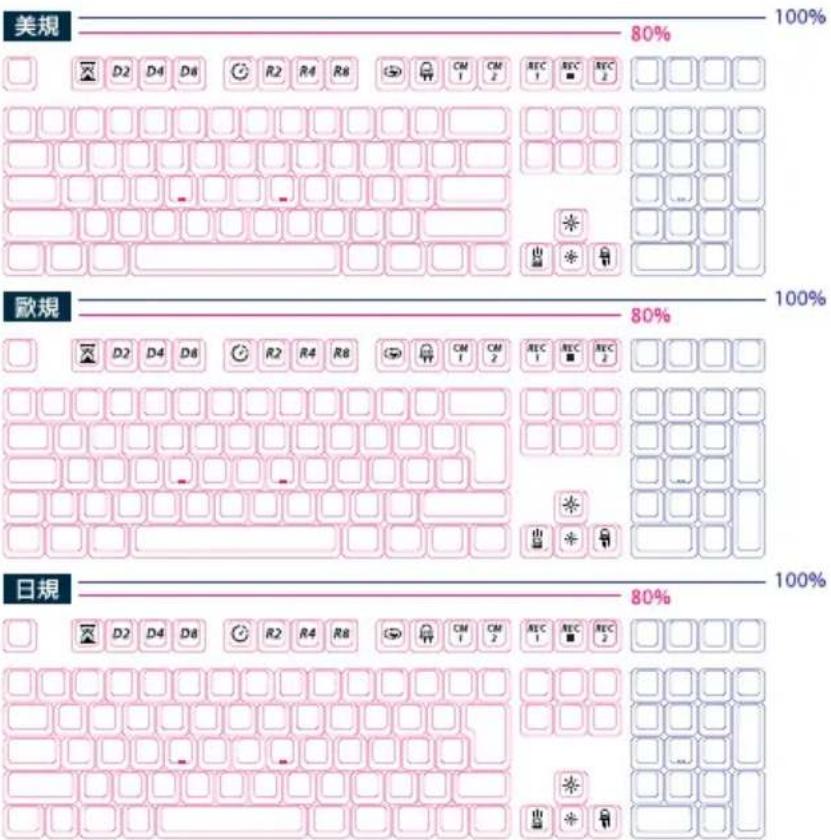
Ducky One 2

單色LED燈
型號:DKON1808S/DKON1887S
■ 結構:機械式結構
■ 軸:Cherry MX 機械軸
■ 錱帽材質:PBT或ABS
■印字技術:二色成形或雷射雕刻
■ 產地:台灣
100%
■ 尺寸:440×135×40 mm
■ 重量:1100g
80%
■ 尺寸:365×135×40mm
■ 重量:950g
確切規格每個地區可能會有所不同,詳細請詢問各地代理商。

美規
歐規
日規
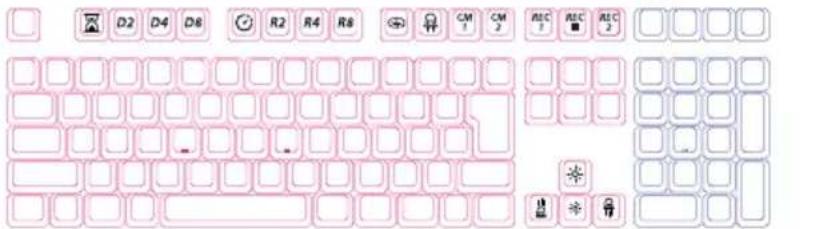
Ducky One 2

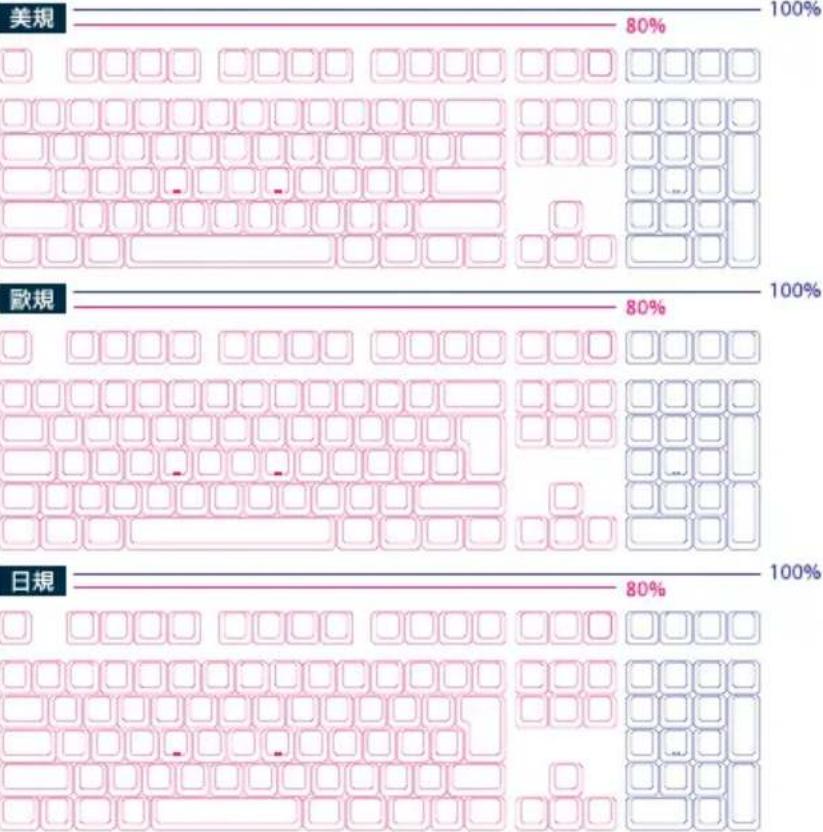
非背光
型號:DKON1808 / DKON1887
■ 結構:機械式結構
■ 軸:Cherry MX 機械軸
■ 錬帽材質:PBT 或 ABS
印字技術:
二色成形或雷射雕刻或熱昇華
■產地:台灣
100%
■ 尺寸:440×135×40mm
■ 重量:1100g
80%
■ 尺寸:365×135×40 mm
■ 重量:950g
確切規格每個地區可能會有所不同,詳細請詢問各地代理商。

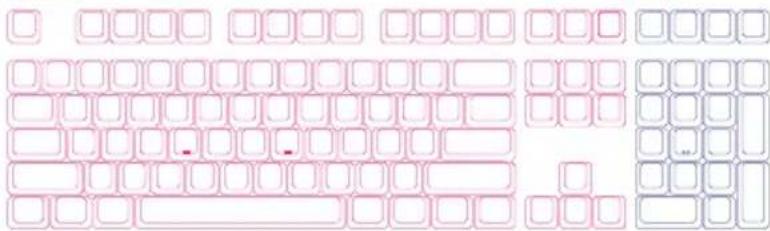
美規
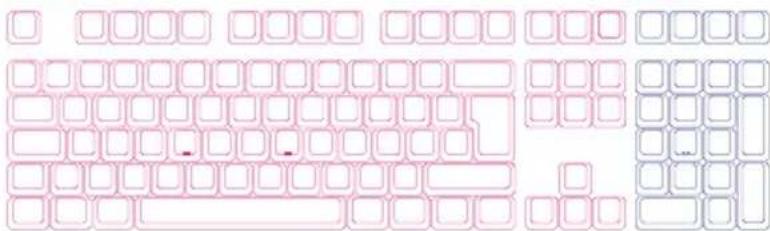
歐規
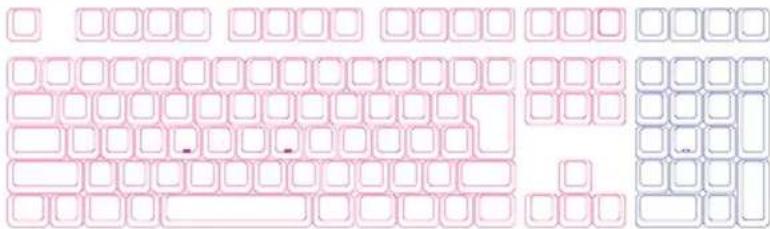
日規
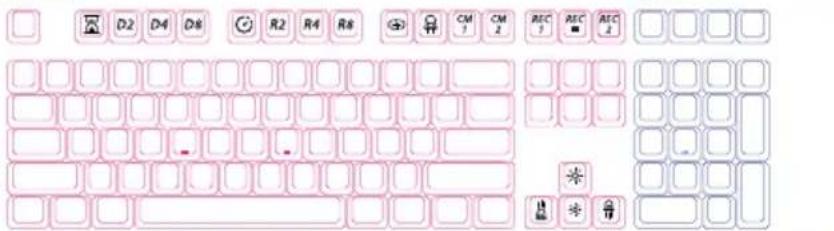
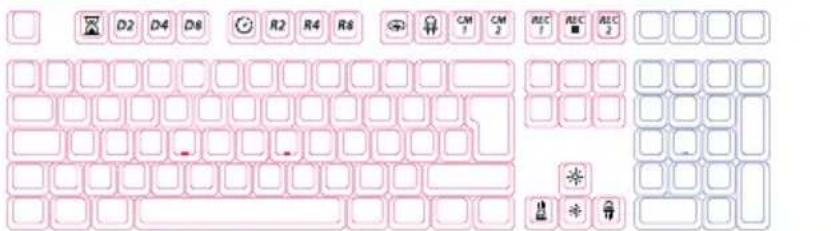
Ducky One 2

RGB LED燈
型號:DKON1808ST / DKON1887ST
■ 結構:機械式結構
■ 軸:Cherry MX RGB 機械軸
■ 錯帽材質:PBT 或 ABS
■印字技術:二色成形或雷射雕刻
■ 產地:台灣
100%
■ 尺寸:440×135×40 mm
■ 重量:1100g
80%
■ 尺寸:365×135×40mm
■重量:950g
確切規格每個地區可能會有所不同,詳細請詢問各地代理商。

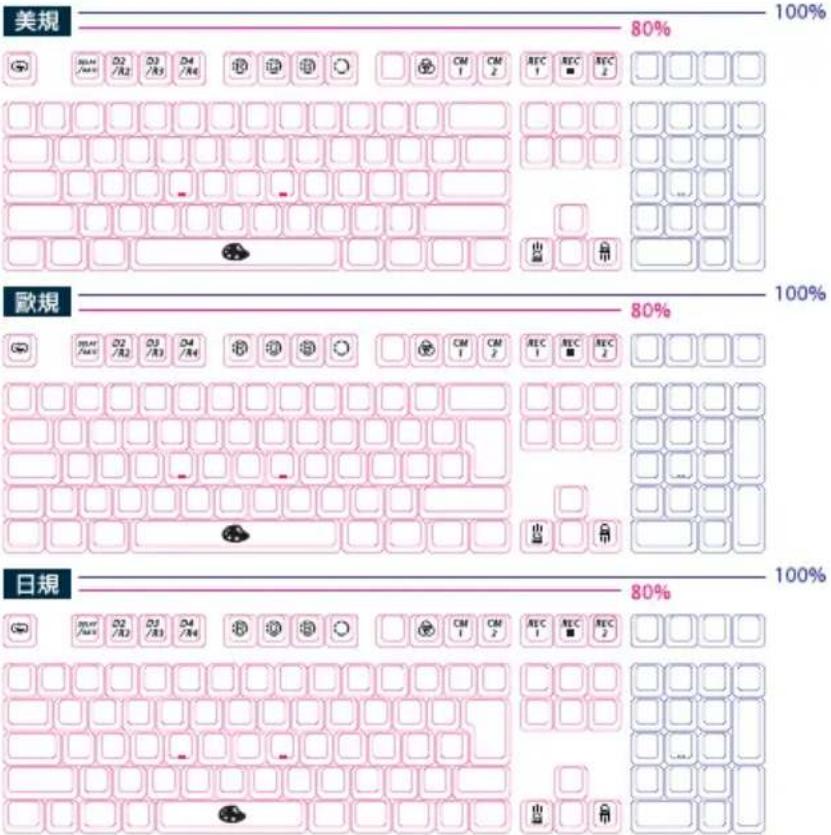
USB輸出字元加速功能


註:
進行USB輸出字元加速設定時,只有在「Function Mode模式」下才能進行切換,在一般模式下無法立即切換。
USB輸出字元加速模式在不同遊戲程式的設計方式下,可能會有不同表現結果,請依使用習慣自行調整。


| Fn+ | F9 | = | 開啟/關閉 Function Mode模式 | 必須壓住3秒鐘切換 |
| F1 | 首字延遲1倍(預設) | 調整USB Repeat Delay Time | ||
| F2 | 首字延遲2倍 | |||
| F3 | 首字延遲4倍 | |||
| F4 | 首字延遲8倍 | |||
| F5 | 字元重覆頻率1倍(預設) | 調整USB Repeat Rate | ||
| F6 | 字元重覆頻率2倍 | |||
| F7 | 字元重覆頻率4倍 | |||
| F8 | 字元重覆頻率8倍 |
| Fn+ | ESC | = | 開啟/關閉 Function Mode模式 | 必須壓住3秒鐘切換 |
| F1 | 首字延遲1倍(預設) | 調整 USB Repeat Delay Time,以紅色表示倍數 | ||
| F2 | 首字延遲2倍 | |||
| F3 | 首字延遲4倍 | |||
| F4 | 首字延遲8倍 | |||
| Alt+F1 | 字元重覆頻率1倍(預設) | 調整 USB Repeat Rate,以綠色表示倍數 | ||
| Alt+F2 | 字元重覆頻率2倍 | |||
| Alt+F3 | 字元重覆頻率4倍 | |||
| Alt+F4 | 字元重覆頻率8倍 |
單色燈光操作模式


| Fn+F10 | 第一次:100%全亮模式 |
| 第二次:呼吸燈模式 | |
| 第三次:波浪模式 | |
| 第四次:蛇行跑馬燈模式 | |
| 第五次:雨滴模式 | |
| 第六次:單點亮模式 | |
| 第七次:漣漪模式 | |
| 第八次:極光模式 | |
| 第九次:關閉所有燈光效果 |
● 以上各種模式,皆可透過下列操作來進行細節調整:
◆ Fn + ← : 降低速度
◆ Fn + → : 增加速度
◆ Fn + ↑ : 增加亮度
◆ Fn + ↓ : 降低亮度
● Fn + F10 按住3秒鐘,可以關閉所有燈光效果(含CM1、CM2)。
RGB 燈光操作模式 (單色 / 混色)


natural_image
Abstract 3D block structure composed of colored blocks (pink, blue, yellow) with no text or symbolsFn+F10
| 第一次:波浪模式 | 第七次:隨機單點亮模式 |
| 第二次:心跳模式 | 第八次:極光模式 |
| 第三次:磚塊模式 | 第九次:單色單點亮模式 |
| 第四次:循環變色模式 | 第十次:單色呼吸模式 |
| 第五次:雨滴模式 | 第十一次:100%全亮模式 |
| 第六次:圓形漣漪模式 | 第十二次:關閉所有燈光效果 |
● 以上各種模式,皆可透過下列操作來進行細節調整:
◆ Fn + ← : 降低速度
◆ Fn + → : 增加速度
● Fn + F10 按住3秒鐘,可以關閉所有燈光效果(含CM1、CM2)。
● 有 ⚙ 符號的模式可透過下列操作來進行細節調整:
◆ Fn + F5:調整紅色(R)亮度,10階。
◆ Fn + F6:調整綠色(G)亮度,10階。
◆ Fn + F7:調整藍色(B)亮度,10階。
◆ Fn + F8:清除紅色、綠色、藍色的顏色設定值。
◆ Fn + 空白鍵(調色盤):開啟調色盤顯示各種不同顏色,只要點選想要的顏色即完成顏色設定。
單色記憶區域背光


| Fn + F11 | CM1依序有不同動作:第1段:依玩家設定的區域顯示亮度第2段:依玩家設定的區域循環呼吸顯示第3段:關閉 CM1 |
| Fn + F12 | CM2依序有不同動作:第1段:依玩家設定的區域顯示亮度第2段:依玩家設定的區域循環呼吸顯示第3段:關閉 CM2 |
| Fn + PrtSc | REC1,錄製 CM1 |
| Fn + Pause | REC2,錄製 CM2 |
| Caps Lock + ↑ ↓ | 設定燈光亮度 |
| Caps Lock + Scroll Lock | 完成錄製 |

natural_image
Abstract 3D block structure with pink and blue blocks forming a cross-like shape, next to a yellow L-shaped block (no text or symbols)單色記憶區域背光



natural_image
Abstract 3D geometric composition with green blocks on yellow base, no text or symbols present單色記憶區域背光操作過程
● 操作重點提示:先調整喜歡的亮度,再選擇要指定的按鍵。
- 按住 Fn + PrtSc 為設定 CM1 的設定,若按下 Fn + Pause 則是設定 CM2 的設定。
- 當進入錄製模式後,Caps Lock 會顯示當前要設定的顯示亮度,可以透過
Caps Lock + ↑ ↓ 調整顯示亮度。當有喜歡的亮度出現時,直接在鍵盤上按下任意鍵,該鍵就會儲存成喜歡的亮度。 - 使用者可以重覆上一個步驟,讓在同一組區域背光設定中,不同按鍵能擁有多種不同亮度。若該鍵已被設定亮起,再按一下可取消該鍵的設定值。
- 當完成錄製後,按下 Caps Lock + Scroll Lock 功能,結束錄製。
註:
● 當進入錄製模式後,Caps Lock 會顯示當前要設定的顯示亮度。
● CM1、CM2可以與其他燈光模式並存,CM1優先權較高(CM1>CM2),分別控制個別區塊。
● 進入錄製模式後,會顯示上次儲存的設定。
● 錄製30秒無動作,不儲存後自動關閉。
RGB 記憶區域背光


natural_image
Abstract blue 3D geometric shape on dark background (no text or symbols)
natural_image
Stacked 3D blocks in blue, yellow, and pink with a cross symbol on top (no text or labels)| Fn + F11 | CM1依序有不同動作:第1段:依玩家設定的區域顯示顏色第2段:關閉 CM1 |
| Fn + F12 | CM2依序有不同動作:第1段:依玩家設定的區域顯示顏色第2段:關閉 CM2 |
| Fn + PrtSc | REC1,錄製 CM1 |
| Fn + Pause | REC2,錄製 CM2 |
| Caps Lock + F5 / F6 / F7 | 設定紅色/綠色/藍色燈光顏色 |
| Caps Lock + F8 | 清除所有燈光 |
| Caps Lock + 空白鍵 | 開啟調色盤 |
| Caps Lock + Scroll Lock | 完成錄製 |
RGB 記憶區域背光


natural_image
Abstract 3D block structure with pink, blue, and yellow blocks on a dark background (no text or symbols)RGB 記憶區域背光操作過程
● 操作重點提示:先調整喜歡的燈色,再選擇要指定的按鍵。
- 按住 Fn + PrtSc 為設定 CM1 的設定,若按下 Fn + Pause 則是設定 CM2 的設定。
- 當進入錄製模式後,Caps Lock 會顯示當前要設定的顯示顏色,可以透過
Caps Lock + F5 / F6 / F7 / F8 調整顯示燈色。當有喜歡的顏色出現時,直接在鍵盤上按下任意鍵,該鍵就會儲存成喜歡的顏色。 - 使用者可以重覆上一個步驟,讓在同一組區域背光設定中,不同按鍵能擁有多種不同燈色。若該鍵已被設定亮起,再按一下可取消該鍵的設定值。
- 當完成錄製後,按下 Caps Lock + Scroll Lock 功能,結束錄製。
註:
● 當進入錄製模式後,Caps Lock 會顯示當前要設定的顯示顏色。
● CM1、CM2 不可並存,在其他燈光模式下也不會存在。
● CM1、CM2 只提供固定位置固定燈色顯示,無固定位置循環變色。
● 進入錄製模式後,會顯示上次儲存的設定。
● 錄製30秒無動作,不儲存後自動關閉。
行動電源Demo模式


壓住按鍵左Ctrl + 左Shift + Caps Lock,再輸入電源
此模式下無法記憶,每次使用皆須重新插拔
註:
適合插在行動電源或USB充電座提供燈光效果展示之用,不送出鍵盤訊號。請注意僅限於輸出電壓為5V的供電設備使用,若電壓不符可能會損壞鍵盤。
店家櫥窗Demo模式,用以展示多色Demo


Fn + Alt + Ctrl 達3秒
開啟 / 關閉展示多種背光模式
鍵盤供應電力調整

USB3.0供電模式(預設模式)
按住右Alt+空白鍵,再將USB插入電腦
USB2.0供電模式
按住左Alt+空白鍵,再將USB插入電腦
回復出廠設定


美規、歐規
左Windows鍵 + 右Windows鍵
日規
Fn + 左Windows鍵
註:
壓住3秒後,鍵盤或指示燈會閃3下表示回復。
開啟 / 關閉 Windows 鍵功能


Fn + 任一Alt + 任一Windows键
註:
壓住3秒後,全鍵盤會閃3下表示切換完成(預設為開啟Windows鍵功能)。
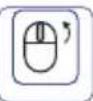
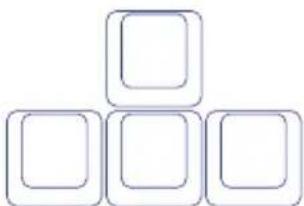
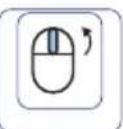
滑鼠控制功能


開啟 / 關閉(預設):
80% (TKL Size)
→ Fn + Scroll Lock
100% (Full Size)
→ Fn + Number Lock
提示:
最右邊的M指示燈亮起,代表開啟滑鼠功能。
滑鼠功能示意图
80% (TKL Size)


natural_image
Three identical empty rounded squares arranged in a triangular pattern (no text or symbols)100% (Full Size)



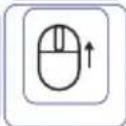
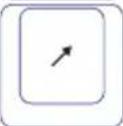
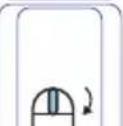
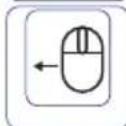
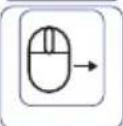
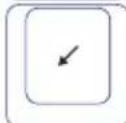
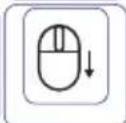
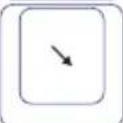
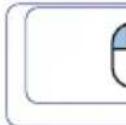
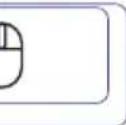
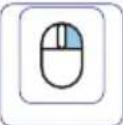
DIP 指撥開關功能


若將鍵盤接上特殊器材(如KVM)等其他裝置,建議切換成6-Key Rollover達到最高支援性。
■當進行 N-Key Rollover 與 6-Key Rollover 模式切換時,請重新插拔且須讓鍵盤完全斷電 15秒才能順利切換。
■只有在 N-Key Rollover 模式(預設模式)下才能更新韌體。
DIP1\~DIP3決定Fn鍵位置(預設為OFF、OFF、OFF):
| DIP1 | DIP2 | DIP3 |
| ON | ON | ON |
| OFF | ON | ON |
| ON | OFF | ON |
| OFF | OFF | ON |
| ON | ON | OFF |
| OFF | ON | OFF |
| OFF | OFF | OFF |
| ON | OFF | OFF |
| Ctrl | Win | Alt | Alt | Win | Ctrl | ||
| Fn | Win | Alt | Alt | Win | Ctrl | ||
| Ctrl | Fn | Alt | Alt | Win | Ctrl | ||
| Ctrl | Win | Fn | Alt | Win | Ctrl | ||
| Ctrl | Win | Alt | Fn | Win | Ctrl | ||
| Ctrl | Win | Alt | Alt | Fn | Ctrl | ||
| Ctrl | Win | Alt | Alt | Win | Fn | Ctrl | |
| Ctrl | Win | Alt | Alt | Win | Fn |
| DIP4 | OFF(預設值) | ON |
| N-Key Rollover任意全鍵輸出 | 6-Key Rollover任意6鍵輸出 |
Ducky Macro V2.0



natural_image
Abstract 3D block structure with pink and blue blocks and yellow blocks on dark background (no text or symbols)Step1. 選取要錄製的Profile
| Fn+ | 1 | = | 切換至第1組設定 | 原始鍵盤功能(預設值) |
| 2 | 切換至第2組設定 | 可自定義按鍵Macro功能 | ||
| 3 | 切換至第3組設定 | |||
| 4 | 切換至第4組設定 | |||
| 5 | 切換至第5組設定 | |||
| 6 | 切換至第6組設定 |
註:當切換完後,Caps Lock 或指示燈會閃爍該設定值數字的次數。
Step2. 進入錄製模式
按住 Fn + Ctrl 3 秒進入錄製模式,進入後 Caps Lock 或指示燈會慢速閃爍。
Step3. 按下按键
按下想要錄製的按鍵,按下後,該按鍵會亮起(非背光版本則不會),Caps Lock 或指示燈會快速閃爍。
Step4. 輸入想要的按鍵設定
輸入想要設定的按鍵功能、Macro 執行情形、Macro 時間間隔或是多媒體功能鍵。
Step5. 結束錄製或是錄製其他按鍵
按下 Fn + Ctrl 結束 Macro 錄製,或是按下 Fn + Alt 繼續錄製其他按鍵。
Ducky Macro V2.0 基本快捷鍵功能



natural_image
3D geometric illustration of stacked green blocks on a yellow base (no text or symbols)Macro執行情形選項
| Fn+ | Q | = | 按1下後執行1次Macro |
| W | 按1次後持續執行Macro,直到按下第2次按鍵才停止 | ||
| E | 按住按鍵時持續執行Macro,直到放開按鍵才停止 |
註:執行 Macro 過程中,若有壓下其他按鍵時則停止原始 Macro 之輸出。
Macro時間間隔選項
| Fn+ | 1 | = | 0.02s |
| 2 | 0.1s | ||
| 3 | 0.2s | ||
| 4 | 0.4s | ||
| 5 | 0.8s | ||
| 6 | 1s |
註:
● Macro 預設輸入會以使用者打字的時間進行記錄儲存。
● Macro 開啟 / 跳出錄製快捷鍵:Fn + Ctrl 3秒。
Ducky Macro V2.0 基本快捷鍵功能



natural_image
Abstract 3D block structure with pink, blue, and yellow blocks on a dark background (no text or symbols)多媒體鍵功能設定
| Fn + Windows鍵 + 下方按鍵 | |||
| A | 音量靜音 | M | 搜尋 |
| B | 音量變大 | N | 上一頁 |
| C | 音量變小 | O | 下一頁 |
| D | 播放/暫停 | P | 滑鼠左鍵 |
| E | 停止 | Q | 滑鼠右鍵 |
| F | 下一首 | R | 滑鼠中鍵 |
| G | 上一首 | S | 滑鼠游標向上 |
| H | 計算機 | T | 滑鼠游標向下 |
| I | 我的電腦 | U | 滑鼠游標向左 |
| J | 瀏覽器首頁 | V | 滑鼠游標向右 |
| K | 郵件 | W | 滑鼠滾輪向上捲動 |
| L | 多媒體程式 | X | 滑鼠滾輪向下捲動 |
清除單一個設定檔的Macro設定
| 美規、歐規 | 任一個Windows鍵+空白鍵3秒 |
| 日規 | Windows鍵+空白鍵3秒 |
註:需錄製後才可使用。
Ducky Macro V2.0 設定區域的範圍



natural_image
Abstract 3D block structure composed of blue, yellow, and pink blocks on a dark background (no text or symbols)無法設定Macro功能的按鍵
| Fn |
| Fn + ESC |
| Fn + F1~F12 |
| Fn + Print Screen |
| Fn + Scroll Lock |
| Fn + Pause |
| Fn + 0~9 |
| Fn + Ctrl |
| Fn + Alt |
| Fn + Windows |
| Fn + ↑ ↓ ← → |
| Fn + Space |
可設定Macro的按鍵(以美規為例)
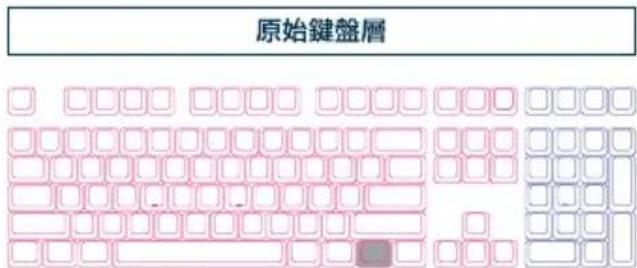
● 白色按鍵為可設定的區域,灰色按鍵為不可設定的區域。
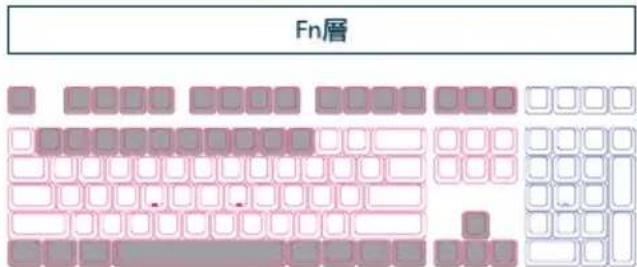
● 白色按鍵為可設定的區域,灰色按鍵為不可設定的區域。
Ducky Macro V2.0
Windows 常見
功能快捷鍵



natural_image
Abstract 3D block structure with pink and blue layers (no text or symbols)
natural_image
Abstract 3D geometric shape in yellow and blue tones (no text or symbols)| Ctrl + C | 複製選取的項目 | Windows鍵 + D | 顯示桌面 |
| Ctrl + X | 剪下選取的項目 | Windows鍵 + M | 將所有視窗最小化 |
| Ctrl + V | 貼上選取的項目 | Windows鍵 + L | 鎖定電腦或切換使用者 |
| Ctrl + Z | 復原動作 | Windows鍵 + R | 開啟 [執行] 對話方塊 |
| Ctrl + Y | 重做動作 | Windows鍵 + F | 搜尋檔案或資料夾 |
| Ctrl + N | 建立新文件 | Windows鍵 + ↑ | 最大化視窗 |
| Ctrl + O | 開啟現有的文件 | Windows鍵 + ↓ | 最小化視窗 |
| Ctrl + S | 儲存文件的變更 | Windows鍵 + ← | 將視窗最大化到螢幕左側 |
| Ctrl + P | 列印文件 | Windows鍵 + → | 將視窗最大化到螢幕右側 |
| Alt + F4 | 關閉使用的程式 | Windows鍵 + Home | 最小化使用中視窗之外的所有視窗 |
- http://windows.microsoft.com/en-us/windows/keyboard-shortcuts
Ducky Macro V2.0 設定邏輯圖



natural_image
Abstract 3D geometric illustration with green blocks on yellow base, no text or symbols present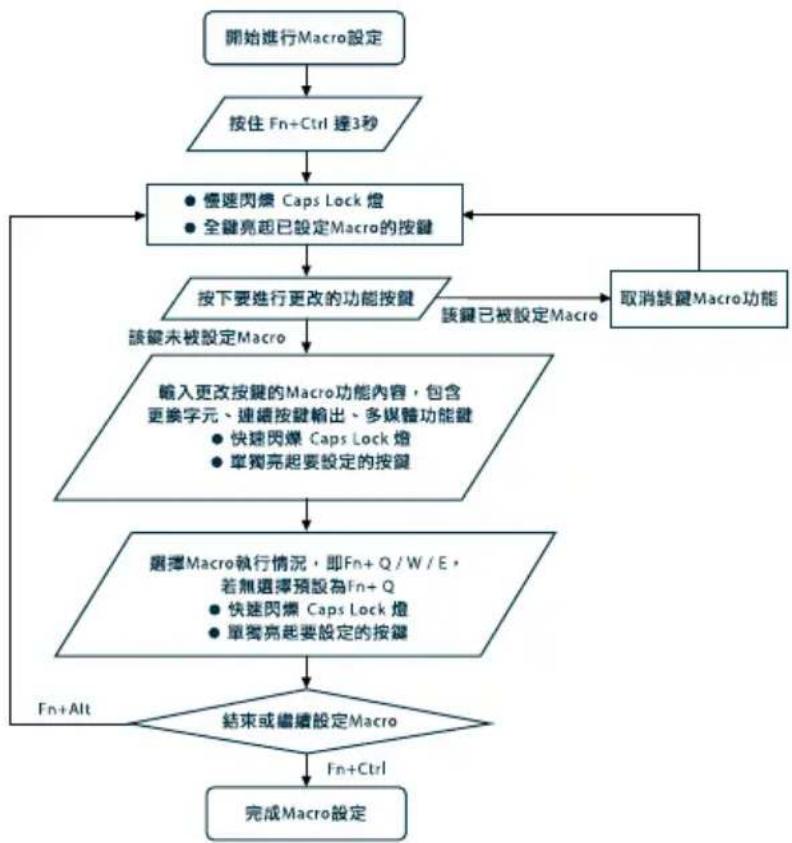
flowchart
graph TD
    A["開始進行Macro設定"] --> B["按住 Fn+Ctrl 達3秒"]
    B --> C["● 僶速閃爍 Caps Lock 燈<br>● 全鍵亮起已設定Macro的按鍵"]
    C --> D["按下要進行更改的功能按鍵"]
    D --> E["該鍵未被設定Macro"]
    E --> F["輸入更改按鍵的Macro功能內容,包含更換字元、連續按鍵輸出、多媒體功能鍵<br>● 快速閃爍 Caps Lock 燈<br>● 單獨亮起要設定的按鍵"]
    F --> G["選擇Macro執行情況,即Fn+Q/W/E,<br>若無選擇預設為Fn+Q<br>● 快速閃爍 Caps Lock 燈<br>● 單獨亮起要設定的按鍵"]
    G --> H{結束或繼續設定Macro}
    H -->|Fn+Alt| I["完成Macro設定"]
    H -->|Fn+Ctrl| J["取消該鍵Macro功能"]
    J --> C
Ducky Macro V2.0 使用範例


注意事項:
請先將設定檔設定成Profile 2\~6,才可以進行Macro設定。
情境A
想要將Z設定成Q輸出
操作方式
- 按住 Fn + Ctrl 達3秒鐘,進入錄製 Macro 模式。
- 按下 Z,選擇要被設定的按鍵。
- 按下 Q,输入想要錄製的結果。
- Fn + Ctrl,完成 Macro 錄製。
情境B
想要按下 Fn + A 後連續輸出文字「ABC」直到使用者放開按鍵才停止動作
操作方式
- 按住 Fn + Ctrl 達3秒鐘,進入錄製 Macro 模式。
- 按下 Fn+A,選擇要被設定的按鍵。
- 依序按下 ABC,输入想要錄製的結果。
- Fn + E,選擇 Macro 執行情形。
- Fn + Ctrl,完成 Macro 錄製。
情境C
在 Windows 系統下,想要按下F1就能顯示桌面
操作方式
- 按住 Fn + Ctrl 達3秒鐘,進入錄製 Macro 模式。
- 按下 F1,選擇要被設定的按鍵。
- 按住 Windows 鍵 + D,輸入想要錄製的結果。
- Fn + Ctrl,完成 Macro 錄製。
情境D
在 Windows 系統下,想要將 M 設定成音量靜音功能
操作方式
- 按住 Fn + Ctrl 達3秒鐘,進入錄製 Macro 模式。
- 按下 M,選擇要被設定的按鍵。
- 按住 Fn + Windows 鍵 + A,輸入想要錄製的結果。
- Fn + Ctrl,完成 Macro 錄製。

Ducky Channel
Ducky One

Single color LED
Model: DKON1608S / DKON1687S
■ Type: Mechanical Keyboard
■ Switch: Cherry MX Switches
■ Keycap Material: PBT or ABS
■ Printing Method:
Double-Shot or Laser engraved
■ Origin Of Production: Taiwan
Full size
Size: 440 x 140 x 41 mm
Weight: 1300g
Tenkeyless
Size: 356.6 x 133 x 41 mm
Weight: 1100g
For more information on the specs and details of our keyboards, please contact the distributor for your region.

Ducky One

Non-backlit
Model: DKON1608 / DKON1687
■ Type: Mechanical Keyboard
■ Switch: Cherry MX Switches
■ Keycap Material: PBT or ABS
■ Printing Method: Double-Shot or Laser engraved or Dye-Sublimation
■ Origin Of Production: Taiwan
Full size
Size: 440 x 140 x 41 mm
Weight: 1300g
Tenkeyless
Size: 356.6 x 133 x 41 mm
Weight: 1100g
For more information on the specs and details of our keyboards, please contact the distributor for your region.

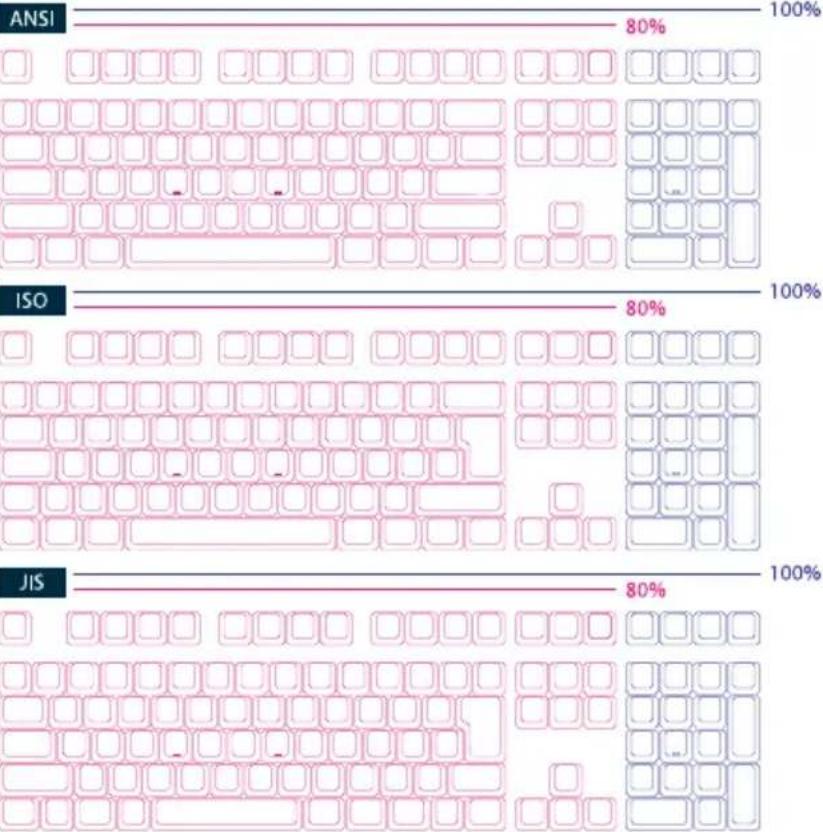
bar
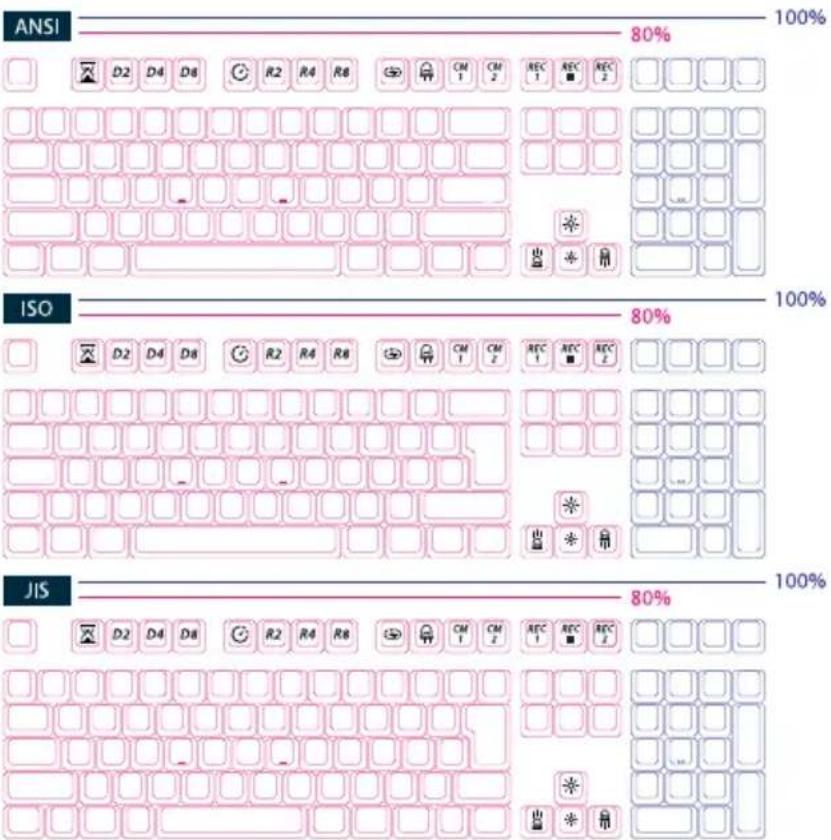
| Category | Value 1 (%) | Value 2 (%) | Value 3 (%) | | :--- | :--- | :--- | :--- | | ANSI | 80 | 100 | | | ISO | 80 | 100 | | | JIS | 80 | 100 | |Ducky One 2

Single color LED
Model: DKON1808S / DKON1887S
■ Type: Mechanical Keyboard
■ Switch: Cherry MX Switches
■ Keycap Material: PBT or ABS
■ Printing Method: Double-Shot or Laser engraved
■ Origin Of Production: Taiwan
Full size
Size: 440 x 135 x 40 mm
Weight: 1100g
Tenkeyless
Size: 365 x 135 x 40 mm
Weight: 950g
For more information on the specs and details of our keyboards, please contact the distributor for your region.

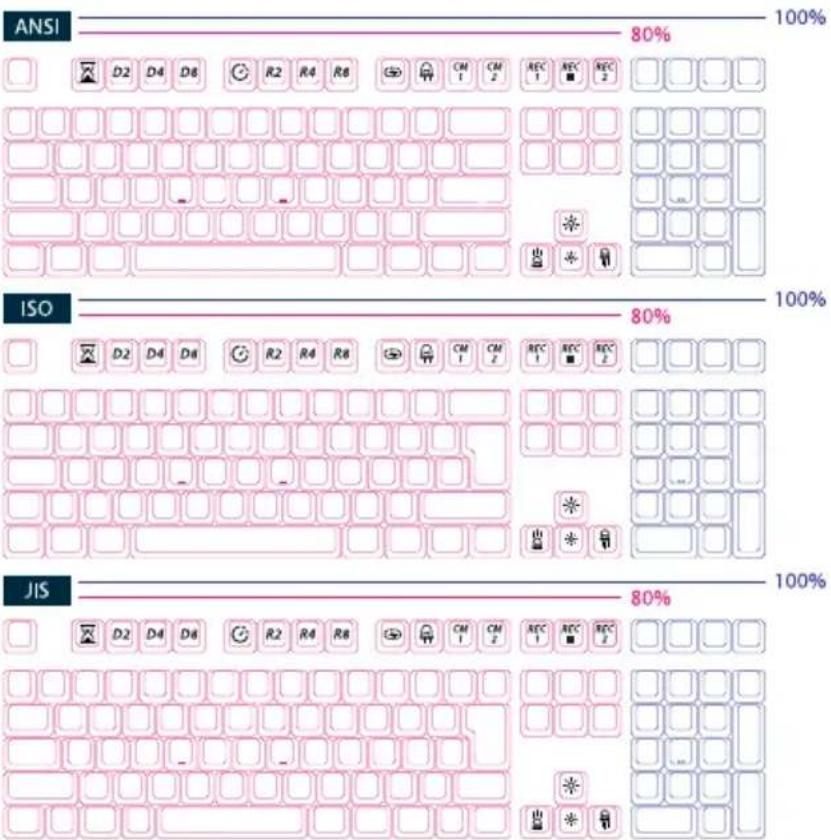
Ducky One 2

Non-backlit
Model: DKON1808 / DKON1887
■ Type: Mechanical Keyboard
■ Switch: Cherry MX Switches
■ Keycap Material: PBT or ABS
■ Printing Method: Double-Shot or Laser engraved or Dye-Sublimation
■ Origin Of Production: Taiwan
Full size
Size: 440 x 135 x 40 mm
Weight: 1100g
Tenkeyless
Size: 365 x 135 x 40 mm
Weight: 950g
For more information on the specs and details of our keyboards, please contact the distributor for your region.

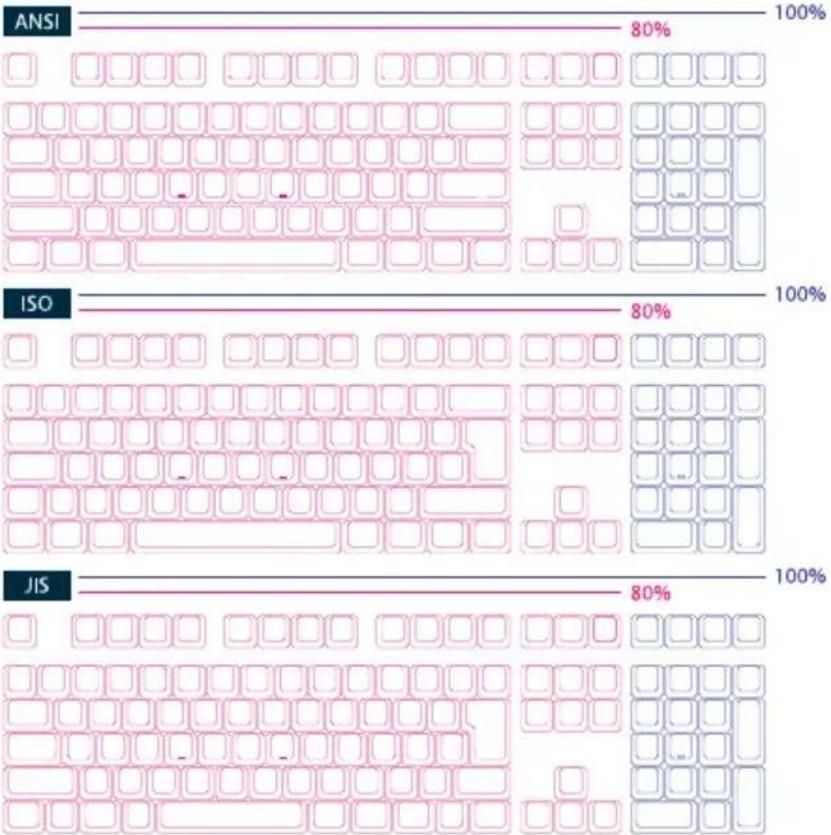
Ducky One 2

RGB LED
Model: DKON1808ST / DKON1887ST
■ Type: Mechanical Keyboard
■ Switch: Cherry MX RGB Switches
■ Keycap Material: PBT or ABS
■ Printing Method:
Double-Shot or Laser engraved
■ Origin Of Production: Taiwan
Full size
Size: 440 x 135 x 40 mm
Weight: 1100g
Tenkeyless
Size: 365 x 135 x 40 mm
Weight: 950g
For more information on the specs and details of our keyboards, please contact the distributor for your region.

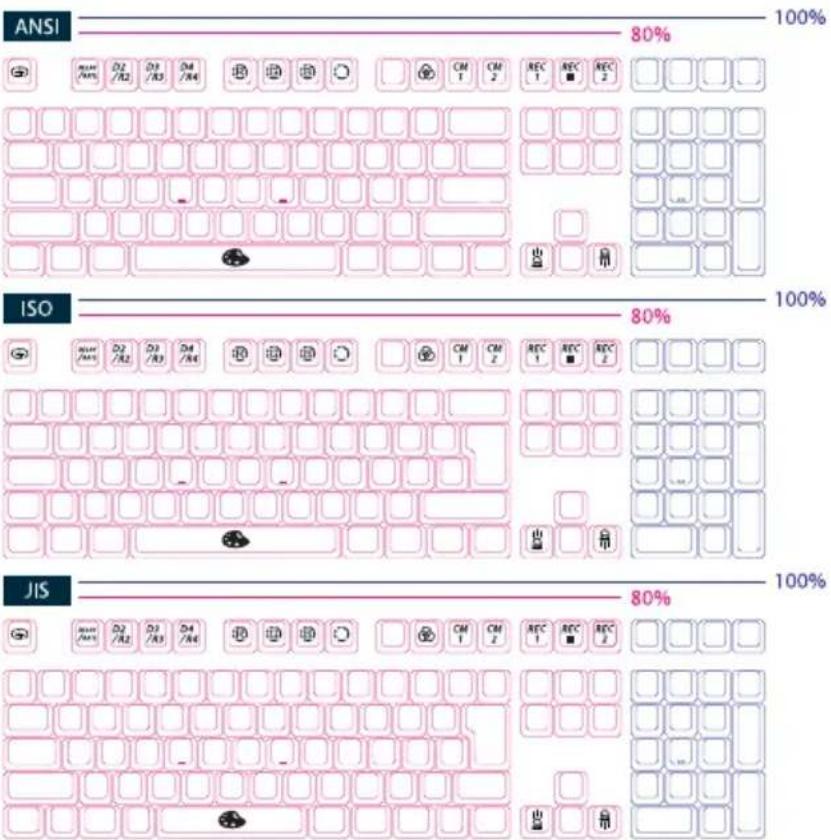
USB Repeat Acceleration


Note:
USB Repeat
Acceleration can only
be adjusted under
"Function Mode."
USB Repeat
Acceleration may work differently in different applications. Please use a suitable setting accordingly.


| Fn+ | F9 | = | Function Mode On / Off | Must Hold for 3 seconds |
| F1 | Repeat Delay 1x (Default) | Adjust USB Repeat Delay Time | ||
| F2 | Repeat Delay 2x | |||
| F3 | Repeat Delay 4x | |||
| F4 | Repeat Delay 8x | |||
| F5 | Repeat Rate 1x (Default) | Adjust USB Repeat Rate Time | ||
| F6 | Repeat Rate 2x | |||
| F7 | Repeat Rate 4x | |||
| F8 | Repeat Rate 8x |
| Fn+ | ESC | Function Mode On / Off | Must Hold for 3 seconds |
| F1 | Repeat Delay 1x (Default) | Adjust USB Repeat Delay Time | |
| F2 | Repeat Delay 2x | ||
| F3 | Repeat Delay 4x | ||
| F4 | Repeat Delay 8x | ||
| Alt+F1 | Repeat Rate 1x (Default) | Adjust USB Repeat Rate Time | |
| Alt+F2 | Repeat Rate 2x | ||
| Alt+F3 | Repeat Rate 4x | ||
| Alt+F4 | Repeat Rate 8x |
| Fn+F10 | First Mode: 100% Full Backlit Mode |
| Second Mode: Breathe Mode | |
| Third Mode: Wave Mode | |
| Fourth Mode: Snake Marquee Mode | |
| Fifth Mode: Rain Drop Mode | |
| Sixth Mode: Reactive Mode | |
| Seventh Mode: Ripple Mode | |
| Eighth Mode: Aurora Mode | |
| Ninth Mode: Backlit Off |
● All above modes can be adjusted with the following key sequence:
◆ Fn + ← : Decrease speed
◆ Fn + → : Increase speed
◆ Fn + ↑ : Increase brightness
◆ Fn + ↓ : Decrease brightness
● Hold Fn + F10 for 3 seconds to turn off all backlit (including CM1 and CM2).
RGB LED Backlit Modes


natural_image
Abstract 3D block structure with pink, blue, and yellow blocks on a dark background (no text or symbols)Fn+F10
| First Mode: Wave mode | Seventh Mode: Random Reactive Mode |
| Second Mode: Alpha Mode | Eighth Mode: Aurora Mode |
| Third Mode: Tetris Mode | Ninth Mode: Reactive Mode |
| Fourth Mode: Color Cycle Mode | Tenth Mode: Breathe Mode |
| Fifth Mode: Rain Drop Mode | Eleventh Mode: 100% Full Backlit Mode |
| Sixth Mode: Circle Ripple Mode | Twelfth Mode: Backlit Off |
● All above modes can be adjusted with the following key sequence:
◆ Fn + ←: Decrease speed
◆ Fn + →: Increase speed
● Hold Fn + F10 for 3 seconds to turn off all backlit (including CM1 and CM2).
- Only the backlit modes with ⏻ can be adjusted using the following:
◆ Fn + F5: Adjust Color Red (R) brightness. 10 Levels.
◆ Fn + F6: Adjust Color Green (G) brightness. 10 Levels.
◆ Fn + F7: Adjust Color Blue (B) brightness. 10 Levels.
◆ Fn + F8: Erase Red, Green and Blue color setting.
◆ Fn + Spacebar (Color Palette): Activate Color Palette to display various different colors, press on the desired color, all the keys will automatically change to match.
Single Color
LED Zone
Customization
Modes



natural_image
Abstract 3D block structure with pink and blue blocks, no text or symbols present
natural_image
Abstract 3D geometric shape in yellow and black tones (no text or symbols)| Fn + F11 | CM1 Cycle:First Step: Turn on user's customized zone and color.Second Step: Turn on user's customized zone and color in breathe mode.Third Step: Turn off CM1. |
| Fn + F12 | CM2 Cycle:First Step: Turn on user's customized zone and color.Second Step: Turn on user's customized zone and color in breathe mode.Third Step: Turn off CM2. |
| Fn + PrtSc | REC1, recording CM1 |
| Fn + Pause | REC2, recording CM2 |
| Caps Lock + ↑ ↓ | To set up brightness |
| Caps Lock + Scroll Lock | REC Over |
Single Color LED Zone Customization Modes


Recording steps
- Important:
Adjust to the brightness first, then set the individual keys to be set to that brightness.
- Press Fn + PrtSc to record CM1, and Press Fn + Pause to record CM2.
- When start recording mode, Caps Lock will display the current LED brightness. The brightness can be adjusted by hitting Caps Lock + ↑ ↓ . After setting the desired brightness, hitting any key on the keyboard will set that key to the selected brightness.
- Repeating the above steps allows the user to set different colors to different keys. If the key has been set, Press again to cancel the setting.
- To finish recording, Press REC Over (Caps Lock + Scroll Lock) function to finish recording. The brightness of the Caps Lock key is the value you set.
Note:
- When starting recording mode, Caps Lock will display the current LED brightness.
- CM1 and CM2 can be turned on along with other lighting modes. CM1 has the priority over CM2 when the zone overlaps.
● Entering the recording mode will display the previously saved setting. - If no changes are made within 30 seconds in the recording mode, the recording session will terminate without saving.
RGB LED Zone Customization Modes


natural_image
Abstract 3D block structure composed of blue, yellow, and pink blocks on a dark background (no text or symbols)| Fn + F11 | CM1 Cycle:First Step: Turn on user's customized zone and color.Second Step: Turn off CM1. |
| Fn + F12 | CM2 Cycle:First Step: Turn on user's customized zone and color.Second Step: Turn off CM2. |
| Fn + PrtSc | REC1, recording CM1 |
| Fn + Pause | REC2, recording CM2 |
| Caps Lock + F5 / F6 / F7 | To set up Red / Green / Blue LED Color |
| Caps Lock + F8 | Erase ALL LED light |
| Caps Lock + Spacebar | Color Palette |
| Caps Lock + Scroll Lock | REC Over |
RGB LED Zone Customization Modes

Recording steps
- Important: Adjust to the color first, then set the individual keys to be set to that color.
- Press Fn + PrtSc to record CM1, and Press Fn + Pause to record CM2.
- When start recording mode, Caps Lock will display the current LED color. The color can be adjusted by hitting Caps Lock + F5 / F6 / F7 / F8. After setting the desired color, hitting any key on the keyboard will set that key to the selected color.
- Repeating the above steps allows the user to set different colors to different keys. If the key has been set, Press again to cancel the setting.
- To finish recording, Press REC Over (Caps Lock + Scroll Lock) function to finish recording. The color of the Caps Lock key is the value you set.
Note:
- When starting recording mode, Caps Lock will display the current LED Color.
● CM1, CM2 cannot work at the same time, under other lighting modes neither. - CM1, CM2 can only turn on user's customized zone and color. That is, it cannot turn on the color in breathe mode.
● Entering the recording mode will display the previously saved setting. - If no changes are made within 30 seconds in the recording mode, the recording session will terminate without saving.
Demo Mode


Hold Left Ctrl + Left Shift + Caps Lock then plug the keyboard into power source.
Note: It is suitable for plugging in the mobile power supply or USB charging stand to provide lighting effects display, and the keyboard won't send any signal. Please note that it is limited to power supply devices with an output voltage of 5V. If the voltage does not match, the keyboard may be damaged.
Display Mode


Hold Fn + Alt + Ctrl for 3 sec
To display various LED Backlit Modes.
Note:
Used for showcasing purposes.
Keyboard Power Mode

USB3.0 Power Mode (Default)
Hold Right Alt + spacebar and plug in USB port.
USB2.0 Power Mode
Hold Left Alt + spacebar and plug in USB port.
Reset Back to Factory Defaults


US ANSI and EU ISO layout
Left + Windows key + Right Windows key
JP JIS layout
Fn+ Windows Key
Note:
Hold for 3 seconds. The keyboard's backlit will flash 3 times to indicate the keyboard have been reset.
Open / Close Windows Function (Windows Key Lock)


Fn + any Alt keys + any Windows key for 3 seconds, the keyboard's backlit will flash 3 times to indicate the keyboard that have been turned ON / OFF(The default setting is ON).
Mouse Function


ON/ OFF (default setting):
TKL, Tenkeyless
→ Fn + Scroll Lock
Full Size
→ Fn + Number Lock
Note:
The corner right indicator "M" key will light up upon activation.
Mouse function diagram
TKL, Tenkeyless


natural_image
Three identical empty rounded squares arranged in a triangular pattern (no text or symbols)Full Size

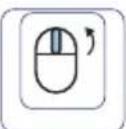
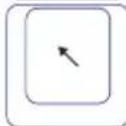
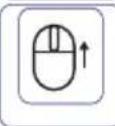
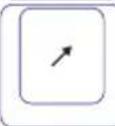
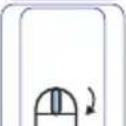
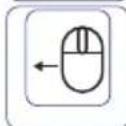
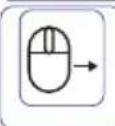
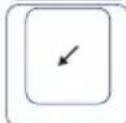
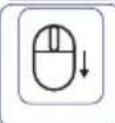
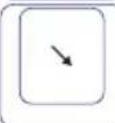

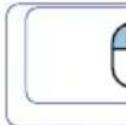
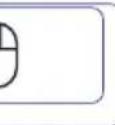
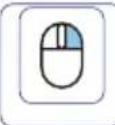
DIP Switch Functions


For compatibility with KVM or operating systems that does not support N-Key Rollover (NKRO), it is recommended to switch to 6-Key Rollover (6KRO) mode.
- Keep the keyboard unplugged for 15 seconds after switching between NKRO and 6KRO mode before plugging the keyboard into the USB port.
■ Keyboard cannot be updated under 6KRO. Please keep the keyboard in NKRO mode (Default) to update the firmware.
DIP1\~DIP3 to assign the position of Fn key (Default is OFF、OFF、OFF):
| DIP1 | DIP2 | DIP3 |
| ON | ON | ON |
| OFF | ON | ON |
| ON | OFF | ON |
| OFF | OFF | ON |
| ON | ON | OFF |
| OFF | ON | OFF |
| OFF | OFF | OFF |
| ON | OFF | OFF |
| Ctrl | Win | Alt | Alt | Win | Ctrl | ||
| Fn | Win | Alt | Alt | Win | Ctrl | ||
| Ctrl | Fn | Alt | Alt | Win | Ctrl | ||
| Ctrl | Win | Fn | Alt | Win | Ctrl | ||
| Ctrl | Win | Alt | Fn | Win | Ctrl | ||
| Ctrl | Win | Alt | Alt | Fn | Ctrl | ||
| Ctrl | Win | Alt | Alt | Win | Fn | Ctrl | |
| Ctrl | Win | Alt | Alt | Win | Fn |
| DIP4 | OFF (Default) | ON |
| N-Key Rollover mode | 6-Key Rollover mode |
Ducky Macro V2.0



natural_image
Abstract 3D block structure with pink and blue blocks and yellow blocks on a dark background (no text or symbols)Step1. Profile Selections
| Fn+ | 1 | = | Switch to profile 1 | Factory settings (Default) |
| 2 | Switch to profile 2 | Customize Macro Key Features | ||
| 3 | Switch to profile 3 | |||
| 4 | Switch to profile 4 | |||
| 5 | Switch to profile 5 | |||
| 6 | Switch to profile 6 |
Note:
Once the profile is selected then the Caps Lock or indicator lights will blink in the amount of selected profile number.
Step2. To enter Macro recording
Press Fn followed by Ctrl and hold both keys for 3 seconds to enter Macro recording. Once in recording mode the Caps Lock or indicator lights will flash slowly.
Step3. Press a key to start recording Macro
Press on the key you want to use to activate Macro. The key pressed will blink (Non-backlit version will not) and the Caps Lock or indicator lights will flash swiftly.
Step4. Recording Macro
Enter any key, and choose the Macro implementation and Record Time option.
Step5. To exit or continuing recording
Press Fn+Ctrl to exit recording or press Fn+Alt to continue recording more keys.
Ducky Macro V2.0 Hotkeys Function



natural_image
Abstract 3D geometric shape with green and yellow blocks on a dark background (no text or symbols)| Macro Implementation Option | |||
| Fn+ | Q | = | Start to run Macro by pressing a key. |
| W | Start to run Macro by pressing down the key once until the key is being pressed again to stop. | ||
| E | Start to run Macro by holding down the keys until it is let go. | ||
Note:
When sending Macro output, pressing any keys will break the ongoing Macro.
| Macro Record Time Option | |||
| Fn+ | 1 | = | 0.02s |
| 2 | 0.1s | ||
| 3 | 0.2s | ||
| 4 | 0.4s | ||
| 5 | 0.8s | ||
| 6 | 1s | ||
Note:
- Default Marco function will be based on the user's typing speed and record it.
● Macro Open / Shortcut keys recording: Hold Fn + Ctrl for 3 sec.
Ducky Macro V2.0 Hotkeys Function



natural_image
Abstract 3D block structure with pink, blue, and yellow blocks on a dark background (no text or symbols)Multimedia function keys
| Fn + Windows Key + Keys below | |||
| A | Mute | M | Search |
| B | Volume up | N | Previous page |
| C | Volume down | O | Next page |
| D | Play / Pause | P | Mouse Left Click |
| E | Stop | Q | Mouse Right Click |
| F | Next playlist | R | Mouse Middle Click |
| G | Previous playlist | S | Mouse Cursor Up |
| H | Calculator | T | Mouse Cursor Down |
| I | My Computer | U | Mouse Cursor Left |
| J | Browser | V | Mouse Cursor Right |
| K | W | Mouse Scroll Up | |
| L | Multimedia | X | Mouse Scroll Down |
Reset Macro setting for single profile
Note:
Need to be recorded first
before use.
| US ANSI and EU ISO layout | Hold any Windows key + Spacebar for 3 seconds. |
| JP JIS layout | Hold Windows key + Spacebar for 3 seconds. |
Ducky Macro V2.0


Unable to set Macro function
Fn
n+F1\~F12
Fn + Print Screen
Fn + Scroll Lock
Fn + Pause
Fn + 0\~9
Fn + Ctrl
Fn + Alt
Fn + Windows
Fn + ↑ ↓ ← →
Fn+Space
Keys can be set to Macro (US ANSI keyboard as example)
Default Layer
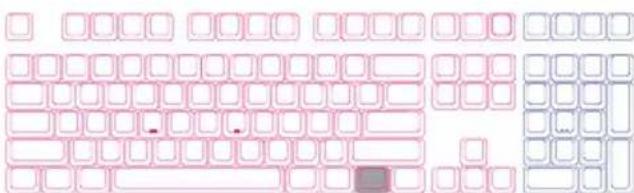
● White keys can be set to Macro, grey keys cannot be set to Macro.
Fn Layer
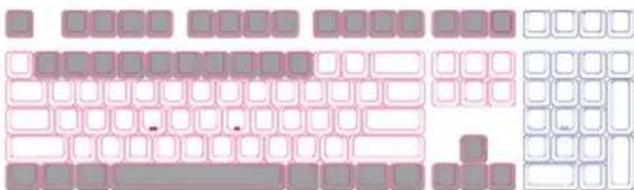
● White keys can be set to Macro, grey keys cannot be set to Macro.
Ducky Macro V2.0 Windows Common Function Keys



natural_image
Abstract 3D block structure with pink and blue blocks and yellow blocks on dark background (no text or symbols)| Ctrl + C | Copy select item | Windows + D | Desktop |
| Ctrl + X | Cut select item | Windows + M | Minimized all windows |
| Ctrl + V | Paste select item | Windows + L | Lock computer or change user |
| Ctrl + Z | Undo | Windows + R | Open [Run] window |
| Ctrl + Y | Redo | Windows + F | Search files or folders |
| Ctrl + N | Open new file | Windows + ↑ | Maximized all windows |
| Ctrl + O | Open current file | Windows + ↓ | Minimized windows |
| Ctrl + S | Save file change | Windows + ← | Maximized window to the left side |
| Ctrl + P | Print file | Windows + → | Maximized window to the right side |
| Alt + F4 | Quit the software | Windows + Home | Minimized all windows other than the one used |
- http://windows.microsoft.com/en-us/windows/keyboard-shortcuts
Ducky Macro Implication Diagram



natural_image
Abstract 3D geometric illustration with green blocks on yellow base, no text or symbols present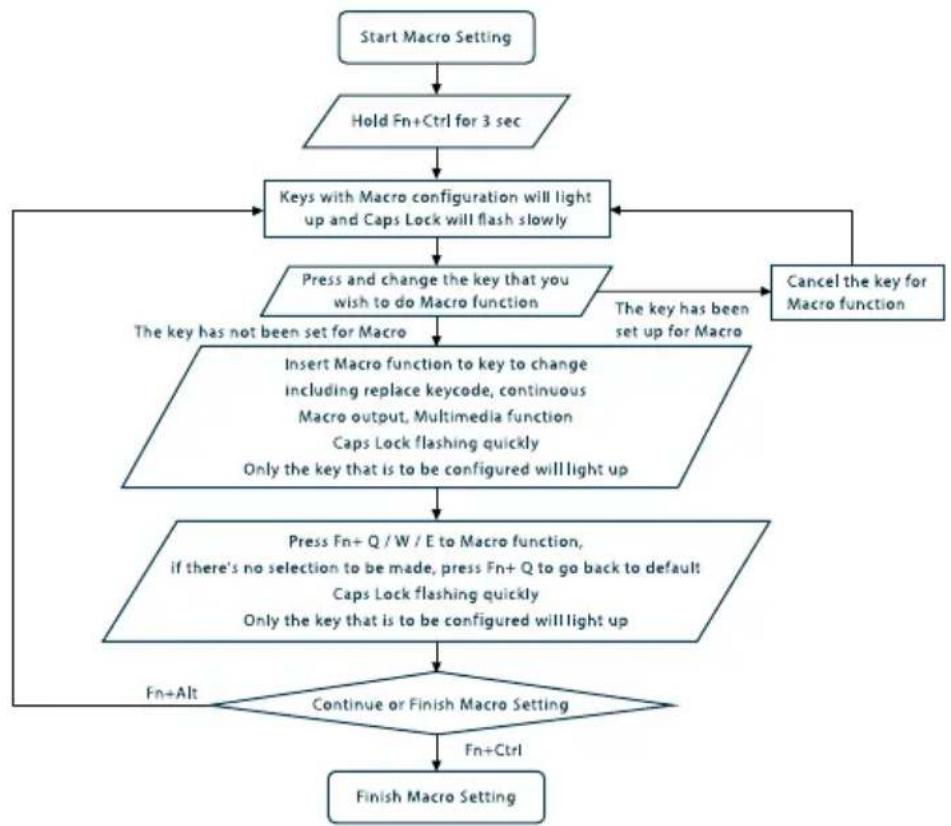
flowchart
graph TD
    A["Start Macro Setting"] --> B["Hold Fn+Ctrl for 3 sec"]
    B --> C["Keys with Macro configuration will light up and Caps Lock will flash slowly"]
    C --> D["Press and change the key that you wish to do Macro function"]
    D --> E["Insert Macro function to key to change including replace keycode, continuous Macro output, Multimedia function Caps Lock flashing quickly Only the key that is to be configured will light up"]
    E --> F["Press Fn+ Q / W / E to Macro function, if there's no selection to be made, press Fn+ Q to go back to default Caps Lock flashing quickly Only the key that is to be configured will light up"]
    F --> G{Continue or Finish Macro Setting}
    G -->|Fn+Alt| C
    G -->|Fn+Ctrl| H["Finish Macro Setting"]
    D -->|The key has been set up for Macro| I["Cancel the key for Macro function"]
    I --> C
Ducky Macro V2.0 Set Up Example


Note:
Set the Profile from Profile 2\~6 before setting Macro.
Example A
Configure the key "Z" to "Q" output.
Steps:
- Hold Fn + Ctrl for 3 seconds, to enter Macro recording.
- Press Z, press on the key you want to use to activate Macro.
- Press Q, enter any key, and choose the Macro implantation.
- Fn + Ctrl / Fn + Alt, to exit recording / to continue recording more keys.
Example B
Holding "Fn + A" then type 「ABC」 until release the key to stop ongoing output.
Steps:
- Hold Fn + Ctrl for 3 seconds, to enter Macro recording.
- Press Fn + A, press on the key you want to use to activate Macro.
- Press A, B and C in sequence to record ongoing Macro.
- Press Fn + E, select implantations option.
- Fn + Ctrl / Fn + Alt, to exit recording / to continue recording more keys.
Example C
To set F1 as show "Desktop" (under Windows system)
Steps:
- Hold Fn + Ctrl for 3 seconds, to enter Macro recording.
- Press F1, press on the key you want to use to activate Macro.
- Hold Windows key + D, enter any key, and choose the Macro implantation.
- Fn + Ctrl / Fn + Alt, to exit recording / to continue recording more keys.
Example D
To set F5 as "mute volume" (under Windows system)
Steps:
- Hold Fn + Ctrl for 3 seconds, to enter Macro recording.
- Press F5, press on the key you want to use to activate Macro.
- Press Fn + Windows key + A, enter any key, and choose the Macro implantation.
- Fn + Ctrl / Fn + Alt, to exit recording / to continue recording more keys.

Ducky Channel
7

Ducky Channel
7

Ducky Channel

natural_image
Abstract 3D cube logo with pink, blue, and yellow blocks on dark background (no text or symbols)
www.duckychannel.com.tw


- ONE
- Series
- 目錄
- CONTENT
- Ducky One
- 單色LED燈
- Ducky One 2
- USB輸出字元加速功能
- 單色燈光操作模式
- RGB 燈光操作模式 (單色 / 混色)
- 單色記憶區域背光
- 單色記憶區域背光操作過程
- 註:
- RGB 記憶區域背光
- RGB 記憶區域背光操作過程
- 行動電源Demo模式
- 店家櫥窗Demo模式,用以展示多色Demo
- 鍵盤供應電力調整
- 回復出廠設定
- 開啟 / 關閉 Windows 鍵功能
- 滑鼠控制功能
- 滑鼠功能示意图
- DIP 指撥開關功能
- Ducky Macro V2.0
- Step2. 進入錄製模式
- Step3. 按下按键
- Step4. 輸入想要的按鍵設定
- Step5. 結束錄製或是錄製其他按鍵
- Ducky Macro V2.0 基本快捷鍵功能
- Ducky Macro V2.0 設定區域的範圍
- 無法設定Macro功能的按鍵
- 可設定Macro的按鍵(以美規為例)
- Windows 常見
- 功能快捷鍵
- Ducky Macro V2.0 設定邏輯圖
- Ducky Macro V2.0 使用範例
- 情境A
- 想要將Z設定成Q輸出
- 操作方式
- 情境B
- 想要按下 Fn + A 後連續輸出文字「ABC」直到使用者放開按鍵才停止動作
- 情境C
- 在 Windows 系統下,想要按下F1就能顯示桌面
- 情境D
- 在 Windows 系統下,想要將 M 設定成音量靜音功能
- Full size
- Tenkeyless
- USB Repeat Acceleration
- Note:
- RGB LED Backlit Modes
- Single Color LED Zone Customization Modes
- Recording steps
- - Important:
- RGB LED Zone Customization Modes
- Demo Mode
- Display Mode
- Keyboard Power Mode
- Reset Back to Factory Defaults
- Open / Close Windows Function (Windows Key Lock)
- Mouse Function
- Mouse function diagram
- DIP Switch Functions
- Step1. Profile Selections
- Step2. To enter Macro recording
- Step3. Press a key to start recording Macro
- Step4. Recording Macro
- Step5. To exit or continuing recording
- Ducky Macro V2.0 Hotkeys Function
- Unable to set Macro function
- Keys can be set to Macro (US ANSI keyboard as example)
- Ducky Macro V2.0 Windows Common Function Keys
- Ducky Macro Implication Diagram
- Ducky Macro V2.0 Set Up Example
- Example A
- Steps:
- Example B
- Example C
- Example D
Marke : Ducky
Modell : One 2 RGB
Kategorie : Tastatur