
PH0920FD3G - Heizung Philco - Kostenlose Bedienungsanleitung
Finden Sie kostenlos die Bedienungsanleitung des Geräts PH0920FD3G Philco als PDF.


Benutzerfragen zu PH0920FD3G Philco
0 Frage zu diesem Gerät. Beantworten Sie die, die Sie kennen, oder stellen Sie Ihre eigene.
Eine neue Frage zu diesem Gerät stellen
Laden Sie die Anleitung für Ihr Heizung kostenlos im PDF-Format! Finden Sie Ihr Handbuch PH0920FD3G - Philco und nehmen Sie Ihr elektronisches Gerät wieder in die Hand. Auf dieser Seite sind alle Dokumente veröffentlicht, die für die Verwendung Ihres Geräts notwendig sind. PH0920FD3G von der Marke Philco.
BEDIENUNGSANLEITUNG PH0920FD3G Philco
PHILCO
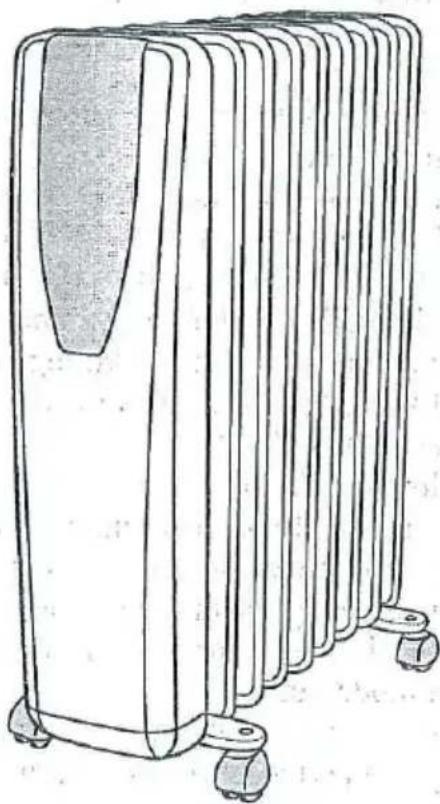
ELECTRICAL OIL RADIATORS
Instructions for use and maintenance
natural_image
Line drawing of a multi-tiered solar water heater with wheels and a central cover (no text or symbols)1. General Instructions
Take the radiator out of the packaging and remove all packing materials lodged between the appliance's ribs.
Ensure the radiator was not damaged during transportation and that the power cable is not damaged.
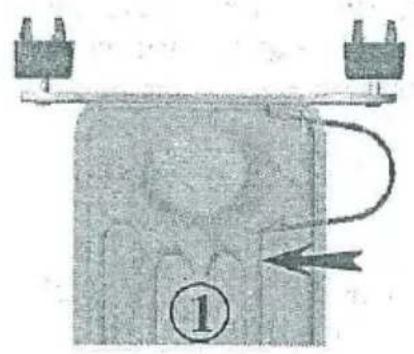
2. Application of the feet and wheels (Figure.1)
Take the feet and wheels out of the packaging. Turn the radiator upside down over a carpet or a soft surface, in order to prevent scratching the finish.
Place the feet's planks between the end openings on the underside of the radiator.
Use the two bent studs, supplied with the radiator, in order to mount the feet. Insert the studs in the wheel planks and screw them down with the winged nuts.
3. Electrical connections
- Prior to initial use, ensure that the electrical supply current conforms to the data on the appliances metal rating plate and that the plug and cable could withstand the load.
- Check the power of the circuit breakers. Connect the radiator only to wall outlets equipped with a neutral connection.
4. How to use the appliance
Switching on
Insert the plug into the wall outlet; twist the thermostat clockwise and switch on the appliance as follows:- switch on
- switch on only (I) button low heating MIN (W)
- switch on only (II) button medium heating MED (W)
- both buttons high heating MAX (W)
The values of the respective settings' power (MIN (W), MED (W), MAX (W)) are outlined in Table 1.
To switch off the appliance, return the two buttons to the OFF position or remove the plug from the wall outlet.
Setting the thermostat
The switch and thermostat must be positioned at the maximum setting until the desired room temperature is reached. After reaching the desired temperature bring the thermostat back, until the red indicator light switches off. Leave the thermostat in that position.
When the room temperature falls below the setting indicated on the thermostat, the heating elements shall switch on automatically, until the desired temperature is reached again. In this manner, the room's temperature shall remain constant with minimum use of energy.
If you desire to keep the temperature of a room from falling below 0 0C, place the thermostat at the minimum setting and place the two buttons in the ON position.
Models equipped with a 24-hour timer ("T")
Set the heating period in the following manner:
- set the clock's time. If the time is 10 o'clock, position the dial with the digits, so that the mark shall be set against the digit 10. Attention: twist the dial only in the direction indicated by the arrows! Set the appliance's working period by pushing the black switches towards the center each of them corresponds to a 15-minute period. The sector with the switches pushed in shall correspond to the radiator's period of work in auto mode. - daily.
Important: the plug must always be plugged into the wall outlet!
- in order to change the programmed period for work, return the black switches to their initial position and set the new working period.
- if you do not wish the appliance to work in a preprogrammed mode, push all the black switches to the center of the dial. In order to switch off the appliance in this case, you must remove the plug from the wall outlet. In this manner you shall avoid the timer's needless use.
Models with thermal fans ("V")
Models equipped with thermal fans with a power of 500 W allow for faster attaining of the
desired temperature and better air convection within the premise. The thermal fan may function independently or simultaneously with the oil heater. It's located at the front panel's bottom part and is switched on via a switch located in the same area. The cold air is drawn in through the grill in the front panel, and the hot air enters the premise through the grill situated at the lower side portion of the radiator's panel. The desired room temperature when the thermal fan is operating may be adjusted via the radiator's thermostat in the manner outlined above. It's required that the air pass unimpeded through the entry and exit grill in order to ensure the
thermal fans normal operation.
The electrical appliance is intended for use in household premises with a normal pollution level. Dust accumulates in the appliance after a certain period of use. You must periodically check the level of pollution and if needed contact a service center for cleaning and pollutants removal.
Attention! In case of blockage of the intake and output grills, the unit's thermal protection circuit shall come into operation, and the heating element and fan shall switch off. In this case, unplug the unit from the wall outlet, remove the cause of the grills' blockage, wait about 5 minutes and plug in the unit again. If the thermal fan fails to work again, call an authorized service center.
The minimum distance from the thermal fan's hot air exit grill to furniture and other objects must be 60 cm.
We recommend you switch off the thermal fan upon attaining the desired room temperature and to switch to the mode "radiator only".
5. Maintenance
Your oil heater requires maintenance in order to ensure many years of trouble free service. Wipe the radiator with a soft, damp cloth; do not use solvents or abrasive cleaning solutions. If needed, use a vacuum cleaner to remove the dust from the appliance.
6. Important notes
- Never use the radiator in close proximity of bathrooms, washbasins or swimming pools.
- Never use the appliance for drying clothes.
- Never place the cable on top of hot surfaces.
- The radiator must always stand upright when in operation.
- If need arises for the cable's replacement, call the service center.
- Operation of the appliance with a damaged or disconnected thermostat shall not be allowed.
- In order to eliminate your radiator's specific "new" smell, set to maximum power for two hours upon initial use.
- Crackling noises are normal during initial operation.
- You must never place the radiator immediately adjacent to a wall outlet or extension outlet, placed immediately below the unit.
- The radiator is filled with a special oil of extremely fine consistency and repairs must be carried out only by an authorized warranty repair center. In the event of any oil leak, immediately contact the service center.
- The appliance must not be used in rooms with a floor area of less than 4 square meters.
ATTENTION: In order to ensure your radiator's safe operation, assemble the bridge, as illustrated on Figure.1
IMPORTANT: Do not cover the radiator when in operation. This may cause a dangerous increase of the radiator's internal temperature.
text_image
Diagram showing a mechanical or electrical component with labeled parts and an arrow indicating direction, marked as figure 1.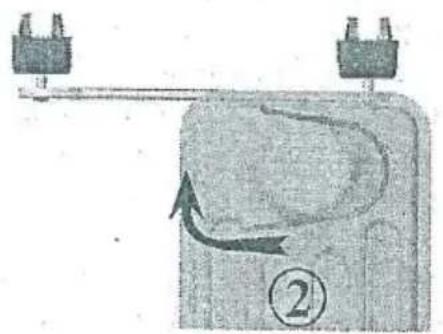
natural_image
Diagram of a mechanical device with two terminals and a curved arrow indicating motion (no text or symbols)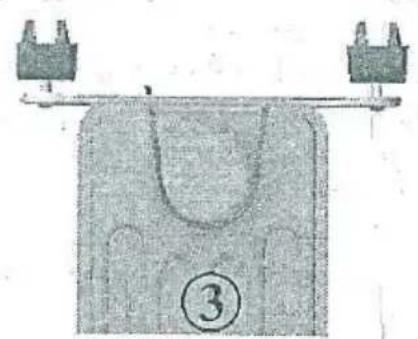
natural_image
Illustration of a mechanical component with two protruding ports and a numbered label (3), no readable text or symbols present.Fig. 1
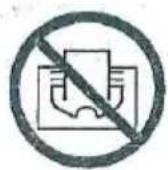
Warning: in order to avoid overheating, do not cover the heater
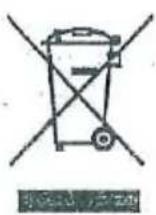
Environmental Protection
Discarded electric appliances are recyclable and should not be discarded in the domestic waste! Please actively support us in conserving resources and protecting the environment by returning this appliance to the collection centres (if available).
| TABLE 1 | |||
| MODEL | MAX(W) | MED(W) | MIN(W) |
| PH0715FD3G | 1500 | 800 | 700 |
| PH0920FD3G | 2000 | 1075 | 925 |
| PH1225TD3G | 2500 | 1400 | 1100 |