
Walkman WM-FS493 - Kassettenabspieler SONY - Kostenlose Bedienungsanleitung
Finden Sie kostenlos die Bedienungsanleitung des Geräts Walkman WM-FS493 SONY als PDF.


Benutzerfragen zu Walkman WM-FS493 SONY
0 Frage zu diesem Gerät. Beantworten Sie die, die Sie kennen, oder stellen Sie Ihre eigene.
Eine neue Frage zu diesem Gerät stellen
Laden Sie die Anleitung für Ihr Kassettenabspieler kostenlos im PDF-Format! Finden Sie Ihr Handbuch Walkman WM-FS493 - SONY und nehmen Sie Ihr elektronisches Gerät wieder in die Hand. Auf dieser Seite sind alle Dokumente veröffentlicht, die für die Verwendung Ihres Geräts notwendig sind. Walkman WM-FS493 von der Marke SONY.
BEDIENUNGSANLEITUNG Walkman WM-FS493 SONY
'95-08-14 13:59 SONY KK GAショウセンカッブ
SONY
3-798-437-22(1)
SPORTS
walkman
Radio-Cassette Player
mm-FS493/FS495
Operating Instructions
WALIKMAN is a registered trademark of Sony Corporation.
Sony Corporation © 1995
Printed in Malaysia
OWNER'S RECORD
The model number is located at the rear and the serial number is located inside the cassette holder. Record these numbers in the spaces provided below. Refer to them whenever you call upon your Sony dealer regarding this product.
Model No. ____
Serial No. ____
INFORMATION
This equipment has been tested and found to comply with the limits for a Class B digital device, pursuant to Part 15 of the FCC Rules. These limits are designed to provide reasonable protection against harmful interference in a residential installation. This equipment generates uses, and can radiate radio frequency energy and, if not installed and used in accordance with the instructions, may cause harmful interference to radio communications. However, there is no guarantee that interference will not occur in a particular installation. If this equipment does cause harmful interference to radio or television reception, which can be determined by turning the equipment off and on, the user is encouraged to try to correct the interference by one or more of the following measures:
- Reorient or relocate the receiving antenna.
- Increase the separation between the equipment and receiver.
- Connect the equipment into an outlet on a circuit different from that to which the receiver is connected.
- Consult the dealer or an experienced radio/TV technician for help.
This device complies with Part 15 of the FCC Rules. Operation is subject to the following two conditions:
(1) This device may not cause harmful interference, and (2) this device must accept any interference received, including interference that may cause undesired operation.
You are cautioned that any changes or modifications not expressly approved in this manual could void your authority to operate this equipment.
Getting Started
Opening the Cassette Holder
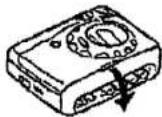
→
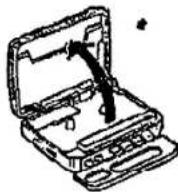
Closing the Cassette Holder
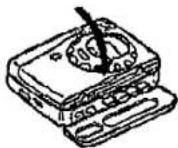
→
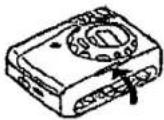
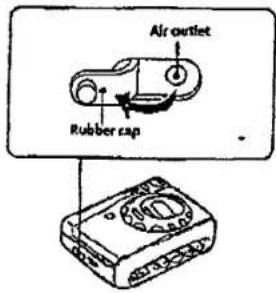
If the cassette holder cannot be opened* Open the rubber cap, then upon the cassette holder. When the cassette holder opens, remember to close the rubber cap. (The Walkman is not water-resistant with the cassette holder open.)
text_image
Air outlet Rubber cap* Since the Walkman is airtight, you may not be able to open the castette holder because of a sudden change in air pressure inside the Walkman which happens after being transported on a plane or moving from a warm place to a cold place.
P.5/1
495-has hand grip & TV Tuner
493-has
attachments for grip but no grip incl.
Inserting Batteries
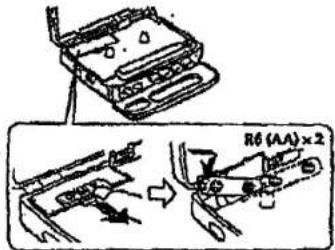
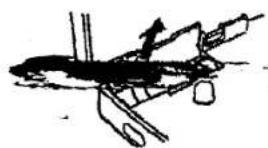
Insert two AA (R6) batteries in correct polarity.
text_image
R6 (AA) × 2Removing Batteries
natural_image
Simple line drawing of an airplane viewed from above (no text or symbols)Using the belt Clip
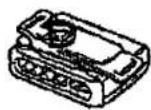
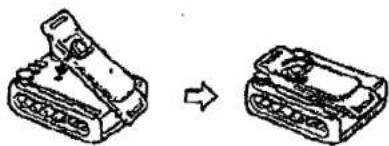
With the supplied belt clip, you can wear your Walkman on a belt for convenient use.
Removing the belt clip
Attaching the belt clip
natural_image
Diagram showing a mechanical component before and after transformation (no text or symbols)Using the Hand Strap (FS495)
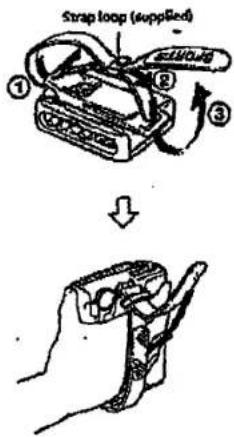
With the supplied hand strap, you can carry your Walkman in your hand for convenient use.
Attaching the hand strap
text_image
Strap loop (supplied) ① ② ③Notes on batteries
- When you are not going to use your Walkman for a long time, remove the batteries to prevent damage from battery leakage and compensation.
- When the batteries become weak, and the sound will be unstable
or can not be heard, in such a case, replace both batteries. - Roplar, both batteries while the E indication comes on in the display, or all the memories will be stopped.
- Concerning the battery life, see "Specifications".
Setting the Clock
text_image
TUNING-/+ ENTERPlaying Cassette
text_image
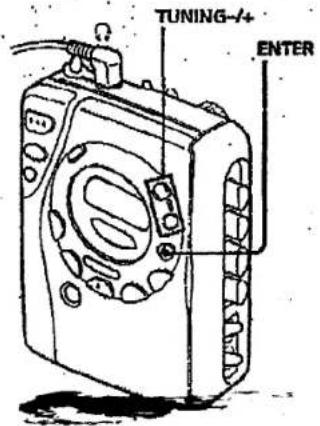
PLAY VOL STOP DIR MODE1 Press the ENTER button to enter the current time setting mode.
ENTER
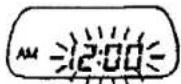
2 Set the time by using the TUNING+/-buttons within six seconds of flashing.
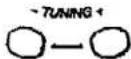
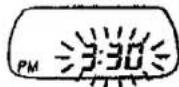
3 Press the ENTER button to return to the current time display.
ENTER
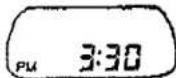
1 Insert a cassette.
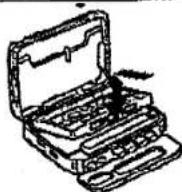
2 Set the TAPE switch to match the tape type.
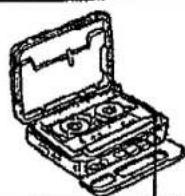
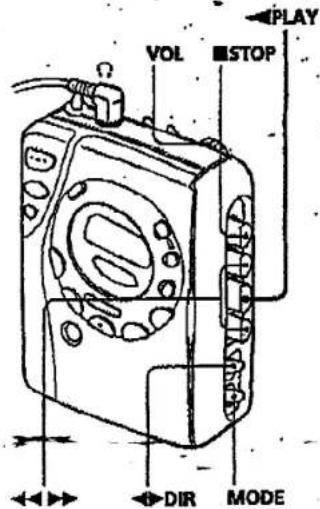
3 Press the ← PLAY button.

Note When the tape is played or the radio is turned on, the OPR indication comes on in the display.
Notes
• The hour display does not advance even when the minute display returns to "00" after "59".
• The hour display is on a 12-hour cycle.
Operating the Cassette Player
| To wind the tape | Press ◀◀ or ▶▶. |
| To change sides | Set ◀▶ DIR. |
| To play both sides once | Set MODE to ☐. |
| To play both sides repeatedly | Set MODE to ☐. |
| To adjust the volume | Set the VOL control. |
| To stop | Press ■ STOP. |
Notes on playing cassettes
• Do not use castettes longer than 90 minutes except for long
continuous playback
- If the tape is playing but no sound comes out, the batteries may be
work. Replace all batteries with new ones.
* If your Walkman has not been used for a long time, run the
Walkman for a few minutes before inserting a cassette.
- Do not open the cassette holder while the tape is running.
Using MEGA BASS
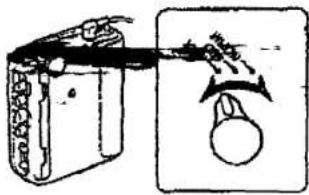
Set the MEGA BASS selector to the MID or MAX position to produce deep and powerful sound.
text_image
Diagram showing a device with a cable being inserted into a bulb, illustrating electrical or mechanical process.When using MEGA BASS
If the AVLS switch is set to ON, the MEGA BASS effect is reduced.
Listening to the Radio
text_image
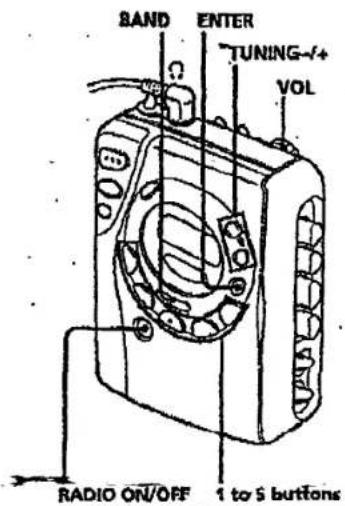
BAND ENTER TUNING-/+ VOL RADIO ON/OFF 1 to 5 buttons
Press the RADIO ON/OFF button.

RADIO ONOFF

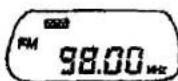
Press the BAND button to select the band".
*PS193: FM or AM
FS495 PM, FY or AM

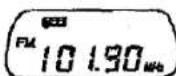
Press the TUNING +J-buttons to tune in the desired station.
| To adjust the volume | Set the VOL control. |
| To turn off | Press RADIO ON/OFF. |
Notes
- If you keep pressing the TUNING or - button, the frequency digits go up or down quickly. And when you release, the frequency digits go up or down step by step. When the desired student is heard, press the TUNING + or - button again to stop the tuning.
- The STEREO indication comes on in the display when receiving an FM studio broadcast.
• (For FS495) TV channel range is 2 to 13. - When the PLAY, or button is pressed in the radio mode, the current mode switches to the tape mode.
- If you have inserted a cassette with a metallic shell or label, and interference in radio reception occurs, restore the cassette.
Presetting Stations
For FS493: You can preset up to 10 radio stations, 5 for each FM and AM bands.
For PS495: You can preset up to 15 radio stations, 5 for each FM, TV and AM bands.
1
Press the RADIO ON/OFF button.

RADIO ON/OFF
2
Tune in the desired station by using the BAND and TUNING +/- buttons.
BAND
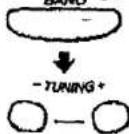
E
Press the ENTER button to enter the presetting mode. The PRESET indication comes on and charts flashing.
ENTER
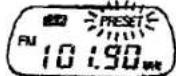
4
Press one of the 1 to 5 buttons within six seconds of flashing. The PRESET Indication and the preset number flash
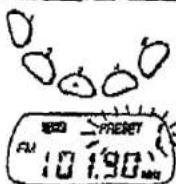
5
Press the ENTER button within six seconds of flashing. The PRESET indication and the preset number light.
ENTER
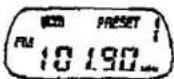
To recall the preset station
Press the BAND button to select the band, and then press the corresponding number button.
Improving Radio Reception
Improving FM reception
Extend the headphones cord or adjust the FM SENS switch.
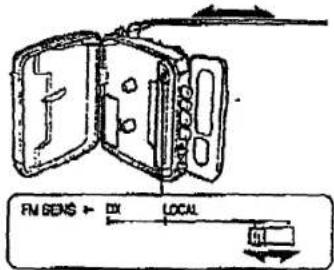
text_image
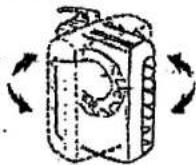
FM GENS + DX LOCALImproving AM reception
Rotate the Walkman.
Listening to the Radio Abroad
The frequency range differs depending on the area. If you listen to the radio in an area of different frequency range, change the area indication in the display. To change it, press the ENTER button while the radio is turned on. Press and hold the BAND button until the area indication flashes. Then, press the BAND button again to change the area indications ("U": USA and Canada; "E": European and other countries). Press the ENTER button to set the frequency range.
Notes
- If you change the frequency range, all the preset stations in the memory will be canceled.
• For E area indication, the hour display is on a 24-hour cycle.
Using the Stopwatch
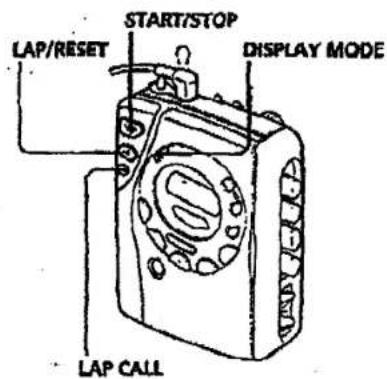
text_image
LAP/RESET START/STOP DISPLAY MODE LAP CALL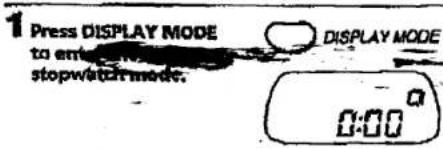
text_image
1 Press DISPLAY MODE to enter stop/watch mode. DISPLAY MODE 0:00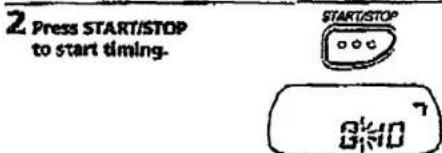
text_image
2 Press START/STOP to start timing. START/STOP° 8'10"7When you press LAP/RESET, the lap time is stored as shown below. The lap time appears for three seconds in the display window. Up to five laps can be stored in memory.
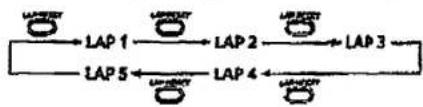
flowchart
graph LR
    A[" "] --> B["LAP 1"]
    B --> C["LAP 2"]
    C --> D["LAP 3"]
    D --> E["LAP 4"]
    E --> F["LAP 5"]
    F --> A
text_image
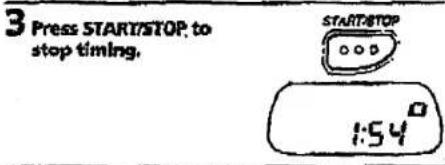
3 Press START/STOP to stop timing. START/STOP 1:54To display the lap time
Press LAP CALL after stopping the timing. The lap time appears in order.
To listen to the radio in the stopwatch mode Press RADIO ON/OFF to turn on the radio.
The frequency appears for three seconds in the display window, and then the timing appears again.
To display the current time while timing Press DISPLAY MODE while timing. Press DISPLAY MODE again to display the timing.
To clear the timing and the lap time Press LAP/RESET after stopping the timing.
To cancel the stopwatch mode
Press LAP/RESET® and DISPLAY MODE after you have stopped timing.
* As long as you do not press LAP/RESET, both the timing and the lap time are stored in memory.
Notes
• The range of the stopwatch is 1 hour 50 minutes 59 seconds.
- You can play a cassette while using the stopwatch.
Using AVLS
AVLS (Automatic Volume Limiter System)
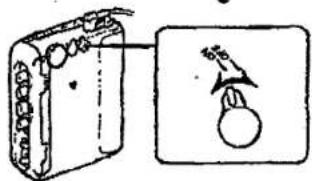
The AVLS switch allows you to limit the maximum volume of your Walkman personal stereo without degrading the sound quality.
- When the AVLS switch is set to ON (around 85 dB), the volume will be kept at a moderate level without the degradation of the sound quality, even if you attempt to turn the volume up higher.
- When the AVLS switch is set to ON, the playback sound may be distorted or unusable according to the music (especially bass boosted part). If this happens, turn down the volume.
- When the AVLS switch is turned off, you will be able to enjoy the full volume capability of your Walkman personal stereo.
text_image
Diagram showing a battery with a plug inserted into a socket, alongside a magnified view of the socket's internal structure.Specifications
Radio Frequency (For U area indication)
PM-475-108 MHz (0.1 MHz step)
ASM 530 - 1,710 kHz (10 kHz step)
(For PSHS) TV: 1 - D channel
Power Requirements
3 V DC Batteries A.A (R6) x 2
Battery Life
(approximate hours when using the batteries specified below)
| Sony Altusine AM3 (N) | Sony SUM-3 (NS) | |||
| FS493 | FS496 | FS493 | FS496 | |
| Playback | 18 | 10 | 8.5 | $5 |
| Radio | 30 | 23 | 15 | 12 |
Dimension
98.3×117.4×40.9 mm (3%×4%×1%) (w/h/d)
ind projecting parts
Mass 205 g (9.4 oz) incl. turbines
Supplied Accessories
- Stenno headphones (1) - Belt chip (1)
- Hand strap (1) (PS-95 only) - Stamp loop (1) (PS-95 only)
Design and specifications are subject to change without notice.
Listening to the Radio
text_image
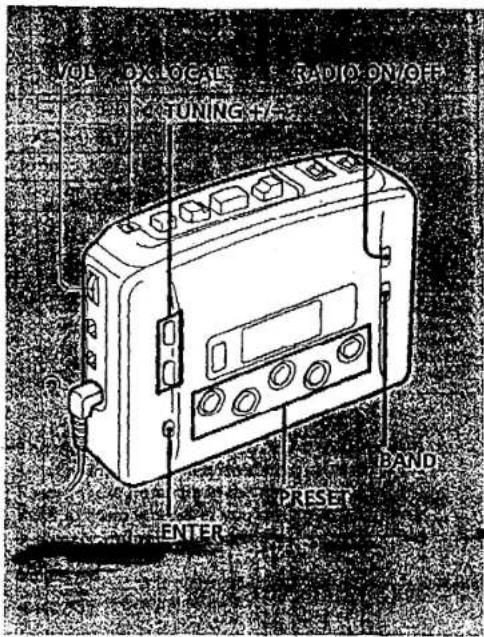
VOL DC-LOCAL MOUNTING RADIO ON/OFF ENTER PRESER BAND[Unreadable]
1 Press the RADIO ON/OFF button.

2 Press the BAND button to select the band (FM. TV or AM).


3 Press the TUNING +/- buttons to tune in the desired station.

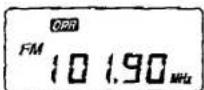
| To adjust the volume | Set the VOL control. |
| To turn off | Press RADIO ON/OFF. |
Notes
- If you keep pressing the TUNING + or - button, the frequency digits go up or down quickly. And when you release, the frequency digits go up or down step by step. When the desired station is heard, press the TUNING + or - button again to stop the tuning.
• The STEREO indication comes on in the display when receiving an FM stereo broadcast.
• TV channel range is 2 to 13. - If you press the ◀ PLAY, ◀ or ▶ button while listening to the radio, the tape operation begins.
- If you have inserted a cassette with a metallic shell or label, and interference in radio reception occurs, remove the cassette.
Presetting Stations
You can preset up to 15 radio stations, 5 for each FM, TV and AM bands.
1 Press the RADIO ON/OFF button.

2 Tune in the desired station by using the BAND and TUNING +/- buttons.
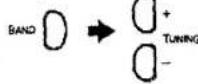
3 Press the ENTER button to enter the presetting mode.
The PRESET indication comes on and starts flashing.

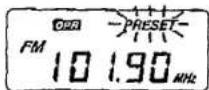
4 Press one of the PRESET buttons 1 to 5 within six seconds of flashing.
The PRESET indication and the preset number flash.
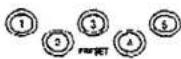

5 Press the ENTER button within six seconds of flashing. The PRESET indication and the preset number light.

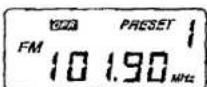
To recall the preset station
Press the BAND button to select the band, and then press the corresponding preset button.
[Unreadable]