
Walkman WM-701C - Kassettenabspieler SONY - Kostenlose Bedienungsanleitung
Finden Sie kostenlos die Bedienungsanleitung des Geräts Walkman WM-701C SONY als PDF.


Benutzerfragen zu Walkman WM-701C SONY
0 Frage zu diesem Gerät. Beantworten Sie die, die Sie kennen, oder stellen Sie Ihre eigene.
Eine neue Frage zu diesem Gerät stellen
Laden Sie die Anleitung für Ihr Kassettenabspieler kostenlos im PDF-Format! Finden Sie Ihr Handbuch Walkman WM-701C - SONY und nehmen Sie Ihr elektronisches Gerät wieder in die Hand. Auf dieser Seite sind alle Dokumente veröffentlicht, die für die Verwendung Ihres Geräts notwendig sind. Walkman WM-701C von der Marke SONY.
BEDIENUNGSANLEITUNG Walkman WM-701C SONY
SONY
3-786-809-11(5)
cassette Player
NM-701C
Operating Instructions
love operating the unit, please read this manual thoroughly and retain it future reference.

owner's Record
a model number is located at the rear and the serial number is located the inside of the cassette holder. Record the serial number in the space widened below. Refer to them whenever you call upon your Sony dealer parking this product
del No WM-701C Senal No
WARNING
prevent fire or shock hazard, do not expose the unit to rain or moisture.
Features
Stereo headphones with a remote controlled device which can operate the unit in your hand.
Dolby B and Dolby C NR system reduces tape hiss noise during
DBB (Dynamic Bass Boost) function for powerful mega bass sound. EX Amorphous head which produces clear treble sound. Easy rapid winding—needless to think about the direction of the tape. Easy last-forward/fast-reverse system
By pressing or during playback, playback starts after winding the top acromatically (Skip revenue function).
DCL drive circuit is used to achieve more sharp bass sound.
Precautions
- Operate the unit on 15 V DC for AC operation or car battery operation, use the accessories recommended for the unit
- Should any solid object or liquid fall into the unit, remove the battery or disconnect the AC power adaptor and have it checked by qualified personnel before operating it any further.
- Do not leave the unit in a location near heat sources, or in a place subject to direct sunlight, excessive dust or sand, moisture, rain, mechanical shock, or in a car with its windows closed.
- If the unit has not been used for a long time, set it in the playback mode and used to be a low number before meeting a cassette.
- The nameplate indicating operating voltage, etc: is located on the rear exterior.
Note on a rechargeable battery
Do not peer off the polyvinyl which covers a rechargeable battery. It could cause a short circuit
About the headphones
- Avoid listening with your headphones:
while driving, cycling, etc. - for an extended time at a high volume
- Remember not to disturb these close to you with the sounds coming from your headphones.
- To obtain the optimum sound, keep the plug of your headphones clean by wiping it with a dry, soft cloth.
Note on cassettes longer than 90 minutes
The use of catheters longer than 90 minutes is not recommended except for long continuous playback.
If you have any question or problem concerning your unit that is not covered in this manual, please consult the nearest Sony dealer.
Cleaning
Cleaning the head
Clean your tape head after every 10 hours of use to enjoy optimum stereo sound. Mosten a cotton swab or a soft cloth with alcohol and wipe the head, the pinch-rollers and the capstars.
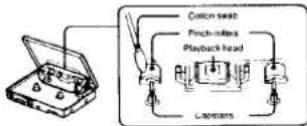
Cleaning the unit's exterior
Clean your unit exterior with water moistened a soft cloth. Do not use alcohol, benzing or thinner to clean the unit's exterior
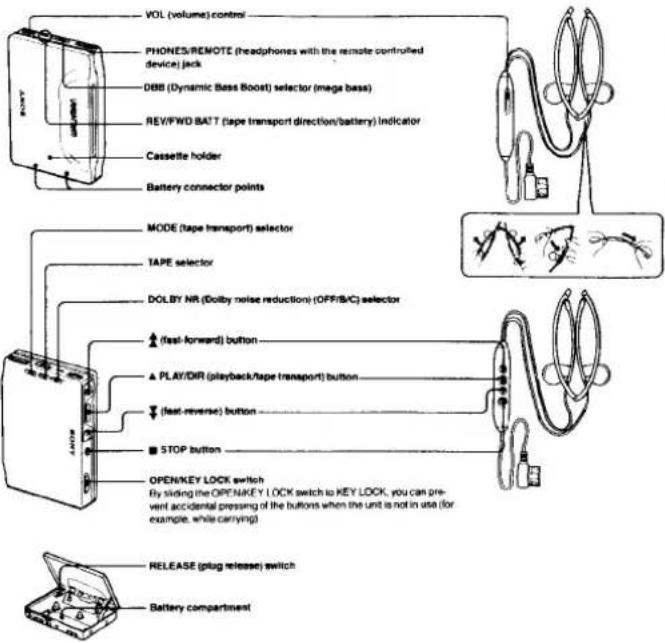
Parts Identification
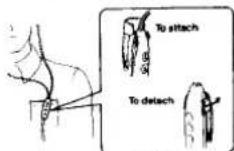
How to Use the Clip
Specifications
Frequency response (DOLBY NR off)
20—18,000 Hz
Output
Headphones (PHONES/REMOTE jack) load impedance 8—300Ω
Power output
5 mW+5 mW at DC operation, 160
Power requirements
15VDC
Rechargeable battery
One size AA (R6) battery
DC In 15 V jack accepts
Sony AC-D1M AC power adaptor for use on 120 V AC, 60 Hz in the U.S.A.
or 240 VAC, 50 Hz in the UK
Sony EBP-500B battery case for use with two size D (R20) batteries
Sony DCC-70 car battery cord for use with 12 V car battery
Battery life
| Battery | Playback hours |
| Rechargeable NC-6WM fully charged | Approx. 2.5 hours |
| Sony SUM-3 (NS) | Approx. 1.5 hours |
| Sony alkaline AM3 (N) | Approx. 4.5 hours |
| Rechargeable NC-6WM with Sony AM3 (N) | Approx. 6.5 hours |
For maximum performance we recommend the use of alkaline batteries.
Dimensions
Approx. 104.6 × 71.6 × 18.2 mm (w/ft/d)
not incl. projecting parts and controls
Aprox. 105.6 × 74.2 × 19.8 mm (w/h/d)
incl. projecting parts and controls
Weight
Approx. 150 g incl. rechargeable battery, not incl. other accessories
Accessories supplied
Battery case (1)
Carrying pouch (1) Battery charger (1)
Rechargeable battery (1)
Stereo headphones with the remote controlled device (open-air type. 1)
Plug adaptor (1)
Clip (!)
Design and specifications subject to change without notice
Note
This appliance conforms with EEC Directives 76/889 and 82/499 regarding interference
suppression
Optional accessories
Battery case EBP-5008
AC power adaptor AC-D1M
Car battery cord DCC-70
Your dealer may not handle some of the above listed optional accessories. Please ask
the dealer for detailed information about the optional accessories available in your
country.
Note: Use only the recommended an AC power adaptor or a car battery cord manufac-
tured by Sony. Polarity of the plug of other manufacturers may be different.

Polarity of the Sony plug
INFORMATION
This equipment generates and uses radio frequency energy and if not installed and used properly, that is, in strict accordance with the manufacturer's instructions, may cause interference to radio and television reception. It has been type tested and found to comply with the limits for a Class B computing device in accordance with the specifications in Subpart J of Part 15 of FCC Rules, which are designed to provide reasonable protection against such interference in a residential installation. However, there is no guarantee that interference will not occur in a particular installation. If this equipment does cause interference to radio or television reception, which can be determined by turning the equipment off and on, the user is encouraged to try to correct the interference by one or more of the following measures:
Reorient the receiving antenna
Relocate the equipment with respect to the receiver
Move the equipment away from the receiver
Plug the equipment into a different outlet so that equipment and
receiver are on different branch circuits.
If necessary, the user should consult the dealer or an experienced radio/television technician for additional suggestions. The user may find the following booklet prepared by the Federal Communications Commission helpful:
"How to identify and Resolve Radio-TV Interference problems"; This
booklet is available from the U.S. Government Printing Office.
Washington, DC 20402. Stock No. 004-000-00345-4
Using with the Rechargeable Battery
Before using, charge the rechargeable battery for approx. 3 hours with the supplied battery charger.
1
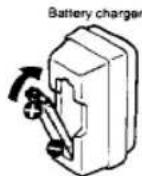
Rechargeable battery
2
to a wall outlet
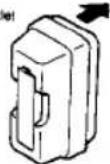
3
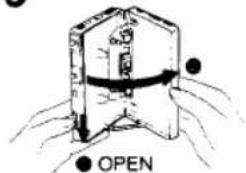
text_image
OPEN4
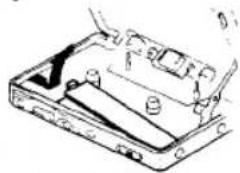
natural_image
Technical line drawing of a mechanical device with no visible text or symbols5
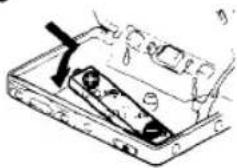
natural_image
Line drawing of a mechanical device with a handle and internal components (no text or symbols)After charging the battery approx. 2 and a half hours of playback can be expected
Notes
• Use only the supplied battery charger.
- Unplug the battery charger from the wall outlet after the battery is charged. Over
charging (for more than 20 hours) may damage the battery.
- Do not short circuit the battery connector points of the unit when the rechargeable battery is installed.
• The supplied rechargeable battery can be recharged approx. 300 times.
Using with a Battery
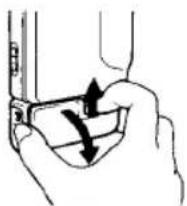
The battery case is necessary.
1

Both of the unit's battery connector points should meet with the terminal points on the battery case.
● | Tighten up the screw
2
3
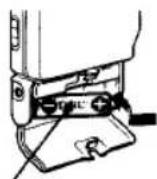
Size AA (R6) battery
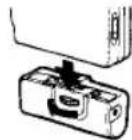
Detaching the battery case
After removed the battery, detach the battery case
Notes
- Do not short circuit the terminal of the battery case when the battery is installed.
- Insert the battery with correct polarity
- When the unit is not to be used for a long period of time, remove the battery to avoid damage caused by battery leakage and corrosion.
When the battery becomes weak
When the battery is weak, REV/FWD the BATT indicator will glow faintly and playback sound will be distorted or unstable. In this case, replace the battery or when using the rechargeable battery, recharge the battery.
Concerning the battery life, see "Specifications".
Note
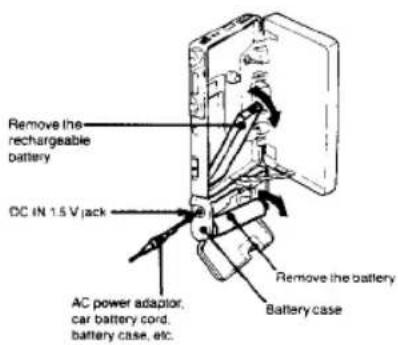
Remove the rechargeable battery if it is installed. Otherwise, the rechargeable battery will be damaged when using alternate sources.
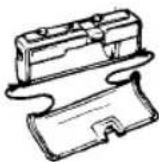
If the battery compartment lid is detached by an accidental drop, excessive force, etc., attach it as in illustration below.
Using Alternate Power Sources
text_image
Remove the rechargeable battery DC IN 1.5 V jack AC power adaptor, car battery cord, battery case, etc. Remove the battery Battery caseAttach the battery case and connect an optional power cord such as AC power adaptor, etc., to the DC IN jack.
Note: Remove the rechargeable battery and the battery if they are installed before using the unit (on AC power). Otherwise, the batteries will be damaged
Concerning alternate power source, see "Specifications"
Tape Playback
1
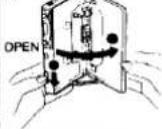
2
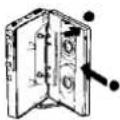
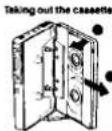
3
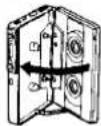
4
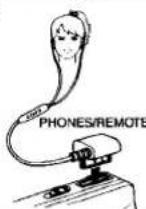
5
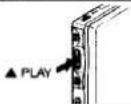
6
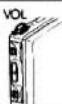
Operating with the remote controlled device


When operating the unit with itself, set the VOL control of the remote controlled device to MA3, and operating the unit with remote controlled device, set the VOL control of the unit to around 6.
Tips on tape operation
DBB
Listening to powerful and heavy
Listening to potential and highly sound Set DBB (mega bass) to the desired position. Bass is located in the order of NORM, MID and MAX
MODE
Playing back both sides of the cassette once
When the playback starts from the reverse side of the cassette, the until will be shut off at the end of the tape
Playing back both sides of the cas- sette repeatedly


Notes
- Do not operate your WALKMAN next an AM receiver, or it may infer the
with the receiver a) If the VOL control on the unit set over B, the effect of the DBB selection - If a value is not available to an offer or the other of the second quarter may be decreased.
- If you press 📁 or 🏱 after pressing ■. playback steps at the end of
The cassette automaticany. • If you slide the KEY LOCK switch to KEY LOCK while the unit is working the tape stops and all of buttons are locked to avoid accidental operation
DOLBY NR
| For Dolby H NR processed tapes | |
| For Dolby C NR processed tapes |
TAPE
| For normal (TYPE II) tapes | |
| For CrO_2 (TYPE III) or metal (TYPE IV) tapes |
Dolby nose reduction manufactured under license from Dolby Laboratories Licensing Corporation
DOI: 10.187 and the double-0 symbols are trademarks of Dolly Laboratories Licensing Corporation
Tape Operations
(1) 2017年1月1日至2018年1月1日(含)的公司股票交易均价为4.56元/股,与前一交易日收盘价相比,涨幅为-0.97%。
| Operating the unit with itself | Operating the unit with the component of device | ||
 |  | ||
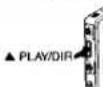 |  | ||
 | The tape will forward in whichever the direction of the tape being played back.By pressing the button during playback, playback of the other side of the cassette will automatically start when the tape comes to the end. (Stop reverse function) |  | |
 | The tape will forward in whichever the direction of the tape being played backBy pressing the button during playback, playback will automatically stop when the tape comes to the first |  | |
Tape direction

- While playing back the cassette holder (forward) side of the tape, the FWD indicator lights up
- While playing back the other (reverse) side, the PEV indicator lights up
- If you present or during playback, the indicator of worked one starts to come on and off
| Playback | Fast forward | Rewind rapidly |
 | Flickening | FlickeningLighting |
| Light | Flickening | LightingFlickening |
see the FWD
- If you press or during playback, the unit starts playback after winding the tape automatically. When you do not use the unit after winding the tape, be sure to press STOP button
- The volume is not turned down completely if you operate with the remote controlled device.
To remove the headphones with the remote controlled device
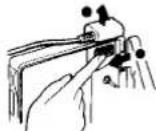
While sliding 1 to the direction of the arrow pull 2 out.
To connect an optional headphones
Use the supplied plug adaptor
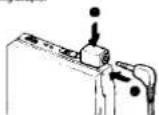
In remove the plug adaptor proceed as "To remove the headphones with the remote controlled device"