
Walkman WM-AF65 - Kassettenabspieler SONY - Kostenlose Bedienungsanleitung
Finden Sie kostenlos die Bedienungsanleitung des Geräts Walkman WM-AF65 SONY als PDF.


Benutzerfragen zu Walkman WM-AF65 SONY
0 Frage zu diesem Gerät. Beantworten Sie die, die Sie kennen, oder stellen Sie Ihre eigene.
Eine neue Frage zu diesem Gerät stellen
Laden Sie die Anleitung für Ihr Kassettenabspieler kostenlos im PDF-Format! Finden Sie Ihr Handbuch Walkman WM-AF65 - SONY und nehmen Sie Ihr elektronisches Gerät wieder in die Hand. Auf dieser Seite sind alle Dokumente veröffentlicht, die für die Verwendung Ihres Geräts notwendig sind. Walkman WM-AF65 von der Marke SONY.
BEDIENUNGSANLEITUNG Walkman WM-AF65 SONY
Precautions
Handling your Walkmen
• Operate the unit on 3 V DC.
For AC operation and car battery operation, use accessories recommended for the unit. Do not use any other type.
- Avoid exposure to temperature extremes, direct sunlight, moisture, sand, dust, or mechanical shock. Never leave in a car parked in the sun.
- If the unit has not been used for a long time, set it in playback mode for a few minutes before inserting a cassette.
Tips on headphone listening
- Do not listen with headphones while driving, cycling, etc.
- Listen at a moderate volume to avoid damaging your ears and to avoid disturbing those close to you.
Note on cassettes longer than 90 minutes
The use of cassettes longer than 90 minutes is not recommended except for long continuous playback.
On maintenance
• To enjoy optimum stereo sound, wipe the head, capstans and pinch rollers with a cotton swab moistened with alcohol after every 10 hours of use.
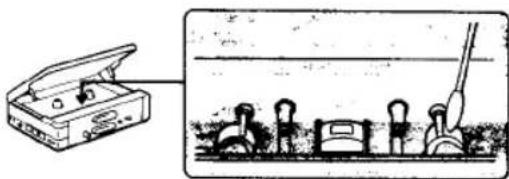
natural_image
Illustration of a portable electronic device and its internal components, no text or symbols present- Keep the plug of your headphones clean to obtain the optimum stereo sound. Wipe it with a dry, soft cloth
• Do not use alcohol, benzene or thinner to clean the case.
If you have any question or problem concerning your unit that is not covered in this manual, please consult your nearest Sony dealer.
Specifications
Radio section
Frequency range
FM: 87.5-106 MHz
AM 530-1.510 kHz
Amiernas
FM: Headphone cord antenna
AM. Built-in fence-bar antenna
Tape player section
Frequency response (Dolby NR off)
60-14,000 Hz (Normal)
40-15.000 Hz (C/C _2 /METAL)
Power output
5 mW + 5 mW 16 Ω at DC operation headphones (stereo min/jack)
load impedance 8-200 Ω
Power requirement
J VDC
Two size AA (196) batteries
DC IN 3 V pack accepts
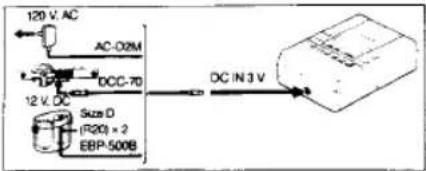
Optional Sony EBP-500B battery case for use with size D-(H2O) batteries
Optional Sony AC-D2M power adaptor for use on 120 V AC, 60 Hz
Optional Sums OCC-70 car battery cord for use with 12 V car battery
Battery He
Approx. 9 hours on tape playback and approx 36 hours on FM reception, using
Sony alkaline betenes AM3 (N)
Dimensions
Approx 85.7 × 121.5 × 37.4 mm (with)
(3^1/2x × 4^1/2x + 1^1/2) nches
ind, projecting parts and control
Willeghi
Approx. 285 g (10.1 oz)
nd batteries
Accessory Supplied
Stereo headphones (1)
Bell clip (1)
Design and specifications subject to change without notice
Optional accessories
AC power adaptor AC-02M
Battery case EBP-5008
Car battery cord DCC-70
Note: Use only the recommended AC power adaptor or car battery card manufactured by Sony Potarity of the plugs of other manufacturers may be different.

Poverty of the Sorry plug
SONY.
3-750-018-22(1)
Radio Cassette Player
WM-AF65
Operating Instructions
Before operating the unit, please read this manual thoroughly and retain it for future reference.
Owner's Record
The model number is located at the rear and the serial number is located at the back-side of the cassette holder.
Record the serial number in the space provided below. Refer to them whenever you call upon your Sony dealer regarding this product.
Model No. WM-AF85
Serial No.
Sony Corporation © 1988 Printed in Japan
WALKMAN
WILLIGMAN is a trademark of Sipay Corporation.
INFORMATION
This equipment generates and uses radio frequency energy and if not installed and used properly, that is, in strict accordance with the manufacturer's instructions, may cause interference to radio and television reception. It has been type tested and found to comply with the limits for a Class B computing device in accordance with the specifications in Subpart J of Part 15 of FCC Rules, which are designed to provide reasonable protection against such interference in a residential installation. However, there is no guarantee that interference will not occur in a particular installation. If this equipment does cause interference to radio or television reception, which can be determined by turning the equipment off and on, the user is encouraged to try to correct the interference by one or more of the following measures:
Reorient the receiving antenna
Relocate the equipment with respect to the receiver
Move the equipment away from the receiver
Plug the equipment into a different outlet so that
equipment and receiver are on different branch circuits.
If necessary, the user should consult the dealer or an experienced radio/television technician for additional suggestions. The user may find the following booklet prepared by the Federal Communications Commission helpful:
"How to identify and Resolve Radio-TV Interference Problems". This booklet is available from the U.S. Government Printing Office, Washington, DC 20402, Stock No. 004-000-00345-4.
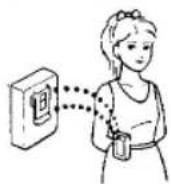
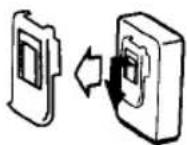
Using the Belt Clip
Installing Batteries
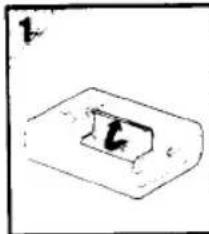
natural_image
Simple line drawing of a rectangular object with a small internal feature, no text or symbols present.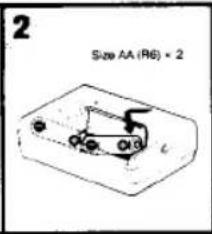
text_image
2 Size AA (RB) × 2Notes on batteries
- Remove the batteries when you will not use the unit for a long time to prevent damage from battery leakage and corrosion.
- The internal batteries are disconnected when you plug cord into DC IN 3 V.
- When the batteries are run down, the DIR/BATT indicator glows fairly and the sound becomes unstable. Try a new set of batteries in this case.
The AM tuning interval is factory press to 9 kHz or 10 kHz in order to match the local frequency allocation system. If you use the receiver in an area where the frequency allocation system is based on another interval, change the position of the switch shown below with a thin instrument.
When you use the unit for the first time or when you have left the unit without badarios for a long time, the display may show incorrect information or the preset stations may not be received correctly. If those happens, change the switch to the other position with a thin instrument, and reset the switch to the original position as an initialization.
Other Power Sources
text_image
120 V, AC AC-02M DCC-70 12 V, DC Size D (R20) x 2 EBP 500B DC IN 3 V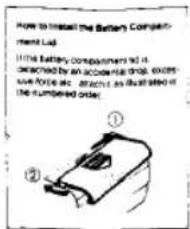
text_image
How to install the Battery Compa-ment List. The battery compartment is it achieved by an accessible drop, 60%- ive force etc. reaches an axial step in the numbered order.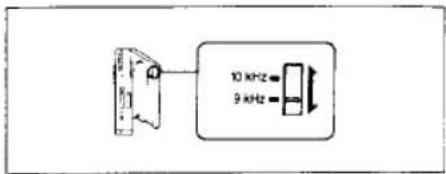
text_image
10 kHz 9 kHzTape Playback
1
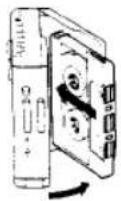
2
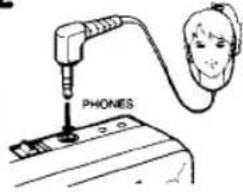
text_image
PHONES3
text_image
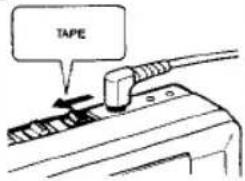
TAPE4
text_image
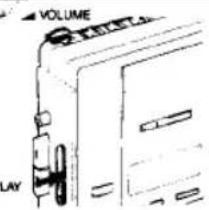
VOLUME LAY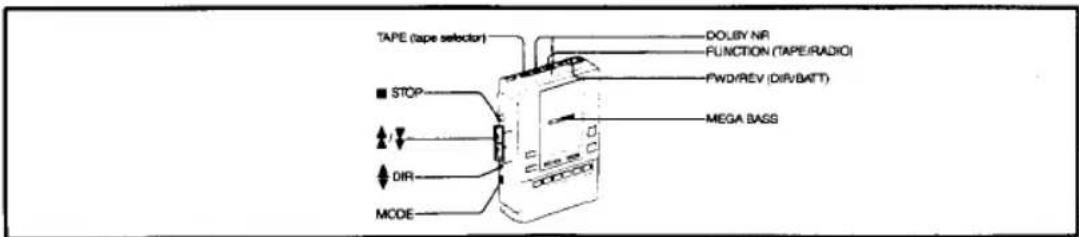
text_image
TAPE (tape selector) DOLEY NR FUNCTION (TAPE/RADIO) FWD/REV (DIR/BATT) MEGA BASS STOP DIR MODE| To listen to the other side of the cassette during playback | Press DIR |
| To stop the tape | Press STOP |
| To wind the tape rapidly | Depress or |
| To check the direction of the tape transportation | See FWD and REV indicators |
| To Use According to Your Tape | |
| For normal (TYPE I) tapes | |
| For CrO2(TYPE II) tapes or metal (TYPE IV) tapes | |
| For Dolby B NR* processed tapes | |
Notes on playback
- At the end of the tape, ▼ PLAY will be released automatically in case that the MODE selector is set to ☐. After winding the tape
with ▲ or ▼, you must press ■ STOP - Do not open the cassette holder while the tape is running
- The DIR button functions even in the stop mode.
| To play back both sides of the cassette once if you begin playback on the reverse side, the unit will shut off at the end of that side of the tape. | MODE |
| To play back both sides of the cassette repeatedly | MODE |
| Set the MEGA BASS selector to your preference.Bass sound is emphasized in the order of NORM, MID and MAX. This functions even when receiving the radio sound. |
* Dolby noise reduction manufactured under license from Dolby Laboratories Licensing Corporation. "DOUBY" and the double-D system are trademarks of Dolby Laboratories Licensing Corporation
Radio Reception
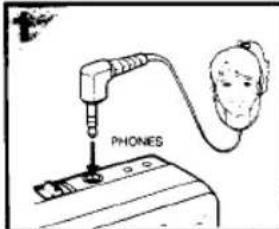
text_image
PHONES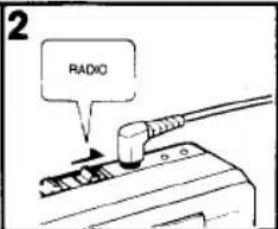
text_image
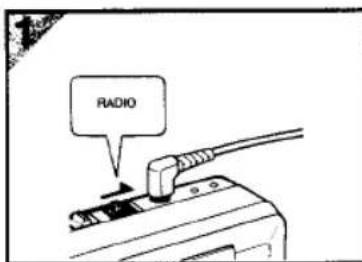
2 RADIO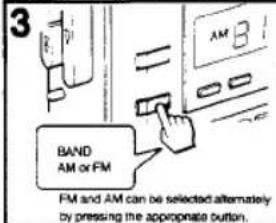
text_image
3 BAND AM or FM FM and AM can be selected alternately by pressing the appropriate button.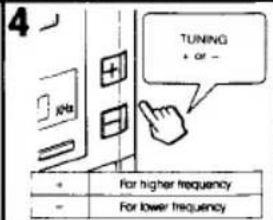
text_image
TUNING + or - For higher frequency - For lower frequency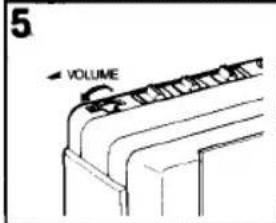
text_image
5 VOLUME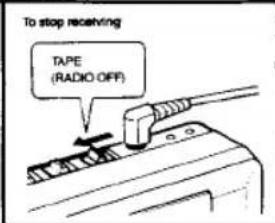
text_image
To stop receiving TAPE (RADIO OFF)On operation
* When you press the + or - button for more than half a second, the automatic tuning begins, and then stops automatically when a station is received.
• To stop automatic tuning, press the + or - button again.
- When scanning reaches the end of the band during automatic tuning, it will return to the other side of the band and continue to scan.
• The STEREO indicator appears on the display when receiving a stereo broadcast on the band.
Notes
- The automatic tuning function may occasionally miss the best setting for a radio station. In this happens, press the + or - button to adjust the tuning.
- You should remove the cassette tape if it has a metallic cassette shell or labels. Such cassettes may cause interference or difficulty in tuning.
| To Improve Receiving Condition | |
| FM | Since the headphone cord serves as an FM antenna,extend it for better reception. |
| AM | Since the reception is affected by the direction of the unit,rotate the unit horizontally for opiumm reception. |
| To Improve FM Sensitivity | |
| Use the FM SENS selector.For FM reception, normally set to DX. It a very strong station signal causes noise, set to LOCAL.The nose will be reduced. | |
Preset Tunning
You can preset up to 10 AM and FM stations.
Preset a station while the MEMORY indicator blinks for 10 seconds.
Presenting the Stations
text_image
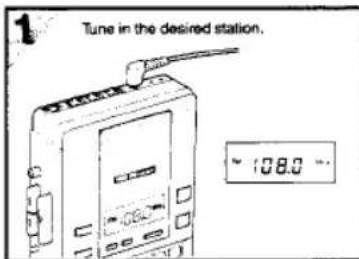
1 Tune in the desired station. 108.0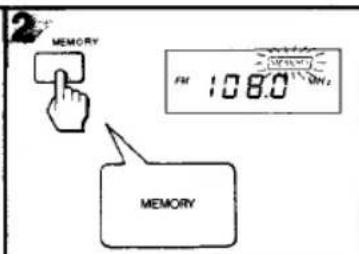
text_image
2 MEMORY FM 10.80 MHz MEMORY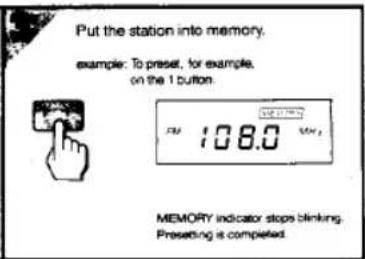
text_image
Put the station into memory. example: To preset, for example, on the 1 button. 108.0 MEMORY indicator stops blinking. Preserving is completed.Receiving the Press
text_image
RADIO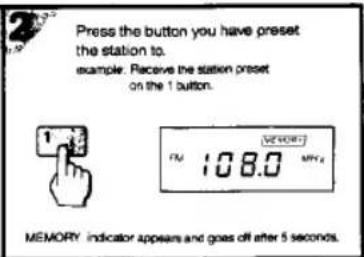
text_image
Press the button you have preset the station to. example. Receive the station preset on the 1 button. 1 108.0 MHz MEMORY indicator appears and goes off after 5 seconds.• To stop the presetting operation just after pressing the MEMORY button, press the button again.
The MEMORY indicator goes off.
- To preset or to receive the station on buttons from six to ten, press the +5 button before pressing the buttons from one to five. The +5 indicator appears on the display and goes off after 5 seconds together with MEMORY indicator: