
MxThinClient - Thin Client Mobotix - Kostenlose Bedienungsanleitung
Finden Sie kostenlos die Bedienungsanleitung des Geräts MxThinClient Mobotix als PDF.


Benutzerfragen zu MxThinClient Mobotix
0 Frage zu diesem Gerät. Beantworten Sie die, die Sie kennen, oder stellen Sie Ihre eigene.
Eine neue Frage zu diesem Gerät stellen
Laden Sie die Anleitung für Ihr Thin Client kostenlos im PDF-Format! Finden Sie Ihr Handbuch MxThinClient - Mobotix und nehmen Sie Ihr elektronisches Gerät wieder in die Hand. Auf dieser Seite sind alle Dokumente veröffentlicht, die für die Verwendung Ihres Geräts notwendig sind. MxThinClient von der Marke Mobotix.
BEDIENUNGSANLEITUNG MxThinClient Mobotix
natural_image
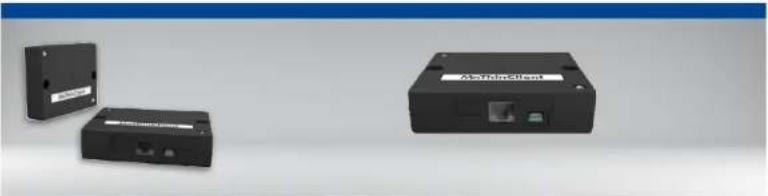
Three black electronic devices on a plain background, one labeled 'Ab+/InteEllect' and two others with visible ports (no readable text beyond label)- MxThinClient
• 2 adhesive tape strips, white
Required accessories
(not included in delivery):
- Ethernet cable RJ45
- HDMI cable (Micro HDMI), fully shielded, type A to type D
- If the MxThinClient is installed using screws, only use flat-head screws (max. dia. of screw head 10 mm, max. dia. of thread 5 mm)
IP Video Interface for Display on a Monitor/TV Panel
High-resolution display of cameras and door stations on a monitor or TV panel.
More information:
www.mobotx.com> Products > Accessories > 1xThinClient
Mx-A-TCLIENTA
32.931 002 FN 07/2017
MOBOTIX
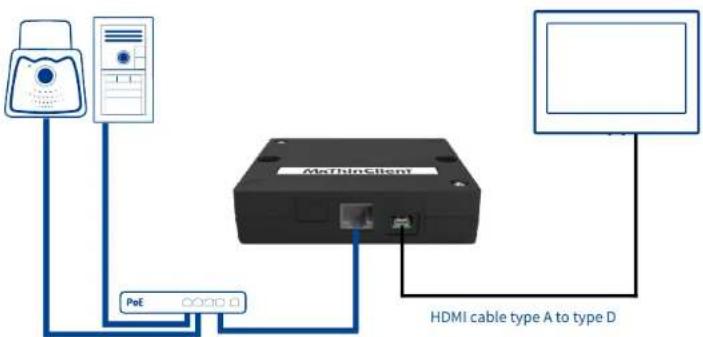
Connection Example
Camera and/or
Door Station
MOBOTIX MxThinClient
Mx-A-TCLIENTA
TV/Monitor
flowchart
graph TD
    A["Device"] -->|PeE| B["Neural Cable"]
    B --> C["HDMI cable type A to type D"]
    C --> D["Monitor"]
Ethernet cable RJ45
Ethernet cable RJ45
Installation Instructions
1. Fasten the MxThinClient
Place the MxThinClient besides the TV or monitor. You can also use the supplied adhesive tape stripes or screws to fasten the box at the desired position (screws are not part of the delivery).
2. Connect the cables
- Connect MxThinClient to the TV/monitor using an HDMI cable.
- Switch to the proper HDMI channel on the TV/monitor.
- Connect MxThinClient to a free PoE port of a switch using an RJ45 Ethernet patch cable.
Note: If the steps above are not followed in the order listed, some display devices may not show any image at all.
Note: Make sure that the devices have a native HDMI connector; adapters cannot be used.
natural_image
Interior scene with a person standing near a window and a small electronic device on a wooden table (no visible text or symbols)Features of the MxThinClient
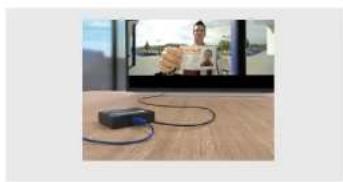
Using the MxThinClient, you can show live streams of MOBOTIX P3 or Mx6 cameras or static images (JPEG or PNG) on a TV or monitor with HDMI input. The following two main features are available:
- Sequencer Feature:
By default, the integrated sequencer automatically cycles through all defined image sources (cameras and still images). For this purpose, you can set a global time to show an image source and also individual times to show specific image sources.
• Automatic Pop-Up Feature (via MxMessageSystem)
On top of the automatic sequencer, the device can also show an image source as a reaction to specific events. For example, you can use this mechanism to show the live video stream from a door station after someone rang the doorbell. To be able to use this feature, MxMessageSystem must be configured both on the camera and on the MxThinClient The image source will pop up after the device has received an
MxMessageSystem notification with the specified message name.
Note: If the MxThinClient is attached to a TV or monitor with several HDMI inputs and the device receives a message to switch to a specific image source, the device cannot automatically switch to the proper HDMI input.
To configure the image sources and all other relevant settings, please use a web browser and follow the instructions on the following page.
1. Open the MxThinClient User Interface in a Browser
Enter the IP address of the MxThinClient:
http://
By default, the MxThinClient has been set to run as a DHCP client with an additional static IP address in the 10.x range (network mask 255.0.0.0) printed on the housing of the device. If you are running the MxThinClient in a network with a DHCP server (e.g., DSL router), you can look up the IP address in the list of devices of the DHCP server. When using a DSL router with integrated DHCP/DNS server, you can also use the host name of the device MxThinClient<10x factory IP address>in the browser address bar.
Example:
http://MxThinClient10-7-35-193
text_image
PUBST'S A#C/Service, 10.1.2017 System Information • Connection, information and data information • Software support information • Binary Data Software (License information) Pages Administration • Language • Change personal for web access Configuration • Network settings • Network resources • Server operating tool to working defaults • Same current configuration to local computer • Local configuration from network computer System Update • Update system software General Tools • Release the Web/Class Client2. Set the Language and Change the Password
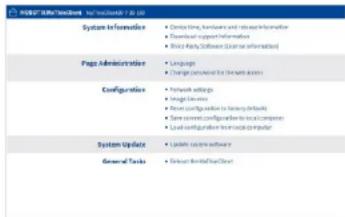
The factory default language is English. If required, click on Page Administration > Language and select a different language.
For security reasons, you should change the factory default password. Click on Page Administration > Change password for the web access and set a new password.
3. Set Up the Network
If you intend to use the pop-up feature to show image sources via MxMessageSystem described above, you need to adjust the settings in the following dialogs of the Configuration section:
• Network settings: NTP
When using messages of the MxMessageSystem,
the time of the MxThinClient must run in sync with the cameras and door stations that are sending the messages. In the NTP section, enable the time synchronization and enter the same time server (IP address or name) as on the cameras and door stations. Note that you can also use a camera or a door station as a time server.
- Network settings: MxMessageSystem - Distribution of Message over the Network
Activate this section if you want to receive messages from a camera or door station via the MxMessageSystem.
Important: Make sure that these entries are identical to the entries in the MxMessageSystem configuration of all cameras or door stations that are sending messages.
4. Configure the Image Sources (Cameras/Still Images)
Open the Configuration > Image Sources dialog to define all image sources (live video streams and/or images) you want to display as well as the corresponding display duration..
Notes:
- To display still images, set the Codec dropdown to Image and then specify the ftp[s] or http[s] address to download the image to show. These images are currently not stored in the MxThinClient, but will be loaded every time they are displayed.
- By default, all defined image sources are displayed using the global sequencer display duration. To define an individual display duration for an image source, activate the Use Individual Display Duration option.
- If you enter the name of a message in the Message Name field, the device will automatically display this image source if it receives a message with this name.
Safety Warnings
- This product must not be used in explosion-hazardous locations.
- The MxThinClient is intended for indoor use only. Make sure to respect the operating temperature range of 0 to -40^ for the MxThinClient.
• Network security: MOBOTIX products include all of the necessary configuration options for operation in Ethernet networks in compliance with data protection laws. The operator is responsible for the data protection concept across the entire system. The basic settings required to prevent misuse can be configured in the software and are password-protected.
This prevents unauthorized parties from accessing these settings.
- Make sure that you adhere to all relevant laws, regulations and that you fulfill all certification requirements for the intended use.
Technical Specifications
| Connections | Ethernet100base-T (RJ15),HDMItype D (Micro HDMI) |
| Certifications | EN55032:2012; EN55022:2010; EN55024:2010; EN50121 4:2015; EN61000-6-1:2007; EN61000-6-2:2005; EN61000-6-3:2007 + A1:2011; EN61000-6-4:2007 + A1:2011; AS/NZS CISPR22:2009 + A1:2010; CFR47 FCC.psd15B |
| Video Codec | MxPEG/M JFPG |
| Formats (codecs) for Still Images | PNG, JPG, up to 10 MB |
| Camera Software | Release 4.4.x/5.0.x or higher |
| Power Consumption | > 7 W |
| Power Supply PoE I | EE 802.3af |
| Protocols | IPv4, HTTP, HTTPS, NTP, FTP, FTPS, HDMI 1.4 |
| Max. Image Size Full | HD |
| Output Image Sizes | - image size of image source unaltered (max. Full HDI -VGA 1640x490), SVGA 1800x600', XGA 11024x768, HD 1280x720, Vega 11280x900], Full HD (1620x720)- When showing dual images, the x value of the image sizes from above is used |
| Operating Conditions | Only for i-door applications, 0 to +40 °C |
| Protection Class | IP20 |
| Dimensions | 'height x width x dcpth): 25 x 100 x 80 mm/1 x 3.96 x 3.15 in |
| Materials Housing: Polycarbonate, black | |
| Weight | Approx. 125 g |
MOBOTIX, the NX logo, MxControlCenter, HxFasy, HxFPE and MxActivitySensor are trademarks of MOBOTIX AG registered in the European Union, the U.S.A., and other countries • Information subject to change without notice • MOBOTIX does not assume any liability for technical or editorial errors or omissions contained herein • All rights reserved • © MOBOTIX AG 2017
MOBO IX AG
Kaiserstrasse
D-67722 Langmeil
Phone: -49 6302 9816 103
Fax: +49 6302 9815-190
sales@mobotix.com
www.mdbcb.com