NE-1856 - Mikrowellen PANASONIC - Kostenlose Bedienungsanleitung
Finden Sie kostenlos die Bedienungsanleitung des Geräts NE-1856 PANASONIC als PDF.


Benutzerfragen zu NE-1856 PANASONIC
0 Frage zu diesem Gerät. Beantworten Sie die, die Sie kennen, oder stellen Sie Ihre eigene.
Eine neue Frage zu diesem Gerät stellen
Laden Sie die Anleitung für Ihr Mikrowellen kostenlos im PDF-Format! Finden Sie Ihr Handbuch NE-1856 - PANASONIC und nehmen Sie Ihr elektronisches Gerät wieder in die Hand. Auf dieser Seite sind alle Dokumente veröffentlicht, die für die Verwendung Ihres Geräts notwendig sind. NE-1856 von der Marke PANASONIC.
BEDIENUNGSANLEITUNG NE-1856 PANASONIC
Operating Instructions
and User Guide
NE-1856/NE-1456
1800 Watts/1400 Watts Microwave Ovens
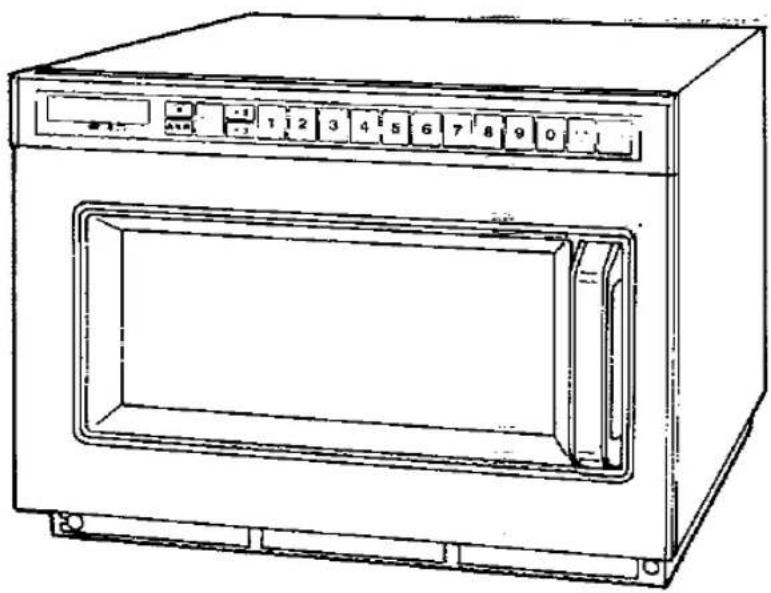
natural_image
Line drawing of a microwave oven with control panel and door (no text or symbols)FOR COMMERCIAL USE
Panasonic
Please read these instructions completely before operating this oven.
Table of Contents
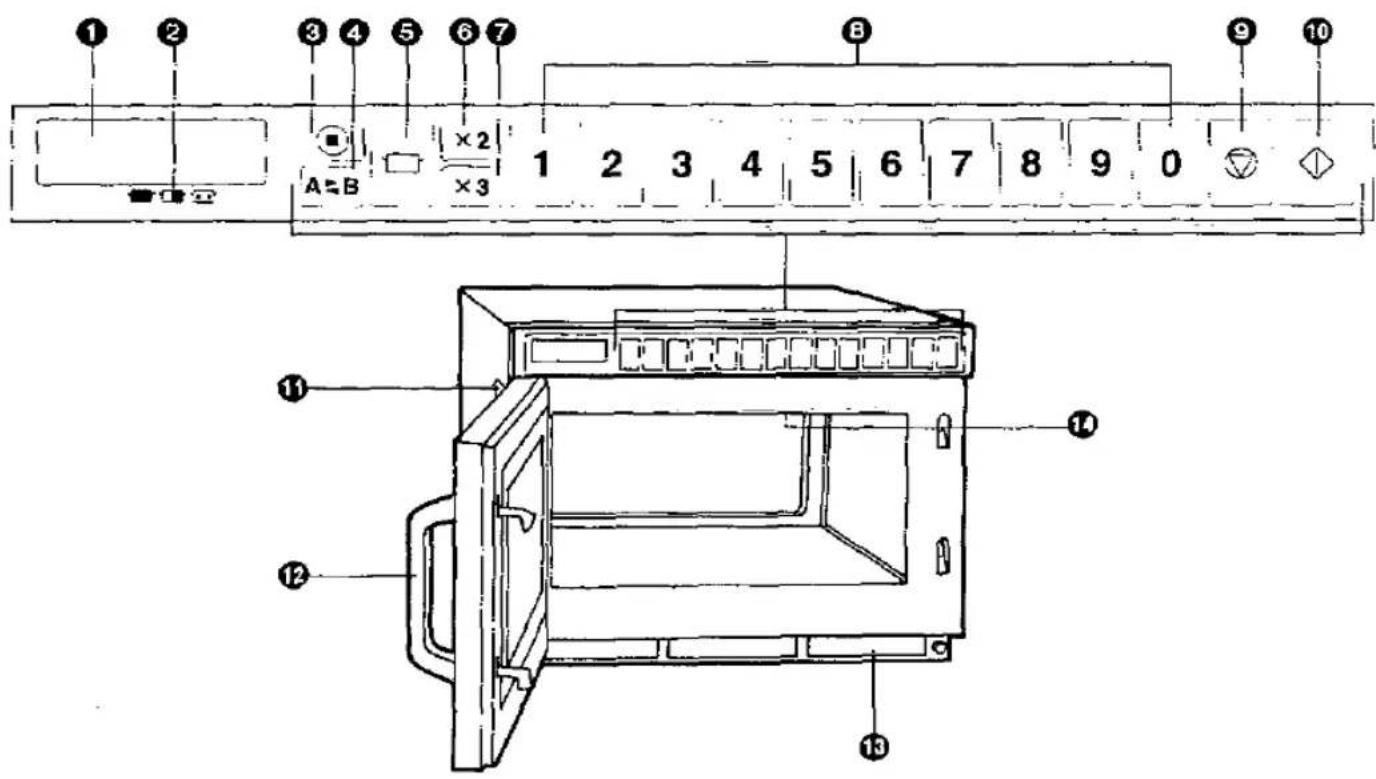
Outline Diagram 1
Safety Information 2
Important Information on Application and Operation 3.4.5
Definitions and Feature Explanations 6
How to Operate
A. Manual Single Stage Heating 7
B. Manual 2 or 3 Stage Heating 8
C. Programming Memory Pads for Single Stage Heating 8
D. Programming Memory Pads for 2 or 3 Stage Heating 9
E. Memory Pad Heating 10
F. Programming Double or Trebie Quantity Pad ....10
G. Memory Pad Heating for Double or Treble Quantity Heating .....11
H. To read the Cycle Counter ..... 11
I. To Activate Program Lock 12
J. To Release Program Lock 12
K. To Read Program List....12
L. To Select Beep Tone Options 13
M. Procedure to Program the Air Filter 14
Installation Instructions for Stacking 15
Self Diagnostic Failure Code Explanation 16
Care of Your Microwave Oven 17
Microwave Basics 18
General Guidelines for Heating in Panasonic Microwave Oven .....18
Snacks 19
Soups and Starters....20
Breakfast 21
Fish 22
Baked Goods and Sweets 23
Sauces and Gravies 24
Vegetables 25.26,27
Plated Meats and Cooked Dishes 28, 29
Technical Specifications....Back cover
Note: All heating times in the following charts are "APPROXIMATE". We recommend you test your own recipe items and plating techniques in this oven to establish the correct heating times for your recipe items.
Maximum programmable time for single stage heating is
HI (☐) and MED (☐) power 15 min.
DEF (☐) power 30 min.
For items that cook longer than 15 minutes on HIGH and MEDIUM power, please program oven for two-stage cooking.
For example: To program 20 minutes:
1st Stage: Program HIGH 15 min.
2nd Stage: Program HIGH 5 min.
Outline Diagram
text_image
Technical diagram of a microwave oven with numbered components and labeled parts① Digital Display Window (see below)
② Power Level Indicator Display
Program Pad (☐)
④ Shift Pad
⑤ Power Level Selector Pad (☐)
⑥ Double Quantity Pad
⑦ Treble Quantity Pad
⑧ Number/Memory Pads
⑨ Stop/Reset Pad (♡)
10 Start Pad (◇)
⑪ Oven Lamp Cover
⑫ Door Handle
⑬ Air Filter
⑩ Splatter Shield (top of inner cavity)
text_image
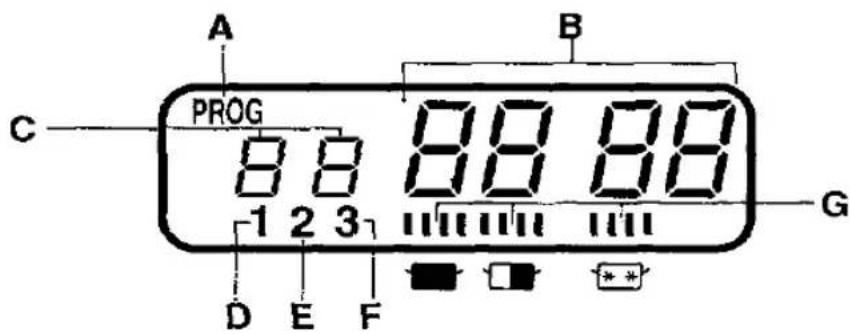
A B C PROG 8 8 88 88 1 2 3 7 11 11 11 D E F GA—Program Display
B—Heating Time Display (min. sec.)
C—Memory Pad Number Display
—1st Stage Heating Indicator
E—2nd Stage Heating Indicator
F—3rd Stage Heating Indicator
G—Power Level Indicator
HIGH
MEDIUM
DEFROST
Safety Information
Earthing Instructions
WARNING: THIS APPLIANCE MUST BE EARTHED.
This appliance is supplied with a moulded three pin mains plug for your safety and convenience. A 13 amp fuse is fitted in this plug. Should the fuse need to be replaced, please ensure that the replacement fuse has a rating of 13 amps and that it is approved by ASTA or BSI to BS1362. Check for the ASTA mark ☑ or the BSI mark ☑ on the body of the fuse.
If the plug contains a removable fuse cover, you must ensure that it is refitted when the fuse is replaced. If you lose the fuse cover, the plug must not be used until a replacement cover is obtained. A replacement fuse cover can be purchased from your local Panasonic Dealer.
IF THE FITTED MOULDED PLUG IS UNSUITABLE FOR THE SOCKET OUTLET THEN THE FUSE SHOULD BE REMOVED AND THE PLUG CUT OFF AND DISPOSED OF SAFELY AND AN APPROPRIATE ONE FITTED. THERE IS A DANGER OF SEVERE ELECTRICAL SHOCK IF THE CUT OFF PLUG IS INSERTED INTO ANY 13 AMP SOCKET.
If a new plug is to be fitted, please observe the wiring code as shown below. If in any doubt, please consult a qualified electrician.
IMPORTANT: The wires in this mains lead are coloured in accordance with the following code:
Green-and-yellow: Earth Blue: Neutral Brown: Live
As the colours of the wire in the mains lead of this appliance may not correspond with the coloured markings identifying the terminals in your plug, proceed as follows:
The wire which is coloured GREEN-AND-YELLOW must be connected to the terminal in the plug which is marked with the letter E or by the Earth symbol ± or coloured GREEN or GREEN-AND-YELLOW. The wire which is coloured BLUE must be connected to the terminal in the plug which is marked with the letter N or coloured BLACK. The wire which is coloured BROWN must be connected to the terminal in the plug which is marked with the letter L or coloured RED.
How to replace the fuse
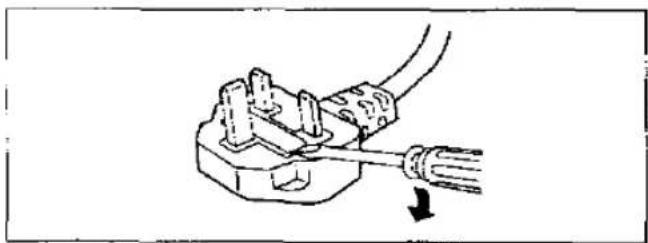
Open the fuse compartment with a screwdriver and replace the fuse.
natural_image
Diagram of a plug with wires and a cable, showing electrical connections (no text or symbols)When an outlet is not earthed:
It is the personal responsibility and obligation of the customer to have it replaced with a properly earthed outlet.
Voltage and Power
The voltage used must be the same as specified on the oven. Using a higher voltage than that which is specified is dangerous, and may result in a fire or other type of accident causing damage.
Service
It is dangerous for anyone other than a service technician trained by the manufacturer to perform repair service.
Do not remove the outer casing of the oven. High voltages are present inside the cabinet. Repairs and adjustments should be done only by qualified service personnel, using manufacturer's genuine replacement parts. Contact the manufacturer.
Door seals
Do not attempt to tamper with or make any adjustments or repairs to door, control panel housing, safety interlock switches or any other part of the oven. Do not remove outer panel from oven. The door seals and door seal areas should always be kept clean—use a damp cloth.
Operation when empty
The appliance must not be operated WITHOUT FOOD IN THE OVEN. Operation when empty will damage the appliance.
Cord/Plug
If the supply cord of this appliance is damaged, it must be replaced by the special cord with metal plate available only from manufacturer.
Do not immerse cord, plug or oven in water.
Keep cord away from heated surfaces. Do not let cord hang over the edge of table or work top. Do not plug your oven in via an extension cable as this can be dangerous. It is important to plug the oven directly into a wall socket.
Placement of Oven
Oven must be placed on a flat, stable surface and can be stacked as required.
For proper operation, the oven must have sufficient air flow to the air vents i.e. 5 cm (2 inches) at the side and rear.
Shelves
Do not place the oven on a shelf directly above or beside a gas or electric hob or cooker. The oven may be damaged. It is dangerous to position this oven on a shelf which is so high that food cannot be safely removed by the user.
Maximum Room Temperature
Do not operate the oven when the room temperature is higher than 40°C (104°F) and/or the humidity is more than 90%. Free airflow around the oven is important.
Interference
There is a possibility of a small amount of interference with weak broadcast signals if the oven is too close to a radio or TV.
Important Information on Application and Operation—Read Carefully
Short Cooking Times
As microwave cooking times are much shorter than other cooking methods it is essential that recommended cooking times are not exceeded without first checking the food. Cooking times given in the time charts are approximate. Factors that may affect cooking times are: preferred degree of cooking, starting temperature, altitude, volume, size and shape of foods and utensils used. As you become familiar with the oven, you will be able to adjust these factors.
It is better to undercook rather than overcook foods. If food is undercooked, it can always be returned to the oven for further cooking. If food is overcooked, nothing can be done. Always start with minimum cooking times.
Important
If the recommended cooking times are exceeded the food will be spoiled and in extreme circumstances could catch fire and possibly damage the interior of the oven.
1. Small quantities of food
Take care when heating small quantities of food as these can easily burn, dry out or catch on fire if cooked too long. Always set short cooking times and check the food frequently. N.B. If materials inside the oven should ignite, keep oven door closed, turn oven off, and disconnect the power cord, or shut off power at the fuse or circuit breaker panel.
NEVER OPERATE THE OVEN WITHOUT FOOD INSIDE.
2. Foods low in moisture
Take care when heating foods low in moisture, e.g. bread items, chocolate, biscuits and pastries. These can easily burn, dry out or catch on fire if cooked too long.
3. Christmas Pudding
Christmas puddings and other foods high in fats or sugar, eg. jam, mince pies, must not be over heated. These foods must never be left unattended as with over cooking these foods can ignite.
4. Boiled Eggs
Do not boil eggs in their shell in your microwave. Raw eggs boiled in their shells can explode causing injury.
5. Foods with Skins
Potatoes, apples, egg yolk, whole vegetables and sausages are examples of food with non porous skins. These must be pierced using a fork before cooking to prevent bursting.
6. Liquids
When heating liquids, e.g. soup, sauces and beverages in your microwave oven, overheating the liquid beyond boiling point can occur without evidence of bubbling. This could result in a sudden boil over of the hot liquid. To prevent this possibility the following steps should be taken:
a) Avoid using straight-sided containers with narrow necks.
b) Do not overheat.
c) Stir the liquid before placing the container in the oven and again halfway through the heating time.
d) After heating, allow to stand in the oven for a short time, stirring again before carefully removing the container.
7. Lids
Always remove the lids of jars and containers and takeaway food containers before you microwave them. If you don't then steam and pressure might build up inside and cause an explosion even after the microwave cooking has stopped. When foods require a cover use a suitable plate or pierced cling film.
8. Deep Fat Frying
Do not attempt to deep fat fry in your oven.
9. Temperature Probe
Use a temperature probe to check the degree of cooking of food only when it has been removed from the microwave. If undercooked, return to the oven and cook for a little longer at the recommended power level. Do not leave a probe in the oven when microwaving.
10. Paper, Plastic
Carefully attend the appliance if paper, plastic or other combustible materials are used as containers or for covering. Do not use wire twist-ties with roasting bags as arcing will occur. Do not use re-cycled paper products, e.g. Kitchen roll unless they say they are specifically designed for use in a microwave oven. These products contain impurities which may cause sparks and/or fires when used.
11. Reheating
It is essential that reheated food is served at the required temperature according to current food safety (temp. control) regulations.
Remove the food from the oven and check that it is "piping hot". ie steam is being emitted from all parts and any sauce is bubbling. Check the food has reached the required temp. with a temperature probe—but remember do not use this inside the microwave.
Even if cooking instructions have been followed always check the food before serving and if in doubt return your food to the oven for further heating.
12. Standing Time
Standing time refers to the period at the end of cooking or reheating when food is left before being eaten, ie. it is a rest time which allows the heat in the food to continue to conduct to the centre, thus eliminating cold spots.
13. Keeping Your Oven Clean
It is essential for the safe operation of the oven that it is wiped out regularly. Use warm soapy water or a food sanitizer solution, squeeze the cloth out well and use to remove any grease or food from the interior. The oven should be unplugged when cleaning.
14. Containers
Before use check that utensils/containers are suitable for use in microwave ovens.
15. Babies Bottles and Food Jars
When reheating babies bottles always remove top and teat. Liquid at the top of the bottle will be much hotter than that at the bottom and must be shaken thoroughly before checking the temperature. The lid must also be removed from babies food jars, the contents must also be stirred or shaken before the temperature is checked.
Caution
Examine your Oven
Unpack oven, retain all packing material. and examine the oven for any damage such as dents. broken door latches or cracks in the door. Notify supplier immediately if unit is damaged. N.B. DO NOT install if unit is damaged.
Removal of protective film
A protective film is used to prevent scratching of the outer case during transportation. Peel this film off before installation or use.
Do not block the air vents.
This Microwave Oven requires free airflow in the back for maximum cooling efficiency. You should keep the air vents clear while cooking.
Do not dry cloths in the oven.
Do not dry cloths in the Microwave Oven since there is a possibility of the cloths burning if left in the oven for too long of a time.
Outdoor Use
Do not use outdoors.
Smoke/Fire
During heating, if smoke is observed, keep the oven door closed, and switch off or disconnect the oven from the supply. If materials inside the oven should ignite, keep oven door closed, press STOP Pad. Switch off at socket and remove plug. If possible shut off power at the fuse or circuit breaker panel
WARNING
- The appliance should be inspected for damage to the door seals and door seal areas and if these areas are damaged the appliance should not be operated until it has been repaired by service technician trained by the manufacturer, using genuine replacement parts.
- Storage of accessories. When the oven is not being used, do not store any objects inside the oven in case it is accidentally turned on. In case of electronic failure, oven can only be turned off at wall socket.
- Liquids or other foods must not be heated in sealed containers since they are liable to explode.
Cookware
- Before using the oven always check that containers are suitable. DO NOT MICROWAVE sealed containers as they may explode.
N.B. Always check manufacturer's instructions as some food manufacturers are producing food in containers that do not require piercing. - DO NOT leave the appliance unattended if paper, plastic or other combustible containers are used. Do not use re-cycled paper products, as they may contain impurities which may cause sparks and/or fires when used, unless packaging states they are specifically designed for MICROWAVE use.
- Heat-proof glassware, such as Pyroceram and Pyrex, is best suited for use in the Microwave Oven.
- Do not use metal ware, ceramics trimmed with gold or silver, or any container with a metal content.
- If "arcing" should occur, check the cookware carefully again for metal.
- You may use ordinary glassware, chinaware, plastic-ware and paper-ware, when cooking food that requires a low temperature. Using this type of cookware for high temperature cooking may cause cracking or warping.
CAUTION
Do not use METAL UTENSILS in this oven.
Defrosting Frozen Food
- If you try to completely defrost frozen food in the Microwave Oven, uneven defrosting may occur due to the differences in the thickness and shape of the food. In actual usage of frozen food, you should not normally defrost them 100%. 70% defrosting in the Microwave Oven is ideal and helpful for the next cooking operation.
- To defrost evenly, turn the food 180°, or turn it over during defrosting.
- To defrost fatty meat, heat it in the Microwave Oven for a short time and leave it to stand at room temperature, or heat it intermittently until defrosted.
- When you defrost a whole chicken, or any frozen food of irregular shape, wrap legs or thin parts with aluminum foil. Otherwise thin parts will be defrosted faster and sometimes cooked before other parts have properly defrosted.
- Ice should be removed at times during defrosting.
Definitions and Feature Explanations
| FEATURE | EXPLANATION |
| Manual Heating | Gives the user maximum flexibility to set the oven to desired heating time and power level. Ideal for menus that require variations in heating. |
| Single Stage Heating | Allows the oven to run at the selected power level for the selected heating time. |
| Two or Three Stage Heating | Allows the oven to be set to begin heating at one power level then shift automatically to a different power level after designated amount of heating time (i.e. ▼HI to □MED or □DEF to □HI). |
| Interrupt Function | Allows opening of the oven door to check on the food in the cavityClosing the door and pressing the ◊ pad resumes heating. Cooking time does not countdown while you check on your food.Note: Interrupt Feature is de-activated in "Program Lock" |
| Repeat Function(For Manual Heating Only) | After you remove your food from the oven the timer is automatically reset to repeat the last heating time and power level. This is especially convenient for Daily Specials that you do not want to program into a memory pad. |
| Two Step Operation(In "Program Unlock" Only) | Gives you time to confirm and or revise the selected heating program before starting the heat cycle. (Select heating program either manually or by pad number then press ◊ pad.) |
| One Touch Start(In "Program Lock" Only) | One touch of the desired programmed number pads starts heating. Good for Fast Food, Convenience store and Vending applications. |
| Cycle Counter | The oven can display the total number of times the oven has been operated by pad number, by manual operation and cumulatively. Good for analyzing usage of the oven and traffic flow at the location. |
| Program Lock | 1. "Locks" the control panel number pads into their programmed heating times and power levels.2. Converts the oven to "One Touch Start" operation3. Deactivates □, □ and ◊ pads.4. Deactivates Manual operation.Prevents unwanted erasing of Memory Pads. Simplifies operation—Good for Fast Food, Convenience Store and Vending applications. |
| Program Unlock | Deactivates "Program Lock" and activates all other features |
| Self Diagnostics | The oven constantly monitors its operation. When an operational problem develops the Display window displays a Failure code. By checking the code number against the list in this manual you will know the nature of the problem and whether you can solve the problem yourself, need to call a service agent or need to call an electrician. If a service agent is required the Failure code number will let him know which parts to bring on the Service call. |
| Tone Loudness Control | Allows setting of the loudness of the Beep Tone to one of 4 different levels. |
| Tone Length Control | Allows you to choose the length of the end of heating cycle beep tone to either short beeps or 60 seconds of long beeps. |
| Program List | Allows you to review all currently programmed Pad number, heating time and Power level for each stage. |
| Filter Clean Function | The word "FILT" will appear in the display after 500 hours of use, to remind you to remove and clean the Air Filter. This time can be reprogrammed to your own needs |
| Double and Treble Quantity Pads | These pads have a pre-set magnification of 1.6 times the original cooking time for Double quantity and 2.2 times for the Treble quantity to cook two or three portions at once. |
How to Operate
This oven is preset at the factory for the following:
-
Manual operation
-
Number Pads preset to high power at the indicated heating times for single stage heating.
A1=10 sec.
A6=1 min.
A2=20 sec.
A7=1 min. 15 sec.
A3=30 sec.
A8=1 min. 30 sec.
A4=40 sec.
A9=1 min. 45 sec.
A5=50 sec.
A0=2 min.
- Program unlock
- Cycle counter set to "0" on all pads.
If you wish to change these times please consult the operating instructions to find how to program them.
A. Manual Single Stage Heating

text_image
0 米 200 米 159 200 1 100-
Make sure the oven is plugged into a properly earthed electrical outlet.
-
Open the door. The oven lamp will be turned on. "0" will appear in the display window.
- Put the food into a suitable container, place it in the centre of the oven and then close the door securely. The oven lamp will go off.
- Select the desired power level by pressing □ pad. The Selected Power Level will be displayed in the display window and the single stage heating indicator. "1" will start to blink.
Example: Press □ pad once for ■ HIGH Power, twice for ■ MEDIUM Power and 3 times for □ DEFROST Power.
- Set the desired heating time by pressing appropriate number pads in the combination of minutes and/or seconds desired. [It would be better to have up to 15 min. (max.) on ☐ or ☐ —or 30 min. (max.) on ☐.]
Example: Press 2, 0 and 0 for 2 minutes.
Note: When you set over the limited time and press pad, the single stage heating indicator "1" and the time will blink. Please cancel by pressing pad and reset correctly.
- Press ♦ pad:
A. The oven lamp and cooling fan will be turned on.
B. Heating will start.
C. The Power Level and the single heating Indicators stage "1" will start to blink.
D. The time on digital display will count down.
- When all time expires, the end of cycle Beep Tone will sound and all heating will stop. The oven lamp will go off. The display will blink "0" until the door is opened. 1 minute later cooling fan will stop.
- Open the door and take the food out. The digital display will return to the originally selected time and power. The oven lamp will be turned on.
- Close the door. The oven lamp will go off and 1 minute later the digital display window will go blank. If a repeat of the last cooking instruction is not required, go to step 4.
SPECIAL NOTE: For both single and 2 stage heating.
- While heating, one press on pad stops the oven. You can restart it by pressing the pad or a second press on pad will cancel the selected program.
- While NOT in a heating cycle one tap on ⑦ pad cancels the selected program.
REPEAT FEATURE
- You can repeat exactly the same manually selected heating time by pressing only pad. if you use the oven again within 1 minute.
- After 1 minute of non-use with door closed, the repeat feature will be cancelled, and the display goes blank.
B. Manual 2 or 3 Stage Heating
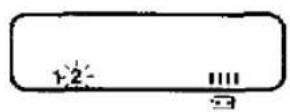
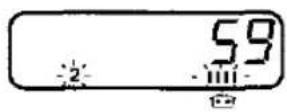
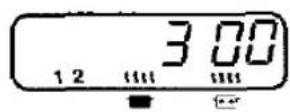
- Follow Steps 1 to 5 on page 7.
- Select the desired power level for second stage heating by pressing □ pad appropriate number of times. The power level will be displayed in the Display Window and the second stage indicator "2" will start to blink.
Example: Press □ pad 3 times for □ power.
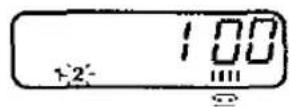
- Set the desired heating time for the second stage by pressing the appropriate number pads.
Example: For 1 minute press pads, 1.0 and 0.
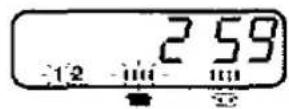
- Press pad:
A. The total time for both stages will be displayed.
B. The oven lamp and cooking fan will be turned on.
C. The single stage indicator "1" will start to blink while the second stage indicator "2" will stay on. The power level indicator for the first Stage will start to blink.
D. The total cooking time on digital display will count down.
- After the first stage heating time expires, a single beep tone will sound, the power level indicator for the second stage will start to blink and the remaining time on digital display will continue to count down.
- When all time expires, the end of cycle Beep Tone will sound. All heating will stop The oven lamp will go off. The time display will blink "0" until the door is opened 1 minute later cooling fan will stop.
- Open the door and take the food out. The digital display will return to the originally selected time and power. The oven lamp will be turned on.
- Close the door. The oven lamp will go off and 1 minute later the digital display window will go blank.
Note: For a 3 Stage Heating cycle, select a power level once again after step 3 on this page and set a heating time.
See Special Note of "Manual Single Stage Heating".—Above.
C. Programming Memory Pads for Single Stage Heating
The oven can not be programmed until the program lock feature is deactivated. (See page 12, I. To Activate Program Lock.)
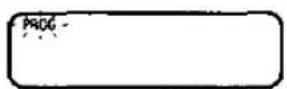
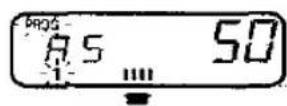
- Make sure the oven is plugged into a properly earthed electrical outlet. —DO NOT OPEN THE DOOR—
The display window MUST be blank before programming can begin. If any indicator light is illuminated in the digital Display Window: Close the door, press ☑ pad and wait 1 minute until the Display goes blank.
-
Press ☐ pad. "PROG" sign will start to blink in the Display Window. Note: Do not keep pressing ☐ pad for more than 5 seconds
-
Press Memory Pad you desire to program. The pad number and the previously selected time. Power Level and the single stage heating indicator "1" will appear in Display. "PROG" will blink.
Example: Press Memory Pad Number 5.
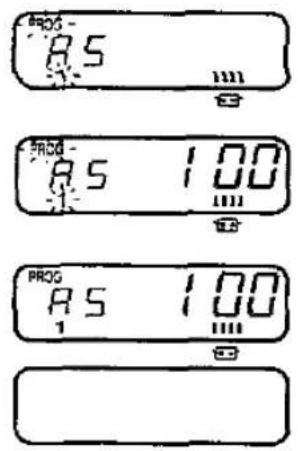
text_image
8.5 PROG 8.5 100 PROG 8.5 100 1- Select the desired power level by pressing □ pad.--the selected power level will be displayed in the window and the Heating time display will go blank. Example: Press □ pad 3 times for □ power.
- Set the desired heating time by pressing the appropriate number pad in combination of minutes and seconds desired. (Up to 15 min. on ☐ and ☐—or 30 min. on ☐.) Example: For 1 minute press pads 1, 0 and 0.
- Press the ☑ pad again. The "PROG" sign will stop blinking. This means that you have completed programming the selected Memory Pad for single stage heating.
- 3 seconds after programming is completed the display will go blank.
- Program the remaining Memory Pads as desired by repeating Step 2-7 above. DO NOT OPEN THE OVEN DOOR while programming.
Notes: • When the "PROG" Display is blinking the program can be cancelled and/or the pad erased by pressing the ☑ pad. • When you want programme the B side, press A–B shift pad before pressing Program Number Pad.
D. Programming Memory Pads for 2 or 3 Stage Heating
DO NOT OPEN THE OVEN DOOR.
- Complete steps 1 to 5 above.
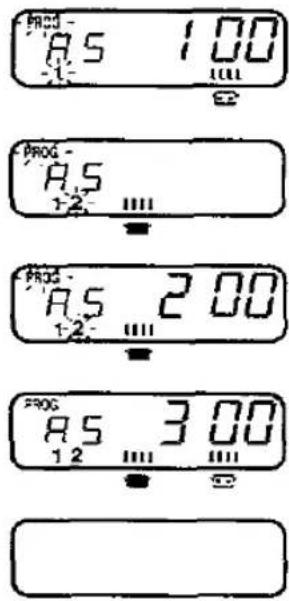
text_image
PROG- A.S 100 -1- ...... PROG- A.S -1-2...... PROG- A.S 200 -1-2...... PROG- A.S 300 -1-2...... ......- Select Power level for the second stage by pressing □ pad. The selected power level will be displayed in the window and the second stage indicator "2" will start to blink. Example: Press □ pad 1 time for ■ power.
-
Set the desired heating time by pressing appropriate number pads. (Up to 15 min. on ■ and □—or 30 min. on □.) Example: For 2 minutes press pads 2, 0 and 0.
-
Press ☐ pad again and the "PROG" sign will stop blinking and the STAGE Indicators (1 and 2) will remain illuminated. The total time for both stages will be displayed. This means that you have completed programming the desired Memory Pad for 2 stage heating.
- 3 seconds after programming is completed, the display will go blank.
- Program the remaining pads as desired by repeating the steps above. DO NOT OPEN THE OVEN DOOR during programming.
Note: When you want to programme the B side, press A-B shift pad before pressing Programme Number Pad.
E. Memory Pad Heating
[Make sure the unit is properly programmed. (See pages 8, 9).]
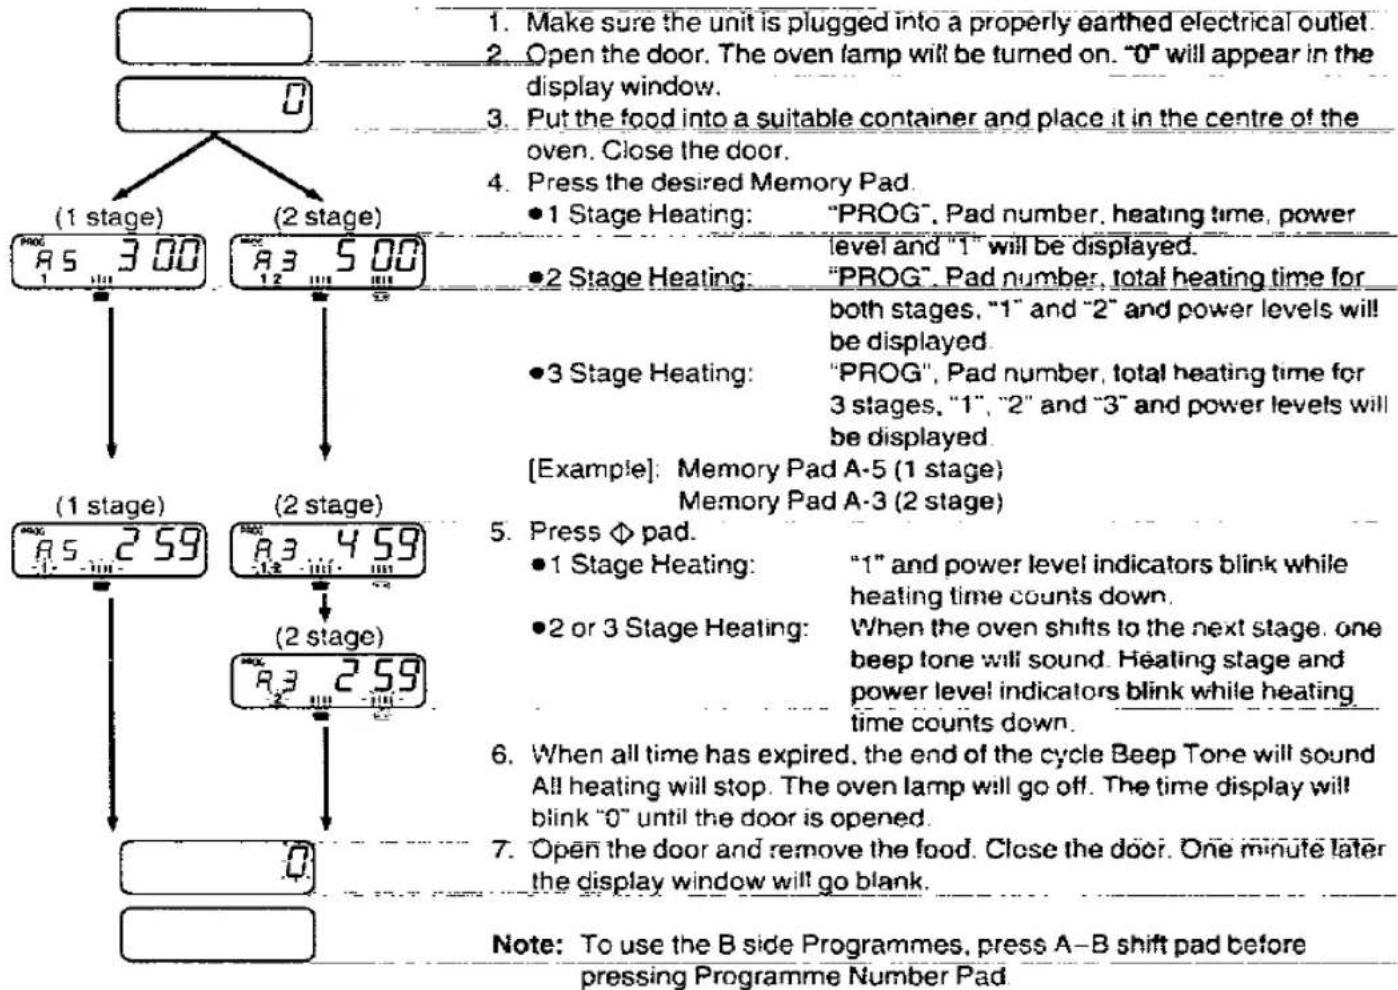
flowchart
graph TD
    A["Start"] --> B["(1 stage)"]
    B --> C["1 stage: R5 3.00"]
    B --> D["(2 stage)"]
    C --> E["2 stage: R3 5.00"]
    D --> F["2 stage: R3 4.59"]
    E --> G["2 stage: R3 2.59"]
    F --> H["2 stage: R3 2.59"]
    G --> I["End"]
    H --> J["End"]
    style A fill:#f9f,stroke:#333
    style B fill:#ccf,stroke:#333
    style C fill:#cfc,stroke:#333
    style D fill:#fcc,stroke:#333
    style E fill:#ffc,stroke:#333
    style F fill:#cfc,stroke:#333
    style G fill:#fcc,stroke:#333
    style H fill:#cfc,stroke:#333
    style I fill:#fcc,stroke:#333
F. Programming Double or Treble Quantity Pad
(The oven can not be programmed until the program lock feature is deactivated.)
text_image
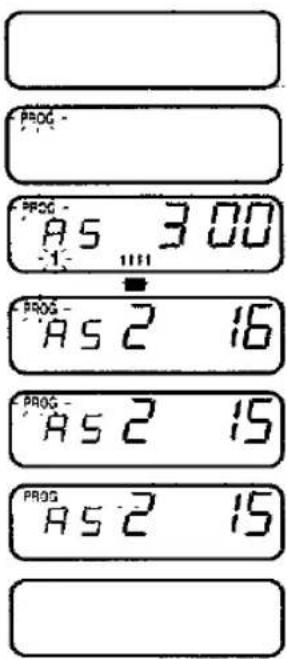
PROG - AS 3 00 AS 2 16 AS 2 15 AS 2 15-
The display window MUST be blank before programming can begin
-
Press the Ⓞ pad. "PROG" will blink in the display window
-
Press Memory pad for desired program. The pad number and the previously selected time and Power Level will appear in the display. "PROG" and the stage heating indicator will blink.
-
Press Double Quantity Pad. The previously selected magnification number will appear in the display. Example: 1.6 times is 16
-
Set the desired magnification by pressing the appropriate number pad. Example: 1.5 times: Press "1" and "5" pad.
-
Press the @ pad again. The "PROG" will stop blinking. This means that you have completed programming the selected Memory Pad for appropriate Double Quantity Pad.
-
After 3 seconds the display will go blank.
Note: If you want to change appropriate time for Treble Quantity Pad, you program Treble Quantity Pad as in above step 4. The magnification is preset. The Double quantity pad is 1.6 times and the Treble quantity pad is 2.2 times. Each pad must be programmed separately for alterations.
N.B. Please test for correct times when setting the program to achieve correct temperatures.
G. Memory Pad Heating for Double or Treble Quantity Heating [Make sure the unit is properly programmed. (See pages 8, 9.)]
![PANASONIC NE-1856 - Memory Pad Heating for Double or Treble Quantity Heating [Make sure the unit is properly programmed. (See pages 8, 9.)] - 1](/content/2026/05/796733/images/55bcef7fefa08555de2b0dd0432d75420258fb869f2c8557da9f664cc8b704df.jpg)
text_image
0 PROG 2 PROG 48 R5 448 1 III PROG 47 R5 447 -1 -iii- 0- Follow Steps 1 to 3 in "E. Memory Pad Heating".
- Press the Double Quantity Pad. Note: When you want treble quantity heating, press Treble Quantity Pad.
- Press the desired Memory Pad. Example: Memory Pad 5 (Programme No. A-5)
- Press pad.
Stage indicator and power level indicators blink while heating time count down. Note: If programme lock is activated, heating programme starts immediately i.e. there is no need to press pad. (See page 12.) - When all time has expired, the end of the cycle Beep Tone will sound. All heating will stop. The oven lamp and the fan will go off. The time display will blink "0" until the door opened.
- Open the door and remove the food. Close the door: 1 minute later the display window will go blank.
Note: To use B side Programmes, press A-B shift pad before pressing Program Number Pad.
H. To read the Cycle Counter
text_image
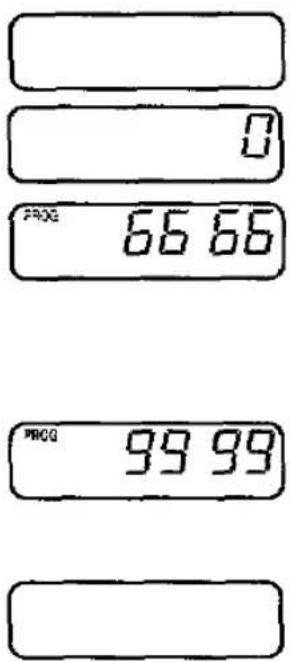
0 PROG 66.66 PROG 99.99-
Make sure the unit is plugged into a properly earthed electrical outlet.
-
Open the door and leave it open. The oven lamp will be turned on. "0" will appear in the display.
-
While pressing the ☑ pad, press each Memory Pad. The display shows the number of times each Memory Pad has been used. Within 3 seconds, press the ☐ pad to show the number of times the oven has been used in the manual mode. Example: 6666
Note: To read the number of times the oven has been used in the B side programmes. Press A-B shift pad. Then while pressing the ⑦ pad press each memory pad.
- Remove your finger from pad and quickly close door while the display is still showing a Pad's cycle count. The display will now show the total cumulative number of times the oven has been used.
3 seconds later. the display window will go blank.
Note: Total cumulative number includes programming memory heating and manual heating number of times oven has been used.
I. To Activate Program Lock
text_image
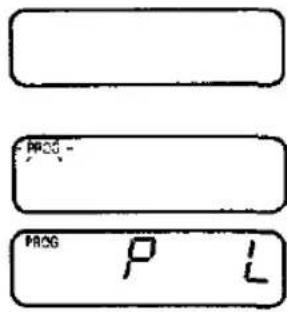
PPCG - PPCG P L- Make sure the unit is plugged into a properly earthed electrical outlet.
- DO NOT OPEN THE DOOR. The Display Window must be blank before the Program Lock feature can be activated.
- Press and hold in the ☑ pad until the display show "PROG", "P" and "L" (for more than 5 seconds).
- Program Lock feature is now activated.
Note: In "Program Lock"
a. The oven is started by touching the desired memory pad. There is no need to touch the start pad.
b. The Interrupt feature is de-activated—opening the door cancels the remaining time on the program.
c. The oven can not be programmed or run manually until the program lock feature is de-activated.
J. To Release Program Lock
text_image
0 PROG P- Make sure the unit is plugged into a properly earthed electrical outlet
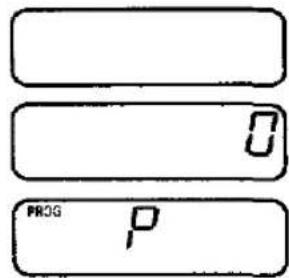
- Open the door. The oven lamp will be turned on, "0" will appear in the display. While pressing the ⑦ pad, press and hold in the ⑧ pad until the display window will show "PROG" and "P" (for more than 5 seconds).
- Program Lock feature is now deactivated.
Note: In "Program Unlock"
a. Oven reverts to a 2 touch operating mode (Number Pad plus pad).
b. Repeat and interrupt features are operational
c. Memory Pads can be programmed.
d. Manual Heating is operational.
e. Tone loudness control and length control are operational.
K. To Read Program List
- With the door opened, while pressing ☑ pad, press and hold in the ☐ pad.
text_image
PROG 80 10 00 1 PRCG 69 400 1 PROG 36E EP 2 PRCG P L-
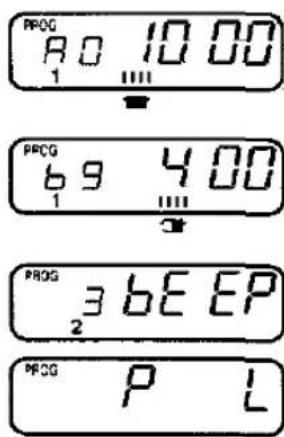
Display window will display: Pad A0 heating time and Power Level currently programmed on Pad A0, first stage heating. 2 seconds later the same information will be displayed for the second heating stage.
-
Display will continue to sequence through the pad numbers.
-
After all memory pad settings have been displayed, the display then shows the beep tone settings followed by the Program Lock: "P", "L" (or Program Unlock: "P").
L. To Select Beep Tone Options
The Beep Tone can be set for Loudness—(4 Levels) and length of Tone—(2 Options). You can select the combination of Loudness and Length that best suits your needs.
The Beep Tone is set at the factory for the loudest level (#3) and for 3 Beeps.
text_image
0 3 BE EP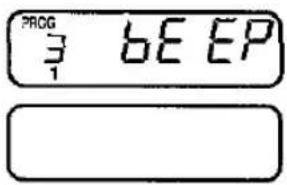
text_image
PROG 3 BE EP 1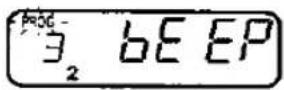
To Select Loudness Level
-
Make sure the unit is plugged into a properly earthed electrical outlet.
-
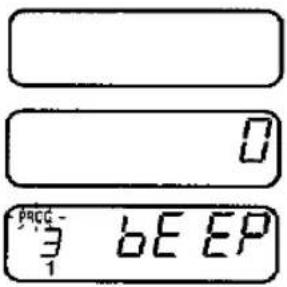
Open the door and leave it open. The oven lamp will be turned on. "0" will appear in the display.
-
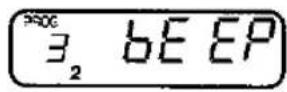
Press ☐ pad first and then within 1 minute press "0" pad. "3 bEEP" and first stage heating indicator "1" will appear in the display window and "PROG" will blink.
-
Select the desired sound loudness level by pressing "0" pad. Repeated pressing of "0" pad will lower the loudness of the tone in stages to silent. The Tone will sound at its loudness level and the display window will display loudness level in digits (3 to 0—loud to silent) followed by the word "bEEP".
Example: 3 bEEP—Loud 1 bEEP—Low 2 bEEP—Mid 0 bEEP—Silent
-
Press the Ⓞ pad again, "PROG" will stop blinking. You have completed selecting the loudness level.
-
Close the door. One minute later display window will go blank.
To Select Length of Tone
At end of heating cycle there are 2 options.
A. 3 Beeps (Factory Setting)
B. 60 seconds of Short Beeps
To Program for 60 Seconds of Short Beeps
-
Complete steps 1-4 above (Select loudness level). "DO NOT CLOSE THE DOOR"
-
Touch ☐ pad and quickly select the desired tone length by touching "0" pad.
A. "PROG" will blink. B. Current loudness level will be displayed. C. Second Stage Heating indicator will illuminate. Example: First Stage Indicator "1" illuminated=3 BEEPS Second Stage Indicator "2" illuminated=60 Seconds of BEEPS
- When the desired length of tone has been selected (1 or 2), press the pad again.
A. "PROG" will illuminate. B. 3 seconds later, the display window will show "0".
- Close the Door. 1 minute later display window will go blank.
M. Procedure to Program the Air Filter
text_image
0 0 H 500-
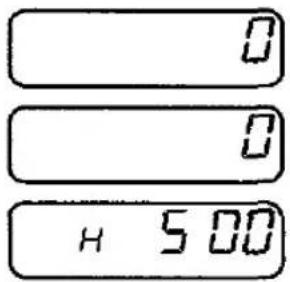
Open the door and leave it open. "0" will appear in the Display Window
-
While pressing pad close and open the door.
-
Quickly press "3" pad. The display will show the length of time (in hours) between cleaning the Air Filter you have programmed in or the original time pre-set by the manufacturer.
-
Set the desired clean time by pressing the appropriate number pads. (Up to 9999 hours)
Example: For 600 hours press pads "6", "0" and "0".
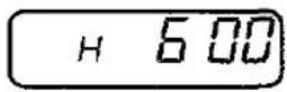
- Press ☐ pad. This completes the Procedure to Program Cleaning of the Air Filter
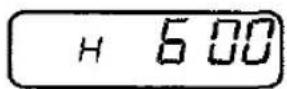
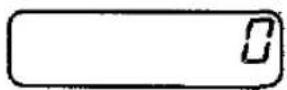
- After 3 seconds "0" will appear in the display window. The oven is now ready for use.
-
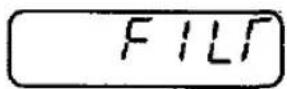
After the time has been set At the end of cooking open the door, remove the food. Close the door. "FILT" will appear in the display.
-
To clear the display after cleaning the filter, press the cancel pad
Note: To check the total number of hours used.
-
Open the door and leave it open.
-
Whilst pressing the press the "3" pad.
-
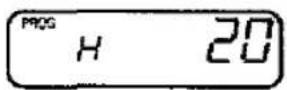
The display will show the number of hours used. "PROG" and "H" will appear in the display
Example: If the oven has been used for 20 hours.
After 3 seconds "0" will appear in the display window.
N.B. If the oven cuts out after short operation, check the Air Filter is clean before calling an engineer.
Installation Instructions for Stacking
Important
- Disconnect the power cord from the wall socket before attempting installation.
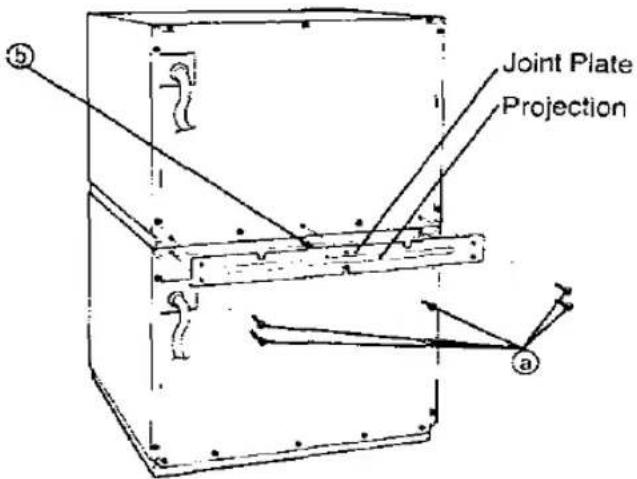
- For stacking installation, you must use the PANASONIC "Joint Plate" which is enclosed with this unit.
- Combination of the unit for stacking is limited within only the following PANASONIC models. NE-1257, NE-1757, NE-1247, NE-1747, NE-1057, NE-1457, NE-1047, NE-1447, NE-1456, NE-1856, NE-1446, NE-1846
- The maximum stacking height is two units.
Preparation
Be sure the oven cavity is empty.
Installation
- Stack the units and remove five screws ⓐ as shown in Fig. 1.
- Loosen the screw ⑨.
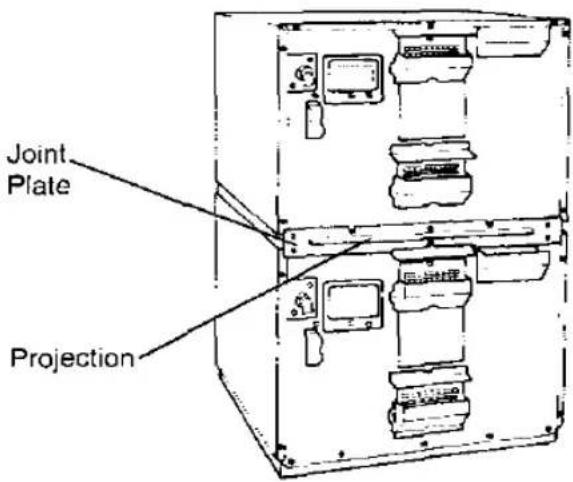
- The projection on the Joint Plate must face away from the oven. Place the Joint Plate on the screw ⑤.
- Attach and tighten five screws ⓐ and the screw Ⓐ. See Fig. 2.
- Ensure the top oven is at a safe and workable height.
text_image
Joint Plate Projection a bFig. 1
text_image
Joint Plate ProjectionFig. 2
Care of Your Microwave Oven
- Remove the plug from the electrical socket before cleaning.
- Keep the inside of the oven clean. If pieces of food or spilled liquids stick to the oven walls, or between door seal and door surface, they will absorb microwaves and may cause arcing or sparks. Wipe up all spills with a damp cloth. Kitchen detergent or Food Sanitizer Solution may be used if the oven gets very dirty. Do not use harsh detergents or abrasives.
Cleaning of the Splatter Shield
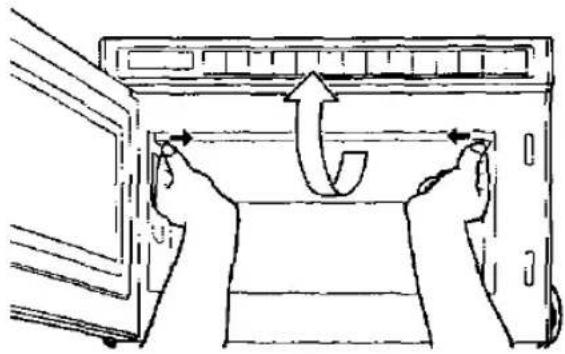
- Hold snap in-snap out side stoppers of splatter shield with both hands and pull them in and down. Then take the splatter shield out of the oven cavity.
- Rinse splatter shield in soapy water or Food Sanitizer Solution.
- Be sure to replace the shield before using the oven.
CAUTION
Splatter shield must be in place securely when you use the oven.
Cleaning the Air Filter
Clean the Air Filter regularly according to the following instructions. The oven may have problems when the Air Filter becomes clogged with dust.
-
Remove the Air Filter from the front bottom skirt by turning to left the right Screw. Then slide the filter to the right and lift it off the post at the left.
-
Wash this filter in warm soapy water.
-
Be sure to replace the Air Filter before using the oven.
*If the Air Filter becomes clogged with debris this will cause an overheating problem on the oven.
- The outside surface of this Microwave Oven should be cleaned with soap and water, then dried with a soft cloth. Make sure that water does not get into the back ventilation or control panel opening since this can damage the unit.
- The window of the door should be washed with very mild soap and water. Be sure to use a soft cloth. Never use window cleaner. The front door can be scratched by harsh soap or cleaners
natural_image
Line drawing of a person opening a door with arrows indicating airflow or movement (no text or symbols)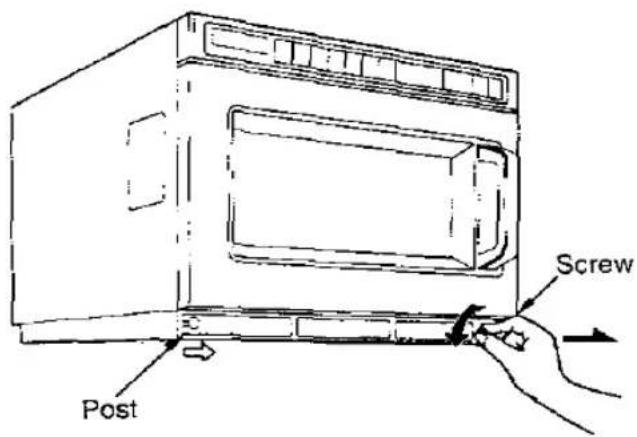
text_image
Screw PostMicrowave Basics
Fundamental principles determine the success of microwave food preparation.
They include:
- Temperature of Foods—Frozen or refrigerated food items will require longer heating times to reach a desired serving temperature than foods from room temperature.
- Food Components—Foods high in sugar, salt, fats and moisture content heat faster because these properties attract microwave energy. Denser foods high in protein and fibre, absorb microwave energy slower which means a lengthier heating time.
- Bulk/Volume—The greater the mass of food, the longer it takes to heat.
- Containers—Ceramic, paper, china, glass and plastic are suitable for use in microwave ovens with the following caution:
Heating foods with either high sugar or high fat content should be done ONLY in high temperature-resistant containers since these foods get very hot. Using styrofoam containers for these foods will cause the styrofoam to warp. Other low temperature restaurant glass or plastic platters may crack or warp, under similar conditions.
DO NOT HEAT foods in a SEALED container or bag. Foods expand when heated and can break the container or bag.
- AVOID METAL because it "bounces" the microwaves, causing uneven heating and sometimes even flashes, which may pit or mar the interior of the oven, the metal container or plate trim.
-
When heating liquids, e.g. soups, sauces and beverages in your microwave oven, overheating the liquid beyond boiling point can occur without evidence of bubbling. This could result in a sudden boil over of the hot liquid. To prevent this possibility the following steps should be taken:
-
Avoid using straight-sided containers with narrow necks.
-
Do not overheat.
-
Stir the liquid before placing the container in the oven and again halfway through the heating time.
-
After heating, allow to stand in the oven for a short time, stirring again before carefully removing the container.
General Guidelines for Heating in a Panasonic Microwave Oven
For specific time, see each food category for appropriate heating techniques. plus necessary pre-preparation of foods.
Heating Foods From Refrigerated Temperature
Foods stored in the refrigerator (5°C) should be covered before reheating with the exception of breads, pastries or any breaded product, which should be heated uncovered to prevent sogginess.
Most conventionally prepared foods should be slightly undercooked, and held in the refrigerator, so that overcooking does not occur during microwave heating.
Cooked items, such as vegetables, may be portion plated and covered for reheating without loss of color, texture or nutritional content.
Heating Foods From Room Temperature
Food items such as canned entrees, vegetables, etc. will require significantly less heating time than those from refrigerated temperatures.
Important Recommendations
- For best results it is recommended that foods conventionally prepared be slightly undercooked when subsequently heated in this oven.
- REMEMBER that after the heating cycle has been completed, internal food temperatures continue to rise slightly in foods heated in this oven.
- A major abuse of microwave applications is the category of breads and baked goods. Because crusts of breads, pastries and pies are drier than insides or fillings, they heat more slowly. Therefore, baked goods should ONLY be heated until the crust is warm to the touch (50°C–55°C).
- DO NOT OVERHEAT YOUR FOOD: 99% of all food quality complaints of microwave heated foods can be traced to overheating
Snacks
Snacks are quickly and easily reheated in the microwave.
Any bread or pastry based snacks should be reheated on a non metallic rack, covered with a piece of kitchen paper. This allows the air to circulate under the food to help prevent sogginess. Remember that pastries reheated in the microwave
oven will never be crisp as there is no hot air in the cavity to dry the pastry out, but the food should never be wet and soggy.
Do remember that products with the same heating time may be placed in the cavity and heated together. The heating times will vary if the products are bigger or smaller than those suggested in the charts.
| Food | Special Instructions | Power Setting | Approximate Times | ||
| NE-1456 | NE-1856 | ||||
| To Reheat | |||||
| Baked Beans | 2.6 kg/5 lb.12 oz.100 g/4 oz. | Put in shallow container. Stir halfway through time and at end. Stand. | HIGH | 10 min.1 min. | 7 min.40 sec. |
| Beefburger | To cook quarter pounder | Place on microwave rack. Stand. | HIGH | 1 min. 45 sec. | 1 min. 20 sec. |
| Beefburger in Bun | Frozen, 137 g/5 oz. | Prepare as instructions or remove from packaging and wrap in kitchen paper, place on microwave rack. | HIGH | 1 min. 15 sec. | 50 sec. |
| Cheeseburger in Bun | Frozen, 137 g/5 oz. | Prepare as instructions or remove from packaging and wrap in kitchen paper, place on microwave rack. | HIGH | 1 min. 20 sec. | 56 sec. |
| Cheese on Toast | 1 slice, 30 g/1 oz. grated cheese | Ensure that the toast is completely covered with cheese. | HIGH | 20 sec. | 14 sec. |
| Hot dog in Bun | ×1 | Place on a microwave rack and cover with kitchen paper. Stand. | HIGH | 30 sec. | 22 sec. |
| Jacket Potato with Cheese | Raw weight 290 g/10 oz. | Place on plate. Cut open and fill with cheese. Stand. | HIGH | 1 min. 15 sec. | 1 min. |
| Meat Pies | 115 g/4 oz. ×1 ×2 | Remove wrapping and foil containers. Place upside down on a plastic rack. Cover with kitchen paper. Stand. | HIGH | 40 sec.1 min. | 26 sec.46 sec. |
| Mushy Peas | 100 g/4 oz. | Place in container. Spread thinly. Do not mound. | HIGH | 46 sec. | 30 sec. |
| Pasty | 250 g/8 oz. | Place on microwave rack. Cover with kitchen paper. | HIGH | 1 min. 40 sec. | 1 min. 20 sec. |
| Pizza, Fresh | 1800 mm/7" | Remove wrapping. Place on plate. Do not cover. Stand before serving. | HIGH | 1 min. 30 sec. | 1 min. |
| Pizza, Frozen | 125 mm/5" ×1 ×2 | Remove wrapping. Place on plate. Do not cover. Stand. | HIGH | 1 min. 40 sec.2 min. 20 sec. | 1 min. 10 sec.1 min. 40 sec. |
| Sausage Roll | 70 g/2 1⁄2 oz. ×1 ×2 | Place on plastic rack. Cover with a piece of kitchen paper. | HIGH | 20 sec.32 sec. | 14 sec.24 sec. |
Soups and Starters
Pre-prepared starters should be refrigerated until use. Starters of the same basic shape and density can be reheated together. Most cooked starters heat on HIGH power, for approx. 10 seconds per 25 grams depending on weight, density, and bone content. Max. 30 seconds per 25 grams for dense items.
ALL HEATING TIMES LISTED IN THE CHART ARE FROM REFRIGERATED TEMPERATURES OF 5°C
| Food | Special Instructions | Power Setting | Approximate Times | ||
| NE-1456 | NE-1856 | ||||
| To Reheat | |||||
| Corn on cob from Fresh | To cook: 160 g/6 oz. & 15 ml/2 tbls. water | Place in dish. Add water. Cover. Stand at end of cooking time. | HIGH | 2 min.-2 min. 30 sec. | 1 min. 30 sec -1 min. 45 sec. |
| Chicken Tikka | 120 g/4 oz. | Place on plate. Cover. Stand. | HIGH | 1 min. 5 sec. | 42 sec. |
| Chicken wings | 150 g/6 oz. | Place on plate. Arrange thinner ends to centre. Cover. Stand. | HIGH | 1 min. | 44 sec. |
| Enchilades | 135 g/5 oz. | Place on plate. Do not cover. Stand. | HIGH | 1 min. 30 sec. | 1 min. |
| Spare Ribs | 215 g/8 oz. | Place on plate. Cover. Stand. | HIGH | 1 min. 25 sec. | 1 min. |
| Soup, cream of | 170 ml/6 fioz. ×1 ×2 | Place in bowl. Stir at end of the heating time. | HIGH | 1 min. 20 sec.2 min. 40 sec. | 55 sec.1 min. 45 sec. |
| Beef Broth | 1 litre/2 pints | Place in bowl. Stir at end of the heating time. | HIGH | 3 min. 45 sec. | 3 min. 30 sec. |
| Chicken noodle soup | 1 litre/2 pints | Place in bowl. Stir at end of the heating time. | HIGH | 4 min. 40 sec. | 3 min. 30 sec. |
| Clam Chowder | 1 litre/2 pints | Place in bowl. Stir at end of the heating time. | HIGH | 4 min. 30 sec. | 3 min. 30 sec. |
To Reheat from Frozen
| MoulesMarinière | 450 g | Place in micro-safe dish.Covered. | 1st HIGHStage | 1 min. 30 sec. | 1 min. 30 sec. |
| 2nd MEDStage | 3 min. | 3 min. | |||
| Sauced Pasta | 100 g | Place in micro-safe dish.Covered. | HIGH | 4 min. | 4 min. |
| Vegetable Chilli | 100 g | Place in micro-safe dish.Covered. | 1st HIGHStage | 3 min. | 3 min. |
| 2nd MEDStage | 3 min. | 3 min. |
Breakfast
Most breakfast foods are heated covered to retain moisture. For poached eggs, pierce yolks before heating and allow to stand for one minute after cooking so pressure subsides before cutting.
WARNING: NEVER COOK OR REHEAT EGGS IN THE SHELL. THEY MAY EXPLODE WHEN INTERIOR PRESSURE BUILDS UP.
| Food | Special Instructions | Power Setting | Approximate Times | ||
| NE-1456 | NE-1856 | ||||
| To Cook from raw chilled | |||||
| Bacon | 1 rasher2 rashers | Place on plastic rack and cover with kitchen paper. | HIGH | 40–50 sec.1 min.-1 min. 10 sec. | 25–30 sec.45–50 sec. |
| Mushrooms | 100 g/4 oz. | Place in shallow container. | HIGH | 2 min. 30 sec. | 1 min. 45 sec. |
| Kipper Fillets | Frozen, boil in bag, 200 g/8 oz. | Cut corner of bag. Place on plate. | HIGH | 3 min. 45 sec. | 3 min. 30 sec. |
| Poached Eggs | 1 egg & 120 ml boiling water | Break egg into ramekin containing water. Pierce white and yolk. | MEDIUM | 1 min. | 30 sec. |
| Porridge | 200 g/8 oz. oats & 500 ml milk | Place oats and milk in bowl with a pinch of salt. Stir at end of the heating time. | HIGH | 3 min. 15 sec.-3 min. 30 sec. | 2 min.-2 min. 15 sec. |
| Scrambled Egg | 2 eggs & 30 ml milk | Beat eggs and milk in jug. Stir halfway through and at the end of the cooking time. | HIGH | 40–50 sec. | 30–35 sec. |
| Smoked Haddock | 500 g/1 lb. 2 oz. | Place fillets on plate and cover: | HIGH | 3 min. 30 sec. | 2 min. 16 sec. |
| To Reheat | |||||
| Bacon | 1 rasher2 rashers | Place on plate and cover with kitchen paper. | HIGH | 10 sec.15 sec. | 10 sec.12 sec. |
| Full breakfast | 1 plate | Arrange on a plate. | HIGH | 1 min. 20 sec. | 1 min. |
| Kedgerce | 500 g/1 lb. 2 oz. haddock & 200 g/8 oz. cooked rice | Arrange on shallow platter. Cover. | HIGH | 2 min. | 1 min. 15 sec. |
| Kidneys on toast | 1 piece | Ensure kidneys cover the toast or dot exposed areas with butter. | HIGH | 40 sec. | 30 sec. |
| Milk, for coffee | 500 ml/1 pt. | Pour into jug. Stir before serving. | MEDIUM | 5 min. 30 sec. | 4 min. |
| Poached Egg on toast | 1 piece | Dot exposed corners of toast with butter. | HIGH | 20 sec. | 15 sec. |
| Sausages | 1 cooked2 cooked | Place on plate and cover with kitchen paper | HIGH | 20 sec.30 sec. | 13 sec.24 sec. |
| Scrambled Egg on toast | 1 piece | Ensure toast is covered with egg. | HIGH | 50 sec. | 34 sec. |
Fish
DEFROSTING: Fish and seafood will defrost easily in a microwave. To defrost evenly the fish should be arranged in a single layer on a container and should only be thawed to the point of being flexible so it does not begin to cook at the edges.
PRIME COOKING: Cooking individual portions demands close attention to prevent overcooking. If fish is overcooked it will become hard and inedible. Always prick with a sharp knife to prevent popping.
| Food (For 500 g/1 lb. 2 oz.) | Special instructions | Power Setting | Approximate Times | ||
| NE-1456 | NE-1856 | ||||
| Defrosting | |||||
| Fish Fillets | Place on plate. Cover lightly. Break fillets apart halfway through the time. If frozen in a block, wash under cold water after defrosting. | DEFROST | 8 min. | 8 min. | |
| Fish Steaks | Place on plate. Cover lightly. Break steaks apart halfway through the time. If frozen in a block, wash under cold water after defrosting. | DEFROST | 8 min. | 8 min. | |
| Prawns | Place in dish. Stir halfway through the time. Run under cold water. | DEFROST | 4 min. | 4 min. | |
| Whole Fish | 280 g/9 oz. ×1 | Place on plate. Cover lightly. Wash under cold water after defrosting. | DEFROST | 4 min. | 4 min. |
| To Cook | |||||
| Fish Fillets | Place on plate. Place smaller fillets to the center of the plate. Cover. Stand at end of time. | HIGH | 3 min. 30 sec. | 2 min. 45 sec. | |
| Fish Steaks | Place on plate. Arrange thinner areas to the centre. Cover. Stand at end of time. | HIGH | 3 min. 30 sec. | 3 min. | |
| Whole Fish | 280 g/9 oz. ×1 | Place on plate. Cover. After half the time shield head and tail with aluminium foil. Stand. | HIGH | 50 sec. | 34 sec. |
Baked Goods and Sweets
Breads, pastries and pies should be heated uncovered. on HIGH power. For best results place on absorbent material, such as a napkin or paper towel to prevent sogginess.
DO NOT OVERHEAT breads and pastries. Baked goods should only be heated until the crust feels warm to the touch (50°C–55°C). Overheating will cause bread to be inedible.
Because crusts of breads, pastries and pies are drier than insider or fillings. they heat more slowly. After heating allow to food rest for approx. 1 min. for the temperature to even out.
Heating times for sweet baked goods and desserts are relatively short because of the high sugar content.
| Food | Special Instructions | Power Setting | Approximate Times | ||
| NE-1456 | NE-1856 | ||||
| To Warm | |||||
| Croissant | 50 g/2 oz. ×1×2 | Place on rack and cover with kitchen paper. | HIGH | 8 sec.12 sec. | 8 sec.12 sec. |
| Doughnuts | 50 g/2 oz. ×1 | Place on kitchen paper. | HIGH | 10 sec. | 8 sec. |
| Fruit Pies individual | 50 g/2 oz. ×1×2 | Remove from foil container and place on rack. Cover with kitchen paper. | HIGH | 8 sec.12 sec. | 8 sec.12 sec. |
| To Defrost | |||||
| Gateau | 150–180 mm6–7" portion | Remove all packaging. Place on plate. | DEFROST | 3 min. | 3 min. |
| Rolls | 50 g/2 oz. ×1×2 | Place on kitchen paper. | DEFROST | 30 sec.45 sec. | 30 sec.45 sec. |
| To Reheat | |||||
| Baked Syrup Roll | 75 g/3 oz. | Place on plate. Stand. | HIGH | 16 sec. | 10 sec. |
| Christmas Pudding | 115 g/5 oz. | Place on plate. Stand. | HIGH | 44 sec. | 24 sec. |
| Custard Portion | 150 g/6 oz. floz. | Place in shallow container. Stir halfway through and at end. | HIGH | 50 sec. | 38 sec. |
| Slice of Apple Pie | 75 g/3 oz. | Place on plate. Stand. | HIGH | 16 sec. | 10 sec. |
| Sponge Pudding | 100 g/4 oz. | Place on plate. Stand. | HIGH | 20 sec. | 12 sec. |
| Suet Pudding | 75 g/3 oz. | Place on plate. Stand. | HIGH | 16 sec. | 10 sec. |
| To Freshen | |||||
| Freshen Rolls | 50 g/2 oz. ×1×2 | Place on kitchen paper. | HIGH | 8 sec.10 sec. | 6 sec.8 sec. |
Sauces and Gravies
Chilled gravies. sweet and savoury sauces can be reheated quickly on HIGH power. Stir well during heating to ensure an even temperature.
| Food | Special Instructions | Power Setting | Approximate Times | ||
| NE-1456 | NE-1856 | ||||
| To Reheat | |||||
| Bechamel Sauce | 1 litre/2 pts. | Place in large, shallow container. Stir at least twice during heating time. | HIGH | 6 min. | 4 min. |
| Veloute Sauce | 1 litre/2 pts. | Place in large, shallow container. Stir at least twice during heating time. | HIGH | 6 min. | 5 min. |
| Gravy | 1 litre/2 pts. | Place in large, shallow container. Stir at least twice during heating time. | HIGH | 4 min. 30 sec. | 3 min. 30 sec. |
Rice and Pasta
Reheat covered at HIGH power. Adding moisture such as a sauce can help rehealing though is not essential. Rice and pasta dishes with cheese sauce, require more stirring than tomato-based sauces to avoid over-healing and cheese sauce may become stringy if overcooked.
| Food | Special Instructions | Power Setting | Approximate Times | ||
| NE-1456 | NE-1856 | ||||
| To Reheat | |||||
| Basmati Rice | 150 g/6 oz. | Place cooked rice in shallow container. Cover. Stand covered. Stir. | HIGH | 48 sec. | 32 sec. |
| Fried Rice | 150 g/6 oz. | Place cooked rice in shallow container. Cover. Stand covered. Stir. | HIGH | 50 sec. | 34 sec. |
| Pilau Rice | 150 g/6 oz. | Place cooked rice in shallow container. Cover. Stand covered. Stir. | HIGH | 46 sec. | 30 sec. |
| Lasagne | 326 g/11 12 oz. | Place in shallow cooking container. Cover. Stand at end of time. | HIGH | 5 min.-5 min. 30 sec. | 4 min. |
| Tagliatelle with Sauce | 290 g/10 oz. | Place in shallow container. Cover. Stir during cooking time and at end. Stand. | HIGH | 2 min. | 1 min. 45 sec. |
Vegetables
Most vegetables, individual and bulk portions, defrost, and cook very successfully in the microwave. retaining colour and texture as well as nutritional value. The thicker and more fibrous the vegetable the longer the cooking time.
Frozen vegetables can be defrosted and heated in one step. One to two tablespoons of water per 450 g should be added to frozen vegetables.
Icy sections should be broken up during heating for even temperature distribution.
Canned vegetables can be heated using HIGH power for approx. 1 minute per pound.
Most fresh vegetables are prepared with a small amount of water (see charts). Do not salt before cooking as this will toughen the vegetables, salt after cooking e.g. with a knob of salty butter.
| Food | Special Instructions | Power Setting | Approximate Times | ||
| NE-1456 | NE-1856 | ||||
| To Cook Fresh Vegetables 450 g (1 lb.) | |||||
| Broccoli | 60 ml/4 tbls. water | Trim stems and cut a cross in the base of any thick stems. Arrange in the cooking container with the stems to the outside. | HIGH | 4 min. 30 sec. | 3 min. |
| Cabbage | 180 ml/12 tbls. water | Trim leaves and shred. Remove very thick parts of the stem. | HIGH | 4 min. 30 sec.-5 min. | 3 min. 30 sec.-4 min. |
| Carrots | 60 ml/4 tbls. water | Prepare and slice into even pieces. Do not cut too thickly. Stir at end of time. | HIGH | 4 min. 30 sec.-5 min. | 3 min. 30 sec.-4 min. |
| Cauliflower | 60 ml/4 tbls. water | Trim leaves and divide into florets. | HIGH | 4 min. 30 sec.-5 min. | 3 min. 30 sec.-4 min. |
| Courgettes | No water | Trim ends and slice evenly. | HIGH | 3 min. 30 sec.-4 min. | 2 min. 30 sec.-2 min. 45 sec. |
| French Beans | 60 ml/4 tbls. water | Trim ends. | HIGH | 6 min. | 4 min. |
| Leeks | 30 ml/2 tbls. water | Trim ends and wash well. Slice into 40 mm/1 12 " pieces. | HIGH | 3 min. 30 sec. | 2 min. 15 sec. |
| Potatoes, Boiled | 60 ml/4 tbls. water | Peel and cut into even shaped pieces. Stir at end of cooking time. | HIGH | 4 min. 30 sec. | 3 min. 30 sec. |
| Potatoes, Jacket | 6-8 oz. per ×1 ×2 ×3 ×4 | Wash and prick with a fork. Turn over after half the cooking time. Wrap in foil and leave to stand after the cooking time. | HIGH | 5 min. 8 min. 30 sec. 12 min. 16 min. | 3 min. 30 sec. 5 min. 45 sec. 8 min. 30 sec. 11 min. |
| Sprouts | 1 piece | Trim and cut a small cross in the base of each sprout. Stir at end of cooking time. | HIGH | 4 min. 30 sec.-5 min. | 3 min. 30 sec.-4 min. |
| To Cook Frozen Vegetables 450 g (1 lb.) | |||||
| Cabbage | 60 ml/4 tbls. water | Place shredded cabbage in a suitable container. Add water. Stir halfway through and at the end of the cooking time. Stand. | HIGH | 7 min. | 4 min. 45 sec. |
| Carrots, baby | 30 ml/2 tbls. water | Place in a suitable container. Add water. Stir halfway through and at the end of the cooking time. Stand. | HIGH | 7 min. 30 sec. | 5 min. 30 sec. |
| Courgettes, sliced | 15 ml/1 tbls. water | Place courgettes in a suitable container. Add water. Stir halfway through and at the end of the cooking time. Stand. | HIGH | 6 min. | 4 min. 30 sec. |
| To Cook Frozen Vegetables | |||||
| French Beans | 30 ml/2 tbls. water | Place beans in a suitable container. Add water. Stir halfway through and at the end of the cooking time. Stand. | HIGH | 8 min. | 5 min. 30 sec. |
| Leeks, sliced | 30 ml/2 tbls. water | Place leeks in a suitable container. Add water. Stir halfway through and at the end of the cooking time. Stand. | HIGH | 20 sec. | 15 sec. |
| Peas | 30 ml/2 tbls. water | Place in a suitable container. Add water. Stir halfway through and at the end of the cooking time. | HIGH | 40 sec. | 30 sec. |
| Potatoes, Jacket | Pre-cooked, raw weight 290 g/10 oz. | Wrap potatoes in kitchen paper. Turn over after half the cooking time. Stand. | HIGH | 1 min. 20 sec. | 1 min. |
| Sprouts | 30 ml/2 tbls. water | Place in a suitable container. Add water. Stir halfway through and at the end of the cooking time. Stand. | HIGH | 6 min. 30 sec. | 4 min. 30 sec. |
| To Reheat Canned Vegetables | |||||
| Carrots, sliced | 3 kg/6 lb. 10 oz. | Place in a suitable container. Add water. Stir halfway through and at the end of the cooking time. Stand. | HIGH | 14 min. | 10 min. |
| Potatoes, whole | 2.4 kg/5 lb. 3 oz. | Place in a suitable container. Add water. Stir after half and at end of cooking time. Stand. | HIGH | 12 min. | 6 min. 30 sec. |
| Food | Special Instructions | Power Setting | Approximate Times | |
| NE-1456 | NE-1856 | |||
To Reheat Precooked Chilled Vegetables
| Broccoli | 500 g/1 lb. 2 oz.100 g/4 oz. | Cover portioned vegetables and reheat. Stir at end of heating time and stand before serving. | HIGH | 2 min.40 sec. | 1 min. 45 sec.30 sec. |
| Cabbage | 500 g/1 lb. 2 oz. | Cover portioned vegetables and reheat. Stir at end of heating time and stand before serving. | HIGH | 3 min. 30 sec.-4 min. | 2 min. 30 sec.-2 min. 45 sec. |
| Carrots | 500 g/1 lb. 2 oz.100 g/4 oz. | Cover portioned vegetables and reheat. Stir at end of heating time and stand before serving. | HIGH | 2 min.-2 min. 15 sec.44 sec. | 1 min. 30 sec.-1 min. 45 sec.30 sec. |
| Cauliflower | 500 g/1 lb. 2 oz.100 g/4 oz. | Cover portioned vegetables and reheat. Stir at end of heating time and stand before serving. | HIGH | 2 min-2 min. 15 sec.40 sec. | 1 min. 30 sec.28 sec. |
| Courgettes | 500 g/1 lb. 2 oz.100 g/4 oz. | Cover portioned vegetables and reheat. Stir at end of heating time and stand before serving. | HIGH | 2 min.-2 min. 15 sec.40 sec. | 1 min. 30 sec.-1 min. 45 sec.26 sec. |
| French Beans | 500 g/1 lb. 2 oz.100 g/4 oz. | Cover portioned vegetables and reheat. Stir at end of heating time and stand before serving. | HIGH | 2 min.40 sec. | 1 min. 30 sec.30 sec. |
| Leeks | 500 g/1 lb. 2 oz.100 g/4 oz. | Cover portioned vegetables and reheat. Stir at end of heating time and stand before serving. | HIGH | 2 min.44 sec. | 1 min. 30 sec.30 sec. |
| Potatoes, Boiled | 500 g/1 lb. 2 oz.100 g/4 oz. | Cover portioned vegetables and reheat. Stir at end of heating time and stand before serving. | HIGH | 2 min. 30 sec.-3 min.44 sec. | 2 min.32 sec. |
| Potatoes,Jacket | 29 g/10 oz. ×1×2×3×4 | Place on kitchen paper and reheat. Stand before serving. | HIGH | 1 min. 30 sec.3 min.4 min. 45 sec.6 min. | 1 min. 15 sec.2 min. 30 sec.4 min.5 min. 15 sec. |
| Sprouts | 500 g/1 lb. 2 oz.100 g/4 oz. | Cover portioned vegetables and reheat. Stir at end of heating time and stand before serving. | HIGH | 2 min.-2 min. 5 sec.30 sec. | 1 min. 30 sec.-1 min. 45 sec.20 sec. |
Plated Meats and Cooked Dishes
Arrange meat or poultry slices in a single layer, overlapping pieces as little as possible, when appropriate cover the meat or poultry evenly with sauces. Covering with a plate or dish will help keep food moist, during reheating.
ALWAYS CHECK WITH A TEMPERATURE PROBE. (Ensure the food is at the correct temperature, which should be according to the current safety regulations.)
| Food | Special Instructions | Power Setting | Approximate Times | ||
| NE-1456 | NE-1856 | ||||
| Reheating | |||||
| Average Prepared Meal | 326 g/11 12 oz. ×1 | Prepare as instructed. Do not heat from frozen. Cover. Stand at end of time. The dense products which can not be stirred will take the longer time. Products which can be stirred will take a shorter time; do not forget to stir the food halfway through and at the end of the heating time. | HIGH | 4 min.-5 min. 30 sec. | 2 min. 30 sec.-4 min. |
| Beef Stew with Dumplings | 340 g/12 oz. | Place in a dish. Cover and reheat. Stand covered. | HIGH | 3 min. | 2 min. |
| Bombay Potatoes | 160 g/6 oz. | Place in dish. Cover and heat. Stir and leave to stand. | HIGH | 1 min. 15 sec. | 1 min. |
| Bolognese Sauce | 220 g/8 oz. | Place in shallow container. Stir halfway through cooking time and at end. Stand. | HIGH | 1 min. 45 sec. | 1 min. 10 sec. |
| Cauliflower Cheese | 225 g/8 oz. | Place in a suitable dish. Cover and heat. Stand covered. | HIGH | 1 min. 35 sec. | 1 min. 15 sec. |
| Chicken in Sauce with Rice | 60 ml/4 tbls. water | Arrange food correctly on plate. Cover and heat. Stand covered. | HIGH | 2 min. 30 sec. | 2 min. 15 sec. |
| Chicken Portion | To cook: 210 g/7 12 oz. | Place on plastic rack in dish. Score skin. Cover and cook. Stand covered. | HIGH | 3 min. | 2 min.-2 min. 30 sec. |
| Chicken Portion | To reheat: 210 g/7 12 oz. cooked | Arrange on plate. Cover and heat. Stand. | HIGH | 1 min. 10 sec. | 46 sec. |
| Cottage Pie | 326 g/11 12 oz. | Place in suitable container. Stand. | HIGH | 4 min. | 2 min. 30 sec. |
| Curry and Rice | 160 g/6 oz. rice 170 g/6 12 oz. curry | Arrange food correctly on plate. Cover and heat. Leave to stand. | HIGH | 2 min.-2min. 30 sec. | 1 min 45 sec.-2 min. |
| Gammon Steak | To cook: 240 g/8 12 oz. | Place on plastic rack in dish. Cover and cook. Stand covered. | HIGH | 1 min. 50 sec. | 1 min. 30 sec. |
| Gammon Steak | To reheat: 240 g/8 12 oz. cooked | Arrange on plate. Cover and heat. Stand. | HIGH | 1 min. 15 sec. | 50 sec. |
| Lamb Chops | 120 g/4 oz. | Place on plate. Cover. Stand. | HIGH | 48 sec. | 34 sec. |
| Moussaka | 300 g/10 12 oz. | Place in dish. Cover and heat. Stir and leave to stand. | HIGH | 3 min. | 2 min. 35 sec. |
| Ratatouille | 160 g/6 oz. | Place in dish. Cover and heat. Stir and leave to stand. | HIGH | 1 min. 15 sec. | 1 min. |
| Roast Meal | 75 g/3 oz. meat x175 g/3 oz. veg. x275 g/3 oz. pots. x4 | Arrange food correctly on plate. Add gravy and cover.Leave to stand covered. | HIGH | 1 min. 50 sec. | 1 min. 10 sec. |
| Defrosting | |||||
| Lamb Chops | 240 g/12 oz. 2 chops | Place on plate thickest part to the outside. Turn during time. Stand. | DEFROST | 5 min. | 5 min. |
| Minced Meat | 454 g/1 lb. | Place in shallow container.Remove any food that defrosts within the time. Stand. | DEFROST | 6 min. | 6 min. |
| Pork Chops | 365 g/13 oz. 2 chops | Place on plate thickest part to the outside. Turn during time. Stand. | DEFROST | 5 min. | 5 min. |
| Prepared Meal | 328 g/11 12 oz. | Prepare as instructed. Break up if possible during defrost time. Stand. | DEFROST | 4-6 min. | 4-6 min. |
| Prepared Meal | 1.36 kg/3 lb. | Prepare as instructed. Break up if possible during defrost time. Stand. | DEFROST | 12-14 min. | 12-14 min. |
| Steaks | 300 g/10 oz. 2 steaks | Place on plate. Turn during defrost time. Stand. | DEFROST | 5 min. | 5 min. |
Technical Specifications
| NE-1456 | NE-1856 | |
| Power Source | 230–240 V, 50 Hz, single phase | 230–240 V, 50 Hz, single phase |
| Required Power | 10.2 A2270 W | 12.3 A2830 W |
| Output | HI 1400 W (IEC-705)MED 700 WDEF 340 W | HI 1800 W (IEC-705)MED 900 WDEF 340 W |
| Frequency | 2450 MHz | |
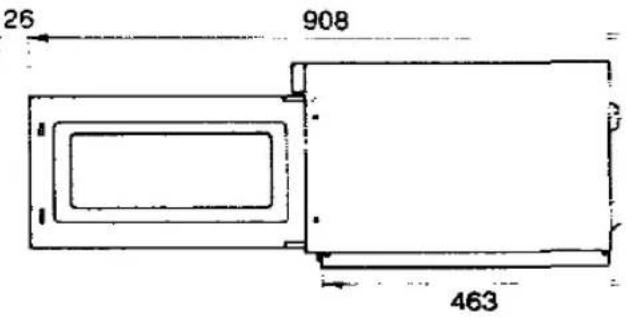
| Outer Dimensions (W×D×H) | 422 mm×508 mm×335 mm | |
| Cavity Dimensions (W×D×H) | 330 mm×310 mm×175 mm | |
| Net Weight | 30 kg | |
| Timer | 30 min. (digital)/10 touch padsMaximum programable time for single stage heatingHI and MED power=15 min.DEF power=30 min. | |
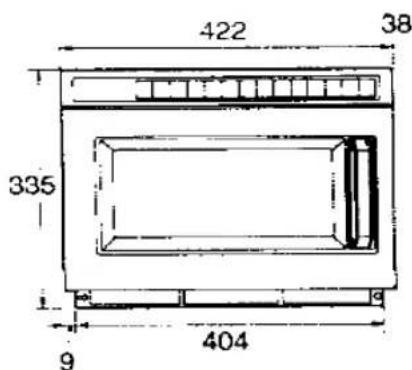
text_image
422 38 335 9 404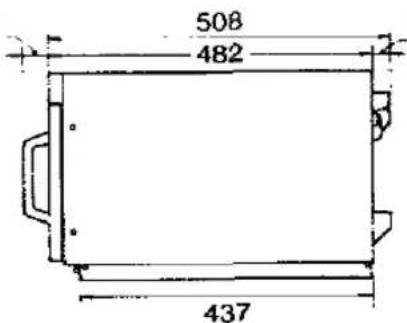
text_image
508 482 437