
RQ-V158 - Hi-Fi PANASONIC - Kostenlose Bedienungsanleitung
Finden Sie kostenlos die Bedienungsanleitung des Geräts RQ-V158 PANASONIC als PDF.


Benutzerfragen zu RQ-V158 PANASONIC
0 Frage zu diesem Gerät. Beantworten Sie die, die Sie kennen, oder stellen Sie Ihre eigene.
Eine neue Frage zu diesem Gerät stellen
Laden Sie die Anleitung für Ihr Hi-Fi kostenlos im PDF-Format! Finden Sie Ihr Handbuch RQ-V158 - PANASONIC und nehmen Sie Ihr elektronisches Gerät wieder in die Hand. Auf dieser Seite sind alle Dokumente veröffentlicht, die für die Verwendung Ihres Geräts notwendig sind. RQ-V158 von der Marke PANASONIC.
BEDIENUNGSANLEITUNG RQ-V158 PANASONIC
Operating Instructions
Mode d'emploi Bedienungsanleitung Gebruiksaanwijzing Bruksanvisning Brugsvejledning Istruzioni per l'uso Instrucciones de manejo
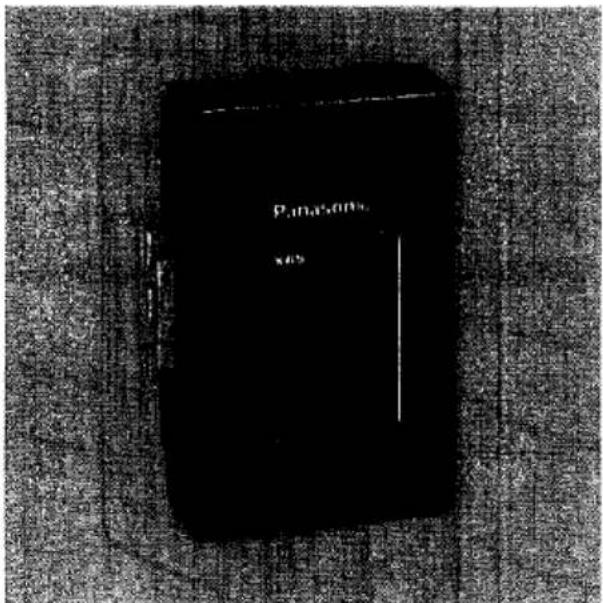
Stereo Radio Cassette Player
MODEL NO RQ-V158
text_image
Panasonic x65Panasonic
Read these instructions completely before operating this unit.
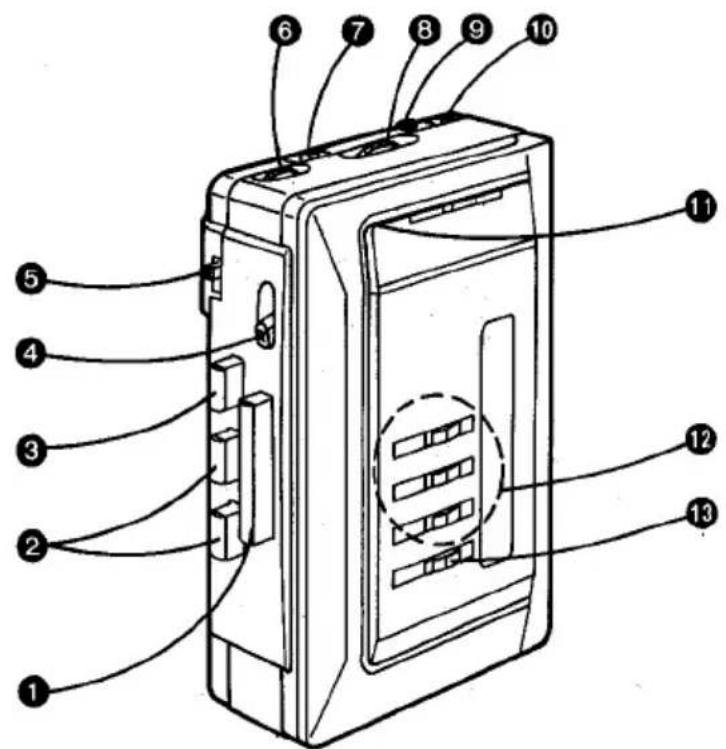
A LOCATION OF CONTROLS
text_image
Diagram of a device rear panel with numbered components for identification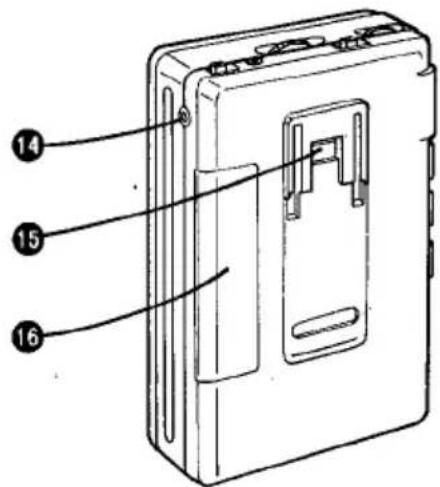
text_image
Diagram of a device with numbered parts labeled 14, 15, and 16 pointing to internal components.
PRECAUTIONS
text_image
Max. 40°C
POWER SOURCE
■ Battery Operation
Two Panasonic R6/LR6, UM-3 batteries
natural_image
Simple line drawing of a device casing with internal components and a base (no text or symbols)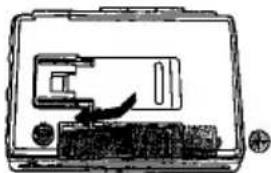
natural_image
Simple line drawing of a device with a handle and base, no text or symbols present
CASSETTE TAPES
text_image
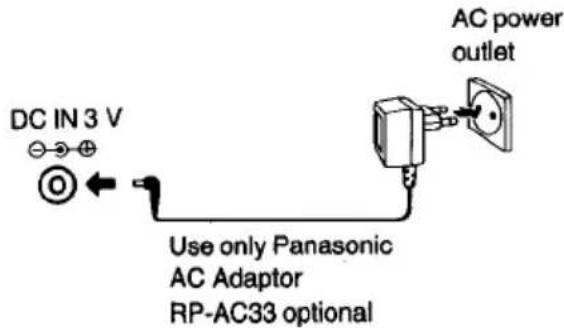
O Pencil X■ AC Power Operation
text_image
DC IN 3 V Use only Panasonic AC Adaptor RP-AC33 optional AC power outlet●For UK, the shape of the AC Adaptor is different.

CASSETTE INSERTION
natural_image
Diagram of an open refrigerator with doors and a door, showing internal compartments and ventilation slots (no text or labels)
natural_image
Technical line drawing of an open industrial control cabinet with internal compartments (no text or symbols)
BELT CLIP
text_image
Belt Clip• Attaching Clip to your belt
•To remove
natural_image
Simple line drawing of two hands holding a rectangular object with a small object on top (no text or symbols)
MAINTENANCE
text_image
PLAY Pressure roller Captoons Playbox head Pressure roller Cotton swabThank you very much for purchasing this unit.
For optimum performance, follow these instructions carefully.
6-12
LOCATION OF CONTROLS (A)
① Playback Button (⇐ PLAY)
② Fast Buttons (▲·▼ FAST)
③ Stop Button (■ STOP)
④ Direction Selector (DIR)
⑤ Function Selector (SELECTOR)
⑥ Volume Control (VOLUME)
⑦ Tape Selector (TAPE)
⑧ Tuning Control (TUNING)
⑨ Headphones Jack (Ω)
10 *Dolby Noise Reduction Switch/FM Mode Switch (DOLBY NR/FM MODE)
⑪ FM Stereo Indicator (FM ST)
⑫ Graphic Equalizer Controls
⑬ XBS Level Control (XBS LEVEL)
⑭ DC Input Jack (DC IN 3 V ⊖-⊕)
⑮ Clip Receptacle
16 Battery Compartment
* Dolby noise reduction manufactured under license from Dolby Laboratories Licensing Corporation.
"DOLBY" and the double-D symbol □□ are trademarks of Dolby Laboratories Licensing Corporation.
PRECAUTIONS (B)
- the set is not used for a long period of time or is used only from an AC mains supply, remove all the batteries to prevent potential damage due to possible battery leakage.
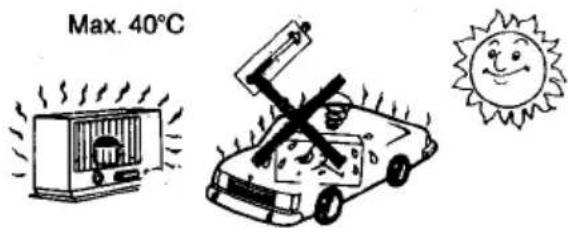
- Avoid using or placing this unit near sources of heat. Do not leave it in an automobile exposed to direct sunlight for a long period of time with the doors and windows closed, as this may deform the cabinet.
- When not in use, disconnect the AC adaptor from the AC power outlet.
CASSETTE TAPES (C)
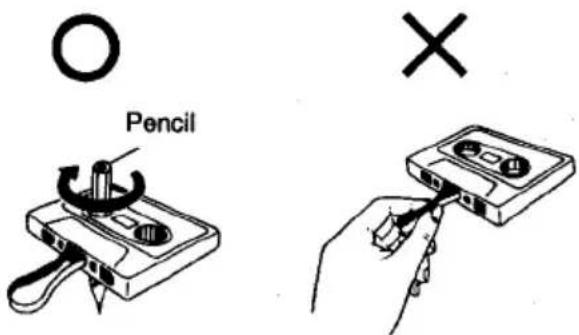
Cassette tapes, both recorded and unrecorded, should not be stored in locations with high temperature, high humidity or direct sunlight. Never place a recorded cassette near a magnetic source such as a magnet or a TV set as this may affect tape performance.
Precautions for Listening with the Headphones
- Do not play your headset at a high volume. Hearing experts advise against continuous extended play.
- If you experience a ringing in your ears, reduce volume or discontinue use.
- Do not use while operating a motorized vehicle. It may create a traffic hazard and is illegal in many areas.
- You should use extreme caution or temporarily discontinue use in potentially hazardous situations.
- Even if your headset is an open-air type designed to let you hear outside sounds, don't turn up the volume so high that you can't hear what's around you.
POWER SOURCE (D)
- Battery removal
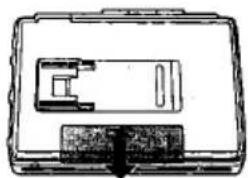
Press battery (not included) "2" toward the ⊖ battery terminal and remove it.
•Battery Life
When the batteries are weak, the tape speed will slow down, the sound will become distorted, and the volume will decrease. Replace them with new ones as soon as possible.
To Prevent Possible Damage to this Unit
- Load new battery with their polarities (⊕ and ⊖) aligned correctly.
- Do not apply heat to batteries, or internal shortcircuit may occur.
- If this unit is not to be used for a long period of time, or used on AC mains supply, remove the batteries and store them in a cool and dry place.
- Remove spent batteries immediately.
- Do not use old and new batteries together. Also never use an alkaline battery with a manganese battery.
RADIO
- Connect the included stereo headphones to "ie Headphones Jack.
- Set the Function Selector to "FM" or "AM".
- Tune in your favorite station using the Tuning Control.
- When you listen to a FM broadcast, set the FM Mode Switch to the proper position (Refer below).
- Adjust the Volume Control, Graphic Equalizer Controls and XBS LEVEL Control to the desired setting.
- To turn off the radio, set the Function Selector to "TAPE/OFF".
Notes:
- To receive FM stereo broadcasts, set the FM/Mode Switch to "ST".
- If FM stereo reception is poor (excessive noise), set the FM Mode Switch to "MONO". This will reduce the noise and provide more clear reception; however, the broadcast will not be heard in stereo.
■ XBS Level Control
At this control to "MAX" during broadcasting or tape yback to boost the low frequency range. You can enjoy dynamic low sound as if you were in a concert hall.
■ Graphic Equalizer Controls
It allows you to tailor the frequency response of the unit to compensate for room acoustics and other factors which affect frequency response. The overall tone can be altered by adjusting the controls which control the following frequency bands:
330 Hz, 1 kHz, 10 kHz
Positioning the control to the "+" side of the detent will amplify the corresponding frequency band; the "-" side will attenuate it.
Antennas
FM:
The headphones cord serves as the FM antenna, hence be sure to use it extended, not coiled.
AM:
The sensitive ferrite core antenna inside the set will provide excellent AM reception in most areas. For optimum reception, turn the set in the direction which gives the best results, since the ferrite core antenna is directional.
Note:
Be sure to have the set in an upright position when you listen to AM broadcasts. If you use the radio in a horizontal position, it may not function adequately.
TAPE PLAYBACK
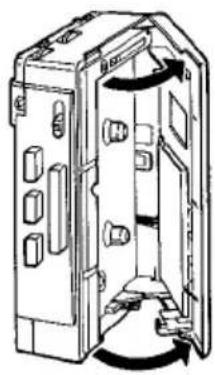
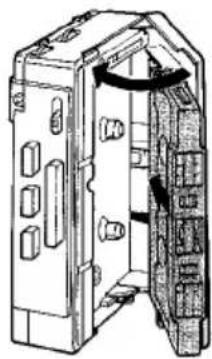
- Open the Cassette Compartment cover with your hand. Insert a cassette as shown in the figure, and then close the Cassette Compartment cover. (E)
- Connect the included stereo headphones to the Headphones Jack.
- Set the Function Selector to "TAPE/OFF"
- Press the Playback Button, and playback will begin.
- Adjust the Volume Control, XBS Level Control and Graphic Equalizer Controls to the desired settings.
●To stop the playback, press the Stop Button.
Notes:
- Do not open the Cassette Compartment cover during playback.
- If you set the Function Selector to "FM" or "AM" during playback, the Playback Button will not be released although the motor has stopped. Press the Stop Button to release the Playback Button.
■ Fast Forward and Rewind
The tape will rapidly advance in the forward or rever direction when one of the Fast Buttons is pressed.
Notes:
- When the tape reaches the end by pressing one of the Fast Buttons, the tape movement stops, but the unit is not turned off.
Do not leave the set in this condition.
Be sure to press the Stop Button.
- Do not press the Playback Button during fast forward or rewind, as this may jam the tape. Always press the Stop Button first, between functions.
■ Dolby Noise Reduction
: unit includes Dolby Noise Reduction which reduces noise to a remarkable degree.
- Set the Dolby Noise Reduction Switch to "ON" to playback a tape recorded with Dolby Noise Reduction. For other tapes, set the switch to "OFF"
■ Tape Selector
Set the Selector to the appropriate position according to the type of tape being used.
MTL/CrO2: Metal tape/High bias chromium tape or equivalent
NOR: Low bias ferric oxide tape
■ Auto Reverse (Continuous Playback)
When the tape comes to the end of its travel, the auto reverse system functions, and the tape direction changes automatically to start playing the opposite side of the tape.
- The cassette tape will run continuously, changing from forward to reverse, then back again, etc., until the Stop Button is pressed.
■ Manual Reverse
Select the playback side, Forward or Reverse, by setting the Direction Selector to "FWD" or "REV"
■ Direction Memory Function
If the Stop Button is pressed during playback, the direction in which the tape was running will be memorized. When the Playback Button is pressed once again, the same side of the tape will be played back.
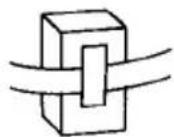
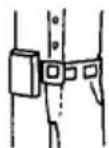
BELT CLIP (F)
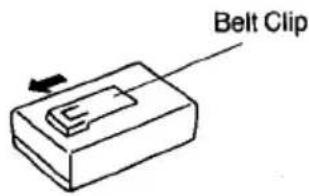
•To attach the Belt Clip
Fit the included Belt Clip into the Receptacle and push to slide up with the index finger.
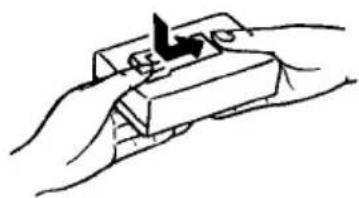
•To remove the Belt Clip
Push to slide down with the index finger.
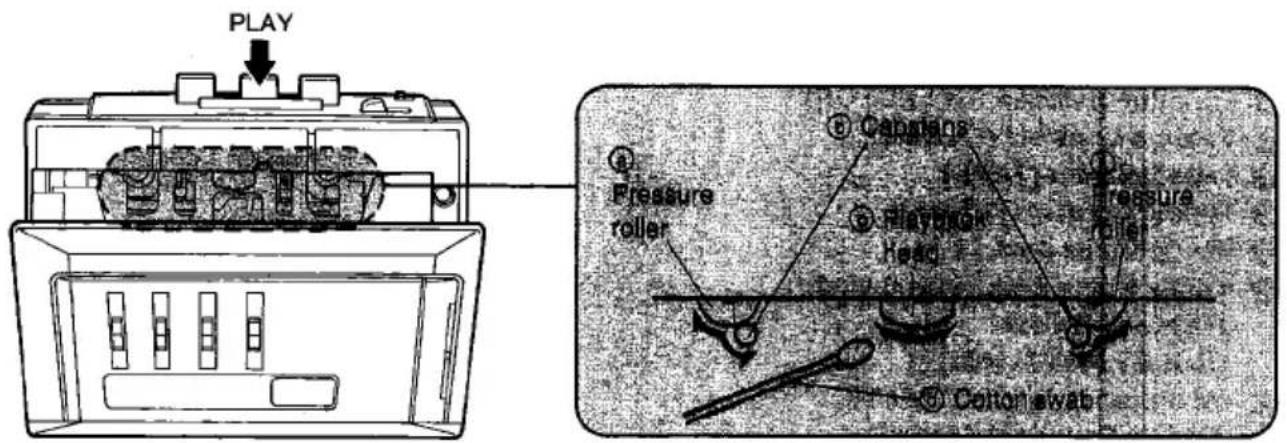
MAINTENANCE (G)
- If the head assembly is extremely dirty, clean them w a soft cloth dampened with a little alcohol.
- Do not bring any type of metal objects or tools such as magnetic screwdrivers in contact with the head assembly.
- Do not clean the plastic cabinet with benzine or thinner. Clean it with a solution of soap and water.
- Avoid spray-type insecticides. Some insecticides contain chemicals that could cause cabinet deformation.