Active Purge Assisit - Nicht kategorisiert Tusa - Kostenlose Bedienungsanleitung
Finden Sie kostenlos die Bedienungsanleitung des Geräts Active Purge Assisit Tusa als PDF.


| Produkttyp | Tauchausrüstung – Aktive Spülhilfe |
| Marke | Tusa |
| Modell | Active Purge Assist |
| Verwendungszweck | Reinigung und Spülung von Tauchreglern |
| Abmessungen (ca.) | 10 x 5 x 3 cm |
| Gewicht (ca.) | 200 g |
| Material | Kunststoff, Edelstahl |
| Farbe | Schwarz |
| Druckbereich | Bis 300 bar geeignet |
| Anschluss | Standard Niederdruckanschluss |
| Funktion | Aktive Spülhilfe zur Entfernung von Salzwasser und Schmutz |
| Reinigung | Nach jedem Tauchgang mit Frischwasser spülen |
| Lagerung | Trocken und kühl lagern, vor direkter Sonneneinstrahlung schützen |
| Sicherheit | Druckbegrenzungsventil integriert |
| Wartung | Jährliche Inspektion durch Fachpersonal empfohlen |
| Lieferumfang | Active Purge Assist, Bedienungsanleitung |
| Garantie | 1 Jahr |
Häufig gestellte Fragen - Active Purge Assisit Tusa
Benutzerfragen zu Active Purge Assisit Tusa
0 Frage zu diesem Gerät. Beantworten Sie die, die Sie kennen, oder stellen Sie Ihre eigene.
Eine neue Frage zu diesem Gerät stellen
Laden Sie die Anleitung für Ihr Nicht kategorisiert kostenlos im PDF-Format! Finden Sie Ihr Handbuch Active Purge Assisit - Tusa und nehmen Sie Ihr elektronisches Gerät wieder in die Hand. Auf dieser Seite sind alle Dokumente veröffentlicht, die für die Verwendung Ihres Geräts notwendig sind. Active Purge Assisit von der Marke Tusa.
BEDIENUNGSANLEITUNG Active Purge Assisit Tusa
TUSA
1st
Method for Changing to Active Purge Assist (APA) Inflator Unit and Usage Method

Note
In some cases, old BCs can not be replaced with APAs, for example because some have different bracket diameters or have the screw mounting rotation direction reversed. For details on which products can be replaced with APAs, please contact your store of purchase or contact us directly.
Preface
Thank you for purchasing this TUSA active purge assist (APA) Inflator unit. This APA Inflator is equipped with a 3-way exhaust system that has the "① Normal exhaust by pressing the exhaust button" and "② Rapid exhaust operating of the OPEV by pulling the Inflator main unit section" of the previous TUSA Inflator.
Setting the low pressure hose
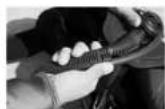
Connect the plug for the coupler for the regulator BCJ medium pressure hose, then fill in the low pressure hose in the groove on the side of the infillator hose as in Photographs 8 and 9. This arranges the hose, nearby and makes it easier to handle and makes it easier to mount and remove the BCJ.
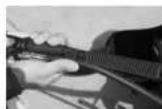
(Photograph 8)
[Photograph 9]
Iors and adds "③ Rapid exhaust operating the OPEV by pressing the APA button".
The APA is a system that opens and closes the shoulder top OPEV (over-pressure exhaust valve) with the force of the medium pressure air to exhaust in the same way as ②. Since the air piping is a simple structure just within the inflator main unit, the APA is more compact and reliable than previous products of the same model. Because rapid exhaust can be executed with the simple operation of just pressing a button, smoother descent is possible.
Replacement method
Use the following procedure to replace a standard TUGA BCJ inflator with an APA inflator.

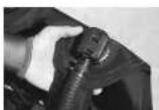
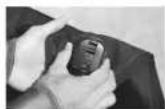
Turn current BCJ inflator unit shoulder top screw cap counter-clockwise and remove the screw cap from the BCJ main unit. (Photographs 1-3)
(Photograph 1)
APA inflator setting position
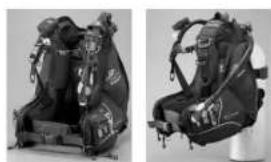
The recommended APA Inflator setting position is the same as for a regular inflator. (Photograph 10)
Of course, normal exhaust operations and use of the quick release valve (rapid exhaust) by pulling the APA inflator main unit are both possible. When primarily using the rapid exhaust function with the APA exhaust button, there is also an APA inflator setting position that uses the BCJ hose holder to fasten with the APA exhaust button right at hand. (Photograph 11)
natural_image
Two side-by-side images of a person wearing a black athletic vest and harness, seated on a white stand (no text or symbols visible)iPhotograph 10; iPhotograph 11
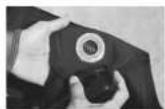
(Photograph 3) (Photograph
in the vertical direction, then tighten the screw cap. (Photographs 5-6)
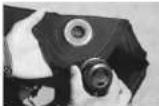
(Photograph 5)
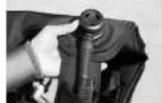
[Photograph 6]

After removing the screw cap, check that the ring-shaped silicone gasket at the center of the BCJ main unit mount is securely fit into place. Be careful. If the gasket comes out of place, this causes air leaks. (Photograph 4)
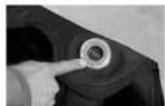
(Photograph 4)

Put the screw cap for the replacement APA inflator unit on the main unit mount and tighten the cap securely by turning it clockwise. When the screw cap is tightened all the way, the inflator hose section stops turning, so first align the inflator hose position so that it extends from the shoulder top

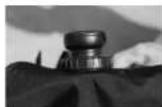
In order to ensure that the APA infillator unit can not come loose, check that the screw cap groove and the main unit mount groove are parallel with each other and fit securely all the way in. (Photograph 7)
If the grooves are fit at a slant, remove the APA initiator unit, then remount it correctly.
Photograph 71
APA inflator unit
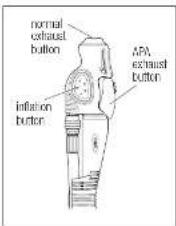
To take in air from the tank and obtain buoyancy, press the or ange inflation button. Holding down this button can take in more air than necessary, so adjust the amount of air by repeatedly pressing the button for a short while then releasing it. On the other hand, air can be exhausted from the BCJ to lower buoyancy by raising the APA inflator main unit high in the direction of the water surface and pressing the regular exhaust button. It is also possible to exhaust rapidly by pressing the APA exhaust button. Of course, it is equipped with the quick release function, which is a feature of TUSA BCIs. This function "enables you to exhaust rapidly by grasping the APA inflator main unit with one hand and just pulling in the horizontal direction".
* See Page 21-22 of the BCJ user's manual.
text_image
normal exhaust button inflation button APA exhaust buttonCautions for APA inflator usage
Reaching the bottom
If the APA infillator main unit is dragged along a surface, for example when you reach the bottom, then sand and pebbles may jam the APA exhaust button and make exhaust operation impossible. If exhaust operations do become impossible, either use a normal exhaust operation or use the quick release value function to exhaust. After exiting, carefully wash out the sand clogging the button with running water.
Usage of other functions
For details on and precautions for usage of other functions, please check the TUSA BCI user's manual. This user's manual can be downloaded from the TUSA homepage.
Address: http://www.tusa.com