Bitter Springs UL1 - Zelt Big Agnes - Kostenlose Bedienungsanleitung
Finden Sie kostenlos die Bedienungsanleitung des Geräts Bitter Springs UL1 Big Agnes als PDF.


Benutzerfragen zu Bitter Springs UL1 Big Agnes
0 Frage zu diesem Gerät. Beantworten Sie die, die Sie kennen, oder stellen Sie Ihre eigene.
Eine neue Frage zu diesem Gerät stellen
Laden Sie die Anleitung für Ihr Zelt kostenlos im PDF-Format! Finden Sie Ihr Handbuch Bitter Springs UL1 - Big Agnes und nehmen Sie Ihr elektronisches Gerät wieder in die Hand. Auf dieser Seite sind alle Dokumente veröffentlicht, die für die Verwendung Ihres Geräts notwendig sind. Bitter Springs UL1 von der Marke Big Agnes.
BEDIENUNGSANLEITUNG Bitter Springs UL1 Big Agnes
BITTER SPRINGS UL SET UP INSTRUCTIONS
- Remove contents from stuff sack. Spread tent body out on ground.
- Stake out the four corners of the tent.
- Assemble the pole. To ensure each pole section is fully seated insert each pole section into the next by hand, instead of allowing the shock cord to snap them together.
- Insert the pole tips into each Jake's Foot at the side of the tent.
- Attach the Twist Clips to the pole and stake out the sides of the body.
- Go to the back of the tent, locate the black pocket and insert the tip of your trekking pole in it. If you will be using the tent without the fly then and stake out the guyline. If you will be using the tent with the fly then you can wait to guy out this point.
- Drape the rain fly over the body aligning the Jake's feet of body with the corresponding hooks on the fly.
- On the underside of the fly, there are Velcro straps behind each guy-out loop. Affix the Velcro straps around the pole.
- Make sure the webbing at the corners of the rainfly is completely slackened. Attach each of the hooks at the side of the rainfly to the corresponding Jake's Foot at the side of the tent body.
- Stand in front of the fly door and locate a webbing loop at the black reinforced patch on the underside of the fly. Insert the tip of your trekking pole in the webbing loop, adjust the height and stake out the vestibule at the front.
- Go to the back of the tent, locate the black pocket on the tent body, and insert the tip of your trekking pole into that pocket. Locate the webbing loop at the reinforced black patch on the rainfly and insert the black pocket with the pole in it. Adjust the height and stake out the fly at the back.
- Stake out the rest of the guylines
- Walk around your tent and make any necessary adjustments.
Separate 6", large diameter pole segment included for emergency field repair. Slide repair pole over the break to act as a splint.

Hardware:
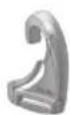
Twist Clip
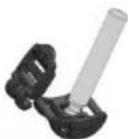
Jake's foot assembly
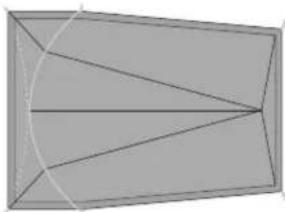
natural_image
Geometric diagram of a rectangle with internal lines and a curved line, no text or symbols presentBitter Springs UL Tent Top View
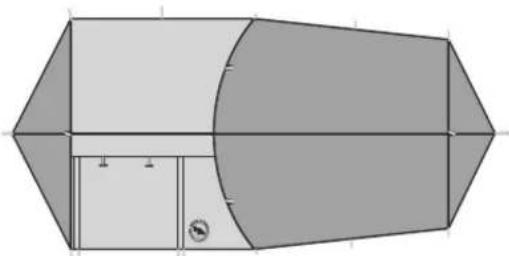
natural_image
Pure geometric diagram of a symmetrical 3D shape with internal divisions and no text or symbolsBitter Springs UL Fly Top View

natural_image
Four grayscale images of different camping tents, each with a simple roof and tent outline (no text or symbols visible)Bitter Springs UL1 Bitter Springs UL2
Thanks for choosing a Big Agnes tent!
Please feel free to contact us if you have any questions or comments.
tech@bigagnes.com
HELPFUL HINTS FOR TENT SET UP
- Our tents are easy to set up but we suggest you practice once at home before using them for the first time to avoid late night bickering with tent mates while fumbling around in the dark.
- Before pitching tent, clear campsite of debris that may pierce tent floor.
- Big Agnes tents are all freestanding, but we recommend staking them out to increase space and keep your tent from becoming a tumbleweed.
- Hang onto your stuff sacks or they'll blow away and create backcountry litter.
- Pull on the pole sleeve fabric when inserting poles to avoid any bunching in the material.
- Push rather than pull poles through pole sleeves.
TENT CARE
Storage
Always make sure your tent is dry and free of debris before storing. Fold and roll your tent a different way each time to avoid permanent creases. Store in a cool, dry place. Never leave your tent in hot temperatures (such as a car trunk or attic space), as it will damage the material coatings. Storing your tent damp can result in mildew growth, which may cause your tent to smell, leak or delaminate. Mildew damage is not covered under warranty.
Cleaning
For light cleaning, you can sponge the tent with warm water. If it's necessary to wash the entire tent, always use cleaners recommended specifically for tents. We recommend McNett Mirazyme cleaner, or Nikwax Tech Wash. Do not dry clean or machine-wash your tent. Detergents and dry cleaning solvents will damage the fabric and ruin waterproofing. Never use hot water, bleach, liquid detergents or dishwashing liquids.
Seam Sealing
Seam tape alone is durable enough to prevent water leakage. Any seams that have been taped do not need to be seam sealed with a liquid sealer unless you want extra protection. Make sure the seam-sealer is completely dry before re-packing your tent. Damage caused by misapplication may void warranty.
Zippers
Keeping your zippers clean will help keep the coils and sliders from wearing out. If filled with dirt, vacuum or brush zippers before storing tent. We recommend McNett Zip care.
Repairs and Warranty
All Big Agnes tents are guaranteed against manufacturing or material defect. We do not warranty products damaged from normal wear and tear, alteration made by owner, misuse, accidents or damages caused by uses other than intended. Damage due to misuse, normal wear and tear, or improper care may be repaired, at the discretion of Big Agnes, at a reasonable charge. Tents returned for repair must be clean and free of debris.

For more information on Tent Care or our Warranty and Return policy, see www.bigagnes.com
P.O. Box 773072 • Steamboat Springs, Colorado • 80477
Toll Free: 877.554.8975 • www.bigagnes.com

Cut here to remove. Do Not Tear!