TopShot Lay-Up - Nicht kategorisiert Etan - Kostenlose Bedienungsanleitung
Finden Sie kostenlos die Bedienungsanleitung des Geräts TopShot Lay-Up Etan als PDF.


Benutzerfragen zu TopShot Lay-Up Etan
0 Frage zu diesem Gerät. Beantworten Sie die, die Sie kennen, oder stellen Sie Ihre eigene.
Eine neue Frage zu diesem Gerät stellen
Laden Sie die Anleitung für Ihr Nicht kategorisiert kostenlos im PDF-Format! Finden Sie Ihr Handbuch TopShot Lay-Up - Etan und nehmen Sie Ihr elektronisches Gerät wieder in die Hand. Auf dieser Seite sind alle Dokumente veröffentlicht, die für die Verwendung Ihres Geräts notwendig sind. TopShot Lay-Up von der Marke Etan.
BEDIENUNGSANLEITUNG TopShot Lay-Up Etan
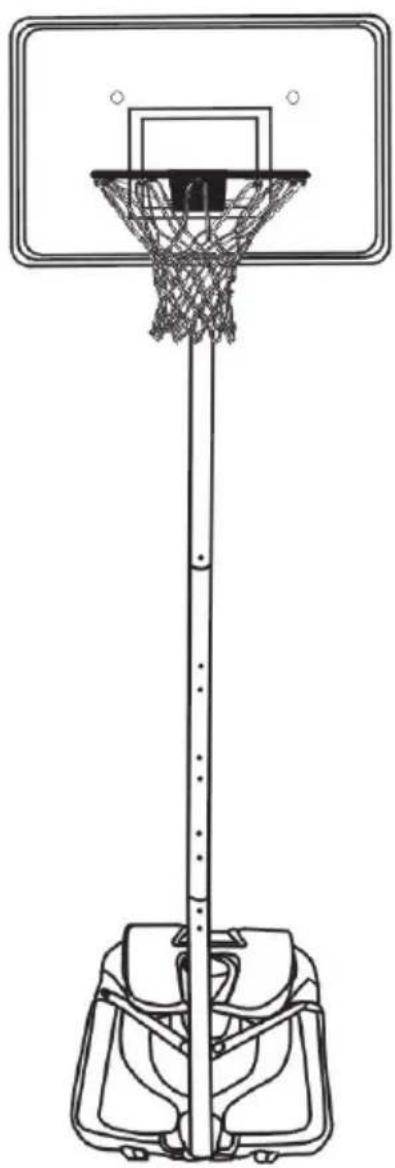
PORTABLE BASKETBALL STAND
TopShot Lay-up
natural_image
Line drawing of a basketball hoop with basket and support structure (no text or symbols)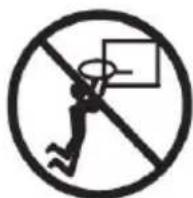
WARNING:
IMPROER INSTALLATION OR SWINGING ON THE RING MAY CAUSE SERIOUS INJURY OR DEATH
Notice to assemblers:
All the basketball systems, including those used for displays, must be assembled and ballasted according to instructions. Failure to follow instructions could result in serious injury.
Please read all warnings and cautions before assembly. It is recommended to supervise children as they play with this product. This product is to be assembled by 2 adults only!
Moving the system:
Note: The system should be moved by at least 2 adults capable of handling its weight. Children should not be allowed to move the system.
- Stand in front of the system and pull the pole forward until the system is balanced on its wheels.
- Move the system to the desired location and carefully set the base down.
!!WARNING!!
FAILURE TO COMPLY WITH THESE WARNINGS COULE RESULT IN INJURY. FAILURE TO COMPLY COULD ALSO RESULT IN PROPERTY DAMAGE.
- Never hang from the rim or climb on the pole as injury or property damage could occur. For these reasons do not perform dunking type activities on this system as it is not designed for such use. Do not allow children to climb on the basketball system.
• Never leave the unit assembled without weight in the tank! - Check the tank frequently for leaks or a loose cap. Slow leakage could cause the system to tip over unexpectedly and damage the floor if used inside.
- Seat the pole sections properly. Not doing so might allow the pole sections to separate during play or during transportation of this system.
• Further check before each use if all fittings and hardware are tight
• Climate, corrosion or misuse could result in system failure.
• This system is not intended for children 3 and under.
• All players must use sufficient guards when playing.
POLE CARE AND SYSTEM MAINTENANCE:
The live of your basketball system depends on many variables, The climate, exposure to corrosives such as salt, pesticides or herbicides and excessive use or misuse can all contribute to pole failure, which may cause property damage or personal injury.
Check your basketball system frequently for loose hardware, excessive wear and signs of corrosion. For safety reasons and to prolong the life of your basketball system, you must take the following preventive measures:
- Check all nuts and bolts, If any are loose, tighten them.
• Check all parts for excessive wear and tear, If necessary, replace any parts that have been worn or
- Check all pole sections for visible rust, chipped or cracked paint. If either are present, do the following:
- Use an emery cloth to completely remove any rust or chipped paint.
- Clean the area with a damp cloth and allow it to dry.
- Apply two coats of a rust preventative, high gloss enamel to the area. Allow the paint to dry between two coats.
Assembly Steps
-
Open the carton, find out all the parts listed on page 4.2 adults are required for assembly.
-
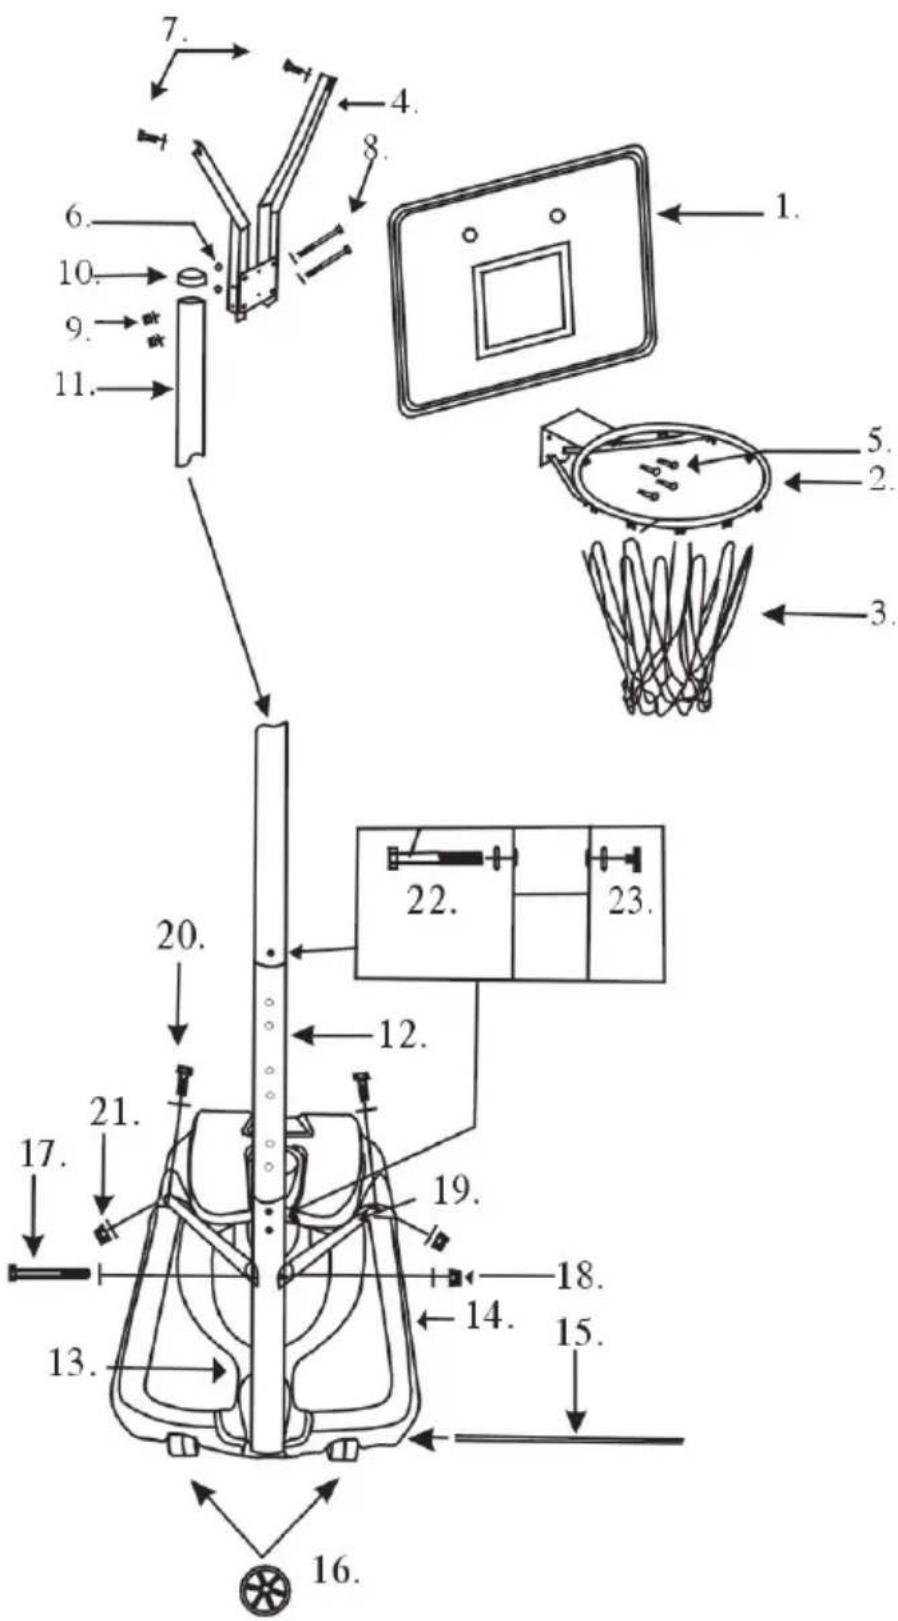
Fix ring (2) and board bracket (4) on board (1) by bolts (4) and nuts (6), after that, use bolts (7) to fix the top of board bracket (4) on the back of board (1) tightly. Insert top pole (11) into board bracket (4), fix them by bolts (8) and nuts (9)
-
Insert top pole (11) on the top of middle pole (12), then insert the middle pole (12) into bottom pole (13), fix these poles together by bolts (22) and plastic nuts (23)
-
Place the base (14) on a chosen playing ground, the surface beneath the base should be horizontal. Insert the wheel shaft (15) into wheel (16), base (14) and end of bottom pole (13) orderly.
-
Fix one end of the 2pcs pole braces (19) on bottom pole (13) by bolt (17) and nut (18). Then fix another end of the 2pcs pole braces (19) on base (14) by bolt (20) and nut (21)
-
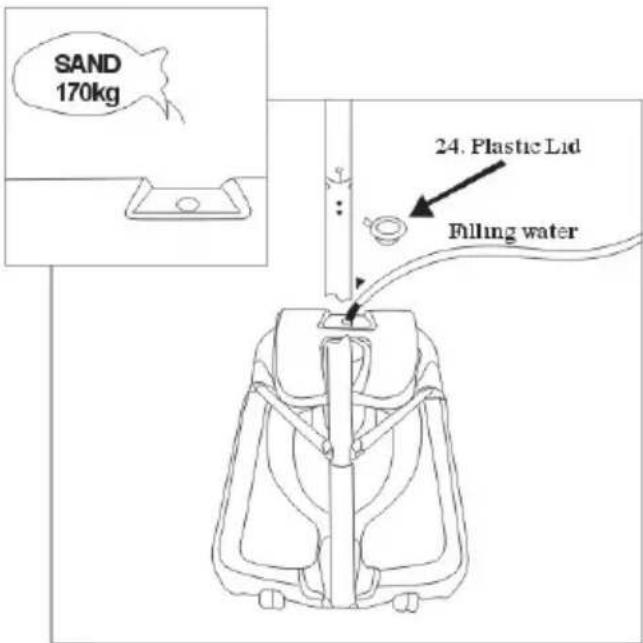
Tighten all the bolts. Filling the base with water or sand as below:
text_image
SAND 170kg 24. Plastic Lid Filling waterWHEN USING WATER:
- Place the base on a smooth surface only! without gravel or other sharp objects which could puncture the base and cause leakage.
- Check the base frequently for cracks and punctures.
- Always check the water level before the game. If a leak is found or the water level is low, lay the system onto the ground so that it can't tip over.
- Add a tablespoon of chlorine bleach to the water each time the base is filled with water. This prevents algae forming inside the base.
text_image
Technical diagram of a mechanical device with numbered components and labeled parts in Chinese1.Board X1
- Ring X1
3.Net X1
- Board Brackrt X1
5.Bolt X4
6.Nut X4
7.Bolt X2
8.Bolt X2
9.Nut X2
10.Cap X1
11.Top Pole X1
12.Middle Pole X1
13.Bottom Pole X1
14.Base X1
-
Wheel Shaft X1
-
Wheel X2
17.Bolt X1
18.Nut X1
- Pole Brace X2
20.Bolt X2
21.Nut X2
22.Bolt X3
- Plastic Nut X3