D5152 - Nicht kategorisiert Eonon - Kostenlose Bedienungsanleitung
Finden Sie kostenlos die Bedienungsanleitung des Geräts D5152 Eonon als PDF.


Benutzerfragen zu D5152 Eonon
0 Frage zu diesem Gerät. Beantworten Sie die, die Sie kennen, oder stellen Sie Ihre eigene.
Eine neue Frage zu diesem Gerät stellen
Laden Sie die Anleitung für Ihr Nicht kategorisiert kostenlos im PDF-Format! Finden Sie Ihr Handbuch D5152 - Eonon und nehmen Sie Ihr elektronisches Gerät wieder in die Hand. Auf dieser Seite sind alle Dokumente veröffentlicht, die für die Verwendung Ihres Geräts notwendig sind. D5152 von der Marke Eonon.
BEDIENUNGSANLEITUNG D5152 Eonon

eonon
Wishing roads were longer.
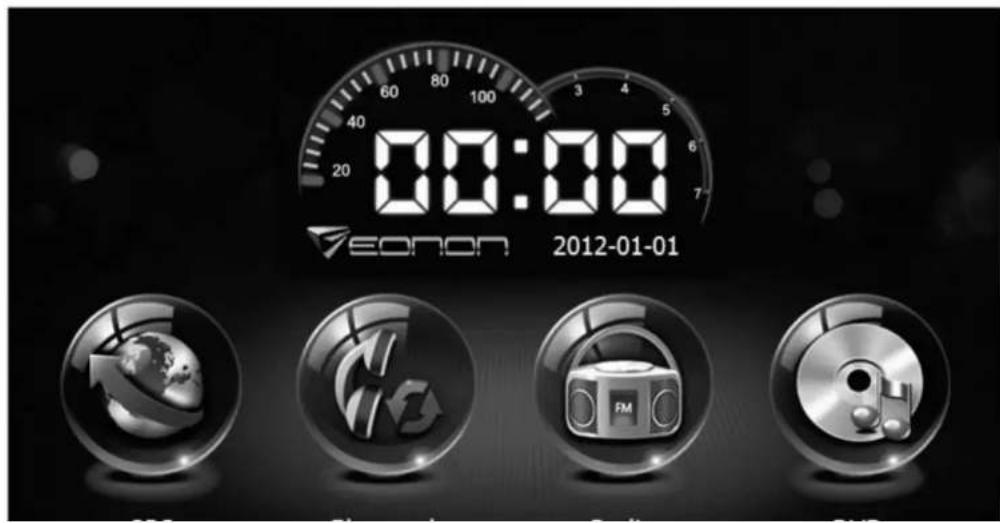
text_image
00:00 ECON 2012-01-01GPS
Bluetooth
Radio
DVD

User manual
Please read this manual carefully before using the unit, and keep it for future reference.

eonon
Content
Connection Settings
Connection Settings 2
Notes 3
Main Menu 4
Setting Interface 5
Navigation Mode 10
Bluetooth Mode 10
Radio Mode 14
DVD, SD, USB Mode 15
TV Mode 17
IPOD Mode 17
AUX Mode 18
TPMS Mode 19
DLNA Mode 20
Miracast Mode 26
Remote Control 26
Troubleshooting 29
Product Parameters 30
Thank you!
Thank you purchasing Eonon vehicle audio/video products!
Please read Instruction Manual before usage and keep it safe for future reference.

1
Connection Settings:
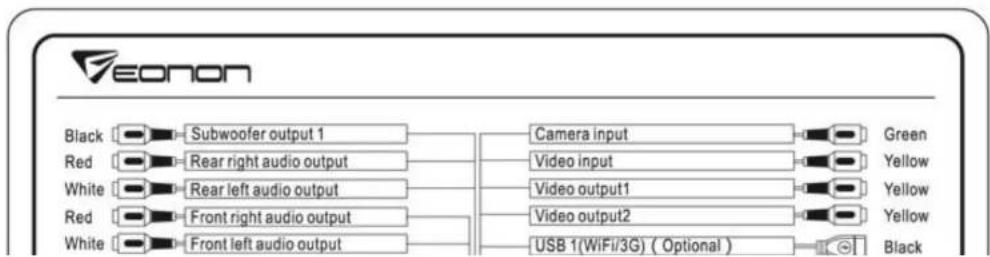
flowchart
graph LR
    A["Black"] --> B["Subwoofer output 1"]
    C["Red"] --> D["Rear right audio output"]
    E["White"] --> F["Rear left audio output"]
    G["Red"] --> H["Front right audio output"]
    I["White"] --> J["Front left audio output"]
    K["Camera input"] --> L["Green"]
    M["Video input"] --> N["Yellow"]
    O["Video output1"] --> P["Yellow"]
    Q["Video output2"] --> R["Yellow"]
    S["USB 1(WiFi/3G) (Optional)"] --> T["Black"]
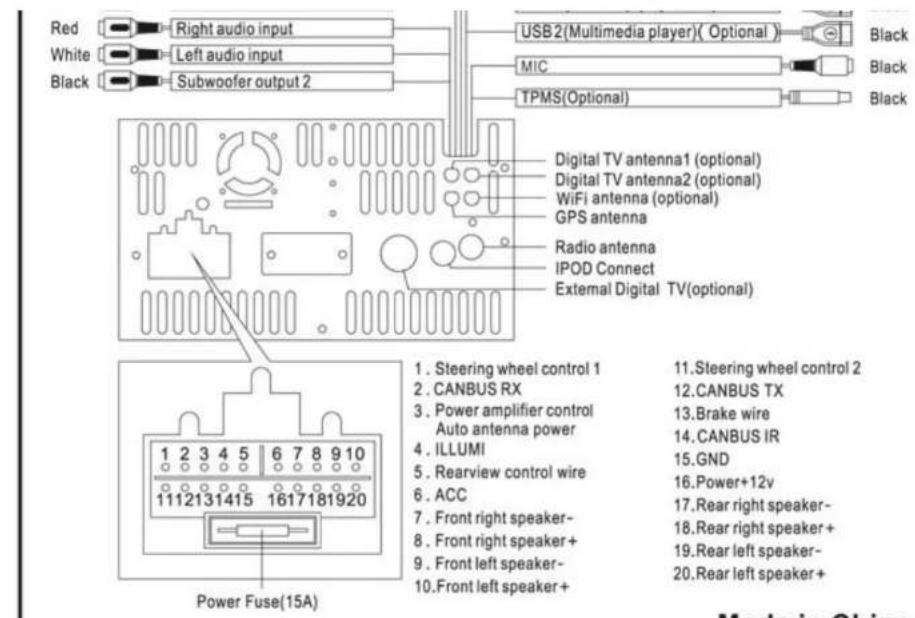
text_image
Red Right audio input White Left audio input Black Subwoofer output 2 USB2(Multimedia player)(Optional) MIC TPMS(Optional) Black Black Digital TV antenna1 (optional) Digital TV antenna2 (optional) WiFi antenna (optional) GPS antenna Radio antenna IPOD Connect External Digital TV(optional) Power Fuse(15A) 1. Steering wheel control 1 2. CANBUS RX 3. Power amplifier control Auto antenna power 4. ILLUMI 5. Rearview control wire 6. ACC 7. Front right speaker- 8. Front right speaker+ 9. Front left speaker- 10.Front left speaker+ 11.Steering wheel control 2 12.CANBUS TX 13.Brake wire 14.CANBUS IR 15.GND 16.Power+12v 17.Rear right speaker- 18.Rear right speaker+ 19.Rear left speaker- 20.Rear left speaker+Made in China
Note: Be sure the unit is connected to a 12V DC power supply with negative ground. Please take the actual function of product as the standard.
Notes:
- This machine adapts to negative grounded vehicles using a DC12V battery, so it is required to install decompression devices before installing in large-sized vehicles using a 24V battery such as trucks and town buses etc.
In order to avoid short circuit of electric system, please disconnect negative wire of the battery before installation.
please fixed the cables to specific position, such as hand brake or gear lever etc. Keep the wire away from any heat source, such as heating vent etc., otherwise, fusion or abrasion of insular layer made by heat source, would cause short circuit in wire connection or vehicle body.
It is required to use a specified fuse (15A) for replacement. Using a fuse with high rated capacity, or connecting without fuse, will cause the device damaged, even on fire.
- Do not insert the yellow power supply cable into engine room through installation hole, otherwise it may damage power supply cable, and cause short circuit.
Do not connect power supply cable of other devices to this machine, otherwise it would cause overload and overheat.
- Please warp unused speaker wire with heat shrinkage tube or insulating tape so as to avoid short circuit.
- Be sure to insulate any exposed wire to avoid short circuit with any other metal terminal.
- If there's no ACC in the car, please use startup key to connect startup wire to "NO/OFF" power supply.
When this machine is powered on, control signals from externally connected amplifier will go through wire POW-AMP output, if an amplifier is externally connected to this machine, do not connect POW-AMP wire to power supply terminal of amplifier, otherwise, it may cause electric leakage and failure.
- Grounding of speaker output terminal of this machine is prohibited, otherwise, it may damage amplifier. Do not use 3-wire speaker sharing a grounding wire, or connect speaker wire to vehicle body.
- Speaker connecting this machine must be high-power, and min. rated value should be 50W, resistance value should be 4?. Do not connect wire of several speakers directly, and keep resistance value within the scope, otherwise, it may cause short circuit and damage the speaker.
Warning:
- In order to avoid fire or electric shock, do not expose the machine in a humid environment.
- There're dangerous high-voltage fittings installed in the machine, do not open machine cover.
- Any change or reform of this machine may cause inconvenience, please inquire our company or units authorized by our company if necessary.
- Keep clean CD feed-in, wipe off dust immediately if there's any, otherwise, dust may be brought in by CDs and impact play effect of the machine over a long period of time, causing poor Disc read quality or Disc read failure.
- Longtime disc playing under high volume may impact usage life of this product. In order to protect this product, please use Radio function for longtime usage, and adjust the volume to mediate.
- This machine is composed of components with high precision, do not dismantle or modify components in the machine on your own, so as to avoid any damage.
- Keep the screen away from any hard object, so as to avoid any scratch.
Safety Tips:
- Do not watch movies or operate the unit when driving for your safety.
- This system is only for auxiliary usage for parking or backing, and the Company takes no responsibility for any backing accident.

3
Main Menu:


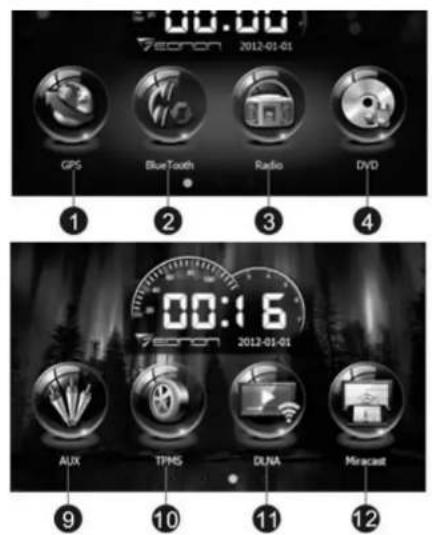
text_image
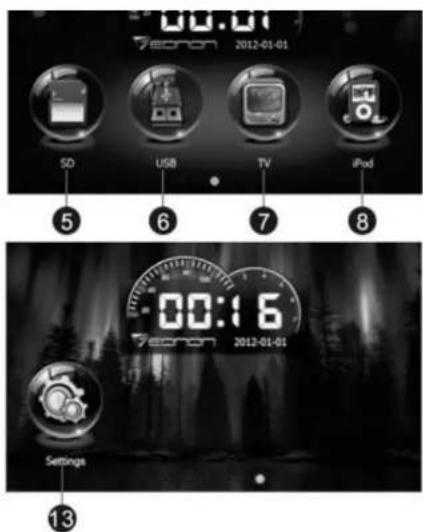
00:00 7ecron 2012-01-01 GPS BlueTooth Radio DVD 1 2 3 4 00:16 7ecron 2012-01-01 AUX TPMS DUNA Miracast 9 10 11 12- GPS Mode
- USB Mode
- DLNA Mode
- Bluetooth Mode 3. Radio
- TV Mode 8. IPOD Mode
- Miracast Mode 13. Setting
text_image
00:01 7eeron 2012-01-01 SD USB TV iPod 5 6 7 8 00:16 7eeron 2012-01-01 Settings 13- DVD Mode
- AUX Mode
- SD Mode
- TPMS Mode
Main menu is displayed in 3 windows respectively, scrolling the screen switch to the next window.
11 functional icons of main interface could be dragged freely to different positions (It is only required to long press the icon for 2 seconds to drag it to a different position).
Enter into different modes by pressing the above 1-11 functions icon
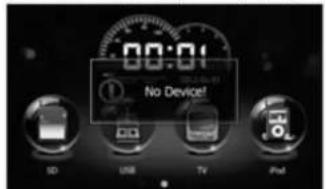
Note: Press the below icons without inserting any DVD, SD, USB or connecting any external device, a "No Device!" prompt will pop up.
text_image
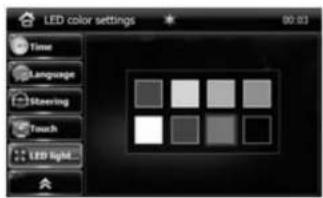
00:01 No Device! SD USB Tv ProdUser can change into hte following 7 color for the Eonon 7-color clock display, meanwhile, the color of front panel button light will change with it.
front panel button light will change with it.
text_image
LED color settings Time Language Blending Touch LED Light... 00:014
eonon
Setting:
text_image
System Settings 00:02 System Audio Video Navigation GPS Mon... Time display: Brake: Key tone: Parking boot: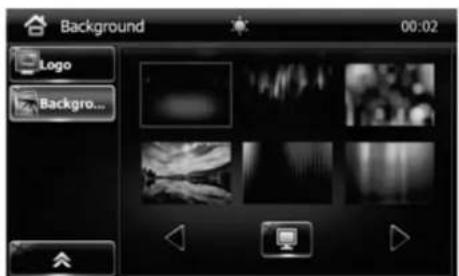
text_image
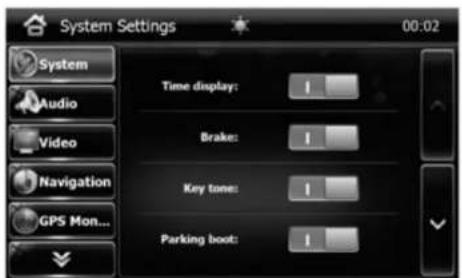
Background 00:02 Logo Backgro...Setting interface includes functional settings such as system settings, audio settings, video settings, navigation software path settings, startup icon and background settings etc. There're 3 pages after entering configuration interface. user could touch 📄 or ✉ to page up or down.
In sub-menu, user could touch ▲ or ▼ to page up or down.
1. System Settings:
text_image
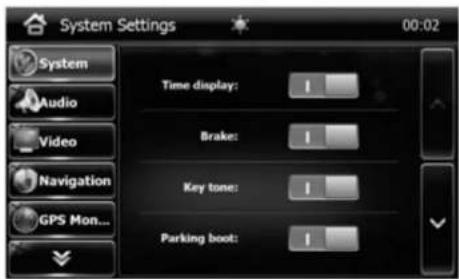
System Settings 00:02 System Audio Video Navigation GPS Mon... Time display: Brake: Key tone: Parking boot:Time display: Display/undisplay time on top right of the screen. Hand brake: Switch on/off Brake detect.
Key tone: Switch on/off key tone.
Rearview startup: Turn on/off rearview camera.
Headlight control: Turn on/off headlight control mode. Headlight on, the screen auto dimmer. Navigation mixing: Turn on/off navigation mixing mode.
Turn on mix mode: Sound of GPS Navigation will be played with playing sound synchronously. Turn off mix mode: When navigation sound on, the music of front speaker will stop, the rear speaker will stay on. After navigation sound stops, front speaker will continue to play music.
Mix ratio: Set mix ratio of navigation soundwith music or radio.
Radio region: User could select radio frequency from (Europe, South America, Japan, Taiwan and America). Frequency of broadcast status will run under corresponding frequency automatically once selected.
Reversing Video: on/off. Please turn off "reversing video function" if your car hasn't installed a rear view camera.
2. Audio Settings:
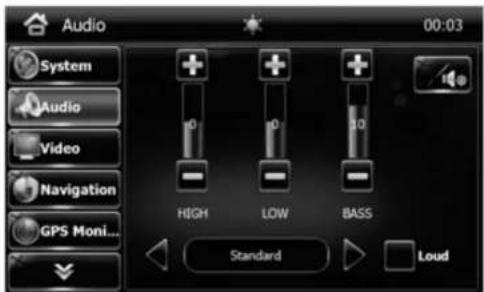
Touch to shift between two audio setting interfaces.
eonon
Interface 1:
Range adjustment on high volume (±7dB), low volume (±7dB) and bass (0-10dB).
Eq : Standard, popular, rock and classic.
Loud: Turn on/off.
Interface 2:
Adjust sound via up, down, left and right buttons.
text_image
Audio 00:03 System Audio Video Navigation GPS Moni... HIGH LOW BASS Standard Loud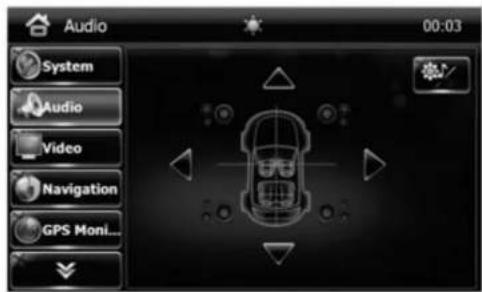
text_image
Audio 00:03 System Audio Video Navigation GPS Moni...3. Video Settings:
This includes brightness, contrast, chrominance adjustment as well as standard, gentle, bright and vivid options.
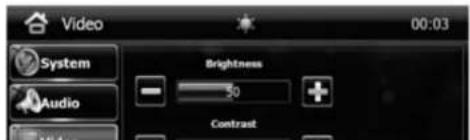
text_image
Video 00:03 System Brightness Audio - 50 + Contrast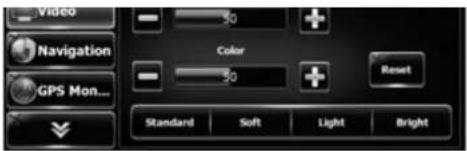
text_image
Video Navigation GPS Mon... Color Reset Standard Suit Light Bright4. Navigation Software Path Settings:
Touch ☐ to enter path selection interface, and select related path. ★ Note: User could enter navigation only via setting the correct path.
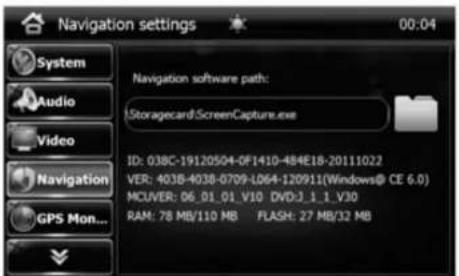
text_image
Navigation settings 00:04 System Audio Video Navigation GPS Mon... Navigation software path: Storagecard:ScreenCapture.exe ID: 038C-19120504-0F1410-4B4E18-20111022 VER: 403B-403B-0709-L064-120911(Windows® CE 6.0) MCUVER: 06_01_01_V10 DVD:1_1_1_V30 RAM: 78 MB/110 MB FLASH: 27 MB/32 MBeonon
5. GPS Monitor:
View signal information related to GPS satellite station.
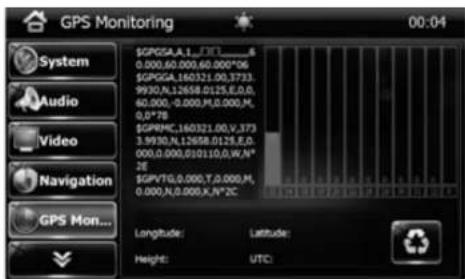
text_image
GPS Monitoring 00:04 System Audio Video Navigation GPS Mon... $GPGGA.A.1_01_6 0.000,60.000,60.000*06 $GPGGA.160321.00.V.3733. 9930.N.12658.0125.E.O.D. 60.000,-0.000,M,0.000,M, 0.0*7B $GPVHC.160321.00.V.373 3.9930.N.12658.0125.E.D. 000,0.000,010110,0.W,N* 2E $GPVTG.0.000,T,0.000,P, 0.000,N,0.000,K,N*2C Longitude: Latitude: Height: UTC:6. Time Settings:
As for time and date settings, user could select 12-hour or 24-hour system, select whether to use synchronous GPS time and time zone and adjust time to be modified, these settings will be effective after user's adjusting and exiting interface.
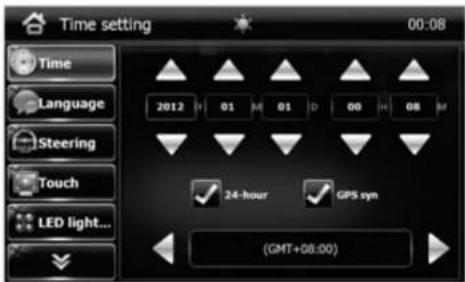
text_image
Time setting 00:08 Time Language Steering Touch LED light... 2012 01 01 00 08 24-hour GPS syn (GMT+08:00)7. Language Settings:
Setup Language.
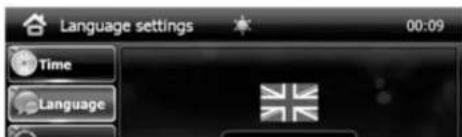
text_image
Language settings 00:09 Time Language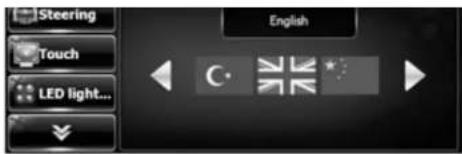
text_image
Steering Touch LED light... English8. Steering wheel control function Settings:
User could customize Steering wheel control function buttons, and operate directly on wheel after setting.
7
eonon
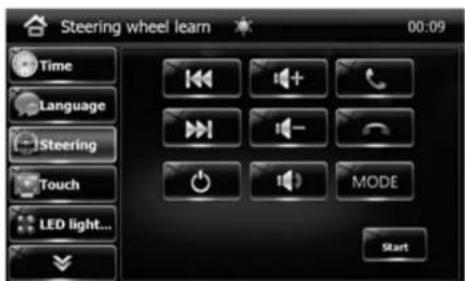
text_image
Steering wheel learn 00:09 Time Language Steering Touch LED light... Mode StartIf your car has steering wheel control buttons, please follow the below steps to set up:
- Under power-off situation, select wheel control cable (KEY 1, KEY2, some vehicles have 3 cables while some have 2 cables), find ground cable of the car, and connect it to the host, if there're 3 wheel control cables, connect those two cables to host wheel control cable, if there're only 2 wheel control
cables, connect the rest cable to one of the wheel control cables;
- Confirmed correct connection, enter inot the Setting interface to set up;
- Press [Start] to set up steering wheel control;
- Long press the button to be set on wheel, till "Please select a button to set up" prompts on screen, and select a functional button to be set on screen, wheel button setup succeed;
- Set other wheel buttons according to the above method, or press [End] button to complete steering wheel control setup.
9. Touch Screen Calibration:
Press "Touch Screen" button to enter touch screen calibration interface. Aim at cross center with a touch pen, and touch 5 adjustment points accordingly. When adjustment completes, an OK will display on screen, press [OK] to return to configuration menu.
10. LED Light Color Settings:
User could set panel button light color and master interface clock color on this interface, and there're 7 colors to be selected, and panel button light could also be turned off.
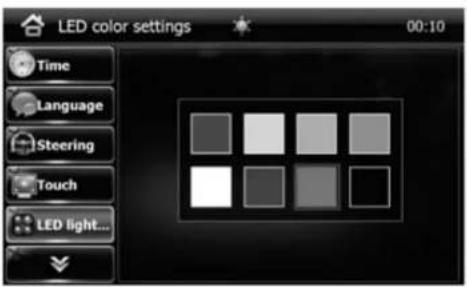
text_image
LED color settings 00:10 Time Language Steering Touch LED light...- Startup LOGO Screen:
eonon
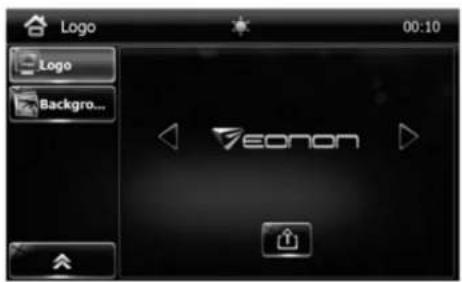
text_image
Logo 00:10 Logo Backgro... EononSelect your favorite startup LOGO, and press

button, to confirm.
- Background Screen Settings:
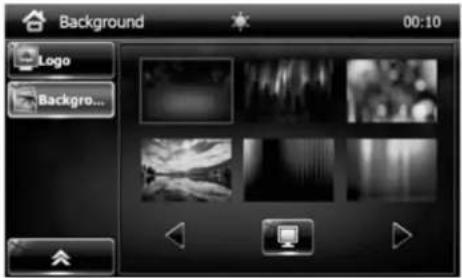
text_image
Background 00:10 Logo Background...Select your favorite background picture, and press 📄 button to confirm background image replacement.
New and Modify Background
- Put your favorite pictures into the file :\Wallpaper of a SD card. (Attention! Image Limited Resolution:800x480; File Type: PNG <32bit pictures are recommended with best effect>)
- Start and insert SD card into GPS slot of the unit. (Note! Image update could only be done with SD card inserted into GPS slot!)
- Enter background settings, and press left or right arrow to view PNG image in SD card.
13. Status Region Icon:

Return to main menu icon.

Adjust screen brightness icon, bright>dark>black screen. Machine keeps normal running during black screen, touch anywhere on the screen to restore the original interface.

Bluetooth connection status icon, indicating Bluetooth device is connected.

eonon
9
Navigation Mode
Before entering navigation mode, please enter setting interface> navigation software path settings, to set navigation software path.
View signal information related to GPS satellite station in setting interface > GPS monitor.
Set navigation mix and mix ratio in setting interface > system settings, according to personal habits.
Notes and Safety Warning
-
Please use GPS system with caution. Functions of this system are only for navigation reference, and do not use this system for accurate measurement on position, distance, location and terrain etc.
-
While carrying out GPS satellite orientation for the first time, it is better to select an open area without any cover-device above. Orientation may take more than 2 minutes, which depends on current environment and strength of satellite signals.
-
In order to guarantee your drive safety, please complete journey settings before setting out, and do not operate this system during driving. The Company takes no responsibility for any traffic accident caused by operating navigation during driving and omitting road situation ahead.
-
While passing tunnels, located in buildings, underground passages, woods, climate impact or high barriers, nearby mobile phone base station etc., it will impact receiving quality of satellite signals, at this moment, system could not provide orientation or navigation temporarily, which will restore immediately after leaving impact resources.
-
Please note any wireless communication product (e.g. mobile phone or speed detection alarm etc.) may interfere satellite receiving, and cause unstable signal receiving.
-
Path planning is only for reference. For regional transportation units will adjust road properties according to local transportation situation (One-way street, no left turn etc.), or adjust based on impacts brought by road construction, governmental or commercial activities etc.; please drive according to traffic rules such as current road situation and road symbols etc. If driving situation is different from that displayed on map, please decide driving route on your own.
Bluetooth Mode
User could answer or dial phone calls via Bluetooth and play mobile phone music etc.
I. Bluetooth Matching Conditions
Mobile phone must support Bluetooth connection, and connection to host could be implemented via mobile phone, so as to carry out information exchange.
II. Matching Steps for Mobile Phone and Host Bluetooth
Touch Bluetooth icon on main menu of the host, to switch to Bluetooth interface.
text_image
Dial Pad 00:10 Pairing Dial Pad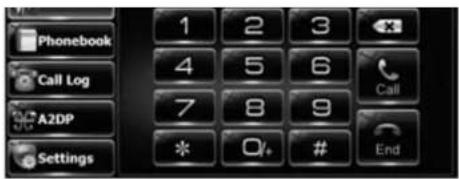
text_image
Phonebook Call Log A2DP Settings- Touch host Bluetooth interface
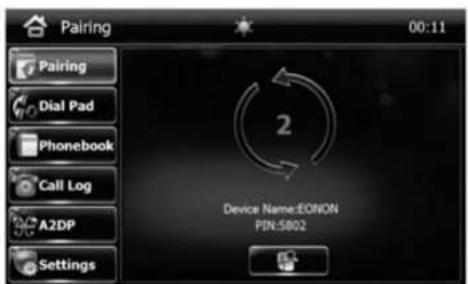
, screen in matching displays, as shown in (Figure 1).
10
eonon
text_image
Pairing 00:11 Pairing Dial Pad Phonebook Call Log AZDP Settings Device Name:EONON PIN:5802(Figure 1)
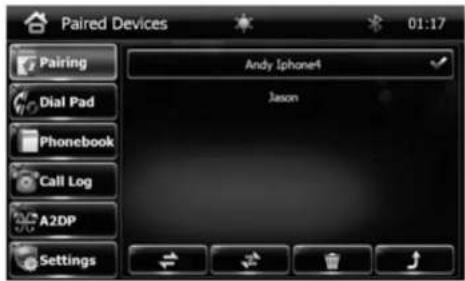
If this mobile phone has connected to the host before, (Figure 2) will display via touching and name of Bluetooth ever connected to mobile phone will display in the list.
text_image
Paired Devices 01:17 Pairing Andy Iphone4 Jason Dial Pad Phonebook Call Log A2DP Settings(Figure 2)
Select name of Bluetooth ever connected to mobile phone and touch to Bluetooth of mobile phone.
, so as to fast connect
Disconnect Bluetooth of connected mobile phone.
Delete name of Bluetooth ever connected to mobile phone.
Return to (Figure 1) interface.
- Set your mobile phone at Bluetooth status, start Bluetooth mode, operate mobile phone to search device name (Eonon), and input initial password (5802) to connect.
- After matching completes, mobile phone will prompt [Yes/No] to authorize connection with this device, select [Yes] to connect mobile phone with this Bluetooth device in 10 seconds automatically.
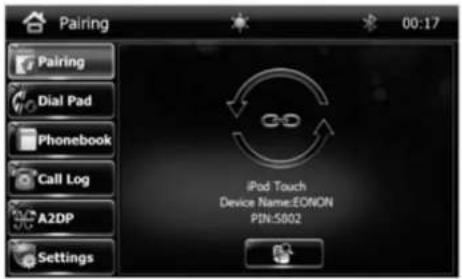
- Mobile phone connects to Bluetooth of the host successfully, as shown in (Figure 3).
text_image
Pairing 00:17 Pairing Dial Pad Phonebook Call Log A2DP Settings iPod Touch Device Name:EONON PIN:5802(Figure 3)
III. Bluetooth Telephone Interface Operation
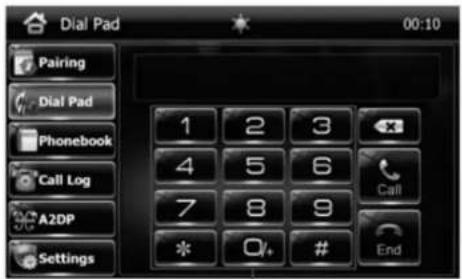
- Touch Dial Pad to enter Bluetooth dial interface, as shown in (Figure 4).
text_image
Dial Pad 00:10 Pairing Dial Pad Phonebook Call Log A2DP Settings 1 2 3 4 5 6 7 8 9 * Q# EndDigital dial button
(Figure 4)
Delete button: If a wrong telephone number is input, touch this button to delete.
Answer/dial button: After a number is input, touch this button to dial; touch this button to answer when there's an incoming call.
Onhook button: Touch this button to hang up after conversation is completed; touch this button to reject when there's an incoming call.
Sound shift button: Touch this button during conversation to shift sound between vehicle speaker and mobile phone.
2. Touch

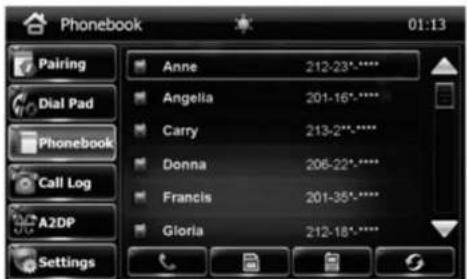
to enter Bluetooth telephone dial interface, as shown in (Figure 5).
text_image
Phonebook 01:13 Pairing Anne 212-23***** Dial Pad Angella 201-16***** Carry 213-2**-**** Donna 206-22***** Francis 201-35***** Gloria 212-18***** Call Log A2DP Settings(Figure 5)
Select number from the list to dial, and touch this
button to dial.
Touch this
button, to view numbers in SIM card of the mobile phone.
Touch this
button7 to view numbers in memory of the mobile phone.
Touch this
button, to refresh numbers in memory card and SIM card of the mobile phone.
While viewing phone numbers in memory card or SIM card of the mobile phone, touch the button to stop refreshing phone numbers.
eonon
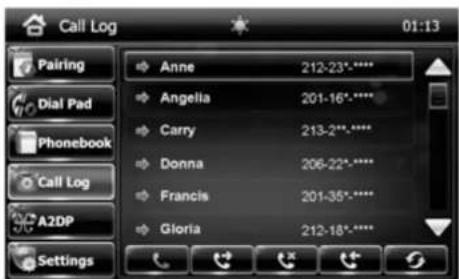
- Touch Call Log to enter Bluetooth telephone call record interface, as shown in the list in (Figure 6).
displaying numbers of dialed calls, missed calls and answered calls.
text_image
Call Log 01:13 Pairing Anne 212-23***** Dial Pad Angelia 201-16***** Carry 213-2****** Donna 206-22***** Francis 201-35***** Gloría 212-18***** Phonebook Call Log A2DP Settings(Figure 6)
Select to call from the list, touch this button to dial.
Touch this

button to view dialed calls.
Touch this

button to view missed calls.
Touch this

button to view answered calls.
Touch this

button to refresh, so as to view new numbers.
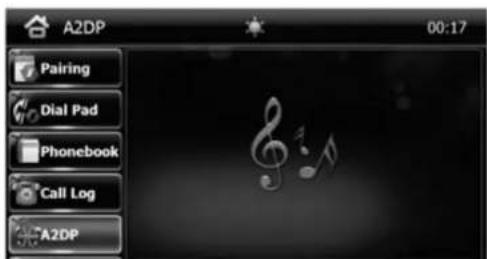
- Touch to enter Bluetooth music screen, as shown in (Figure 7)
text_image
A2DP 00:17 Pairing Dial Pad Phonebook Call Log A2DP(Figure 7)



Play/Pause button: Under pause status, touch this button to return to play status; under play status, touch this button to pause.

Stop button: At this moment, play time returns to 00:00 position of the song.

Select previous button: Under play status, touch this button to play the previous song.

Select next button: Under play status, touch this button to play the next song.
eonon
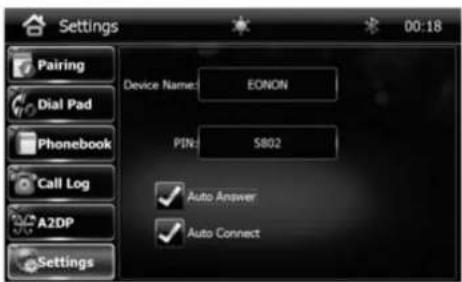
- Touch Settings enter Bluetooth phone settings interface
text_image
Settings 00:18 Pairing Device Name: EONON PIN: S802 Dial Pad Phonebook Call Log Auto Answer A2DP Auto Connect SettingsBluetooth auto connection: Select this status to enable auto connection function, during the next startup, host and mobile phone will connect to Bluetooth function automatically. If Bluetooth function has ever been disabled during mobile phone usage, it is required to reconnect manually.
Bluetooth auto answer: Select this status to enable auto answer function, at this moment, all incoming calls could be answered automatically.
Radio Mode
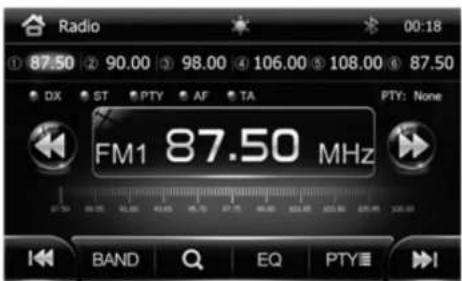
This unit has built-in high quality FM/AM tunner, supporting functions such as FM/AM channel auto search, saving radio channel, frequency display and frequency micro-adjusting etc.
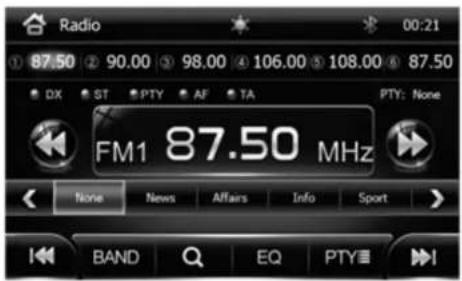
FM channel control interface is as shown in the following figure:
text_image
Radio 87.50 90.00 98.00 106.00 108.00 87.50 DX ST PTY AF TA FM1 87.50 MHz PTY: None BAND EQ PTY- Short touch 🖼 to tune up gradually; long touch to tune up to search radio channels in a semi-automatic manner. Short touch 🖼 to tune down gradually; long touch to tune down to search radio channels in a semi-automatic manner.
BAND Band shifting button: Used for shifting among bands, i.e.: FM1, FM2, FM3, AM1 and AM2. Short touch Q to browse radio stations in preset radio station region; long touch to carry out full automatic search on radio stations, and save radio stations in preset radio station region according to strength of signals searched.
-
In FM band, touch DX/LOC button to switch between Distant/Local Mode, Default is Distant search mode; please noted AM band does not have this function.
-
RDS: PTY, AF and TA (not applicable for Taiwan and Japan. Only available for supporting RDS radio regions.)
PTY selects whether to display program type information. Touch PTY and then short touch < or > to set information type displayed by PTV. As shown in (Figure 1), when PTV tune is set, reclass PTV will
to set information type displayed by PTT. As shown in (Figure 1), when PTT type is set, reselect PTT will auto search PTY type radio channels.

text_image
Radio 00:21 87.50 90.00 98.00 106.00 108.00 87.50 DX ST PTY AF TA PTY: None FM1 87.50 MHz None News Affairs Info Sport BAND EQ PTY(Figure 1)
AF automatic frequency adjustment function. If signals become weaker, it will auto search forwards or backwards through the frequency range and only stop when it reaches a stronger one.
TA selects whether to enable transportation notice. Enable TA, to search all RDS channels noticed by transportation broadcast automatically per 30 seconds, under any mode, it will turn to broadcast alarm messages automatically when there's any alarm message.
DVD, SD and USB Mode
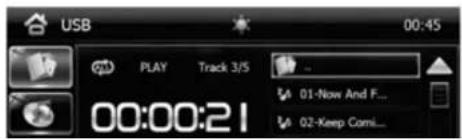
System will enter DVD, SD and USB mode while CD, SD card or USB is inserted. If there's already a DVD, SD or USB in the host, user could touch corresponding icon on master interface to enter this mode.
text_image
USB 00:45 PLAY Track 3/5 01-Now And F... 02-Keep Comi...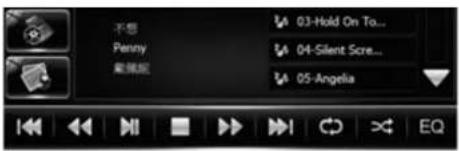
text_image
不想 Penny 戴眼姐 03-Hold On To... 04-Silent Screw... 05-Angella EQ
Profile icon: Touch this icon, level I content of profile of the device will be displayed in the right list.

Sound document icon: Touch this icon, all profiles of sound supported by the device will be displayed in the right list.

Video document icon: Touch this icon, all video files supported by the device will be displayed in the right list.

Image file icon: Touch this icon, all image files supported by the device will be displayed in the right list.
Automatic play priority of DVD, SD and USB mode is Profile > Music > Video > Image
Touch button functions during playing profile and music:

to the previous song

Rewind

Play/pause

Stop playing

Fast forward

to the next song

Repeat single/all

Random play

Sound effect option
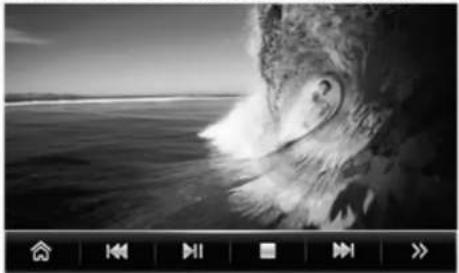
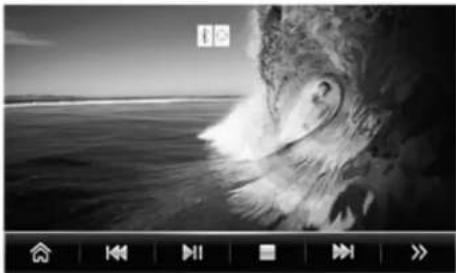
Touch button functions during playing videos and browsing images:
natural_image
Black-and-white photo of a person crashing into the ocean surface, with no visible text or symbols.
Return to main menu button.

Back button.

Play/Pause button.

Stop button.

Next button.

Display next page functional button.

Display previous page functional button.

Fast forward.

Rewind.

Directory Function.

Channel settings, user could shift among left channel, right channel, mix channel, stereo and language (should be supported by disc).

Video Settings
During playing CDs with view shifting function, press this button to change view angles.
press this button to set screen size.
A press this button to change subtitle language.
Repeat Mode selection.
Random play.
Audio settings, user could set volume, left and right channel balancing, press [VOL-] and [VOL+] on host panel to set values after selecting adjustment schedule.
Aa Display button, could be used to turn on/off DVD play time, songs and remaining time.
Video settings, to set chrominance, brightness and contrast. Press [VOL-] and [VOL+] on host panel to set values after selecting adjustment schedule.
eonon
Status icon description during imaging:
natural_image
Black and white photo of a person wading out the ocean surface, no visible text or symbols: Bluetooth connection status icon, when this icon displays on screen, it indicates a Bluetooth device is connected T
: When this icon displays on screen, it indicates a tire pressure warning.
TV Mode (Optional)
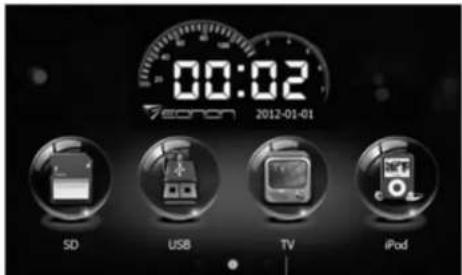
1 This function is specific for EONON digital TV Set-top Box.
text_image
00:02 Seeron 2012-01-01 SD USB TV iPod1
TV Mode Status Icon Description:
Return to master interface button. On top right of touch screen, touch this button to return to master interface after return to master interface button displays.
As for other touch button functions, please refer to use instruction for EONON external hung digital TV.
IPOD Mode
text_image
iPod 00:52 PLAY 60/78 Smooth Criminal So Cool sorry, sorry super junior - snow... super junior - wait... Take Me To Your Heart Take Me to Your Heart Michael Learns to Rock 00:00:11 00:03:58 Take Me To Your H...
eonon
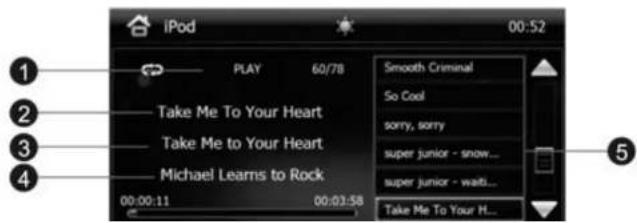
1 Play status region. Icon displays status such as repeat play, random play, play/pause and songs etc.
② Song name.
③ Album.
4 Singer name.
5 Profile play list. Main menu includes play list, singers and record list etc.
MENU Return to main menu
Back Rewind
Play/Pause Fast forward Next
Repeat single/all Random play EQ Sound effect option
AUX Mode
natural_image
Black and white photo of a person crashing into the ocean waves (no text or symbols visible)
Connect video input plug to video input socket, audio input to audio input sockets LIN1 and RIN1. This host provides a set of video input ports and audio input ports.
- Select external input icon on home page to enter external input interface.

Return to main interface button.

Audio settings, user could set volume, left and right channel balancing, press [VOL-] and [VOL+] on host panel to set value after selecting adjustment schedule.

Video display settings, user could set chrominance, brightness and contrast. Press [VOL-] and [VOL+] on host panel to set value after selecting adjustment schedule.

Sound effect option.

Turn on/off sound effect.
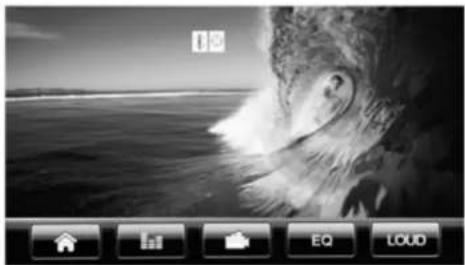
natural_image
Black and white photo of a person on a beach with waves crashing against the sea, no visible text or symbolsStatus icon description during imaging:

: Bluetooth connection status icon, when this icon displays on screen, it indicates a Bluetooth device is connected.

: When this icon displays on screen, it indicates there's a tire pressure warning.
Tire Pressure Monitor TPMS Mode (Optional)
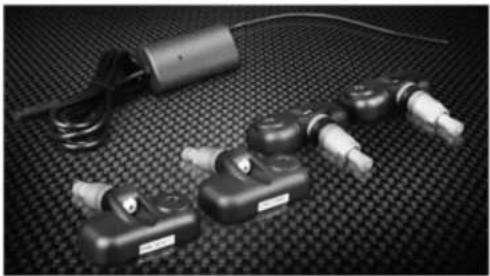
Host could be externally connect to TPMS device (Eonon specific TPMS product), and a TPMS connection socket is set behind the host, so it is not required to carry out any modification, plug-and-play, and it will detect whether there's any connection to the device automatically. TPMS parameters and information display could be set by host via touch screen.
natural_image
Black-and-white photo of multiple electronic devices with cables and connectors on a textured surface (no visible text or symbols)Specific Eonon TPMS product functions:
Monitor whether tire pressure is abnormal
Monitor tire temperature is abnormal
Adjustable range for low pressure alarming setting: 1.3 bar \~ 2.5 bar
Adjustable range for high pressure alarming setting: 2.8 bar \~ 4.2 bar
Adjustable range for high temperature alarming setting: 40 °C\~90°C
Exchange and monitor displaying positions of tires in a convenient way
User could manually input emission sensor ID code or charge code to set ID code for tire monitor
Shift tire pressure units in a convenient way: bar/psi/kPa
Shift temperature units in a convenient way: °C/F
TPMS interface is shown in the figure:
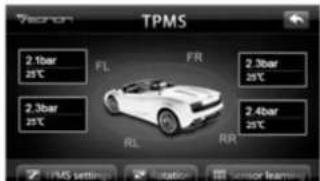
text_image
TPMS 2.1bar 25℃ FL FR 2.3bar 25℃ 2.4bar 25℃ RL RR FMS Settings Rotation Sensor learning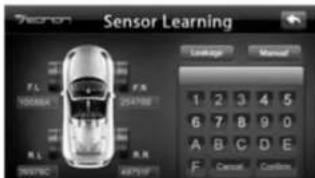
text_image
Sensor Learning Leakage Manual FL F.N 10000A 254780 RL R.N 36910C 48719 1 2 3 4 5 6 7 8 9 0 A B C D E F Default Customers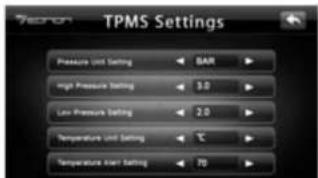
text_image
TPMS Settings Pressure Unit Setting BAR High Pressure Setting 3.0 Low Pressure Setting 2.0 Temperature Unit Setting 10 Temperature Alert Setting 70Installing TPMS to display functions such as blowout alarming, tire abnormal alarming, air leakage monitor and extending tire life etc., so as to avoid any accident.
eonon
DLNA Mode(Optional)
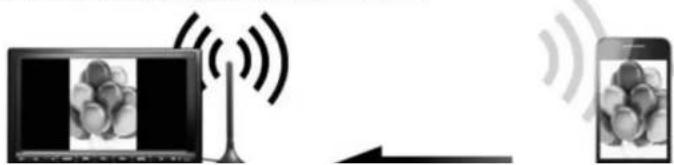
DVD transmit wireless signal via WIFI antenna
natural_image
Illustration of a TV and smartphone connected via wireless signals, showing video and image content (no text or symbols)


Mobile phone receives signal, after WIFI connection, mobile phone transfers picture/music/video to DVD screen display.
Android smart phone operation steps:
- Please download the display software EONON DLNA from www.eonon.com.
- Install EONON DLNA to your android mobile phone.
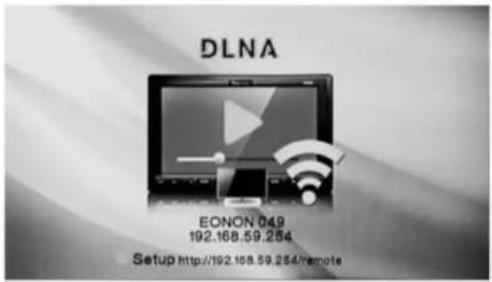
- Click DLNA icon on car DVD main interface to enter into DLNA mode:
text_image
DLNA EONON 049 192.168.59.254 Setup http://192.168.59.254/remote- Activate WIFI in your phone, scan and connect WIFI internet "Eonon ***".
- Activate the EONON DLNA software installed in your phone, choose the same IP address "192.168.59*" as car DVD shows.
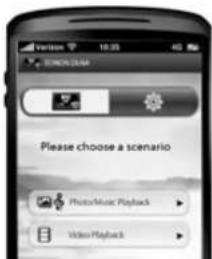
- Click button (as below picture), picture/music/video selection will be shown.
text_image
Please choose a scenario PhotoMusic Playback Video Playback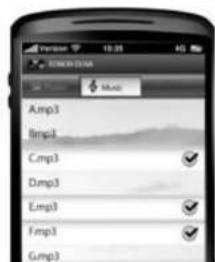
text_image
Version 10.05 MOSKOMA Audio Music Amp3 Rmp3 Cmp3 Dmp3 Lmp3 Fmp3 Gmp36.1 When press Picture button, the software will search pictures in your phone automatically, select pictures -> press phone menu -> press Play so as to display the selected pictures on DVD screen.
6.2 When press Music button, the software will search music in your phone automatically, select music -> press phone menu -> press Play so as to display the selected music on DVD screen.
6.3 When press Video button, the software will search videos in your phone automatically, select video -> press phone menu -> press Play so as to display the selected video on DVD screen.
20
eonon
Iphone and Ipad operation steps:
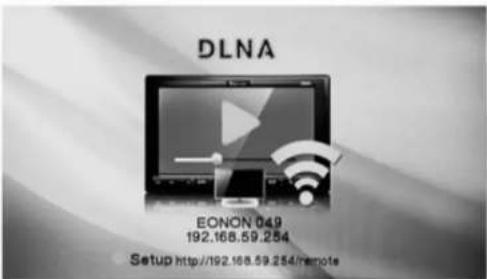
- Click DLNA icon on car DVD main interface to enter into DLNA mode:
text_image
DLNA EONON 049 192.168.59.254 Setup http://192.168.59.254/remote- Activate WIFI in your phone, scan and connect WIFI internet "Eonon ***".
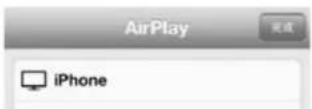
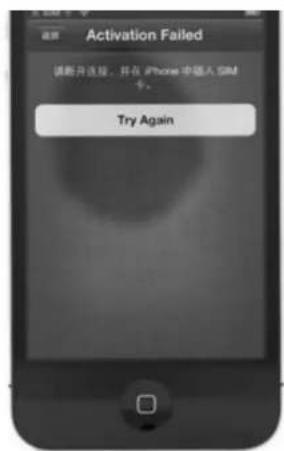
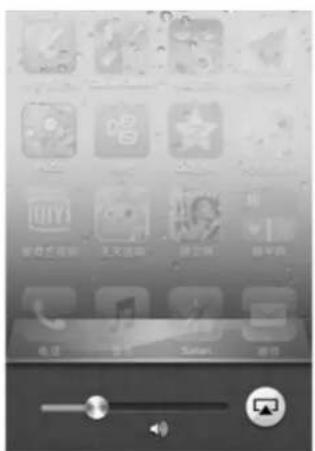
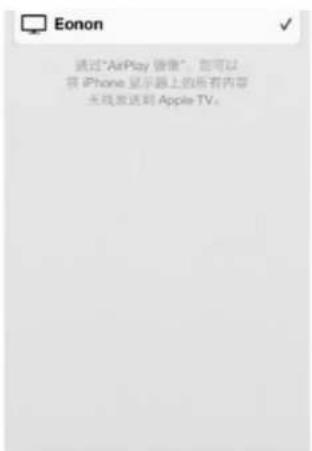
- Double click Iphone home key ☐, find 📷 on mobile phone screen and touch it, then chose Eonon in the newly opened interface to use the screen synchronizes function.
text_image
Activation Failed 请断开连接,并在 iPhone 中插入 SIM卡。 Try Again1
text_image
Screenshot of a mobile app interface with Chinese menu items and icons2
text_image
Eonon 通过"AirPlay 错像",你可以 获 iPhone 显示器上的所有内容 无线发送到 Apple TV。3
- Click button,【Or you can enter website http://192.168.59.254/remote on your smart phone directly.】 enter into Setup, WIFI Setup, Remote Control interface.
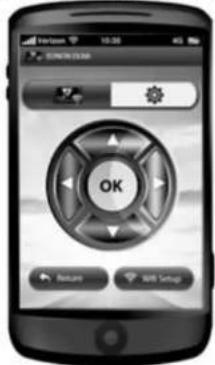
text_image
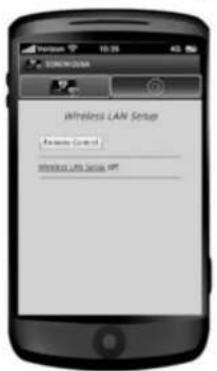
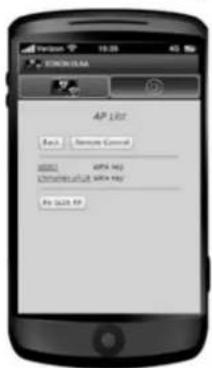
OK1.1. Click Wifi Setup to enter wireless network setting:
text_image
Wireless LAN Setup Password Control Password LAN Setup1-a
text_image
AP List Back Remove Control APR 142 Remove Control with app APR 142 191-b
text_image
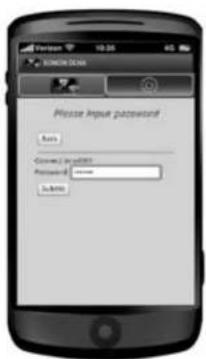
Please input password Email Password: ******** Is Adm1-c
a.Open the network as 7-a.
b. After showing the router list, please select the suitable router(Please scan again if the router doesn't show up). See the picture 7-b.
c.Input wireless router password and submit. If connection succeeds, the mobile phone will show as picture 7-c.
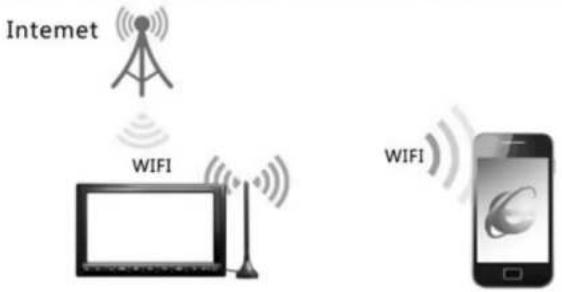
You can visit internet via your mobile phone, download a DLNA end user software, then you can transfer the Audio/videos from internet to DVD screen and play.
text_image
Internet WIFI WIFI22
eonon
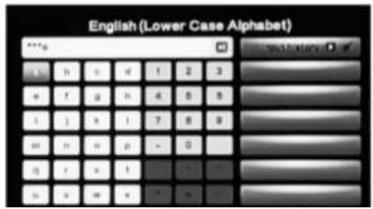
1.2 Touch Set up button, it will ask for password: aaaa, press OK will enter below display.
text_image
English (Lower Case Alphabet)
Below interface doesn't support touch function, please operate up/down/left/right/ok via your mobile phone, enter password:aaaa and move to OK position as above picture, press OK button, it will enter below page.
text_image
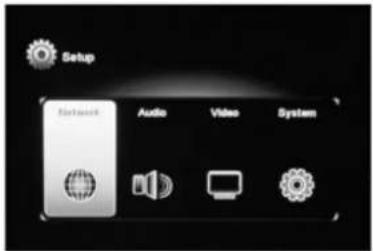
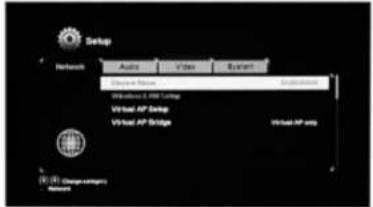
Setup Network Audio Video System1.2.1 Network setting: Network settings includes four options: 【device name】, 【wireless internet mode switch】, 【wireless internet setting】, 【no internet setting】. (★Suggest to use the factory default setting)
text_image
Setup Network Audio Video System System Name Windows 8.0000 Setup Virtual AP Setup Virtual AP Bridge Virtual AP setup © Design company Networka. Device name: The device name is changeable. This setting can be done by the virtual remote control. Press its "UP"" "DOWN" "LEFT""RIGHT" buttons and choose the digit numbers and letters shown on the screen.
Select the numbers and letters, press "OK" to enter the name column. Press 'OK' again after finish changing.
b. Switch of network connection: This function enables the device to switch between the internet mode or no internet mode. When the switch is completed the device will be connected to network automatically and reboot.
Note: Network will be disconnected when any of the switch is completed. Please close the original setting interface and EONON DLNA. Reconnect the device to mobile phones or computers. Reopen EONON DLNA and interface on virtual remote controller to do the setting or playing.
c.Wireless network setting.
1) Set the device in wireless network connection mode via [switch of wireless network] option.
2) Press 【wireless network setting】 and choose the compatible router at the interface of selection of wireless routers.
3) Enter "password" interface.
4) Input router code and press "OK".
eonon
The device will search network connection automatically and display "connection succeed". Users can see router is connected in main interface after the device is rebooted.
Note: There are two encryption methods for routers, WPA and WEPFor WPA, it will enter password interface directly after router is selected. For WEP, it will enter selection interface of Hex Code and Ascl. The default code is Hex Code.
d. No password setting for wireless Internet; this encryption setting requires to input the password when using and connecting this product every time. It is not recommended. Click [Wireless Internet Security] option, enter [Open System] and [WPA encryption], click [WPA encryption] and then choose [Password], input wireless base station password and click OK; enter [Area] to select encryption area; press [Save Changes], the product will be disconnected automatically, reboot and reconnect it, then encryption setting is completed.
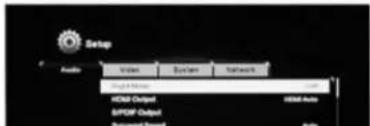
1.2.2 Volume setting: Volume setting includes three options: 【night mode】: Opening the night mode can avoid the disturbing volume occurred suddenly. 【HDMI output】, 【Volume synchronization (HDMI A/V)】. Note: This product doesn't support HDMI display, please do setting according to your own device and your requirement.
text_image
Setup Audio Single Image HDMI Output S/PDF Output Multi-Channel Audio
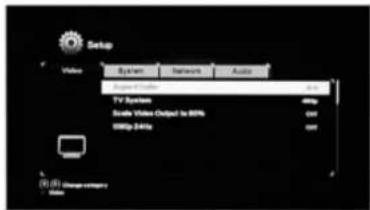
1.2.3 Video setting: Video setting includes 4 options: 【screen ratio】, 【TV system】, 【shrink the video ratio to 90%】, 【1080P 24Hz】. Please do setting according to your device and requirement:
text_image
Setup Video System Network Audio Supervideo TV System Scale Video Output to 80% 986p 24Hz (5) (5) Change company Videoa. Aspect Ratio: select the best players ratio of your TV, monitor or projector which are matched. The default is widescreen 16:9.
b. According to your monitor or projector display capabilities, select the appropriate resolution.
c. Shrink the Proportion of video output to 90%: The screen display will be forced to shrink after reopening.
d.1080 24Hz: this function is to select video display resolution.
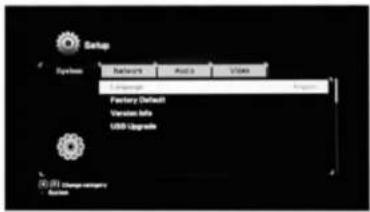
1.2.4 System Settings: System Settings includes five options, namely [language], [Restore Defaults], [Version information], [online upgrade], [USB upgrade]. Do the setting according to the device and the necessity:
text_image
Setup Systems Networks Auto Video Language Factory Default Version Info USB Upgrade [ ] 2.1 Change summary Buttona.language: choose the language of the operation system
★b.restore defaultsWhen the wrong setting appears, this function can revert to the factory defaults setting.
- Click restore factory default
◆Pop up the confirmation picture
After clicking "confirm", Wifi system will restart automatically. Then the initialization settings interface will come and displays the new WIFI device name (EONON "*" the digital number behind would change). At this time this device can not be chosen and any of operation can not be carried out.
◆Please turn off mobile phone WLAN, and reopen WLAN and search for devices. After a successful connection, return to EONON DLNA picture. The system will automatically choose the device to be initiaalled (eg. EONON DLNA software is disable, you need to open it again).
-Click button "OK" directly, Initialization settings can be carried out
c.version information: Display information about the product
d.online upgrade:select this option to get the software and make it upgraded in Internet
e.USB upgradeSelect this option to get the software and make it upgraded via USB device.
★USB Upgrade
◆Copy the upgraded software to the root of U disc directly.
◆Put into the USB 1 interface.
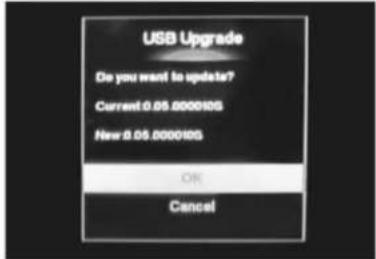
- Then enter DLNA mode, follow procedure 2.2 above, (Press Setup->ok->enter password "aaaa" via up/down/left/right keys on mobile virtual remote control ->ok->system settings ->select USB Upgrade, enter the following interface
text_image
USB Upgrade Do you want to update? Current 0.05.000105 New 0.05.000105 OK Canceleonon
When confirm "ok", WIFI system will reboot, DLNA mode will display NO Sigal.
★Then, please exit DLNA, enter Miracast mode, you will see the upgrade progress bar. When the upgrade is completed, WIFI system reboots, as shown in the following picture

natural_image
Pure black rectangle with a white circular symbol in the bottom-left corner (no text or symbols)
natural_image
Pure black background with a small white circular mark in the bottom right corner (no text or symbols)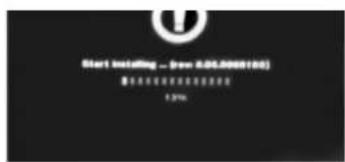
text_image
Start Instilling ... (New 0.05.000100) 8:00:00:00:00 13%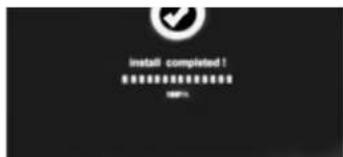
text_image
install completed! OKNote: Do not turn off the power during the upgrade. When the upgrade is completed, the system will reboot back to the WiFi main screen.
Miracast Mode(Optional)
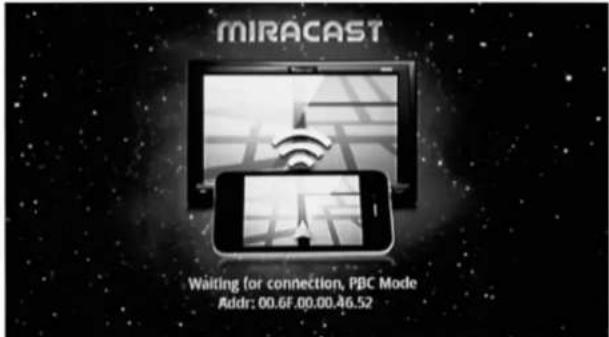
Click on the Miracast icon of the car dvd main menu, enter the wireless transmission screen mode, as below (the premise that smart phone can suport Miracast Protocol)
text_image
MIRACAST Waiting for connection, PBC Mode Addr: 00.6F.00.00.46.52- Turn on WIFI function, and locate miracast option in the phone setting menu (Samsung mobile phones are: AllShare Cast, please refer to the mobile phone manual for different phone's specific location of Miracast option.), and select "Open".
2.Mobile phone begins to search this product "Eonon 00:70:*:*:*". After searching it and a successful connection, you can achieve that phone's screen can be transferred to the display on dvd player directly.
Remote Control
Remote Control Usage
Usage notes:
◆Please use a CR2025 Li battery.
◆Under normal situation, usage life of the battery is around 1 year. When remote control is unoperational, please change the battery on a regular basis.
- Do not expose remote control in high temperature or sunlight, otherwise, remote control may not work properly.
During battery installation, please correctly install positive (+) and negative (-) electrodes of the battery.
◆Do not clamp the battery with metal pliers, otherwise, it may cause short circuit.
26
eonon
Changing Remote Control Battery
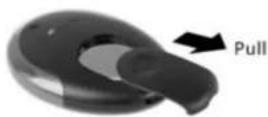
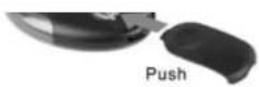
1. Taking out battery
Take out the battery from the back of remote control as shown in figure.
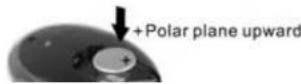
2. Installing battery
Place battery positive and negative electrodes correctly according to the following figure, via using a CR2025 Li battery.
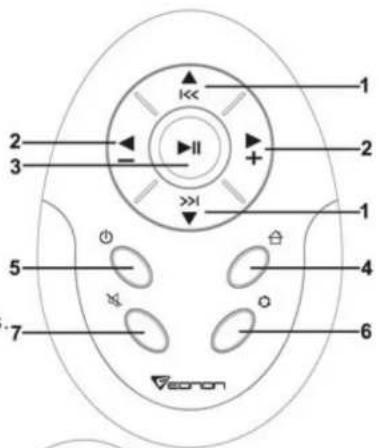
Remote Control Instruction Manual
1、Under play mode, press up/down to select songs. Under radio mode, press up/down to select channels.
2、Press – button to decrease volume, and press + button to increase volume.
3、Play/Pause
4、Return to master interface button.
5、Power supply switch, press this button to start, and long press this button to shut down.
6、Press this button to shift mode.
7、Mute button.
8、NFC signal transmitter location
text_image
1 2 3 4 5 6 7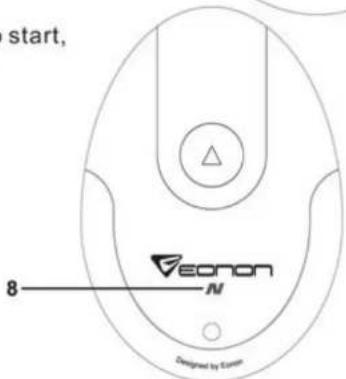
text_image
start, 8 Coron M Designed by CanonVEONON
- Attentions
1) Require mobile phones equipped with NFC function.
2) The phone with system under Android 4.1 is required to download and install mobile client software for normal use from www.eonon.com. Adroid 4.1 or above systems can work directly without the step.
3) For the moment, the effective distance for NFC is within 2CM. If over 2CM, the connection may be affected. For every connecting, please put mobile phone's NFC antenna as close as possible to the NFC logo (6) on the remote controller.
- Operation Steps
1、Activate Bluetooth and NFC in mobile phone, both functions should be open at the same time.
2、Put mobile phone back cover NFC signal position close to the silk print location, ^③ of the remote controller, then the Bluetooth of mobile phone and DVD unit will connect automatically, no need to pair them manually or enter a password. After well connection, car DVD screen's Bluetooth icon will become illuminated. The following Bluetooth related functions' operation can refer to Bluetooth user instructions.
(Notes: When the mobile phone's NFC antenna location is just against to the DVD panel's silk print position, they can be connected the most easily. As different mobile phones's NFC antenna location are different, users can move slowly the phones body close to 📄. NFC antenna location can be found by this method.)
3、Bluetooth will be disconnected once the mobile phone NFC antenna close to 📄 again. It will be reconnected if close to it again. With this regular patterns, can connect or disconnect the operation.
text_image
AR/AR @www.ar/ @www.ni @www.ni @www.ni @www.ni @www.ni @www.ni @www.ni @www.ni @www.ni @www.ni @www.ni @www.ni @www.ni @www.ni @www.ni @www.ni @www.ni @www.ni @www.ni @www.ni @www.ni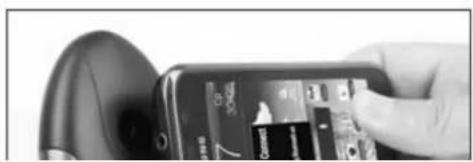
natural_image
Close-up of a hand holding a smartphone displaying a screen with app icons (no readable text or symbols)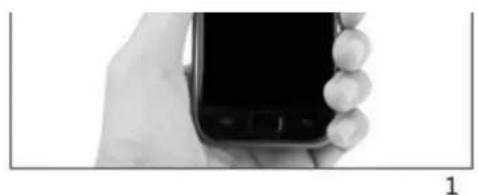
natural_image
Hand holding a smartphone with a black screen (no visible text or symbols)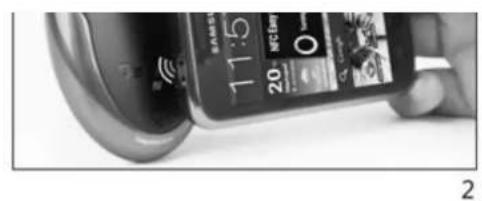
natural_image
Close-up of a smartphone with a visible app interface showing time, battery, and status bar (no readable text or symbols)eonon
Troubleshooting
| Problems | Reasons | Measures |
| Incorrect online connection and connectors. | Please confirm whether all connections are correct via comparing online configuration. | |
| Unable to start | Check whether power supply of fuse fails. | Replace with a new fuse of the same capacity. |
| Abnormal operation of Built-in MCU caused by other reasons. | Press RES button on panel, to return the machine to system initial value. | |
| Unable to play CDs | Contaminated CDs. | Clean the CD. |
| Loaded CDs are those unable to be played by this product. | Please check CD type. | |
| Loaded CD video system is incompatible with this machine. | Please replace with a compatible CD. | |
| After launching power-on/off, all set information will get lost. | Wrong connection of positive power supply cable BATT of startup wire ACC. | Reconnect exchange wire. |
| Invalid remote control | Insufficient battery capacity in remote control. | Change remote control battery. |
| No sound | Incorrect connection. | Check wire connection. |
| Check whether mute is on. | Turn on sound. | |
| CD is executing fast forward, rewind or other operation. | Sound could not be played during fast forward and rewind. | |
| Low volume. | Increase volume. | |
| Symbol “ø” displays, no operation could be carried out. | This operation is disabled for CDs. | Unable to operate. |
| Operation is incompatible with CDs. | Unable to operate. | |
| Unable to play DVDs. | There's already a CD in DVD. | Exit that CD and put in another CD. |
| Noise | CD damage or contamination. | Clean the CD or replace with a new CD. |
| No image | DVD video cable is disconnected to TV. | Check and connect in a proper way. |
| Splash screen | Incorrect system color settings. | Set “PAL” or “NTSC” according to your TV color system. |
| Bluetooth unable to operate | Check whether Bluetooth mobile phone is connected to the host correctly. | Carry out Bluetooth matching, according to steps for matching between mobile phone and host Bluetooth. |
| Loud Bluetooth responding sound | Loud volume | Adjust the host to a proper volume. |
| Intermittent music and conversation of Bluetooth mobile phone | Check whether Bluetooth mobile phone is too far away from the host. | Place mobile phone in a proper position within 5 meters away from |
vi Brustovin mobile phone
the host.

Product Parameters
General Specification
| Power supply | DC 12V(10.8~16V) |
| Load resistance | 4Ω |
| Max. current | 15A |
| Max. power | 4X65W |
DVD Player
| Sound output | 2.0Vrms±0.3V 10KΩ |
| Signal to voice ratio | ≥95dB (1KHz) |
| Distortion | ≤0.01% |
| Resolution | ≥75dB (1KHz) |
| Frequency response | ±3 dB (20Hz~20KHz) |
| Video output | 1.0Vp_p±0.2V/75Ω |
FM Radio
| Frequency range | 87.5-108.0MHZ |
| Intermediate frequency | 10.7MHZ |
| Practical flexibility | ≤ 10 dB |
| Signal to voice ratio | ≥ 65 dB |
| Distortion | ≤ 0.2% |
| Resolution | ≥ 30 dB(1KHz) |
AM Radio
| Frequency range | 522~1620KHz |
| Intermediate frequency | 450KHZ |
| Practical flexibility | ≤ 35 dB |
| Signal to voice ratio | ≥ 50 dB |
| Distortion | ≤ 0.3% |