Opia 2 - Dashcam Vicovation - Kostenlose Bedienungsanleitung
Finden Sie kostenlos die Bedienungsanleitung des Geräts Opia 2 Vicovation als PDF.


| Produkttyp | Dashcam |
| Modell | Opia 2 |
| Marke | Vicovation |
| Prozessor | Ambarella A12 |
| Bildsensor | 4 Megapixel CMOS |
| Objektiv | F/2.0, 6G Megapixel-Linse |
| Blickwinkel | 160° Diagonal |
| Videoauflösung | 2K Ultra-HD 1440p HDR (2560x1440p @ 30fps HDR), 1296p HDR, Full HD 1080p 60fps, Full HD 1080p HDR |
| Bildschirm | 2.0 Zoll TFT-LCD |
| G-Sensor | 3-Achsen |
| Notfallaufnahme | G-Sensor-Trigger / Manueller Trigger |
| Speicher | microSDHC & SDXC (Class 10, bis zu 128 GB) |
| UHD & 3DNR | Ultra-High Dynamic Range & 3D Rauschunterdrückung |
| Audio | Aufnahme / Stummschaltung |
| Videoformat | H.264-Kompression, .MP4 |
| Stromversorgung | USB-Zigarettenanzünder (Eingang: DC 12-24V, Ausgang: DC 5V/1A über Mini-USB) |
| Betriebstemperatur | 0 °C bis 75 °C |
| Lagertemperatur | -20 °C bis 85 °C |
| Abmessungen (L x B x H) | 72 mm x 53 mm x 33 mm |
| Zertifizierungen | CCC, CE, FCC, BSMI (D33i02), ROHS |
| Funktionen | Loop/Nahtlose Aufnahme, Bildschirmschoner, Notfallaufnahme, Zeit-/Datum-/Benutzertext-Stempel, vollautomatische Parküberwachung (Smart Motion Detection, Smart Time-Lapse) (erfordert Vico-Power PLUS) |
| Erweiterte Funktionen | LDWS (Spurverlassenswarnung), FCWS (Frontkollisionswarnung), Geschwindigkeitswarnung, GPS-Tracking (mit optionalem GPS-Modul) |
| Lieferumfang | Installationsanleitung, Garantiekarte, Quick-Release-Halterung, Saugnapfhalterung, 3M-Klebefolie, Vico-Power PLUS (optional), CPL-Filter (optional) |
Häufig gestellte Fragen - Opia 2 Vicovation
Benutzerfragen zu Opia 2 Vicovation
0 Frage zu diesem Gerät. Beantworten Sie die, die Sie kennen, oder stellen Sie Ihre eigene.
Eine neue Frage zu diesem Gerät stellen
Laden Sie die Anleitung für Ihr Dashcam kostenlos im PDF-Format! Finden Sie Ihr Handbuch Opia 2 - Vicovation und nehmen Sie Ihr elektronisches Gerät wieder in die Hand. Auf dieser Seite sind alle Dokumente veröffentlicht, die für die Verwendung Ihres Geräts notwendig sind. Opia 2 von der Marke Vicovation.
BEDIENUNGSANLEITUNG Opia 2 Vicovation
OP//A
— PREM/UM PACK
Vico-Opia 2 Premium Pack Installation Guide
text_image
OP//A IP A10112K-HD
2K ULTRA-HD HDR 2560X1440p
A12
AMBARELLA A12 INSIDE
HSFHD
HIGH SPEED FULL HD 1920 X 1080/60FPS
HDR
OCTRA HIGH DURING RANGE 1440p/1236p
Index
English 02
中文 28
Vico-Opia2 Installation Guide
Thank you for choosing Vico-Opia2 Car Camcorder. To ensure safety, please read this manual carefully before installation.
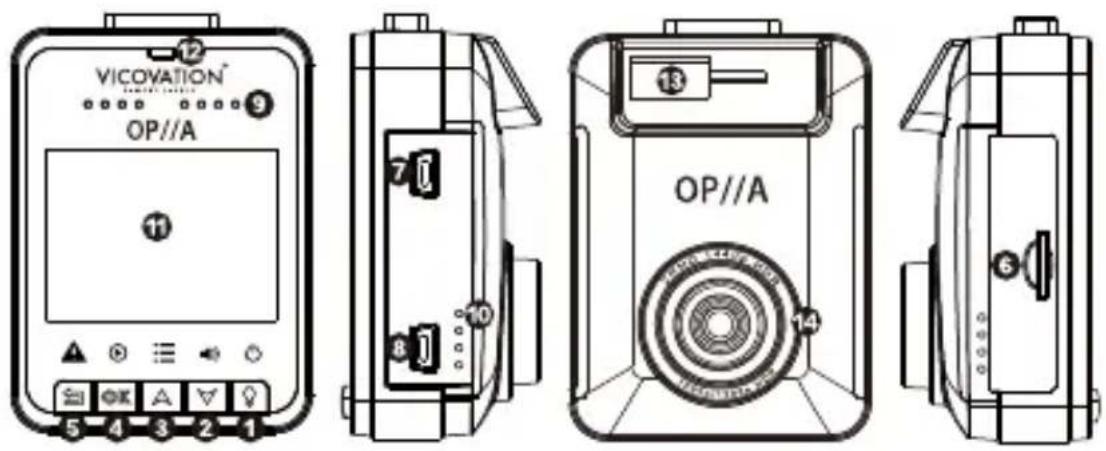
Vico-Opia2 Exterior Overview :
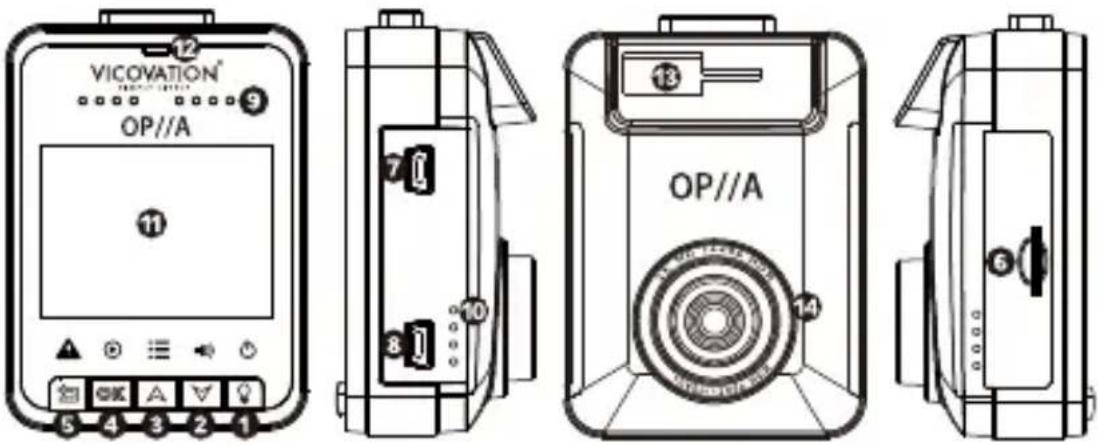
- Power button
(Hold for 3 seconds to turn off) - Down/Mute
- Up/Menu
- Start/Stop Recording/Confirm
- Emergency Recording/Return
- Micro SD card slot
- USB/Power Port
-
External GPS socket
-
Speaker/Mic
-
Ventilation Holes
11.2.0" TFT LCD Display - LED indicator
(Red=Recording, Green=Stand by,
Red Flashing=No SD Card)
- Mount Socket
- Lens
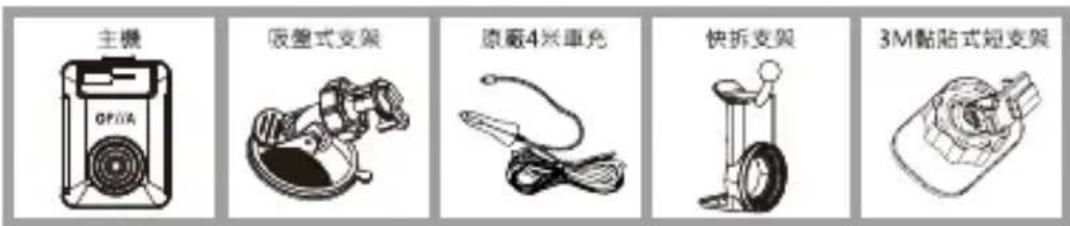
Vico-Opia2 Premium Accessories:


Installation guide

Warranty card
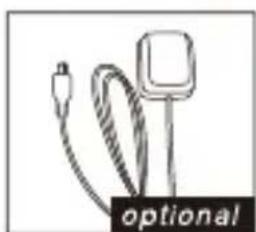
Optional :
natural_image
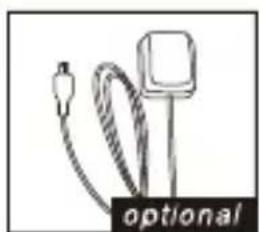
Simple line drawing of a plug and plug connector with a label 'optional' below (no text or symbols on the diagram itself)External GPS Mouse
natural_image
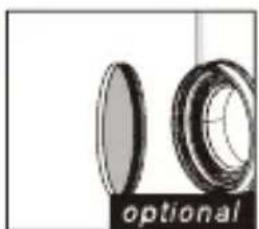
Two circular mechanical components with a label 'optional' below (no other text or symbols visible)CPL Filter
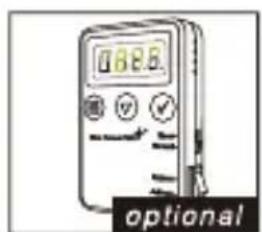
text_image
0.826 optionalVico-Power PLUS
Quick Release Mount Installation
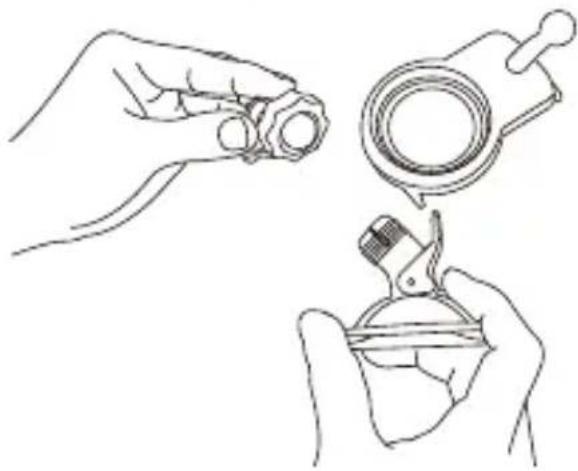
Please follow the steps below to assemble Quick Release Mount with Suction Cup Mount.
Assembling the Mounts
natural_image
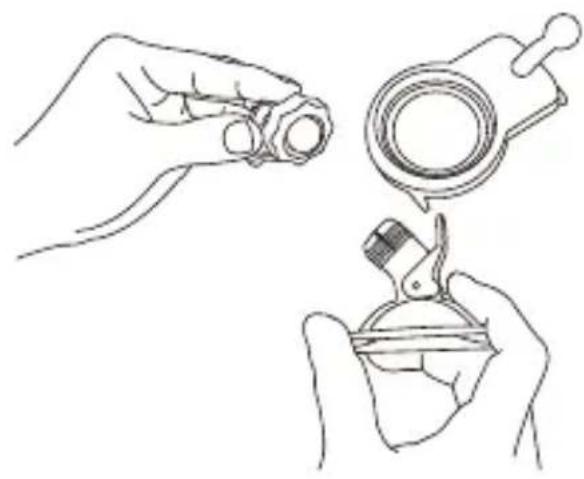
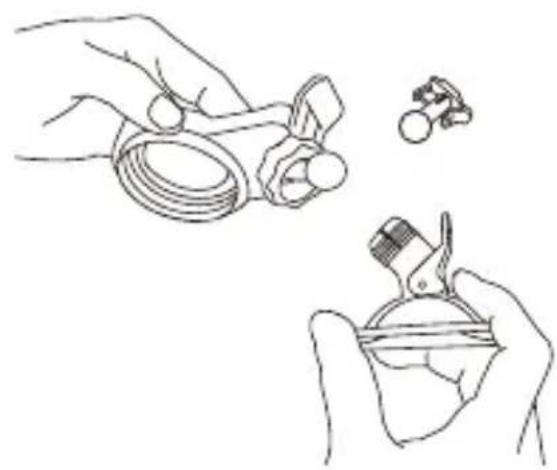
Line drawing of hands using a tool to adjust or trim a circular component (no text or symbols present)Unscrew the cap nut from Suction Cup Mount first, then remove the T-shaped ball joint.
natural_image
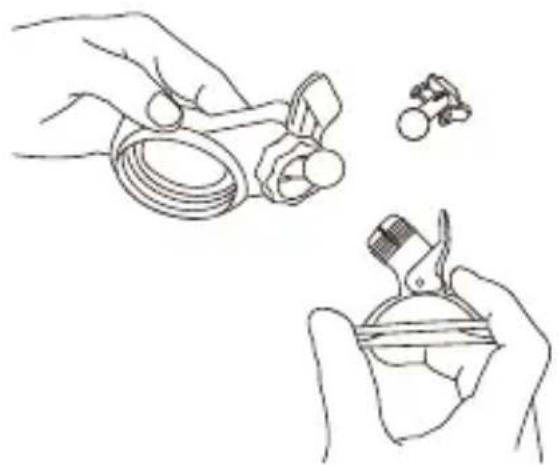
Line drawing showing hands using a tool to cut a component, with a small inset image of a small object nearby (no text or symbols)Insert the ball-shaped joint from Quick Release Mount into the notch and tighten the cap nut. Please be aware that in order to install the two mounts correctly, the cap nut has to be place into the ball-shaped joint first.
VicoVation CPL Filter (Optional)
- VicoVation CPL Filter is not included in the package. Users may choose to install VicoVation CPL Filter or any 52mm standard CPL filters.
- Having CPL filters installed will result in a darker image. Please adjust the settings for night-time recording by (1) adjusting the CPL Filter's installation angle. (2) changing exposure values. (3) removing the CPL Filter at night.
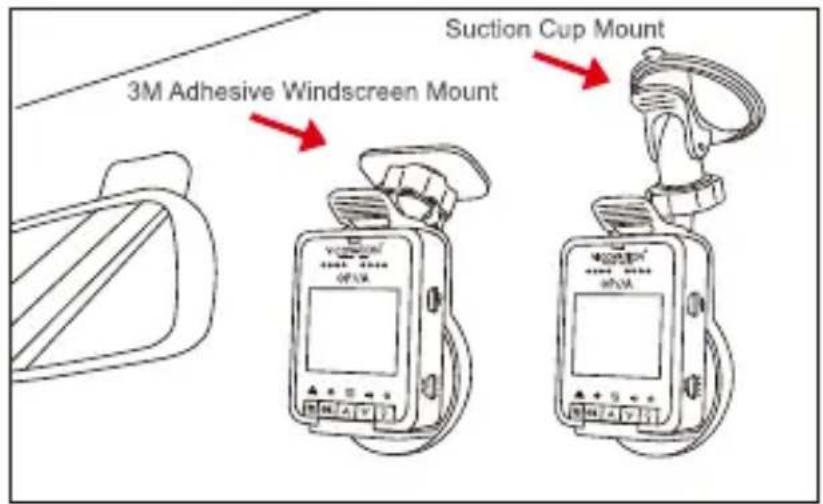
Suction Cup Mount Installation
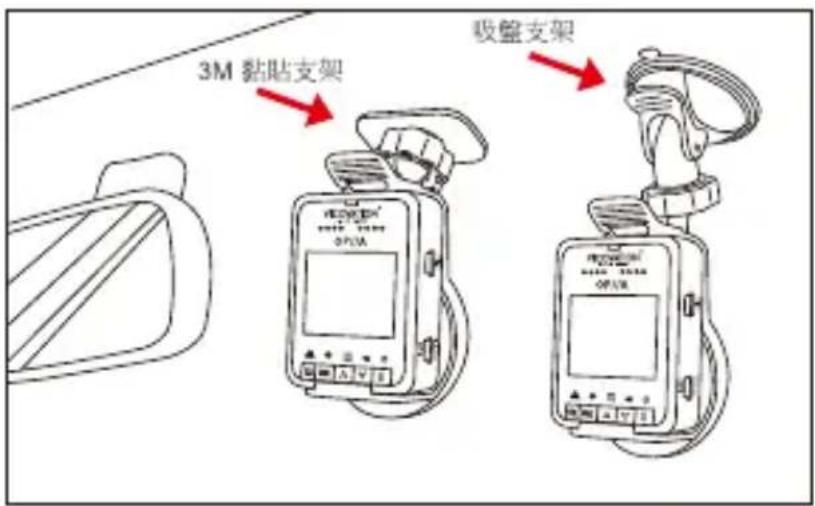
Vico-Opia2 + Quick Release Mount + Suction Cup Mount / 3M Adhesive Windscreen Mount
text_image
3M Adhesive Windscreen Mount Suction Cup MountPlease make sure to face the direction of the mounts toward the windshield.
Ultra-HDR (High Dynamic Range) @1440p 30fps HDR Mode
Vico-Opia2 is equipped with the latest Ultra-HDR technology. It adjusts the images to the best balance between bright and dark and generates extremely high quality 1440p recording footages. The default resolution setting is under 1440p@30fps HDR mode.
Camera and Cord Installation
Installation Steps
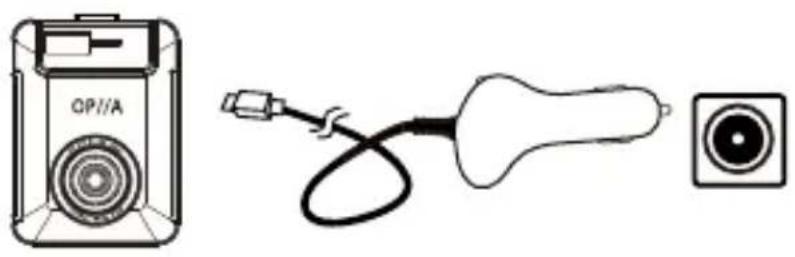
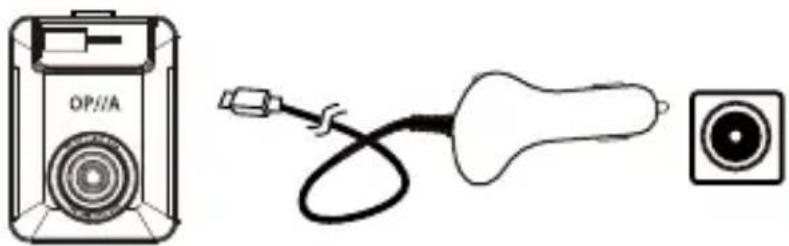
- In order to keep the device functioning properly, please use the VicoVation power cable that comes with the package at all times.
- Plug the power cable into the D/C outlet then connect the USB side with Vico-Opia2 insert into the power port.
- Attach and adjust the mount on the windshield in the proper position.
natural_image
Illustration of a portable electronic device with a plug, a bulb, and a speaker (no text or symbols)Recommend Installation Position for Wiring
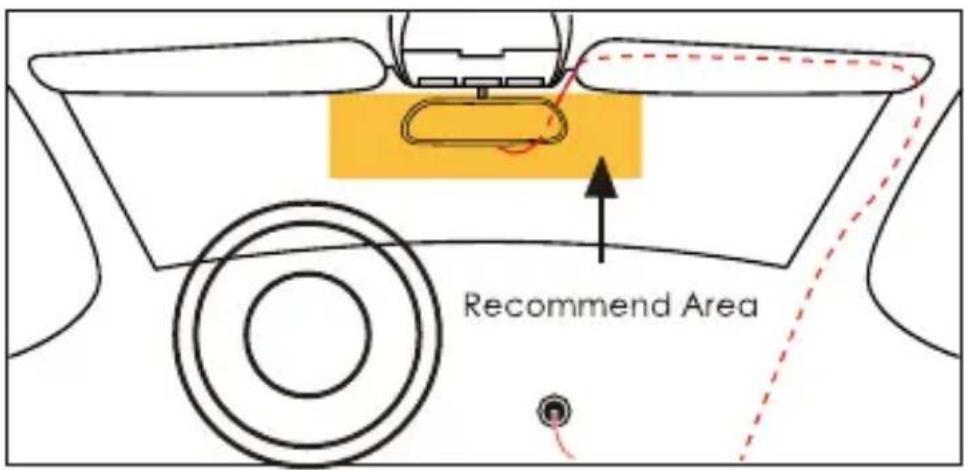
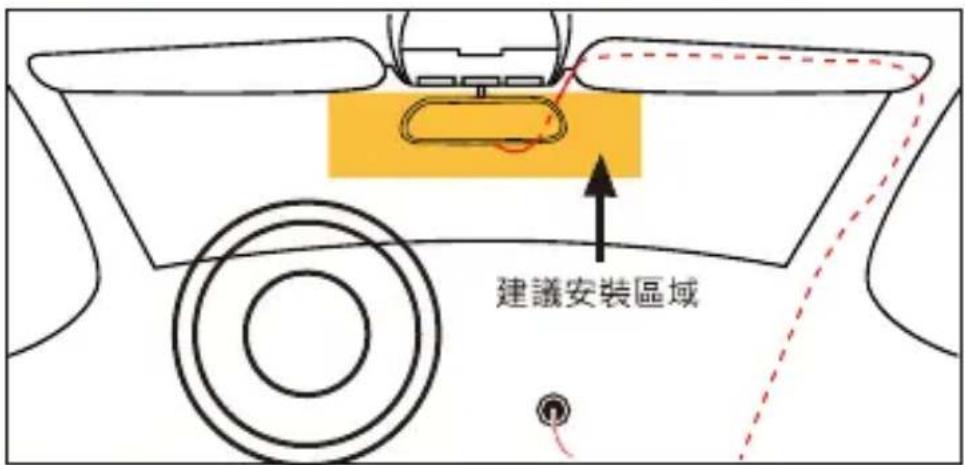
To achieve a clean looking installation after you have plugged the camera in follow the cord back from the camera and tuck it in under the roof headliner. Then run it along the "A" Pillar and tuck it behind. Finally hide the cable under the passenger side floor mat.
text_image
Recommend AreaSpecial Notice:
- It is not recommended to wiring the cables on your own if your car is equipped with airbags in the "A" Pillar. Please seek for professional assistance.
- To avoid effecting the water proof performance on the doors, please restore the rubber seal properly after wiring the power cable.
- Opia Power Cables are specially designed and only for Opia series dashcams. Opia Series Power Cables are not compatible with other VicoVation products.
Camera and Cord Installation
-
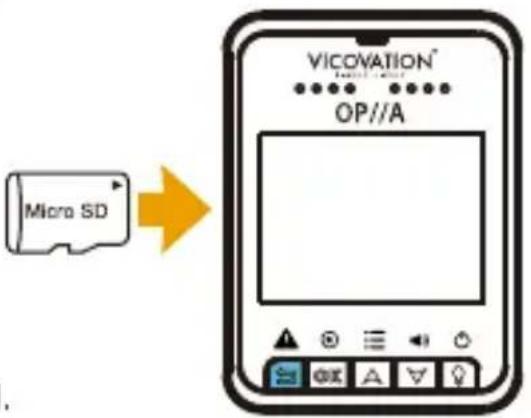
Insert the memory card into microSD Card Slot following the direction shown in the picture. Push to the end until you hear a light click.
-
Vico-Opia2 supports 2K HD 1440p recording, and a class 10 memory card must be used.
text_image
Micro SD VICOVATION® OP//ARecording Storage Capacity
(10 sets of EmgencyRecording is not included)
| 1440p 30fps | 1296p 30fps | 1080p 60fps | 1080p 30fps | |
| 8GB | 55 mins | 60 mins | 60 mins | 75 mins |
| 16GB | 115 mins | 120 mins | 120 mins | 166 mins |
| 32GB | 245 mins | 250 mins | 250mins | 347 mins |
| 64GB | 516 mins | 520 mins | 520 mins | 710 mins |
| Video Bit Rate | 19Mb/s | 16Mb/s | 16Mb/s | 12Mb/s |
- After connecting to a power source, the device will boot up and enter recording mode. During the initial 3 seconds, recording cannot be paused due to the system check. However, you may enter "Menu" during this time.
- Please adjust the "Time/date" settings and format the memory card from the settings menu first before operating the device for the first time.
- To remove your inserted memory card, please make sure the recording has been stopped and the power has been turned off. Do not try to eject the memory card while the camera is recording as this may result in the file becoming damaged. Please use Micro SD card (SDHC/SDXC) with level Class10 only.
-
A Class 10 microSD memory card (SDHC/SDXC) is required.
-
The device is equipped with standard microSD card slot.
-
Card reader mode can be turned on on the device by connecting with a computer. To go back to operating normally, simply connect the device back to the power source with the power cable.
What's the Life Expectancy of a Memory Card?
One of the most important reasons to have a Dashcam installed in a car is to keep it recording in case something unexpected happens.
Therefore, you should pay attention to your memory card as much as you care about the quality of your Dashcam.
There are more than 20 memory card brands out there. We recommend you to buy from more well-known and reliable ones.
If possible, you need to format your memory cards on a regular basis. Most of SDHC/SDXC cards on the market are TLC (Triple-Level Cell) type. They are hugely applied on smartphones, digital cameras, and tablets. Their rewrite cycles (TLC) are limited, and it's lower than MLC (Multi-Level Cell) and also cheaper.
Most people care about the specifications, image quality, and price when it comes to choosing a Dashcam. Usually, when you purchase a Dashcam, the package already includes a memory card. Therefore, the importance of selecting a good memory card is commonly ignored. If you were to purchase your own memory card, make sure you read the required class (usually Class 10) and maximum supported size (usually 32G or 64G) of your Dashcam first. Also, keep in mind that memory cards have limited rewrite cycles so they are considered as consumables.
TLC memory cards have limited rewrite cycle for about 500 to 1000 times. In other words, after going through the cycle for more than 500 times, chance of the memory card to be broken will be hugely increased. More, memory card can be broken in any time after going through the cycle more than 1000 times. Unlike TLC memory on smartphones, memory cards on Dashcams are constantly being written (recording). The higher the read/write frequency, the shorter of memory card life-time. There are more and more MLC memory cards for users to choose nowadays. Users may consider going for higher price MLC memory cards to have a better performing experience on Dashcams.
Please be aware: memory cards have limited rewrite cycles so they are considered as consumables!
Brand new memory cards surely wouldn't make a difference at first, but you will be able to see the bad ones from the good ones though out time. Using poor quality memory cards could lead to crushing, stuck in the standby mode, or continuously restarting.
Periodically check your memory cards:
★ 1. Manually perform a format once a month.
Always format your memory card from the Dashcam before you use it for the first time! After using the memory card for a while, the flash storage gets fragmented because of the constantly writing and rewriting. Manually format once a month will help to improve the data writing performance.
★ 2. Avoid direct exposure to the sunlight.
Normally, the operating temperature of memory card is under 60^ C ( 140^ F). It is recommended to keep your device in the glove box during summer. Exposing Dashcam in the direct sunlight may lead to damage of memory card and Dashcam both. Any electronic device shall avoid direct sun exposure and high temperature.
★ 3. Check if your recorded files are broken or in fragments with a computer.
Checking video data in memory through computers to see if all footages records normally. Switch to a new memory card if you find anything abnormal, like damage files, or unable to read from memory cards.
★ 4. Format/Deep-Scan with a computer with ScanTool.
This might take some time but performing this deep scan can determine whether your memory card is healthy or not. Please make sure to format the memory card again after inserting back into the Dashcam.
Recommendations and notifications:
★ 1. Replacing with a new card after using the same one for two years.
Memory cards nowadays are almost half of the price (maybe even lower) comparing to years ago. The life expectancy of memory cards would decrease because of the increasing number on the rewrite cycles. If you are not sure whether your memory card is TLC (Triple-Layer Cell) or MLC (Multi-Level Cell), please simply replace a new one after two years.
★ 2. DO NOT eject your memory card without a safe shut down on your Dashcam first.
If you eject your card while the footages are still being saved onto memory card, file damaging and date lost could be occurred. In the event of car accidents, make sure DashCam has been power-off safely before you eject the memory card from DashCam.
★ 3. Always have a backup memory card in your car, in case the other one fails.
It's always nice to have a backup, in case of accidents.
★ 4. If you find anything unusual about your memory card or in doubt, replace with a new one immediately.
Memory cards are fairly cheap nowadays. Don't wait on replacing a new memory card if you are not sure if your memory card is working right or not. Better safe than sorry.
★ 5. DO NOT share the memory card you use on Dashcam with your smartphone or other devices.
The format type of the memory card could be changed when you apply it onto your cell phone due to the operating system requirements. This could lead to malfunctioning on your DashCam.
Our Top Choices
The following SD card brands have been tested and are compatible with our cameras: ADATA, Kingston, Transcend, SanDisk (16G\~64G max and must be rated class 10 or higher).
Main Display Icons
Recording Mode Interface
-
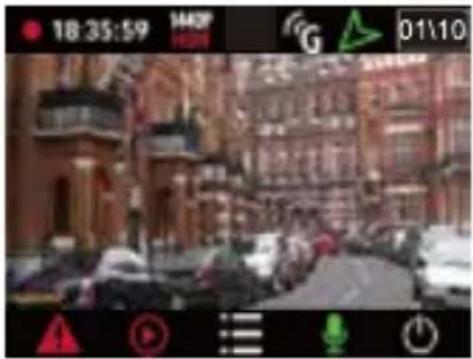
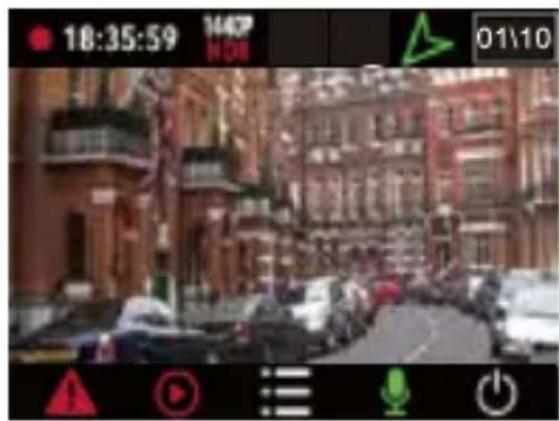
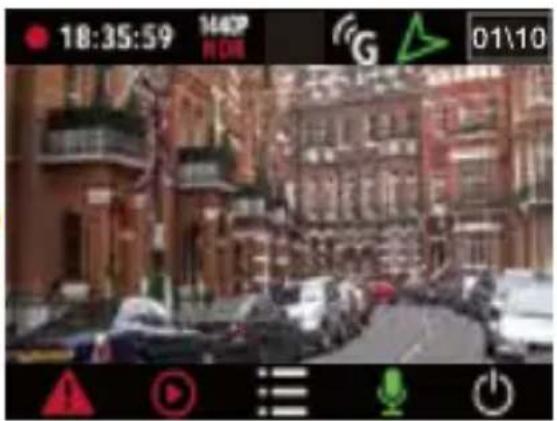
Icons on the upper bar (from left to right):
-
Red Dot Recording Indicator
- Current Time
- Recording Resolution
- G-Sensor Function Indicator
- GPS Tracking Function Indicator
- Emergency Recording Saved Files
text_image
18:35:59 1442F G 01\10-
Icons on the lower bar (from left to right):
-
Emergency Recording Function in Progress
- Normal Recording Function Activating
- Menu Key
- Voice Recording On / Off Hotkey
- Power On / Off Hotkey
Menu Interface
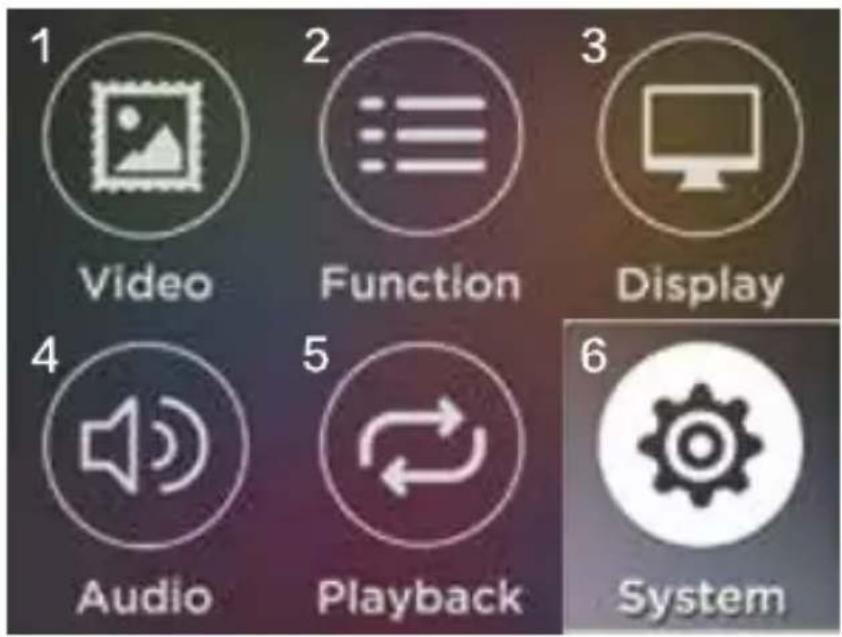
text_image
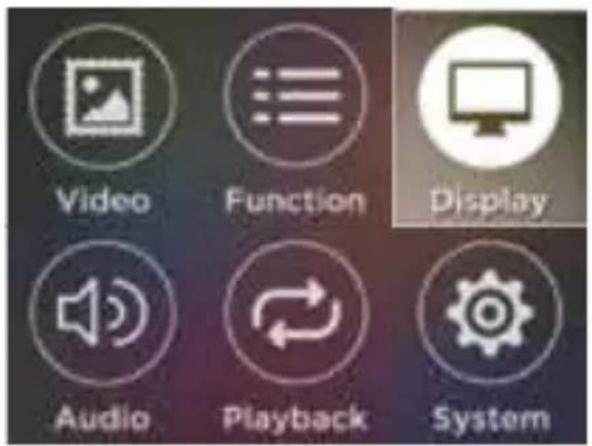
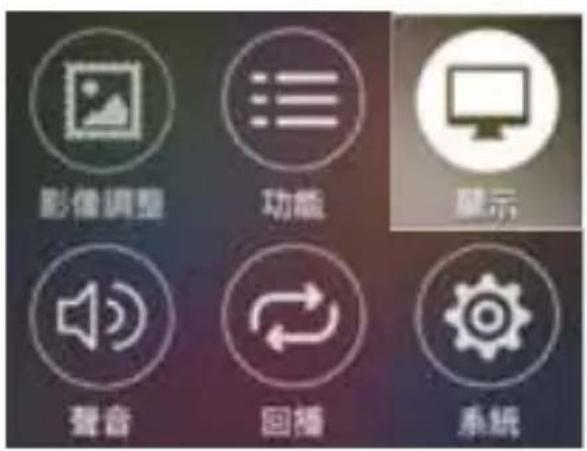
1 Video 2 Function 3 Display 4 Audio 5 Playback 6 SystemMenu Interface
- Video Settings
- Function Settings
- Display Settings
- Audio Settings
- Playback Settings
- System Settings
Main Settings
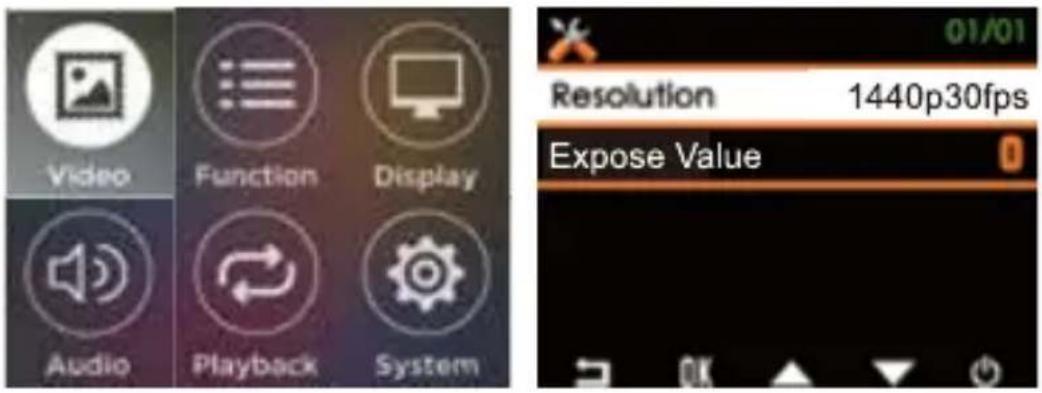
Video Settings
Change video recording resolutions and exposure values.
Function Settings
Change G-Sensor sensitivity (default: Off) and External GPS Mouse related settings.
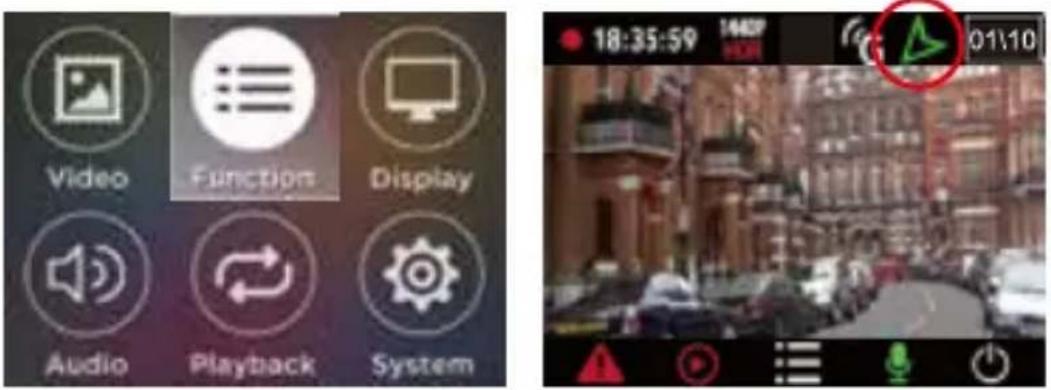
- GPS related settings can only be activated when External GPS Mouse is installed correctly. Please wait until the GPS signal is fully acquired for these settings to become available.
- GPS signal is acquired automatically every time the device is powered up with an external GPS Mouse connected.
- After successfully acquiring the GPS signal, a green arrow will be displayed in the upper right corner to confirm GPS functions are activated.activated.
External GPS Mouse (Optional) Settings
LDWS (Lane Departure Warning System)
After the current vehicle speed reaches the set value leaving the current lane will cause the device to beep to notify the driver and an alert icon will show up on the screen.

natural_image
Simple line drawing of a car inside a circle with an orange vertical stripe (no text or symbols)LDWS
FCWS (Forward Collision Warning System)
When the current speed reaches the set value while the distance with the car in the front is less than the safety distance (5\~7 meters), the device will notify the drivers with a beep sound and an alert icon will show up on the screen.
natural_image
Simple line drawing of two cars facing each other with sound waves (no text or symbols)FCWS
LDWS / FCWS Calibration
The device has to be calibrated to improve the accuracy on LDWS and FCWS. After turning LDWS and FCWS on and returning to the normal recording mode, a red baseline will show up on screen. Please align the red baseline with your horizon. The baseline will disappear in 30 seconds.
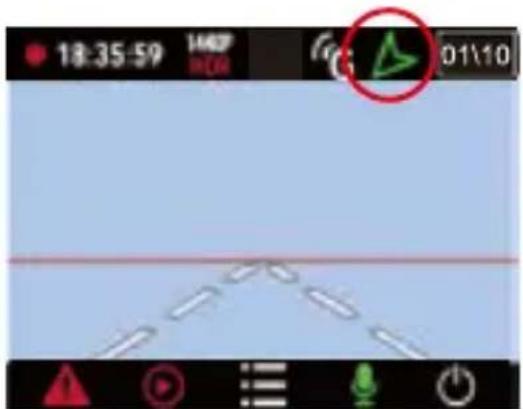
text_image
18:35:59 1467 01\10Please installed the device in the middle of the windshield to ensure the best performance.
Smart Parking Surveillance (Required Vico-Power PLUS)
Smart Parking Surveillance (SPS) function can be unlocked by having Vico-Power PLUS (VPP) installed. SPS will monitor your car while it is stationary from impacts or sabotage.
Vico Power-PLUS
Your Best Smart Car-Battery Power Management Device!
Video recording will be activated by Motion Detection.
Camera will switch to Standby Mode automatically if no motion is detected to conserve memory space. During Standby Mode, no recordings will be made. SPS will be automatically activated when turned on and G-Sensor inside detects no movement made by vehicle for 5 minutes.
Special Notice:
Full time SPS requires a constant power source. Normal ACC is not meant to provide full time power supply to camera when engine turned off. To enable SPS, it requires constant power from the car battery while engine off (ACC off). Some cars provide constant power through the accessory socket, and others do not. If your car does not, or you would like it wired in directly, it is recommended to find a professional auto electronics shop to make sure it is wired in properly.
Avoid Using External Power Banks for Smart Parking Surveillance:
During summer time, the temperature inside a car can reach a very high level and using a power bank under such high temperature could result in explosions due to the lithium batteries inside.
Smart Parking Surveillance Settings:
After turning on Smart Parking Surveillance (default is Off):
1.) Smart Motion Detection Sensitivity: High / Medium / Low
Sensitivity levels of Motion Detection under SPS: Red LED light indicates Recording Mode is triggered by Motion Detection (Active Mode, recording). Green LED light indicates no motion is detected (Standby Mode, not recording).
2.) Smart Time-Lapse Video: Every 1 Second / 10 Seconds / 60 Seconds:
After entering Smart Parking Surveillance, the device will automatically take a picture at the selected interval of time(1s/10s/60s) and create a time-lapse video to document the things happening in front of the vehicle.
3.) LCD Covert Mode: On / Off
The screen may be turned on or off when Recording is triggered by Motion Detection during SPS. The screen is set to be both off while standing by (no recording) and activated (recording) by default.
Smart Parking Surveillance (Required Vico-Power PLUS)
Smart Parking Surveillance: Working Behavior
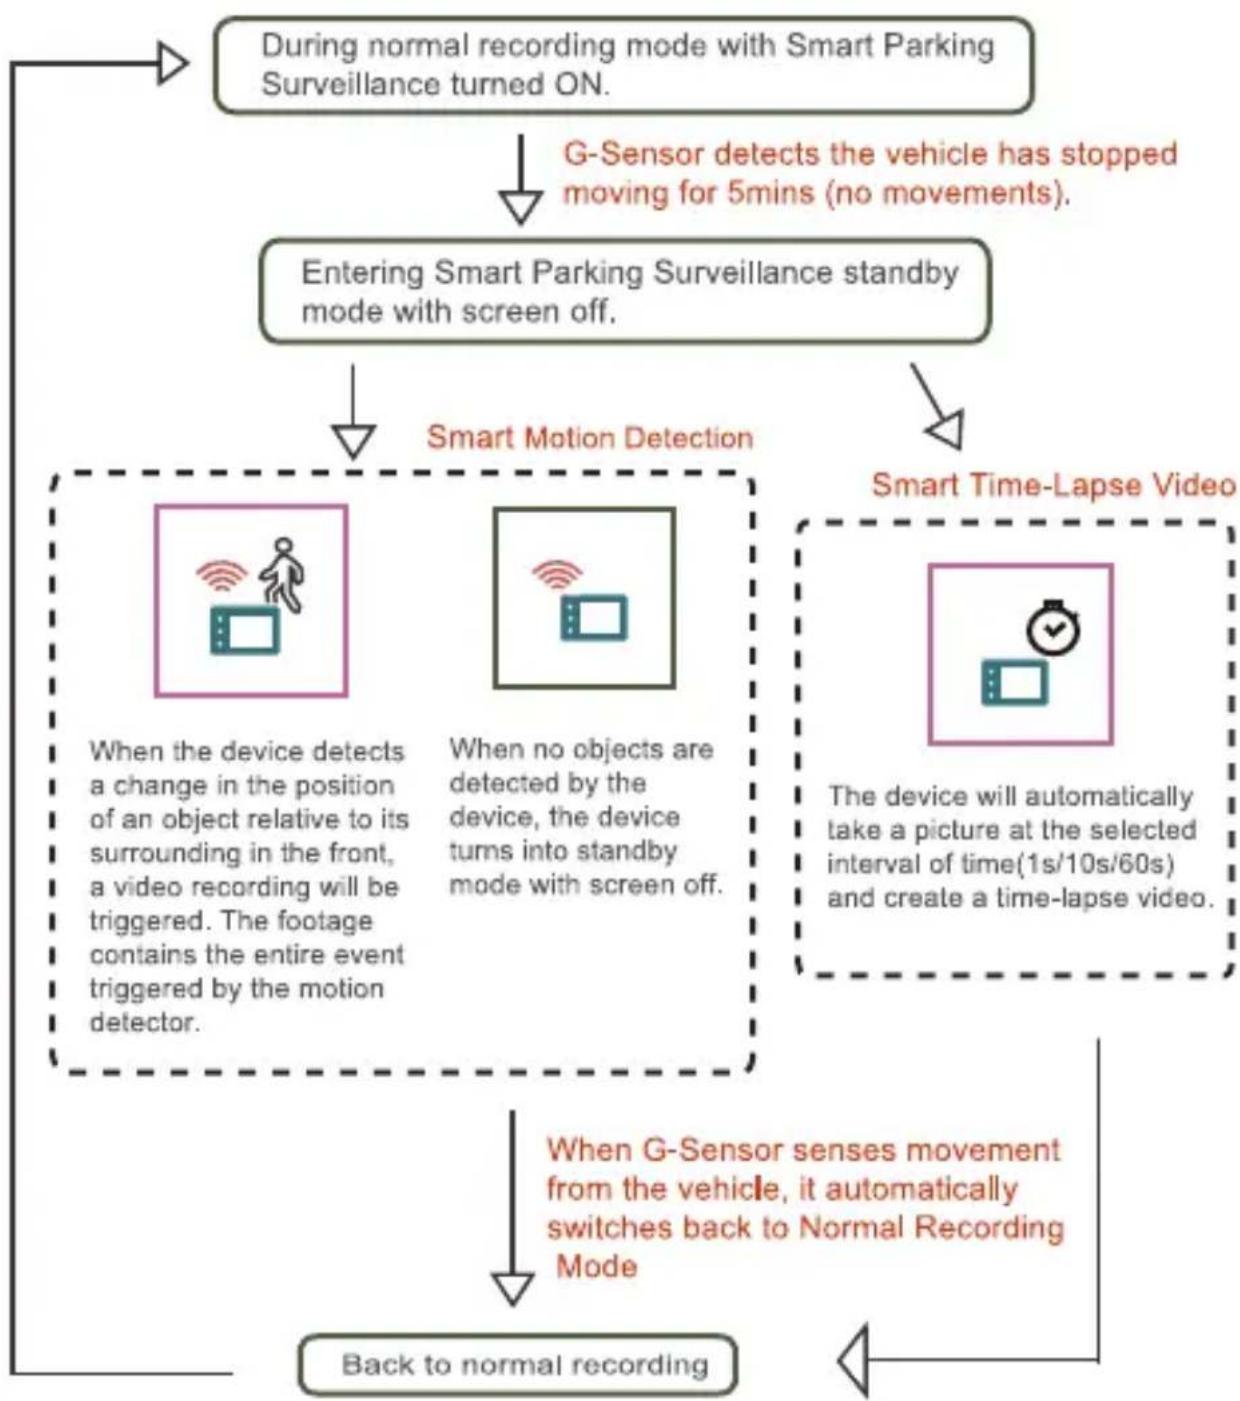
flowchart
graph TD
    A["During normal recording mode with Smart Parking Surveillance turned ON."] --> B["G-Sensor detects the vehicle has stopped moving for 5mins (no movements)."]
    B --> C["Entering Smart Parking Surveillance standby mode with screen off."]
    C --> D["Smart Motion Detection"]
    D --> E["Smart Time-Lapse Video"]
    E --> F["When G-Sensor senses movement from the vehicle, it automatically switches back to Normal Recording Mode"]
    F --> G["Back to normal recording"]
    style A fill:#f9f,stroke:#333
    style B fill:#f9f,stroke:#333
    style C fill:#ccf,stroke:#333
    style D fill:#cfc,stroke:#333
    style E fill:#fcc,stroke:#333
    style F fill:#cff,stroke:#333
    style G fill:#ffc,stroke:#333
Smart Parking Surveillance and G-Sensor's sensitivity settings:
G-Sensor's sensitivity settings are only related to Emergency Recording function.
Having G-Sensor turned off would not affect Smart Parking Surveillance.
Smart Parking Surveillance (Required Vico-Power PLUS)
Differences between
Smart Motion Detection and Smart Time-Lapse Video :
| When does it work | Recording Methods | Saved content | |
| Smart Motion Detection | Initiates recording when movements are detected. | Video recording | Saved content every triggered event recorded during Smart Parking Surveillance. |
| Smart Time-lapse Video | Takes pictures at the selected interval of time and create videos. | Videos combined with photos | Videos combined with images captured during Smart Parking Surveillance. |
Smart Motion Detection
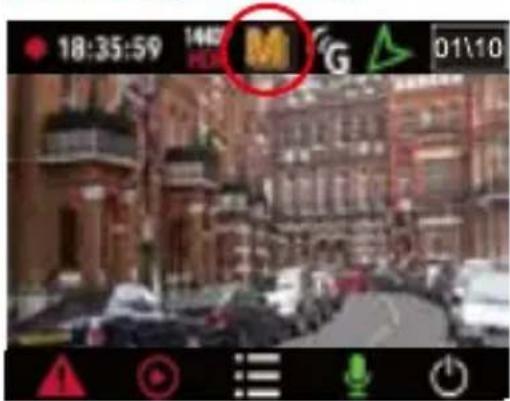
text_image
18:35:59 140 M G 01\10Smart Time-lapse Video
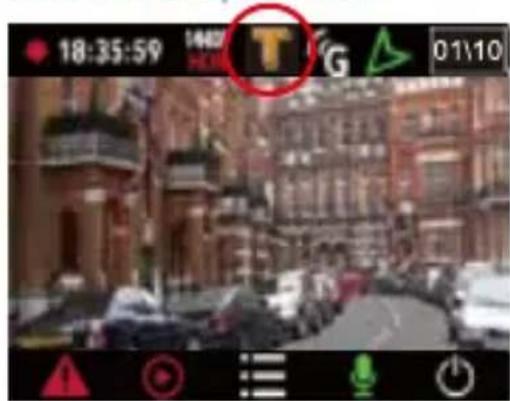
text_image
18:35:59 1402 T G 01\10Day Time Parking
Smart Parking Surveillance Mode
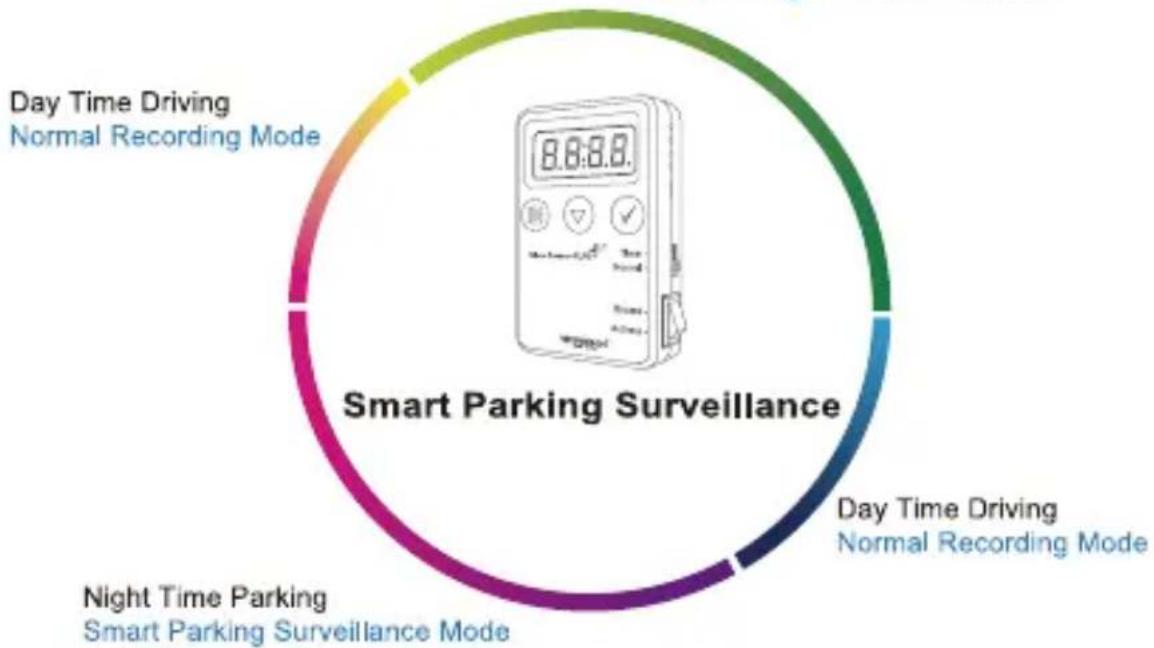
flowchart
graph TD
    A["Day Time Driving Normal Recording Mode"] --> B["Night Time Parking Smart Parking Surveillance Mode"]
    B --> C["Day Time Driving Normal Recording Mode"]
    C --> D["Smart Parking Surveillance"]
Smart Parking Surveillance (Required Vico-Power PLUS)

text_image
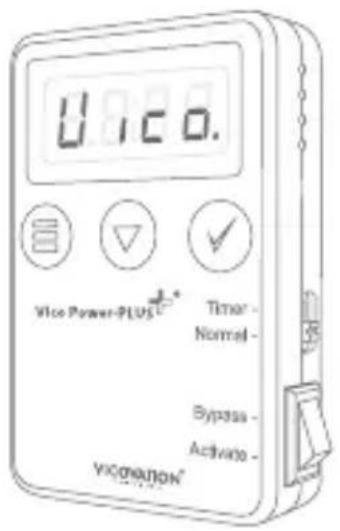
120 Vice Power-PLUS Timer- Normal- Bypass- Activate- VIXONATIONVico-Power PLUS (VPP) is a Battery Discharge Prevention device that connects to the car battery (Fuse Box). It continuously provides power to Dashcam after engine is turned off and monitors car battery status at the same time. When VPP detects car battery status has reached the set level, it stops supplying power to the Dashcam (cut-off) to prevent car battery from going dead (drained out). VPP is equipped with built-in temperature sensors and features over-heating protection. This device is compatible with any Dashcam or Blackbox DVR.
Battery Protections
- Low voltage protection
- Over-temperature protection
- Auto shutdown timer
- Overcurrent & Impulse current protection

text_image
Prohibition sign with a crossed-out box and lightning bolt icon, indicating no prohibition or restriction.Low Voltage protection:
Power-PLUS will periodically auto-detect your battery voltage status, to cut-off the power if the voltage drops below the configured value (11.6/11.8/12.0/12.2/12.4V or 23.2/23.4/23.6/23.8/24/24.2/24.4/24.6V) to prevent car battery becoming excessively discharged.

natural_image
Illustration of a thermometer with a sun symbol (no text or labels)Over Temperature protection:
During Summer daytime, inner car temperature raise extremely high if you left your car outside with direct sunlight. Over temperature operation might damage your dash cam. Power-PLUS built-in thermo sensor will cut-off power if temperature exceeded setup value. (40°/ 45°/50°/55°/60°/65°C) * (104°F/ 113°F/ 122°F/ 131°F/ 140°F/ 149°F)

Timer protection:
If you switch into Timer mode, Power-PLUS will cut-off power when time out, based on your setup schedule (2/6/12/24/48/72hrs).
Over Current/Surge protection:
Power-PLUS will detect abnormal over current status and cut-off power to prevent any damage on dash cam device. Additionally, Power-PLUS built in with an extra fuse box (2A), to have extra protection if anything goes wrong as incorrect installing or short circuit.
Built-in Digital Display/ Backlight LED, easier to monitor/control
Backlight LED enables users to have clear display of car-battery voltage n monitoring and setup control, even at night. It's easier to setup configuration with 3 handy control buttons with clear LED friendly display.
Multi Input Power Type, DC12V/24V all in one
No matter your car is running DC12V or 24V battery, Power-PLUS will auto-detect the voltage input to display different programmable menu setting. It's automatic.
Multi-Switch to Select Normal mode and Timer mode
Normal mode provides low voltage and over temperature protection at the same time. Timer mode provides original both low voltage and over temperature, also additional timer cut-off when schedule time out. There is a switch on the right side of Power-PLUS for you to switch under different condition.
Programmable Setting, fitting your car environment
Users can select it's own suitable parameter in different cut-off voltage, temperature, and time. It's all clearly displayed in comprehensive menu and friendly user interface.
External GPS Mouse (Optional) Settings
Speed Alert
Users may select to set the value between 80/90/100/110/120/130km. When the driving speed is faster than setting, the device will alert the drive with a beep warning sound and an alert icon to be displayed on the screen.
Speed Cameras Alert:
This feature is currently only available in Taiwan.

natural_image
Simple analog clock face showing 3 o'clock with no hands (no numbers or text)Speed Alert
GPS Signal
bar
| X | Value | |---|---| | 12 | 31 | | 14 | 26 | | 18 | 26 | | 21 | 12 | | 22 | 41 | X:12 1,572930E Y: 25,075930N HDOP: 1,3 Sta:Fix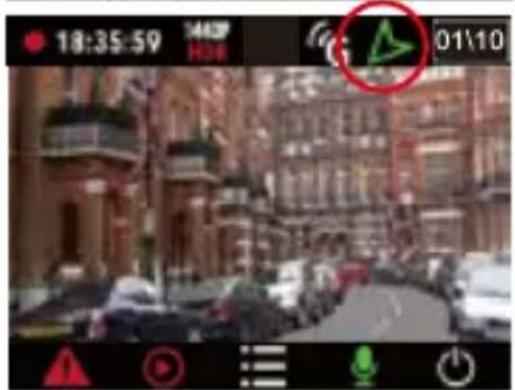
text_image
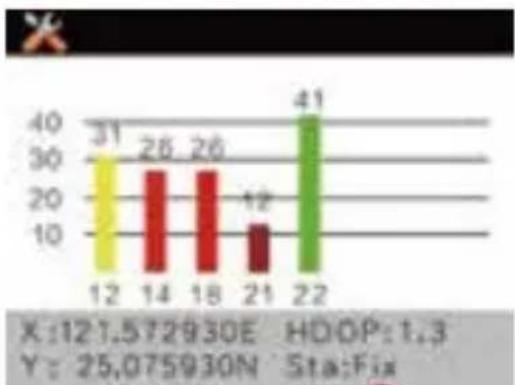
18:35:59 1442P H06 01\10GPS locating requires at least 3 signal bars from satellites to be working properly. As shown in the picture, there are 5 bars of signal from 5 satellites. Different colors indicate different strength on GPS signal.
Green: Great (40dB or above) Yellow: Normal (30\~40dB) Red: Medium (20\~30dB) Dark Red: Bad (20dB or below)
After successfully complete GPS locating, the screen will display a Green Arrow icon on the top bar to confirm.
- Please be aware that windscreen films that contain metal material and tall buildings may have an effect on GPS signal receiving.
- You may also enter Menu-> Function to monitor the locating state. 3 normal signal bars are required.
Display Settings
Screen Saver
Default is Always ON. Users may change to 15 seconds, 1 minute, 3 minutes, or 5 minutes. After the device has been powered on, the screen can be set to OFF (Sleep Mode) accordingly. The screen can be woken up by pressing ON & OFF button.
LCD Brightness
Default is Standard. Can be adjusted to LOW.
Time Stamp
Date and time will be embedded at the bottom left of the videos. Default setting is ON.
Vico-Tag
Users may customize12 characters to be embedded next to Time Stamp.
Vertical Flip
Default is OFF. This feature is for special installing purposes.
Horizontal Flip
Default is OFF. This feature is for special installing purposes.
text_image
Video Function Display Audio Playback System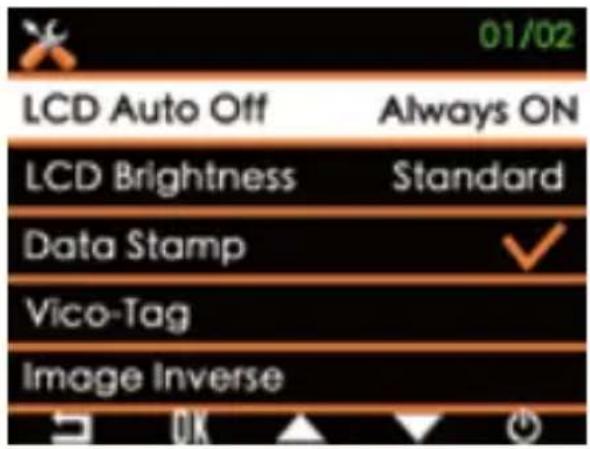
text_image
01/02 LCD Auto Off Always ON LCD Brightness Standard Data Stamp ✓ Vico-Tag Image InverseAudio Settings
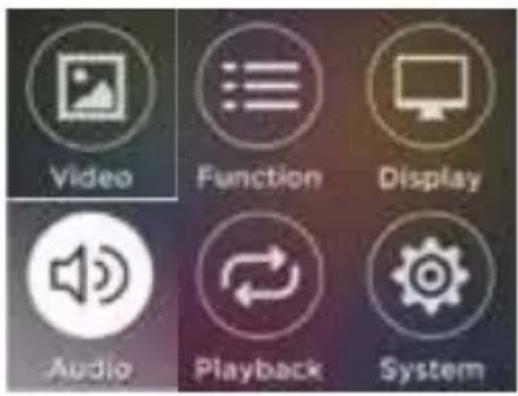
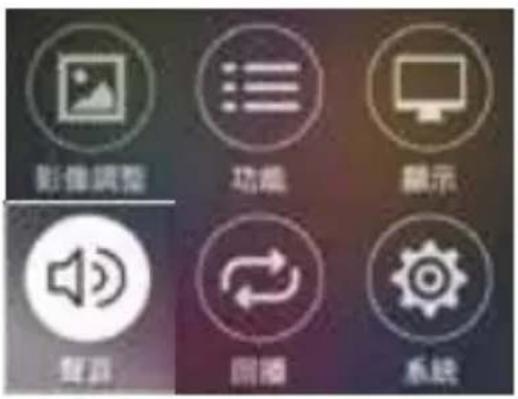
Audio Recording
Default is Medium. User may use the Down key button to switch the audio while recording.
text_image
Video Function Display Audio Playback System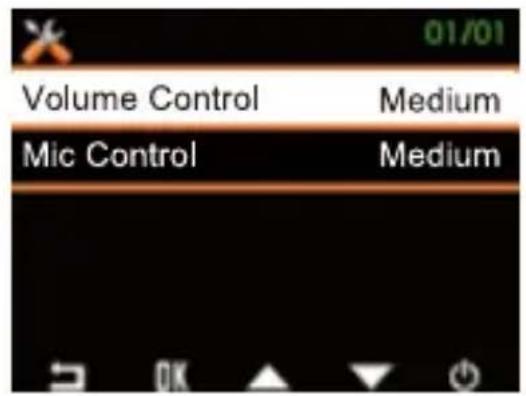
text_image
Volume Control Medium Mic Control MediumKeypad Sounds
(volume for the whole device)
Default is Medium. Volume can be set as High, Medium, Low. This setting also effects the volume in playback mode and warning sounds.
Playback Settings
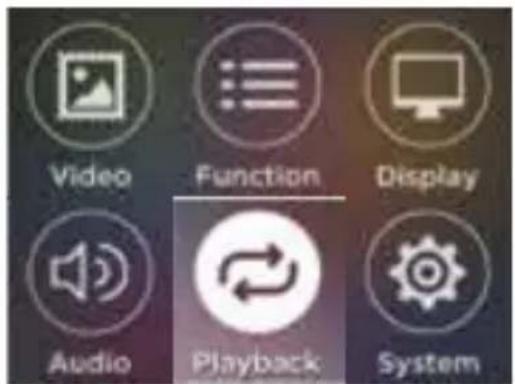
- Enter Menu, Select Playback.
- In the playback mode, you may press On & Off key to switch between Normal Recording Mode files and Emergency Recording Mode files. Press Up and Down keys to select between the files, and then press OK to playback, delete, and lock the files.
text_image
Video Function Display Audio Playback SystemPlayback Settings
Manually Make an Emergency Recording
During Normal Recording mode, if you wish to make a recording from being overwritten by the looping function you may press the orange button. This will create a 60 second segment new file (30 seconds before and after the button was pressed) on the memory card. These files must be manually deleted using a computer or the Emergency Recording capacity is filled up. Emergency Recording folder only saves the most recent 10 emergency recordings.
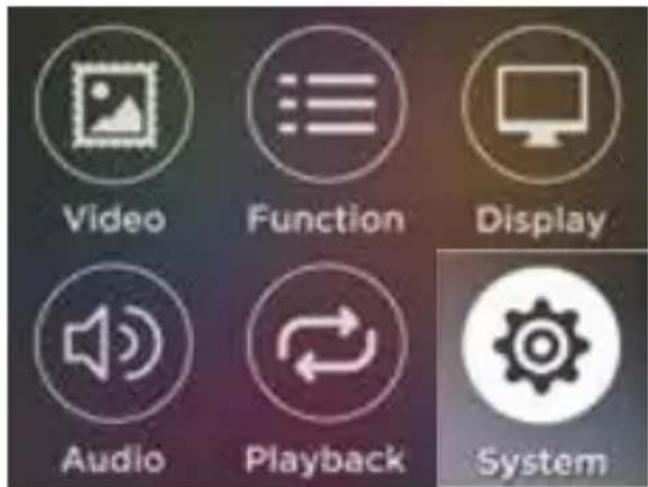
System Settings
Date/Time Setup system time and date.
Language Default is English. Users may change to other 18 languages.
Version Current firmware version on this device. The latest version of the firmware can be found on our VicoVation official website at www.vicovation.com and Facebook fan page at www.facebook.com/VicoVationOfficial.
Format Please format the memory card before operating the device for the first time. In order to keep the memory card healthy and have less fragments, preforming a format the once a month is recommended.
Format Default is Off. The device will remind the user to format the Reminder inserted memory card once a month or once every two months.
Default Please default the device after each upgrade.
text_image
Video Function Display Audio Playback SystemReviewing Videos On a Computer
- After shutting the device off, eject the memory card from the slot, memory cards can be connected with a computer using a memory card reader. Videos can be played after copied on to the computer.
- The device can also be put into card reader mode when connected to a computer with a USB Mini B to USB Type A cable. However, it is highly suggested that you use a card reader because there will be lagging during copying due to poor transmission rate. Videos can be played after copied on to the computer.
- Make sure the files are copied onto the hard drive before playing. Playing back videos stored on the memory card while in the camera will result in lagging during playback due to poor transmission rate.
- Video output on Vico-Opia2 is .MP4. File compression format is H. 264. Some computer built in players do not support H.264 codec. It is recommended to use professional players to play videos.
- The highest recording resolution on Vico-Opia2 is1440p @ 30fps(2560x1440p). Playing video in this resolution would require computers with higher level graphic card and more RAM. If videos cannot be played on the computer correctly, users may need to upgrade their computer hardware or try playing on a faster computer.
-
If videos are not playing correctly on the computer, users may check the videos on the device in playback mode. If the videos are displayed correctly on the device, it is suggested to try a different video player, check to see if video codecs are up to date, or upgrade PC.
-
Video brightness and clarity can be effected by the windscreen film. Please adjust exposure values to achieve better recording image.
- The device has supercapacitors built-in instead of II-ion batteries. Please power the device up with VicoVation Car Cable.
3-Axis Gravity Sensor Function
G-sensor
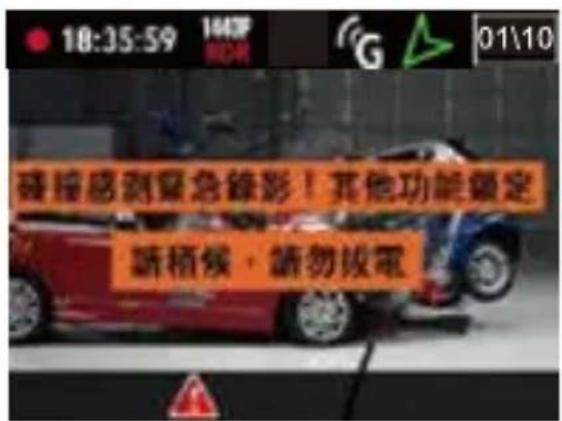
The device is equipped with G-Sensor. It triggers Emergency Recording automatically when impacts are detected. To avoid false detections during initial installation, G-Sensor function is defaulted as OFF. Please activate this function manually after the device has been properly installed.
15 seconds after G-Sensor was activated and the device was restarted, the senor will start working to avoid false alarm.
text_image
18:35:59 01\10
text_image
18:35:59 140P G 01\1015 seconds after G-Sensor was activated, a "G" icon will be displayed on the screen.
text_image
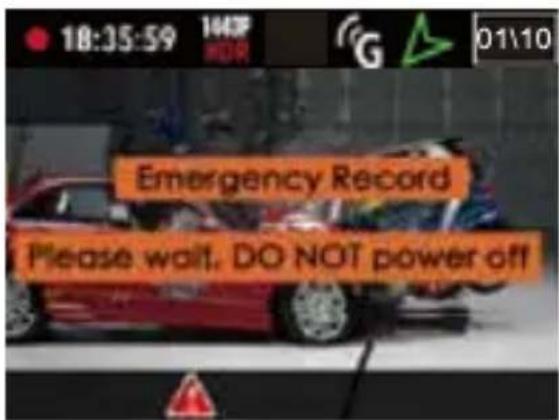
18:35:59 143F Emergency Record Please wait. DO NOT power offWhen G-Sensor detecting impacts.
text_image
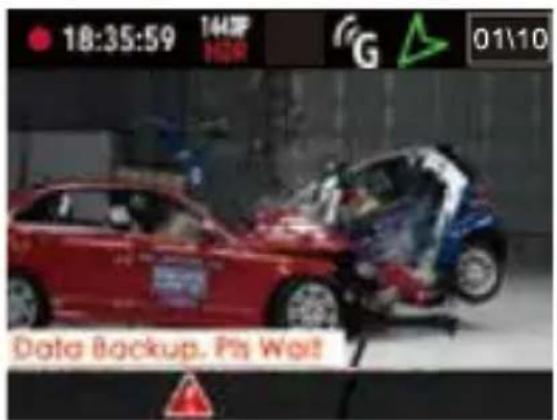
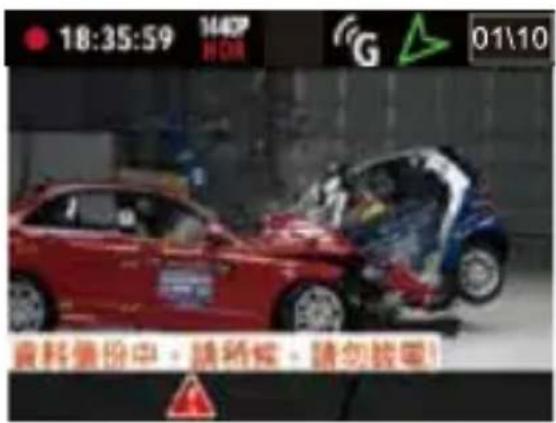
18:35:59 14MP G 01\10 Data Backup. Pi WaitData is being saved.
After 30 seconds upon detection, device will start backup process. Bottom side of LCD monitor will pop up with red triangle signal. It will last about 2 to 3 mins. During this period, no other operation can be made. Please wait till the end of processing and do not remove power.
Emergency Recording Function
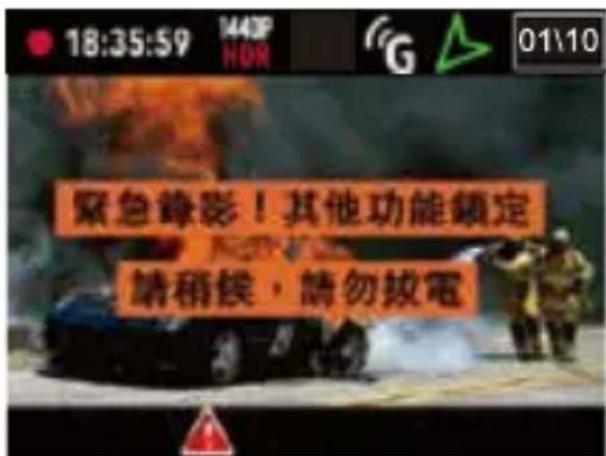
- Users may manually activate Emergency Recording function by pressing the orange button on the device in the event of accident. A red triangle will show up on the screen when this function is activated.
-
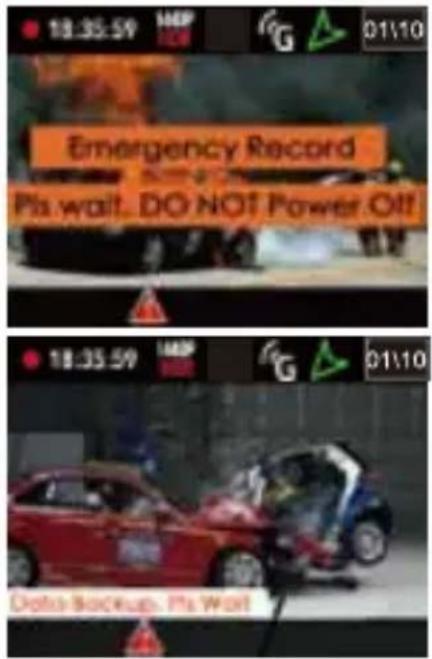
After been triggered for 30 seconds, Emergency Record function will automatically save the recorded file to Emergency folder. The content of this folder will not be overwritten by Loop Recording function.
-
When operating Emergency Record function, system will automatically check if the prior 30 seconds are included in the currently Emergency file or not. If the prior 30 seconds are included in the previous file, system will also move the previous file into Emergency folder to ensure both the prior and subsequent 30 seconds are protected.
text_image
18:35:59 Emergency Record Play wait. DO NOT Power Off 18:35:59 Data Backup. Play Wall- The maximum on Emergency Recording is 10 files.
Special Note:
To ensure the completeness of saving file, please do not shut down the device while Emergency Record triggered. In the case where the device was shut down during the process of saving an emergency record, the device will continue the process while reboot on the following time.
Ejecting memory card while recording is prohibited. Please turn off the device safely before ejecting memory card to avoid file damaged.
Optional Accessories
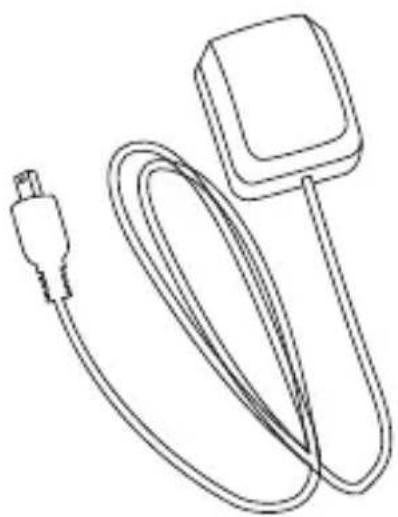
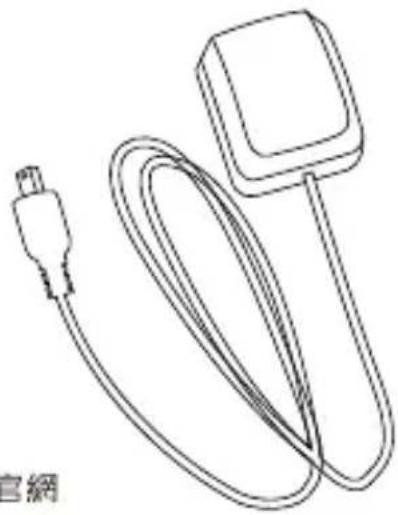
Vico-GPS Mouse
- LDWS (Lane Departure Warning System).
- FCWS (Forward Collision Warning System).
- GPS Tracking, work with VicoPlayer. Download from www.vicovation.com
- Over Speed warning system.
- GPS location/Speed info overlay on video.
natural_image
Line drawing of a cable with a connector, no text or symbols presentVico-CPL Filter
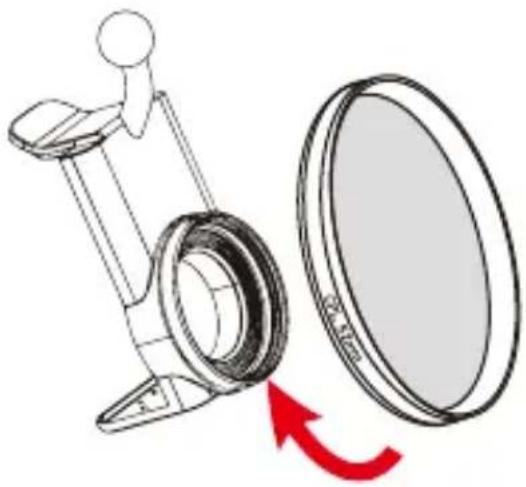
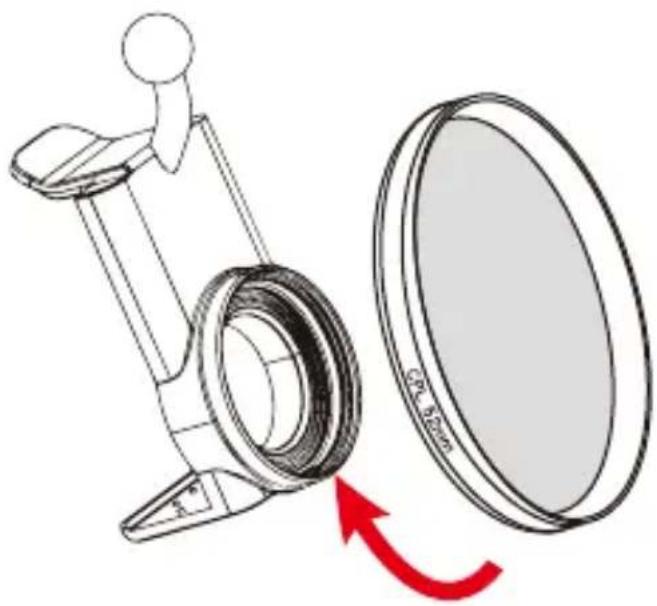
The VicoVation CPL Filter is easy to install and simply screws to the front of the VicoVation Quick Release Mount. This will dramatically help to reduce the reflection effect from the windscreen enabling you to achieve more saturated and beautiful video. The VicoVation CPL Filter has been designed for use with the VicoVation Quick Release Mount and is made from high quality optical AGC glass. It has an ultra slim frame design with a 52mm anti-reflection (AR) coated filter. This is perfect for reducing unwanted reflections and glare from your windscreen.
Having a CPL Filter installed would have an effect on night time recording brightness. Users may remove CPL Filter during the night or change EV settings.
natural_image
Diagram of a mechanical device with a circular component and red arrow indicating rotation (no text or symbols)Vico-Player Download
Please visit VicoVation official website: www.vicovation.com
Enter "INFO & DOWNLOAD" page → "DOWNLOADS".
Download VicoVation Vico-Player. (Only supports the Windows operating system at this time.)
After installing Vico-Player on the computer, please select "Folder" on top of the player.
Choose videos from the memory card or the computer.
Vico-Player will play the video while displaying the GPS location route with Google Maps and G-Sensor values simultaneously. (Only when an internet connection is available.)
Limited Warranty Service
- The limited warranty starts from the Original Purchase Date. 12 months limited warranty is available on all car video recorders (body units only) and Vico-Power PLUS. 6 months limited warranty is available on all the accessories of VicoVation. The original valid proof of purchase will be required.
- The limited warranty is only valid in the countries where this product is sold. Please contact the retailer or online shop who sold this unit for detailed in-warranty service.
- The limited warranty does not apply to the damages caused by shipping, malfunctioning in events of accident, misuse, abuse, water, fire, or other acts of nature, external causes, or faulty installation.
- Warranty is void if this unit has been disassembled or modified.
If you have any questions, please feel free to contact us or our local distributors.
Email: service.en@vicovation.com
Facebook : www.facebook.com/VicoVationOfficial

VICOVATION
SIMPLY LIVELY
Vico-Opia2 超畫質行車紀錄器 安裝操作指南
感謝您選購Vico-Opia2 頂級畫質行車紀錄器,請詳閱安裝操作指南,並注意相關提醒,正常操作主機。
Vico-Opia2 產品外觀介紹
- 電源開關 (長按三秒開關機)
- 向下鍵 (靜音快速鍵)
- 向上键 (進入選單鍵)
- 錄影鍵 (確認鍵)
- 緊急錄影鍵 (返回鍵)
- Micro SDHC卡槽
7.車充電源接孔/USB輸出介面 -
GPS外接模組接孔
-
嘲叭/麥克風
- 散熱孔
- 雨吋液晶螢幕
- LED指示燈 (紅色=錄影·綠色=待機·紅色閃爍=無記憶卡)
- 支架接合孔
- 百萬像素鏡頭
Vico-Opia2 產品盒內標準配件內容:
- 快速安装指南
● 保固卡
選配:
natural_image
Simple line drawing of a plug and cable with a label 'optional' below (no text or symbols on the diagram itself)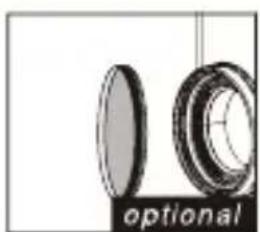
natural_image
Close-up of two mechanical components with no visible text or symbols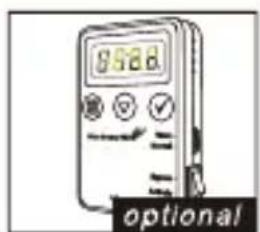
text_image
8:86 optional快拆支架使用
Opia2可以使用專屬快拆支架,方便使用者快速裝卸機器。亦可單獨使用吸盤支架,直接與主機前方T型扣環接孔連結安裝。
快拆使用方法
natural_image
Line drawing of hands using a tool to adjust or trim a circular component (no text or symbols present)快拆前方可加裝標準52mm CPL偏光濾鏡,減少白天車內前檔玻璃的內反射,有更清晰飽和的錄影畫面。
更換快拆球型雲台時,請先將原本T型卡卸之球型雲台的螺帽鬆開,再往外把它用力拉出。
natural_image
Line drawing showing hands using a tool to cut a component, with a small inset image of a small object nearby (no text or symbols)之後再將更換的快拆模組雲台裝回球形卡槽,請注意,螺帽必須先放進球型雲台之間,裝回之後才能正確鎖緊固定。
注意事項
- CPL偏光濾鏡為選購配件,可購買CPL Filter,或自行購買加裝。
- CPL偏光濾鏡有減光效果,請特別留意夜間錄影畫面,調整偏光鏡角度,另外調整錄影曝光值,或是解除拆卸下來。
吸盤支架安裝說明
Opia2 盒內附有專用的吸盤支架之球形雲台。安裝方式如下圖,使用者可自由決定適合自己愛車之安裝位置。
安裝須以不影響行車視線為原則,請特別注意。
Opia2主機 + 快拆支架 + 3M 黏貼支架 / 吸盤支架
text_image
3M 黏貼支架 吸盤支架請注意吸盤固定板手方向。
Ultra-HDR (高動態範圍影像)
@1440p 30fps HDR錄影模式
Opia2 內建視連科最新的高動態影像錄影模式,可以在夜間平衡影像的亮部及暗部,產生極高品質的畫面。
預設的解析度為1440p 30fps HDR錄影模式。
車用環境安裝方式
安裝步驟
- 請務必使用Vicovation原廠車充線,以確保主機運作正常。
- 請將車充電源線接至汽車點煙座,另一端接至主機的USB電源輸入孔。
- 將吸盤支架安裝於適當位置,不遮擋行車視線與方便操作為原則,可參考支架安裝示意圖。
natural_image
Diagram showing a device labeled 'OP//A', a cable with plug, and a speaker icon (no text or symbols on main elements)建議安裝位置與電源走線
簡易DIY電源走線方式:車充電源線可由副駕駛座(腳踏墊下方),往上走右邊A柱內側防水膠條(可能需要工具,請小心使用與復原膠條位置,或由專業人員協助),再經由副駕駛座遮陽板上固定,走至Opia2主機。
text_image
建議安裝區域特别注意
- 若您的愛車A柱內有安全氣囊,建議由專業人員協助安裝,不建議自行埋線安裝。
- 安裝時請注意防水膠條的位置復原,否則可能影響車門防水性能。
- 請務必使用Opia2盒內專屬車充電源線,請勿使用其他車充電源。新Opia系列所使用之新版車充線與視連科其他舊款產品無法共用,請勿拿其他款視連科產品之車充電源線互換使用。
開始操作
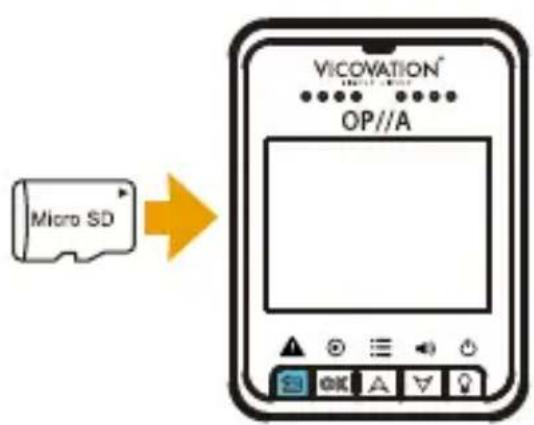
- 請依照正確方向插入 MicroSDHC / SDXC 記憶卡·輕推到底後會有輕微喀擦聲·(請注意卡片金手指方向)
- Opia2 支援2K Ultra-HD 1440p · 嚴禁使用Class 10 等級以下之記憶卡。
text_image
Micro SD VICOVATION® OP//A錄影時間對照表 (不含緊急錄影時間)
| 1440p 30fps | 1296p 30fps | 1080p 60fps | 1080p 30fps | |
| 8GB | 55 mins | 60 mins | 60 mins | 75 mins |
| 16GB | 115 mins | 120 mins | 120 mins | 166 mins |
| 32GB | 245 mins | 250 mins | 250mins | 347 mins |
| 64GB | 516 mins | 520 mins | 520 mins | 710 mins |
| Video Bit Rate | 19Mb/s | 16Mb/s | 16Mb/s | 12Mb/s |
- 電源連接後,自動開機進入錄影模式。錄影的前三秒為保護系統穩定(防呆),將無法立刻停止錄影。進入選單不受此限制。
- 首次使用Opia2·請先設定時間並將記憶卡格式化。
- 拔插SD卡前,請先停止錄影或關閉電源。請勿在錄影中任意拔除SD卡以避免資料毀損。
- 請使用Class 10 Micro SD 卡,請避免使用Class 10等級以下之SD卡。
Opia2使用標準Micro SD卡插槽。
使用USB線連接電腦將自動成為讀卡機;欲開機操作,請連接車充電源線。
記憶卡的選擇與注意事項
發生事故,只希望車上服役的行車記錄器能錄好,不中斷。除了清晰影像的需求,也同時希望存檔紀錄表現能夠穩定,遠離莫非定律。
行車紀錄器連續長時間使用,記憶卡多次循環讀寫之後,可能發生無預期的故障。我們多點關注,以免真正需要它時,發現記憶卡已損壞...
市面上記憶卡品牌種類繁多,品質有好有壞。選用大品牌高速記憶卡,自然比廉價雜牌有保障。(機率問題,即便是大品牌,也可能有不良的情況發生。)使用任何品牌,都需要透過定期手動檢查來確保正常。一般市面上所販售的記憶卡(SDHC/SDXC)零售包裝,大部分是TLC製程記憶體所製造,大規模用於智慧型手機/數位相機/平板電腦,讀寫循環的次數與壽命比MLC製程來的低,也較為便宜。
購買行車記錄器時,經銷商都會附贈記憶卡,針對記憶卡的挑選並不會在第一時間注意到。通常購買時的挑選,會落在主機規格/畫質功能與性價比,搭贈的記憶卡通常會被忽略。而自行購買記憶卡的使用者,也必須注意主機所能支援的最大容量(32GB or 64GB),與最低傳輸速度限制(大部分行車記錄器需要滿足Class10規格)。
零售通路所購買的TLC製程記憶卡,讀寫循環次數壽命約為500\~1000次,也就是說循環500次以上,損壞機率就會大幅增加。若超過1000次以上,則隨時都有可能損壞。一般正常使用1\~2年的記憶卡,損壞的機率曲線也會跟著曲率上升,畢竟TLC的記憶體用在智慧型手機/DSC/平板電腦上,並不像行車記錄器持續頻繁地寫入檔案/刪檔循環,使用環境不同,壽命長短自然不同。
目前市面上有越來越多的MLC型記憶卡提供消費者選購,也可選購價格較高的MLC記憶卡來優化設備。
記憶卡因為讀寫循環次數的壽命限制,嚴格說來算是一種消耗品,務必注意。
當然,全新的記憶卡在一開始使用時,並不會有任何差異,而是使用一段時間之後,記憶卡優劣可能產生一些衍生問題,像是當機/卡在待機狀態停止錄影,或是反覆重開機。
記憶卡的選擇與注意事項
您可以透過以下幾個檢查,來確認您的行車記錄器與記憶卡是否正常運作:
★1. 定期手動格式化:
第一次使用全新記憶卡,一定要用行車記錄器主機來格式化。長時間錄影,在多次循環之後,磁區的完整性較低(較破碎)。建議定期手動格式化,也可以透過格式化的錯誤訊息來判斷狀況。如果記憶卡有損壞產生,格式化可能會有無法格式化/格式化失敗的錯誤訊息。定期格式化建議至少每個月手動操作一次。
★2. 虛量避免高溫錄影,停車時主機可放置物箱避免直射曝曜:
一般記憶卡的工作溫度是60度C以下,夏日氣候炎熱,在陽光曝曜之下,回到車上開車錄影時,在車內冷氣降溫前會有一段時間錄影是在極高溫度下執行存取工作,可能會對記憶卡壽命造成嚴重影響。建議停車在外高溫曝曜,可以先將主機取下放置置物箱內,任何電子產品都應盡量避免高溫曝曜,高溫曝曜也可能對主機PCB造成老化與其他損壞問題發生。
★3.電腦讀取記憶卡檔案,檢查是否有不連續的壞檔或碎檔:
使用電腦存取記憶卡的檔案,也可使用電腦來檢查是否記憶卡的讀寫狀況正常與否。如果使用電腦檢查發現有異常,就建議更換記憶卡。
★4. 使用電腦深度格式化,或是使用Scan-Tool來確認記憶卡的狀況:
這是較花時間的步驟,可以深度檢查記憶卡狀態。但是請注意,使用電腦格式化程序或掃描之後,拿回行車記錄器使用時,請務必再使用行車記錄器主機格式化一次記憶卡。(電腦格式化可能會格式化成其他不同的檔案格式,導致行車記錄器無法使用。)
記憶卡的選擇與注意事項
其他重要使用注意事項與建議:
★1. 請勿直接拔卡,一定要先正常關機後再拔:
如果錄影中直接將記憶卡拔出,會造成檔案損壞與資料遺失的狀況。任何事故/事件發生之後,除了使用緊急錄影備份之外,若要取出卡片,請記得一定要先關機,確認關機之後再拔出卡片。
★2.車上準備第二張記憶卡,以備不時之需:
道路意外事故無法預料,有時也可能成為事故發生的目擊者。您的行車記錄器錄下重要資料,當下提供記憶卡給警察處理,或是交由事故發生當事人使用,熱心助人為善。若車上有準備第二張記憶卡,可以方便替代使用,不擔心沒有記憶卡無法使用的窘境。
★3. 如果發現記憶卡有任何異常發生,建議立即更換,不要拖延:
不怕一萬,萬一置之不理而中途發生意外,沒有錄影的扼腕也是令人沮喪。記憶卡價格也多有降價,價格合理,有問題直接更換,不拖延是上上策。
★4. 專卡專用,不要拿行車器錄器的記憶卡與手機共用:
記憶卡使用在某些智慧型手機時,手機會因為作業系統需求,而將記憶卡變更為其他檔案格式使用。如果交互使用,可能會造成不相容問題產生,而衍生當機或是其他不錄影問題,專卡專用不混用。
★5. 連續使用兩年之後,建議更換新記憶卡:
現今記憶卡價格已經是多年前的半價,甚至更低。連續長時間使用下,記憶卡會因為循環次數而降低壽命,越來越接近使用壽命上限。如果不確定記憶卡是TLC或MLC,可以在使用兩年之後,固定時間汰換記憶卡。
主畫面圖示與操作說明
一般錄影模式
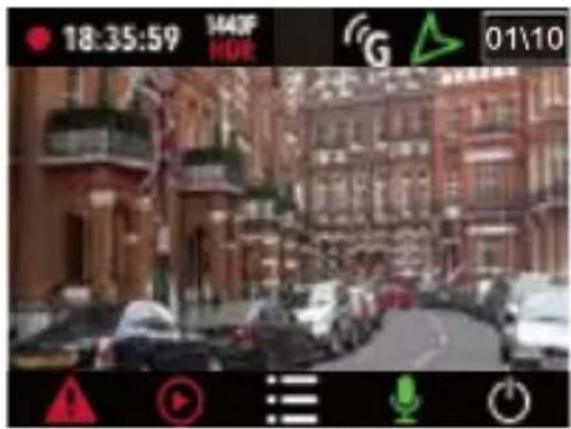
畫面上方圖示依序為
紅色圓形錄影圖示/
現在時間/
影像解析度/
碰撞感測器運作中圖示/
GPS定位圖示/
緊急錄影次數。
text_image
18:35:59 MAF HOR G 01\10畫面下方圖示依序為
緊急錄影鍵/
錄影狀態圖示/
顯示選單鍵/
錄音靜音圖示/
開關機鍵。
操作介面
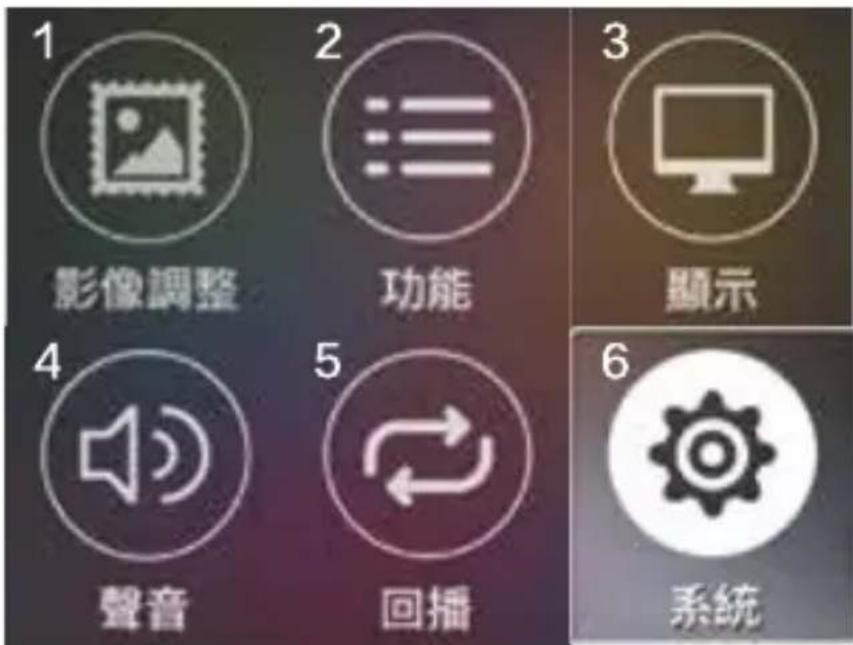
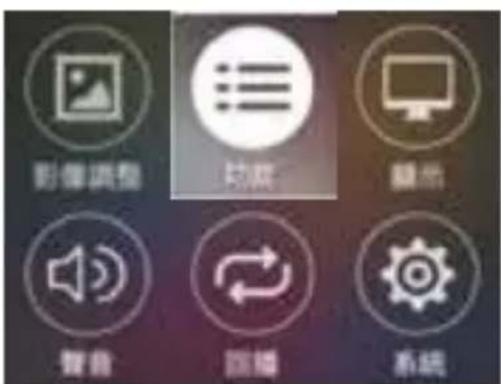
- 影像設定
- 功能設定
- 顯示設定
- 聲音設定
- 回放操作
- 系統設定
功能介紹
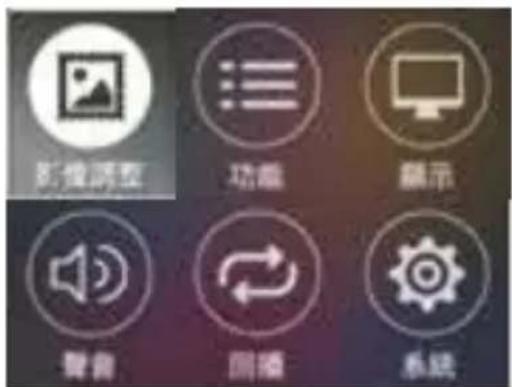
影像設定
可設定錄影解析度與曝光值。
text_image
影像调整 功能 顯示 聲音 回播 系統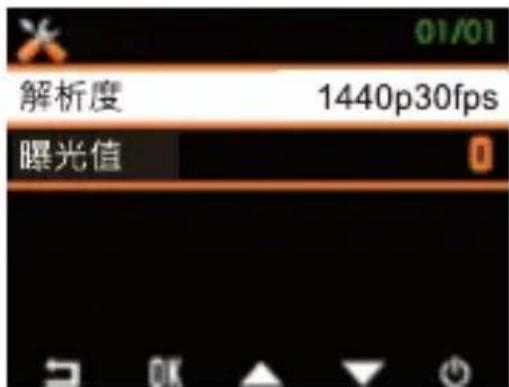
text_image
01/01 解析度 1440p30fps 曝光值功能設定
可設定G-sensor靈敏度(預設值為關閉),與GPS相關設定。
GPS相關功能需要確實安裝GPS整合模組(選配)·並接上GPS接孔來啟用。
text_image
影像调整 功能 演示 聲音 回播 系统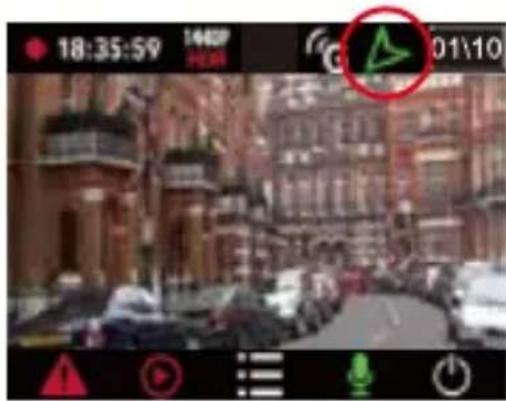
text_image
18:35:59 1400 01\10- GPS相關功能啟用需正確接上GPS模組(選配),並等待GPS搜尋,主機取得衛星訊號之後,GPS相關功能才可作用。
- 每次開機後,GPS相關功能也需要等待衛星訊號定位完成後才能作用,主畫面右上方會顯示綠色箭頭定位完成圖示。
功能介紹(選配GPS模組功能)
車道偏離警示
(LDWS, Lane Departure Warning System)
當車輛時速達設定值(例如60km/h),在車輛行進時偏離車道,主機會發出警示音與圖示,提醒駕駛人車道偏移情況發生。可選擇時速60/70/80km以上啟動。

natural_image
Diagram of a car inside a circular frame with a vertical line and horizontal section, no text or symbols present.LDWS
前車碰撞警示
(FCWS, Forward Collision Warning System)
當車輛時速達60km/h,在行進中與前車未達安全距離約5\~7公尺,主機會發出警示音與圖示,提醒駕駛人前車距離過近。
natural_image
Simple line drawing of two cars facing each other with sound waves, enclosed in a circle (no text or symbols)FCWS
影像校正
開啟LDWS與FCWS需校正影像拍攝畫面,使偵測更為準確。開啟LDWS/FCWS功能後,回到錄影模式,畫面會出現基準線畫面,請將地平線對齊紅線。三十秒後,校正基準線將會自動消失。
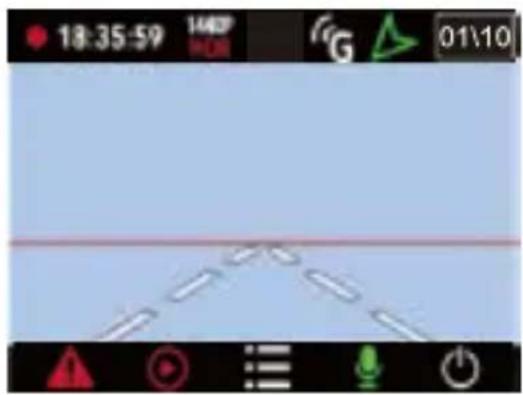
text_image
18:35:59 140P G 01\10請將主機架設在車輛正中間,以確保警示功能有更準確的效能。
功能介紹(選配GPS模組功能)
超速提醒設定
可設定車速提醒值,在車輛超過設定值,主機會發出警示音與圖示,提醒駕駛人超速發生。可選擇60/70/80/90/100/110/120/130 km/hr

pie
| Slice | Value | |---|---| | Orange | 100 |OverSpeed
台灣定點測速照相機警示
台灣地區支援定點測速照相機提醒,當車輛行經定點超速照相機,主機會發出人聲警示停醒與圖示提醒駕駛人。
僅支援台灣地區定點超速違規照相警示,不支援移動式/三腳架/與其他超速照相機警示。
測速照相提醒功能使用GPS定位座標參考,可能與實際測速方向不同,警示提醒僅供參考,提醒用路人小心駕駛。
GPS訊號
GPS定位須至少三個以上衛星訊號正常之衛星才能完成。旁邊圖示顯示衛星搜尋有五個,一個衛星訊號良好(綠色,40dB以上),一個衛星訊號正常(黃色,
40\~30dB),兩個衛星訊號尚可(紅色,30\~20dB),一個衛星訊號差(深紅色,20dB以下)。
定位完成後,螢幕右上方會顯示綠色箭頭,表示GPS功能開啟。
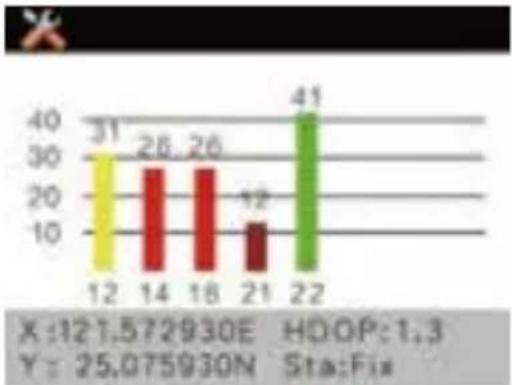
bar
| X | Value | |---|---| | 12 | 31 | | 14 | 26 | | 18 | 26 | | 21 | 12 | | 22 | 41 | X: 121.572930E Y: 25.075930N HOOP: 1.3 Sta: Fix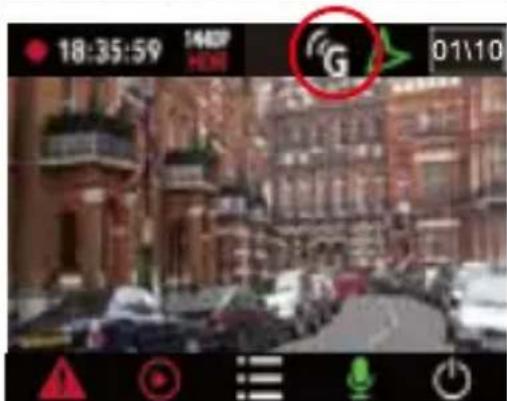
text_image
18:35:59 1400P HAIN 01\10含有金屬成分的隔熱紙可能會影響GPS訊號接收,高樓與建築物屏蔽也會影響GPS。安裝時請特別注意。
檢查螢幕主畫面是否有顯示GPS藍色箭頭,或是進入GPS訊號選項確認是否能取得至少三個以上訊號正常(黃色40\~30dB)之衛星訊號。依環境收訊不同,而有不同之定位完成時間。
特殊功能介紹(全自動智慧停車監控模式)
需搭配Power-PLUS 電力加-不斷電智慧電源監控保護模組使用
Vico Power-PLUS

Your Best Smart Car-Battery Power Management Device!
全自動智慧停車監控模式 (Smart Parking Surveillance)
智慧停車監控模式可提供更完整的愛車保護,在停車時仍可使用位移偵測來啟動錄影,避免您的愛車在停車時遭受意外撞擊或人為破壞。前方若無任何畫面變化時,主機進入睡眠待機狀態,節省記憶卡錄影空間。智慧停車監控功能使用重力感測器(G-Sensor)的G值變化,偵測停車狀態,自動切換停車/正常模式錄影模式。
需要改裝為全時供電環境使用:
在引擎熄火(ACC Off)之後,還可以持續提供主機電源,方能開啟此功能使用。此電源改裝需要車廠專業人員協助,請勿自行改裝,以免發生危險,或造成車輛電器系統損壞。若使用一般點煙座電源,則是根據引擎熄火(ACC OFF)斷電而主機關機,停車時則無法進入停車監控模式。
搭配Vico-Power PLUS 電力加-不斷電智慧電源監控保護模組:
電力加是一個車輛電瓶電力監控保護裝置,透過改裝與車用電瓶DC12V連接後,可在引擎熄火後持續供電給行車紀錄器之位移偵測使用,同時監控電瓶電壓狀態,當電壓過低時自動斷電,避免電瓶過度放電而無法發動引擎。
同時具備全球唯一可設定高溫斷電保護,自行設定溫度感測值,在溫度過高的情況下自動斷電保護主機與記憶卡(高溫狀態下錄影可能造成記憶卡損毀),並具備計時斷電功能,還有多種模式/參數切換,可依不同停車環境切換熄火供電與否,簡單操作,自由開關。
不建議使用外接行動電源(Power Bank)作停車監控:
夏天天氣高溫炎熱,使用行動電源作停車監控供電使用,可能會有鋰電池高溫危險狀況,不建議於車上使用。
智慧停車監控模式設定:
選擇開啟智慧停車監控模式後(預設值為關閉)·相關設定:
1.) 智慧監控位移偵測:靈敏度高 / 中 / 低
此為進入停車監控模式後,判斷觸發錄影的位移偵測靈敏度之設定。主機會根據畫面內的物體移動來啟動錄影。(啟動錄影時主機上方LED顯示紅色)。若畫面內沒有任何物體移動,主機則是待機不錄影的狀態。(待機時主機上方LED顯示綠色)。
2.)智慧秒拍縮時攝影:1秒一拍/10秒一拍/60秒一拍
進入停車監控模式後,依照設定的間隔時間(1s/10s/60s)自動拍攝一張照片,並將拍攝的影像堆疊成縮時影片,將車輛週遭發生的事物完全記錄。
3.)錄影螢幕顯示:錄影螢幕休眠/錄影螢幕啟動
此為位移偵測觸發錄影後,主機螢幕是否顯示之設定。選擇錄影螢幕休眠,則是位移偵測觸發錄影之後,螢幕維持休眠(不顯示),上方LED由綠色轉為紅色燈號。若選擇錄影螢幕啟動,則是觸發錄影之後,螢幕由原本待機的休眠狀態,轉為螢幕顯示,直到畫面沒有其他物體移動之後,回到待機狀態,螢幕回到休眠。
特殊功能介紹(全自動智慧停車監控模式)
需搭配Power-PLUS 電力加-不斷電智慧電源監控保護模組使用
智慧停車監控模式 - 智慧監控位移偵測運作定義 - 智慧秒拍縮時攝影運作定義
(Smart Parking Surveillance)
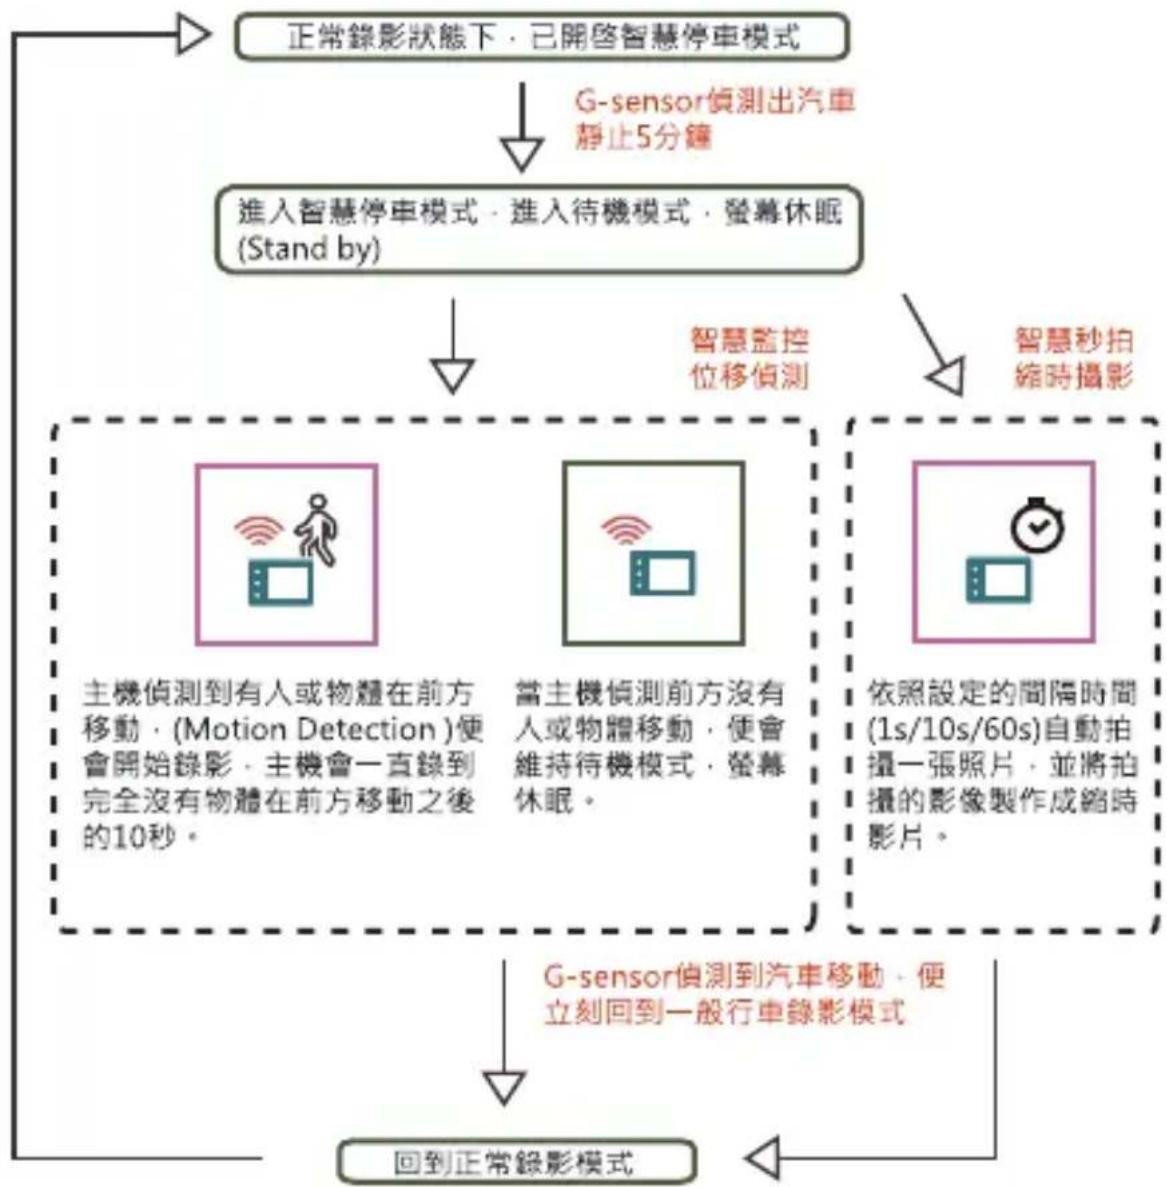
flowchart
graph TD
    A["正常錄影狀態下·已開啟智慧停車模式"] --> B["G-sensor偵測出汽車靜止5分鐘"]
    B --> C["進入智慧停車模式·進入待機模式·螢幕休眠(Stand by)"]
    C --> D["智慧监控位移偵測"]
    C --> E["智慧秒拍縮時攝影"]
    D --> F["主機偵測到有人或物體在前方移動·(Motion Detection)便會開始錄影·主機會一直錄到完全沒有物體在前方移動之後的10秒。"]
    E --> G["依照設定的間隔時間(1s/10s/60s)自動拍攝一張照片,並將拍攝的影像製作成縮時影片。"]
    F --> H["回到正常錄影模式"]
    G --> H
    H --> I["G-sensor偵測到汽車移動·便立刻回到一般行車錄影模式"]
智慧停車監控模式與一般G-Sensor重力感測觸發緊急錄影之G值靈敏度之設定一般錄影可使用手動按壓橘色緊急按鈕鍵,與G-Sensor重力感測器來觸發緊急錄影(前後30秒的一分鐘緊急錄影檔案)。此G-Sensor的G值靈敏度(高/中/低)設定,與智慧停車模式的偵測功能並沒有相關,即便是將G值靈敏度設定為關閉,也不影響智慧停車模式的判斷。
特殊功能介紹(全自動智慧停車監控模式)
需搭配Power-PLUS 電力加-不斷電智慧電源監控保護模組使用
啟動智慧監控位移偵測
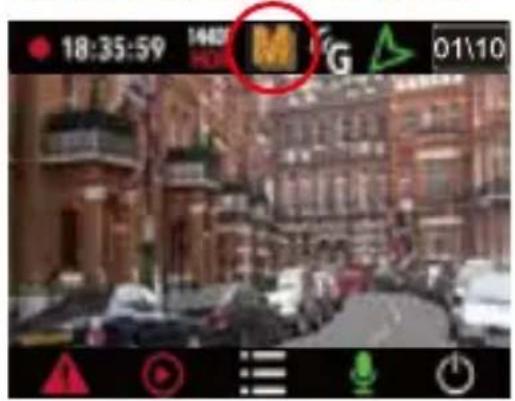
text_image
18:35:59 M 01\10螢幕上方會有“M”的圖示。
啟動智慧秒拍縮時攝影
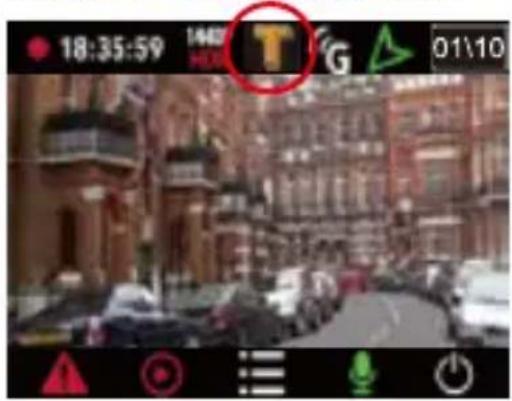
text_image
18:35:59 1462 T 01\10螢幕上方會有“S”的圖示。
進入停車監控模式後。
啟動智慧監控位移偵測與智慧秒拍縮時攝影之功能比較:
| 觸發方式 | 記錄方式 | 記錄內容 | |
| 智慧監控位移偵測 | 主機前方偵測到物體移動時啟動錄影,前方沒有任何物體移動(無影像變化)時,主機則是待機不錄影。 | 動態錄影片檔 | 只有因屬發位移偵測而紀錄的事件。 |
| 智慧秒拍縮時攝影 | 主機自動每隔一段時間拍照之縮時攝影(可設定每秒/每十秒/每六十秒一拍) | 縮時攝影片檔 | 全時段停車之縮時攝影紀錄。 |
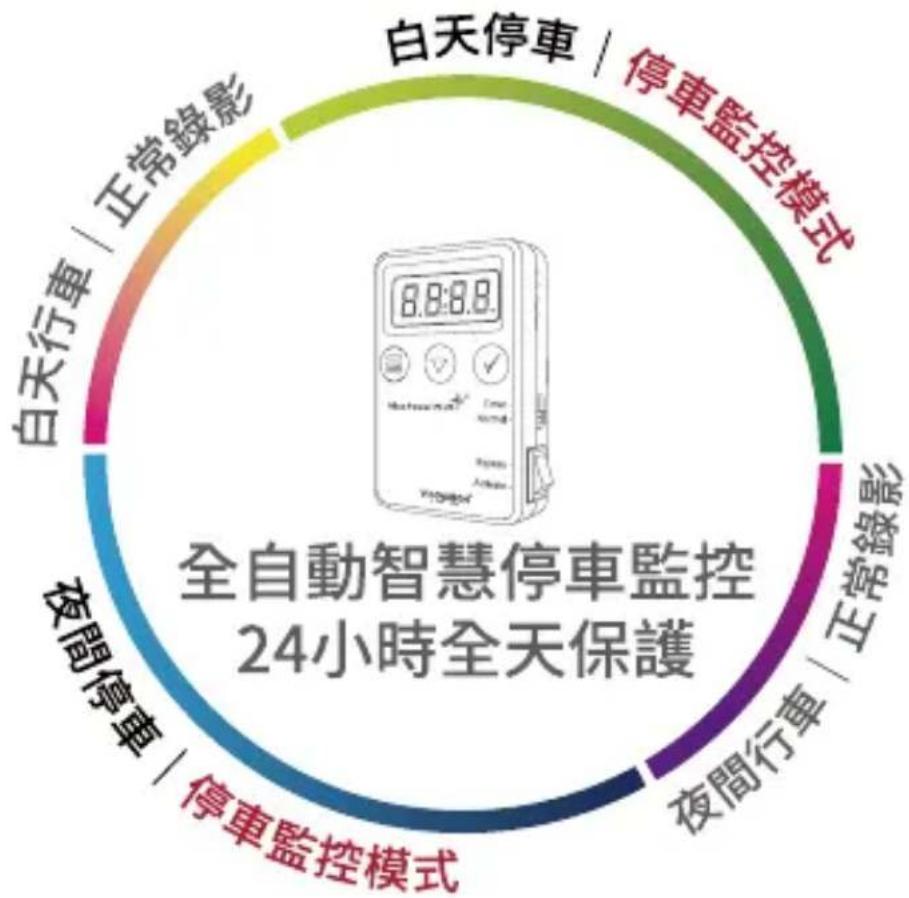
flowchart
graph TD
    A["白天停車 | 停車監控模式"] --> B["白天行車 | 正常錄影"]
    B --> C["夜間行車 | 正常錄影"]
    C --> D["夜間停車 | 停車監控模式"]
    D --> E["全自動智慧停車監控 24小時全天保護"]
Vico Power-PLUS 電力加
您的最佳智慧車輛電力監控模組。(選配)
text_image
U1c0. Vico Power-PLUS Timer Normal Bypass Activato VICONATIONPower-PLUS是一個車輛電力監控保護裝置(選配),與車用電瓶連接後,可在引擎熄火之後持續供電給行車記錄器,提供 Smart Parking Surveillance 智慧停車監控功能使用。同時監控電瓶電壓狀態,電壓過低自動斷電,避免電量過度消耗而無法發動引擎。
搭配啟動視連科獨家智慧停車監控功能(Smart Parking Surveillance) Opia 主機會自動偵測車輛停車狀態(五分鐘靜止之後),自動進入停車位移偵測模式。攝影機前方的事件都可以被記錄下來(位移偵測觸發Motion Detection),同時也可以被碰撞觸發錄影(G-Sensor),若沒有任何事件發生,則是維持休眠模式,簡省記憶卡空間。當您回到車上發動引擎,G-Sensor偵測到車輛位移或是振動,記錄器則回到正常錄影模式。Power-PLUS加上智慧停車監控功能,提供您最完整的行車/停車安全保護。
Power-PLUS 提供完整全面的保護功能,包含:
- 低電壓斷電保護
- 溫度過高斷電保護
- 停車計時斷電保護
- 大電流與突波電流保護

text_image
Prohibition sign with a crossed-out icon of a briefcase and a lightning bolt, indicating no use or absence of usage.低電壓斷電保護
Power-PLUS會持續偵測車用電瓶電壓狀態,當電壓低於設定值,自動斷電保護。設定電壓值可自行調整:
11.6/11.8/12.0/12.2/12.4V 或
23.2/23.4/23.6/23.8/24/24.2/24.4/24.6V (一般串輛為
DC12V · Power-PLUS會自動偵測12/24V,顯示不同設定。) 建議設定值不低於12V。

natural_image
Illustration of a thermometer and sun (no text or symbols)溫度過高斷電保護
夏日炎熱高溫,若車輛放置室外陽光直射,車內溫度過高可能導致電器設備損壞。Power-PLUS內建溫度感測器,當溫度高於設定值,自動斷電保護。設定溫度值可自行調整:40°/45°/50°/55°/60°/65°C,預設值為45°C。

停車計時斷電保護
若將開關切換至Timer Mode,車輛熄火之後,Power-PLUS會依照時間設定值倒數計時,時間到了之後會自動斷電。時間設定值可自行調整;2/6/12/24/48/72hrs.
大電流與突波電流保護
Power-PLUS除了電壓過低斷電保護之外,在主要的接線上(Battery+)有裝置額外的保險絲盒,內有2A的保險絲,提供異常短路可能產生的大電流保護。
內建背光LED面板,顯示清晰,操作得心應手!
紅色背光LED螢幕具有更好的清晰顯示,無論白天黑夜,電壓監測與操作設定皆可清晰顯示。
DC12V/24V雙模,各種車輛都可使用
無論你的愛車是標準DC12V電壓,或是重型卡車DC24V,Power-PLUS皆可支援使用。Power-PLUS會自動偵測輸入電壓,選單顯示不同的斷電電壓參數設定值。

模式切換鈕,輕鬆切換一般(Normal)或計時斷電(Timer)模式
一般模式(Normal)同時提供低電壓與溫度過高斷電保護,而計時斷電模式除了提供同時提供低電壓與溫度過高斷電保護之外,還可依照設定時間倒數計時自動斷電。側邊的切換鈕可依照不同需求輕鬆切換使用。
多種設定參數可選,可依照車況與環境調整設定
使用者可自行設定不同的斷電電壓值,溫度設定值,與計時斷電時間設定值,可以依照不同的車況與環境來客製化調整適合自己愛車的設定參數。
顯示設定
螢幕自動關閉功能
預設為永遠開啟,可設定十五秒鐘/一分鐘/三分鐘/五分鐘。開機錄影之後會依照所設定的時間,螢幕自動休眠,主機繼續錄影,螢幕休眠之後可短按電源鍵喚醒。
螢幕亮度
預設為正常亮度,可調整為低亮度。
錄影時間紀錄
時間戳記在影像中左下方,預設為開啟。
個性化標籤Vico-Tag
可自行修改填入12個字元,錄影會將此Tag放置在左下角時間戳記右邊。(開啟“速度與座標顯示”功能,Vico-Tag則不顯示)
影像翻轉
預設為關閉,此為特殊安裝使用。
影像左右鏡射
預設為關閉,此為特殊安裝使用,行車使用建議關閉。
text_image
影像調整 功能 顯示 聲音 回播 系統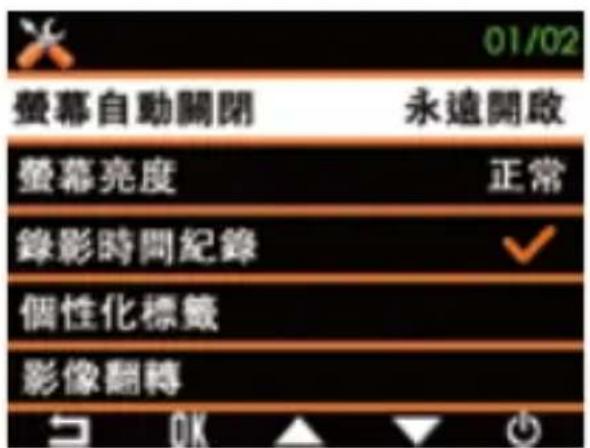
text_image
01/02 螢幕自動關閉 永遠開啟 螢幕亮度 正常 錄影時間紀錄 ✓ 個性化標籤 影像翻轉聲音設定
錄音
可調整錄音音量(低/中/高)或者關閉,預設為中。
按鍵音量控制
可調整按鍵觸控音量,同時改變智慧警示提醒時的音量大小(低/中/高)或者關閉,預設為中。
text_image
影像調整 功能 顯示 聲音 回播 系統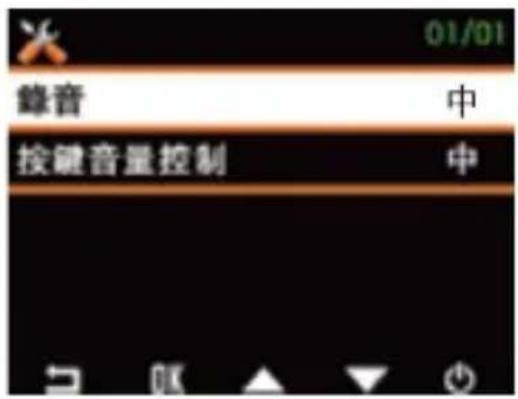
text_image
01/01 聲音 中 按键音量控制 中回放操作
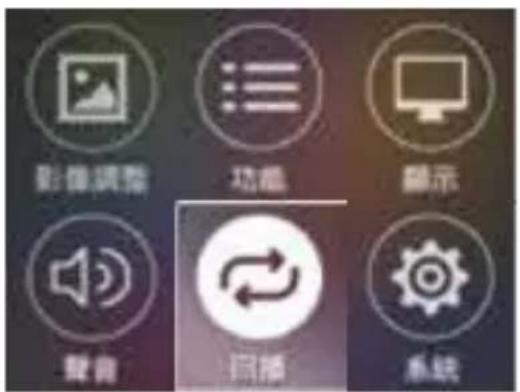
- 進入主選單頁面,選擇Playback進入回放模式。
- 進入回放模式後,可以使用最右邊電源鍵來切換模式(一般錄影/緊急錄影),上下可移動選擇檔案,按下確認鍵可撥放/刪除/鎖定檔案。
text_image
影像调整 功能 显示 聲音 回播 系统系統設定
語言設定
預設值為繁體中文,可更改語言。
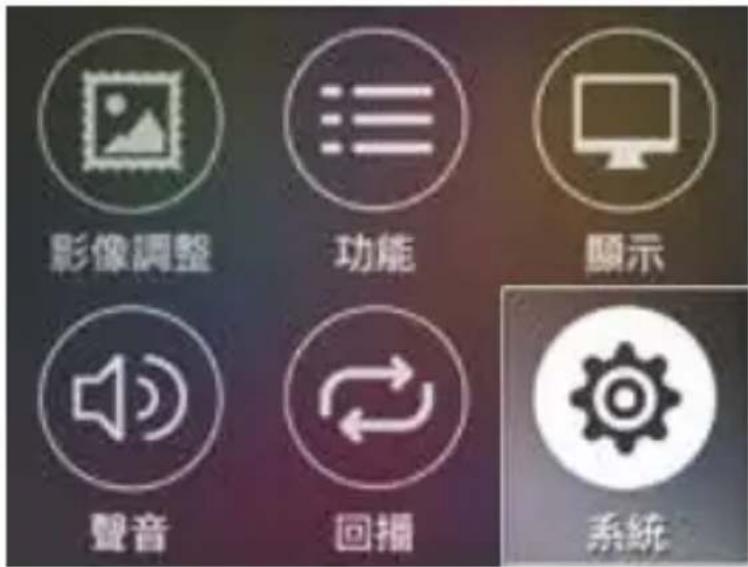
軟體版本
顯示軟體版本·加入視連科Facebook粉絲頁,可同步即時更新未來所發佈之新版軟體 www.facebook.com/vicovation
記憶卡格式化
首次使用,請務必格式化記憶卡一次。建議每月定期格式化,可避免長期循環錄影產生檔案破碎而降低存取效能。
定期記憶卡格式化提醒
每月/每兩個月定期出現格式化提醒。
回復原廠預設值
未來升級更新軟體後,請先回復原廠預設值一次。
text_image
影像調整 功能 顯示 聲音 回播 系統使用電腦撥放
- 主機確認關機後,再取出Micro SD卡,使用讀卡機或是小卡轉大卡,將檔案拷貝至電腦硬碟裡面。
- 確認檔案複製到電腦硬碟之中,在選取檔案播放。
- 亦可使用Opia2主機,用USB線連接至電腦,手動按壓主機電源開關。Opia2會自動判斷成為讀卡機。
- 同樣將檔案複製到電腦硬碟之後再播放,避免問題發生。
若未將檔案複製至硬碟之中就直接播放,可能會因為傳輸速度不足而影響播放品質,可能導致影片停格或不順暢。
Opia2 的影片檔名為MP4,壓縮格式是H.264。許多電腦內建的播放軟體(如Windows Media Player)沒有支援H.264壓縮格式,可能會無法播放或是播放時影片定格或破碎或影音不同步。建議下載使用其他專業的播放軟體。
Opia2 錄影解析度為2K Ultra-HD 1440p (2560x1440p 30fps),對於顯示卡與記憶體的要求比Full HD 1080p更高,請特別注意。若您已下載可支援H.264壓縮格式的播放軟體且正確將檔案複製至電腦硬碟之中,影片播放仍不順暢,可能要升級您的電腦配備,或是使用其他電腦播放。
特别提醒
可以使用Opia2主機回播影片功能來檢查對照電腦播放問題。影像檔案在Opia2主機裡回播的順暢度,來比較與電腦播放的時的順暢度,用以判斷是否是因為播放電腦等級或是播放軟體的問題造成回播不順。也可以交互檢查所錄影之聲音與影像,是否有正確錄製。
- 拍攝畫面明暗度與清晰度會因隔熱紙深淺而有差異,若進光量不足(深色隔熱紙),可能使畫面出現較多雜訊或畫面較不清楚之問題,請調整曝光值來達到最佳攝影狀態。
- 本產品為耐高溫超級電容設計,不含內建鋰電池,使用機器時請以車充電源線給電開機錄影。
三軸G-Sensor碰撞感測器
Opia2配備G-Sensor碰撞感側器,能在碰撞發生時,自動觸發緊急錄影功能,為了避免誤動作發生。G-Sensor功能預設為關閉,請在車內安裝完畢之後進入選單開啓此功能。
G-Sensor設定開啓後,機器重新開機之後,開始錄影後15秒鐘,G-Sensor功能才會自動打開偵測,以減少誤動作的發生。
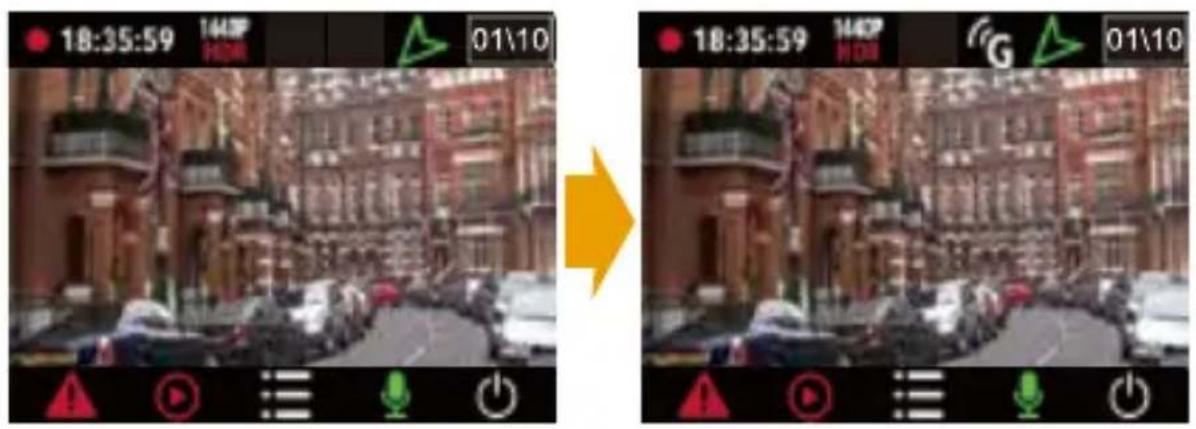
開機錄影15秒之後,G-Sensor功能開啟。螢幕上方會有“G”的圖示。
text_image
18:35:59 143F G ▲ 01\10 碰撞感測電急錄影!其他功能確定 請稍候,請勿按電碰撞錄影觸發圖示
text_image
18:35:59 140P G 01\10 資料價份中,請稍候,請勿被單!碰撞錄影後資料備份圖示
碰撞感測緊急錄影觸發後,Opia2會將其他功能鎖定,30秒後會進入資料備份保存程序,此時螢幕下方會出現紅色三角形警示符號,約兩~三分鐘時間做資料備份,其他功能鎖定,將無法進行任何動作,請稍候,請勿強制關機。
緊急錄影介紹
- 行車途中,遇見特殊狀況或緊急事故時,可手動觸發緊急錄影(橘色鍵)。此時螢幕下方會出現一個紅色三角形符號。
- 緊急錄影觸發三十秒後,會自動關檔儲存該影片至緊急錄影資料夾。而緊急錄影資料夾內容不受循環錄影複寫影響。
text_image
18:35:59 緊急錄影!其他功能鎖定 請稍候,請勿拨電-
執行緊急錄影時,系統會自動檢查觸發前的30秒影片是否包含在該緊急影片之中。若緊急錄影觸發前30秒影片是包含在前一個錄影檔案,系統也會自動將前一個檔案移動至緊急錄影資料夾保存,確保緊急錄影檔案觸發前後30秒都不受循環錄影複寫。
-
共有10個緊急錄影數可以使用。
特别注意:
- 緊急錄影觸發時請勿強制關機,以確保檔案完整保存。若緊急錄影觸發時強制關機,主機會在下次重開機時,繼續執行檔案移動與存檔動作。
- 請勿在主機錄影中直接拔出記憶卡,請務必正常關機之後再拔出記憶卡,以免錄影檔案損毀。
其他選購配件
Vico-GPS 整合模組
安裝Vico-GPS 模組,主機增加功能
- LDWS 車道偏離警示
- FCWS 前方碰撞警示
- GPS 軌跡紀錄,搭配VicoPlayer使用,請至官網下載 www.vicovation.com
- 超速警示
- GPS座標與時速標示,標示於影片左下方。
- 台灣地區定點測速照相機提醒
natural_image
Line drawing of a USB cable with a square connector (no text or symbols)Vico-CPL 偏光濾鏡
Opia專屬快拆支架支援標準52mm鏡環,可搭配CPL偏光濾鏡,可選購Vico-CPL Filter或是自行購買。安裝CPL鏡可減少白天車內前擋玻璃的內反射,有更清晰飽和的錄影畫面。
請注意CPL偏光濾鏡有減光效果,請特別留意夜間錄影畫面。
或於夜間錄影時,選擇:
- 調整偏光鏡偏折角度
- 調整錄影曝光值
- 夜間解除使用偏光鏡
text_image
CPL BoxVicoPlayer 撥放器 與 資源下載
Vico-Player 撥放器 與 資源下載
請至視連科官方網站www.vicovation.com 點選上方“服務支援”→檔案下載。
可下載視連科專用播放器程式Vico-Player·(Vico-Player目前僅支援微軟Windows系統。)
安裝Vico-Player至電腦之後,選擇播放器上方播放資料夾,選擇SD卡播放影像檔案,播放器會同步將GPS軌跡路徑秀在右邊Google Map上(電腦必須在連線上網狀態),也會同步在下方畫出3軸G-Sensor的感應加速度G值。
維修服務與保固條款
視連科保證產品皆經過完整測試,避免原物料及加工過程之瑕疵,並符合所公佈之規格。若產品在保固期間內,於正常環境使用下有任何不良或損壞發生,您可與原購買的經銷商連絡,透過原購買經銷商寄回視連科維修。若有其他相關維修問題,也歡迎您直接撥打客服專線與我們聯繫。
免付費維修服務保固說明
- 視連科產品主機提供一年保固,自消費者之原始購買日起算一年。用戶須出示原始購買日之證明(發票或是保固卡)始能享有保固服務,若無法提供正常購買證明,視連科將依產品序號判定保固期間。
- 若產品主機在購買七日內 (含),於正常操作下發生硬體故障,視連科提供免費更換新品。
- 所有配件 (車充、支架、線材) 為耗損品,自購買日起享有六個月的免費保修服務。
- 如逾保固期之維修與配件更換則另行報價收費。
- 台灣地區(臺澎金馬)保固期內,產品寄回視連科的運費,由使用者自行負擔。回送使用者的部分由視連科負責,保固期外與國外地區,兩趟運費皆由使用者自行負擔。
有任何安裝操作問題,歡迎來信或是致電視連科客服中心
台灣地區:
Email: Service@vicovation.com
Line : VicoVation
客服專線:02-2627-5883轉分機22,23客服部
行動客服專線:0975-023-262
視連科客服中心地址:台北市內湖區瑞光路358巷38弄36號2樓之2
客服時間:週一\~週五上午09:00\~12:30·13:30\~18:00 (例假日與國定假日除外)
歡迎您加入視連科Facebook專頁www.facebook.com/VicoVation
可得到第一手產品相關資訊與更新軟體資源,有任何問題也可以直接於Facebook留言提問。

natural_image
Facebook logo on a blue cube background (no additional text or symbols visible)中國地區:
視連科數碼科技(上海)有限公司
Email: Service.cn@vicovation.com
Weibo: VicoVation_China
客服專線:021-61197208
客服中心地址:上海市普陀區中山北路1715號707室(浦發廣場E座)
客服時間:週一\~週五上午09:00\~12:00 下午13:00\~18:00(例假日與國定假日除外)
觀迎您關注視連科微博專頁http://weibo.com/3204503793,可得到第一手產品相關資訊與更新軟資源,有任何問題也可以直接於微博留言提問。

natural_image
Red stylized eye logo with signal waves, no text or symbols present視連科LINE線上客服

text_image
QR code with a green 'LINE' logo in the center, likely linking to a digital service or website.视连科官方微信公众号

text_image
QR code image with a central logo, likely linking to a digital resource or website.Specifications
Vico-Opia2/Vico-歐華亞2 規格表
| Processor | Ambarella A12 |
| Image Sensor | 4 Megapixel CMOS |
| Lens | F/2.0, 6G Megapixels Lens |
| Field of View | 160° Diagonal Viewing Angle |
| Video Resolution | 2K Ultra-HD 1440p HDR(2560 x 1440p @ 30fps HDR)Extreme HD 1296p HDR(2304 x 1296p @ 30fps HDR)High Speed Full HD 1080p 60fps(1920 x 1080p @ 60fps WDR)Full HD 1080p HDR(1920 x 1080p @ 30fps HDR) |
| Screen | 2.0"TFT LCD Display |
| G-Sensor | 3-Axis Sensors |
| Emergency Record | G-Sensor Trigger / Manual Trigger |
| Storage | micro SDHC & SDXC(Class 10 only, up to 128GB) |
| UHDR & 3DNR | Ultra-High Dynamic Ranger &3-Dimensional Noise Reduction |
| Audio | Recording / Mute |
| Certificate | CCC / CE / FCC / BSMI(D33i02) / ROHS |
| Video Format | H.264 Compression @ .MP4 Format |
| Languages | 繁體中文/簡體中文/English/Japanese/Russian,Total 18 languages |
| Power | USB Cigar Car Charger(Input: DC 12~24V/Output: DC 5V/1A @mini USB) |
| Operation Temp. | 0 °C (32 °F) ~ 75 °C (167°F) |
| Storage Temp. | -20 °C (-4 °F) ~ 85 °C (185 °F) |
| Product Dimensions | 72mm(L) x 53mm(W) x 33mm(H) |
| Human Tech. | Loop/Seamless RecordingScreen Saver (15secs/1/3/5 Mins)Emergency RecordingTime/Date/User Customized Text StampFull Auto Smart Parking Surveillance:Smart Motion DetectionSmart Time-Lapse Video(Requires Vico-Power PLUS) |
VICOVATION
SIMPLY LIVELY
VICO VATION
SIMPLY LIVELY