
Remote 800 - Fernbedienung GENIUS - Kostenlose Bedienungsanleitung
Finden Sie kostenlos die Bedienungsanleitung des Geräts Remote 800 GENIUS als PDF.


| Produkttyp | Fernbedienung |
| Marke | Genius |
| Modell | Remote 800 |
| Abmessungen (ca.) | 200 x 50 x 25 mm |
| Gewicht (ca.) | 150 g (ohne Batterien) |
| Stromversorgung | 2 x AAA-Batterien (nicht im Lieferumfang) |
| Signalityp | Infrarot (IR) |
| Reichweite | ca. 10 m |
| Kompatible Geräte | TV, DVD-Player, Satellitenempfänger, Hi-Fi-Anlagen und mehr |
| Funktionen | Lautstärke, Kanalwechsel, Ein/Aus, Menüsteuerung, Zifferneingabe |
| Programmierbarkeit | Ja, über Codesuche oder manuelle Eingabe |
| Anzahl der Tasten | 30 |
| Reinigung & Pflege | Mit einem weichen, trockenen Tuch abwischen. Keine aggressiven Reinigungsmittel verwenden. |
| Sicherheitshinweise | Fernbedienung vor Feuchtigkeit und hohen Temperaturen schützen. Keine beschädigten Batterien einlegen. |
| Ersatzteile & Reparierbarkeit | Ersatzteile nicht erhältlich; bei Defekt ist ein Neukauf erforderlich. |
| Lieferumfang | Fernbedienung, Bedienungsanleitung |
Häufig gestellte Fragen - Remote 800 GENIUS
Benutzerfragen zu Remote 800 GENIUS
0 Frage zu diesem Gerät. Beantworten Sie die, die Sie kennen, oder stellen Sie Ihre eigene.
Eine neue Frage zu diesem Gerät stellen
Laden Sie die Anleitung für Ihr Fernbedienung kostenlos im PDF-Format! Finden Sie Ihr Handbuch Remote 800 - GENIUS und nehmen Sie Ihr elektronisches Gerät wieder in die Hand. Auf dieser Seite sind alle Dokumente veröffentlicht, die für die Verwendung Ihres Geräts notwendig sind. Remote 800 von der Marke GENIUS.
BEDIENUNGSANLEITUNG Remote 800 GENIUS
Preface
About this manual
This manual is designed to make the use of the REMOTE 800 smart remote control as easy as possible. Information in this document has been carefully reviewed for accuracy and is subject to change without notice.
Copyright
© Copyright 2007
This document is protected by the international copyright law. No part of this publication may be reproduced by any means without the permission of KYE SYSTEMS CORP.
The information provided from KYE SYSTEMS CORP. is believed to be accurate. Any change and enhancement to the product and to the information thereof will be documented and issued as a new release to this manual.
Trademarks
Other product names mentioned in this manual are used for identification purposes only. All trademarks and registered trademarks are the property of their respective owners.
ENGLISH
Table of Contents
ABOUT REMOTE 800....2
BATTERY PRECAUTIONS....2
TOUCHSCREEN PRECAUTIONS ....3
REMOTE CONTROL FEATURES....3
IDENTIFYING COMPONENTS....4
REMOTE CONTROL OPERATION....5
Inserting the Batteries....5
Customizing the Remote Layout ....6
Manually Setup by Pre-code ....7
Automatically Setup by Pre-code ....10
Using Learning Mode to Setup....13
Using Delete Mode to Setup....16
-
Deleting preset code for a key ..... 16
-
Deleting preset codes for an entire devices 17
-
Deleting preset codes for all devices at once 18
Macro Function .....20
-
Creating a Macro....20
-
Running a Macro 23
-
Viewing assigned Macro keys....23
Transferring Information from Unit to Unit......24
Setting the Backlight 25
Setting Backlight Sensitivity....26
Turning off the Beep Signal 27
Alternating between Screens....27
TROUBLESHOOTING GUIDE....28
ENGLISH
ABOUT REMOTE 800
REMOTE 800 Universal Touchscreen
Remote lets you control up to eight electronic devices, including your VCR, DVD, TV, CD, and satellite dish—all with one remote. And it's simple to set up. You can quickly configure each device in your household or office using the "learning eye" or by easily programming their codes into the universal remote. Convenient and simple, your remote provides you with a central control solution. The Universal Touchscreen Remote has been thoroughly tested to be certain it meets our own exacting quality control standards.
Please take a few moments to review the following important information before using it. Enjoy the show!
BATTERY PRECAUTIONS
• Always use fresh batteries. Alkaline batteries are recommended. Do not mix different types of batteries.
- Ensure that positive (+) and negative (-) polarities of the batteries match the diagram inside the compartment.
- Do not expose the batteries to excessive heat or flame.
- Keep batteries out of the reach of children.
- Weak batteries reduce the effective distance of the unit. Replace batteries immediately when the icon appears.
• To reduce danger of leakage and damage, remove batteries when used longer than two years.
- The remote will not lose programmed data when batteries are replaced.
TOUCHSCREEN PRECAUTIONS
- Tap the LCD touchscreen gently. Never use force.
- Do not use a pen or any sharp object to tap the screen.
- This unit is not waterproof. Keep the touchscreen dry and never immerse it in liquid. Wipe off any spills immediately.
- Do not expose to extreme temperatures. Keep away from heat sources.
- Avoid dropping the unit and don't drop anything on the unit.
- Clean the touchscreen with a soft cloth. If needed, dampen the cloth slightly before cleaning. Never use abrasives or cleaning solutions.
REMOTE CONTROL FEATURES
• Large touch screen display.
- Macro sequence function—each macro can store 60 commands.
• Control up to eight devices including DVDs, TVs, Satellite Receivers, VCRs and CDs.
- Learn the IR codes from your existing remote controls to quickly set up devices.
- Preprogrammed codes for many remote control models.
- User-programmable keys for each device, up to 56 keys in total.
• Automatic shutoff after 90 seconds of inactivity.
IDENTIFYING COMPONENTS

- Infrared Eye
- Light Sensor
-
LCD Touchscreen
-
Learning Eye
1. Infrared Eye
Point the infrared eye at the device you want to operate.
2. Light Sensor
Detects ambient light to automatically turn on the backlight.
3. LCD Touchscreen
The LCD panel enables you to configure and operate your devices by touching the screen.
4. Learning Eye
Point your device's remote control at the unit's eye, so that the unit can learn your devices' remote functions.
REMOTE CONTROL OPERATION
Inserting the Batteries
- Use two thumbs to push the battery cover in the direction of the arrow and lift it off
- Insert AAA battery x 3 pieces (not included) according to the polarities inside the battery compartment.
- Replace the cover.
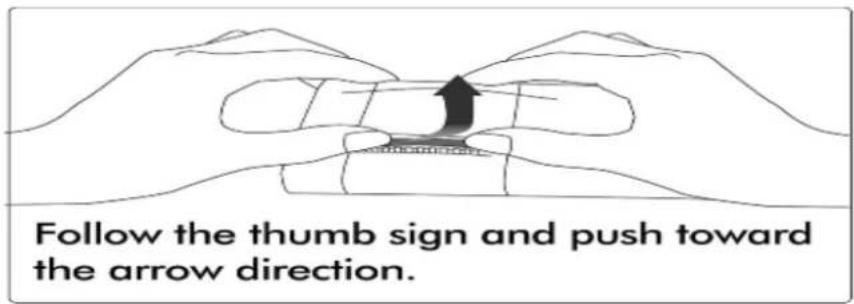
Note:
When the power of battery is low, the power low icon will display in the upper right corner.
ENGLISH
Customizing the Remote Layout
You may customize the unit's display to match your existing remote controls.
Note:
These instructions will help you learn how to use all the advanced features of this remote control. It will not explain how to use your device's functions. So please refer to your device's user manual for information related to your device if needed.
- Press and hold the desired DEVICE KEY for four seconds. The password screen appears, preventing you from accidentally modifying your remote. Press each number button (2, 4, 6, 8) in any order until they disappear.
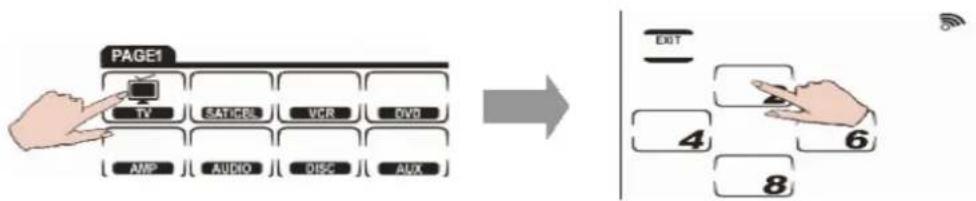
flowchart
graph TD
    A["PAGE1"] --> B["TV"]
    A --> C["SATICGB"]
    A --> D["VCR"]
    A --> E[" DVD "]
    A --> F[" AMP "]
    A --> G["AUDIO "]
    A --> H[" DISC "]
    A --> I["AUX "]

    J["EXIT"] --> K["4"]
    J --> L["6"]
    J --> M["8"]
- Press key labels to figure out all
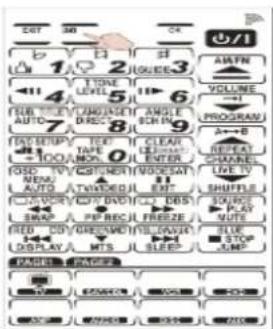
ENGLISH
- Select a key you want to modify. EX. Press that key repeatedly to scroll through the available choices for the key.
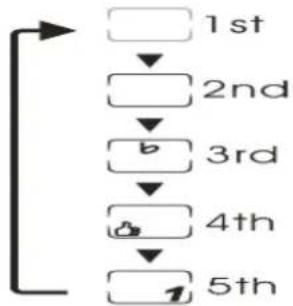
flowchart
graph TD
    A[" "] --> B[" "]
    B --> C["2nd"]
    C --> D[" "]
    D --> E["3rd"]
    E --> F[" "]
    F --> G["4th"]
    G --> H[" "]
    H --> I["5th"]
-
Repeat Step 2 to modify all desired keys.
-
After you have finished customizing the layout, press OK to confirm changes.
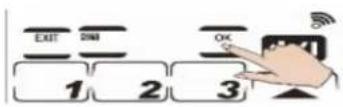
- Press to exit.
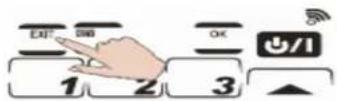
Note:
Press EXIT at any time while customizing to exit without making any changes.
Manually Setup by Pre-code
You may configure all keys on this unit for use with a specific manufacturer's model number. This is the fastest way to program the unit, but requires that the device to be programmed has a code listed in Preprogrammed Code List.
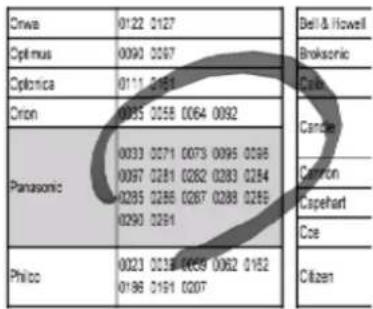
- Press and hold CODE for four seconds.
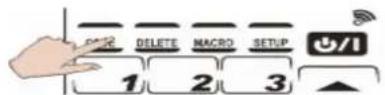
ENGLISH
- Press each number button (2, 4, 6, 8) in any order until they disappear. CODE begins flashing and ▲, ▼, ▼ appear on the screen.
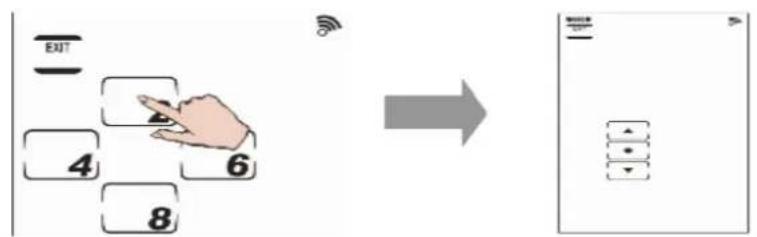
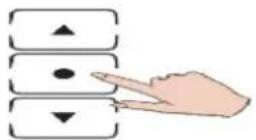
- Press □ and the device's remote layout appears.
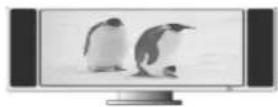
- Turn on the target device (ex. TV)
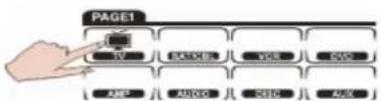
- Press the DEVICE KEY you want to program.
- Locate your target device's four-digit code in Preprogrammed Code List and enter it. (ex. 0124)
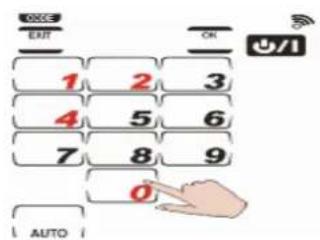
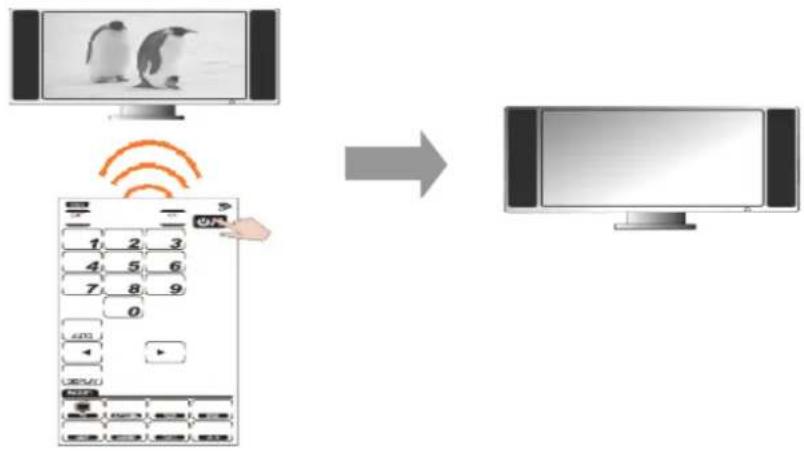
- Press ⏻/1 to make sure if the code is correct. TV will be turned off when the code is correct.
ENGLISH
flowchart
graph TD
    A["User Interaction"] --> B["Screen Display"]
    B --> C["Monitor"]
- If incorrect, please enter another code number until you find the correct one.
Note:
- Some codes are designed to operate more than one model. It may take several tries to find the code that works with the unit.
- If you enter the manufacturer's code from Preprogrammed Code List and ERROR appears on the screen, that code may not exist in the manufacturer's code table yet.
ENGLISH
Automatically Setup by Pre-code
- Press and hold four seconds.
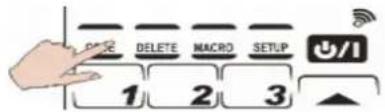
- Press each number button (2, 4, 6, 8) in any order until they disappear. CODE begins flashing and ▲, ▼, ▼ appear on the screen.
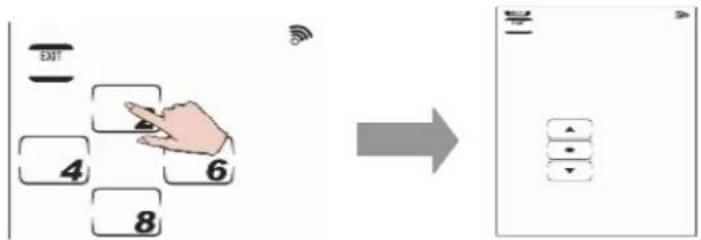
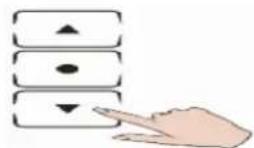
- Press ▲ or ▼ until you reach CODE. Press • and the device's remote layout appears.
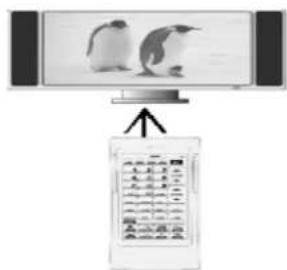
- Turn on the target device and point the unit at the target device. (ex. TV)
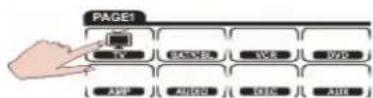
- Press the DEVICE KEY you want to program.
- Press ☐ AUTO and wait for the target device to turn off.
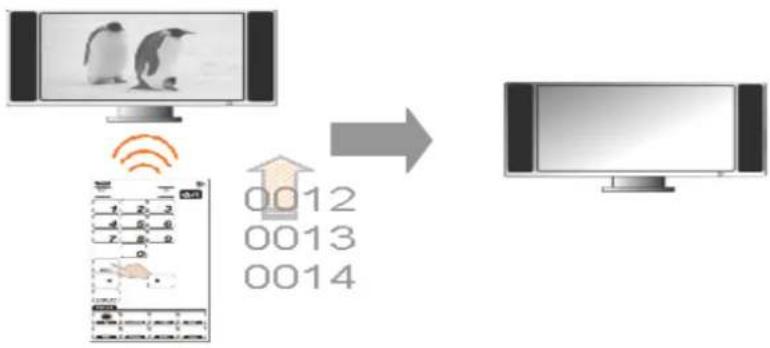
flowchart
graph TD
    A["Monitor"] -->|Wireless Signal| B["User Interface"]
    B --> C["Access Data"]
    C --> D["Monitor"]
-
Touch any part of the screen to stop automatic searching.
-
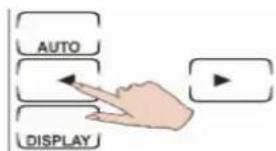
Press ▶ to search for the target device's correct power key.
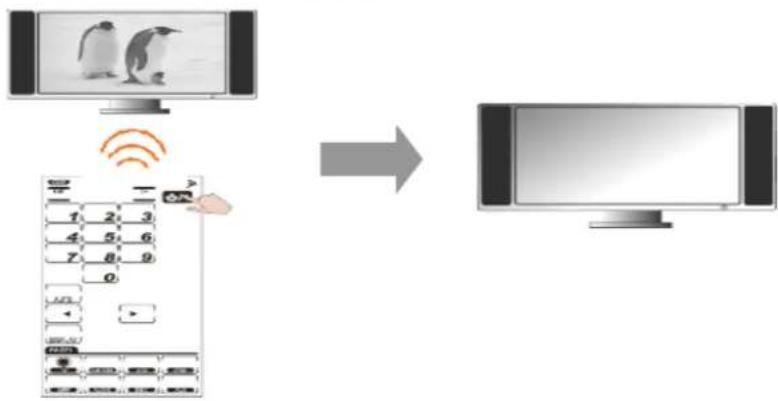
- Press ⏻/I to confirm the correct number if the TV is turned off.
flowchart
graph TD
    A["User Interaction"] --> B["Screen Display"]
    B --> C["Monitor"]
ENGLISH
- Press DISPLAY to show the correct preprogrammed code in sequence. (ex. 0124)
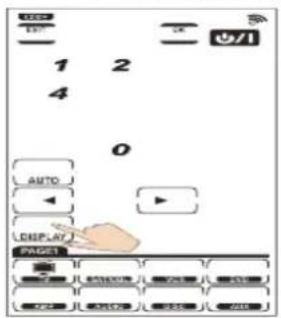
- Press OK to confirm changes.
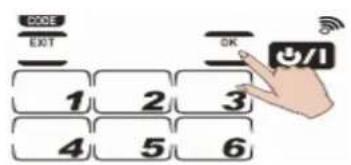
- Press EXIT to exit.
Note:
Press EXIT at any time while programming to exit without making any changes.
ENGLISH
Using Learning Mode to Setup
The remote has the ability to learn how to operate any infrared controlled device. Before you start using the remote's learning function, follow these precautions:
- To change from a device that has already been programmed, delete all of the commands for the first device before teaching new ones. For example, to operate the living room TV instead of the bedroom TV, delete all commands for the bedroom TV first. (To delete, refer to Deleting Key Codes or Deleting Device Key's Settings). Then reconfigure the TV device screen for the living room TV.
• Code learning does not work with all devices. -
All keys except CODE, DELETE, MACRO and SETUP can be learned.
-
Set both remotes on a flat surface, so that the target device remote's IR is pointed to the unit's LEARNING EYE. Keep them at a distance of 2-4 inches apart.
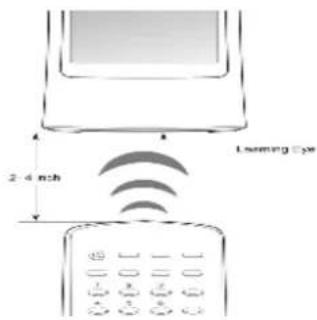
Note:
During learning, please keep pressing each learnt key of the original remote until the "OK" message appears on the screen of SRC-3200 and hear a beep. For some special codes, you might have to learn all keys twice for general operation. As you see "ERROR" message appears but hear TWO beeps during learning, please press each learnt key of the original remote once again until you see the "OK" message and hear only ONE beep. Otherwise, you will see the "ERROR" message blinking once and hear THREE beeps if the learning fails.
ENGLISH
- Press and hold CODE for four seconds.
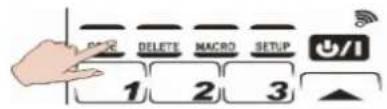
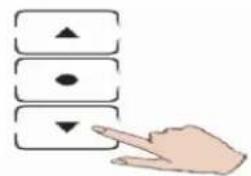
- Press each number button (2, 4, 6, 8) in any order until they disappear. CODE begins flashing and ▲, ●, ▼ appear on the screen.
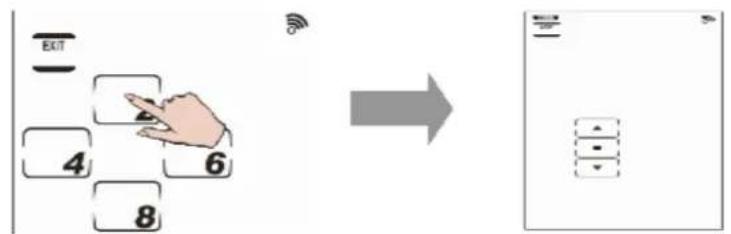
- Press ▲ or ▼ until you reach LEARN. Press • and that device's remote layout appears
- Press the DEVICE KEY you want to program. Keys begin blinking individually.(ex. TV)
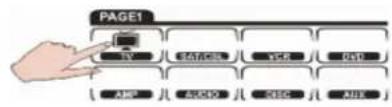
flowchart
graph TD
    A["PAGE1"] --> B["TV"]
    A --> C["STARTED"]
    A --> D["DDR"]
    A --> E["PUB"]
    A --> F["AMF"]
    A --> G["SHROOM"]
    A --> H["CISC"]
    A --> I["AUX"]
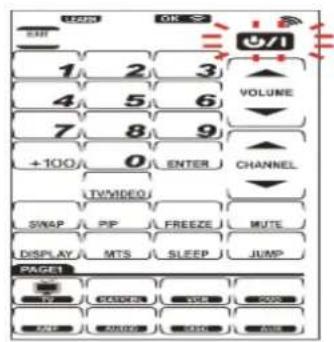
- With each blinking key on the unit, press the corresponding key on the target device's remote control.
ENGLISH
- Continue to press the buttons on your target device's remote control which corresponds to the blinking buttons on the unit's screen. After each press of the corresponding key,
OK 📋 appears and the next key will automatically begin blinking. When all buttons are programmed on the current page, it will automatically move to the next page. You can also directly select the next button to program by touching it or pressing the DEVICE KEY to go to the next page.
Note:
- If ERROR appears, repeat Steps 6-7.
- If a key is preset with a code, CODE appears on the screen to remind you that the key is preset. Continuously learning new codes overwrites the existing settings.
- Press EXIT at any time while customizing the remote to exit learning mode.
ENGLISH
Using Delete Mode to Setup
1. Deleting preset code for a key
1-1. Press and hold for four seconds.
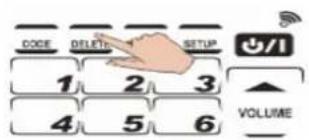
1-2. Press each number button (2, 4, 6, 8) in any order until they disappear. KEY begins flashing and ▲, □, ▼ appear on the screen.
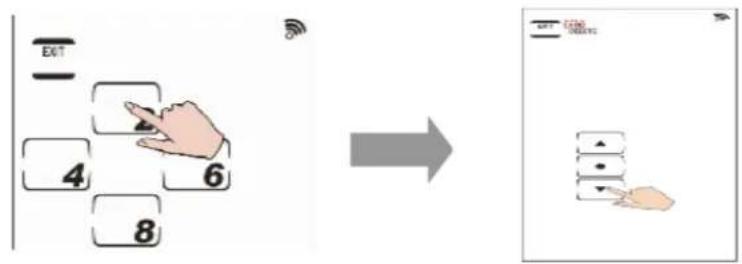
1-3. Press ▲ or ▼ until you reach KEY DELETE and both keys flash concurrently.
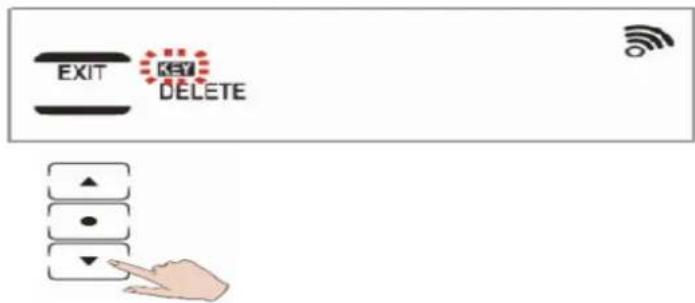
1-4. Press □ and that device's remote layout appears.
1-5. Press the desired key that you want to delete. Delete each code setting by pressing any key.
1-6. Press EXIT to exit this mode.
Note:
- Press at any time while customizing the remote to exit delete mode.
• Device keys can also save codes. To delete codes saved in the device keys, press a device key for two seconds. OK ✉ briefly appears at the top of the screen.
2. Deleting preset codes for an entire device
2-1. Press and hold for four seconds.
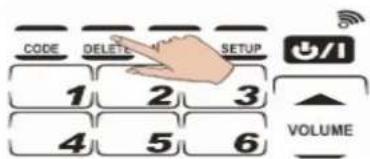
2-2. Press each number button (2, 4, 6, 8) in any order until they disappear. KEY begins flashing and ▲ ● ▼ appear on the screen.

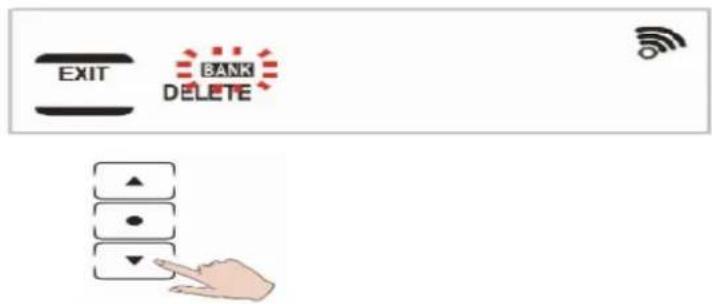
2-3. Press ▲ or ▼ until you reach BANK DELETE and both keys flash concurrently.
ENGLISH
2-4. Press • and that device's remote layout appears.
2-5. Press the desired DEVICE KEY that you want to delete (ex. TV).
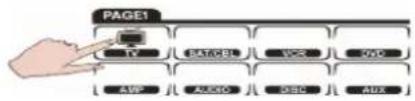
2-6. Press OK to confirm changes. OK briefly appears at the top of the screen.
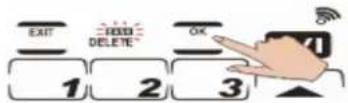
2-7. Press EXIT to exit this mode.
Note: Press EXIT at any time while deleting to exit delete mode.
3. Deleting preset codes for all devices at once
3-1. Press and hold for four seconds.
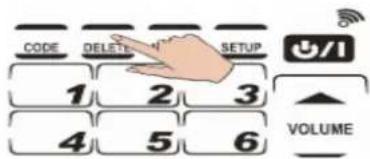
3-2. Press each number button (2, 4, 6, 8) in any order until they disappear. KEY and BANK begins flashing and ▲ ▼ ▼ appear on the screen.
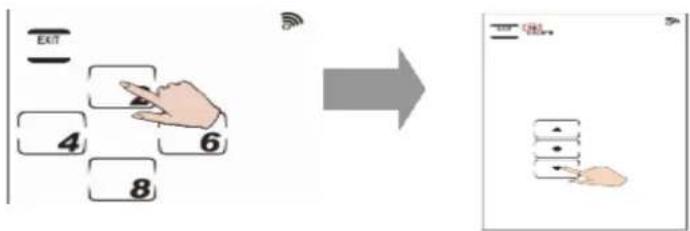
flowchart
graph TD
    A["EXIT"] --> B["Step 4"]
    B --> C["Step 6"]
    C --> D["Step 8"]
    D --> E["→"]
    E --> F["Next Step"]
    F --> G["← Step 1"]
    G --> H["← Step 2"]
ENGLISH
3-3. Press ▲ or ▼ until you reach KEY BANK DELETE and both keys flash concurrently.
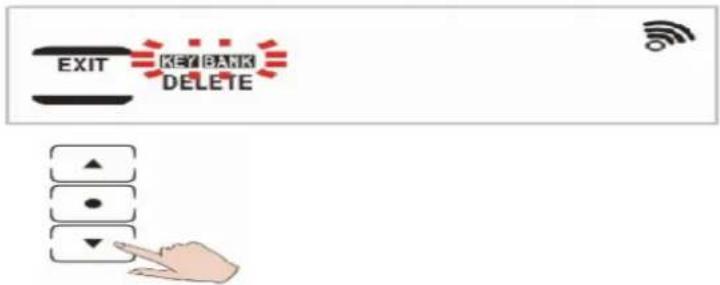
3-4. Press □. The password screen appears again.
3-5. Press each number button (2, 4, 6, 8) in any order until they disappear. OK appears briefly on the screen, and all key codes and device key settings are now deleted. The unit returns to the factory defaults.
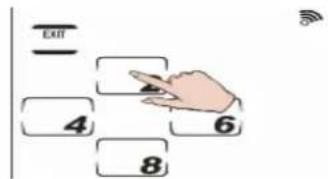
Note:
Press EXIT at any time while deleting to exit delete mode.
Macro Function
A macro is simply a series of commands.
MACRO enables you to initiate a sequence of up to 60 commands with a single button. You can create a macro on any key and insert time delays into the sequence. Remember, however, assigning a macro will eliminate the button's original function.
1. Creating a Macro
The following example will help you better understand creating a macro sequence. It is provided to teach you how to record a macro. It is by no means the only macro sequence you can create. You can create macros using any sequence of commands you desire.

flowchart
graph LR
    A["March 2020"] --> B["Play DVD"]
    B --> C["Disc Reject"]
    C --> D["DVD Power On"]
    D --> E["DVD"]
    E --> F["Power On"]
The following macro example will:
(1) Turn the TV on.
(2) Switch the TV to video mode.
(3) Turn the DVD player on.
(4) Create a five second delay.
(5) Play a DVD.
Set up the example macro using the following steps:
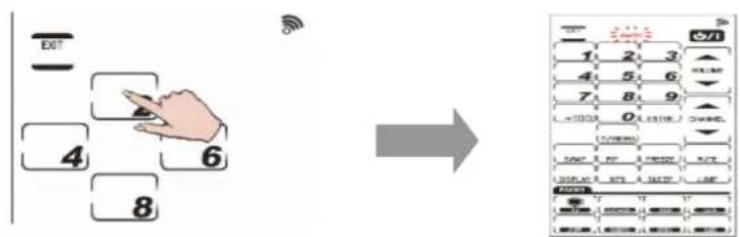
1-1. Press and hold MACRO for four seconds to enter the password mode.
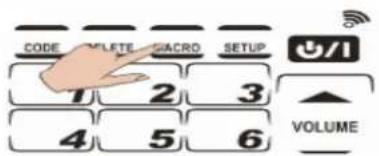
1-2. Press each number button (2, 4, 6, 8) in any order until they disappear. MACRO begins flashing.
ENGLISH
1-3. Select a device screen. For this example, we have chosen TV so press 📄. Then, press ☐ (for this example).
☐ will be used to start the macro in the normal operation mode.
Note:
• 1 will no longer perform its original function.
- If you select a key that already has a macro stored in it, the new macro will replace the old macro.
- Do not use any DEVICE KEY to run your macro.
1-4. Press ⏻/I to turn on the TV
1-5. Press TVVIDEO to switch to Video mode so that you can watch the DVD.
1-6. Select DVD device screen.
1-7. Press ⏻/I to turn on the DVD.
Note:
You may need to set a time delay between turning on the DVD player and playing a DVD.
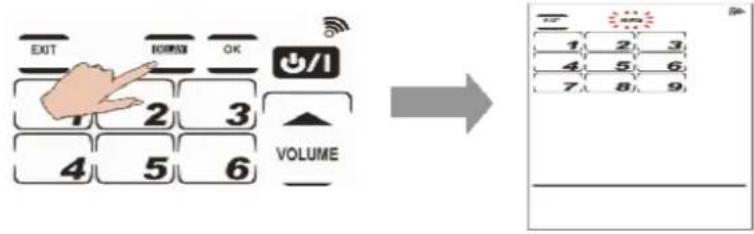
1-8. Press, and a number pad appears.
ENGLISH
1-9. Press the desired time delay. In this case, press 5. After that, the screen will jump to Macro setup page automatically.
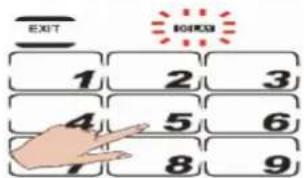
1-10. Press ▶ PLAY to play a DVD·
1-11. Press OK to confirm setting.
Note:
- Press at any time while creating a macro to exit macro mode.
- You may create another macro at this time by entering another sequence of commands.
- If trying to create a macro with _REC under VCR, you must press and hold _REC for two seconds. This is to prevent accidentally overwriting a tape.
ENGLISH
2. Running a Macro
Press the DEVICE KEY.
To run the macro example, press 📄, then press ☐. Be sure to point the remote at the devices while the macro sequence is being sent. The following macro will begin:
(1) TV turns on.
(2) TV switches to Video mode.
(3) DVD player turns on.
(4) Five seconds delay.
(5) DVD player starts playing DVD.
Note:
- To restore TV's 1 to its original function, delete the macro using the delete function.
• After pressing the preset macro key for a device, you can interrupt the command
sequence by pressing EXIT. ERROR appears and the macro stops.
3. Viewing Assigned Macro Keys
You may view which keys are assigned to macro for any particular device.
3-1. Press the DEVICE KEY.
3-2. Press MACRO. The assigned macro keys are displayed for this DEVICE KEY.
For example, if you set 9 as a macro key
for 📄, when MACRO is pressed, the preset macro key "9" appears.
Note:
If you'd like to check the macro key for Page 2, press the DEVICE KEY to switch to the next page and repeat Step 2.
ENGLISH
Transferring Information from Unit to Unit
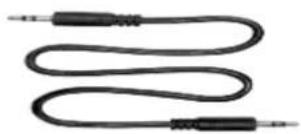
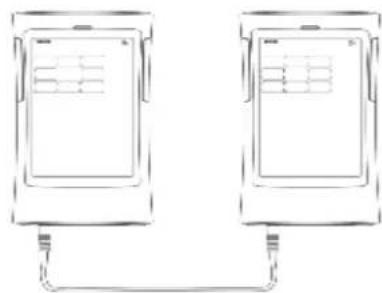
- Connect the two units with a cable (not included).
natural_image
Black cord with two metallic connectors (no text or symbols visible)- Press and hold SETUP for four seconds.
- Press each number button (2, 4, 6, 8) in any order until they disappear. BACKLIGHT begins flashing and ▲ ▼ ▼ appear on the screen.
-
Press ▲ or ▼ until you reach CODE .
-
Press ☐. During transmission, the screen displays blank keys. When transmission is complete, OK is displayed on the screen.
natural_image
Two identical rectangular electronic devices connected by a cable, no text or symbols visibleNote:
- If there is an error in transmission, ERROR appears on the display.
- Press EXIT to exit without transferring data.
Setting the Backlight
The backlight function is always powered on, but can be set to remain on for shorter or longer periods of time.
-
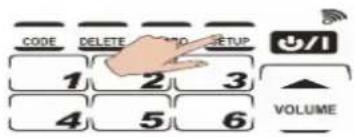
Press and hold SETUP for four seconds. CODE DELETE NO SETUP 1 2 3 4 5 6 VOLUME
-
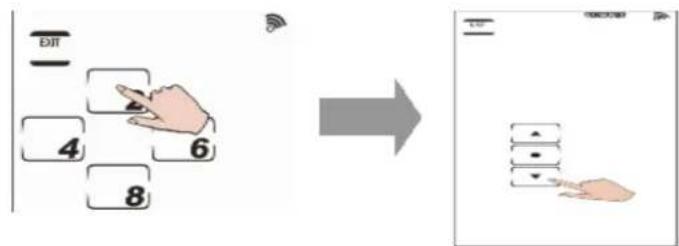
Press each number button (2, 4, 6, 8) in any order until they disappear. BACKLIGHT begins flashing and ▲ ● ▼ appear on the screen.
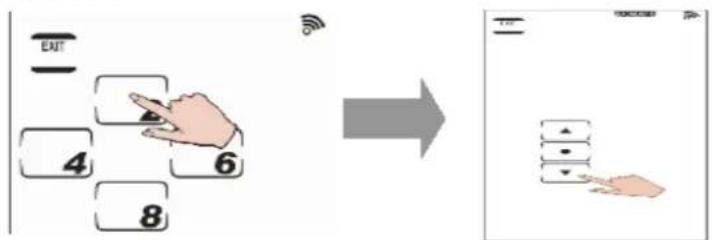
- Press ☐. A number pad 1-6 appears on the screen.

- Press a number to select the amount of seconds the backlight stays on after pressing a key.
Note:
The backlight can be set from 10-60 seconds. Therefore, the number pad is set in 10-second increments. 1 is for 10, 2 is for 20 seconds, and so on.
- Press OK to confirm setting.
- Press EXIT to exit this mode.
Note:
Press EXIT at any time while setting the backlight to exit backlight mode.
ENGLISH
Setting Backlight Sensitivity
- Press and hold SETUP for four seconds.
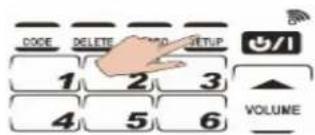
- Press each number button (2, 4, 6, 8) in any order until they disappear. BACKLIGHT begins flashing and ▲ ● ▼ appear on the screen.
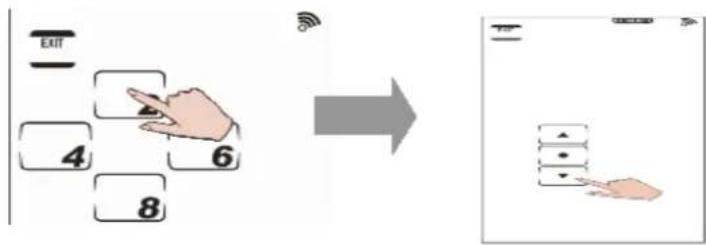
-
Press
-
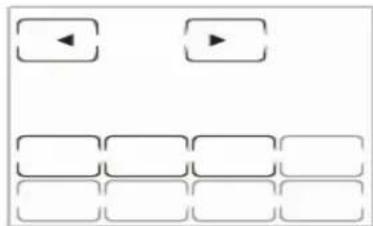
Press □ or ▶. There are a total of eight sensitivity levels, and eight frames appear or disappear as □ or ▶ is pressed.
flowchart
graph TD
    A["◀"] --> B["▶"]
    C[" "] --> D[" "]
The more frames selected, the more sensitively the backlight reacts to ambient lighting.
- Press to confirm setting.
- Press EXIT to exit this mode.
Note:
Press EXIT at any time while setting sensitivity to exit backlight mode.
Turning off the Beep Signal
- Press and hold SETUP for four seconds.
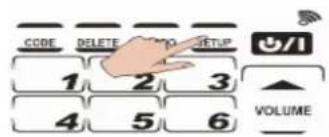
- Press each number button (2, 4, 6, 8) in any order until they disappear. BACKLIGHT begins flashing and ▲ ▼ ▼ appear on the screen.
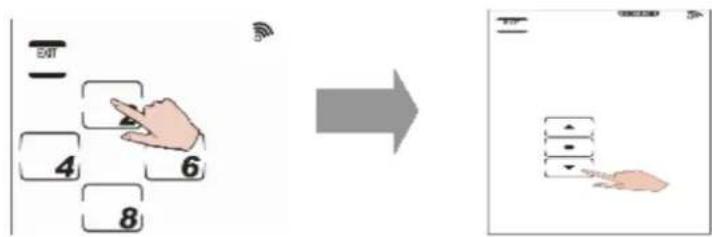
- Press ▲ or ▼ until you reach 📞.
- Press
- Press □ or ▶ to change the beep pitch or turn off the beep signal completely. The number key shows the different beep pitches. When the beep is on, 📋 appears on the screen.
- Press OK to confirm or EXIT to cancel the operation.
Note:
Press at any time during this function to exit this mode.
Alternating Between Screens
Press a DEVICE KEY to alternate between PAGE 1 and PAGE 2.
ENGLISH
TROUBLESHOOTING GUIDE
If you have trouble configuring or operating the remote, first check that you have inserted the batteries correctly. Then check this chart.
| Problem | Solution |
| LCD does not display when touched | 1. Batteries may be dead. Replace the batteries with three new AAA alkaline batteries.2. Check that the batteries are properly installed. |
| The unit won't operate a device | 1. Ensure that the desired DEVICE KEY has been selected.2. Move closer to the target device. The maximum operating distance is approximately 30 feet.3. Ensure you are aiming the unit directly at the target device and there are no obstructions between the unit and the target device.4. Ensure programming with the learning function or the manufacturer codes has been properly done. |
ENGLISH
| Problem | Solution |
| Your VCR will not record | As a safety feature, you must press on the unit for two seconds |
| You cannot operate the target device even after teaching it using the learning function | 1. Ensure that the unit has correctly learned the target device's remote control code.2. Delete the device data from the unit and carry out the learning function again.3. Ensure you did not program more than one remote for a given device. |
| You see ERROR displayed on the LCD during the learning procedure | 1. Ensure you hold the target remote's key until the screen displays OK or ERROR.2. Ensure the unit and the target remote are not too close or too far apart — keep them about 2-4 inches apart.3. Make sure your target device's remote control is aimed directly at the unit's learning eye. |
| Your existing remote has a key that performs two or more functions | Some remotes issue multiple commands when a key is held down.Teach the unit the different commands. The unit can only learn one command for each key. |
ENGLISH
| Problem | Solution |
| IR LEARNING is not successful | 1. Replace the batteries in both the unit and the target device's remote.2. Keep the target device's remote control and the unit's learning eye about 2-4 inches apart.3. Do not use the learn function near an incandescent lamp.4. The learning process has no errors, but you still can't control your AV devices: Repeat the learning procedure again |
| Macro does not work | 1. Target device's remote might not be compatible with learning procedure.2. Be sure to aim the unit at the devices while the macro commands are being sent.3. Macro was not properly set up. Repeat macro set-up procedure. |
| The LCD screen turns off | The unit is preset to automatically switch the LCD off after 90 seconds.Just tap the screen to turn the unit back on again |

- Preface
- About this manual
- Copyright
- Trademarks
- ENGLISH
- Table of Contents
- ABOUT REMOTE 800
- REMOTE 800 Universal Touchscreen
- BATTERY PRECAUTIONS
- TOUCHSCREEN PRECAUTIONS
- REMOTE CONTROL FEATURES
- IDENTIFYING COMPONENTS
- Infrared Eye
- Light Sensor
- LCD Touchscreen
- Learning Eye
- REMOTE CONTROL OPERATION
- Inserting the Batteries
- Note:
- Customizing the Remote Layout
- Manually Setup by Pre-code
- Automatically Setup by Pre-code
- Using Learning Mode to Setup
- Using Delete Mode to Setup
- Deleting preset code for a key
- Deleting preset codes for an entire device
- Deleting preset codes for all devices at once
- Macro Function
- Creating a Macro
- Running a Macro
- Viewing Assigned Macro Keys
- Transferring Information from Unit to Unit
- Setting the Backlight
- Setting Backlight Sensitivity
- Turning off the Beep Signal
- Alternating Between Screens
- TROUBLESHOOTING GUIDE
Marke : GENIUS
Modell : Remote 800
Kategorie : Fernbedienung