LHO120D - Ofen Lloyd - Kostenlose Bedienungsanleitung
Finden Sie kostenlos die Bedienungsanleitung des Geräts LHO120D Lloyd als PDF.


Benutzerfragen zu LHO120D Lloyd
0 Frage zu diesem Gerät. Beantworten Sie die, die Sie kennen, oder stellen Sie Ihre eigene.
Eine neue Frage zu diesem Gerät stellen
Laden Sie die Anleitung für Ihr Ofen kostenlos im PDF-Format! Finden Sie Ihr Handbuch LHO120D - Lloyd und nehmen Sie Ihr elektronisches Gerät wieder in die Hand. Auf dieser Seite sind alle Dokumente veröffentlicht, die für die Verwendung Ihres Geräts notwendig sind. LHO120D von der Marke Lloyd.
BEDIENUNGSANLEITUNG LHO120D Lloyd

text_image
LLOYDLIVE THE FUTURE
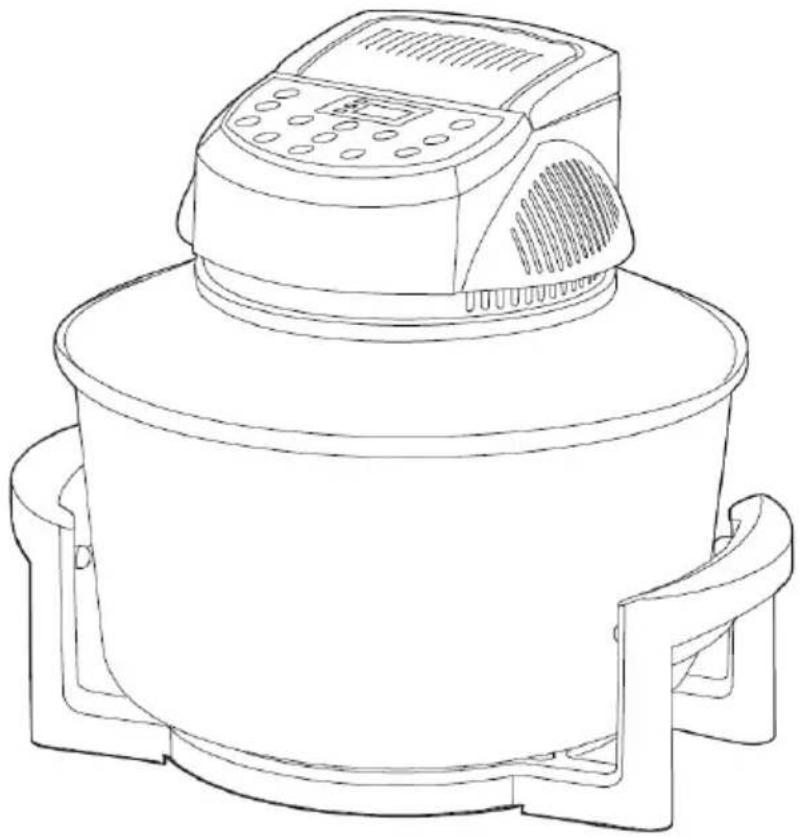
Halogen Oven
natural_image
Line drawing of a kitchen appliance with a cylindrical top and side legs (no text or symbols)LHO120D
INSTRUCTION MANUAL
Please read and save all instructions to ensure safe and effective use of this appliance.
Dear Customer
Congratulations on being the proud owner of Lloyd Halogen Oven. Your Halogen Oven comes with a Lloyd Guarantee of Quality.
Lloyd takes great pride in providing its customers with perfect products that adheres to international quality standards.
Lloyd is committed to provide the ultimate customer satisfaction as nothing brings us greater joy than having satisfied customers of Lloyd.
At Lloyd, feedback and suggestions based on your product usage experience are greatly appreciated.
Please feel free to contact us at perfectservice@lloydmail.com
NIPUN SINGHAL DIRECTOR
TABLE OF CONTENTS
SAFETY INFORMATION AND INSTRUCTIONS 2-3
PACKAGE CONTENTS OF YOUR PRODUCT 4
UNPACKING AND FIRST USE STERLIZATION 5-6
OPERATING INSTRUCTIONS 6-9
CLEANING 9
STORAGE10
RECIPIES 10-13
TECHNICAL SPECIFICATIONS 14
SAFETY INFORMATION AND INSTRUCTIONS
In order to make the best use of this product and use it safely, please read the instruction manual carefully and keep it for future reference.
- Never place food directly on the bottom of the glass bowl, as the bottom of the food will not cook evenly. Always use a rack or pan when cooking. Note: Most pans can be used in this oven as long as it is a baking pan and fits comfortably inside the bowl.
- Do not touch hot surfaces. The temperature of the outer surface can get very hot while the appliance is in operation. Always use oven gloves when handling hot materials and allow metal parts to cool before cleaning. Allow the appliance to cool thoroughly before putting in or taking out parts. Always use the handles when moving the appliance.
- Do not use the appliance for other than its intended use.
- Before turning on, ensure the electrical voltage and frequency of the circuit corresponds to those indicated on the rating label of the appliance.
- To protect against the risk of electric shock, do not immerse this appliance, cord set or plug in water or any other liquid.
- The appliance is not intended to be operated by means of an external timer or any type of separate remote control system.
- The use of accessories which are not recommended or sold by the manufacturer may cause fire, electric shock or injury.
- This appliance is designed for indoor use only. Do not use outdoors.
- Do not use an extension cord unless completely necessary with this product. If an extension cord is used please ensure that it has a rating equal or exceeding the rating of this appliance.
- Do not pull or carry by cord, use cord as a handle, close a door on the cord, or pull cord around sharp edges or corners. Keep cord away from heated surfaces.
- Do not bend or damage the power cord.
- Always unplug the appliance when not in use. To disconnect from the power supply, grip the plug and pull from wall outlet. Never pull by the cord. The plug must be removed from wall outlet before cleaning, servicing, maintenance or moving the appliance.
- Never force the plug into an outlet.
- Do not place the appliance near a hot gas or electric burner.
-
Do not cover the appliance while in use. If it is covered there is a risk of fire.
-
Improper installation may result in the risk of fire, electric shock or injury to persons.
- If the power cord or plug is damaged, do not use the appliance.
- The appliance has no user-serviceable parts contained within. Do not attempt to repair, disassemble or modify the appliance.
- Always operate on a dry level surface. Operating on sinks or uneven surfaces must be avoided.
- Do not clean with metal scouring pads.
- Extreme caution must be used when moving an appliance containing hot oil or other hot liquids.
- Do not move or lift the appliance while the power cord is still connected to wall outlet.
- All metal items inside the bowl, such as the low rack, can get very hot during cooking. Please be careful when removing these items from the appliance, always use the tongs supplied.
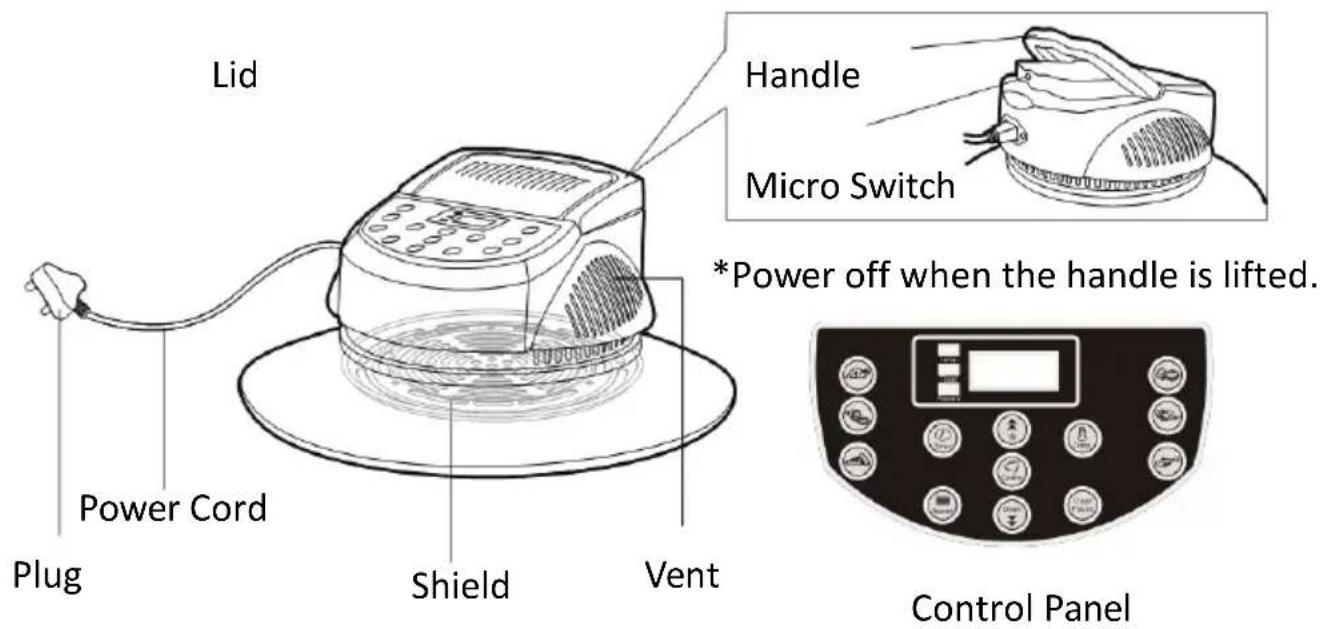
PACKAGE CONTENTS OF YOUR PRODUCT
text_image
Lid Power Cord Plug Shield Vent Handle Micro Switch *Power off when the handle is lifted. Control Panel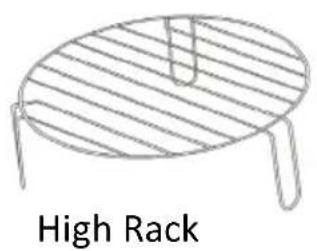
text_image
High Rack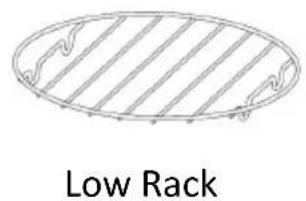
natural_image
Simple line drawing of an oval plate with horizontal slats and curved handles, labeled 'Low Rack' below (no other text or symbols)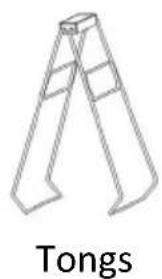
natural_image
Line drawing of a tongs structure with no text or symbols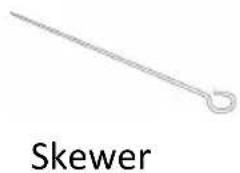
text_image
Skewer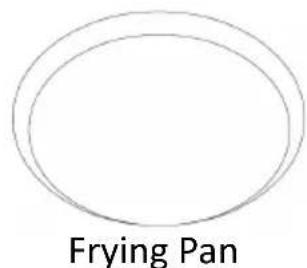
text_image
Frying Pan
natural_image
Diagram of a steamer with circular holes and label (no text or symbols on the diagram itself)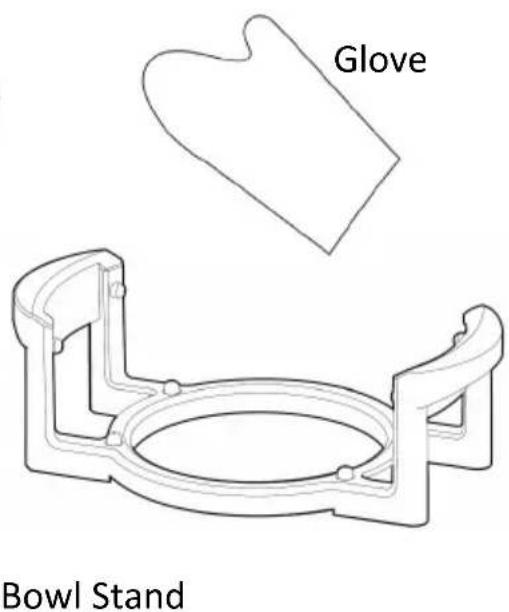
text_image
Glove Bowl Stand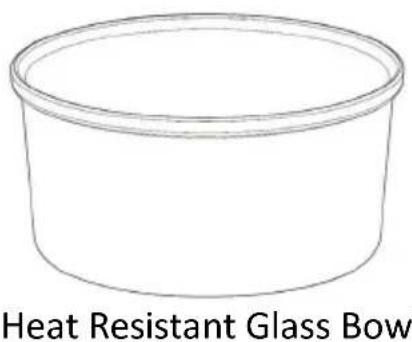
text_image
Heat Resistant Glass BowUNPACKING AND FIRST USE STERLIZATION
- Unpack the appliance and all accessories from the packaging box.
- Check all parts of your appliance before discarding any packaging materials.
- Peel off any adhesive label or sticker from your appliance, where necessary.
- We recommend you keep the original box for future storage and shipping purposes.
Step1: Wash the glass bowl and low/high rack in warm soapy water or in the dishwasher. Dry thoroughly before use.
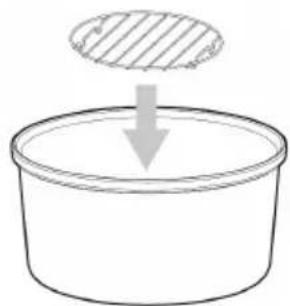
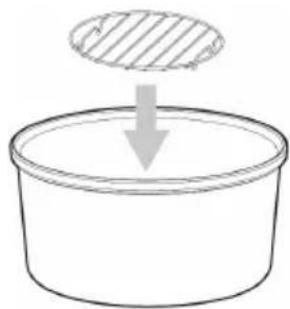
Step2: Position the low/high rack on the bottom of the glass bowl.
natural_image
Simple line drawing of a container with an arrow pointing downward, no text or symbols present.Step3: Connect the power cord to wall outlet.
natural_image
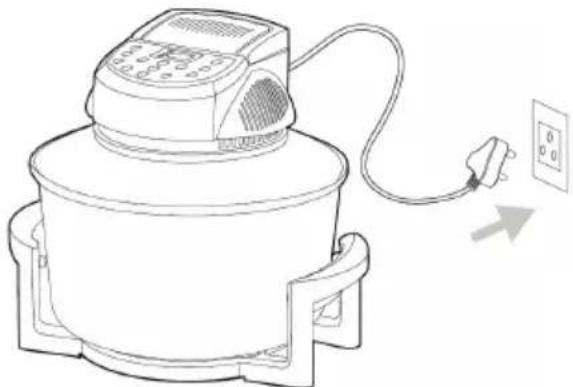
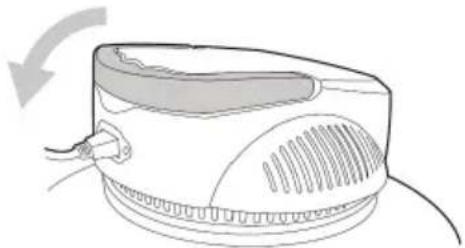
Line drawing of a portable air purifier with a power outlet and cable, no text or symbols presentStep4: Fold down the handle completely.
natural_image
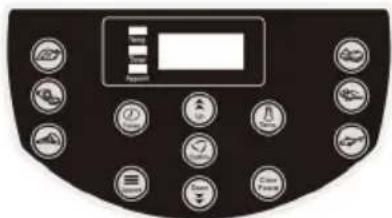
Line drawing of a portable air conditioner with a scroll wheel and cable, showing airflow direction (no text or symbols)Step5: Set the temp to 250^ C and the time to 10 min, then press “Confirm” to start.
text_image
Control panel interface with icons for temperature, humidity, and water levels in a digital displayAfter timer ends, allow to cool for 10 min, then you can open the lid. Now your Halogen Oven is ready to cook your first meal!
NOTE: A slight burning odour may be emitted during the first few uses. This is normal because the appliance is burning off the excess lubricants and will not cause any harm to you, your food or the appliance.
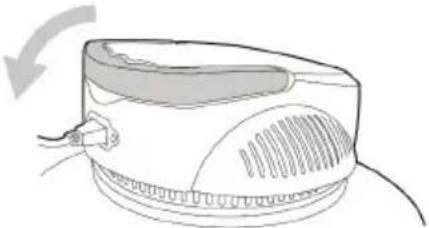
NOTE: This oven features a handle with a micro switch. For safety purpose, the appliance will only work when the handle is completely folded down (you will hear it 'click' into place).
OPERATING INSTRUCTIONS
Your Halogen Oven is a multifunction cooker. It can be used to stew, roast, bake, grill, barbeque, broil, fry, steam and defrost.
USING THE APPLIANCE
Step1: Position the low/high rack on the bottom of the glass bowl.
natural_image
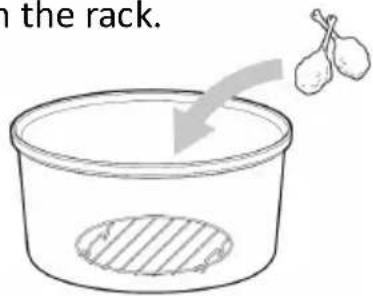
Simple line drawing of a container with an arrow pointing downward, no text or symbols present.Step2: Place food directly on the rack.
text_image
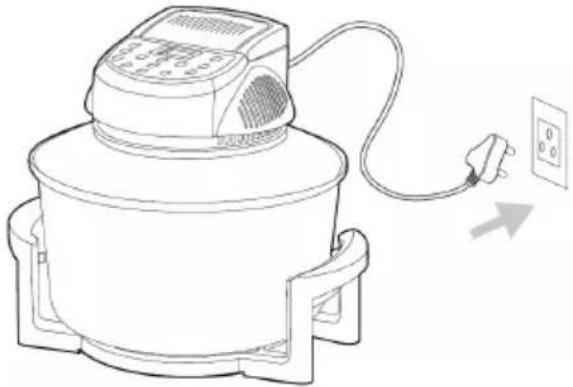
in the rack.Step3: Close the lid and connect the power cord to wall outlet.
natural_image
Line drawing of a portable air purifier with a power outlet and cable, no text or symbols presentStep4: Fold down the handle completely.
natural_image
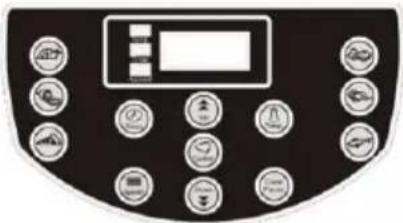
Line drawing of a portable air conditioner with a scroll wheel and cable outlet (no text or symbols)Step5: Set a desired temperature and a required time according to different food. Press "Confirm".....Now you're cooking!
text_image
Control panel with icons for heating, cooling, and monitoring functionsNow let's run through it in a little more detail so you know exactly what to do.
-
Connect the power cord. The digital display lights will show "01:00". The temperature will be at 60°C.
-
Set a desired cooking time (1 min to 3 hours) by pressing "Up" or "Down". To increase the time rapidly, simply hold the button down. Then set the cooking temperature as you desire (60-250°C), then press "Confirm".
-
After timer ends, the heating element will automatically switch off. The fan will continue to dissipate heat until it cools down. This is to prolong the life of the circuit board and other electronic components.
- During the cooking, if you want to check the left time or your set cooking temperature, just press the button “Timer” or “Temp”. If you press “Timer” several time, it will switch between “cooking time” and “appointing time” (If any preset appointing time), The same, If you press the “Temp” button several times, it will switch between “F” and “°C”.
NOTE: For safety reasons, if the oven is opened midway through the cooking process, the heating element will switch off. To continue cooking, lower the oven's lid to the closed position.
3. "Appoint" function:
The “Appoint” function allows you to delay the start of the cooking time.
1) Firstly choose the delay temperature by pressing "Temp" to a required cooking temperature.
2) Secondly set the cooking time by pressing "Up" or "Down".
3) Press the "Appoint" button once, the light will flash. Input the expected time for the appliance to start. (10 min to 19 hours and 50 min)
4) Once all the information has been set, press the "Confirm" button twice. The delay time will display and the indicator light of "Timer" will be on.
The delay time will begin to count down. The appliance will turn on when it counts down to the cooking time.
4. One-key setting:
This appliance features a one-key setting function allowing you to cook in an easy way. Connect the power cord, press one of the 6 menu buttons and then press “Confirm” to start. It’s that simple!
General guide to cook food
The temperature and cooking time may vary depending on the type, the amount and the thickness of the food you are cooking.
| Food | Time | Temperature |
| Cake | 8-10 min | 200-230°C |
| Medium Prawns | 10-12 min | 150-180°C |
| Sausages | 10-13 min | 120-150°C |
| Roasted Bread | 8-10 min | 120-140°C |
| Potatoes &Vegetables | 12-15 min | 180-200°C |
| Chicken wings | 10-13 min | 150-180°C |
| Hot dogs | 5-8 min | 190-210°C |
| BBQ Spareribs | 18-20 min | 220-240°C |
| Thick Chips | 25-30 min | 230-250 °C |
| Fried Chicken Pieces | 20-25 min | 230-250 °C |
CLEANING
CAUTION:
- Always allow the appliance to cool completely before cleaning.
- Never immerse the lid into liquid.
- Always unplug the power cord before cleaning.
- It is imperative that the appliance be washed thoroughly after each use.
- Do not use any abrasive materials for cleaning.
Step1: Disconnect the power cord and allow the appliance to cool completely before cleaning.
Step2: Wipe the lid clean using a damp cloth rinsed in warm soapy water.
Step3: Wash the bowl and any other used accessory in warm soapy water.
Step4: You can also clean the appliance with its automatical cleaning process. Add approx 5cm of cold tap water into the bowl with a squirt of dishwashing liquid. Set the temperature to 80°C and the time to 10 min to start the cleaning process to soften any stuck on deposits. Accessories can be left in the bowl during this process to soften any deposit.
STORAGE
Ensure all parts are thoroughly cleaned and dried before storage.
We recommend to put the appliance back in the original box and store in a dry and clean area.
RECIPES
ROAST VEGETABLES
Vegetables of your choice garlic, salt ground black pepper
Peel and clean vegetables. Cut into similar size pieces. Pat dry and place in a large pot with 2 or 3 tbsp of vegetable oil, add garlic, salt and pepper. Place lid on pot, shake and oscillate vigorously. Place vegetables on rack. Set time to 250^ C and bake for approx 30 to 45 min. Vegetables can be roasting while meat is cooking by placing around the meat and/or by utilising the rack and perforated baking dish.
JACKET POTATOES
4 medium-sized potatoes Olive oil Sea salt
Wash and prick the potato and place on the rack. Set the time to 40 min and the temp to 200°C. Remove and serve with topping of your choice! It's as easy as that!
CHICKEN WINGS
1lb chicken wings 1/4 cup of sake or dry sherry
1/2 cup soy sauce 1 clove crushed garlic
1 tablespoon finely chopped fresh ginger
Trim excess fat, remove tips from chicken wings and pat dry. Place wings in a bowl. Combine soy sauce, garlic, ginger, sake or dry sherry. Pour mixture over chicken wings. Toss well. Cover and allow to marinate for 3 hours, turn wings now and again. Place chicken wings on low pan and cook at 230°C for 10 min. Check process. Turn or move wings as necessary. Cook for a further 8 to 10 min until golden brown.
LEMON AND ORANGE DRIZZLE CAKE
Ingredients
1 orange
1 lemon
175g/6 oz self-raising flour
1 tsp baking powder
2 medium eggs
60g/2 ¼ oz ground almonds
125g/4 ½ oz golden caster sugar
125g/4 ½ oz soft butter
100g/3 ½ oz icing sugar
Method
A well-known traditional cake to which I've added ground almonds. Bite into a slice and taste the intense citrus flavours of the sweet glaze which is poured over the hot cake. You will need a greased and base-lined 18cm/7 inch deep cake tin (square or round) which fits in your oven.
- Remove the lid from the Halogen Oven, place the low rack inside the oven and replace the lid. Preheat the oven to 180^ C ( 356^ F).
- Finely grate the rind from half the orange and half the lemon, cut both in half and squeeze the juice from the whole fruits (you will need about 6 tbsp). Mix the juices together in a small basin.
- Sift the flour and baking powder into a large bowl. Break the eggs into the flour and add the ground almonds, sugar, butter, orange and lemon rinds and 3 tbsp fruit juice.
- With a wooden spoon or mixer, lightly beat the ingredients together until thoroughly mixed, light and fluffy. Spoon into the prepared tin and level the surface.
- Put into the hot oven and cook for 20-25 minutes until risen, firm to the touch and cooked through.
- Whilst the cake is cooking, make the drizzle mixture. Sieve the icing sugar into a bowl, pour in the remaining 3 tbsp fruit juices and mix to a smooth paste.
- Turn the cake onto a wire rack and whilst still hot use a fine skewer to make several holes in the top of the cake. Spoon the drizzle mixture over the top of the cake and leave to cool.
SPICY VEGETARIAN KEBABS
Ingredients
3 tbsp tikka paste
500g/18 oz tub yoghurt
2 tsp cumin seeds
Thumb-size piece fresh root ginger, finely grated
250g/9 oz small new potatoes
300g/11 oz paneer cheese, cut into chunks
3 red onions, wedges
2 red peppers, cut into chunks
5 tbsp mango chutney
Small pack mint leaves, leaves picked
250g/9 oz bag salad leaves
12 chapattis
Cuisine: Cooking time: 50 mins Serving: 4-6 people
Method
Soak 12 wooden skewers in water for 30 mins (stop them burning). Mix the tikka paste, half of the yogurt, the cumin, ginger and seasoning to gather.
Boil the potatoes in a pan of salted water for 7 mins, then drain well and tip into the tikka mixture with the paneer. Mix into the marinade, and chill for at least a couple of hours.
Next, alternately thread the marinated potatoes and paneer onto the skewers with the onions and peppers, then cover on a tray until you are ready to cook.
Grill the Kebabs at 200^ C ( 392^ F) on high rack in your Halogen Oven for 8-10 mins, turning, until the veg are charred and softened. Times may vary given the Halogen Oven and size of veg, so grill for 5-10 min more if you find the kebabs are not yet cooked through. With a few minutes to go, add the chapattis to warm through.
Serve the kebabs with the minty salad, cooling mango yoghurt and chappattis.
VEGETABLE CHILLI
Ingredients
One onion chopped finely
Some mushrooms (however many you lik) chopped
2 carrots chopped
2 green chillies with seeds removed chopped
1 red chilli with seeds removed chopped
1 teaspoon of cumin
1 teaspoon of paprika
Half a teaspoon of cinnamon
2 garlic cloves crushed
One can of tinned tomatoes
3 teaspoons of tomato puree
One can of red kidney beans
Some olive oil
Two tablespoons of vinegar
One tablespoon of granulated sweetener
Cuisine: Cooking time: 30 mins Serving: 2 people
Method
- Chop the veg and lightly fry the onion, garlic, mushrooms and whatever other veg you would like to put in. After, add the tomato puree, stir for one minute and then add the tomatoes.
- Pour this mixture into an oven dish and add the carrot and spices.
- Cook in the Halogen Oven for about 20 minutes at 200^ C ( 392^ F) on the low rack, then add the kidney beans, vinegar and sweetener.
- Reduce the heat to 180^ C ( 356^ F) and cook for a further 10 minutes on the low rack. Check the carrots at this point to see whether they are tender and if not cook for further 5 minutes.
- Serve with rice and salad.
TECHNICAL SPECIFICATIONS
| Model Number | LHO120D |
| Rated Power | 1200W |
| Voltage | 220-240V~/ 50Hz |
| Capacity 12L |
Imported and marketed by
LLOYD ELECTRIC AND ENGINEERING LIMITED
159, Okhla Industrial Estate, Phase 3, New Delhi - 110 020
Correspondence Address
Plot No 2, Industrial Area, Kalkaji, New Delhi - 110 019
Customer care toll free No
Gujarat, Madhya Pradesh: 1800-2582-583 | Punjab, Haryana, Himachal Pradesh, J&K: 1800-1377-781
Maharashtra, Chhattisgarh, Goa: 1800-1024-212 | South India: 1800-1200-666 |
East India: 1800-2121-666 | Rest of India: 1800-1020-666
Email: perfectservice@lloydmail.com

text_image
LLOYDLIVE THE FUTURE
LLOYD ELECTRIC & ENGINEERING LIMITED
159, Okhla Industrial Estate Phase-III, New Delhi – 110020
Correspondence Address
Plot-2, Industrial Area, Kalkaji, New Delhi – 110019
Email: perfectservice@lloydmail.com
Customer Care Toll Free No.
Gujarat, Madhya Pradesh: 1800-2582-583 | Punjab, Haryana, Himachal Pradesh, J&K: 1800-1377-781
Maharashtra, Chhattisgarh, Goa: 1800-1024-212 | South India: 1800-1200-666 | East India: 1800-2121-666
| Rest of India: 1800-1020-666