
M3104-LVE - Sicherheitskamera AXIS - Kostenlose Bedienungsanleitung
Finden Sie kostenlos die Bedienungsanleitung des Geräts M3104-LVE AXIS als PDF.


Benutzerfragen zu M3104-LVE AXIS
0 Frage zu diesem Gerät. Beantworten Sie die, die Sie kennen, oder stellen Sie Ihre eigene.
Eine neue Frage zu diesem Gerät stellen
Laden Sie die Anleitung für Ihr Sicherheitskamera kostenlos im PDF-Format! Finden Sie Ihr Handbuch M3104-LVE - AXIS und nehmen Sie Ihr elektronisches Gerät wieder in die Hand. Auf dieser Seite sind alle Dokumente veröffentlicht, die für die Verwendung Ihres Geräts notwendig sind. M3104-LVE von der Marke AXIS.
BEDIENUNGSANLEITUNG M3104-LVE AXIS
AXISM3104-LVENetworkCamera
AboutthisDocument
Thismanualisintendedforadministratorsandusersof AXISM3104-LVENetworkCamera, andisapplicabletofirmware6.15 andlater.Itincludesinstructionsforusingandmanagingtheproduct onyournetwork.Previousexperienceofnetworkingwillbeofusewhen usingthisproduct.SomeknowledgeofUNIXorLinux-basedsystems mayalsobeusefulwhendevelopingshellscriptsandapplications.Later versionsoftthisdocumentwillbepostedatwww.axis.com.Seealsothe product'sonlinehelp,availablethroughtheweb-basedinterface.
LegalConsiderations
Videosurveillancecanberegulatedbylawsthatvaryfromcountryto country.Checkthelawsinyourlocalregionbeforeusingthisproduct forsurveillancepurposes.
Thisproductincludesone(1)H.264decoderlicense.Topurchase furtherlicenses,contactyourreseller.
Liability
Everycarehasbeentakeninthepreparationofthisdocument.Please informyourlocalAxisofficefanyinaccuraciesoromissions.Axis CommunicationsABcannotbeheldresponsibleforanytechnicalor typographicalerrorsandreservestherighttomakechangestothe productandmanualswithoutpriornotice.AxisCommunicationsAB makesnowarrantyofanykindwithregardtothematerialcontained withinthisdocument,including,butnotlimitedto,theimplied warrantiesofmerchantabilityandfitnessforaparticularpurpose.Axis CommunicationsABshallnotbeliablenorresponsibleforincidentalor consequentialdamagesinconnectionwiththefurnishing,performance oruseofthismaterial.Thisproductisonlytobeusedforitsintended purpose.
IntellectualPropertyRights
AxisABhasintellectualpropertyrightsrelatingtotechnologyembodied intheproductdescribedinthisdocument.Inparticular,andwithout limitation,theseintellectualpropertyrightsmayincludeoneormore ofthepatentslistedatwww.axis.com/patent.htmandoneormore additionalpatentsorpendingpatentapplicationsintheUSandother countries.
Thisproductcontainslicensedthird-partysoftware.Seethemenuitem "About"intheproduct'suserinterfaceformoreinformation.
ThisproductcontainssourcecodecopyrightAppleComputer, Inc.,underthetermsofApplePublicSourceLicense2.0(see www.opensource.apple.com/apsl).Thesourcecodeisavailablefrom https://developer.apple.com/bonjour/
EquipmentModifications
This equipment must be installed and used in strict accordance with the instructions given in the user documentation. This equipment contains no user-serviceable components. Unauthorized equipment changes or modifications will invalidate all applicable regulatory certifications and approvals.
TrademarkAcknowledgments
AXISCOMMUNICATIONS, AXIS, ETRAX, ARTPECandVAPIXare registeredtrademarksortrademarkapplicationsofAxisABinvarious jurisdictions. All other company names and products are trademarksor registeredtrademarksof their respective companies.
Apple,Boa,Apache,Bonjour,Ethernet,InternetExplorer,Linux, Microsoft,Mozilla,Real,SMPTE,QuickTime,UNIX,Windows,Windows VistaandWWWareregisteredtrademarksoftherespectiveholders. JavaandallJava-basedtrademarksandlogosaretrademarkors registeredtrademarksofOracleand/oritsaffiliates.UPnP ^TM is certificationmarkoftheUPnP ^TM ImplementersCorporation.
SD, SDHC and SDXC are trademarks or registered trademarks of SD-3C, LLC in the United States, other countries or both. Also, miniSD, microSD, miniSDHC, microSDHC, microSDXC are all trademarks or registered trademarks of SD-3C, LLC in the United States, other countries or both.
RegulatoryInformation
Europe
CE ThisproductcomplieswiththeapplicableCEmarkingdirectives andharmonizedstandards:
- Electromagnetic Compatibility (EMC) Directive 2014/30/EU. See Electromagnetic Compatibility (EMC) on page 2.
LowVoltage(LVD)Directive2014/35/EUSeeSafetyopaga
- Restrictions of Hazardous Substances (RoHS) Directive 2011/65/EU. See Disposal and Recycling on page 3. Acopy of the original declaration of conformity may be obtained from Axis Communications AB. See Contact Information on page 3.
Electromagnetic Compatibility(EMC)
This equipment has been designed and tested to fulfill applicable standards for:
- Radiofrequencyemissionwheninstalledaccordingtothe instructionsandusedinitsintendedenvironment.
- Immunitytoelectricalandelectromagneticphenomenawhen installedaccordingtotheinstructionsandusedinitsintended environment.
USA
This equipment has been tested using a shielded network cable (STP) and found to comply with the limits for a Class Digital device, pursuant to part 15 of the FCC Rules. These limits are designed to provide reasonable protection against harmful interference in residential installation. This equipment generates, uses and can radiate radio frequency energy and, if not installed and used in accordance with the instructions, may cause harmful interference or radio communications. However, there is no guarantee that interference will not occur in particular installation. If this equipment does cause harmful interference or radio television reception, which can be determined by turning the equipment off and on, the user is encouraged to try to correct the interference by one or more of the following measures:
•Reorientorrelocatethereceivingantenna.
- Increase these separation between the equipment and receiver.
- Connecttheequipmentintoanoutletonacircuitdifferentfrom thattowhichthereceiverisconnected.
- Consultthedealeroranexperiencedradio/TVtechnicianforhelp. Theproductshallbeconnectedusingashieldednetworkcable(STP) thatisproperlygrounded.
Canada
ThisdigitalapparatuscomplieswithCANICES-3(ClassB).Theproduct shallbeconnectedusingashieldednetworkcable(STP)thatis properlygrounded.Cetappareilnumériqueestconformeålanorme CANNMB-3(classB).Leproduitdoîtêtreconnectéal'aided'uncâble réseaublindé(STP)quiestcorrectementmisålaterre.
Europe
This digitalequipmentfulfillstherequirementsforRFemission according to the ClassBlimitofEN55032. The product shall be connected using ashieldednetworkcable(STP) that is properly grounded.
This product fulfillstherequirementsforimmunityaccording to EN61000-6-1 residential, commercialandlight-industrial environments.
Thisproductfulfillstherequirementsforimmunityaccordingto EN61000-6-2industrialenvironments.
Thisproductfulfillstherequirementsforimmunityaccordingto EN55024officeandcommercialenvironments.
Australia/NewZealand
This digitalequipmentfulfillstherequirementsforRFemission according to the ClassBlimitofAS/NZSCISPR22. The product shall be connected using ashieldednetworkcable(STP) that is properly grounded.
Japan
この装置は、クラスB情報技術装置です。この装置は、家庭環境で使用することを目的としていますが、この装置がラジオやテレビジョン受信機に近接して使用されると、受信障害を引き起こすことがあります。取扱説明書に従って正しい取り扱いをして下さい。本製品は、シールドネットワークケーブル(STP)を使用して接続してください。また適切に接地してください。
Korea
이기기는가정용(B급)전자파적합기기로서주로가정에서사용하는것을목적으로하며,모든지역에서사용할수있습니다.적절히접지된STP(shieldedtwistedpair)케이블을사용하여제품을연결하십시오.
Safety
ThisproductcomplieswithIEC/EN/UL60950-1and IEC/EN/UL60950-22,SafetyofInformationTechnology Equipment.Theproductshallbegroundedeitherthroughhashielded networkcable(STP)orotherappropriatemethod.
Thepowersupplyusedwiththisproductshallfulfilltherequirements forSafetyExtraLowVoltage(SELV)andLimitedPowerSource(LPS) accordingtoIEC/EN/UL62368-1orIEC/EN/UL60950-1.
Battery
TheAxisproductusesa3.0VBR1632lithiumbatteryasthepower supplyforitsinternalreal-timeclock(RTC).Undernormalconditions thisbatterywilllastforaminimumoffiveyears.
LowbatterypoweraffectstheoperationoftheRTC,causingittoresetateverypower-up.Whenthebatteryneedsreplacing,alogmessagewillappearintheproduct'sserverreport.Formoreinformationabouttheserverreport,seetheproduct'ssetuppagesorcontactAxissupport.
The battery should not bereplaced unless required, but if the battery does need replacing, contact Axis support at www.axis.com/techsupfor assistance.
Lithiumcoincell3.0Vbatteriescontain1,2-dimethoxyethane;ethylene glycoldimethylether(EGDME),CASno.110-71-4.
WARNING
- Riskofexplosionifthebatteryisincorrectlyreplaced.
- Replaceonlywithanidenticalbatteryorabatterywhichis recommendedbyAxis.
- Disposeofusedbatteriesaccordingtolocalregulationsor thebatterymanufacturer'sinstructions.
DisposalandRecycling
Whenthisproducthasreachedtheendofitsusefullife,disposeof itaccordingtolocallawsandregulations.Forinformationabout yournearestdesignatedcollectionpoint,contactyourlocalauthority responsibleforwastedisposal.Inaccordancewithlocallegislation, penaltiesmaybeapplicableforincorrectdisposalofthiswaste.
Europe

Thissymbolmeansthattheproductshallnotbedisposedof togetherwithhouseholdorcommercialwaste. Directive2012/19/EU onwasteelectricalandelectronicequipment(WEEE)isapplicablein theEuropeanUnionmemberstates.Topreventpotentialharmto humanhealthandtheenvironment,theproductmustbedisposed ofinanapprovedandenvironmentallysaferecyclingprocess.For informationauthorityournearestdesignatedcollectionpoint,contact yourlocalauthorityresponsibleforwastedisposal.Businessesshould contacttheproductsupplierforinformationabouthowtodispose ofthisproductcorrectly.
ThisproductcomplieswiththerequirementsofDirective2011/65/EUon therestrictionoftheuseofcertainhazardoussubstancesinelectrical andelectronicequipment(RoHS).
China

Thisproductcomplieswiththerequirementsofthelegislative dministrationontheControlofPollutionCausedbyElectronic mationProducts(ACPEIP).
ContactInformation
AxisCommunicationsAB
Emdalavägen14
22369Lund
Sweden
Tel:+46462721800
Fax:+4646136130
www.axis.com
Support
Shouldyourequireanytechnicalassistance,pleasecontactyourAxis reseller.Ifyourquestionscannotbeansweredimmediately,your resellerwillforwardyourqueriesthroughtheappropriatechannelsto ensurearapidresponse.Ifyouareconnectedtothelnternet,youcan:
- downloaduserdocumentationandsoftwareupdates
•findanswerstoresolvedproblemsintheFAQdatabase.Search byproduct, category, orphrase
•reportproblemstoAxissupportstaffbyloggingintoyourprivate supportarea
- chatwithAxissupportstaff
- visitAxisSupportatwww.axis.com/techsup/
LearnMore!
VisitAxislearningcenterwww.axis.com/academy/forusefultrainings, webinars,tutorialsandguides.
SafetyInformation....6
HazardLevels....6
OtherMessageLevels......6
HardwareOverview....7
ConnectorsandButtons....7
LEDIndicators......8
AccesstheProduct....9
AccessfromaBrowser....9
AccessfromtheInternet....9
SettheRootPassword....10
CameraOrientation....10
ConfigureCaptureMode....10
SetPowerLineFrequency....10
TheLiveViewPage....11
MediStreams
HowtoStreamH.264....13
MJPEG....13
AXISMediaControl(AMC)....13
AlternativeMethodsofAccessingtheVideoStream....14
SetuptheProduct
BasicSetup....16
Video....17
SetUpVideoStreams....17
StreamProfiles....19
ONVIFMediaProfiles....19
CameraSettings....19
ViewArea....21
Aboutoverlays....22
PrivacyMask 24
Configure the liveViewPage
DefaultViewerforBrowsers......25
ViewerSettings....25
UserDefinedLinks....26
LightButtons....26
PTZ(PanTiltZoom)......27
PresetPositions....27
GuardTour....27
Advanced....28
ControlQueue....29
Detectors
CameraTampering....30
Applications
ApplicationLicenses....31
UploadApplication....31
Application Considerations
AXIS/idedMotionDetection
Considerations....33
StartandStoptheApplication....33
ConfigureApplication....33
UsingtheApplicationinanActionRule....36
Events....38
SetUpActionRules....38
Add Recipients....40
CreateSchedules....42
SetUpRecurrences....42
Recordings....43
FindRecordings......43
PlayRecording....43
ExportVideoClip....44
ContinuousRecording....44
Languages....45
TableofContents
SystemOptions....46
Security......46
Date&Time....48
Network 49
Storage....54
Maintenance....56
Support......57
Advanced....57
ResettoFactoryDefaultSettings....58
Troubleshooting....59
ChecktheFirmware....59
UpgradetheFirmware....59
Symptoms, Possible Causes and Remedial Actions....59
TechnicalSpecifications....62
PerformanceConsiderations....64
SafetyInformation
HazardLevels
DANGER
Indicatesahazardoussituationwhich,ifnotavoided,willresultindeathorseriousinjury.
⚠ WARNING
Indicatesahazardoussituationwhich,ifnotavoided,couldresultindeathorseriousinjury.
CAUTION
Indicatesahazardoussituationwhich,ifnotavoided,couldresultinminorormoderateinjury.
NOTICE
Indicatesasituationwhich,ifnotavoided,couldresultindamagetoproperty.
OtherMessageLevels
Important
Indicatessignificantinformationwhichisessentialfortheproducttofunctioncorrectly.
Note
Indicatesusefulinformationwhichhelpsingettingthemostoutoftheproduct.
HardwareOverview
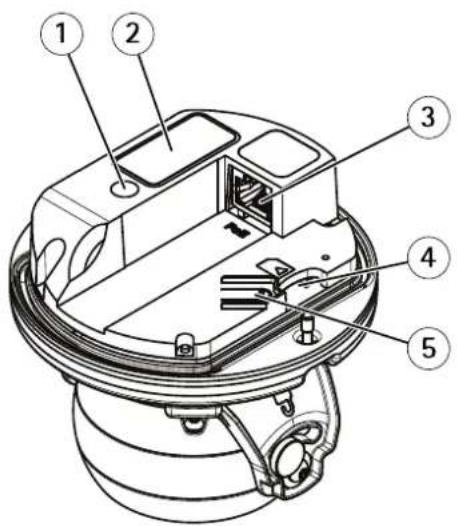
text_image
Technical diagram of a mechanical device with numbered components for identification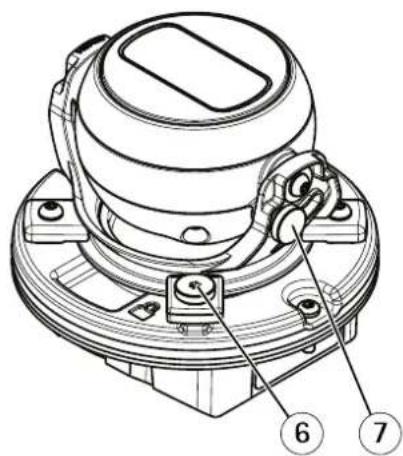
text_image
Technical diagram of a mechanical device with numbered parts labeled 6 and 71 StatusLEDindicator
2 Partnumber(P/N)&Serialnumber(S/N)
3 Networkconnector(PoE)
4 SDmemorycardslot
5 Controlbutton
6 Panlockscrew
7 Tiltlockscrew
ConnectorsandButtons
Fortechnicalspecifications,seepage62.
NetworkConnector
RJ45EthernetconnectorwithPoweroverEthernet(PoE).
NOTICE
Theproductshallbeconnectedusingashieldednetworkcable(STP).Allcablesconnectingtheproducttothenetworkshall beintendedfortheirspecificuse.Makesurethatthenetworkdevicesareinstalledinaccordancewiththemanufacturer's instructionsfoinformationaboutregulatoryrequirementsseeElectromagneticCompatibility(EMCbrpag2
SDcardslot
NOTICE
- Riskofdamage to SDcard. Donotuses harptools, metal objects are excessive force when inserting or removing the SDcard. Use your fingersto insert and remove the card.
- Riskofdatalossandcorruptedrecordings.DonotremovetheSDcardwhiletheproductisrunning.Disconnectpoweror unmounttheSDcardfromtheAxisproduct'swebpagesbeforeremoval.
ThisproductsupportsmicroSD/microSDHC/microSDXCcards(notincluded).
ForSDcardrecommendations,seewww.axis.com
ControlButton
Forlocationofthecontrolbutton,seeHardwareOverviewonpage7.
Thecontrolbuttonisusedfor:
- Resetting the product to factory default settings. See page 58.
Connecting an AXIS Vided Hosting System service Sep 50 to connect press and hold the button for about seconds until the Status LED flashes green.
Connecting to AXIS Internet Dynamic DNS Service Seepage 50 connectpress and hold button for about seconds.
LEDIndicators
Note
TheStatusLEDcarbeconfiguredflashfoidentifyinghunitGdSetupSystemOptionsMaintenance
| StatusLED | Indication |
| Unlit | Connectionandnormaloperation. |
| GreenShowssteadygreenfor10secondsfornormaloperationafterstartupcompleted. | |
| Amber | Steadyduringstartup.Flashesduringfirmwareupgrade. |
| Amber/RedFlashesamber/redifnetworkconnectionisunavailableorlost. | |
| UpReddefailure. | |
ashesredforfirmwareu
AccesstheProduct
ToinstalltheAxisproduct,seetheInstallationGuidesuppliedwiththeproduct.
Theproductcanbeusedwithmostoperatingsystemsandbrowsers.Werecommendthefollowingbrowsers:
- InternetExplorer ^® withWindows ^®
- Safari ^ withOSX ^
- Chrome TM orFirefox® withotheroperatingsystems.
ToviewstreamingvideoinInternetExplorer, allowinstallationofAXISMediaControl(AMC)whenprompted.
TheAxisproductincludesone(1)H.264decoderlicenseforviewingvideostreams. ThelicenseisautomaticallyinstalledwithAMC. Theadministratorcandisabletheinstallationofthedecoderstoppreventinstallationofunlicensedcopies.
Note
- QuickTime ^TM is also supported for viewing H.264 streams.
AccessfromaBrowser
1.Startawebbrowser.
2.EntertheIPaddressorhostnameoftheAxisproductinthebrowser'sLocation/Addressfield.
ToaccesstheproductfromaMaccomputer(OSX),gotoSafari,clickonBonjourandselecttheproductfromthe drop-downlist.
If you donot know the I paddress, use AXISIP Utility to locate the product on thenetwork. For information about how to discover and assign I paddress, the document Assign I P Address and Access the video Stream or Axis Support web at www.axis.com/techsup
Note
ToshowBonjourasabrowserbookmark, gotoSafari>Preferences.
- Enteryourusernameandpassword.Ifthisisthefirsttimetheproductisaccessed,therootpasswordmustfirstbe configured.Forinstructions,seeSettheRootPasswordonpage10.
- The product'sLiveViewpageopensinyourbrowser.
Note
The controls and layout of the liveView pagemay have been customized to meet specific installation requirements and user preferences. Consequently, some of the examples and functions featured her may differ from those displayed in your own liveView page.
Accessfromthelnternet
Onceconnected,theAxisproductisaccessibleonyourlocalnetwork(LAN).ToaccesstheproductfromtheInternetyoumust configureyournetworkroutertoallowincomingdatatrafficctotheproduct.Todothis,enabletheNAT-traversalfeature,which wilattemptautomaticallyconfiguretheroutetallowaccesstheproductThisenabledronSetupSystemOptions>Network>TCP/IPAdvanced.
FomoreinformationedNATraversa(portmappingforPv4orpage5SeAlsoAXISnterneDynamidDNServicat www.axiscam.net
ForTechnicalnotesonthisandothertopics,visittheAxisSupportwebatwww.axis.com/techsup
SettheRootPassword
Tacces the Axi product you must the password for the default administrator user of this sloner the Configure Root Passworddialog, which opens when the product is accessed for the first time.
Topreventnetworkeavesdropping,therootpasswordcanbesetviaanencryptedHTTPSconnection,whichrequiresanHTTPS certificate. HTTPS(HypertextTransferProtocoloverSSL)isaprotocolusedtoencrypttrafficbetweenwebbrowsersandservers.The HTTPscertificateensuresencryptedexchangeofinformation.SeeHTTPSonpage47.
The default administrator names are root permanent and cannot be deleted the password for roots, the product must be reset another default setting. See ResetFactorDefaultSettingspage 58.
TosetthepasswordviaastandardHTTPconnection,enteritdirectlyinthedialog.
TosetthepasswordviaanencryptedHTTPSconnection,followthesesteps:
- ClickUseHTTPS.
A temporary certificate(validforoneyear)iscreated,enabling encryptionofalltraffictoandfromtheproduct,andthe passwordcannowbesetsecurely.
2.Enterapasswordandthenre-enterittoconfirmthespelling.
3.ClickOK.Thepasswordhasnowbeenconfigured.
CameraOrientation
ThisettingsdefinedthfirstimethoproductsaccessedDependingprhowtheAxisproductinstalledselecteilingwall
Tochangethesesettings, the product must be restored to the original factory default settings. To restore restore the product, goto SetupSystemOptions MaintenanceProduct's webpages. For information about these and restored Maintenance page 56.

Camera Orientation
How is this camera mounted?


OK
This camera works differently depending on if it is wall mounted or ceiling mounted. Make sure to select the correct camera orientation before saving.
ConfigureCaptureMode
CapturemodedefinesthemaximumresolutionandmaximumframerateavailableintheAxisproduct.Thecapturemodesettingalso affectsthecamera'sangleofview.
Select the desired capture mode from the drop-down list and click OK.
See also Capture Mode on page 20.
SetPowerLineFrequency
PowelinfrequencysetfirstimtheAxiproductaccessedandonlychangedfromPlainConfigsepage58) orbyresettingtheproducttofactorydefault.
Selectthepowerlinefrequency(50Hzor60Hz)usedatthelocationoftheAxisproduct.Selectingthewrongfrequencymaycause imageflickeriftheproductisusedinfluorescentlightenvironments.
Whenusing50Hz, themaximumframerateislimitedto25fps.
Note
Powerlinefrequencyvariesdependingongeographicregion.TheAmericasusuallyuse60Hz,whereasmostotherpartsoftheworlduse50Hz.Localvariationscouldapply.Alwayscheckwiththelocalauthorities.
TheLiveViewPage
The controls and layout of the liveView pagemay have been customized to meet specific installation requirements and user preferences. Consequently, some of the examples and functions featured her may differ from those displayed in your own live view page. The following provides an overview of each available control.
ControlsontheLiveViewPage




Click the viewsize button to show the imageful size (righbutton) to scale down the image to fit the browser window (leftbutton).
ClicWDRortenableVDRintensbacklightconditionsClicWDRoffalisableVDRnow lightconditionsforoptimalexposure.
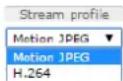
SelectstreamprofileoftheLiveViewpagefromtheStreamProfiledrop-downlistInformation abouthowtoconfigurestreamprofiles,see page 19.
Us the Manual Trigger button trigger action rule from the Live View page Information about how to configure and enable the button, see Manual Trigger on page 1.
ClickSnapshotsav snapshot of the video image this button primarily intended for when the AXISMediaControlview toolbar is not available. Enable this button fromLiveViewConfig> ActionButtons.
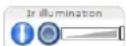
Activatorde-activatdRlluminationfromSetupVideoCameraSettingsEnablethisbuttonfromLiveViewConfig>ActionButtons. MovetheslidertoincreaseordecreasetheintensityoftheLEDs.
ManualTrigger
The ManualTriggerusedTriggeraction rule from the liveView page. The manual trigger carfo example used to validate actions during product installation and configuration.
Toconfigurethemanualtrigger:
1.GotoSetup>Events.
2.ClickAddtoaddanewactionrule.
BonthTriggedrop-downlistselectnpuSignal.
- From these second drop-down list, select Manual Trigger.
- Select the desired action and configure the other settings as required.
Formoreinformationaboutactionrules,seeEventsonpage38.
ToshowthemanualtriggerbuttonsintheLiveViewpage:
1.GotoSetup>LiveViewConfig.
UndeActionButtons;selectShowmanuatriggebutton.
AXISMediaControlviewertoolbar
TheAXISMediaControlviewetoolbarsavailableInterneExploreOnlySeeAXISMediaControl(AMC)brpageJomore information.Thetoolbardisplaysthefollowingbuttons:

ThePlaybuttonconnectstotheAxisproductandstartsplayingamediastream.

TheStopbuttonstopsthemediastream.

TheSnapshotbuttontakesasnapshotofthevideoimage.

ClickhViewFullScreenbuttonandhvideimagowilfilthentirescreenPresESQEscapeorthecomputer keyboardtocancelfullscreenview.

TheRecordbuttonisusedrecordthecurrentvidestreamonyoucomputerThelocationwhetherecordingssavedcarbspecifiedtheAMControlPaneEnablethisbuttonfromLiveViewConfigVieweSettings.
PTZControls
Note
These controls are available to fligitaPTZ enabled through selected view area page 2.

Click the Emulatjoystickmodbutton and click the image to move the camera view with the direction of the mousepointer.

Click the Centemode button and click the image to enter the camera view with a position.
Thecentermodebuttoncouldalsobeusedtozoominonaspecificarea.Clickintheimageanddragtodrawa rectanglesurroundingtheareatobemagnified.Tozoomout,rotatethemousewheel.
Toviewaspecificviewareaorpresetposition,selectitfromtheSourcelist.
ParandTilbarsUsdharrowstoparandiltheameravieworlicionpositionorthbatsteethcameraviewto thatposition.
Zoombar–Usethearrowstozoominandout,orclickonapositiononthebartozoomtothatposition.
The PTZ controls are disabled under PTZ Advanced Controlssee Control or page 28.
MediaStreams
TheAxisproductprovidesseveralvideostreamformats.Yourrequirementsandthepropertiesofyournetworkwilldeterminethetypeyouuse.
TheLiveViewpageintheproductprovidesaccesstoH.264andMotionJPEGvideostreams,andtothelistofavailablestream profiles.Otherapplicationsandclientscanaccessvideostreamsdirectly,withoutgoingviatheLiveViewpage.
HowtoStreamH.264
H.264can, without compromising image quality, reduce the size of a digital video file by more than 80% compared with the Motion JPEG format and as much as 50% more than the MPEG-4 standard. This means that much less network bandwidth and storage space are required for a video file. Or seen another way, much higher video quality can be achieved for a given bitrate.
Deciding which combination of protocols and method stoused depends on your viewing requirements, and on the properties of your network. The available options in AXIS Media Control are:
| UnicastRTP | Thisunicastmethod(RTPoverUDP)isused forliveunicastvideo,especiallywhenitis importanttohaveanup-to-datevideostream, evenifsomeframesaredropped. | Unicastingisusedforvideo-on-demand transmissionsothatthereisnovideotraffic onthenetworkuntilaclientconnectsand requeststhestream.Notethatthereareamaximumof20 simultaneousunicastconnections. |
| RTPoverRTSP | Thisunicastmethod(RTPtunneledoverRTSP) isusefulasitisrelativelysimpletoconfigure firewallstoallowRTSPtraffic. | |
| RTPoverRTSPoverHTTP | Thisunicastmethodcanbeusedtotraverse firewalls.Firewallsarecommonlyconfiguredto allowtheHTTPprotocol,thusallowingRTPto betunneled. | |
| MulticastRTP | Thismethod(RTPoverUDP)shouldbeusedforlivemulticastvideo.Thevideostreamisalways up-to-date,evenifsomeframesaredropped.Multicastingprovidesthemostefficientusageofbandwidthwhentherearelargenumbersof clientsviewingsimultaneously.Amulticastcannothowever,passanetworkrouterunlessthe routerisconfiguredtoallowthis.ItisnotpossibletomulticastovertheInternet,forexample.Notealsothatallmulticastviewerscountasoneunicastviewerinthemaximumtotalof20 simultaneousconnections. | |
AXISMediaControlnegotiateswiththeAxisproducttodeterminethetransportprotocoltouse.Theorderofpriority,listedintheAMCControlPanel,canbechangedandtheoptionsdisabled,tosuitspecificrequirements.
Note
H.264islicensedtechnology.TheAxisproductincludesoneH.264viewingclientlicense.Installingadditionalunlicensed copiesoftheclientisprohibited.Topurchaseadditionallicenses,contactyourAxisreseller.
MJPEG
This formatusesstandardJPEGstillimagesforthevideostream. These images are then displayed and updated at a ratesufficient to create stream that shows constantly updated motion.
TheMotionJPEGstreamusesconsiderableamountsofbandwidth,butprovidesexcellentimagequalityandaccesstoeveryimage containedinthestream.TherecommendedmethodofaccessingMotionJPEGlivevideofromtheAxisproductistousetheAXISMediaControlInInternetExplorerinWindows.
AXISMediaControl(AMC)
AXISMediaControl(AMC)inInternetExplorerinWindowsistherecommendedmethodofaccessinglivevideofromtheAxisproduct.
TheAMCControlPanelcanbeusedtoconfigurevariousvideosettings.PleaseeseetheAXISMediaControlUser'sManualformore information.
TheAMCControlPanelisautomaticallyinstalledonfirstuse,afterwhichitcanbeconfigured.OpentheAMCControlPanelfrom:
- WindowsControlPanel(fromtheStartscreenorStartmenu)
Alternatively right-click the video image Interne Explore and click Settings.
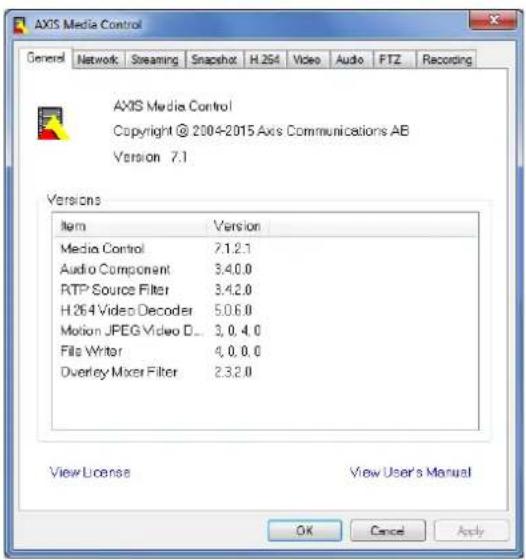
text_image
AXIS Media Control Copyright © 2004-2015 Axis Communications AB Version 7.1 Versions Item Version Media Control 7.1.2.1 Audio Component 3.4.0.0 RTP Source Filter 3.4.2.0 H.26.4 Video Decoder 5.0.6.0 Motion JPEG Video D... 3.0.4.0 File Writer 4.0.0.0 Overlay Mixer Filter 2.3.2.0 View License View User's Manual OK Cancel ApplyAlternativeMethodsofAccessingtheVideoStream
YoucanalsoaccessvideoandimagesfromtheAxisproductinthefollowingways:
MotiodPEGervepush(ifupported the client Chromo Firefoxfor example) This option maintains a proper HTTP connection to the browser and sends data as and when required, for as long as required.
StiJPEGImageinbrowserEntethepathhttp://
WindowMedPlayerThisrequiresAXISMediaControlandH.264lecodetobinstalledThefollowingpaths canbeused:
-UnicastviaRTP:axrtpu://<ip>/axis-media/media.amp
-UnicastviaRTSP:axrtsp://<ip>/axis-media/media.amp
-UnicastviaRTSP,tunneledviaHTTP:axrtsphttp://<ip>/axis-media/media.amp
-Multicast:axrtpm://<ip>/axis-media/media.amp
- QuickTime TM. The following pathscanbeused:
-rtsp://<ip>/axis-media/media.amp
-rtsp://<ip>/axis-media/media.3gp
Note
=IPaddress
•TheAxisproductsupportsQuickTime6.5.1andlater.- QuickTimemayaddlatencytothevideostream.
- It maybe possible to use other player's view the H.264 stream using the paths above, although Axis does not guarantee this.
SetUptheProduct
The Axproduct are configured by users with administrator operator rights to the product's setup pages, including the copyright-hand corner of the Live View page.
- Administratorshaveunrestrictedaccesstoallsettings.
Operator have restricted access settings used on page 46
Seealsotheonlinehelp

BasicSetup
BasicSetupprovidesshortcutstothesettingsthatshouldbemadebeforeusingtheAxisproduct:
1.Users.Seepage46.
2.TCP/IP.Seepage49.
3. Date&Time.Seepage48.
4.VideoStream.Seepage17.
TheBasicSetupmenucanbedisabledfromSystemOptions>Security>Users.
Video
ItispossibletoconfigurethefollowingvideofeaturesinyourAxisproduct:
•Videostream.See page 17.
- Streamprofiles.See page 19.
- Camerasettings.See page 19.
-Viewareas.Seepage21.
•Overlayimage.Seepage22.
- Privacymask.See page24.
SetUpVideoStreams
Toetuphproduct'sideestreamsgdVideoVidestream.
Thevideostreamsettingsaredividedintothefollowingtabs:
- Image.Seepage17.
•H.264.Seepage18. - Zipstream.Seepage18
- MJPEG.Seepage19.
PixelCounter
Thepixelcountershowsthenumberofpixelsinanareaoftheimage. Thepixelcounterisusefulinsituationswherethereis aspecificsizerequirement,forexampleinfacerecognition.
Thepixelcountercanbeused:
When setting a video stream setup up video streams or page 1 UndePreview clic Oper and selecth Show pixel counterption enable the rectangle l'them image Usch mous domov and size d rectangle pent the number pixelsirth Width and height fields and clic Apply.
- When accessing theLiveViewpageinInternetExplorerwithAXISMediaControl(AMC)inWindows.Right-clickinthe imageandselectPixelcounter.Usethemousetomoveandresizetherectangle.
Image
ThedefaultmagsettingscarbeconfiguredundeVideo>VideoStreamSelectdmagtab.
The followingsettingsareavailable:
- Resolution.Selectthedefaultresolution.
CompressionThe compression level affects the image quality bandwidth and file size of saved images that the compression, the higher the image quality with higher bandwidth requirements and larger filesizes. - Mirrorimage.lfrequired, theimagecanbemirrored.
- Rotateimage.lfrequired, theimagecanberotated.
Maximunframeate avoid bandwidth problems the frame at allowed each viewer and limited of fixed amount Alternatively the frame at car between which means the Axiproduct always deliver the highest framerate possible under the current conditions.
OverlayettingSeeAboutoverlaytextbrpag2.
ClickSavetoapplythenewsettings.
H.264
H.264,alsoknownasMPEG-4Part10/AVC,isavideocompressionstandardthatprovideshighqualityvideostreamsatlowbitrates. AnH.264videostreamconsistsofdifferenttypesofframessuchasl-framesandP-frames.Anl-frameisacompleteimagewhereas P-framesonlycontainthedifferencesfrompreviousframes.
The H.264streamsettings are configured from the VideoVideoStreampageSelectdH.264abThesettings defined this pagewillapplytoallH.264streamsthatdonotuseastreamprofile.
The GOFengththe number frames between two consecutive frames, increasing the GOFengthmay save considerably on bandwidth requirements in some cases, but may also have an adverse effect on image quality.
TheAxisproductsupportsthefollowingH.264profile(s):
BaselineTheBaseline profiles recommended for clients that don't support CABAentropy coding.
MainTheMairprofilprovideshighercompressionwithmaintainedvidequalitycomparedtheBaselineprofilbut requiresmoreprocessingpowertodecode.
ThebitatcarbetaVariablebitate(VBR)Maximunbitate(MBR)VBRadjustthebitataccordingtheimage complexity,usingupmorebandwidthforincreasedactivityintheimage,andlessforlowerimageactivity.Whentheactivity in thesceneincreases,thebitratewouldusuallyincreaseaswell.Ifthereisasurplusinbandwidth,thismaynotbeanissue and selectingvariablebitate(VBR)wilbescufficientButbandwidthlimited(recommendedcontrothbitatoselectingMaximunbitate(MBR)Whertheactivityrthecencreases)VBRadjustthebitataccordingthecomplexityusingup morebandwidthforincreasedactivityinthescene,andlessforlowersceneactivity.MBRallowsyoutosetatargetbitratethat limitsthebandwidthconsumption.
TheMBRtargetbitrateworksliketheceilingofatent.Itlimitsthebitrate,whilemaintainingsomeflexibility.Thebitrate maybounceupanddownwithinthesettargetbutwhenitnearsthesettargetvalue,thelimitationkicksin.However,because MBRwillalwaysprioritizeacontinuousvideostream,itallowstemporaryovershootsfromthetargetbitrate.Becausesettinga targetvaluepreventsthebitratefromincreasing,framerateandimagequalityareaffectednegatively.Topartlycompensatefor this,selectwhichvariableshallbeprioritized,framerateorimagequality.Notsettingaprioritymeansthatframerateand imagequalityareequallyaffected.
The current coordinate appearance table overlayUndeOverlaySettingsSelectInclude text and the modifier #binthefield.
Toapplythesettings,clickSave.
Axis'ZipstreamTechnology
Zipstreamisabitrate-reductiontechnologyoptimizedforvideosurveillance.ZipstreamreducestheaveragebitrateintheH.264 streambyremovingunnecessarydataandmakesitpossibletoallowhigherresolutions,reducestoragecostortokeeprecordingsforalongertime.Toreducethebitrate,Zipstreamreducesthenumberofbitsintheareasoftheimagethatarelessinterestingfroma videosurveillanceperspective,forexamplethebackground.Imagedetailsthatareimportantforforensicvideoanalysis,forexample facesandlicenseplates,arepreservedwithenoughnumberofbits.
TheseZipstreamstrengthoptionsareavailable:
-Off.Zipstreamdisabled.
LowesZipstreamstrengthLowbandwidthreductionNovisiblequalitydegradationmostscenes
MediumZipstreamstrengthMediumbandwidthreductionLimitedvisuaqualitydegradationimoprioritizedareasomescenes
HighesZipstreamstrengthHighbandwidthreductionVisiblequalitydegradationimoprioritizedareasmanyscenes
LowesZipstreamstrengththedefaultsettingoftheproductThisconfigurationisverysafeuseralapplicationswhilestill reducingthebitrate.
Forcloud-connectedcamerasorcamerasusingedgestoragethatneedtolimitthebitrateforincreasedstoragetimeitis recommendedselect the Highest Zipstream strength This settings vergood combine with motion detection triggering and variablebitrate(VBR) where thebitrate is allowed to adapt to changes in complexity in the scene.
Axis'ZipstreamTechnologyforH.264conformstotheH.264standardandiscompatiblewiththird-partyclientsandVMSsolutions thatdecodeH.264video.
ThebitratecontrollerbuiltintotheproductcanbecombinedwithZipstreamtoenforceamaximumbitrate(MBR)limit.Axis CommunicationsrecommendsusingVBRorMBRwitharatherhighbitratelimittoenablethefullpotentialofAxis'Zipstream Technology.
MJPEG
Sometimes the imagesize is large duolow light or complex scenery. Adjusting them a maximum framesize help to control the bandwidth and storage used by the Motion PEG video stream in these situations. Setting the framesize default setting provides consistently good image quality at the expense of increased bandwidth and storage usage in low light. Limiting the frame size optimizes bandwidth and storage usage, but may give poor image quality. Toprevent increased bandwidth and storage usage, them a maximum framesize should be set to an optimal value.
StreamProfiles
Astreamprofileisasetofpredefinedstreamsettingsincludingresolution,compression,framerateandoverlaysettings.Stream profilescanbeused:
- Whensettinguprecordingusingactionrules.SeeEventsonpage38.
- Whensettingupcontinuousrecording.SeeContinuousRecordingonpage44.
In the ViewpageselectstreamprofilefromtheStreamprofiledrop-downlist.
Forquicksetup, useoneofthepredefinedstreamprofiles. Each predefinedprofilehasadescriptivename, indicatingitspurpose. If required, thepredefinedstreamprofilescanbemodifiedandnewcustomizedstreamprofilescanbecreated.
To create new profile to modify existing profile to Setup Video StreamProfiles.
To select default stream profile for the live/view page and setup live/view config.
ONVIFMediaProfiles
AnONVIFmediaprofileconsistsofasetofconfigurationsthatcanbeusedtochangemediastreamsettings.ONVIFmediaprofiles canbesetthroughtheONVIFMediaProfileSettingspageandbeusedbyaclienttoconfiguremediastreamproperties.
The ONVIFmediaprofile page is all such pre-configure profiles. These profiles cannot be removed. Pre-configured media profiles have been included in the product for quick setup. It is also possible to configure new ONVIFmediaprofiles as per required specifications. To address ONVIFmediaprofile click Add and then the required information you can also modify remove profile from this page.
CameraSettings
The Video Camer Settings page provides access to advanced image settings for the Axis product.
CaptureMode
CapturemodedefinesthemaximumresolutionandmaximumframerateavailableintheAxisproduct.Acapturemodewithalarge maximumresolutionhasareducedmaximumframerateandviceversa.Thecapturemodesettingalsoaffectsthecamera'sangle of viewastheeffectivesizeoftheimagesensordiffersbetweenencapturemodes.
CapturemodesethfirstimethproductaccessedSelecthesiredcapturemodandlicIOK.
Important
Changingcapturemodewhentheproducthasbeenconfiguredisnotrecommendedasmostothersettingswillbeeitherremovedorreset.
Tochangecapturemode, followthesesteps:
- GotoSetup>Video>CameraSettings.
- Selectthenewcapturemode.
3.ClickSave.
ImageAppearance
TochangImageAppearancedothemenusundeSetupVideoCameraSettings.
Increasing the Colorevel Increase the colosaturation The value 0 gives maximum colosaturation and the value gives minimum colorsaturation.
Thémag Brightness arb adjusted the range 0–100 where higher value produces brighter image.
Increasing Sharpness can increase bandwidth usage, sharper image might increase image noises especially now light conditions. Alowersetting reduces image noise, but the whole image will appear less sharp.
The Contrastangestrelativdifferencbetrweerlightandarktcarbadjustedusingtheslider.
LocaContrast applies contrast specific area of image Use the lid to adjust contrast where high value produces animagewith high contrast between dark and light areas and dissuitable for scenes with wider dynamic range.
WhiteBalance
TochangethissettinggotoSetup>Video>CameraSettings
Whitebalanceisusedtomakecolorsintheimageappearthesameregardlessofthecolortemperatureofthelightsource.TheAxis productcanbesettoautomaticallyidentifythelightsourceandcompensateforitscolor.Alternatively,selectthetypeoflight sourcefromthedrop-downlist.Foradescriptionofeachavailablesetting,seetheonlinehelp
The white balance window enabled the Automation and Automatic outdoor options that appear in the White balance drop-down list. Select of the options from the drop-down list the white balance window properties Select Automatic use the default settings for the Automation and Automatic outdoor options (in the White balance drop-down list). Select Custom manually set a reference window for white balance in the view area.
ExposureSettings
Exposureistheamountoflightthecamera'ssensorcapturesforascene.Toomuchlightresultsinawashedoutimageandtoo littlelightresultsinadarkimage.
ExposurevalueUsedExposurevalueclipetadjustoveralbrightnessofhimage.
Exposurecontrol-Selectasuitableoptiontocontroleexposure.
Fomostcenesh Automation will provide best results. The shutterspeed automatically set to produce optimum image quality.
If the mageflicker that can be caused by fluorescent samples, the light sources to reduce flicker in the images, select the Flicker option that matches the power line frequency.
Video
TheHoldcurrentoptionlocksthecurrentexposuresettings.
MaxexposureShutterspeedalscalledexposuretimestandforthengthoftimthecamershutterspenthereby exposingthecamerasensortolight.Ifshutterspeedisfastitcanfreezeactioneffectively.Ifshutterspeedisslow,itcancause movingobjectstoappearblurred.Decreasingtheexposuretimewillreducemotionblur.
Exposure zones This setting determines which part of the images used calculate the exposure from the situations that Auto setting can be used.
YoucanselectapredefinedareabydefiningIncludeandExcludewindowswithintheimage.Excludewindowsexcludeareaasthatare toobrightordark,andIncludewindowsincludeareasinthescenethathavebetterlightingwhichwillcontributetotheexposuredata. Theremustbeatleastonelcludewindow.TherecanbeatotaloftenIncludeandExcludewindowstotailortheexposurezone. NotethatanExcludewindowiseffectiveonlywhenplacedinsideancludewindow.
Tip: IfanareaisextremelybrightdrawanIncludewindowtocoverthewholeareaanddefineExcludewindowswithinitto blockoutthebrightareas.
Shutter&Gain
NormalLightUseShelidetcethePrioritybetweenLovmotionbluandLownoiseWhenprioritizingownois(slider allthewaytotheleft)theAxisproductwillautomaticallydecreaseshutterspeedasbrightnessdecreases.Whentheshutter speedeaches/3TheAxisproductwillincreasingauntithesetnaximungainfonormalightsreachedSelecthMax gainvalufronthdrop-downlistThisdefinesheupperlimifogainthecontextbnormalightMaxfasthuttersets shutterspeedlimitinnormallightconditions.Dependingonascenario,theshutterspeedlimitmayneedtobedefined.Thiss donthroughSystemOptionsAdvancedPlainConfig.
LowLightUstheclidetsethePrioritybetweenLowmotionbluandwnoiseWhenprioritizingowmotionblu(slider allthewaytotheright)thecamerawillautomaticallyincreasegainasbrightnessdecreases.Whenthegainreachesthet maximumgainforlowlight,thecamerawilldecreaseshutterspeeduntilthesetmaximumshutterforlowlightisreached. Thisisthedefaultprioritysettingforlowlight.
Day/Night
TheIRcutfilterpreventsinfrared(IR)lightfromreachingtheimagesensor.Inpoorlightingconditions,forexampleatnight,orwhenusingarexternalRampsetdIRcutfilterOffThisincreasedightsensitivityandallowtheproducto"seeInfraredightTheimageisshowninblackandwhitewhentheIRcutfilterisoff.
If using automatic exposure control, the Rufilter to Auto automatically switch between Orand Off according to the lighting conditions.
The Day/Night shift event helps to determine whether the camera will shift from day to night mode. Normally the camera automatically changes from day to night when very dark level 00th slider setting Day/Night shift events lower value, the camera will change on night mode earlier.
Built-inIRIlluminationsLEDs
TheIRilluminationcanbeactivatedorde-activated,anditsintensitycanbeincreasedordecreasedbymovingtheslider,from theproduct'sLiveViewpage.
OthesettingscanbedefinedronSetupVideoCameraSettings.
De-select the EnabldRllumination option to disable Rllumination altogether, you disable the Synchronized Illumination with day/nightoption, I Illumination will not be synchronized with day/night changes.
ViewArea
AivewareascroppefarofthfulviewEachviewarestreatedawideesourcerLiveViewandhastownvideostreamandPTZsettings.
When setting up avieware aitis recommended that the videostream resolution is the same size as smaller than the view area size. Setting the videostream resolution larger than the view area size implies digitally scaled up video aftersensor capture, requiring more bandwidth without adding image information.
TenablegedVideoCameraSettingsandelecEnablViewAreas.
Toaddanewviewarea:
- GotoVideo>ViewArea.
2.ClickAdd.
The new iew are appears under Selected view area Ent endscriptiven a name the Nam field.
SelectAndAspectandVideestreamresolution.
5.Anewviewareacoversthewholeimage.Usethemousetomoveandresizetheviewarea.
- SelectEnablePTZtoenabledigitalPTZfortheviewarea.
7.ClickSavetosavethesettings.
TomodifyviewareaselecttheviewarearthestandmodifythettingsasequiredClickSave.
Toremoveaviewarea,selecttheviewareaandclickRemove.
Note
ThePTZfunctionalityisusefulduringinstallationoftheAxisproduct.Useaviewareatocropoutaspecificpartofthefullview.
Aboutoverlays
Overlaysaresuperimposedoverthevideostream.Theyareusedtoprovideextrainformationduringrecordings,suchasatimestamp,orduringproductinstallationandconfiguration.
Aboutoverlaytext
Anoverlaytextcandisplaythecurrentdateandtime,oratextstring.Whenusingatextstring,so-calledmodifierscanbeusedto displayinformationsuchasthecurrentbitrateorthecurrentframerate.
Italspossible displaytextwhenactionrulestriggeredsedHowtincludeoverlayextractionrulepage22.
Howtoincludeoverlaytext
GoVideoVideStreamandelectdImageab.
2includatandimeselectncludatandncludeime.
TincludetextstringselectIncludetextandentethextrthfieldModifiersarbusedseeFileNamingt
Date/TimeFormatsintheonlinehelp

- Selectsize, color, and placement of the text string.
5.ClickSave.
To modify the date and time format to SystemOptionsDateTimeSeeDateTimepage48.
Howtoincludeoverlaytextinanactionrule
Note
Todisplayoverlaytextinmultipleviewareas, overlaytextmustbeenabledlineachviewarea.
GoVideoVideStreamandelectdImageab.
UndeOverlapSettingsselectncludtext.
Entethemodifi# DWherthrulestriggered# Displacedbythetxspecifiedrthactionrule.
Additional text in this field will be displayed as soon when the action rule is not active.
@ddEventsActionRulesandcreateyouactionrule.
EonthActionsistselectOverlayText.
6.EnterthetexttodisplayintheTextField.
Specify the Duration The text bar displayed while the rule active for fixed number seconds.
Aboutoverlayimages
Anoverlayimageisastaticimagesuperimposedoverthevideostream.Theimage,forexampleacompanylogo,isfirstuploadedto theAxisproductandthenusedtoprovideextrainformationortomaskapartoftheimage.
Imagespecifications:
- The uploadedimages should be a Windows 24-bit BMP image with maximum 250 colors.
- Theimagewidthandheight,inpixels,mustbeexactlydivisiblebyfour.
- The image cannot be larger than the maximum image resolution.
- If combining text and image overlays, take into consideration that the text overlay occupies 16 or 32 pixels in height (depending on the resolution) and has the same width the video image.
Sinceitisstatic, the position and size of an overlay image will remain the same regardless of resolution and span, tiltor zoom movements.
TalwayscoverselectefarbfthemonitoredareauseprivacymaskSeePrivacyMaskpage24.
Howtuploadanoverlayimage
- GotoVideo>OverlayImage.
2.ClickBrowseandbrowsetothefile.
3.ClickUpload. - The Transparency Settings page is now displayed:
TomakacolorithoverlaymagtransparentselectUsertransparencyandentethRGBhexadecimalvalue forthecolor.Example:Tomakewhitetransparent,enterFFFFFF.
Formoreexamplesofhexadecimalvalues,seetheonlinehelp

TscaltheimageautomaticallyselectScalewithresolutionThimagwillscaledlowrtothe resolutionusedbytheAxisproduct.
5.ClickSave.
Howtoincludeanoverlayimage
- GotoVideo>OverlayImage.
SelecthimagctousfromthUsoverlaymageistandliclSave.
GoVideoVideStreamandelecthImagtab.
UndeOverlapSettingsselectinclude overlaymagath coordinates.
To controthe image 'positionentethor horizontal and vertical coordinate The = and' = positions the topleft corner. If a part of the image is positioned outside the video image, the overlay image will be removed so that the whole image is visible.
6.ClickSave.
PrivacyMask
Aprivacymaskisauser-definedareathatpreventusersfromviewingpartsofthemonitoredarea.Privacymasksappearasblocks ofsolidcolorandareappliedonthevideostream.PrivacymaskscannotbebypassedusingtheVAPIX®applicationprogramming interface(API).
The PrivacyMaskList(VideoPrivacyMask) shows the mask that are currently configured in the Axiproduct and indicates if they are enabled.
Youcanaddanewmask,re-sizethemaskwiththemouse,chooseacolorforthemask,andgivethemaskaname.
Formoreinformation,seetheonlinehelp

Important
Adding many privacy masks may affect the product's performance.
ConfiguretheLiveViewPage
YoucancustomizetheLiveViewpageandalterittosuityourrequirements.ItispossibletedefinethefollowingfeaturesoftheLiveViewpage.
- StreamProfile.Seepage 19.
- DefaultViewerforBrowser.Seepage25.
-ViewerSettings.Seepage25.
ActionButtonsThesearchbuttonsdescribedControlsorthedLiveViewPage1page1.
-UserDefinedLinks.Seepage26.
DefaultViewerforBrowsers
FromLiveViewConfigDefaultVieweselecthdefaultmethodofviewingideimagesyoubrowserTheproductattempts toshowthevideoimagesintheselectedvideoformatandviewer.Ifthisisnotpossible,theproductoverridesthesettingsand selectsthebestavailablecombination.
| BroDesertification | ||
| WindowsInternetExplorer | AMC | RecommendedviewerinInternetExplorer(H.264/MotionJPEG). |
| QuickTime | H.264. | |
| StDisplaystillimagesonly.ClicktheRefreshbuttoninyourbrosertoviewa newimage. | ||
| Otherbrowsers | ServerPush | Recommendedviewerforotherbrowsers(MotionJPEG). |
| QuickTime | H.264. | |
| StDisplaystillimagesonly.ClicktheRefreshbuttoninyourbrosertoviewa newimage. | ||
Formoreinformation,pleaseetheonlinehelp

ViewerSettings
Toconfigureoptionsfortheviewer, gotoLiveViewConfig>ViewerSettings.
SelectShowewetoolbata display the AXISMediaControl(AMC)theQuickTimeviewetoolbaundethevideo imageinyourbrowser.
H.264lecodeinstallationThe administratorandisableinstallationofH.264lecodeincludedwithAXISMedia Control.Thisisusedtopreventinstallationofunlicensedcopies.Furtherdecoderlicensescanbepurchasedfromyour Axisreseller.
SelectShowcrosshainPTJoystickmode enable crosshat will indicate the center of the image PTJoystick mode.
SelectUsePTZystickmodasdefaultenablejoystickmodeThemodearbechangedemporarilyfromthe PTZcontrolpanel.
SelectEnablerecordingbuttonEnablerecordingfromtheLiveViewpageThisbuttonisavailablewhenusingtheAMCviewer.TherecordingsaresavedtothelocationspecifiedintheAMCControlPanel.SeeAXISMediaControl(AMC)onpage13.
UserDefinedLinks
Todisplayuser-definedinkintheLiveViewpageselectShowcustomlinkoptiongivthdinknamandherentethURL tolinkto.Whendefiningaweblinkdonotremovethehttp://'fromtheURLaddress.Customlinkscanbeusedtorunscriptsor activateexternaldevicesconnectedtotheproduct,ortheycanlinktoawebpage.Customlinksdefinedascgilinkswillrunthe scriptinthebackground,inahiddenframe.Definingthelinkasaweblinkwillopenthelinkinanewwindow.
LightButtons
The built-in light on the AXIS product can be controlled directly from theLiveView page by enabling the display of light buttons. Display the light button in the LiveView Page select the type of control from the drop-down list under LiveView Config Light Buttons:
PulsactivateshighfordefineperiodofimeThepulsimcarbsetshorted/10SecondandSongs 60seconds
•Active/Inactive displaystwobuttons(on/off).
Slidercontrolthebrightnessofbuilt-inightslideeftalmandslideightddbrighten.
PTZ(PanTiltZoom)
ThePTZmenuisavailableifdigitalPTZ(pan,tiltandzoom)isenabledintheselectedviewarea.Formoreinformationonviewareas, seeViewAreaonpage21.
PresetPositions
Apresetpositionisasavedviewthatcanbeusedtoquicklysteerthecameratoaspecificposition.Apresetpositionconsistsof thefollowingvalues:
•Panandtiltpositions
- Zoomposition
Eachviewareahasitsownpresetpositions.
AccessthePresetPositions
Presetpositionscanbeaccessedinseveralways:
- ByselectingthepresetfromtheSourcedrop-downlistintheLiveViewPage.
- Whensettingupactionrules.Seepage38.
- Whensettingupguardtours.See page27.
AddaPresetPosition
- GotoPTZ>PresetPositions.
Click them agous the control to teeth camera view the desire position see Preset Positions.
3.EnteradescriptivenameintheCurrentpositionfield.
4.ClickAddtosavethepresetposition.
To include these positionamaint overlaytextcode, select include overlayext and enteth modified. The field form or information about modifiers see FileNamingDate/TimeFormatsthonline help
?
SettheHomePosition
The entire view are treated with the composition which readily accessible by clicking the HomeButton or the live view page and in the Preset Position setup window.
TheproductcanbeconfiguredtoreturntotheHomepositionwhenthePTZfunctionalityhasbeeninactiveforaspecifiedlengthoftimeEntethdengthofimintheturrthomeftefieldandlicSavSethdimderdpreventheproducfromautomaticallyreturningtotheHomeposition.
GuardTour
Aguardtourdisplaysthevideostreamfromdifferentpresetpositions,one-by-one,inapredeterminedorderoratrandomandforconfigurabletimeperiods.Theenabledguardtourwillkeeprunningaftertheuserhasloggedofforclosedthebrowser.
Toaddaguardtour:
GdPTZGuardToundclicAdd.
2.Enteradescriptivename.
-
Specifythepauselengthbetweenruns.
-
SelectanavailablepresetpositionandclickApply.
-
Specify theViewTimeinsecondsorminutes.
Specify the View Order Select the Random View Option.
7.ClickSave.
TomodifyremoveguardoursgdoPTZGuardTourselectheguardourithGuardTouListandlicModify/Remove.
Note
ForproductsthatsupportLimitedGuardTour,theproducthasafixedminimumviewtime
Formoreinformationseetheonlinehelp

TourRecording
Theguardtourfunctioninthisproductincludestourrecording,whichallowsrecordingofacustomtourusinganinputdevicesuchasajoystick,mouse,keyboardorthroughtheVAPIX®ApplicationProgrammingInterface(API).ArecordedtourisareplayofarecordedsequenceofPan/Tilt/Zoommovements,includingtheirvariablespeedsandlengths.
GdPTZGuardTouandclicAdd.
SelectCreatarecordouandlicIOK.
3.Enteradescriptivename.
- Specify the pause length between runs.
5.Click

tostartrecordingthePan/Tilt/Zoommovements.
- Whensatisfied, click

7.ClickOK.
Note
Only then a name of the recorded tour and pause between run scan bemodified. Starting an new recording will over writ the existing guard tour.
TherecordedtourcanbeactivatedfromtheLiveViewandGuardTourpagesorthroughevents.Formoreinformationseethe onlinehelp ②.
Advanced
Controls
AdvancedPTZsettingscanbeconfiguredunderPTZ>Advanced>Controls.
The PaneShortcutCommandButtonisshowtheuser-definedbuttonthataraccessedfromtheLiveViewpage'Ctrl panel. These buttons are used to provide direct access command issued using the APIX® application programming interface. ClickAddtoaddanewshortcutcommandbutton.
The following PTZ controls are enabled by default:
•Pancontrol
- Tiltcontrol
- Zoomcontrol
Tolisable specific controls deselect options under Enable/Disable controls.
Ifusing multiple view areas, deselecting a control will only disable the control in these selected view area.
Note
DisablingPTZcontrolswillnotaffectpresetpositions. Forexample, ifthetiltcontrolisdisabled, theproductcanstillmoveto presetpositionsthatrequireatiltmovement.
ControlQueue
Note
- The administratorcanenableanddisablePTZcontrolsforselectedusers.
- Toidentifydifferentusersintheviewergroup,cookiesmustbeenabledontheclient.
The ControqueupoltimeismeasuredsecondsEomoreinformationsethonlinlhelp

The administrator setup que ufo PTZ controller from PTZ Control Queue Once set up the PTZ Control Queue buttons appear in theLiveViewpageofferingoneviewerexclusivecontrolforalimitedperiodoftime. Other users will be placedinqueue.
Ausewhbelongsagroupsed/userpage46)withnighePTZpriorityandbeforetheuserirthequeueandake controloftheproduct.Theorderofpriorityisasfollows:
Administrator-AdministratotakesvePTZcontrolegardless of who'sfirstqueue. The administrator wilbe removedfromthequeue60secondsafterthelastPTZcontrolcommand.
Event-TheAxiproductarbeconfigured to d'opresepositionwhertriggered byalarm(seeEventsorpage38). Theeventwillimmediatelybeplacedfirstinthequeueexceptwhenanadministratorisincontrol.
- Operator—Sameas administrator but with lower priority
GuardTour-Aguardou(sepage27)hasPTZontroforindefinitoperiodfimeldmayoverriddenbyan operator,eventoradministrator.Theguardtourwillresumewhenhigherprioritygroupsleavethequeue.
Viewer-MultipleviewersmustwaifotheiturnTheviewhas6SecondPTZontrobeforecontrolpassed ontothenextviewerinqueue.
Detectors
CameraTampering
CameraTamperingcangenerateanalarmwheneverthecameraisrepositioned,orwhenthelensiscovered,spray-paintedorseverely defocused.Tosendanalarm,forexampleanemail,anactionrulemustbesetup.
Toconfigure tampering detection:
- GotoDetectors > CameraTampering.
SethMinimundurationthattheimthatmustlapsbeforealarmigeneratedincreaseimdprevent falsealarmsforknownconditionsthataffecttheimage.
Select Alarmfodarkimagesfinalarmshouldbegeneratedfightaredimmedturnedoffpithdenisprayed, covered,orrenderedseverelyoutoffocus.
4.ClickSave.
Toconfiguretheproducttosendanalarmwhentamperingoccurs:
- GotoEvents>ActionRules.
2.ClickAddtosetupanewactionrule.
- EnteraNamefortheactionrule.
UndeConditionselecDetectorsfromthTriggerist.
-
SelectTamperingfromthelistofdetectors.
-
Optionally, select as schedule and set additional conditions.
SelectactionTo sendaremailselectSendNotificationandselectRecipientfromtheDisbDefinedrecipients.
Note
The Which Executive Option Unde Duration cannot be used with cameramperings since camerampering does not have duration and onceithasbeentriggereditwillnotautomaticallyreturntoitsuntriggeredstate.
Formoreinformationonactionsrules,seeEventsonpage38.
Applications
AXISCameraApplicationPlatform(ACAP)isanopenplatformthatenablesthirdpartiestodevelopanalyticsandotherapplications forAxiproductsFoinformationaboutavailableapplicationsdownloadstrialsandicensesgovwww.axis.com/applications
Note
The application AXIS/ided Motion Detection is included with this product. See AXIS/ided Motion Detection.
- Several applications can run at the same time but some applications might not be compatible with each other. Certain combination of applications might require to much processing power or memory resources when run in parallel. Verify that the applications work together before deployment.
ApplicationLicenses
Someapplicationsneedalicensetorun.Licensescanbeinstalledintwoways:
•Automaticinstallation—requiresaccesstothelnternet
- Manualinstallation—obtainthelicensekeyfromtheapplicationvendoranduploadthekeytotheAxisproduct
Torequestalicense, theAxisproductserialnumber(S/N) is required. The serial number can be found on the product label and under SystemOptions > Support > SystemOverview.
UploadApplication
Touploadandstartanapplication:
- GotoSetup>Applications.
2ndeUploadApplicationclickBrowseLocatchapplicationfileandclickUploadPackage.
- Install the license (if applicable). For instructions, seethedocumentation provided by the application vendor.
Start the applicationGd page Applications select the application in the disf installed applications and click Start.
- Configure the application. For instructions, seethedocumentation provided by the application vendor.
Note
- Applicationscanbeuploadedbyproductadministrators.
- ApplicationsandlicensescanbeinstalledonmultipleproductsatthesametimeusingAXISCameraManagement,version 3.10andlater.
To generate log file for the application to Application Select the application and click Log.
ApplicationConsiderations
Ifanapplicationisupgraded, applicationsettings, including the license, will be removed. The license must be installed and the application reconfigured.
IftheAxisproduct'sfirmwareisupgraded,uploadedapplicationsandtheirsettingswillremainunchanged,althoughthisisnot guaranteedbyAxisCommunications.Notethatheapplicationmustbesupportedbythenewfirmware.Forinformationabout firmwareupgrades,seeUpgradetheFirmwareonpage59.
If the Axis product is restarted, running applications will restart automatically.
If the Axis product is restored, uploaded applications remain unchanged but must be restarted. Tostart the application, goto Setup Application Select the application in the dis installed applications and click Star Information about restoring the Axis product, see Maintenance on page 56.
If theAxisproductisresettofactorydefault, uploadedapplicationsandtheirsettingsareremoved.Forinformationaboutfactory default, see ResettoFactoryDefaultSettingsonpage58.
AXISVideoMotionDetection
AXISVideoMotionDetectionisanapplicationthatdetectsmovingobjectsinthecamera'sfieldofview.Whenamovingobject isdetected,AXISVideoMotionDetectionssendsanalarmthatcanbeusedbytheAxisproductorbythird-partysoftwaretoforexample,recordvideoorsendanotification.
AXIS/ided MotionDetection included with the Axis product and available under SetupApplications. Use AXIS/ideo MotionDetection, the application must first best started. To avoid detecting unwanted objects, the applications should be configured. During configuration, visual confirmation can be used to help understand the effect of the different filters. When visual confirmation is enabled, red polygonsshow which objectsthe application detects and green polygonsshow which objectsthe application ignores.
Considerations
BeforeusingAXISVideoMotionDetection3,takethefollowingintoconsideration:
- Smallanddistantobjectsmightnotbedetected.
- Detection accuracy may be affected by weather conditions such as heavy rainorsnow.
- MakesurethatthelightingconditionsarewithintheAxisproduct'sspecification.Addadditionallightingifneeded.
- Makesurethatthecameraisnotsubjecttoexcessivevibrations.Vibrationsmightcausefalsedetections.
StartandStoptheApplication
TstarthapplicationselectrthInstalledApplicationsisbrtheApplicationspagandclickStart.
Tostoptheapplication,selectitinthelistandclickStop.
ConfigureApplication
The application is available from SetupApplicationsMotionDetectionGoSettingsandherclickAXIS AXIS AXIS Video Motion Motion Detection Settings/scopingtheapplication'swebpage.
ToconfigureAXISVideoMotionDetection3,followthesesteps:
Modify the size of position of include area This there are in which moving objects will be detected. See include Area on page 33.
Optionally added more exclud areas Objects are excluded before ignored See Exclude Are on page 34.
3.ClickSavetoapplythechanges.
Use visual confirmation to verify the settings. See Visual Confirmation on page 84.
Ifo many unwanted objects detected enabl and configure onomore of the ignore filter Sedignore Filters onpage35.
After modifying setting click Save to apply the changes The video stream will be restarted and may take a few seconds before the change is applied.
IncludeArea
Theincludeareaistheareainwhichmovingobjectswillbedetected.Objectsmovingoutsidetheincludeareawillbeignored. Theobjectwillbedetectedalsoifonlyapartoftheobjectisinsidetheincludearea.
Note
Tomodifytheincludearea,InternetExplorerandAXISMediaControl(AMC)mustbeused.
Thedefaultincludeareaisasquarethatcoversthewholeimage.Clickontheicontohighlighthearea.
Usethemousetoreshapeandresizetheareasothatitonlycoversthepartoftheimageinwhichmovingobjectsshouldbedetected. Thedefaultsquarecanbechangedtoapolygonwithupto20points(corners).
- Toaddanewpoint, clickontheincludeareaborder.Dragthepointtothedesiredposition.
- Toremoveapoint, right-clickonthepoint.
- Tomoveapoint, dragthepointtothenewposition.
- Tomovetheentireincludearea, placethemousepointerinsidethearea. Whenthepointerbecomesacross, dragthe areatothenewposition.
- Toselecttheincludearea,clickontheborder.
Toresettheincludeareatoitsdefaultsize,clickReset.
ExcludeArea
Anexcludeareaisanareainwhichmovingobjectswillbeignored.Useexcludeareasifthereareareasinsidetheincludearea thattriggeralotofunwanteddetectedobjects.Upto10excludeareascanbeused.
Note
Toaddandmodifyexcludeareas,InternetExplorerandAXISMediaControl(AMC)mustbeused.
To address excluding a click Add default exclude a rectangle placed in the center of the image. The theme to remove, reshape and resize the areas so that it covers the desired part of the image. The defaults square can be changed to a polygon with up to 20 points (corners).
- Tomovetheexcludearea, placethemousepointerinsidethearea. When the pointer becomes across, drag the area to thenew position.
- Toaddanewpoint, clickontheexcludeareaborder.Dragthepointtothedesiredposition.
- Toremoveapoint, right-clickonthepoint.
- Tomoveapoint, dragthepointtothenewposition.
- Toselectanexcludearea,clickontheborder.
Toremoveanexcludearea,selecttheareaandthenclickRemove.
Tohighlighttheexcludeareas,clickonthe

icon.
VisualConfirmation
Visualconfirmationisusedtovalidatethatthesettingsarecorrect,thatis,thatallobjectsthatshouldbedetectedaredetected.
Note
Tousevisualconfirmation, Internet Explorer and AXIS Media Control (AMC) must be used.
When visual confirmation is enabled, all moving objects found by the application will be circled and followed by polygons. A red polygon indicates that the object is found and detected as a moving object. Agreen polygon indicates that the object is found but is ignored because it is not in the include area or because of one of the ignore filters.
Toenablevisualconfirmation:
- Select the Enable visual confirmation option.
2.ClickSave.
Note
- Visualconfirmationisdisabledafter15minutes.
After modifying setting click Save apply the change The video stream will be restarted and may take few seconds before the change is applied.
- Enablingvisualconfirmationmayintroducevideolatency.
IgnoreFilters
IfAXISVideoMotionDetection3detectstoomanyunwantedobjects,startbymodifyingtheincludeandexcludeareas.Ifstilltoo manyobjectssaredetected,useoneormoreoftheignorefilters.
Supportedignorefilters:
- Swayingobjects—Usedtoignoreobjectsthatonlymoveashortdistance
- Short-livedobjects—Usedtoignoreobjectsthatonlyappearintheimageforashortperiodoftime
- Smallobjects—Usedtoignoresmallobjects
Ignorefiltersareappliedtoallmovingobjectsfoundbytheapplicationandshouldbeconfiguredwithcaretoensurethatno importantobjectsareignored.
Onlyuseignorefiltersifneededanduseasfewfiltersaspossible. Enableandconfigureonefilteratatimeandusevisualconfirmation toverifythesettingsbeforeenablinganotherfilterWhenconfiguringfilterstartwithsmallfiltersizeclicSavendusevisual confirmationtoverifythesettings.lfrequired,increasethefiltersizeinsmallstepsuntilthenumberofunwantedobjectsisreduced.
SwayingObjectIgnoreFilter
Theswayingobjectfilterisusedtoavoiddetectingobjectsthatonlymoveashortdistance,forexamplemovingtrees,flagsandtheir shadows.Usethefilterifsuchobjectscausealotoffalsedetections.Iftheswayingobjectsinthescenearelarge,forexamplelarge pondsorlargetrees,useexcludeareasinsteadofthefilter.Thefilterwillbeappliedtoallmovingobjectsinsceneand,ifsettoavaluetoolarge,importantobjectsmightnotbedetected.
When the waying object filter is enabled and the application finds a moving object, the object will not be reported as detected (red polygon in visual confirmation) until the travelled distance larger than the set filtersize. The alarms sent by the application will be sent when the object is detected. If the alarm is used to start are cording, configure the pre-trigger times that there cording also include the time the object moved in the scene before being detected.
Toenablethefilter:
- Select the Swaying objectsoption.
2.Clickonthe icontoshowthefiltersizeintheimage. - Usethemousetoadjustthefiltersize.Startwithasmallsize.Objectsmovingadistanceshorterthanthedistancefrom thecenterofthecrosstooneofthearrowheadswillbeignored.Thefiltercanbemovedtothelocationofaswaying objecttomakeiteasiertoadjustthesize.Notethatthefilterwillbeappliedtoallobjectsintheimage,notonlytothe onesatthelocationwherethefilterisplaced.
4.ClickSavetoapplythefilter. - Usevisualconfirmation to verify the settings.
- If the result is not satisfactory, increase the filtersize small steps.
Thefiltersizecanalsobesetbyenteringavaluebetween10and50inthefield.Thevaluecorrespondstothedistancefromthe centerofthecrosstooneofthearrowheads.Thevalue100impliesthatanobjectmusttravelfromitsinitialpointtoonethirdofthe imagewidthtorheightbeforebeingdetected.Thevalue50implieshalfthatdistance,thatis,theobjectmusttraveladistanceof onesixthoftheimagewidthtorheightbeforebeingdetected.
Short-LivedObjectIgnoreFilter
Theshort-livedobjectfilterisusedtoavoiddetectingobjectsthatonlyappearforashortperiodoftime,suchaslightbeamsfroma passingcarandquicklymovingshadows.Usethefilterifsuchobjectscausealotoffalsedetections.
Whentheshort-livedobjectfilterisenabledandtheapplicationfindsamovingobject,theobjectwillnotbereportedasdetected(redpolygoninvisualconfirmation)untilthesetimeaspassed.Thealarmsentbytheapplicationwillbesentwhentheobjectis detected.Ifthealarmisusedtostartarecording,configurethepre-triggertimesothattherecordingalsoincludesthetimethe objectmovedinthescenebeforebeingdetected.
Toenablethefilter:
- SelecttheShort-livedobjectsoption.
2.Enterthenumberofsecondsinthefield.Thenumberofsecondsistheminimumtimethatmustpassbeforetheobjectis detected.Startwithasmallnumber.
3.ClickSavetoapplythefilter. - Usevisualconfirmation to verify the settings.
- If the result is not satisfactory, increase the filtersize in small steps.
SmallObjectIgnoreFilter
Thesmallobjectfilterisusedtoavoiddetectingobjectsthataretoosmall.Forexample,ifonlymovingcarsshouldbedetected,the smallobjectfiltercanbeusedtoavoiddetectingpeopleandanimals.
Ifusingthesmallobjectfilter, take into consideration that an object far from the camera appears smaller than an object closet to the camera. If the filter is set to ignore object sthesize of a person, people that are closet to be cameracan still be detected because they are larger than the filters size.
Toenablethefilter:
- SelecttheSmallobjectsoption.
2.Clickonthe

icontoshowthefiltersizeintheimage.
- Usethemousetoadjustthefiltersize.Startwithasmallsize.Movingobjectsthatfitinsidetherectanglewillbeignored. Thefilterdisplayedintheimagecanbemovedtomakeiteasiertocomparethefiltersizewiththesizeofobjects intheimage.Notethatthefilterwillbeappliedtoalobjectsintheimage,alsotoobjectsthatarenotlocatedat thepositionofthedisplayedfilter.
4.ClickSavetoapplythefilter. - Usevisualconfirmation to overify the settings.
- If the result is not satisfactory, increase the filtersize in small steps.
Thefiltersizecanalsobesetbyenteringthewidthandheightinthefields. Thewidthhandheightarethemaximumwidthand maximumheightoftheobjectstoignoreandaremeasuredinpercentoftheimagewidthandheight.Valuesbetween5and100 canbeused.
Using the Application in an Action Rule
The following examples show to configure the Axis product to record video when AXIS Video Motion Detection 3 detectsmotion.
InsertarS deardrtheAxiproductogd SetupSystemOptionsStoragertheAxiproduct'swebpagesand configuretheproducttouseanetworkshare.
Optionallygd:SetupVideoStreamProfilesandcreatestreamprofileusforecording.
GdoSetupEventsActionRulesandclickAddcreatenewactionrule.
From the Triggeredrop-downlistselectApplicationsandtherselectVMD.
Configure the settings required. For example only record video during certain time periods, select Schedule.
UndeActionsselectRecordVidedfromthTypdrop-downlist.
-
Selectthestreamprofileandstoragedevicetouseandconfigurethepre-andpost-triggertimes.
-
MakesurethattheruleisenabledandthenclickOK.
Note
TappeairthTriggeristthapplicationomusbstartedandtstatusmustedloRunning.
Events
TheEventpagesallowyoutoconfiguretheAxisproducttoperformactionswhendifferenteventsoccur. Forexample, theproduct canstartarecordingorsendanemailnotificationwhenmotionisdetected.Thesetofconditionsthatdefineshowandwhen theactionistriggerediscalledanactionrule.
SetUpActionRules
Anactionruledefinestheconditionsthatmustbemetfortheproducttoperformanaction,forexemplerecordvideoorsendan emailnotification.Ifmfultipleconditionsaredefined,allofthemmustbemettotriggertheaction.
FomoreinformationaboutavailabletriggersandactionssedTriggersorpage38andActionsorpage39.
The following example describes how to setup an action rule to record video to an network share if there is movement in the camera's field of view.
Setupmotiondetectionandaddanetworkshare:
GdoApplicationsstartandconfigureAXIS/idedMotionDetectionSeeAXIS/idedMotionDetection.
QdsSystemOptionsStorageandetupthetworkshareSeepage56.
Setuptheactionrule:
GdEventsActionRulesandclicAdd.
- SelectEnableruleandenteradescriptivenamefortherule.
SelectApplicationsfromtheTriggerdrop-downlistandheselect/MD3
OptionallyselectScheduleandAdditionaConditionSebelow.
UndeActionsselectRecordVidedfromthTypdrop-downlist.
SelectStreamprofilandconfigurethDurationsettingsdescribedbelow.
- SelectNetworkSharefromtheStoragedrop-downlist.
Touse mortharondriggefothaction rules elect Additional conditions and lic Add add additionatriggers When using additional conditions, all conditions must bemettotrigger theaction.
To prevent an action from being triggered repeatedly, Waiteastime can be set Entethdimer hours minutes and seconds, during which the triggers should be ignored before the action rule can be activated again.
The recording Duration of actions can be set into a threshold immediately before and after the event. Select Pre-trigger time and oPost-triggered number of seconds When while the active enabled and action is triggered again during the post-trigger time, thereocording timewill be extended with another post-trigger time period.
Formoreinformation,seetheonlinehelp

Triggers
Available actionultriggersandconditionsinclude:
ApplicationsUsinstalledapplicationsstriggetheuleSeeApplicationsorpage31.
VMD3Trigger rule when AXIS/ided Motion Detection detects moving object See AXIS/ided Motion Detection.
- Detectors
Events
Day/NightModeTrigger rule whether product switches between day mode (IRcutilten) and night mode (IRcutilteroff). This can forexample be used to control an external infrared (IR) light connected to an output port.
LivStreamAccessedTrigger the rule when any stream is accessed and during ed storage playback. This can forexample be used to send notifications.
TamperingTriggetheulewhertamperingsdetectedSeeCameraTamperingpage30.
- Hardware
NetworkTriggertheulefetworkconnectionisostrestoredThisaforexampleusedstart recordingtotheSDcard.
TemperatureTriggetheulethtemperaturfallsoutsideinsidethoperatingangofthproductThis canforexamplebeusedtosendmaintenancenotifications.
- InputSignal
ManualTriggerTriggertheULusinghManualTriggerbuttonintheLiveViewpageSeeControlson theLiveViewPageonpage11.Thiscanforexamplebeusedtovalidateactionsduringproductinstallation andconfiguration.
VirtualInputscarbused by MSVidedManagemenSystemdriggeactionsVirtualInputscanfor example,beconnectedtobuttonsintheVMSuserinterface.
•PTZ
MovingTrigger the rule whether the camera view moves dueto PT operation This is a example based as an additional condition to prevent an action rule triggered by motion detection to record videowhile the camera view moves dueto PT operation.
PreseReachedTriggertheulewherthecameratopsapresepositionThisareofexampleused withtheSendImagesactiontouploadimagesfromthepresetposition.
•Storage
DisruptionTrigger the rule for storage problems are detected for example of storage device is unavailable, removed, full, locked or if other reader or write problems occur. This can forecast be used to send maintenance notifications.
RecordingTriggertheulwhertheAxiproductrecorddthestoragedeviceTherecordingstatusrigger canbeusedtonotifytheoperator,forexamplebyflashingLEDlights,iftheproducthasstartedorstoppedto recordtothestoragedevice.Notethat,thistriggercanbeusedonlyforedgestoragerecordingstatus.
•System
SystemReadyTriggetheulewhertheproduchabeerstartedandalservicesareunningThisarfor examplebeusedtosendanotificationwhentheproductrestarts.
•Time
RecurrenceTrigger the ul periodically Se Set Up Recurrences page 4 This far example used to upload an image every 5 minutes.
UsScheduleTriggertheRuleaccordingtheSelectedScheduleSeeCreateSchedulesorpage42.
Actions
Availableactionsinclude:
- IRIllumination-ActivateordeactivateIRlight.
Day/NighVisionModeSetlaymodel(Rufiltepon)nightmode(Rufilteppf).
OverlayTextDisplayroverlaptextSeeHowincludeoverlaytextfranactionrulorpage22.
- PTZControl
-PresetPosition-Gotoapresetposition.
GuardTourStartguardtourSeeGuardTouvrpage27.
- RecordVideo–Recordvideotoaselectedstorage.
- SendImages–Sendimagestoarecipient.
- SendNotification-Sendanotificationmessagetoarecipient.
SendNMfTrapSendrSNMPrapmessagechoperatorMakeurchaSNMPenabledandconfigured undeSystemOptionsNetworkSNMP.
- SendVideoClip-Sendavideocliptoarecipient.
- WDRMode-TheWDRModecanbeturnedonoroffwhentheactionruleistriggered.
AddRecipients
Theproduct cansendmediafilesandmessagesto notifyusersaboutevents.Beforetheproduct cansendmediafilesornotification messagesyoumustdefinonoremorerecipientsEoinformationaboutavailableoptionsseeRecipientTypesorpage40.
Toaddarecipient:
GetEventsRecipientsandlicAdd.
2.Enteradescriptivename.
3.SelectarecipientType.
4.Entertheinformationneededfortherecipienttype.
5.ClickTesttotesttheconnectiontotherecipient.
6.ClickOK.
RecipientTypes
The following recipients are available:
| RecipientUsewithaction | ||
| SendImagesSendNotificationSendVideoClip | Anemailrecipientcancontainmultipleemailaddresses. | |
| FTP | SendImagesSendVideoClip | |
| SFTPSendImages | SendVideoClip | EncryptedfiletransferusingSSHFileTransportProtocol (SFTP).SFTPisamoresecuremethodthanFTPbutfile transfermightbeslower,especiallyforlargefilessuchashigh resolutionvideo.SpecifylogininformationfortheSFTPserverandtheserver's publickeyMD5fingerprint(32hexadecimaldigits).TheSFTPrecipientsupportsSFTPserversusingSSH-2with RSAandDSAhostkeytypes.RSAisthepreferredmethod.To useDSA,disabletheRSAkeyontheSFTPserver. |
| HTTP | SendImagesSendNotificationSendVideoClip | |
| HTTPSSendImages | SendNotificationSendVideoClip | EncryptedfiletransferusingHyperTextTransferProtocol Secure(HTTPS).SpecifylogininformationfortheHTTPSserverandvalidate theserver'scertificate.IfthereisaproxybetweentheAxis productandtheHTTPSserver,alsospecifytheproxysettings. |
| NetworkShareSendImages | SendVideoClip | Anetworksharecanalsobeusedasastoragedevicefor recordedvideo.GoSystemOptions>Storagetoconfigure anetworksharebeforesettingupacontinuousrecordingor anactionruletorecordvideo.Formoreinformationabout storagedevices,seeStorageonpage54. |
| TCPSendNotification |
SetUpEmailRecipients
Emailrecipientscanbeconfiguredbyselectingoneofthelistedemailproviders,orbyspecifyingtheSMTPserver,portand authenticationusedby,forexample,accorporateemailserver.
Note
Some email providers have security filter that prevent users from receiving or viewing large amount of attachments, from receiving scheduled emails and similar. Check the email provider's security policy to avoid delivery problems and locked email accounts.
Tosetupanemailrecipientusingoneofthelistedproviders:
GdEventsRecipientandlicAdd.
EnterNameandelecEmailfromthTypeist.
Entethemailaddresses to end emails for the field Usecommas separate multiple addresses.
- Select the email provider from the Provider list.
5.Entertheuser|Dandpasswordfortheemailaccount.
6.ClickTesttosendatestemail.
To setup email recipient using example corporate mail server follow instructions above but elect used as Provider Enteth email addressappeas send in the Fromfield Select Advanced detting and specify SMTServer addressport and authentication method. Optionally select us encryption to send emails over encrypted connection. The server certificate can be validated using the certificates available in the Axis product. For information on how to upload certificates, see Aboutcertificates on page 48.
CreateSchedules
Schedulescanbeusedasactionruletriggersorasadditionalconditions,forexampletorecordvideoifmotionisdetectedoutside officehours.Useoneofthepredefinedschedulesorcreateanewscheduleasdescribedbelow.
Tocreateanewschedule:
GdEventsSchedulesandClickAdd.
2.Enteradescriptivenameandtheinformationneededforadaily,weekly,monthlyoryearlyschedule.
3.ClickOK.
Taus the scheduler action rule selects the schedule from the Schedule drop-down list the Action Rule Setup page.
SetUpRecurrences
Recurrencesareusedtotriggeractionrulesrepeatedly,forexampleevery5minutesoreveryhour.
Tosetuparecurrence:
GdEventsRecurrencesandlicAdd.
- Enteradescriptivenameandrecurrencepattern.
3.ClickOK.
To set the recurrence in action rule first select Time from the Trigger drop-downlist the Action Rule Setup page and then select the recurrence from these second drop-downlist.
To modify remove recurrences select the recurrence path Recurrence List and click Modify Remove.
Recordings
TheAxisproductcanbeconfiguredtorecordvideocontinuouslyoraccordingtoanactionrule:
- Tostartacontinuousrecording,seepage44.
- Tosetupactionrules,seepage38.
• Toaccessrecordings, see FindRecordings on page 43.
• Toplayrecordings, see PlayRecordingonpage43.
• Toexportarecordingasavideoclip, see ExportVideoCliponpage44. - Toconfigurecameracontrolledstorage,seeStorageonpage54.
FindRecordings
RecordingstorebirthSCardnetworksharcarbaccessedrothRecordingsListpageThepagedistallrecordingon thestoragedeviceandshowseachrecording'sstartdateandtime,durationandtheeventthattriggeredtherecording.
Note
Therecording'sstartdateandtimeissetaccordingtotheAxisproduct'sdateandtimesettings.IftheAxisproductisconfiguredausetimzonedifferenfromthdocatimezonemakeuretconfigurehRecordingimfiltersaccordingtchproduct'stizoneDatandtimesettingsareconfiguredundeSystemOptionsDateTimeedDateTimeonpage48.
Tofindarecording, followthesesteps:
- GotoRecordings>List.
Dreducethnumberfecordingsdisplayedselecthe desireoptionsundeFilter:
RecordingtimeListecordingthatstartedbetweenFromanddimes.
EventListecordingthatwerdriggeredbyspecificEventSelectcontinuoudistontinuousrecordings.
Storage-Listrecordingsfromaspecificstoragedevice.
Sort-Specifyhowrecordingsshouldbesortedinthelist.
Results–Specify maximum number of recording stodisplay.
To apply the filters click the Filte button Some filters may take long time complete.
- TherecordingsaredisplayedintheRecordinglist.
T play recording select the recording and lic Play Se also Play Recording page 43.
To view detailed information about recording, select the recording and lic Properties.
To export recording, part of recording via eclip select the recording and lic Export Seals Export/ided Clip on page 44.
To remove recording from the storage device, select the recording and click Remove.
PlayRecording
RecordingsontheSDcardornetworksharecanbeplayeddirectlyfromtheAxisproduct'swebpages.
Toplayarecording, followthesesteps:
- GotoRecordings>List.
DreducethenumberofecordingsdisplayedselecthdesiredoptionsundeFilteandclickthFiltebuttorto applythefilters.SeealsoFindRecordingsonpage43.
Select recording and click Play The recording will be played a new browser window.
ExportVideoClip
Recordings on the SD cardornetworkshare can be exported as videoclips. It is possible to export a complete recording or part of are cording.
Note
TheexportedrecordingisaMatroskavideofile(.mkv).ToplaytherecordinginWindowsMediaPlayer,AXISMatroskaFile SplittemusbinstalledAXISMatroskaFileSplittercandownloadedfromwww.axis.com/techsup/software
Toexportavideoclip, followthesesteps:
- GotoRecordings>List.
DreducethnumbeofecordingdisplayedselectddesiredoptionsundeFilteandclickthFiltebuttorto applythefilters.SeealsoFindRecordingsonpage43.
Select recording and click Export The Export Recording dialog opens.
-
Bydefault, the completerecording is selected. To export a part of the recording, modify the start and stop times.
-
Optionally, enterafilename for therecording.
6.ClickExport.
Note
Recordingscanalsobeexportedfromtheplaybackwindow.
ContinuousRecording
The Axiproductar be configured continuously saved to storage device information about storage devices: Storage or page 54 prevent the disk from becoming full is recommended configuration disk automatically removed in recordings.
Ifanewstreamprofileisselectedwhilearecordingisongoing,therecordingwillbestoppedandsavedintherecordinglistanda newrecordingwiththenewstreamprofilewillstart.Allpreviouscontinuousrecordingswillremainintherecordinglistuntilthey areremovedmanuallyorthroughautomaticremovalofoldrecordings.
Tostartacontinuousrecording,followthesesteps:
- GotoRecordings>Continuous.
2.SelectEnabled.
-
SelectthetypeofstoragedevicefromtheStoragelist.
-
SelectaStreamprofiletouseforcontinuousrecordings.
5.ClickSavetosaveandstarttherecording.
Languages
MultiplelanguagescanbeinstalledintheAxisproduct.AllwebpagesincludingtheonlinehelpwillbedisplayedintheselectedlanguageTo switchlanguagesgdo SetupLanguagesandfirstuploadthenewlanguagefileBrowseandocatchthe landfillclicktheUploadLanguagebutton.SelectthenewlanguagefromthelistandclickSave.
Note
- Resetting the product to factory default settings will erase any uploaded language files and reset the product language to English.
- ClickingtheRestorebuttonontheMaintenancepagewillnotaffectthelanguage.
- Afirmwareupgradewillnotaffectthelanguageused. However if you have uploaded an ewlanguageto the product and later upgradethe firmware, it may happen that the translation no longer match the product's web pages. In this case, upload an updated language file.
- Alanguagealreadyinstalledintheproductwillbereplacedwhenacurrentoralaterverersionofthelanguagefileisuploaded.
SystemOptions
Security
Users
Use access controlled by default and a configuration under SystemOptionsSecurityUsersAdministrator can setup other users by giving them usernames and passwords. It is also possible to allow anonymous viewer login, which means that anybody may access the live view page.
Theuserlistdisplaysauthorizedusersandusergroups(accesslevels):
•ViewershaveaccesstotheLiveViewpage
-Operatorshaveaccesstoallsettingsexcept:
-creatingandmodifyingPTZpresets
-creatingandmodifyingPTZcontrolsettings
-creatingandmodifyingprivacymasksettings
-uploadingapplicationsandlanguagefiles
-anyofthesettingsincludedintheSystemOptions
Administrator have unrestricted accessal settings. The administrator can add modify and remove other users.
Note
NotchawtherthoptionEncryptedunencryptedselectedtheobserverwilencypthepasswordThisthedefault optionforanewunitoraunitresettofactorydefaultsettings.
UndeHTTP/RTSIPasswordSettingsselecttheTypeofpasswordallowYoumayneedallowunencryptedpasswordsifthereareviewingclientsthatdonotsupportencryption,orifyouupgradedthefirmwareandexistingclientssupportencryptionbutneedtologinagainandbeconfiguredtousethisfunctionality.
UndeUseSettingsselecttheEnablanonymousvieweloginoptiontallowanonymoususersaccesstheLiveViewpage.
Select the Enablanonymou PTZontrologirtallowanonymoususeraccess the PTZ controls.
DeselecttheEnablBasiSetupoptionthetaBasiSetupmenuBasiSetupprovidesquickaccesssettingsthatshouldbe madebeforeusingtheAxisproduct.
ONVIF
ONVIF(OpenNetworkVideoInterfaceForum)isaglobalinterfacestandardthatmakesiteasierforendusers,integrators,consultants,andmanufacturerstotakeadvantageofthepossibilitiesofferedbynetworkvideotechnology.ONVIFenablesinteroperabilitybetweendifferentvendorproducts,increasedflexibility,reducedcostandfuture-proofsystems.
BycreatingauseryouautomaticallyenableONVIFcommunication.UsetheusernameandpasswordwithallONVIFcommunication withtheproduct.Formoreinformationseewww.onvif.org
IPAddressFilter
IAddressfiltering enableorth SystemOptions Security. IAddressFilterpage. Once enabled the listed address are allowed, denied access the AxiproductSelectAllowoDenyronthdistance. Apply enable address filtering.
The administrator can add up to 256IP addressentriestothelist (asingleentry can contain multipleIP addresses).
HTTPS
HTTPS(HyperTextTransferProtocoloverSecureSocketLayer,orHTTPoverSSL)isawebprotocolprovidingencryptedbrowsing. HTTPScanalsobeusedbyusersandclientstoverifythatthecorrectdeviceisbeingaccessed. Thesecuritylevelprovidedby HTTPSisconsideredadequateformostcommercialexchanges.
TheAxisproductcanbeconfiguredtorequireHTTPSwhenusersfromdifferentusergroups(administrator, operator, viewer)login.
TouseHTTPSaHTPScertificatenusfirsbeinstalledGoSystemOptionsSecurityCertificatesinstallandmanage certificates.SeeAboutcertificatesonpage48.
ToenableHTTPSontheAxisproduct:
- GotoSystemOptions>Security>HTTPS
- SelectanHTTPCertificatefromthelistofinstalledcertificates.
- Optionally, click Ciphers and select the encryption algorithm for SSL.
- SettheHTTPSConnectionPolicyforthedifferentusergroups.
5.ClickSavetoenablethesettings.
Taccess the Axis product via desired protocol, the address field browser, https://fortheHTTPprotocol. and http://fortheHTTPprotocol.
The HTTP Sport change or the System Options Network TCP/IP Advance page.
IEEE802.1X
IEEE802.1Xisastandardforport-basedNetworkAdmissionControlprovidingsecureauthenticationofwiredandwirelessnetwork devices.IEEE802.1XisbasedonEAP(ExtensibleAuthenticationProtocol).
ToaccessanetworkprotectedbyIEEE802.1X,devicesmustbeauthenticated.Theauthenticationisperformedbyanauthentication servertypicallyRADIUServerexampleswhichareFreeRADIUSandMicrosoftInternetAuthenticationService.
InAxisimplementation, theAxisproductandtheauthenticationserveridentifythemselveswithdigitalcertificatesusingEAP-TLS (ExtensibleAuthenticationProtocolTransportLayerSecurity)ThecertificatesareprovidedbyCertificationAuthorityCA). Youneed:
- aCAcertificatetoauthenticatetheauthenticationserver.
- aCA-signedclientcertificatetoauthenticatetheAxisproduct.
TreatandInstallcertificatesgodSystemOptionsSecurityCertificateSeeAboutcertificatesorpage48ManyCA certificatesarepreinstalled.
ToallowtheproducttoaccessanetworkprotectedbyIEEE802.1X:
- GotoSystemOptions>Security>IEEE802.1X.
SelectCAcertificatandClienCertificatfromtheistoInstalledcertificates.
UndeSettingsselecttheEAPVersionanprovidetheEARidentityassociatedwiththeClientertificate. - ChecktheboxtoenableIEEE802.1XandclickSave.
Note
Forauthenticationtoworkproperly, the date and timesettings in the Axis product should be synchronized with an NTP server. See Date & Time on page 48.
Aboutcertificates
Certificatesareusedtoauthenticatedevicesonanetwork.Typicalapplicationsincludeencryptedwebbrowsing(HTTPS),network protectionviaIEEE802.1Xandsecureuploadofimagesandnotificationmessagesforexampleviaemail.Twotypesofcertificates canbeusedwiththeAxisproduct:
Server/Clientcertificates: To authenticate the Axiproduct/Server/Clientcertificate can self-signed issued by Certificate Authority(CA). Aself-signed certificate offers limited protection and can be used before a CA-issued certificate has been obtained.
CAcertificatesToauthenticatpeecertificatesforexamplethecertificatoAuthenticationserveincastheAxisproducts connectedtoanIEEE802.1Xprotectednetwork.TheAxisproductisshippedwithseveralpreinstalledCAcertificates.
Note
- If the product is reset to factory default, all certificates, except preinstalled CA certificates, will be deleted.
- If the product is reset to factory default, all preinstalled CA certificate that have been deleted will bere installed.
Howtocreateaself-signedcertificate
- GotoSetup>SystemOptions>Security>Certificates.
- ClickCreateself-signedcertificateandprovidetherequestedinformation.
HowtocreateandinstallaCA-signedcertificate
Createself-signedcertificatesHowtocreateself-signedcertificatorpage48.
- GotoSetup>SystemOptions>Security>Certificates.
ClickCreatecertificatesigningequestanprovidetherequestedinformation.
- CopythePEM-formattedrequestandsendtotheCAofyourchoice.
Whether signed certificates returned click install certificate and upload certificate.
HowtoinstalladditionalCAcertificates
- GotoSetup>SystemOptions>Security>Certificates.
- ClickInstallcertificateanduploadthecertificate.
Date&Time
The Axi product's lat and im settings are configured under SystemOptionsDateTime.
CurrenServeTimedisplaythecurrentlatandtime(24clock)Thetimecarbeisplayednl2hclockthetexverlay(see below).
TochangchelatandimsettingsselecthepreferredTimmodendeNewServeTime:
SynchronizewithcomputeTimeSetslatandimaccordingthecomputer'slockWiththisoptiondatandtimearesetonceandwillnotbeupdatedautomatically.
SynchronizewithNTPServerObtainslatandimfromNTServerWiththisoptiondatandimsettingare updatedcontinuouslyEoinformationnNTBettingssedNTPConfigurationorpage51.
IfusingmoshamefothNTServerDNServermustconfiguredSeeDNSConfigurationorpage5.1.
- Setmanually—Allowsyoutomanuallysetdateandtime.
Ifusing NTServer select your Timezonefrontdrop-downlistrequiredcheckAutomaticallyadjustfordaylightsaving timechanges.
The DateTimeFormUsedImagesShdatandimformatdisplayedstexoverlaythevidestreamUsche
predefined formatsosed File Naming Date/Time Format@thonlinfformationhowcreatecustomdatand time formatsToinclude datandimethoverlayextg0dVideandselectIncluddatandIncludtime.
Network
BasicTCP/IPSettings
TheAxisproductsupportsIPversion4andIPversion6.Bothversionscanbeenabledsimultaneously, andatleastoneversion mustalwaysbeenabled.
IPv4AddressConfiguration
Bydefault, theAxisproductissettouseIPv4(IPversion4) and to obtain theIPaddress automatically via DHCP. TheIPv4settings are configured under SystemOptions > Network > TCP/IP > Basic.
DHCP(DynamicHostConfigurationProtocol) allows network administrator stocentrally manage and automate the assignment of IP addresses. DHCP should only be enabled if using dynamicIP address notification, or if the DHCP can update a DNS server. It is then possible to access the Axis product by name (hostname).
If DHCPisenabledandtheproductcannotbeaccessed,runAXISIPUtilitytosearchthenetworkforconnectedAxisproducts,orresettheproductdthefactorydefaultsetting(sepage58)andherperformtheninstallationagain.
TousestatidAddresscheckUsethfollowingAddressandspecifytheAddresssubnetmaskldefaultouter.
IPv6AddressConfiguration
IfIPv6(IPversion6)isenabled,theAxisproductwillreceiveanIPaddressaccordingtotheconfigurationinthenetworkrouter.
TenablePv6gotoSystemOptionsNetworkTCP/IPBasicOthesettingsforPvShouldbeconfiguredrthenetworkrouter.
ARP/Ping
The product's Address can be assigned using ARP and Ping for instructions see Assign/Address Using ARP/Ping or page 49.
TheARP/Pingserviceisenabledbydefaultbutisautomaticallydisabledtwominutesaftertheproductisstarted,orassoonasanIP addressisassigned.Tore-assignIPaddressusingARP/Ping,theproductmustberestartedtoenableARP/Pingforanadditional twominutes.
TalisabletheServicegodoSystemOptionsNetworkTCP/IPBasicandleathoptionEnableARP/PingettingofAddress.
Pinging the product is still possible when the service is disabled.
AssignIPAddressUsingARP/Ping
Theproduct'sIPaddresscanbeassignedusingARP/Ping.Thecommandmustbeissuedwithin2minutesofconnectingpower.
- AcquireafreestaticIPaddressonthesamenetworksegmentasthecomputer.
- Locatetheserialnumber(S/N) on the product label.
3.Openacommandpromptandenterthefollowingcommands:
Linux/Unixsyntax
arp-s<IPaddress><serialnumber>temp
ping-s408<IPaddress>
Linux/Unixexample
arp-s192.168.0.12500:40:8c:18:10:00temp
ping-s408192.168.0.125
Windowssyntax(thismayrequirethatyourunthecommandpromptasanadministrator)
arp-s<IPaddress><serialnumber>
ping-1408-t<IPaddress>
Windowsexample(thismayrequirethatyourunthecommandpromptasanadministrator)
arp-s192.168.0.12500-40-8c-18-10-00
ping-l408-t192.168.0.125
- Check that thenetworkable is connected and then restart the product by disconnecting and reconnecting power.
Glosthe command prompt whether product responds with Reply from 92.168.0.125:..osimilar.
Openbrowseandyphttp://
Fothemethods of assigning the Address, the Document Assignor IP Address and Access the Video Stream or Axis Support web at www.axis.com/techsup
Note
ToperformmandpromptWindowspperthStartmenandtypemdirthRun/Searchfield.
- TousetheARPcommandinWindows8/Windows7/WindowsVista,right-clickthecommandprompticonandselectRunasadministrator.
To open command prompt Mac OS x perth Termin utility from Application Utilities.
AXISVideoHostingSystem(AVHS)
AVHSusedinconjunctionwithanAVHSservice,provideaseasyandsecureInternetaccesstoliveandrecordedvideoaccessiblefromanylocation.FormoreinformationandhelptofindalocalAVHSServiceProvidergotowww.axis.com/hosting
The AVHSettings are configured under SystemOptionsNetworkTCPBasic the possibility to connect AVHService is enabled by default. Todisable, clear the Enable AVHSbox.
One-clickable Press and hold the product's contro button (see Hardware Overview page) about second to connect an AVHS service over the Internet Once registered Always will be enabled and the Ax product stays connected to the AVHS service. If the product is not registered within 24 hours from when the button is pressed, the product will disconnect from the AVHS service.
Always The Ax product will constantly attempt to connect the AVH Service over the Internet. Once registered the product will stay connected to the service. This option can be used when the product is already installed and is not convenient to set the one-click installation.
AXISInternetDynamicDNSService
AXISnterneDynamidDNServiceassignshostnamforeasyaccesstdhproductFomoreinformationsewww.axiscam.net
ToregistetheAxisproductwithAXISnterneDynamicDNSServicegdsystemOptionsNetworkTCP/IPBasidUnderServicesclicktheAXISnterneDynamicDNSServiceSettingsbutton(requiresaccessdInternet)Thedomainamecurrently registeredatAXISInternetDynamicDNSservicefortheproductcanatanytimeberemoved.
Note
AXISInternetDynamicDNSServicerequiresIPv4.
AdvancedTCP/IPSettings
DNSConfiguration
DNSDomainNamServiceprovideshtranslationofhostnameidAddressesTheDNSettingsareconfiguredundecSystem Options>Network>TCP/IP>Advanced.
SelectObtainDNServeaddress via DHCP to the DNSetting provided by the DHCP server.
TomakemanuasettingsselectUsethe followingDNServeaddressandspecifythe following:
DomainamEntethelomain(s)searchfothenoshamusedbytheAxiproductMultipledomainsarseparated by semicolonsTheoshnameiswaythefirsparbfullyqualifieddomainameforexamplenyserverithoshamerthefullyqualifieddomainamenyserver.mycompany.comwheremycompany.comthelomainame.
Primary/SecondaryDNServerEntethAddresses the primary and secondaryDNServer. The secondaryDNServe is optional and will be used if the primary is unavailable.
NTPConfiguration
NTP(NetworkTimeProtocol)isusedtosynchronizetheclocktimesofdevicesinanetwork.TheNTPsettingsareconfiguredunder SystemOptions>Network>TCP/IP>Advanced.
SelectObtainNTBerveaddressviaDHCRousetheNTBettingsprovidedbytheDHCRerver.
TomakmanuasettingsselectUsethfollowingNTBerveaddressandentethnosthamofAddressoftheNTBerver.
HostNameConfiguration
TheAxisproductcanbeaccessedusingahostnameinsteadofanIPaddress.ThehostnameisusuallythesameastheassignedDNS nameThehostnameconfiguredundesystemOptionsNetworkTCP/IPAdvanced.
SelectObtainmoshamviaPv4DHCR@shoshamprovidedbytheDHCServerunningrlPv4.
SelectUsethehostnametosetthehostnamemanually.
SelectEnablDynamiDNSUpdates dynamically update docaDNServers whenever the Axis product's Paddress changes.
Formoreinformation,seetheonlinehelp
Link-LocalIPv4Address
Link-LocalAddress enabled default assignment the product additional address which can be used to access the product from other hosts on the same segment on the local network. The product can have a Link-LocalIPandastic or DHCP-suppliedIPaddressatthesametime.
This function can be disabled under System Options Network TCP/IP Advanced.
HTTP
The HTTP port used by the Axisproduct are changed under SystemOptionsNetworkTCP/IP Advanced addition the default setting, which is 80, any port in therange 1024-65535 can be used.
HTTPS
The HTTPSportused by the Axi product are changed under SystemOptions Network TCP/IP Advanced addition to the default setting, which is 443, any portion in the range 1024-65535 can be used.
TenableHTTPSgdsystemOptionsSecurityHTTPSFomoreinformationsedHTTPSpage47.
NATtraversal(portmapping)forIPv4
Anetworkrouterallowsdevicesonaprivatenetwork(LAN)toshareasingleconnectiontothelnternet.Thisisdonebyforwarding networktrafficfromtheprivatenetworktothe"outside",thatis,theInternet.Securityontheprivatenetwork(LAN)isincreased sincemostroutersarepre-configuredtostopattemptsstoaccesstheprivatenetwork(LAN)fromthepublicnetwork(Internet).
Use NATraversawhthertheAxiproductlocatedbrarintranet(LAN)andyouwishtomakitavailablefromthe(WAN)side ofaNATrouter.WithNATtraversalproperlyconfigured,allHTTPtraffictoanexternalHTTPportintheNATrouterisforwardedto theproduct.
NATraversalsconfiguredindeSystemOptionsNetworkTCP/IPAdvanced.
Note
- ForNATtraversaltowork, this must be supported by the router. Therouter must also support UPnP
TM. - In this context, router refer to an any network routing devices such as NATrouter, Networkrouter, Internet Gateway, Broadbandrouter, Broadband sharing device, or as softwares such as firewall.
Enable/DisableWhenenabledtheAxiproductattemptsconfigurportmappingnAToutepryournetworkusingUPnP NotethatUPnP™ mustbeenabledintheproduct(seeSystemOptions>Network>UPnP).
TM.
Usmanually selected NATouteSelect this option manually select NAToute and the address that the route in the field. If norouter is specified, the product automatically searches for NATrouterson your network. If more than one router is found, the default router is selected.
Alternative HTTP port Select this option manually defines external HTTP Port Enterprise range 024-65535. The portfield isempty or contains the default setting, which is 0, a port number is automatically selected when enabling NAT traversal.
Note
- AnalternativeHTTPportcanbeusedorbeactiveevenifNATtraversalisdisabled. ThisisusefulifyourNATrouterdoesnot supportUPnPandyouneedtomanuallyconfigurereportforwardingintheNATrouter.
- If you attempt to manually enter a port that is already in use, another available port is automatically selected.
WherthportselectedautomaticallyitsdisplayedthisfieldTochangthisentemewportnumberandclickSave.
FTP
TheFTPserverrunningintheAxisproductenablesuploadofnewfirmware,userapplications,etc.TheFTPservercanbedisabled underSystemOptions>Network>TCP/IP>Advanced.
Note
ThisFTPserverhasnothingtodowiththeproduct'sabilitytotransferimagesviaFTPtootherlocationsandservers.
RTSP
TheRTSPserverrunningintheAxisproductallowsaconnectingclienttostartanH.264stream.TheRTSPportnumbercanbe changedundeSystemOptionsNetworkTCP/IBAdvancedThedefaultport554.
Note
H.264videostreamswillnotbeavailableiftheRTSPserverisdisabled.
SOCKS
SOCKSisanetworkingproxyprotocol.TheAxisproductcanbeconfiguredtouseaSOCKSservertoreachnetworksontheother sideofafirewallorproxyserver.ThisfunctionalityisusefuliftheAxisproductislocatedonalocalnetworkbehindafirewall,and notifications,uploads,alarms,etcneedtobesenttoadestinationoutsidethelocalnetwork(forexamplethelnternet).
SOCKSconfigured under System Options Network SOCKS from information set the online help

QoS(QualityofService)
QoS(QualityofService)guaranteesacertainlevelofaspecifiedresourcetoselectedtrafficonanetwork.AQoS-awarenetwork prioritizesnetworktrafficandprovidesagreaternetworkreliabilitybycontrollingtheamountofbandwidthanapplicationmayuse.
The DoSettings are configured under SystemOptions Network. DoSUsing DSCI(Differentiated Service Codepoint) values the Axisproduct can mark different types of traffic.
SNMP
TheSimpleNetworkManagementProtocol(SNMP) allows remotemanagementofnetworkdevices.AnSNMPcommunityisthe groupofdevicesandmanagementstationrunningSNMP.Communitynamesareusedtoidentifygroups.
AXISVideoMIB(ManagementInformationBase)forvideohardwarecanbeusedtomonitorAxis-specific,hardware-related issuesthatmayneedadministrativeattention. FormoreinformationaboutAXISVideoMIBandtodownloadMIBfiles,goto www.axis.com/techsup
Tenable and configure SNMPth the Axi product get th System Options Network SNMP page.
Dependingonthelevelofsecurityrequired,selecttheversiononSNMPtouse.
Trapareused by the Axis product send messages to management system important events and status changes Check Enable transparente the Address where the trap message should be sent and the Trap community that should receive the message.
Note
If HTTPSisenabled, SNMPv1 and SNMPv2 should be disabled.
TrapfoSNMR1/v2areused by the Axiproduct send messages management system important events and status change: ChecEnabletrapandentetherAddress where the trapmessage should be sent and the rcommunity that should receive them message.
The followingtrapsareavailable:
•Coldstart
•Warmstart
- Linkup
- Authenticationfailed
Note
AllAXISVideoMIBtrapsareenabledwhenSNMPv1/v2ctrapsareenabled.Itisnotpossibletoturnonoroffspecifictraps.
SNMR3 provides encryption and secure passwords to strap with SNMR3 and SNMR3 management application required.
TousSNMR3HTTPSmustenablededsethTPSorpage41enablSNMR3checkboxanprovidethenitialuser password.
Note
The initial password can only be set once. If the password is lost, the Axis product must be reset to factory default, see ResettoFactoryDefaultSettingspage58.
UPnP ^TM
TheAxisproductincludessupportforUPnP ^TM .UPnP ^TM isenabledbydefaultandtheproductisautomaticallydetectedbyoperating systemsandclientsthatsupportthisprotocol.
UPnPTM canbedisabledunderSystemOptions>Network>UPnP
RTP/H.264
The RTportangandmulticastettings are configured under SystemOptionsNetworkRTP.
The RTP portranged defines the range of ports from which the video ports are automatically selected. Form multicast streams, only certain IP addresses and port numbers should be used.
SelectAlwayMulticastVidedstartmulticaststreamingwithoutpeningarRTSBession.
Bonjour
TheAxisproductincludessupportforBonjour.Bonjourisenabledbydefaultandtheproductisautomaticallydetectedbyoperating systemsandclientsthatsupportthisprotocol.
BonjourcanbedisabledunderSystemOptions>Network>Bonjour.
Storage
SDCard
NOTICE
Topreventdatacorruption, the SDcardshouldbeunmountedbeforeremoval.
Note
ForSDcardrecommendationssee www.axis.com
TheAxisproductsupportsmicroSD/microSDHC/microSDXCcards.
The following SDcardfilesystemsaresupported:
ext4-recommendedluditsresiliencagainstlatalosifhecardsjectediftherebruppowelosstaccess
datastoredonthecardfromtheWindowsoperatingsystem,athird-partyext4driverorapplicationisrequired.
• vFAT—supportedbymostoperatingsystemsforpersonalcomputers.
The SDcardsmanagedorthSystemOptionsStoragePageClickSTCardOpenStorageManagement.
If he card's tatushows a failed click Check disk to see if problem car found and her try Repair this option only available for SD cards with next 4. For SD cards with v FAT, use acard reader or computertot roubles hoot the card.
T avoid filling the card is recommended to remove recordings continuously. UndeGenera Settings select Remove recordings older than and select then number of days or weeks.
Tstopwriting the card an protectecording from being removed select Lockunde Genera Settings.
MountandUnmountSDCard
NOTICE
Topreventcorruptionofrecordings,theSDcardshouldalwaysbeunmountedbeforeitisejected.
TheSDcardisautomaticallyymountedwhenthecardisinsertedintotheAxisproductorwhentheproductisstarted.Amanual mountisonlyrequiredifthecardhasbeenunmountedandnotejectedandre-inserted.
TounmounttheSDcard:
OpertheAxiproduct'swebpagesandSetupSystemsOptionsStorage.
2.ClickSDCard.
3.ClickUnmount.
- The card can now be removed.
FormatSDCard
NOTICE
FormattingtheSDcardwillremovealldataandrecordingsstoredonthecard.
TheAxisproductcanbeconfiguredtoautomaticallyformatSDcardsthataareinsertedintotheproduct.lfautoformatisenabledandanSDcardisinserted,theproductwillcheckiftheSDcardhastheext4filesystem.Ifthecardhasadifferentfilesystem,thecardwillautomaticallybeformattedtoext4.
Important
Ifautoformatisenabled,onlyuseneworemptySDcards.Anydatastoredonthecardwillbelostwhenthecardisinserted intotheAxisproduct.
Toenableautomaticformatting, followthesesteps:
OpertheAxisproduct'swebpagesandSetupSystemsOptionsStorage.
2.ClickSDCard.
UndeGeneraSettingsselectAutoformato.
4.ClickOKtosavesettings.
AnSDcardinsertedintotheproductcanbemanuallyformattedtooneofthesupportedfilesystems.Tomanuallyformatthe SDcard,followthesesteps:
- Insert the SD card in the SD card slot.
OpertheAxisproduct'swebpagesandSetupSystemsOptionsStorage.
3.ClickSDCard.
- ClickFormatandselectthedesiredfilesystem.
5.ClickOKtostartformattingthecard.
EncryptSDCardData
Topreventunauthorizedindividualsandsystemsfromaccessingrecordedvideo,theSDcardcontentcanbeencrypted.Encryption canonlybeenabledwhenthecardisunmounted.Afterenablingencryption,theSDcardmustbeformattedsothatnounencrypted dataremainsonthecard.Thecardmustalsobemountedbeforeitcanbeused.
Note
Ifautoformatisenabled, thecardwillbeformattedandmountedautomaticallywhenencryptionisenabled. Theformatand mountstepsbelowshouldthenbeskipped.
ToencrypttheSDcardcontent:
OpertheAxisproduct'swebpagesandSetupSystemsOptionsStorage.
Click CardoperStorageManagement.
- If the SD card is mounted, click Unmounttounmountthecard.
4.ClickEncrypt.
-
SelectEnableSDcardencryptionandenterapassphrase.
-
BackinStorageManagement, clickFormattoformattheSDcard.
7.ClickMounttomounttheSDcard.
It possible changing the passphrase without e formatting the card Open Storage Management clic Encrypted ethold and new passages. The passphrase can only be changed when the card is mounted. Ongoing recordings will not be affected if the passphrase is changed.
Talisable encryption unmounted Card and follow the steps above but leath Enable Card encryption option The card must be formatted and mounted when encryption has been disabled.
NetworkShare
NetworkshareallowsyoutoaddnetworkstoragesuchasaNAS(network-attachedstorage).TheNASshallbededicatedfor recordingsanddatafromtheAxisproductsconnectedtothenetwork.ForinformationaboutreferenceNASdevices,goto www.axis.com/products/axis-camera-companion/support-and-documentation
Note
ForNASrecommendationsseewww.axis.com
Toaddanetworkshare:
- GotoSystemOptions>Storage.
2.ClickNetworkShare.
3.EntertheIPaddress,DNSorBonjourametothehostserverintheHostfield.
4.EnterthenameoftheshareintheSharefield.Subfolderscannotbeused.
I ^s required ^e selectTheshare requires ogirandentethusenamenanspassword.
6.ClickConnect.
TeleaalrecordingsandatafromtheAxiproduct'soldeorthdesignatedshareclickCleaundeStorageTools.
To avoid filling the share if recommended remove recordings continuously Under Recording Settings; select Remove recordings older than and select then number of days or weeks.
Tstopwriting@shareanprotectecordingfrombeingemovedselectLockundeRecordingSettings.
Maintenance
The Axis product provides several maintenance functions. These are available under System Options Maintenance.
ClickRestart perform correct start the Axiproducts no behaving expected This will have affected any of the current settings.
Note
ArestartclearsallentriesintheServerReport.
ClickRestoreresetmostsettingsdhfactorydefaultvaluesThefollowingsettings are not affected:
- thestaticIPaddress
- thedefaultrouter
- thesubnetmask
- thesystemtime
• theIEEE802.1Xsettings
•thebootprotocol(DHCPorstatic)
- uploadedapplicationsarekeptbutmustberestarted
ClickDefaultresetSettingsincludinghdAddressdthfactorydefaultvaluesThisbuttonshouldusedwithcautionTheAxiproductandalsdresetfactorydefaultusingthecontrolbuttonseeResetFactoryDefaultSettingspage58.
To identify the product testh Status LEDclic FlashLED undelentify and specify the duration in seconds minutes hours. This can be useful for identifying the product among other products installed in the same location.
Forinformationaboutfirmwareupgrade,seeUpgradetheFirmwareonpage59.
Support
SupportOverview
The SystemOptionsSupportSupportOverviewpage provides information on troubleshooting and contact information, should you require technical assistance.
See also Troubleshooting on page 59.
SystemOverview
Together overview of the Axi product status and settings go System Options Support System Overview Information that can be found here includes firmware version, IP address, network and security settings, event settings, imagesettings and recent log items. Many of the captions are linked to the proper Setup page.
Logs&Reports
The SystemOptionsSupportLogReportpag generates logs and reports useful for system analysis and troubleshooting of contactingAxisSupport, please provide a valid Server Report with your query.
SystemLog-Providesinformationaboutsystemevents.
AccesLog lists failed attempts to access the product The AccesLog can also be configured disal connections to the product (see below).
ServeReport Provides information about the product status: pop-up window The Access log automatically included in the Server Report.
Youcanviewordownloadtheserverreport.Downloadingtheserverreportcreatesa.zipfilethatcontainsacompleteserverreport texfileUTF-formatSelectdIncludenapshowwithdefaultmagsettingsoptionincludesnapshoftheproductlive View.Theserverreport.zipfileshouldalwaysbeincludedwhencontactingsupport.
ParameteLisShowProduct' parameters and their current settings This may prove useful when troubleshooting or when contacting AxisSupport.
ConnectionList-Listsallclientsthatarecurrentlyaccessingmediastreams.
CrashReport-Generatesanarchivewithdebugginginformation.Thereporttakesseveralminutestogenerate.
Advanced
Scripting
Scriptingallowsexperienceduserstocustomizeandusetheirownscripts.
NOTICE
Improperuse may cause unexpected behavior and loss of contact with the Axis product.
Axisstronglyrecommendsthatyoudonotusethisfunctionunlessyouunderstandtheconsequences.AxisSupportdoesnotprovide assistanceforproblemswithcustomizedscripts.
To Perth Script Editor go System Options Advanced Scripting Script cause problems reset product to factory default settings, see page 58.
Formoreinformation,seewww.axis.com/developer
FileUpload
Files,forexamplewebpagesandimages,canbeuploadedtotheAxisproductandusedascustomsettings.Tuploadafile,go toSystemOptions>Advanced>FileUpload.
Uploadedfile accessed through http://
PlainConfig
PlainConfigisforadvanceduserswithexperienceofAxisproductconfiguration.Mostparameterscanbesetandmodifiedfrom thispage.
TooperPlainConfigdSystemOptionsAdvancedPlainConfigAxisSupportdoesnoprovidassistance.
ResettoFactoryDefaultSettings
Important
Resettofactorydefaultshouldbeusedwithcaution.Aresettofactorydefaultwillresetallsettings,includingtheIP address,tothefactorydefaultvalues.
Note
The installation and management software tools are available from the support pages on www.axis.com/techsup
Toresettheproducttothefactorydefaultsettings:
- Disconnectpowerfromtheproduct.
PressandholdthecontrobuttonandeconnectpowerSedHardwareOvervieworpage? - Keep the control button pressed for 15–30 seconds until the status LED indicator flashes amber.
- Releasethecontrolbutton. The process is complete when the status LED indicator turns green. The product has been reset to the factory default settings in DHC server available on the network the default address 92.168.0.90
- Using the installation and management software tools, assign an Paddress, set the password, and access the videostream.
ItalspossiblereseparametersfactorydefaultviahwebinterfaceGoSetupSystemOptionsMaintenanceandclickDefault.
Troubleshooting
ChecktheFirmware
Firmwareissoftwarethatdeterminesthefunctionalityofnetworkdevices.Oneofyourfirstactionswhentroublershootingaproblem shouldbetocheckthecurrentfirmwareversion.Thelatestversionmaycontainacorrectionthatfixesyourparticularproblem.The currenfirmwareversiontheAxiproductsdisplayedthepagSetupBasiSetupandrSetupAbout.
UpgradetheFirmware
Important
- Yourdealerreservestherighttochargeforanyrepairattributabletofaultyupgradebytheuser.
- Preconfiguredandcustomizedsettingsaresavedwhenthefirmwareisupgraded(providingthefeaturesareavailableinthenewfirmware)althoughthisisnotguaranteedbyAxisCommunicationsAB.
Note
- Aftertheupgradeprocesshascompleted, theproductwillrestartautomatically. Ifrestartingtheproductmanuallyafterthe upgrade, wait10minutesevenifyoususpecttheupgradehasfailed.
- When you upgrade the Axis product with the latest firmware from Axis website, the product receives the latest functionality available. Always read the upgrade instructions and releases notes available with each new release before upgrading the firmware.
Toupgradetheproduct'sfirmware:
- Download the latest firmware file to your computer, available free of charge at www.axis.com/techsup
- GotoSetup>SystemOptions>Maintenanceintheproduct'swebpages.
UndeUpgradServeryclicBrowseandocatchfileyourcomputer.
4.ClickUpgrade. - Wait approximately 10 minutes while the product is being upgraded and restarted. Then access the product.
AXISCameraManagementbanusedomultipleupgradesSeewww.axis.comfromoreinformation.
Symptoms, Possible Causes and Remedial Actions
ProblemssettingtheIPaddress
| WhenusingARP/Ping | Trytheinstallationagain.TheIPaddressmustbesetwithintwominutesafterpowerhasbeen appliedtotheproduct.EnsurethePinglengthissetto408.Forinstructions,seeAssignIPAddressUsingARP/Pingonpage49. |
| Theproductislocatedona differentsubnet | IfthelPaddressintendedfortheproductandthelPaddressofthecomputerusedtoaccessthe productarelocatedondifferentsubnets,youwillnotbeabletosethelPaddress.Contactyour networkadministratortoobtainanIPaddress. |
Troubleshooting
| TheIPaddressisbeingused byanotherdevice | DisconnecttheAxisproductfromthenetwork.RunthePingcommand(inaCommand/DOS window,typepingandthelPaddresssoftheproduct):Ifyoureceive:Replyfrom:bytes=32;time=10... thismeansthatthelPaddressmayalreadybeinusebyanotherdeviceonthenetwork. ObtainanewIPaddressfromthenetworkadministratorandreinstalltheproduct.Ifyoureceive:Requesttimedout,thismeansthatthelPaddressisavailable forusewiththeAxisproduct.Checkallcablingandreinstalltheproduct. |
| PossibleIPaddressconflict withanotherdeviceonthe samesubnet | ThestaticIPaddressintheAxisproductisusedbeforetheDHCPserversetsadynamicaddress. ThismeansthatifthesamedefaultstaticIPaddressisalsousedbyanotherdevice,theremay beproblemsaccessingtheproduct. |
Theproductcannotbeaccessedfromabrowser
| Cannotlogin | WhenHTTPSisenabled,ensurethatthecorrectprotocol(HTTPorHTTPS)isusedwhenattemptingtdoginYoumayneedmanuallytypehttpithttpsithebrowser'saddressfield. |
| Ifthepasswordfortheuserrootislost,theproductmustberesettothefactorydefaultsettings.SeeResettoFactoryDefaultSettingsonpage58. | |
| ThelPaddresshasbeenchangedbyDHCP | IPaddressesobtainedfromaDHCPserveraredynamicandmaychange.IfthelPaddresshasbeenchanged,useAXISIPUtilityorAXISCameraManagementtolocatetheproductonthenetwork.Identifytheproductusingitsmodelorserialnumber,orbytheDNSname(ifthenamehasbeenconfigured). |
| Ifrequired,astaticlPaddressscanbeassignedmanually.Forinstructions,seethedocumentAssignandAddressandAccesstheVideStreamorAxisSupportwebwww.axis.com/techsup. | |
| CertificateerrorwhenusingIEEE802.1X | Forauthenticationtoworkproperly,thedateandtimesettingsintheAxisproductshouldbesynchronizedwithanNTPserver.SeeDateEtTimeonpage48. |
Theproductisaccessiblelocallybutnotexternally
| RouterconfigurationToconfigureyourroutertoallowincomingdatatrafficitotheAxisproduct,enabletheNAT-traversalfeaturewhichwillattempttoautomaticallyconfiguretheroutertoallowaccesstotheAxisproductsedNATraversal(portmapping)forPv4orpage52TheroutemustupportUPnP | TM. | |
| Firewallprotection | CheckthelInternetfirewallwithyournetworkadministrator. | |
| Defaultroutersrequired | CheckifyouneedtoconfiguretheroutersettingsfromSystemOptions>Network>TCP/IP>Basic. | |
ProblemswithstreamingH.264
| ProblemswithAXISMedia Control(InternetExplorer only) | ToenabletheupdatingofvideoimagesinInternetExplorer,setthebrowsertoallowActiveX controls.Also,makesurethatAXISMediaControlisinstalledonyourcomputer. |
| NoH.264displayedinthe client | CheckthattherelevantH.264connectionmethodsandcorrectinterfaceareenabledintheAMC ControlPanel(streamingtab).SeeAXISMediaControl(AMC)onpage13. |
| IrtheAMCcontroPanelselectdH.264bandclicSetdefaultH.264decoder. | |
| CheckthaRTSPenabledundesystemOptionsNetworkTCP/IPAdvanced. | |
| MulticastH.264only accessiblebylocalclients | Checkifyourroutersupportsmulticasting,orifteroutersettingsbetweentheclientandthe productneedtobeconfigured.TheTTL(TimeToLive)valuemayneedtobeincreased. |
| NomulticastH.264 displayedintheclient | CheckwithyournetworkadministratorthatthemulticastaddressesusedbytheAxisproduct arevalidforyournetwork. |
| Checkwithyournetworkadministratortoseeifthereisafirewallpreventingviewing. |
Troubleshooting
| PoorrenderingofH.264 images | Ensurethatyourgraphicscardisusingthelatestdriver.Thelatestdriverscanusuallybe downloadedfromthemanufacturer'swebsite. |
| Colorsaturationisdifferent inH.264andMotionJPEG | Modifythesettingsforyourgraphicsadapter.Refertotheadapter'sdocumentationformore information. |
| Lowerframeratethan expected | SeePerformanceConsiderationsonpage64.Reducethenumberofapplicationsrunningontheclientcomputer.Limitthenumberofsimultaneousviewers.Checkwiththenetworkadministratorthatthereisenoughbandwidthavailable.CheckintheAMCControlPanel(H.264tag)thatvideoprocessingisNOTsettoDecodeonly keyframes.Lowertheimageresolution.SetCaptureModchaprioritizesframeRateChanginghecapturemodeprioritizeframeRatewilllowerthemaximumresolution.SeeCaptureModeonpage20.Themaximumframespersecondisdependentonthutilityfrequency(60/50Hz)oftheAxis product.SeeTechnicalSpecificationsonpage62. |
Videoandimageproblems,general
| Imageunsatisfactory | CheckthevidestreamandcamersettingsundeSetupVideoVideStreamandSetup>Video>CameraSettings. |
| Disturbedfocus | Setthefocusmanuallybyturningthefocusing.SeeHardwareOverviewonpage7 |
| Storageanddiskmanagementproblems | |
| Storagedisruption | Astoragedisruptionalarmissentifastoragedeviceisunavailable,removed,full,lockedorifotherreadwriteproblemsoccurToidentify thesourceoftheproblemcheckSystemLogunderSystemOptions>Support>LogsetReports.Dependingontheproblem,itmightbenecessaryto re-mountthestoragedevice.Forinformationonhowtosetupastoragedisruptionalarm,seeEventsonpage38. |
| Videocannotberecorded | CheckthattheSDcardisnotwriteprotected(thatis,readonly). |
| SDcardcannotbemountedReformattheSDcardandthenclickMount. | |
NOTICE
Formattingthecardwillremoveallcontent,includingallrecordings,fromtheSDcard.
TechnicalSpecifications
| Camera | |
| Imagesensor | 1/2.8"progressivescanRGBCMOS |
| LensM12mount,Fixediris,Fixedfocus2.8mm,F2.0Horizontalfieldofview:80°Verticalfieldofview:45° | |
| DayandnightAutomaticallyremovableinfrared-cutfilter | |
| Minimumillumination | Color:0.2luxat50IRE,F2.0B/W:0.04luxat50IRE,F2.00luxwithIRilluminationon |
| Shuttertime | 1/65000sto2s |
| Cameraangleadjustment | Pan:±180°Tilt:0°to60°(0°=lensdirectedatarightangletocamerabase)Rotation:±95°Canbedirectedinanydirectionandseethewall/ceiling |
| Video | |
| Videocompression | H.264(MPEG-4Part10/AVC)Baseline,MainandHighProfilesMotionJPEG |
| Resolutions | 1280x720to176x120 |
| Framerate | Upto25/30fpswithpowerlinefrequency50/60Hz |
| Vidostreaming | Multiple,individuallyconfigurablestreamsinH.264andMotionJPEGControllableframerateandbandwidthAxis'ZipstreamtechnologyinH.264VBR/MBRH.264 |
| Imagesettings | Compression,Color,Brightness,Sharpness,Contrast,Localcontrast,Whitebalance,Exposurecontrol,WDR-forensiccapture,Rotation:0°,90°,180°,270°includingCorridorFormat,Textandimageoverlay,Privacymasks,Mirroringofimages |
| Pan/Tilt/Zoom | DigitalPTZ |
| Network | |
| SecurityPasswordprotection,IPaddressfiltering,HTTPS authentication,Useraccesslog,CentralizedCertificateManagement | a encryption,IEEE802.1X a networkaccesscontrol,Digest |
| Supportedprotocols | IPv4/v6,HTTP,HTTPS a,SSL/TLS a,QoSLayer3DiffServ,FTP,SFTP,CIFS/SMB,SMTP,Bonjour,UPnP (MIB-II),DNS,DynDNS,NTP,RTSP,RTP,TCP,UDP,IGMP,RTCP,ICMP,DHCP,ARP,SOCKS,SSH TM,SNMPv1/v2c/v3 |
| Systemintegration | |
| ApplicationProgrammingInterface | OpenAPIforsoftwareintegration,includingVAPIX®andAXISCameraApplicationPlatform;specificationsatwww.axis.comAXISVideoHostingSystem(AVHS)withOne-ClickConnectionONVIFProfileS,specificationatwww.onvif.org |
| Analytics | AXISVideoMotionDetection3,ActivetamperingalarmSupportforAXISCameraApplicationPlatformenablinginstallationofAXISCrossLineDetectionandthird-partyapplications,seewww.axis.com/acap |
| EventtriggersAnalytics,Edgestorageevents | |
| Eventactions | Notification:email,HTTP,HTTPSandTCPandSNMPtrapVideorecordingtoedgestorage |
TechnicalSpecifications
| SendvideoclipPre-andpost-alarmvideobufferingOverlaytext | |
| Data streaming | Eventdata |
| Built-in installation aids | Pixelcounter |
| General | |
| CasingIP66-,NEMA250Type4X,andIK08-rated,ASApolymercasingEncapsulatedelectronics,Captivescrews(Torx10)Color:WhiteNCSS1002-BForrepaintinginstructionsandimpactonwarranty,contactyourAxispartner | |
| SustainabilityPVCfree | |
| Memory512MBRam,256MBFlash | |
| Power | PoweroverEthernet(PoE)IEEE802.3af/802.3atType1Class3Typical:4.2W,Max.:6.2W |
| Connectors | RJ4510BASE-T/100BASE-TXPoE |
| IRillumination | Power-efficient,long-life850nmIRLED.Rangeofreachupto15m(50ft)dependingonscene |
| Storage | SupportformicroSD/microSDHC/microSDXCcardSupportforrecordingtodedicatednetwork-attachedstorage(NAS)ForSDcardandNASrecommendationsseewww axis.com |
| Operating conditions | -30°Cto50°C(-22°Fto122°F)Humidity10-100%RH(condensing) |
| Storage conditions | -40°Cto65°C(-40°Fto149°F) |
| Approvals | EMCEN55022ClassB,EN55024,IEC62471,EN61000-6-1,EN61000-6-2,FCCPart15SubpartBClassB,ICES-003ClassB,VCCIClassB,RCMAS/NZSCISPR22ClassB,KCCKN32ClassB,KN35EnvironmentIEC60068-2-1,IEC60068-2-2,IEC60068-2-78,IEC60068-2-14,IEC60068-2-6,IEC60068-2-27,IEC/EN62262IK08,IEC/EN60529IP66,NEMA250Type4X,IEC60721-3-4Class4M3SafetyIEC/EN/UL60950-22 |
| Dimensions | Height:94mm(3.7in)ø101mm(4.0in) |
| Weight | 380g(0.83lb) |
| Included accessories | InstallationGuide,Windowsdecoder1-userlicense,TorxL-key,Connectorguard |
| Optional accessories | AXIST94B02DPendantkitAXIST94B01PCconduitbackboxAXIST94B02MJ-Box/GangboxplateBlackcasingAXISMountsAXISSurveillancemicroSDXC ^TM CardFormoreaccessories,seewww axis.com |
| Video management software | AXISCompanion,AXISCameraStation,VideomanagementsoftwarefromAxis'ApplicationDevelopmentPartnersavailableonwww-axis.com/techsup/software |
Languages English, German, French, Spanish, Italian, Russian, Simplified Chinese, Japanese, Korean, Portuguese, Traditional Chinese
Warranty Axis3-yearwarrantyandAXISExtendedWarrantyoption,see www.axis.com/warranty
aThisproductincludessoftwarelevelopedbytheOpenSSIProjectfours@theOpenSSIToolkit(www.openssl.org)andcryptographicsoftwarewrittenbyEricYoung(eay@cryptsoft.com).
Environmental responsibility: www.axis.com/environmental-responsibility
PerformanceConsiderations
Whensettingupyour system, it is important to consider how various settings and situations will affect performance. Some factors affect the amount of bandwidth (the bitrate) required, others can affect the framerate, and some affect both. If the load on the CPU reaches its maximum, this will also affect the framerate.
The following factors are among them most important to consider:
- Highimageresolutionand/orlowercompressionlevelsresultinimagescontainingmoredata.Bandwidthaffected.
- AccessbylargenumbersofMotionJPEGand/orunicastH.264clients.Bandwidthaffected.
- Simultaneousviewingofdifferentstreams(resolution, compression)bydifferentclients.Effectonframerateand bandwidth.
- AccessingMotionJPEGandH.264videostreamssimultaneously.Framerateandbandwidthaffected.
- Heavyusageofeventsettingsaffecttheproduct'sCPUload.Framerateaffected.
- UsingHTTPSmayreduceframerate, inparticularifstreamingMotionJPEG.
- Heavynetworkutilizationduetopoorinfrastructure.Bandwidthaffected.
- Viewingonpoorlyperformingclientcomputerslowersperceivedperformance.Framerateaffected.
- RunningmultipleAXISCameraApplicationPlatform(ACAP)applicationssimultaneouslymayaffecttheframerateand thegeneralperformance.