ET9 Series 2 - Klimaanlage Andrews - Kostenlose Bedienungsanleitung
Finden Sie kostenlos die Bedienungsanleitung des Geräts ET9 Series 2 Andrews als PDF.


Benutzerfragen zu ET9 Series 2 Andrews
0 Frage zu diesem Gerät. Beantworten Sie die, die Sie kennen, oder stellen Sie Ihre eigene.
Eine neue Frage zu diesem Gerät stellen
Laden Sie die Anleitung für Ihr Klimaanlage kostenlos im PDF-Format! Finden Sie Ihr Handbuch ET9 Series 2 - Andrews und nehmen Sie Ihr elektronisches Gerät wieder in die Hand. Auf dieser Seite sind alle Dokumente veröffentlicht, die für die Verwendung Ihres Geräts notwendig sind. ET9 Series 2 von der Marke Andrews.
BEDIENUNGSANLEITUNG ET9 Series 2 Andrews
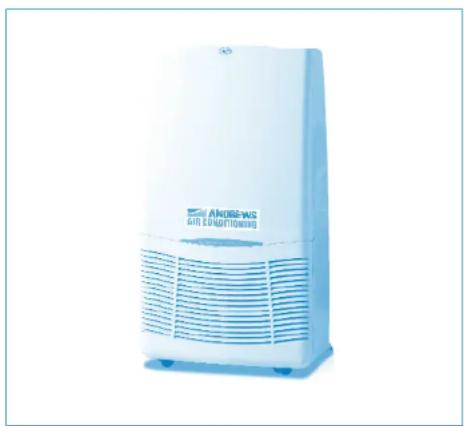
ET9 Series 2 Portable Air Conditioning
natural_image
Exterior view of a white portable air conditioner unit (no visible text or symbols on the device body)Operating Instructions & Safety Guide

ANDREWS
AIR CONDITIONING
General Safety
- Keep children and animals away from air conditioning units. Never leave them alone in a room where the units in use.
This equipment should only be used by a competent person who has read and understood these instructions.
Never operate this equipment if you are ill, feeling tired or under the influence of alcohol or drugs. - Keep the Air Conditioning vents clear of all obstructions.
Never put anything on top of the unit or block the air outlets.
Make sure equipment is switched off and unplugged after use.
Never leave switched on or unattended.
Do not use the unit where sunlight is shining directly onto it.
Check condition of equipment before use. If unit is showing signs of damage contact your supplier immediately.
Electrical Safety
This unit requires a 230 volt electrical supply. It plugs into a standard BS1363 domestic socket.
Always inspect plugs and leads for damage before plugging into the supply - DO NOT USE IF ANY DAMAGE IS FOUND
Ensure cables are run as not to cause a hazard.
If an extension lead is used, ensure it is of the correct standard, and fully uncoiled when being used.
Do not lay electrical cables in wet / damp areas.
Do not move equipment whilst operating.
Do not pull equipment by its cable.
It is recommended that electrical equipment is used via a suitable RCD.
Maintenance
- Disconnect from the electrical supply before any cleaning or maintenance.
Do not use chemical solvents to clean the surface of the unit.
Use a clean, damp cloth.
Check the filter every week (fig. 5).
Remove the air filter, the element may be vacuum cleaned or washed in a neutral warm water & detergent mix (40°C)
Rinse and dry the filter before replacing.
Do not dry in direct sunlight.
Laying Up
- Clean filter
- Clean surfaces
- Drain water from the unit
Please note water will drain from the water drain (fig. 4).
DO NOT DO THIS ON ANY INDOOR FLOOR SURFACES - When the unit is clean and drained store in a clean, dry area. Stow cable. The unit may be covered.
Getting started and operation
Never operate the unit in very hot or cold conditions - it works properly at temperatures between 17 and 30^ .
Always allow the unit to stand/settle for 15 minutes before switching on when either setting up or restarting.
Put the mobile air conditioner in a flat location where the air outlets cannot be covered up. Place the unit no less than 50cm away from a wall or other obstacle
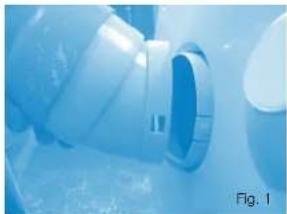
Fit the end of the exhaust duct to the exhaust terminal of the unit (fig. 1).
Put the other end (discharge) to the nearest window. The length of the air exhaust between 600 - 1800mm. Use the min length when working. When mounting, try to keep the air exhaust horizontal, sloping up or down. Never operate if the hose is kinked or sagging (fig. 2&3).
If mounting through the wall, the height of the hole should be 40 - 130cm.
Water Drain
The water full indicator (8) will illuminate. The unit will stop. Pull pipe on the rear of the unit (Fig 4). Be careful as water will spill from this pipe. Drain all the water into a suitable container, Replace pipe into its clip. The unit will restart.
Operating Instructions - ET9 Series 2
Filter
Clean the filter every week (fig. 5).
Slide the filter out from the side of the unit.
Wash the filter in neutral warm water & detergent mix (40°C)
Rinse and dry completely.
Replace. Do not dry in direct sunlight.
Light dust may be removed by vacuum cleaning.
natural_image
Close-up of a blue industrial pipe fitting with a circular opening, labeled Fig. 1 (no text or symbols on the diagram itself)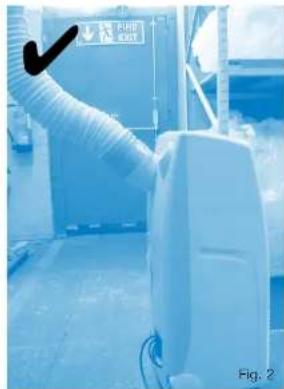
natural_image
Exterior view of a medical or industrial device with a white hose and control panel, no visible text or symbols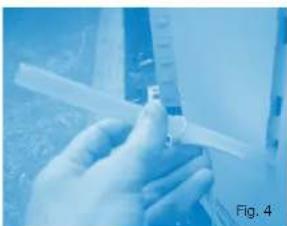
natural_image
Close-up of a gloved hand holding a syringe, with no visible text or symbols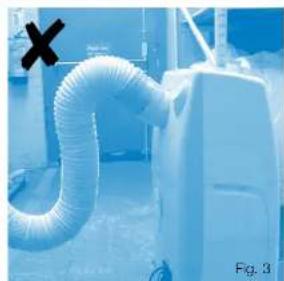
natural_image
Industrial air duct system with a white container and pipe, no visible text or symbols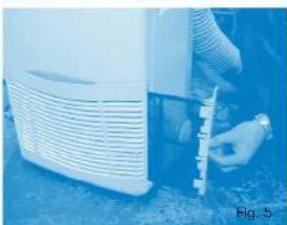
natural_image
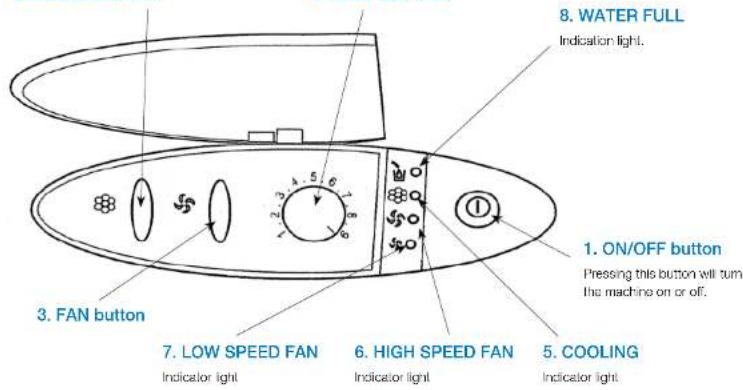
Close-up of a person interacting with a white air purifier or heater component, no visible text or symbols- COOLING button
- TEMP SETTING
text_image
8. WATER FULL Indication light. 1. ON/OFF button Pressing this button will turn the machine on or off. 3. FAN button 7. LOW SPEED FAN Indicator light 6. HIGH SPEED FAN Indicator light 5. COOLING Indicator lightOperation
- Twist the knob (4) of the thermostat clockwise until you reach the position of maximum cooling.
- Switch on the air conditioner pressing the ON/OFF push-button (1) ① lamps of last operations are displayed.
- Select the cooling operation 🎨 pressing the push-button (2), and lamp (5) lights.
- Press the push-button (3) 🎨 to select the high fan speed, and the 🎨 lamp (6) lights.
- When room temperature has reached the most
suitable value for your comfort, press again the push-button (3) 🎨 to select the low fan speed, the 🎨 lamp (7) & lights.
- Now slowly twist the thermostat knob back towards the left until the compressor stops. At this point the air conditioner is set for automatic operation under the control of the electronic thermostat to maintain the room temperature at the pre-set value.
- To stop the air conditioner press again the ON/OFF push-button. (1).