IPRO35 - Dashcam iRoad - Kostenlose Bedienungsanleitung
Finden Sie kostenlos die Bedienungsanleitung des Geräts IPRO35 iRoad als PDF.


Benutzerfragen zu IPRO35 iRoad
0 Frage zu diesem Gerät. Beantworten Sie die, die Sie kennen, oder stellen Sie Ihre eigene.
Eine neue Frage zu diesem Gerät stellen
Laden Sie die Anleitung für Ihr Dashcam kostenlos im PDF-Format! Finden Sie Ihr Handbuch IPRO35 - iRoad und nehmen Sie Ihr elektronisches Gerät wieder in die Hand. Auf dieser Seite sind alle Dokumente veröffentlicht, die für die Verwendung Ihres Geräts notwendig sind. IPRO35 von der Marke iRoad.
BEDIENUNGSANLEITUNG IPRO35 iRoad
My Driving Partner
JAEWONCNC HD BLACKBOX / IROAD DRIVING RECORDER
INSTRUCTION MANUAL
IROAD IPRO35
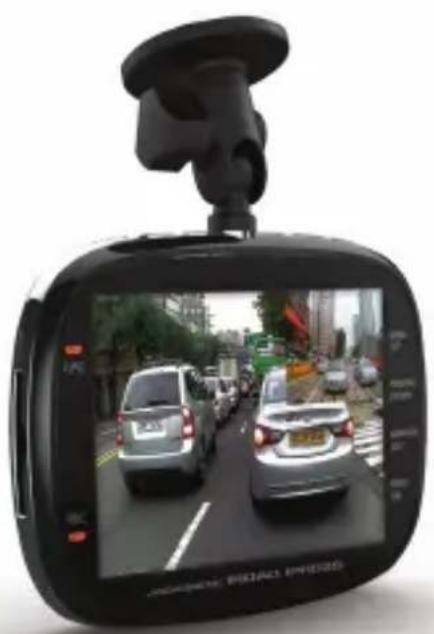
natural_image
Digital car rearview display showing a multi-lane highway scene with cars on both sides (no visible text or symbols)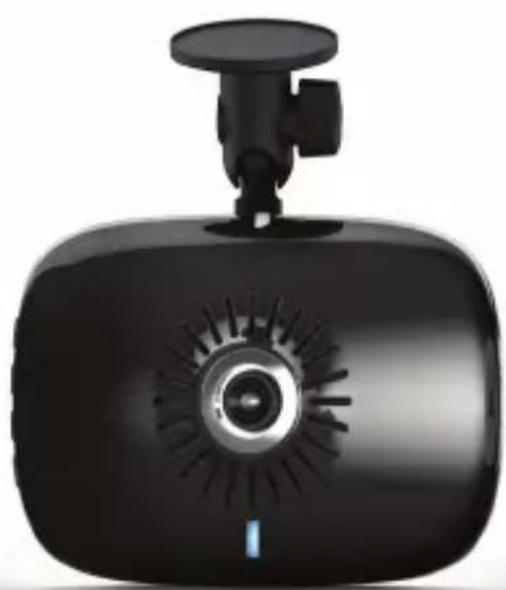
natural_image
Black digital camera with a circular lens and mounted sensor (no visible text or symbols)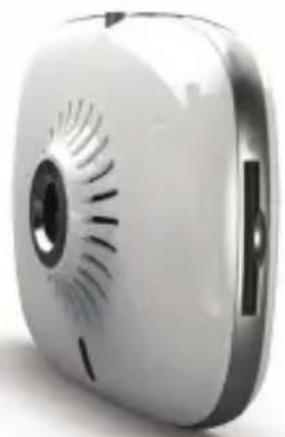
natural_image
Exterior view of a white electronic device with a circular vent and ventilation grille (no text or symbols visible)Table of Contents
Before Using the Unit Warranty / Warning 1
Precautions SD Cared/How to remove 2
How to Use 3
Product Features 4
About the Unit 5
LED Operation Guide 6
Product Configuration 7
Product Specification 8
Product Description 9
How to Mount 10
Storage Folder/LCD Menu Mode 12
LCD Menu Description 13
How to SD Card Format 16
Dedicated Viewer 18
Quality Warranty Note 23
MEMO
Please use aware of before using the product to ensure your safety and the proper use of the product. Products and documentation without prior notice in order to improve the convenience and functionally of the part or description can be changed
Warranty and Warning
We are not responsible for any problems that occur while using the violations listed in the instruction manual
- We are not responsible for damage arising from failure of the product, loss of data, and other product use
- The storage of this product is the SD Card, the user's continuous care and attention is required
- The products of the black box made in order to take advantage of the accidents recorded/saved images, but the impact of the vehicle or events and does not guarantee that the video recording /storage
- Regular power supply when connecting the vehicle battery discharge shall not be responsible for it or a fire occurs due to mounting bad/any modifications
Warning
Please use only the specified voltage
It cause of the failure and it can be a fire hazard of the product
* Do not disassemble the product
* After service in case of user error is the cause of the malfunction, electrical shock or breakdown can be caused (If repair is required, contact an authorized service center, please)
* Careful not to undermine or cut the power and attached other electronic products on the devices (The cause of the failure and the risk of fire)
* At power –on, depending on the state of the vehicle and the surrounding environment can be malfunction. Recommend regular power supply connection, Please avoid as much as possible (Regular power cable installation is recommended by experts. Discharging the vehicle battery and fire damage shall not be held liable on us)
2 Notice
SD Card
When you remove or insert the SD Card, please remove the power jack of the product and check the LED is off, and then check the saved data
-There is a danger of damage, if forcibly remove the SD Card
- Data loss in case you want to remove the SD Card or the card may be damaged during operation
-Stored or during than spot kept in the case, the SD Card may damaged or loss of data by static or external voltage
(Avoid use and stored in hot or humid places, or places where the risk of corrosion)
-Please keep the important data is saved on a different storage device (HDD, CD, USB)
- Make sure that the data in order to determine whether the product is in proper operating condition at least once a month to use to format the SD Card
- The SD Card is consumable parts, If it used long period time, it would shorten the life. Therefore may not be able to save the video data normally, it is advisable to periodically check. Recommended emergencies SD card you purchase separately.
※ card format and inserted into the product, the folder is automatically created and recorded video will be saved

How to remove SD Card
The unit's power will be turned off if the car ignition off or unplug the power plug When remove or insert the SD card, please turn off the power and then proceed to the steps below
-
Remove SD Card
-
Turn off car ignition
- Check all LED is off
- Remove the SD Card after all LED is off
(It may cause a malfunction by remove forced, press lightly be easily separated)
-
Insert SD Card
-
Insert the SD Card into the slot on the Block box
- Connect the power jack on the main unit and then start up
※ Make sure remove the power jack first and then remove or insert the SD Card
Please read carefully the following document that caused by fire on the product or SD Card
Use SD Card after the format by PC, Please the first time you use SD Card after opening
※ Even when you purchase a new SD Card, use it after format also
During summer when temperature will hot enough inside the vehicle, you parked in a shady place away from direct sunlight
Do not operate while driving. Park the vehicle in safety place and operate the terminal
Do not touch oil or water on your hand
Do not insert any other objects into the SD Card entrance of the terminal
If power is lost or damaged due to an accident, the recording can not be working well
Please remove the accessories that interfere with recording or tinted
If you are having trouble with your product or SD Card, contact us to solve the problem
Do not any impact to the terminal, Cause of damage or malfunction
When you changed the location, because the operation can not be carried out properly and be securely fastened when you install,
after install please move to device to avoid impact or applying excessive force
SD card is recommended that is the genuine specified by our company
It can be a source of malfunction or loss of data to use of non-genuine or other product
You do not remove the SD Card or turn off the power during the firmware update.
It may cause a malfunction or loss of data
4 Product Features
This product installation, depending on the direction of the car in the front or rear or inside the car video or voice recording. Therefore to encourage safe driving while driving accidents and theft prevention, helping to secure the evidence of the incident, the vehicle car recorder for drivers

3.5-inch Widescreen LCD on board / Front-to-Back split screen PIP Split screen, easy video playback and 3.5-inch LCD front and rear. Check at the same time

2-Channel black box / The Front : HD , The Rear : VGA Front 1280x720 real HD Image, Rear 640x480 VGA-class Image

Automatic Parking Mode The parking mode automatically start in 20 minutes, If there is no movement of the G-Sensor after car parked

Motion Sensor/Motion Detector Saved separately to detect the movement of video recording from the camera sensor. The vehicle is automatic parking mode while it is entering (May not implement this function working properly the environment and climate change)

3D G-Sensor It I equipped with a G-Sensor detects impact sudden acceleration and sudden deceleration to automatically record video at the time of the accident

Nomal and Event Recording Nomal Recording: Recording at 1 minute intervals Event Recording: Recording separated by vehicle impacted

Voice Guidance and Voice Recording Check the status of devices with the voice guidance. The video and audio record at same time. You can check the video with sound when you playback

LCD Auto Off Function Support When parking mode and the sensors detects no movements, It will turn off automatically to protect the battery of vehicle

Format the Memory Card in the Device itself Support Functions Support a function can format directly from the memory card malfunction of the unit
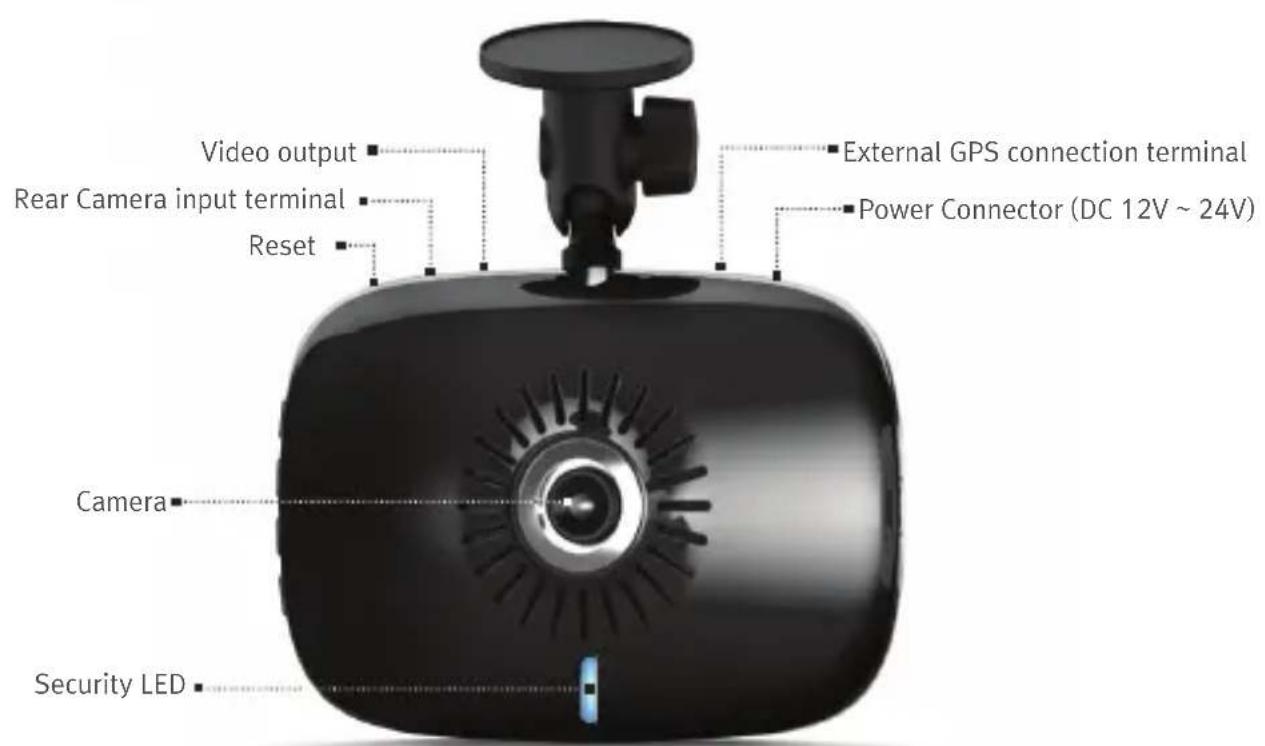
text_image
Video output Rear Camera input terminal Reset External GPS connection terminal Power Connector (DC 12V ~ 24V) Camera Security LED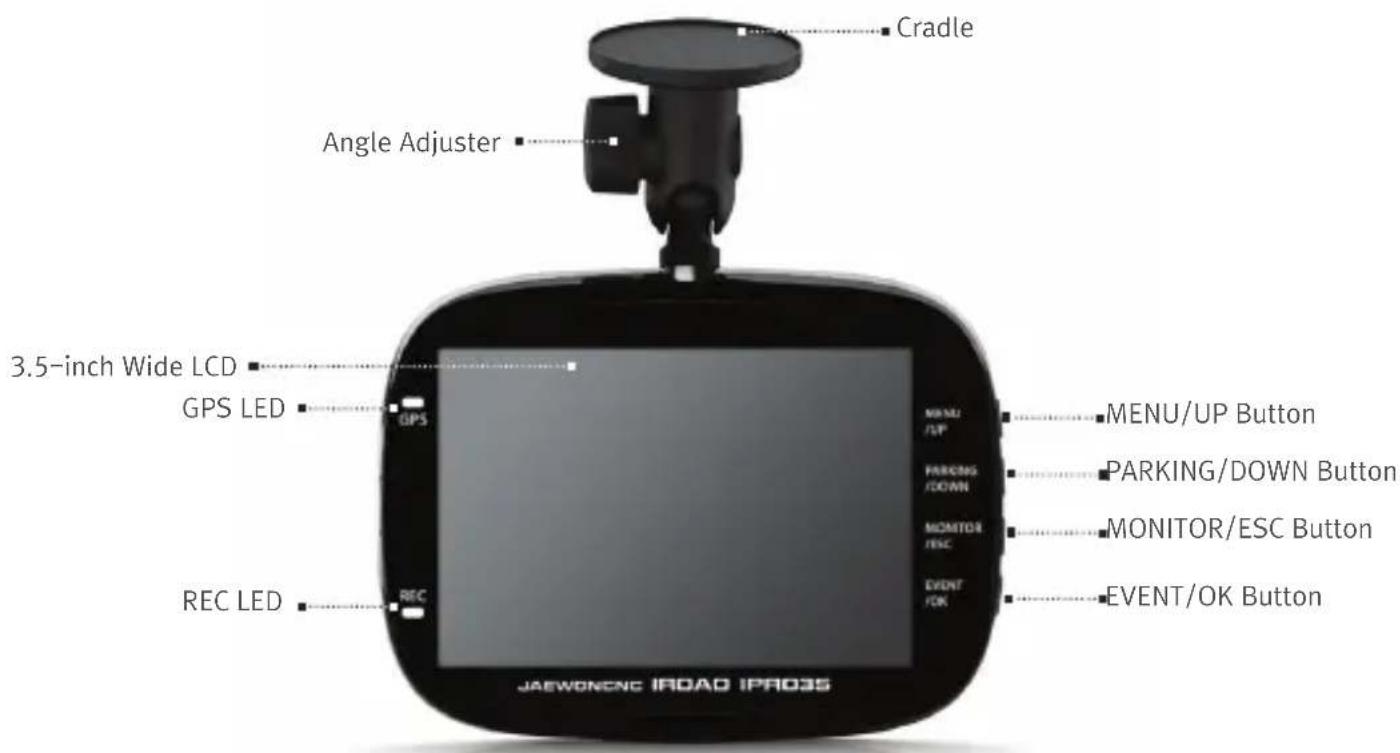
text_image
Cradle Angle Adjuster 3.5-inch Wide LCD GPS LED REC LED MENU/UP PARKING/DOWN MONITOR/ESC EVENT/OK JAEWONCNC IROAD IPRO3S MENU/UP Button PARKING/DOWN Button MONITOR/ESC Button EVENT/OK Button6 About the Unit
text_image
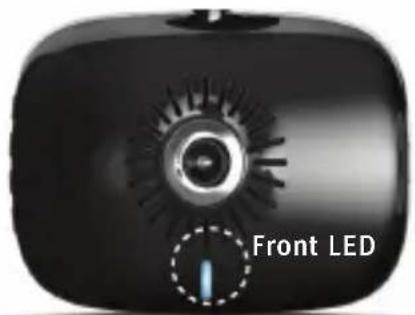
Front LED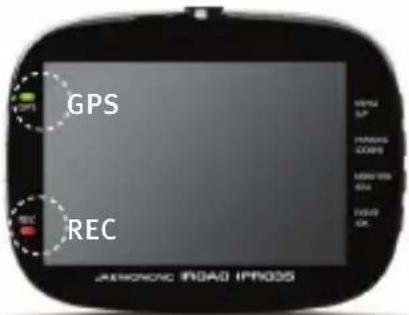
text_image
GPS REC AEROHONG ROAD GPS05Audio Guidance
- Driving safely today
- Can not use SD Card, Please change SD Car
- Start upgrade.
- Upgrade complete, Reboot system
- SD Card will start the initialization
| LED FUNCTION STATUS | NOTE | ||
| Front(Blue) | Security Flickering | Be on and off per 2 seconds | |
| GPS(Green) | GPS Received Active | Not received disabled | |
| REC(Red) | Recording Active | - | |
| REC(Red) | Event(Impact) Flickering | Be on and off per 2 seconds for 30 Seconds | |
| REC(Red) | Mute LCD display | - | |
| REC(Red) | Motion Mode Slowly Flickering | Be on and off per 2 seconds | |
| - Upgrade Firmware - | Voice guidance | ||
| - SD Card Poor - | Voice guidance | ||
| - SD Card Format - | Voice guidance | ||
| REC(Red) | Into Motion Mode | Flickering | Be on and off per 2 seconds |
| REC(Red) | Motion Recording | Flickering | Be on and off per 0.1 Seconds |
※ Flickering: Active: ON, Inactive: OFF
※ Possible simple setting through LED Menu of the device
※ Product manual and button in order to improve the device performance what is subject to change without notice
Basic Components
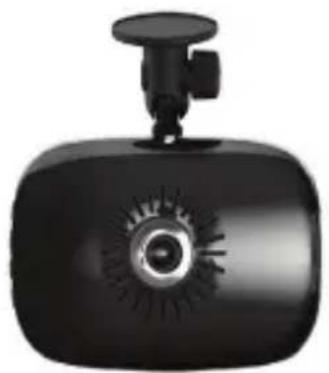
natural_image
Black and white photo of a modern digital camera with a circular lens and control knob (no text or symbols visible)IROAD IPRO35 Main Product and Cradle
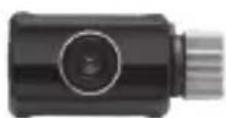
Rear Camera
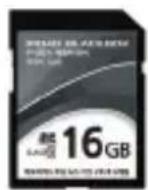
SD Memory Card
natural_image
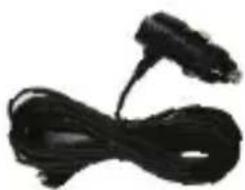
Close-up of a black cable with a small connector (no text or symbols visible)Cigar Jack (12V\~24V)
text_image
iShares iPRODS iShares iPRODSManual
※ Rear camera my different from the picture
Additional Pdoduct
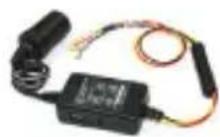
Constant Power Cable
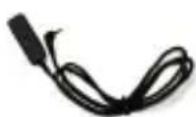
External GPS
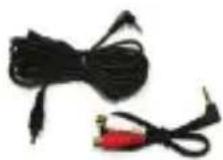
AV Cable

SD Card Reader
8 Product Specifica
| Screen Resolution | 3.5-inch Wide LCD / PIP (The Front and Rear Split Screen) |
| Lens Angle of View | 120 ~ 130 Degrees (2.0 Mega) |
| Intensity of illumination | Higher the 0.5 LUX |
| LED | High Intensity LED equipped |
| Video In/Output | AV IN/OUT(2.5pie), NTSC/PAL |
| Function | Quick Button support(Event,Mute,SimpleFormatting,Auto Parking Mode) |
| Frame | 30fps (Front:15, Rear:15) |
| Video Format | MPEG4(H.264) |
| Memory | SD Memory 2GB~32GB / Simple Formatting on the Device itself support |
| Saving Method | Over Writing |
| Voice Recording/Output | High Quality MIC equipped(Mute Support)/Speaker |
| GPS Module | External GPS Type(Optional), Location/Time/Speed Support |
| G-Sensor/Time | 3D Acceleration Sensor(x,y,z)/Internal RTC(Automatic Sync when GPS connected) |
| Voltage | 12~24 V |
| Support Temperature | -20 ~ 80 Celsius |
| Preservation Temperature | -25 ~ 85 Celsius |
| Power Consumption | 200mAh |
| Battery | Lithium (internal) |
| Recording Mode | Nomal/Event and Menual Recording/Parking Mode/Motion Detect |
| NomalRecording | 1minite increments |
| Impact Recording | Before impact 10 Seconds and After impact 20 Seconds |
| Motion Recording | Before detect 10 Seconds and After detect 20 Seconds |
| SD Format | SD format function button support of the device, format on PC |
| Security | High Intensity Blue/White Front LED |
| PC Viewer | Dedicated Viewer(Freeware)/Window XP, Vista, Windows7, Windows 8 |
| F/W Update | Support Firmware upgrade |
※ The specifications and features are subject to change without prior notice in order to improve the performance of the product
AV-OUT
You can be seen the video recording is in connection to the navigation
The navigation and car recorder connect with video jack
Please use right navigation AV-in jack cable for a cable that fits in the navigation model.
※ The cable is a separate sale product in the office or the shop where you purchased, please contact us
※ You can see AV output only when real-time video and recorded video will not play
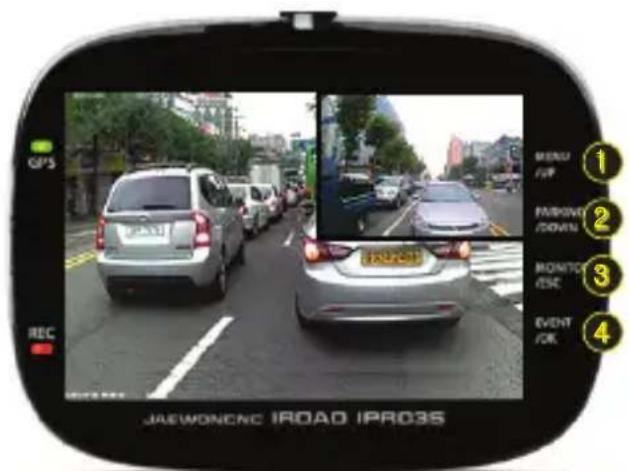
A Simple Button and PIP function
text_image
GPS REC JAEWONCNC IROAD IPRO3S MENU /UP PANIONO /DOWNS MONTO /ESC EVENT /OK 1 2 3 4MENU: - when you press the button shortly -LED is Off When you pressed the button for a long time
UP: - In the active menu, ↑ direction key
2 PARKING: - Parking mode on when you press 1 short second - Parking mode off when you press again shortly
DOWN: - In the active mode, ↓ direction key
3 MONITOR: - Front and rear screen when Press 1 second shortly Screen orderly transition
- Pressed the button for a long time, switch the front or rear of the PIP screen
ESC: - Active mode cancel
4 EVENT: - An event occurs when pressed the button shortly
OK: - Key to run the selected menu
10 How to Mount
▶ How to Mount 1
〈Front〉
natural_image
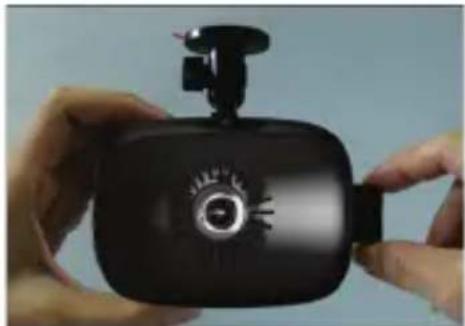
Close-up of hands holding a black electronic device with a rotary knob (no visible text or symbols)- Insert the memory card into the right direction of the unit
natural_image
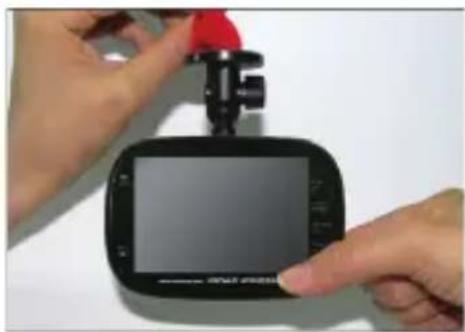
Close-up of hands holding a black GPS controller with a red sensor mounted on top (no visible text or symbols)- Please remove the plastic cover of double-sided type at the top of the unit.
natural_image
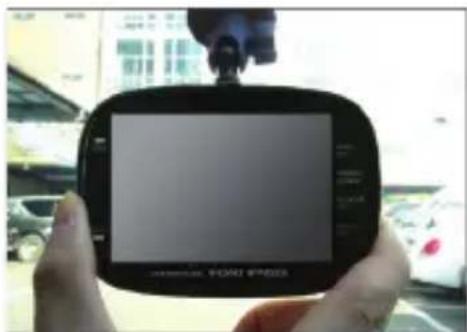
Close-up of hands holding a black rectangular device with a mounted sensor or camera on top, against a blurred background of vehicles and buildings (no visible text or symbols)- Wipe the front glass with a soft cloth and attached a black box terminal
natural_image
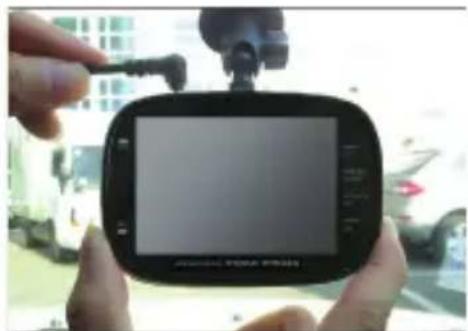
Close-up of hands holding a black GPS navigation device with a mounted sensor (no visible text or symbols)- Connect the power plug of the attached terminal.
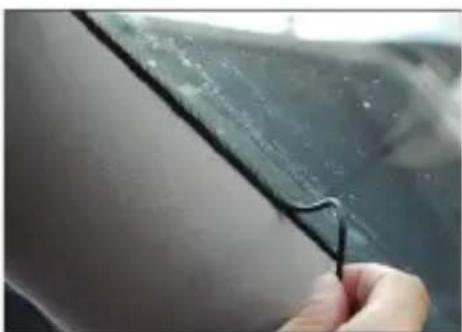
natural_image
Close-up of a hand holding a black cable or wire against a dark background, no visible text or symbols- In order to clean the power line by using the top and corners of the vehicle


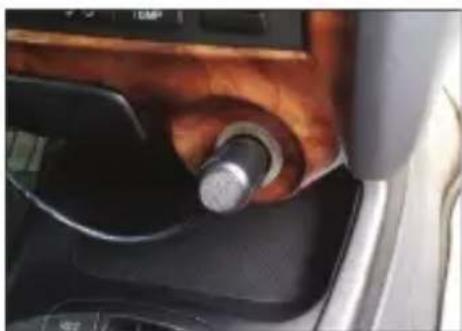
natural_image
Close-up of a car's gear shift lever and mode dial (no visible text or symbols)- Power line connect to the vehicle power socket and the check whether it w
▶ How to Mount 2
< Rear >
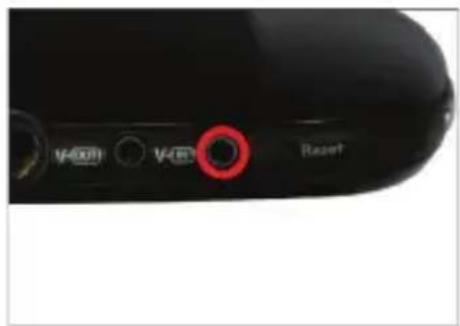
text_image
V400 V400 Reset- Check AV-in Jack on the top of the unit

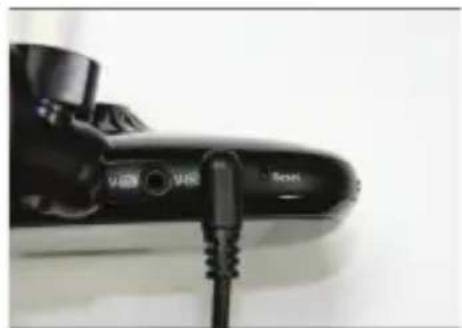
natural_image
Close-up of a black handheld device with a cable inserted, showing ports and labels (no readable text or symbols beyond branding)- AV-in jack of the rear camera connect to the main device
natural_image
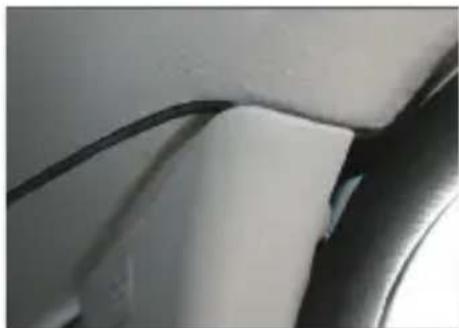
Close-up of a white wall corner with a black cable and a circular object, no visible text or symbols- The rear camera cable is 6M long. Clean up the cable to the edge of under
natural_image
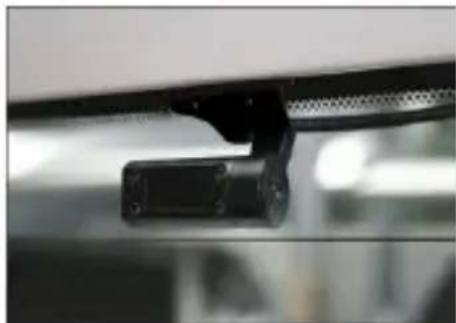
Close-up of a black mechanical component mounted on a glass surface, possibly a camera or sensor device (no visible text or symbols)- The back-side windows of the car and attached the rear-view camera and then adjust the angle of the front LCD
※ You may not see the screen if the power is on while you are connecting the rear camera. Please power on after connected rear camera first
12 Stored the Contents of the Saved Folder/LED Menu Mode
■ Memory Card Storage
After recording the SD Card is inserted into the card-reader is connected to a PC
The file is generated files are recorded in one-minute increments
The two folders and a description of each folder are as follows

EVENT
(When impacted : 30 Seconds)
20% of the space in SD Card capacity, saved to overwrite capacity is exceeded

INFINITY
(normal, parking, motion : 1 Min)
80% of the space in SD Card capacity, Saved to overwrite capacity is exceeded
By SD Card create time unit with file
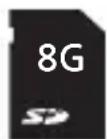

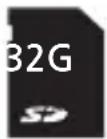
When impacted : create files per 30 Second
Normal/Parking/Motion : Create files per 1 Min
Total storage time / from front-to-back video recording
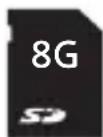
about 4 hours
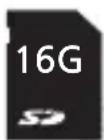
about 8 hours
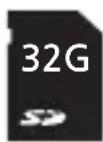
about 16 hours
※ Variable frame storage day and night, depending on the user's operating environment and may vary
※ Please use a genuine memory-card CLASS 10 or higher is recommended
※ Shorten the life of the memory card while constant power supply is connected, please check its useful life and replace a new memory card
1 Recording Start
[Main Menu]
- Recording Start
2.Play Video Data
3.Video Setting - Audio Setting
5.G-Sensor Setting
6.Time Setting - System
→ Start Recording after setting the function of each values
2 Playback Recordings
[Play Video Data]
- Infinity
- Event
-
Exit
-
Infinity
→ NormalRecording - Event
→ Event Recording - Exit → Return to previous menu
![iRoad IPRO35 - [Play Video Data] - 1](/content/2026/05/773131/images/0507cf044ea378113408d09df56de129790cb8189060038dd3e248726112612c.jpg)
[Infinity File List]
470.20120616_141944_12
470.20120616_141944_12
→ File List
※ Click OK to show the front view files (Press ESC/Monitor button to switch Rear view)
※ ESC/Monitor Button
= Front view, - the button to switch Rear view
3 Video Setting (Adjust Video)
[Video Setting]
- FPS < 30FPS>
- Bitrate < 8Mb >
- VideoOut < LCD >
- Channel < 2CH >
- Exit
1) Second Screen <30FPS> Adjust Frame(10\~30) In case of using 2-Channel divide into 15FPS each
2) Image Quality<8Mb> Adjust Image Quality(2,4,8) In case of using 2-Channel divide into 4MB each
3) Output〈LCD〉-LCD / TV Out Conversion
4) Channels-The Front/Rear Switching
5) BACK-Back to previous Menu
4 Audio Setting
[Audio Setting]
- Audio Record< On >
- SPK Volume < Level 5 >
- Exit
1) Record
2) Volume
3) Back-back to previous menu
5 Adjust Shocking Sensitivity
[G-sensor Setting]
- ACC X < LV 3 >
- ACC Y < LV 3 >
- ACC Z < LV 3 >
- Exit
1) X-axis - 1\~10, OFF (Left, Right)
2) Y-axis - 1\~10, OFF (UP, Down)
3) Z-axis - 1\~10, OFF (Before, After)
4) BACK - back to previous menu
※1\~10
(Sensitive \~ insensitive)
6 Time Setting
[Time Setting]
| 1. Year | 〈 | 2012 | 〉 |
| 2. Month | 〈 | 06 | 〉 |
| 3. Day | 〈 | 20 | 〉 |
| 4. Hour | 〈 | 17 | 〉 |
| 5. Minute | 〈 | 18 | 〉 |
| 6. Save&Exit | |||
| 7. Cancel |
1) Year : Set the year
2) Month : Set the month
3)Day : Set the Day
4) Hour : Set the hour
5) Minute : Set the minute
6) Save&Exit : back to previous menu after saving
7) Cancel
7 SYSTEM
[System]
| 1. Mode | 〈 Park 〉 |
| 2. Format | |
| 3. Language | 〈 English 〉 |
| 4. Info | |
| 5. Exit |
1) Mode - Switch Park / Motion Mode
2) SD Card Format - Format SD Card
3) Language - Korean/English
4) Information - H/W, S/W information
5) BACK- Return to previous menu
4. Info
[System Information]
| 1. H/W Ver : V1.0.0 |
| 2. S/W Ver : V1.8.4 |
→ H/W, S/W information Screen
16 How to SD Card Format
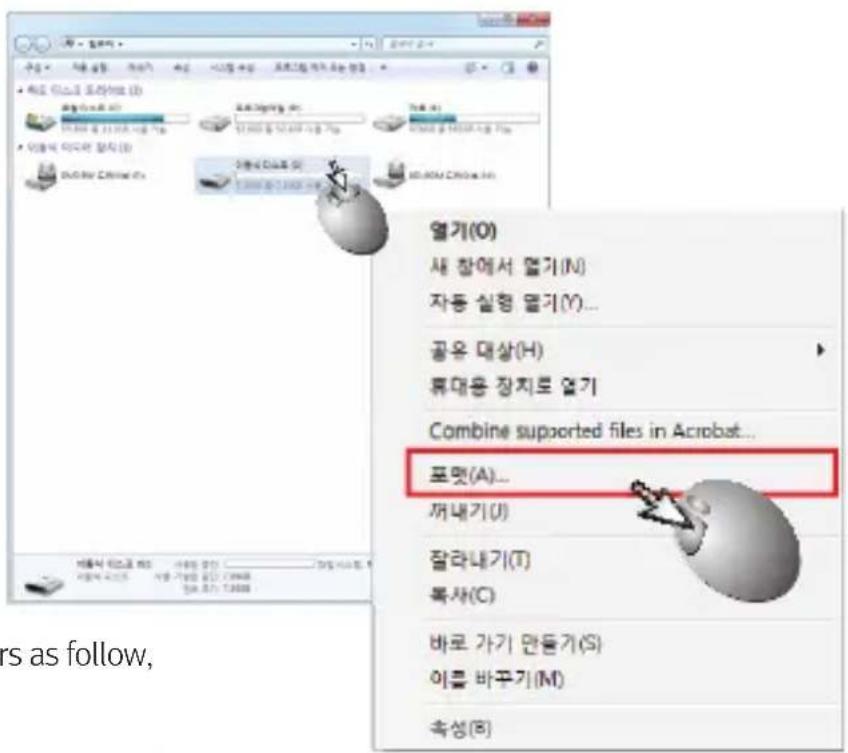
- Double click "My Computer" on the desktop environment
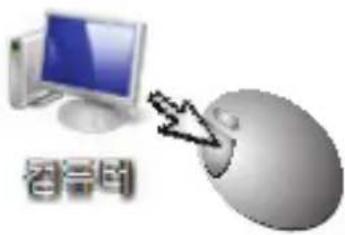
text_image
컴퓨터- go to menu bar where removable storage by right click, then click "Format"
text_image
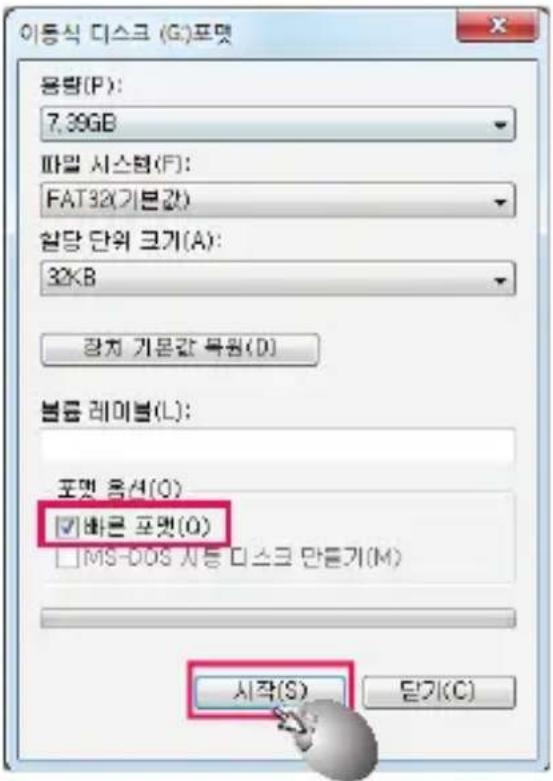
로 헤이 수록 서울 쓀류 사용품 수량 모바트일 라이 높스 (1) 로 헤이 (2) 로 헤이 (3) 로 헤이 (4) 로 헤이 (5) 로 헤이 (6) 로 헤이 (7) 로 헤이 (8) 로 헤이 (9) 로 헤이 (10) 로 헤이 (11) 로 헤이 (12) 로 헤이 (13) 로 헤이 (14) 로 헤이 (15) 로 헤이 (16) 로 헤이 (17) 로 헤이 (18) 로 헤이 (19) 로 헤이 (20) 로 헤이 (21) 로 헤이 (22) 로 헤이 (23) 로 헤이 (24) 로 헤이 (25) 로 헤이 (26) 로 헤이 (27) 로 헤이 (28) 로 헤이 (29) 로 헤이 (30) 로 헤이 (31) 로 헤이 (32) 로 헤이 (33) 로 헤이 (34) 로 헤이 (35) 로 헤이 (36) 로 헤이 (37) 로 헤이 (38) 로 헤이 (39) 로 헤이 (40) 로 헤이 (41) 로 헤이 (42) 로 헤이 (43) 로 헤이 (44) 로 헤이 (45) 로 헤이 (46) 로 헤이 (47) 로 헤이 (48) 로 헤이 (49) 로 헤이 (50) 로 헤이 (51) 로 헤이 (52) 로 헤이 (53) 로 헤이 (54) 로 헤이 (55) 로 헤이 (56) 로 헤이 (57) 로 헤이 (58) 로 헤이 (59) 로 헤이 (60) 로 헤이 (61) 로 헤이 (62) 로 헤이 (63) 로 헤이 (64) 로 헤이 (65) 로 헤이 (66) 로 헤이 (67) 로 헤이 (68) 로 헤이 (69) 로 헤이 (70) 로 헤이 (71) 로 헤이 (72) 로 헤이 (73) 로 헤이 (74) 로 헤이 (75) 로 헤이 (76) 로 헤이 (77) 로 헤이 (78) 로 헤이 (79) 로 헤이 (80) 로 헤이 (81) 로 헤이 (82) 로 헤이 (83) 로 헤이 (84) 로 헤이 (85) 로 헤이 (86) 로 헤이 (87) 로 헤이 (88) 로 헤이 (89) 로 헤이 (90)- Format window appears as follow, click "Start" button
text_image
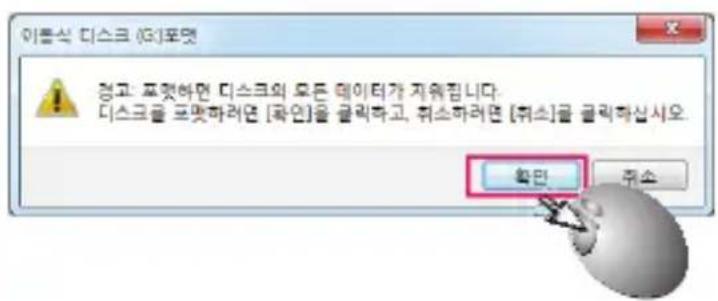
이동식 디스크 (G)포맷 용량(P): 7.39GB 파괴 시스템(F): FAT32(기본값) 참당 단위 크기(A): 32KB 장치 기본값 목원(D) 불률 레미블(L): 포맷 음건(O) ☑바른 포맷(O) □MS-DOS 시능 디스크 만든기(M) 시작(S) 달기(C)- Click confirm when warning window appears
text_image
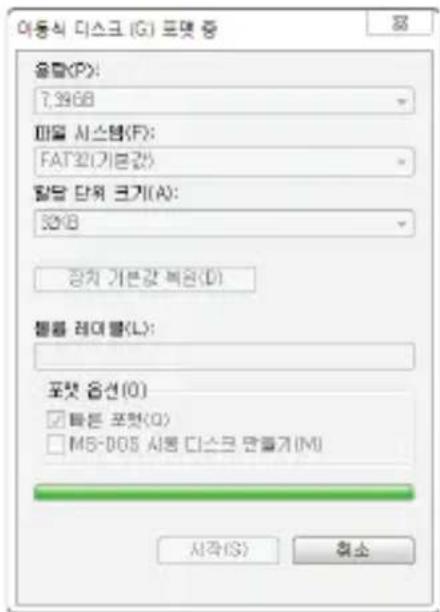
이름식 디스크 (디포맷) 경고: 포켓하면 디스크와 모든 데이터가 지워됩니다. 디스크을 포켓하려면 [공인]을 클릭하고, 휘소하려면 [취소]를 클릭하십시오. 확인 주소- Please wait do not click the cancel button never, move the status bar as shown in progress format
text_image
이동식 디스크 (G) 포맷 중 용량(P): 7,3968 파워 시스템(F): FAT30(기본값) 할당 단위 크기(A): 3268 장치 기본값 복율(D) 텔레 레이 밀(L): 포켓 올션(O) □ 태른 포켓(O) □ MS-DO5 시동 디스크 만들기(M) 시각(S) 帮소- "The format is complete" windows appears, Click the OK button
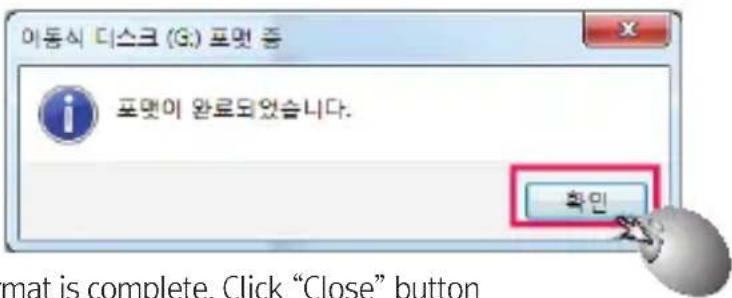
text_image
이동식 디스크 (G:) 포맷 중 포맷이 완료되었습니다. 확인 mat is complete, Click "Close" button- After the format is complete, Click "Close" button
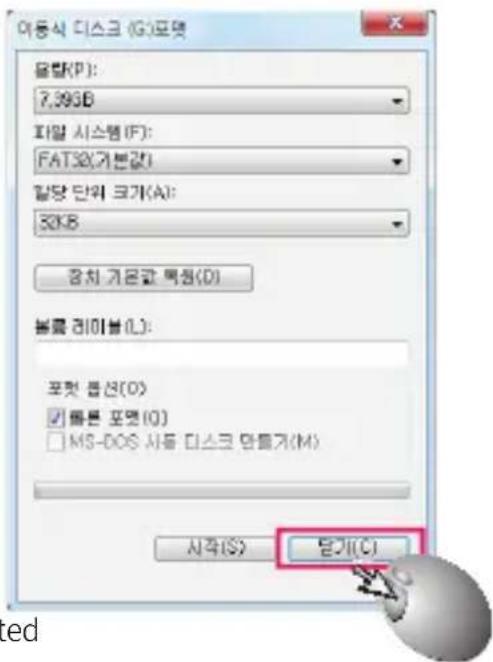
text_image
이동식 디스크 (G:)로봇 물단(P): 7,396B 파말 시스템(F): FAT30(기본값) 할당 단위 크기(A): 30KB 감치 기문관 목원(D) 불량 라이블(L): 포켓 품션(O) ☑ 품론 포켓(O) ☐ MS-DOS 시동 디스크 만들기(M) 시작(S) 塌기(C)- The format has been completed
18 Dedicated Viewer

text_image
ROAD BLACKBOX HQ 메라 1 마지군인중게사 (8) 2000화 전용부어 창을 최소화 합니. 메라 2 주방거리 0 km 감리/초고속도 0 / 0 km/h1) Select folder: select the recording video stored on removable disk or folder
2) App Information Screen On/Off: App information can be displayed or turned off
3) Screen Capture : To capture video images
(After capture can open the folder)
4) Print: when selected the print preview screen appears (Since can be printed)
5) Convert video file : Recorded video can be converted to MP4 file (After convert can open the folder)
6) Preferences setting: You can get the recording environment To activate the right and left mirror screen,
Change the value 1 on mirror_CAM1,
CAM2 in edit screen in preferences setting window and then re-run the viewer
7) Program information: Displayed information about the program
8) End of program : Exit the viewer
2)\~5) Button is enabled only when the viewer is playing
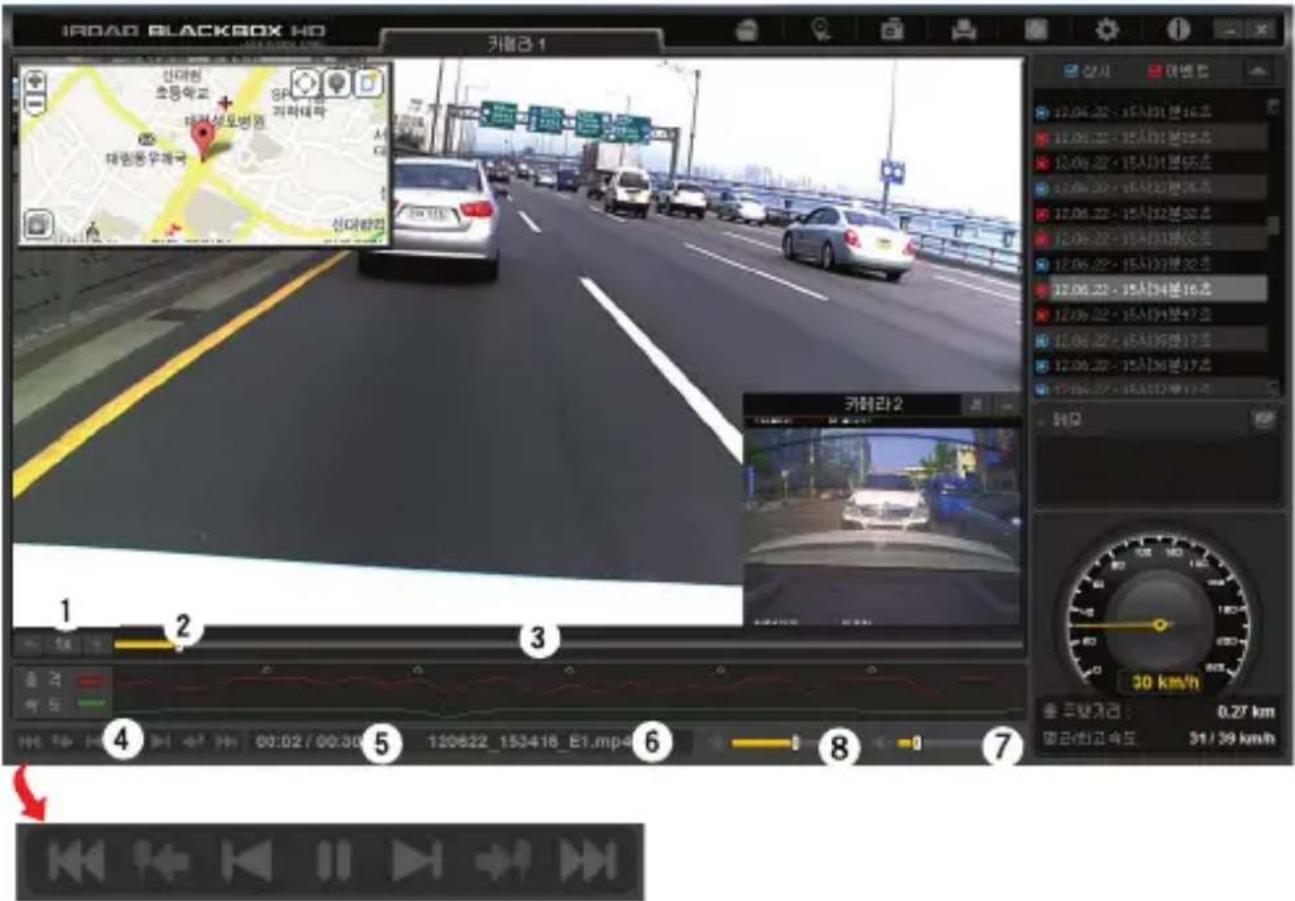
text_image
ROAD BLACKBOX HD 카메라 1 13.04.22 - 15시31분 46초 13.04.22 - 15시31분 35초 13.04.22 - 15시31분 95초 13.04.22 - 15시32분 26초 13.04.22 - 15시32분 30초 13.04.22 - 15시33분 6초 13.04.22 - 15시33분 32초 13.04.22 - 15시34분 16초 13.04.22 - 15시34분 47초 13.04.22 - 15시35분 17초 13.04.22 - 15시36분 17초 13.04.22 - 15시37분 17초 카메라 2 00:02 / 00:30 120822_153418_E1.mp4 0 0 30 km/h 0.27 km 일반/해고 수도 31 / 39 km/h(1) Changing the playback speed: [-]Slow/[1] Normal/[+] Fast)
(2) Playing explorer bar: To display the playback section
(3) Bookmark setting/Off : Bookmark setting or Off on the corresponding section
(4) Control Panel
- Previous file : Recorded in the list of the previous file
- Go to Previous bookmark: go to previous bookmark if there is
- Go to previous 5 Seconds: go to previous 5 seconds from now
- Playback/Pulse : Could be same button as Space Key
- Next 5 seconds: go to next 5 seconds
- Go t next bookmark: go to next bookmark if there is
- Next file : Playback on the list of recordings
(5) Playing time/Total : Current playback time of recordings / Total playing time
(6) File name : file name of current playback
(7) Volume: adjust volume (mute when press "speaker button")
(8) Brightness: adjust brightness of the recording
20 Dedicated Viewer
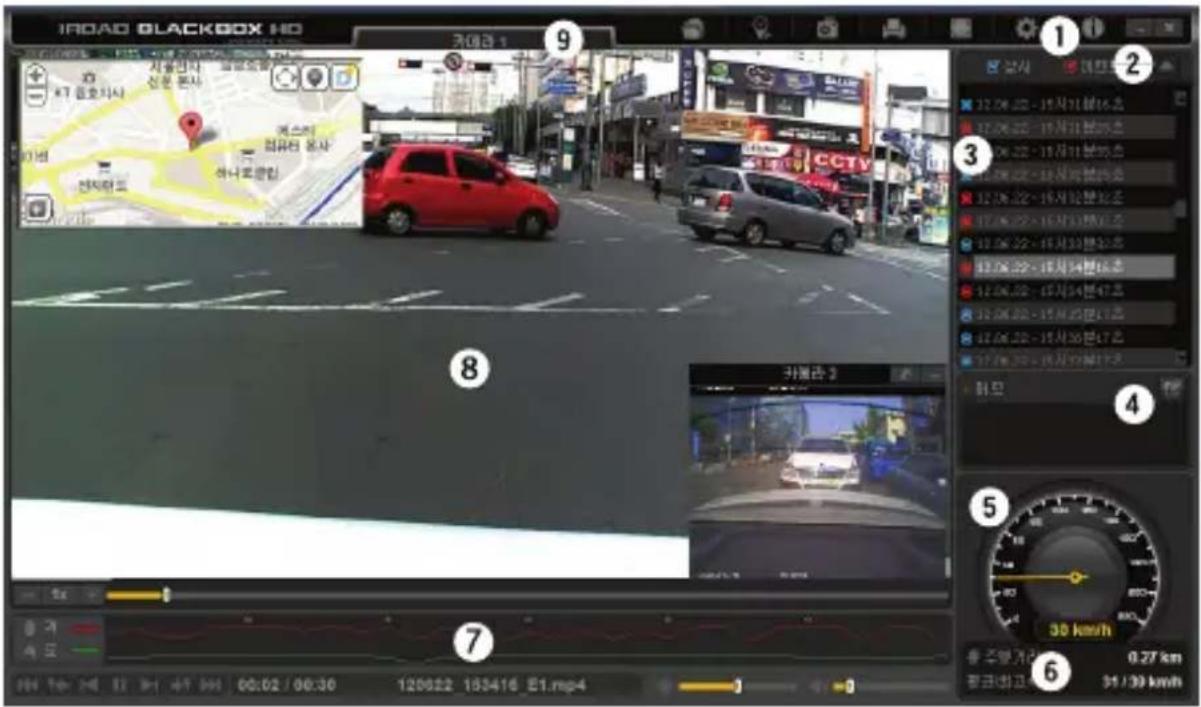
text_image
ROAD BLACKBOX HD 2023.1 9 1 2 3 4 5 6 7 8 지구리 2 30 km/h 0.27 km 34 / 30 km/h(1) Filter the list of Recorded : Events files always visible or hidden
(2) Sort the Recording List: Ascending sequence, descending sequence
(3) Recording List : Display recording lists
(4) Memo : Press the top button to the right to note new registration and can be modify
(5) Full Screen View: Press button to switch to full screen, press again to the original screen
(6) Total Mileage/Average Speed/Highest Speed : Average total travel distance in the playback interval / Top speed display
(7) Changes in Speed Grape : Green, shock sensor graph : Blue, Red
Recording events at the time of the shock graph color changes from blue to red
(8) Full Screen Playback Capability: Double click to the full screen To the previous screen, press the ESC or enter key in full screen
(9) Reverse the Screen Left and Right
Click the "Camera1 and 2" of the main screen or press the key board 1 and 2, to reverse the screen left and right
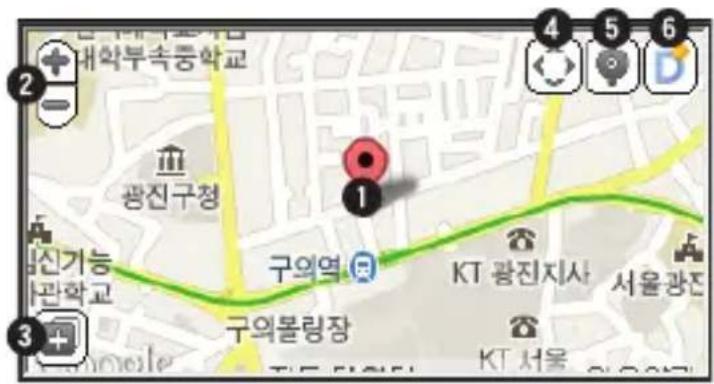
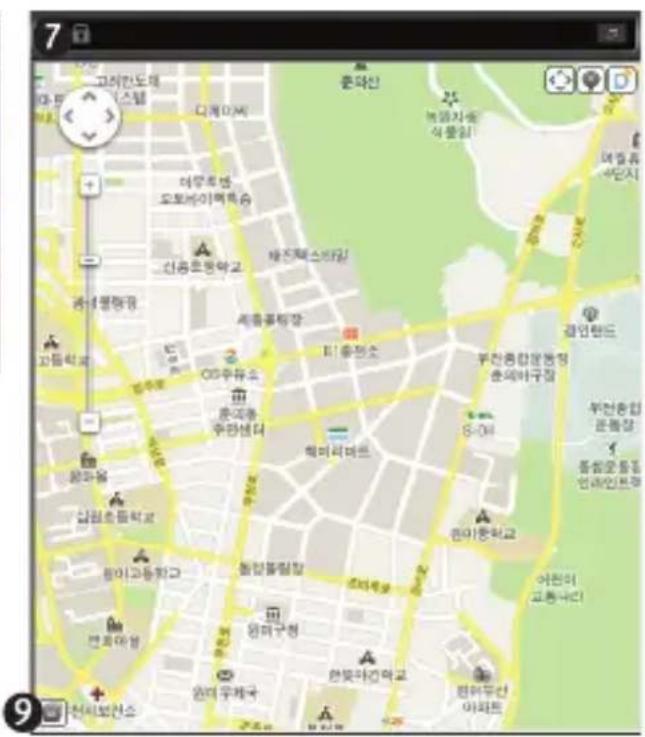
Function of MAP Button
The MAP appears only while connected to the internet normally
text_image
개학부속등학교 광진구청 신기능 관학교 구의역 구의물링장 KT 광진지사 서울광진 KT 서울Mini MAP Screen
text_image
7 동양지산 동양지산아름사식 동양지산 동양지산아름사식 동양지산 동양지산아름사식 동양지산 동양지산아름사식 동양지산 동양지산아름사식 동양지산 동양지산아름사식 동양지산 동양지산아름사식 동양지산 동양지산아름사식 한국 한국 한국 한국 한국 한국 한국 한국 한국 한국 한국 한국 한국 한국 한국 한국 한국 한국 한국 한국 한국 한국 한국 한국 한국 한국 한국 한국 한국 한국 한국 한국 한국 한국Large MAP Screen
1) MAP Information Screen : Screen mini-map
2) MAP Screen Zoom IN/OUT : [+] Zoom IN / [-] Zoom OUT
3) Switchto Large Map and Mini Map
4) On/ff : (Map On/Off Scroll)
5) Switch to General MAP and Satellite Transition
6) Select MAP: Switch Goggle map and other map
7) LOCK (Lock Large MAP: The map window can be locked or moving)
9) Switch to Small MAP
22 Dedicated Viewer
text_image
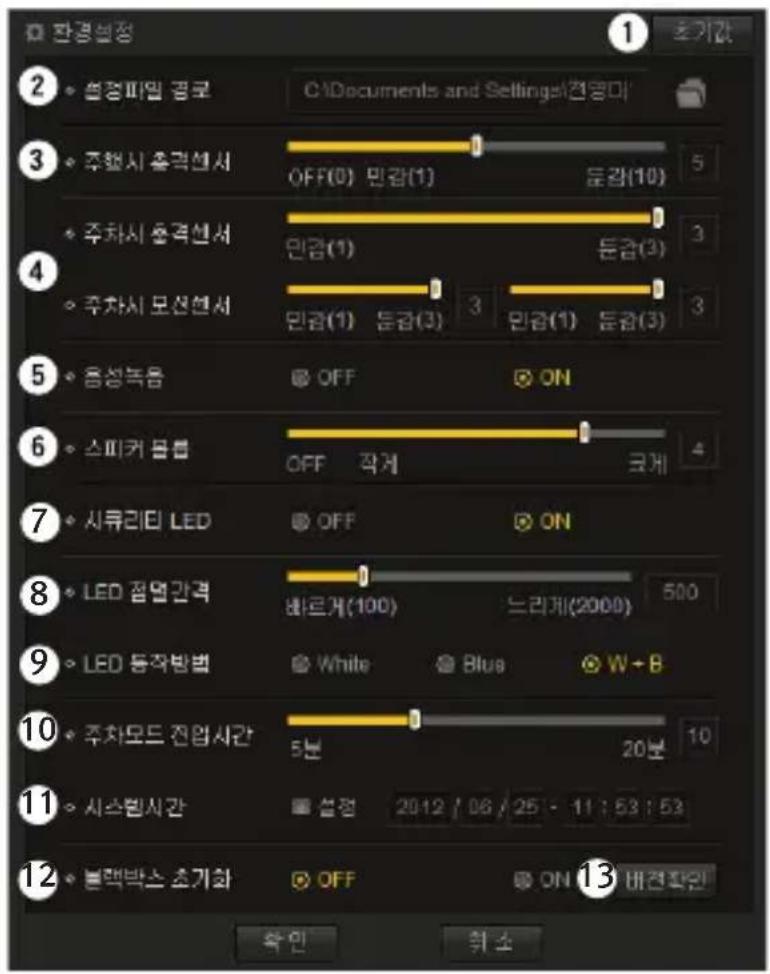
2 3 4 5 6 7 8 9 10 11 12 CS:Documents and Settings\瞳명마 주행시 출격센서 OFF(0) 민감(1) 돈감(10) 주차시 출격센서 민감(1) 돈감(3) 주차시 모션센서 민감(1) 돈감(3) 민감(1) 돈감(3) 증성복음 OFF ON 스피커 물품 OFF 작게 크게 시큐리티 LED OFF ON LED 점면간격 바르게(100) 느리게(2000) LED 등자방법 White Blue W+B 주차모드 전압시간 5분 20분 시스템시간 설정 2012 / 06 / 25 - 11 : 53 : 53 블랙박스 초기화 OFF ON 초기간 확인 위소1) Initialization: Initialize preferences
2) Setting file path : Select the saved folder
3) Driving a shock sensor: Set the sensitivity of the sensor while driving
4) Parking a shock and motion sensor: Set the sensitivity of the shock and motion sensor while the vehicle is parking
5) Voice Recording: Select the microphone recording when video is recording
6) Volume : Adjusting the volume
7) Security LED : Set the security LED On/Off
8) LED Interval : Set the flashing time of security LED
9) LED Operation : Set the color of security LED
10) Parking Mode: Normal (Always) to set the entry time of parking mode
11) The System Time : Initialization to set the Black box time
12) Initialize Black box : Set the On/Off initialize Black box
13) Version : Check version information
(Depending on the firmware update, the version information is changed)
Quality Warranty
■ Model : JAEWONCNC IROAD IPRO35
Serial No. :
■ The date of Purchase :
■ Name of Customer : (☎.)
■ Where to buy : (☎.)
Thank you for purchasing Car Recorder IROAD IPRO35.
JAEWONCNC, Consumer compensation in a accordance with the provisions of the following quality assurance
- Please contact or call the service center, If any problems of the product
● The Warranty period is fully 1 year since the date you purchased the product
● The warranty does not apply in following case (Careless handling, overvoltage caused by natural disasters) - If you would like to return Please return to place you purchase in the original unopened containers After opening the product packing can not be returned
- Return costs will be borne by the customer (except if caused by defects in the product)
- It does not apply to use the warranty to change other way, this product is just use for the vehicle only
JAEWONCNC . CO., LTD.
+82-2-444-7933
www.navinc.co.kr
Wontac Bldg., Chunggok-dong Gwangjin-gu Seoul
| Certified as suitable for using with requirement of electromagnetic wave | |
 | 1. Product(Product No.): Vehicle Black-box(IROAD IPRO35)2. Certification No.: KCC-REM-S1R-IPRO353. Name of the certified entity: JAEWONCNC Co. Inc.4. Certified date: September 20135. Manufacturer/Country: JAEWONCNC Co. Inc/ Republic of Korea |
| A-Class Device(Business use for broadcasting and telecommunication Device) | Seller or user need to be noted that this device has been officially registered as passed the suitability test for the requirement of electromagnetic wave and should be used at the areas other than home. |