
M-103 PK - Lautsprecher MUSE - Kostenlose Bedienungsanleitung
Finden Sie kostenlos die Bedienungsanleitung des Geräts M-103 PK MUSE als PDF.


| Produkttyp | Docking Clock Radio für iPhone/iPod |
| Marke | MUSE |
| Modell | M-103 PK |
| Abmessungen (B x H x T) | 130 x 78 x 120 mm |
| Stromversorgung | AC 100-240 V ~ 50/60 Hz (Netzteil) oder DC 3 V (2 x AAA-Batterien für Backup) |
| Leistungsaufnahme | 2 x 2 W |
| Lautsprecherimpedanz | 8 Ohm |
| Radio-Empfang | FM 87,5 - 108 MHz |
| Speicherplätze für Radiosender | 20 FM-Sender programmierbar |
| Weckfunktionen | 2 unabhängige Alarme (Wecker mit Summerton, Radio oder iPod/iPhone) |
| Sleeptimer | 10 - 90 Minuten (einstellbar) |
| Equalizer-Modi | Classic, Rock, Pop, Jazz, Aus |
| Anschlüsse | AUX IN (3,5 mm Klinke), VIDEO OUT (Composite), iPhone/iPod Docking |
| Display | LCD mit Hintergrundbeleuchtung (3 Helligkeitsstufen) |
| Mitgeliefertes Zubehör | Netzteil, 5 Wechseladapter für iPhone/iPod, Staubschutzabdeckung, Bedienungsanleitung |
| Reinigung | Soft, trockenes Tuch; keine Lösungsmittel oder Scheuermittel |
| Sicherheitshinweise | Netzstecker als Trennvorrichtung; keinem Regen oder Feuchtigkeit aussetzen; Belüftung nicht blockieren |
Häufig gestellte Fragen - M-103 PK MUSE
Benutzerfragen zu M-103 PK MUSE
0 Frage zu diesem Gerät. Beantworten Sie die, die Sie kennen, oder stellen Sie Ihre eigene.
Eine neue Frage zu diesem Gerät stellen
Laden Sie die Anleitung für Ihr Lautsprecher kostenlos im PDF-Format! Finden Sie Ihr Handbuch M-103 PK - MUSE und nehmen Sie Ihr elektronisches Gerät wieder in die Hand. Auf dieser Seite sind alle Dokumente veröffentlicht, die für die Verwendung Ihres Geräts notwendig sind. M-103 PK von der Marke MUSE.
BEDIENUNGSANLEITUNG M-103 PK MUSE
MUSE
M-103 IP
User Manual
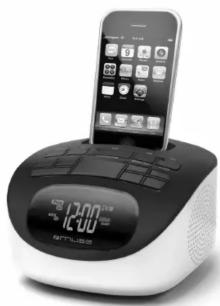
Docking Clock Radio PLL for iPhone/iPod
natural_image
Digital alarm clock with smartphone and app icons, no visible text or symbols on device bodyiPhone/iPod not included
Please read the instruction carefully
before operating the unit.
English
Cautions:
- The included AC adaptor is for use with this unit only. Do not use it with other equipments. - When the unit is not going to be used for long time, disconnect the AC adaptor from the AC outlet.
- Be sure to use it near the wall outlet. If a malfunction occurs, disconnect the plug from the wall outlet at once.
- When the AC adaptor is plugged in, the apparatus is not completely disconnected from the main power source, even when the unit is turned off.
- AC adaptor is used as the disconnect device. It shall remain readily operable and should not be obstructed during intended use. To disconnect the apparatus from supply mains, completely disconnect the AC adaptor of the apparatus from the mains socket outlet
Battery backup system
DC power: 2x1.5V, battery type AAA/R03/UM4 (not provided) for clock and alarm time backup system
An alkaline type battery is recommended. For optimum performance, this battery should be replaced every 6 months.
BACKUP SYSTEM: All clock settings will be kept in memory; however, the clock time may require adjustment for exact accuracy. If the backup battery is not installed, the display will show the clock flashing to indicate that you have to reset the time and the alarm.
Note: When the battery backup is functioning, the display has no backlight.
BASIC OPERATION
Turn on the unit
The unit is in clock mode when it is plugged in, Press ON/OFF button (1) to turn on or turn off the unit.
Operating mode selection (FUNCTION)
Press FUNCTION button (5) repeatedly to select iPhone/iPod, AUX or Radio mode.
Sound volume
Press VOL +/- button (2) to adjust sound level. There are a total of 32 volume levels.
Equalizer
When listening to the radio, iPhone/iPod or other music source from AUX IN, press the EQ button (3) repeatedly to select different modes: CLASSIC, ROCK, POP, JAZZ or EQ off.
Display dimmer
In OFF mode, press the SNOOZE/DIM button (7) repeatedly will change the backlight brightness of the display. There are 3 levels: low, medium, and high.
UNPACKING YOUR UNIT
When you unpack your new iPhone/iPod clock-radio, make sure that you have removed all the accessories and information papers:
- Docking Clock Radio PLL for iPhone/iPod
- AC adaptor
- 5 pieces iPhone/iPod interchangeable adaptors
- 1 piece Dust Cover
- User manus
PRODUCT DESCRIPTION
1. ON/OFF button
-
DOI: 10.101
-
VOL +7 - buttons
-
EQ button (equalizer)
-
MEMO./SET button (memory/clock
(1) 2017年
setting)
5. FUNCTION button
-
iPhone/iPod Socket
-
If nonenf ou socket
-
ONCO75/DIM↓
-
SNOOZE/DIM button
-
SLEEP Button
-
ALM. 1/M- button
10 ALM 2/M
-
ALM. 2/ M+ button
-
◀ button
-
▶ button
-
▶ button (play/pause)
-
▶ button (play/pause)
-
LCD display
-
Speakers
-
FM Wire Antenna
-
VIDEO OUT
-
VIDEO OUT
-
AUX IN jack
-
DC input (AC adaptor jack)
-
Battery Backup Compartment
Main Unit Top View

Back View

GB - 1
TIME SETTING
Current time
When used for the first time, or if the mains plug has been removed with no backup battery inside, the clock display will blink.
-
In OFF mode, Press the MÉMO./SET button (4) on the unit, the clock blinks on the display.
-
With clock display blinking, press FUNCTION button (5) to select 12 or 24 hour format.
-
Press the MEMO./SET button (4), the hour digits will flash, set the hour with ◀◀ (11) or ▶▶ (12) button.
-
Press the MEMO./SET button (4) to save the hour setting, the minute digits flash. Set the minutes with ◀◀(11) or ▶▶(12) button.
-
Press MEMO./SET button (4) to complete time setting.
NOTE: With clock display blinking, if no button is pressed within 8 seconds, it will return to previous clock display.
SLEEP (Automatic turn off)
In sleep mode, the unit will turn off automatically after a specified time.
Note: Sleep time can only be set when the unit is turned ON.
Note: Sleep time can only be set when the unit is turned ON. You can select duration in minutes before the unit turns off automatically. Press SLEEP button (8) repeatedly to select 90-80-70-60-50-40-30-20-10 or 00 minutes, then release SLEEP button (8). "SLEEP" icon displays.
NOTES:
- To turn off the unit before the SLEEP activates, press ON/OFF button (1), or press SLEEP button (8) repeatedly until value is adjusted to "00". It will return to normal display after 5 seconds, the sleep function will be cancelled and "SLEEP" icon will not be displayed. - If the playing time from your iPhone or other player is shorter than the selected sleep time, the music will stop at the end of the playing time.
GB - 3 GB - 5
LCD DISPLAY

D1. - Alarm #1 wake to buzzer
- Alarm #2 wake to buzzer
- Alarm #1 wake to iPhone/iPod
2 - Alarm #2 wake to iPhone/iPod
- Alarm #1 wake to radio
2 - Alarm #2 wake to radio
D2. iPhone -iPhone/iPod mode playback
D3. FM - Radio mode
D4. AUX - AUX IN mode
D5. Equalizer modes
D6. Volume
D7. SNOOZE
D8. SLEEP
D9 Memory
D10 Time or radiofrequency display
D11. EM Stereo
D12. Radio frequency unit
D13. "PM"-12hr time mode display
POWER SUPPLY
Using the AC adaptor
This AC adaptor operates on AC100-240V\~50/60Hz.
- The supplied AC adaptor is suitable for use on AC mains supplies of 100-240V\~50/
60Hz and should only be connected to a mains supply within these parameters.
- Use the supplied AC adaptor only. Using any other AC adaptor could damage the unit.
GB - 2
ALARM SETTING
This unit can be set for two different wake up times which you can choose to use independently or simultaneously ALARM1, ALARM2 or both ALARM1 and ALARM2.
pendently or simultaneously Alarm 1 or Alarm 2 setting
- In OFF mode, press ALM. 1/M- (9) or ALM. 2/M+ (10) button, alarm type will flash on display. Press ◀◀ (11) or ▶▶ (12) button to select to wake up by buzzer, iPhone/iPod, or radio. The icon “ ”/“ ”, “ 1”/“ 2” or “ ”/“ 3” will show on display accordingly.
- “ ☐” or “ ☑” (wake up by buzzer): “Beep” sound comes when the alarm time is reached.
- “ ⑪ ” or ” ② ” (wake up by iPod): Follow the procedure in “PLAY YOUR DOCKABLE iPhone/iPod”. The iPhone/iPod will start playing automatically when the alarm time is reached and the unit is off.
- “ ” or “ ” (wake up by radio): Follow the procedure in “LISTENING TO THE RADIO” to select your desired radio station. The radio will turn on automatically when the alarm time is reached and the unit is off.
-
Press ALM. 1/M- (9) or ALM. 2/M+ (10) button again, the hour digit flashes on display. Press the ▶ (11) or ▶ (12) button to adjust the hour.
-
Press ALM. 1/M- (9) or ALM. 2/M+ (10) button again, the minute digit flashes on display. Press the ◀ (11) or ▶ (12) button to adjust the minutes.
-
Press ALM. 1/M- (9) or ALM. 2/M+ (10) to save the setting of alarm 1 or alarm 2. The display will resume to the current time.
To check the alarm settings
In OFF mode, press ALM. 1/M- (9) or ALM. 2/M+ (10) button. Time and alarm source of the corresponding alarm are displayed for 5 seconds.
Turning off Alarm
The alarm is programmed to run for 59 minutes and triggers progressively
Once the alarm 1 or alarm 2 is activated, corresponding alarm indicator “ 📞 ”/“ 📞 ”, “ 📝 ”/“ 📝 ” or “ 🏠 ”/“ 🏠 ” will flash on display.
-
In wake up mode, to temporarily stop alarm, press the SNOOZE/DIM button (7). The alarm will resume to the previous playing mode after 9 minutes. " ☐" / " ☑", " ☐" / " ☒" or " ☐" / " ☒" and " SNOOZE" are on display.
-
To stop the alarm for 24 hours, press ON/OFF button (1), “”/“”, “”/“” or “”/“” remains displayed. The alarm will trigger at the preset time one day later.
- To turn off the alarm permanently, in OFF mode, press and hold ALM. 1/M- (9) or ALM. 2/M+ (10) until “”/“”, “”/“” or “”/“” disappears.
NOTE:
- You can adjust the wake up sound level by VOL+/- button on wake to iPhone/iPod or radio modes your last setting.
- But since this is a progressive alarm, the sound will be louder and louder. You could decrease the volume after the alarm reaches to its max volume level (24).
GB - 4


LISTEN TO YOUR iPhone/iPod
IMPORTANT
The docking station in this system follows the Apple "Universal Dock" design. This system can be fitted to different iPhone or iPod model.
Play your iPhone/iPod on the main unit
-
Connect your iPhone/iPod to the socket of the unit.
-
Press the ON/OFF button (1) to turn on the unit.
-
Press the FUNTION button (5) repeatedly to select iPhone/iPod mode. The display indicates "iPhone".
-
Press ▶|| button (13) to play or pause. Press and hold ▶|| button (13) for 5 seconds to enter the iPod/iPhone sleep mode.
-
Select the previous or next track by pressing ◀◀ (11) or ▶▶ (12) button, press and hold ◀◀ (11) or ▶▶ (12) on the unit to review or fast forward.
- Press VOL +/− buttons (2) to adjust sound level
iPhone call pick up
- When phone call coming in, the music from the docking iPhone will pause automatically.
-
Incoming call ring comes out from the unit speaker.
-
You can take iPhone from the unit and pick up phone call.
-
After finish your call, connect back the iPhone to the socket, it will resume the playback of iPhone.
Charge your iPhone/iPod
While your iPhone/iPod is docked on the system, its battery recharges automatically until fully charged.
iPhone/iPod interchangeable adapter
This system includes 5 different adapters designed to allow you to securely connect any "dockable" iPhone/iPod model to the docking station. Refer to the chart below to select the proper adapter for your particular iPhone/iPod model and insert that adapter into the docking station before connecting your iPhone/iPod.
NOTE: No adapter is provided for the 3G (third generation) iPod.
Please use that adapters that were included with these iPod at time of purchase. They will fit properly into the docking station of this system.
We have also included one flat adapter with no opening at all. This serves as a dust cover that can be inserted in the docking station if no iPhone/iPod will be connected to the system for an extended period of time.
| iPod/iPhone Model | Play & Charge Compatibility | Included Bracket |
| 10 | ||
| iPod/iPhone Model | Play & Charge Compatibility | Included Bracket |
| 12 | ||
| 12 | ||
| 8 | ||
| 14 | ||
| 8 | ||
| 12 |
Made for iPod and iPhone

"Made for iPod" and "Made for iPhone" mean that an electronic accessory has been designed to connect specifically to iPod or iPhone respectively, and has been certified by the developer to meet Apple performance standards. Apple is not responsible for the operation of this device or its compliance with safety and regulatory standards. iPhone and iPod are trademarks of Apple Inc., registered in the U.S. and other countries.
GB - 6
GB - 7 GB - 8
LISTEN TO THE RADIO
Manual operation
-
Press ON/OFF button (1) to turn on the unit
-
Press FUNCTION button (5) to select the RADIO mode. The display indicates "FM"
- Press (11) or (12) to tune to a desired station.
Automatic search operation
Press and hold ◀◀ (11) or ▶▶ (12) button for approx. 2 seconds to start searching in the chosen direction. The automatic searching operation locates strong stations. Press again to stop searching. A station with a weak signal can be tuned manually. NOTE: During the search operation the sound level will be muted automatically.
Program preset stations
This unit is able to store 20 FM radio stations in memory.
-
Select a radio station either manually or by automatic search.
-
Press MEMO./SET button (4) once, "MEMO" will flash and "01" will appear on display.
-
Press ALM. 1/M- (9) or ALM. 2/M+ (10) button to select a preset channel.
-
Press MEMO./SET button (4) again to save the radio station in the selected preset channel.
-
Repeat steps 1-4 to store other stations.
When you memorize a station on a preset, the previous station is erased and replaced by the new one.
Listening to the preset stations
Press ALM. 1/M- (9) or ALM. 2/M+ (10) button directly to select a preset station. NOTE: For a better reception in FM, extend the antenna. If a stereo broadcast is received, “((ST))” is displayed.
CONNECTIONS
AUXILIARY
This unit includes the AUX IN jack (18) to allow you to connect external devices, such as MP3 player, and listen to the music of your external device through the speakers of this unit.
-
Connect the external device to the AUX IN jack (18) at the back of the unit.
-
Press ON/OFF button (1) to turn on the unit.
-
Press FUNCTION button (5) to select AUXILIARY mode. The display indicates "AUX"
-
Start to play your auxiliary source.
-
Adjust the volume to desired level.
-
To stop playback, disconnect your external device from the AUX IN jack.
VIDEO
You can view the video from the iPhone/iPod on a TV by connecting it to your unit via the VIDEO OUT jack (17) at the back of unit.
Use the cable with yellow plug of an AV cable to connect the composite video output of this unit to the video input of a TV/monitor.
SPECIFICATIONS
GENERAL
Power source
AC 100-240V \~ 50/60Hz
DC 3V, 2x1.5V "AAA/R03/UM4" size batteries (not included) or
equivalent for memory backup
130(W) x 78 (H)x 120(D) mm
Dimension
TUNER
Frequency range
FM: 87.5 - 108 MHz
AUDIO SECTION
Power Consumption
2X2W
8 ohms
SAFETY INSTRUCTION

ATTENTION: To reduce the risk of electric shock, do not remove the cover or back. There are no user serviceable parts inside the unit. Refer all servicing to qualified personnel.
The lightning flash with arrowhead symbol within the triangle is a warning sign alerting the user of "dangerous voltage" inside the unit.
The exclamation point within the triangle is a warning sign alerting the user of important instructions accompanying the product.
WARNING: TO PREVENT FIRE OR SHOCK HAZARD, DO NOT EXPOSE THIS
APPLIANCE TO RAIN OR MOISTURE
IMPORTANT SAFETY INSTRUCTIONS
- AC adaptor is used as the disconnect device. It shall remain readily operable and should not be obstructed during intended use. To be completely disconnected the apparatus from supply mains, the AC adaptor of the apparatus shall be disconnected from the mains socket outlet completely.
- Never use an AC adaptor that is damaged, route power lead in a safe manner and make sure it is not subjected to trapping or pinching. If the power lead is damaged refer to a qualified service agent.
- Place the unit on a flat and even surface.
- Do not restrict the air flow of the unit by placing it in a place with poor air flow, by covering it with a cloth, or by placing it on carpeting.
- To avoid magnetized, do not place the unit near speaker or magnet.
- Do not use this unit in direct sunlight or leave the unit in a closed automobile (or yacht, etc) where it would be exposed to high temperatures above 40^ .
- It also should not be placed in temperatures less than 5^ or greater than 35^ . - Do not use the unit immediately after transportation from a cold place to a warm place, condensation problem may result.
GB - 9
GB - 10
-The ventilation should not be impeded by covering the ventilation openings with items such as newspapers, table-cloths, curtains, etc.
-No naked flame sources, such as lighted candles, should be placed on the apparatus. -The use of apparatus in moderate climates.
-The apparatus should not be exposed to dripping or splashing.
-Ensure a minimum distance of 5cm around the apparatus for sufficient ventilation.
-Do not place objects filled with liquids, such as vases, on the apparatus.
-The rating plate is located on the bottom of unit.
-Attention should be drawn to the environmental aspects of battery disposal.
-Do not throw batteries in fire!
-Battery shall not be exposed to excessive heat such as sunshine, fire or the like
-Excessive sound pressure from earphones and headphones can cause hearing loss. -Under the influence of electrical fast transient or/and electrostatic phenomenon, the product may malfunction and require user to power reset.
MAINTENANCE
Cleaning
Be sure to turn the unit off and disconnect the AC adaptor before maintaining the unit.
- Use a soft, dry, clean cloth. Regularly dust the vents at the back or sides.
- Using solvents, abrasive or alcohol-based products risks damaging the appliance. - If an object or liquid enters inside the appliance, unplug it immediately and have it checked by an authorized engineer.

If at any time in the future you should need to dispose of this product please note that Waste electrical products should not be disposed of with household waste. Please recycle where facilities exist. Check with your Local Authority or retailer for recycling advice.(Waste Electrical and Electronic Equipment Directive)

GB - 11


- MUSE
- M-103 IP
- User Manual
- Docking Clock Radio PLL for iPhone/iPod
- English
- Cautions:
- Battery backup system
- BASIC OPERATION
- Turn on the unit
- Operating mode selection (FUNCTION)
- Sound volume
- Equalizer
- Display dimmer
- UNPACKING YOUR UNIT
- PRODUCT DESCRIPTION
- ON/OFF button
- setting)
- FUNCTION button
- TIME SETTING
- Current time
- SLEEP (Automatic turn off)
- NOTES:
- POWER SUPPLY
- Using the AC adaptor
- ALARM SETTING
- pendently or simultaneously Alarm 1 or Alarm 2 setting
- To check the alarm settings
- Turning off Alarm
- NOTE:
- LISTEN TO YOUR iPhone/iPod
- IMPORTANT
- Play your iPhone/iPod on the main unit
- iPhone call pick up
- Charge your iPhone/iPod
- iPhone/iPod interchangeable adapter
- LISTEN TO THE RADIO
- Manual operation
- Automatic search operation
- Program preset stations
- Listening to the preset stations
- CONNECTIONS
- AUXILIARY
- VIDEO
- SPECIFICATIONS
- GENERAL
- TUNER
- AUDIO SECTION
- SAFETY INSTRUCTION
- WARNING: TO PREVENT FIRE OR SHOCK HAZARD, DO NOT EXPOSE THIS
- IMPORTANT SAFETY INSTRUCTIONS
- MAINTENANCE
- Cleaning
Marke : MUSE
Modell : M-103 PK
Kategorie : Lautsprecher