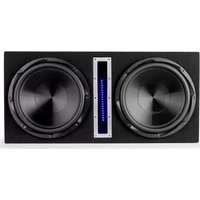
X12L - Freisprecheinrichtung fürs Auto Auna - Kostenlose Bedienungsanleitung
Finden Sie kostenlos die Bedienungsanleitung des Geräts X12L Auna als PDF.


| Produkttyp | Freisprecheinrichtung fürs Auto |
| Marke | Auna |
| Modell | X12L |
| Abmessungen (ca.) | 10 x 6 x 2 cm |
| Gewicht | ca. 50 g |
| Stromversorgung | 12 V Kfz-Steckdose oder integrierter Akku (150 mAh) |
| Bluetooth-Version | Bluetooth 5.0 |
| Reichweite | bis zu 10 m |
| Anzeige | LED-Anzeige für Betriebsbereitschaft und Ladestatus |
| Lautsprecher | Eingebauter Lautsprecher (1 W) |
| Mikrofon | Integriertes Mikrofon mit Rauschunterdrückung |
| Kopplung | Freisprechen und Musik-Streaming |
| Funktionen | Anrufannahme/-ablehnung, Wahlwiederholung, Lautstärkeregelung |
| Kompatible Geräte | Smartphones, Tablets mit Bluetooth |
| Befestigung | Klemme an Sonnenblende oder Armaturenbrett |
| Betriebsdauer (Akku) | bis zu 8 Stunden Gesprächszeit |
| Ladezeit | ca. 2 Stunden |
| Lieferumfang | Freisprecheinrichtung, Ladekabel, Kfz-Adapter, Klemme, Bedienungsanleitung |
| Reinigung und Pflege | Mit einem trockenen Tuch reinigen, keine aggressiven Reinigungsmittel |
| Sicherheitshinweise | Nicht während der Fahrt einrichten; Lautstärke nicht zu hoch einstellen |
| Ersatzteile und Reparatur | Nur durch autorisiertes Fachpersonal; keine selbständige Reparatur |
Häufig gestellte Fragen - X12L Auna
Benutzerfragen zu X12L Auna
0 Frage zu diesem Gerät. Beantworten Sie die, die Sie kennen, oder stellen Sie Ihre eigene.
Eine neue Frage zu diesem Gerät stellen
Laden Sie die Anleitung für Ihr Freisprecheinrichtung fürs Auto kostenlos im PDF-Format! Finden Sie Ihr Handbuch X12L - Auna und nehmen Sie Ihr elektronisches Gerät wieder in die Hand. Auf dieser Seite sind alle Dokumente veröffentlicht, die für die Verwendung Ihres Geräts notwendig sind. X12L von der Marke Auna.
BEDIENUNGSANLEITUNG X12L Auna

auna
multimedia
OPERATION
- Prior to switching on, turn volume down to minimum.
- Connect the audio source to the appropriate input socket.
3 Another speaker can be connected to the output socket, so that several boxes can be daisy chained. - Connect to the mains supply.
5.Switch on the audio source, followed by the active speaker. - Set the volume with the ap
- Adjust the volume
INSTRUCTIONS
- Do not overload the box to avoid damage to the speakers.
- Do not place an open fire on top or next to the box-FIRE HAZARD.
- For indoor use only. If the box is used outdoors, you need to make sure that no humidity can enter the box.
- When not in use, unplug the unit from the mains.
● Unplug the unit from the mains prior to checking or replacing the fuse.
● Make sure that the box is placed on a stable, strong surface.
● The boxes can be hung. Use only strong and approved mounting material. During the mounting, make sure that nobody is standing below the mounting area. - Do not place liquids on the box and protect it against humidity. Humidity can shorten the life time considerably.
● Only use suitable means of transportation if you want to move the box-BEWARE OF YOUR BACK!!
● Always unplug the unit during a thunderstorm or when it is not in use. - If the unit has not been used for a long period of time, condensation can occur inside the housing. Please let the unit reach room temperature prior to use.
● Never try to repair the unit yourself. It does not contain any user serviceable parts.
● Run the mains lead in such a way that nobody can fall over it and nothing can be put in it. - Set the unit to the lowest volume prior to switching it on.
- Keep the unit out of reach of children.
CONTROLS AND CONNECTIONS
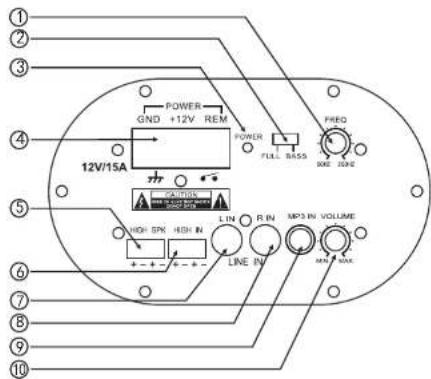
① FREQUENCY RESPONSE:50HZ-250HZ
② FULL/BASS
③ POWER TIPS
④ AC POWER IN
⑤ HIGH SPK
⑥ HIGH IN
⑦ LEFT LINE INPUT
⑧ RIGHT LINE INPUT
⑨ MP3 INPUT
⑩ VOLUME CONTROL
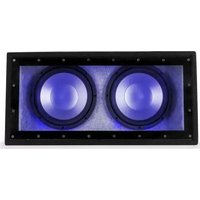
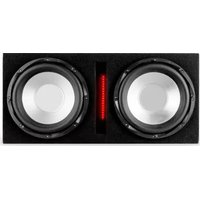

Marke : Auna
Modell : X12L
Kategorie : Freisprecheinrichtung fürs Auto