
24-414 - Wi-Fi antenne Biltema - Gratis brugsanvisning og manual
Find enhedens vejledning gratis 24-414 Biltema i PDF-format.


Brugerspørgsmål om 24-414 Biltema
0 spørgsmål om dette apparat. Besvar dem du kender, eller stil dit eget.
Stil et nyt spørgsmål om dette apparat
Download vejledningen til din Wi-Fi antenne i PDF-format gratis! Find din vejledning 24-414 - Biltema og tag din elektroniske enhed tilbage i hånden. På denne side er alle dokumenter nødvendige for brugen af din enhed offentliggjort. 24-414 af mærket Biltema.
BRUGSANVISNING 24-414 Biltema
\*BILTEMA
- Ram
- Huvudenhet
- Skruv A
- Metallklämma
- Lock
- Skruv B

PREPARERA KOAXIALKABEL
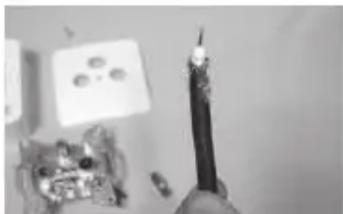
Skala koaxialkabeln som bilden visar. Du kan använda koaxialkablar RG59 eller RG6 75 Ohm.
natural_image
Close-up of a hand holding a lit candle with a small object nearby (no visible text or symbols)PREPARERA RAMEN
Knipsa bort en bit av ramen.

natural_image
Close-up of hands using a power tool to cut or wire around a small circular object (no visible text or symbols)© 2008 Biltema Nordic Services AB
Art. 24-415
DRA KABELN GENOM RAMEN

natural_image
Close-up of a hand using a tool to adjust or install a small white object (no visible text or symbols)FÄST KABELN I HUVUDENHETEN
Steg 1: För in kabeln

natural_image
Close-up of a mechanical component with metallic parts and bolts (no visible text or symbols)Steg 2: Var säker på att kabeln är helt införd

natural_image
Close-up of a mechanical assembly with gears and components (no visible text or symbols)Steg 3: Skruva åt skruven på huvudenheten för att fästa kabeln.

natural_image
Close-up of mechanical components with no visible text or symbolsSteg 4: Fäst metallklämman med skruv A.

natural_image
Close-up of a mechanical assembly with gears and a tool (no visible text or symbols)FÄST HUVUDENHETEN PÅ RAMEN
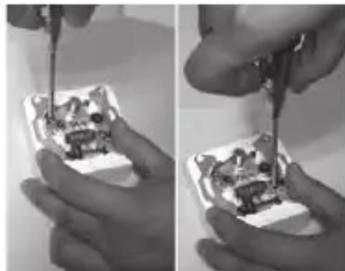
Steg 1: Placera huvudenheten i ramen som bilden visar.

natural_image
Two views of an electrical socket with exposed wiring and a central connector (no text or symbols visible)Steg 2: Skruva åt de två skruvarna som sitter diagonalt mot varandra på huvudenheten för att fästa huvudenheten på ramen.
natural_image
Close-up of hands using a screwdriver to adjust or repair electronic components (no visible text or symbols)
FÄST HELA ENHETEN PÅ VÄGGEN
Steg 1. Fäst hela enheten på väggen med två skruvar, se bild.

natural_image
Close-up of a small electronic component with metallic and black wires, no visible text or symbolsSteg 2: Sätt på locket med skruv B.

natural_image
Close-up of hands installing or adjusting a white electrical socket on a wall, with a cable visible (no text or symbols)\*BILTEMA
- Ramme
- Hovedenhet
- Skrue A
- Metallklemme
- Lokk
- Skrue B

KLARGJ∅RE KOAKSIALKABEL
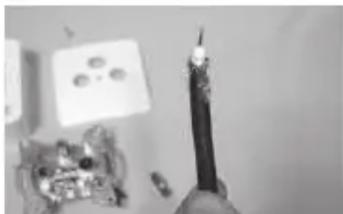
Avisoler koaksialkabelen som vist på bildet. Du kan bruke koaksialkabel RG59 eller RG6 75 ohm.
natural_image
Close-up of a hand holding a lit candle with a small inset showing electrical components (no visible text or symbols)KLARGJ∅RE RAMMEN
Knips bort en bit av rammen.

natural_image
Two-panel image showing hands holding scissors and a small object inside a container (no visible text or symbols)© 2008 Biltema Nordic Services AB
Art. 24-415
DRA KABELEN GJENNOM RAMMEN

natural_image
Close-up of a hand holding a small white object with a pen, possibly part of a device or tool (no visible text or symbols)FEST KABELEN I HOVEDENHETEN
Trinn 1: Før inn kabelen.

natural_image
Close-up of a mechanical component with metallic parts and bolts (no visible text or symbols)Trinn 2: Forsikre deg om at kabelen er ført helt inn.

natural_image
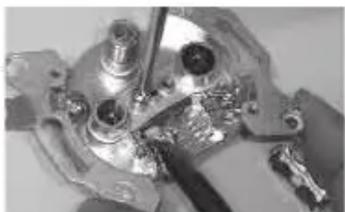
Close-up of a mechanical component with metallic parts and bolts (no visible text or symbols)Trinn 3: Skru til skruen på hovedenheten for å feste kabelen.
natural_image
Close-up of mechanical components with metallic surfaces and connectors (no visible text or symbols)Trinn 4: Fest metallklemmen med skrue A.

natural_image
Close-up of mechanical components with no visible text or symbolsFEST HOVEDENHETEN PÅ RAMMEN
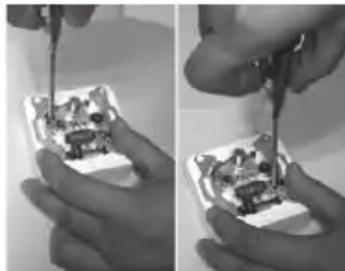
Trinn 1: Plasser hovedenheten i rammen som vist på bildet.

natural_image
Two views of an electrical socket with exposed wiring and metal components (no text or symbols visible)Trinn 2: Skru til de to skruene som sitter diagonalt mot hverandre på hovedenheten for å feste hovedenheten på rammen.
natural_image
Close-up of hands using a screwdriver to adjust or install electronic components (no visible text or symbols)FEST HELE ENHETEN PÅ VEGGEN
Trinn 1. Fest hele enheten på veggen med to skruer, se bilde.

natural_image
Close-up of a small electronic component with metallic and black wiring (no visible text or symbols)Trinn 2: Sett på lokket med skrue B.

natural_image
Close-up of hands installing or adjusting a white electrical socket with three buttons, connected to a cable (no text or symbols visible)\*BILTEMA
- Runko
- Pääyksikkö
- Buvi A
- Metallinen kiinnitin
- Kansi
- Ruuvi B

KOAKSIAALIKAAAPELIEN VALMISTELEMINEN
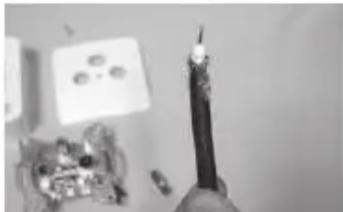
Kuori koaksiaalikaapeli kuvan osoittamalla tavalla. Voit käyttää RG59- tai 75 ohmin RG6 -kaapelia.
natural_image
Close-up of a hand holding a lit candle with a small inset showing three lights (no visible text or symbols)RUNGON VALMISTELEMINEN
Irrota pieni osa rungosta.

natural_image
Two-panel image showing hands holding scissors and a small object inside a container (no visible text or symbols)© 2008 Biltema Nordic Services AB
Art. 24-415
PUJOTA KAAPELI RUNGON LÄPI

natural_image
Close-up of a hand holding a small white object with a pen, possibly part of a device or tool (no visible text or symbols)KIINNITÄ KAAPELI PÄÄYKSIKKÖÖN
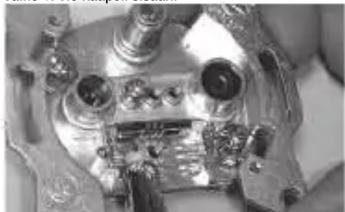
Vaihe 1: Vie kaapeli sisään.
natural_image
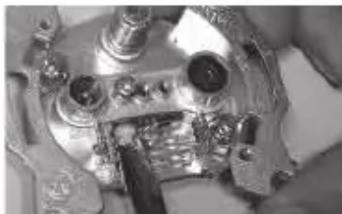
Close-up of a mechanical component with metallic parts and bolts (no visible text or symbols)Vaihe 2: Varmista, että kaapeli on kokonaan sisällä.
natural_image
Close-up of a mechanical component with metallic parts and bolts (no visible text or symbols)Vaihe 3: Kiinnitä kaapeli ruuvaamalla ruuvi pääyksikköön.
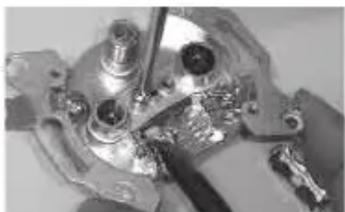
natural_image
Close-up of mechanical components with metallic surfaces and connectors (no visible text or symbols)Vaihe 4: Kiinnitä ruuvi A metallisella kiinnittimellä.

natural_image
Close-up of mechanical components with no visible text or symbolsKIINNITÄ PÄÄYKSIKKÖ RUNKOON
Vaihe 1: Aseta pääyksikkö runkoon kuvan osoittamalla tavalla.

natural_image
Two views of an electrical socket with exposed wires and metal components (no text or symbols visible)Vaihe 2: Kiinnitä pääyksikkö runkoon kiristä-mällä kaksi ruuvia, jotka sijaitsevat pääyksikössä vinosuunnassa toisiinsa nähden.
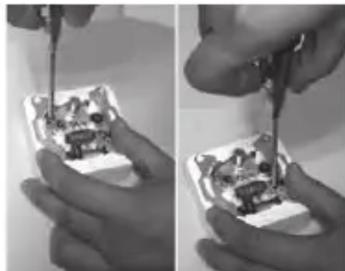
natural_image
Close-up of hands using a screwdriver to adjust or install electronic components (no visible text or symbols)KIINNITÄ KOKO YKSIKKÖ SEINÄÄN
Vaihe 1: Kiinnitä koko yksikkö seinään kahdella ruuvilla kuvassa näkyvällä tavalla.
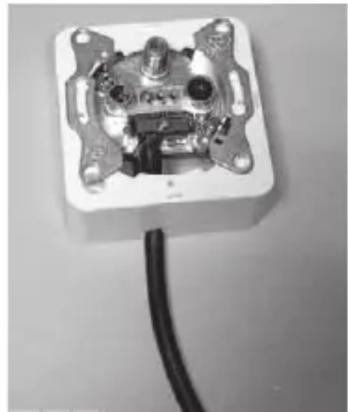
natural_image
Close-up of a small electronic component with metallic and black wiring (no visible text or symbols)Vaihe 2: Kiinnitä kansi ruuvin B avulla.

natural_image
Close-up of hands installing or adjusting a white electrical socket with three buttons (no text or symbols visible)



Mærke : Biltema
Model : 24-414
Kategori : Wi-Fi antenne