
Austin 440 - Hi-Fi System BLAUPUNKT - Gratis brugsanvisning og manual
Find enhedens vejledning gratis Austin 440 BLAUPUNKT i PDF-format.

Brugerspørgsmål om Austin 440 BLAUPUNKT
0 spørgsmål om dette apparat. Besvar dem du kender, eller stil dit eget.
Stil et nyt spørgsmål om dette apparat
Download vejledningen til din Hi-Fi System i PDF-format gratis! Find din vejledning Austin 440 - BLAUPUNKT og tag din elektroniske enhed tilbage i hånden. På denne side er alle dokumenter nødvendige for brugen af din enhed offentliggjort. Austin 440 af mærket BLAUPUNKT.
BRUGSANVISNING Austin 440 BLAUPUNKT
NOTE: This equipment has been tested and found to comply with the limits for a Class B digital device, pursuant to Part 15 of the FCC Rules. These limit are designed to provide reasonable protection harmful interference in a residential installation. This equipment generates, uses and can radiate radio frequency energy and, if not installed and used in accordance with the instructions, maybe cause harmful interference to radio communications. However, there is not guarantee that interference will not occur in a particular installation. If this equipment does cause harmful interference to radio or television reception, which can be determined by turning the equipment off and on, the user is encourage to try to correct the interference by one or more of the following
-Reorient or relocate the receiving antenna.
-Increase the distance between the equipment and receiver
-Connect the equipment into an outlet on a circuit different from that to which the receiver is connected.
-Consult the dealer or an experienced radio/TV technician for help.
BLAUPUNKT
AUS440
7" In Dash Touch Screen DVD Receiver Instruction Manual
natural_image
Red sedan displayed on a digital audio workstation, no visible text or symbols on the vehicle or background.Enjoy it.
SIMPLE TROUBLESHOOTING
| PROBLEMS, CAUSES & SOLUTIONS |
| No power- Check and make sure the connecting wires are connected correctly.- Check whether the fuse is blown. Replace with the proper value fuse if necessary. |
| No sound- Check and make sure the speaker wires are connected correctly. |
| No picture- Check whether the video wire is connected to the video device. |
| Unit hang-up- Press the RESET button to reset the unit to its default stage. |
| No function when pressing the buttons or TFT screen- Press the RESET button to reset the unit to its default stage. |
| Poor effect or unable to receive radio / TV- Check whether the radio / TV antenna is inserted or properly connected.- Antenna may not be the proper length. Make sure the antenna is fully extended.- Antenna may be poorly grounded. Check and make sure the antenna is properly grounded. |
| Stereo cannot be received under radio mode- Tune the radio frequency accurately.- The broadcasting signal is too weak, set the mode to MONO. |
| Disc inserted but cannot play- Check whether the disc inserted upside down.- Check whether the disc is dirty or badly cracked.- Lens is dirty. Clean lens by using the lens clean disc. |
| Picture without colour or no sound under disc / TV mode- Improper setting of colour system. Set again to "PAL", "SECAM" or "NTSC".- The disc is dirty or damaged. Wipe the disc with a dry soft cloth or replace with a new disc. |
| Abnormal moving, skipping or sound during playback- The disc is dirty or damaged. Wipe the disc with a dry soft cloth or replace with a new disc. |
| Remote handset does not work- Replace with a new battery of the remote handset.- Point the remote handset directly at the remote sensor of the main unit.- Clean the surface of the remote sensor. |
| Bluetooth not working- check to make sure the devices are linked up correctly. |
| GPS not working- check to make sure the micro SD card for GPS has been inserted.- check to make sure GPS antenna connected properly. |
Note
After the above efforts, if the unit still cannot be operate normally, consult your service dealer. Never attempt to disassemble the unit by yourself. No service part inside the unit.
IMPORTANT NOTICE & PRECAUTIONS
Thank you for buying an BLAUPUNKT product. To operate the unit correctly, please read the operation manual carefully before using. Keep this operation manual for future reference.
The unit is designed only for DC 12V negative ground operation system. Make sure your vehicle is connected to DC 12V negative ground operation system. Be sure to connect the speaker(-) leads to the speaker(-) terminal. Never connect the left and the right channel speaker wires together or to the vehicle body.
The normal temperature for operation is between -20 and +60 degree Fahrenheit. Do not operate in extreme hight or low temperature and lock vents or radiator panel of the unit. Blocking them will cause heat to build up inside the unit and may cause damage or fire.
This unit can play the following discs (4.72 in) and media files: DVD ±R/RW /MPEG 4 / DivX / AVI / SVCD / VCD / MP3 / WMA / CD-R/RW / JPEG.
This operation manual probably shows the full version of this unit. GPS navigation system; dynamic multi-color illumination; iPod connection, digital TV tuner; analog TV tuner; Bluetooth, AM radio band and RDS (Radio Data System) are optional features of the software and may not be included. Refer to the exact funtions & features equipped with this unit for operation
INSTALLATION
Accessories included in the package for installation

Mounting Method
Put the mounting sleeve into the dashboard.
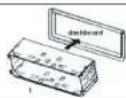
Band the tabs of the mounting sleeve (1) outward into the dashboard for a secure mounting.
If necessary, use the strap (6) to secure the back of the unit in place. The strap (6) can be bent by hand to the desired angle.
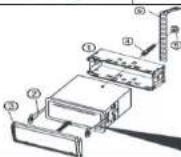
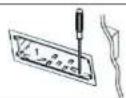
To remove the unit, insert the release keys (2) on both sides of the unit and then pull the unit out from the dashboard.

To Detach the From Panel
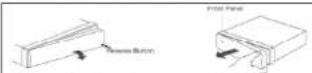
Before detaching the front panel, be sure to turn off the unit. Press the release button and pull off the front panel from the main unit.

First, insert the left hand side of the front panel into the main unit. Then push the right hand side of the front panel into the main unit until it locks firmly.
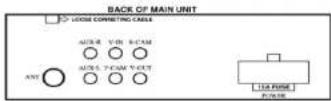
WIRING CONNECTION
Remarks:
This drawing shows the full version of the unit and may not be available for connection on some versions. Refer to the exact functions and features of the unit for proper connection.
Due to the law of some countries, video playback is not allowed during driving. To allow video playback during driving, the brown wire (brake) should be connected to ground (B-) of the car battery.
| Portion | Colour | Connection | |
| Connecting Socket | POWER | Red | Ignition switch (B+) with 1A fuse |
| Black (Coarse)(Fine) | Ground (B-)Steering wheel control (Ground) | ||
| Yellow | Memory back up (B+) | ||
| WhiteWhite / Black | Front left speaker (+)Front left speaker (-) | ||
| GreyGrey / Black | Front right speaker (+)Front right speaker (-) | ||
| GreenGreen / Black | Rear left speaker (+)Rear left speaker (-) | ||
| PurplePurple / Black | Rear right speaker (+)Rear right speaker (-) | ||
| Blue | Auto antenna (B+) | ||
| Pink | Back sight (B+) | ||
| Pink / Black | Front camera (B+) | ||
| Grey | Steering wheel control (1) | ||
| Green | Steering wheel control (2) | ||
| Orange | Illuminate backlight (B+) | ||
| Brown | Brake (B-) | ||
| Red RCA Jack | Auxiliary right speaker output | ||
| Write RCA Jack | Auxiliary left speaker output | ||
| ANT | Radio antenna | ||
| Audio input jack | AUX-R | Red | Auxiliary right speaker input |
| AUX-L | White | Auxiliary left speaker input | |
| Video output jack | V-OUT | Yellow | Video output |
| Video input jack | F-CAM | Yellow | Front sight camera input |
| R-CAM | Yellow | Back sight camera input | |
| V-IN | Yellow | Video input | |
| Loose Connecting Cable | TV antenna input socket (for version with TV tuner)iPod input socket (for version with iPod connection)USB slot (for version with backside USB connection) | ||
SPECIFICATION
GENERAL
Power Requirement:
Load Impedance:
Maximum Power Output:
DC 12 Volts, negative ground
4 Ohms
40 watts x 4 channels
RADIO SECTION
Frequency Range
Area:
Europe
Russia
Australia
Middle East
America 1
America 2
America 3
America 4
Japan
Brazil
China
AM Section
Frequency:
522-1620
522-1620
522-1710
522-1620
530-1620
530-1620
530-1710
530-1710
522-1629
520-1710
522-1620
450 KHz
FM Section
Frequency:
87.5-108MHz
65 - 74 MHz (FM1)
87.5 - 108 MHz (FM2/FM3)
87.5 - 108 MHz
87.5 - 108 MHz
87.5 - 108 MHz
87.5-107.9MHz
87.5-107.9MHz
87.5 - 108 MHz
76 - 90 MHz (EM1)
76 = 50 MHz (FM1) 87.5 - 108 MHz (EM2/EM3)
87.5 - 108 MHz (FM2/FMS)
87.5 - 108 MHz
87.5 - 108 MHz
10.7 MHz
DISC SECTION
Disc Play:
Mounting Angle:
DVD / VCD / MP3 / CD
+/- 30°
VIDEO
Video
Video Output Level:
Horizontal Resolution:
PAL / SECAM / NTSC
1.0Vp-p 75 Ohms
500
BLUETOOTH SECTION
Communication type
Maximum Distance:
V2.0
5 meters
AUDIO SECTION
Maximum Output Level:
Frequency Response:
Signal to Noise Ratio:
Channel Separation:
2 Vrms (+/-3 dB)
20 Hz to 20 KHz
85 dB
80 dB
Note: Specification and design; functions and features; unit illumination; colour and display segment are subject to change without prior notice. Photos and drawings on gift box or operation manual might be varied from the exact unit. Depending on the input devices, operation might be varied from the operation manual described.
ON SCREEN - AUXILIAR INPUT OPERATION
In MAIN MENU, touch "AUX IN" icon on screen to go to AUXILIARY INPUT MENU for auxiliary input operation
During auxiliary input operation, touch any portion of screen to activate AUXILIARY INPUT MENU for various operation mode
AUXILIARY INPUT MENU


AUDIO & VIDEO SETUP
Touch to activate the AUDIO & VIDEO SETTING INTERFACE for audio & video adjustment. (Refer to ON SCREEN-AUDIO & VIDEO SETUP for operation details)

SOUND MUTING
Touch to turn down the sound output. In sound muting mode, touch to release the mode and recover to the previous sound output level.

SCREEN DISPLAY
Touch to turn off the screen. When the screen is turned off, touch any portion of the screen to turn it on again.

BLUETOOTH OPERATION
Touch to go Bluetooth operation (when mobile phone is connected).

MAIN MENU
Touch to go to MAIN MENU for other operation modes
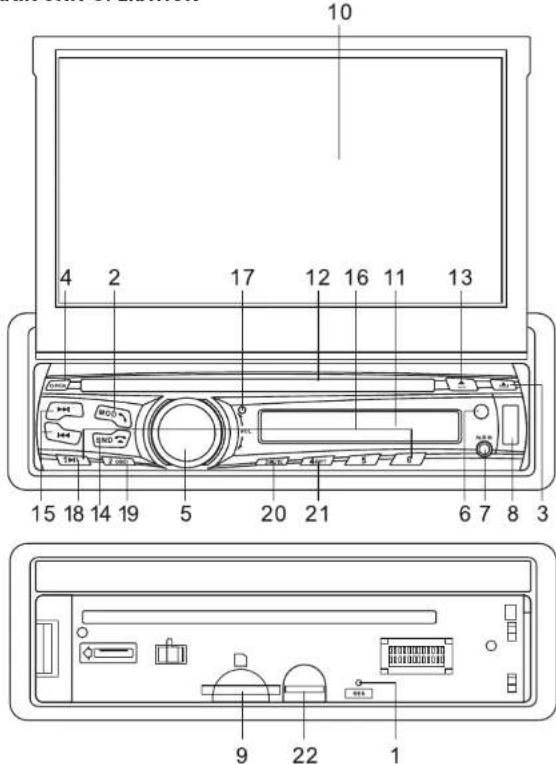
MAIN UNIT OPERATION
[3]
No / Symbol / Function Operations & Controls
-
RES Press with a pointed object (such as a ballpoint pen) to reset the unit to its initial setting by the factory (default stage).
-
(ON/OFF) Power On/Off When the unit is turned off, press to turn on the unit. When the unit is turned on, press & hold shortly to turn off the unit. SRC Mode Selection
During unit operation, press repeatedly to select the desired mode for operation.

-
Press to detach the front panel from the main unit for inserting SD card and micro SD card (for GPS navigation). The detachable front panel is also for anti-theft security purpose.
-
OPEN / When the TFT screen is stored in its compartment, press to open the TFT screen.
When the TFT screen is open, press repeatedly to adjust the angle for viewing.
When the TFT screen is open, press & hold shortly to store back the TFT screen to its compartment.
-
- VOL + Volume Control Rotate to adjust the sound output level. SEL Function Selector During unit operation, press repeatedly to move to the following audio & visual control modes:
\~ VOL (volume control) At VOL control mode, rotate SEL to adjust sound output level \~ DSP (bass & treble control) At DSP control mode, rotate SEL and press ▶▶/ [◀◀ to adjust output on bass and treble
- SOUND (balance & fader control) At SOUND control mode, rotate SEL and press ▶▶|/|◀◀ to adjust balance between left & right speakers as well as output level of front & rear speakers
\~ DISPLAY (brightness, chroma, contrast & sharpness control) At DISPLAY control mode, press ▶▶/□◀◀ to shift control through BRIGHT, CHROMA, CONTRAST & SHARP. When the desired mode is displayed, rotate SEL to adjust the setting. (Note: DISPLAY control not available under radio & Bluetooth operation mode).
- IR Remote control sensor (for signal reception from remote handset).

DIAL OUT / CALL PICK UP / REDIAL
Touch to answer a call when received. Touch to dial a call after input phone number. Touch to redial.

HANG UP / REFUSE CALL
Touch to hang up.

SHIFT BETWEEN MOBILE PHONE & CAR UNIT
Touch to switch between mobile phone and Bluetooth of the car unit.
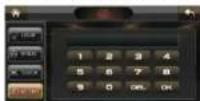
NUMBER PAD
Touch to input the phone number.

ERROR ERASE

Touch to erase the last number input in error.

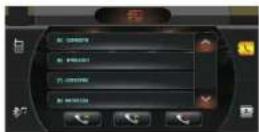
DIAL OUT NUMBER
Touch to show the list of dialed calls.

DIAL IN NUMBER
Touch to show the list of received calls.

MISSING CALL NUMBER
Touch to show the list of missing calls.
PAGE UP AND DOWN
Touch to scroll up or down.

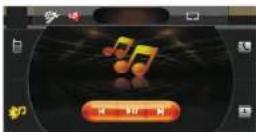
PLAY AND PAUSE
Touch to play or pause playback of music from the mobile phone through the car unit.

TRACK FORWARD
Touch to shift track forward for playback

TRACK BACKWARD
Touch to shift track backward for playback

AUDIO & VIDEO SETUP
Touch to activate the AUDIO & VIDEO SETTING INTERFACE for audio & video adjustment.
(Refer to ON SCREEN - AUDIO & VIDEO SETUP for operation details)

SOUND MUTING
Touch to turn down the sound output. In sound muting mode, touch to release the mode and recover to the previous sound output level.

SCREEN DISPLAY
Touch to turn off the screen. When the screen is turned off, touch any portion of the screen to turn it on again.

MAIN MENU
Touch to go to MAIN MENU for other operation mode.
ON SCREEN - BLUETOOTH OPERATION
In MAIN MENU, touch "BLUETOOTH" icon on screen to go to BLUETOOTH MENU for bluetooth operation
BLUETOOTH MENU
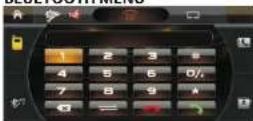
LINK UP WITH MOBILE PHONE
To linkup the Bluetooth connection with the mobile phone, follow the
steps
- set the mobile phone to Bluetooth state
- start to search new device
- after searching for new device "CAR KIT", "CAR BT" or similar device name will appear
- confirm the search at the mobile phone
- if password is required, input default code "0000" or "8888" in the mobile phone
- press "CONNECT" on the screen
- when the connection is successful, you can start using Bluetooth function
CONNECT / DISCONNECT WITH MOBILE PHONE
When Bluetooth is connected ( linked with mobile phone), when a call is
received or dialed, the unit will respond automatically and switch to Bluetooth operation.
The unit will return to its original mode when the call ends.

Touch to go to BT-HISTORY MENU.
Touch to go to BT-MUSIC MENU.
Touch to go to BLUETOOTH MENU.
No function.
BT-HISTORY MENU BT-MUSIC MENU
[22]
-
AUX IN
-
USB
-
SD /
-
TFT Screen
-
LCD Display
-
DISC SLOT
13.
- BND

- ▶▶|/|◀◀
Plug an external device to this port for output of that external device through the unit.
Insert USB device to this slot for digital files playback. (Note: The USB slot is intended for data transfer only)
Remark: When USB devices had been inserted both in the front & back USB slots, playback will only be made at the front USB device (available for unit with back side USB slot)
Insert SD/MMC card to this port for digital files playback.
Shows the operation status of the unit. This screen is also a touch display - soft touch the screen for different operations of unit (for details, refer to other parts of this operation manual).
Shows the operation status of the unit.
Insert or remove disc from this disc slot.
Press to eject disc from the disc slot (when a disc has been inserted).
Radio Mode
During unit operation, press to shift current operating mode to radio mode for operation.
At radio mode, press repeatedly to select the desired radio band for broadcasting.
Bluetooth Mode
Press to end a call or refuse an incoming call.
Radio Mode - Manual Tune
Press repeatedly to fine tune the radio frequency upward or downward.
Radio Mode - Auto Seek
Press & hold shortly to tune the radio frequency upward or downward station for broadcasting.
Disc / USB / SD / iPod Input Mode - Select Tracks
Press repeatedly to shift track upward or downward for playback.
Disc / USB / SD/ iPod Input Mode – Fast Forward / Fast Rewind Each time Press & hold shortly to activate various fast forward or fast rewind speeds for playback. (Note: In iPod input playback mode, fast forward or fast rewind mode just in one step only)
TV Mode – Channel Selection
Press to scroll TV channel upward or downward for broadcasting.
TV Mode - Auto Seek
Press and hold shortly to tune the TV frequency upward or downward and stop for broadcasting when a TV channel received.
BLUETOOTH Mode - Select Tracks
Press repeatedly to shift track upward or downward for music playback transmitted from mobile phone.
[5]
- 1 - 6
In radio mode, press any one of the number keys 1 - 6 to select a station which had been stored in the memory. Press the desired number key for several seconds, and the current station broadcasting will be stored into this number key. - MIC
- OSC
In playback mode, press to start, pause or resume playback. - MENU
In video & photo playback mode, press & hold shortly to display the contents of the currently playing sources on screen. (Note: Depends on the media files that recorded, not all sources can be displayed)
For Unit without GPS Navigation
Press & hold shortly to shift the current operating mode to the main menu for various operating selection.
For Unit with GPS Navigation
Press & hold shortly to shift the current operating mode to GPS navigation mode or from the GPS navigation mode to the previous operating mode. - RPT
In playback mode and depends on playback device, press
& hold shortly to select the desired repeat playback mode. - GPS / (MICRO SD CARD)
For Unit with GPS Navigation Only
Insert micro SD card installed with navigation software to this port for operation under GPS mode. (Note: GPS operation mode requires up to 4GB of space on microSD card.)
Note
Printing and symbols on the above drawing may vary from the exact main unit. Referred to the main unit for exact functions and features. User is recommended to use the touch screen control to operate. Most of the functions cannot be operated by the main unit.

ON SCREEN DISPLAY
Touch repeatedly to display the contents of the currently playing source on screen. Depending on the disc or file type, it may display the disc type, little number, total title numbers, chapter number, total chapter number, playing time, elapsed time as well as audio output channel. (Note: Depends on different type of discs and media files that recorded, not all sources can be displayed)

MENU / PBC
DVD Mode
In DVD playback mode, touch to show the on- screen menu of the entire disc, touch again to title.
VCD Mode
In VCD playback mode, touch to start playback from the beginning in sequence

BLUETOOTH OPERATION
Touch to go Bluetooth operation.

PLATBACK SELECTION
Touch once to activate the number key pad for track selection for playback. Touch twice to activate the direction key for playback selection (In photo playback mode, use the direction keys for rotating the photo for viewing)


SYSTEM SETUP
Touch to start the system set up. A set up menu appears on screen. Touch to have setup of the follow: SYSTEM / LANGUAGE / AUDIO / VIDEO / SPEAKER / DIGITAL (Note: Not all the setups available for operation on the unit)

AUDIO & VIDEO SETUP
Touch to activate the AUDIO & VIDEO SETTING INTERFACE for audio & video adjustment. (Refer to ON SCREEN-AUDIO & VIDEO SETUP for operation details)

SOUND MUTING
Touch to turn down the sound output. In sound muting mode, touch to release the mode and return to the previous sounds output level.

SCREEN DISPLAY
Touch to turn off the screen. When the screen is turn off, touch any portion of the screen to turn it on again.

BLUETOOTH OPERATION
Touch to go the Bluetooth operation (when mobile phone connected).

MAIN MENU
Touch to go to MAIN MENU for other operation mode.
PLAYBACK OPERATION MENU


In PLAYBACK OPERATION MENU, hold and slide the lowest portion (icons) of the screen to shift to another PLAYBACK OPERATION MENU. There are three playback operation menus. The following shows the operation under these menus.
C
DISC INPUT
This shows operation under disc input mode.
The image is too blurry to recognize any text content.
USB INPUT
This shows operation under USB device input mode.
m = 311
SD CARD INPUT
This shows operation under SD card input mode.
[Unreadable]
PAUSE AND PLAY
Touch to pause playback, touch again to resume to normal playback.
•
TRACK UP / DOWN
Touch to choose track upward or downward for playback.
•
。
m = 311
FAST FORWARD / FAST REWIND
Touch repeatedly to fast forward or fast rewind the tracks. Touch one time for x2, two times for x4, three times for x8, four times for x20, 5 times for returning to normal playback. During fast forward or fast rewind mode, touch to resume normal playback.
-
SLOWLY PLAYBACK
Touch repeatedly to start playback in slow motion. There are 6 steps of slow motion
(No text)
available for
STOP MODE In USB/SD playback mode, touch will stop the playback temporarily and playback will resume after a while. In disc playback mode, touch will stop the playback. In stop mode, touch h to stop the playback, and touch 📄 to resume normal playback.
[Unreadable]
AUTO SCAN (At Music Playback Mode)
Touch to start scanning the tracks and playback for a few seconds.
m = 311
REPEATED PLAYBACK
Touch repeatedly to choose different modes of playback.
The image is too blurry to recognize any text content.
RANDOM PLAYBACK
Touch to playback tracks in random order.
The Ground Truth image displays a single, solid horizontal line. According to Rule 2 (UNDERSCORE & LINE RULES), this is a stylistic or background line, not a placeholder underscore. Therefore, the OCR result must ignore it and output nothing or only meaningful text.
(no text)
AUDIO CHANNELS SELECTION
Touch repeatedly to select the audio output channels recorded in the device.
-
SUB-TITLE SELECTION
Touch repeatedly to select different sub-titles recorded on the devices.
The Ground Truth image displays a single, solid horizontal line. According to Rule 2 (UNDERSCORE & LINE RULES), this is a stylistic or background line, not a placeholder underscore. Therefore, the OCR result must ignore it and output nothing or only meaningful text.
(no text)
MULTI-ANGLE SETTING
In video playback mode, touch repeatedly to view the angle changes in sequential
-
order (available for video recorded with multi-angle senses).
ZOOM IN / OUT
Touch repeatedly to zoom in and zoom out of screen for viewing.
[20]
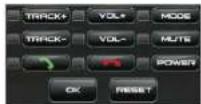
REMOTE HANDSET OPERATION
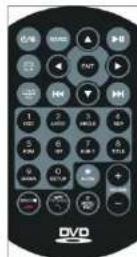
GENERAL OPERATION
Symbol / Function
(1)
Operations & Controls
When the unit is turned off, press to turn on the unit.
When the unit is turned on, press & hold shortly to turn off the unit.
SOURCE
Press repeatedly to choose your desired modes for operation.
VOL+/VOL-/
Press repeatedly or press & hold to adjust sound output level.
VOLUME + / -
nd
Press to turn sound mute on or off
Press repeatedly to select the desired preset audio equalization mode
LOUD
Press & hold shortly to turn on or off loudness control.
RADIO OPERATION
Symbol / Function
BND
Operations & Controls
Press repeatedly to select the desired radio band for broadcasting.
Q
Auto Memory Store
Press & hold shortly to start searching the frequency and storing the strongest signal stations into the corresponding preset station number 1 - 6. The searching will stop until one cycle search is finished and the unit will start scanning the preset stations and stop for broadcasting a few seconds on the preset station scanned.
Auto Memory Scan
Press to scan the preset stations on the selected radio band. Auto Memory Scan will stop for several seconds for broadcasting on each preset station scanned. During scanning, press again to stop and the current radio station will be broadcasting. Scanning will be stopped after one cycle of scanning is completed.
[7]
▶▶|/◀◀
Press & hold shortly to seek the frequency upward or downward and stop for broadcasting when a radio station is received. Press repeatedly to fine tune the radio frequency upward or downward.
1/2/3/4/5/6
Press any one of the number keys to select a station stored in the memory for broadcasting. Shortly press & hold the desired number key to store the current broadcasting station or frequency into that number key.
7 / SUB-T
In FM radio band, press to switch between a local setting (LOC) for reception of strong stations, and a distant setting for reception of weak stations. When a local mode is selected, "LOC" appears on screen. This is no indication for distant mode.
8 / TITLE
In FM radio band, press to select between stereo or mono mode. When stereo mode is selected, "ST" appears on screen when stereo signal is received. There is no indicator for mono mode and mono signal received.
DISC / USB / SD / IPOD INPUT OPERATION

Press to start, pause or resume playback.
At disc & iPod playback mode, press to stop playback.
At USB / SD playback mode, press to stop playback temporarily and go to folder menu for other selection. If no selection is made or after a while, playback will resume.
▶▶|/|◀◀
Track Selection
In playback mode, press repeatedly to choose track upward or downward for playback.
Fast Forward & Fast Rewind
At playback mode, press & hold shortly to activate various fast forward or fast rewind speeds for playback. (Note: In iPod playback mode, fast forward or fast rewind available in one speed only)
0-9
Press directly to input the track number for playback.
OSD
In video & photo playback mode, press & hold shortly to display the contents of the currently playing sources on screen. (Note: Depends on the media files that recorded, not all sources can be displayed)
AUDIO
In video & music playback mode, press & hold shortly to select different audio output channels. (Note: Available on media files recorded with different audio output channels. Audio setting is not available at iPod mode)
ANGLE
In video playback mode, press & hold shortly to view the angle changes in sequential order. (Note: Available on video files recorded with multi-angle scenes)
[8]

AUDIO & VIDEO SETUP
Touch to activate the AUDIO & VIDEO SETTING INTERFACE for audio & video adjustment.
(Refer to ON SCREEN - AUDIO & VIDEO SETUP for operation details)

SOUND MUTING
Touch to turn down the sound output. In sound muting mode, touch to release the mode and recover to the previous sound output level.

SCREEN DISPLAY
Touch to turn off the screen. When the screen is turned off, touch any portion of the screen to turn it on again.

BLUETOOTH OPERATION
Touch to go to Bluetooth operation (when mobile phone is connected).

MAIN MENU
Touch to go to MAIN MENU for other operation mode.
ON SCREEN - DISC / USB / SD INPUT OPERATION
In MAIN MENU, touch "DISC" / "USB" / "SD" icon on screen to go to disc / USB / SD input operation. In audio playback mode, MUSIC MENU

In MUSIC MENU, touch to go to FOLDER MENU in order to select media, folder or track for playback.

In MUSIC MENU, touch to activate PLAYBACK OPERATION MENU for various operation modes.
FOLDER MENU
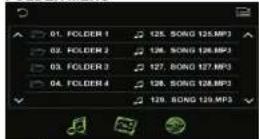
MUSIC MENU
Touch to scroll page up or down.

Touch to switch current playback mode to music playback mode. Note: Available on device recorded with music media file

Touch to switch current playback mode to photo playback mode. Note: Available on device recorded with photo media file

Touch to switch current playback mode to video playback mode. Note: Available on device recorded with video media file
During video/photo playback mode, touch any portion on screen to activate PLAYBACK OPERATION MENU for various operation modes.

During audio playback, touch to activate PLAYBACK OPERATION MENU for various operation modes.
[19]

AUTO MEMORY STORE / SCAN
Touch to start searching the frequency and storing the strongest signal stations into the corresponding preset station number 1 – 6. The searching will stop until one cycle search is finished and it will start scanning all the preset stations on memory and stop for a few seconds for broadcasting. During scanning, touch again to stop this scanning and the current radio station will be broadcasting.
AUTO SCAN
Touch to start scanning all the preset stations on memory and stop for a few seconds for broadcasting. During scanning, touch again to stop this scanning and the current radio station will be broadcasting.
AUTO SEARCH
Touch to start searching the current radio frequency upward and stop for broadcasting a few seconds when a radio station received. Touch again to stop the searching or searching will not stop.
PRESET STATIONS SELECTION
Touch any one of the preset station number 1 - 6 to select a station which is stored in the memory for broadcasting. Touch and hold the station number to store the current broadcasting station into this preset number. The unit can store up to 30 stations: FM1 x 6; FM2 x6; FM3 x6; AM1 x 6; AM2 x 6.
SEEK CONTROL
Touch to seek the radio frequency upward or downward and stop when a radio station is received.
MANUAL TUNING
MANUAL TUNING Touch repeatedly to fine tune the radio frequency upward or downward manually.


AF CONTROL ( ALTERNATIVE FREQUENCIES )
This control is available for units with RDS. Touch to turn RDS operation on or off. Whenever RDS is on, the program name will be show on TFT display when receiving a RDS station. "ALARM" will be displayed when an emergency broadcasting is received.
(Note: When AF is on, using 📄 / 📋 to search station will only stop at stations which have RDS broadcasting)
TA CONTROL (TRAFFIC ANNOUNCEMENT)
This control is available for units with RDS. Touch to activate traffic announcement mode on or off. When TA mode is on a traffic announcement is transmitted:
- when the unit is on other operating modes, it will temporarily switch to radio mode and switch over to a linked station when it detects a traffic announcement on that program
- If the volume level is under the threshold point, it will raise to the threshold point (Note: When TA is switched on, using 📄 / 📋 to search station will only stop at stations which have TA broadcasting)
MONO / STEREO SELECTOR
Touch to select FM reception in stereo or mono mode. When stereo signal is received, stereo indicator appears on screen, But there is no indicator for mono signal. LOCAL / DISTANT CONTROL
In FM radio mode, touch to switch between a local setting for reception of strong stations, and a distant setting for reception of weak stations. When a local setting mode is selected, "LOC" appears on screen. There is no indicator for distant setting.
[18]
REP
In playback mode and depending on the media files recorded, press & hold shortly to select various playback modes.
RDM
In playback mode, press & hold shortly to turn on or off random playback of the input device. (Note: depending on the input device, random playback may not be available for setting. Random playback is not available In iPod mode)
INT
In playback mode, press & hold shortly to turn on or off intro playback of the input device. (Note: depending on the input device, intro playback may not be available for setting. Intro playback is not available In iPod mode)
SUB-T
In video playback mode, press & hold shortly to select different sub-titles recorded in the device. (Note: Available on video files recorded with different sub-titles)
TITLE
In DVD playback mode, press & hold shortly to show the on-screen menu or title of the disc. By using ▲/▼/◄/► and ENT keys to select or set for the desired playback modes.
TITLE
ZOOM In video & photo playback mode, press & hold shortly to select different zoom in and zoom out ratio of screen for viewing.
ZOOM In video & photo playback mode, press & hold shortly to select different zoom in and zoom out ratio of screen for viewing.
SLOW In video playback mode, press & hold shortly to select different slow motion playback.
SETUP
Press & hold shortly to activate the system setup. A setup menu will appear on screen. use ▲/▼/◄/► and ENT keys to have the desired setup. (Note: Not all the setups are available for selection on the unit. Password for parental lock "0000". Setup is not available In iPod mode)
MENU / PBC
DVD Mode
In DVD playback mode, press & hold shortly to show the on-screen menu or title of the disc. use ▲/▼/◄/► and ENT keys to select or set the desired playback modes.
In DVD playback mode, press & hold shortly to show the on-screen menu or title of the disc. use ▲/▼/◄/► and ENT keys to select or set the desired playback modes.
VCD Mode
In VCD playback mode, press & hold shortly to switch PBC on or off. In PBC on mode, sequence playback starts at the beginning.
In VCD playback mode, press & hold shortly to switch PBC on or off. In PBC on mode, sequence playback starts at the beginning.
SYS
Each time press & hold shortly to select different TV system on NTSC, PAL, AUTO. (Note: Not available In iPod mode)
▲/▼/◄/►
Directional Keys
Press to select on screen your desired position/control for operation. (Note: Available for setting in SETUP / TITLE / MENU / PBC mode) Photo Playback Mode
Press to select on screen your desired position/control for operation. (Note: Available for setting In SETUP / TITLE / MENU / PBC mode) Photo Playback Mode
ENT Press to rotate photo position or show up-down, left-right mirror image. Press to confirm or enter the selected setting.
[9]
BLUETOOTH OPERATION
Symbol / Function Operations & Controls
Press to answer an incoming call. Press to dial out a call after inputting the phone number. When no phone number has been input, press to redial the last dialed number.
Press to end or refuse an incoming call.
→ PHONE In BLUETOOTH mode, press to switch conversation between main unit and mobile phone.
0-9 Phone Number
Press directly to input the phone number for dial out.
International Call
Press & hold shortly 0 to input + for international call.
# / ☒ Press to input for conversation that needs data input
CLR Press to erase the digit that input by error.
▶II Press to start or pause playback of music transmitted from the mobile phone.
In music playback mode, press repeatedly to choose track upward or downward for playback.
NOTE
-
For battery replacement, please refer to the back of the remote handset for details.
-
Depending on the input devices and media files recorded, not all the operations as described above can function on some operating modes and operation method may vary.
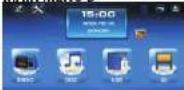
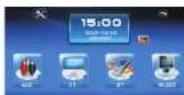
ON SCREEN - MAIN MENU OPERATION
IMPORTATION NOTICE:
Interfaces, photos, images and icons as shown in this part of operation manual may be varied from the exact unit. However, all of them have a similar outlook with the same operation method.
This unit is equipped with two background colours MAIN MENU which show different sources of input and operation. Touch the icon of your desired mode on screen and the unit will then enter into the mode that you selected. Hold and slide on the lower portion of screen (icons) to shift to next or previous page of MAIN MENU.
[10]

AUTO MEMORY STORE / SCAN
Touch to start searching the frequency and storing the strongest signal stations into the corresponding preset station number 1 - 6. The searching will stop until one cycle search is finished and it will start scanning all the preset stations on memory and stop for a few seconds for broadcasting. During scanning, touch again to stop this scanning and the current radio station will be broadcasting.

AUTO SCAN
Touch to start scanning all the preset stations on memory and stop for a few seconds for broadcasting. During scanning, touch again to stop this scanning and the current radio station will be broadcasting.

AUTO SEARCH
Touch to start searching the current radio frequency upward and stop for broadcasting a few seconds when a radio station is received. Touch again to stop the searching or searching will not be stopped.

PRESET STATIONS SELECTION
Touch any one of the preset station number 1 - 6 to select a station which is stored in the memory for broadcasting. Touch and hold the station number to store the current broadcasting station into this preset number. The unit can store up to 30 stations: FM1 x 6; FM2 x6; FM3 x6; AM1 x 6; AM2 x 6.

SEEK CONTROL
Touch to seek the radio frequency upward or downward and stop when a radio station is received.

MANUAL TURING
MANUAL TUNING Touch repeatedly to fine tune the radio frequency upward or downward manually.

AF CONTROL (ALTERNATIVE FREQUENCIES)
This control is available for units with RDS. Touch to turn RDS operation on or off. Whenever RDS is on, the program name will be show on TFT display when receiving a RDS station. "ALARM" will display when an emergency broadcasting is received.
(Note: When AF is on, using 📄 / 📋 to search station will

TA CONTROL (TRAFFIC ANNOUNCEMENT)
This control is available for units with RDS. Touch to activate traffic announcement mode on or off. When TA mode is on a traffic announcement is transmitted:
- when the unit is on another operating mode, it will temporarily switch to radio mode and switch over to a linked station when it detects a traffic announcement on that program.
- If the volume level is under the threshold point, it will raise to the threshold point (Note: When TA is switched on using 📄 / 📄 to search station will only stop at stations which have TA broadcasting)

MONO / STEREO SELECTOR
Touch to select FM reception in stereo or mono mode. When stereo signal is received, stereo indicator will appear on screen, but there is no indicator for mono signal.
LOCAL / DISTAN CONTROL
In FM radio mode, touch to switch between a local setting for reception of strong stations, and a distant setting for reception of weak stations. When a local setting mode is selected, "LOC" appears on screen, but there is no indicator for distant setting.
[17]
TOUCH SETUP MENU
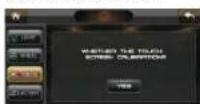

Touch to go to TOUCH SETUP MENU for calibration
on screen.
At TOUCH SETUP MENU, follow the instruction and touch on screen in order to complete the calibration.

FACATORY SETUP MENU

Touch to go to FACTORY SETUP MENU
Note:
This setting is for ex-factory setting and not available for user setup.
VERSION MENU


Touch to go to VERSION MENU which show the details of the unit.
ON SCREEN - RADIO OPERATION
In MAIN MENU, touch "RADIO" icon on screen to go to RADIO MENU for radio
operation
RADIO MENU
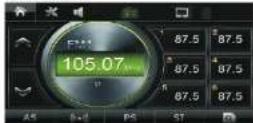
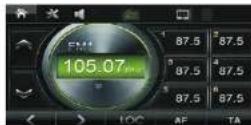
In RADIO MENU, hold and slide the lowest portion (icons) of the screen to go to another RADIO MENU. There are two radio operation menus on radio operation.
(Note: Depending on various versions of the unit, display of RADIO MENUS may be varied)
BAND SELECTION
Touch repeatedly to select different radio band for broadcasting:
FM1 > FM2 > FM3 > AM1(MW1) > AM2(MW2) >
MAIN MENU A

MAIN MENU B


Touch to start radio operation.
Touch to start disc operation (when disc is inserted).
Touch to start USB input operation (when USB device inserted).
Touch to start SD card input operation (when SD card inserted).
Touch to start auxiliary input operation (when auxiliary device inserted)
Touch to start TV operation (when TV antenna is connected).
Touch to start Bluetooth operation (when connected to a mobile phone).
Touch to start iPod input operation (when an iPod is connected).
Touch to start GPS navigation (when micro SD card with map is inserted).
Touch to start various setting of the unit.
Touch repeatedly to adjust the brightness of the screen or turn off the screen. When the screen is off, touch any portion of the screen to turn the screen on again.

In this mode, the brightness of screen is set by the user (user setting). Refer to ON SCREEN - SETUP OF UNIT (LIGHT SETUP MENU) for details.

Touch to activate audio & video setting mode. Refer to ON SCREEN - AUDIO & VIDEO SETTING for details.
Touch to turn down the sound output. In sound muting mode, touch to release the mode and return to the previous sound output level.
Touch to go to Bluetooth menu for Bluetooth operation.
Touch to go back to previous operation mode.
Touch to eject disc from the disc slot (when a disc is inserted).

Touch repeatedly to choose a different background colour (MAIN MENU A / MAIN MENU B).
Note
Some operation modes are optional items of the unit. Refer to the exact functions & features that apply to your unit.
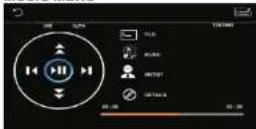
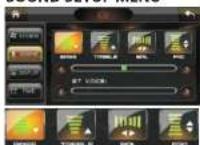
ON SCREEN - AUDIO & VIDEO SETUP

When selecting this audio & video setting icon (image varied from different MAIN MENU and operation modes), the AUDIO & VIDEO SETTING MENU appears on screen. Touch the respective icon of VOL / DSP / SOUND / DISPLAY to go to your desired setting interface on screen.
VOLUME SETTING MENU

VOLUME CONTROL
Hold and slide the VOLUME BAR to set your desired output level of sound.
EQUALIZATION CONTROL
Repeatedly touch the EQ icon to select the following preset equalization mode: FLAT, CLASSIC, POP, ROCK, JAZZ, EQ OFF.
LOUDNESS CONTROL
Touch LOUD icon to select on and off loudness control.
DSP SETTING MENU
Hold and slide on screen to set your desired output level on bass and treble (Note: When bass and treble set, equalization mode will be set to EQ OFF)
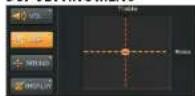
SOUND SETTING MENU

Hold and slide on screen to set the balance between left and right speakers as well as the sound output level on front and rear speakers.
[12]
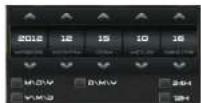
TIME SETUP MENU
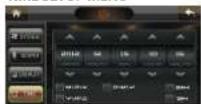

Touch to go to TIME SETUP MENU for various settings.
In TIME SETUP MENU, you can select the display format of year, month and time. Touch on screen your desired mode and touch the following icons to adjust your setting:

LIGHT SETUP MENU
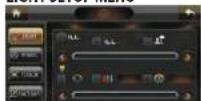

Touch to go to LIGHT SETUP MENU for various settings.

Click on the respective column to activate this function for setting (illumination backlight wire – orange should be connected). Hold & slide the control bar to adjust the lamp of your car.
Hold & slide the control bar to adjust the screen brightness (user setting mode).
To activate dynamic multi-colour illumination of the unit (automatically shifting illumination colour).
To activate user setting on RGB. Click on the column to select "R" / "G" / "B" colour and when the desired colour is reached, hold & slide the control bar to adjust the brightness.
To activate user setting on a single illumination colour of the unit. Click on the column to select the colour.
WHEEL SETUP MENU


Touch to go to WHEEL SETUP MENU for various settings.
In WHEEL SETUP MENU touch on screen the respective mode for setting
the wheel control available in your car (Operate when steering wheel control wire - grey and green connected).
[15]
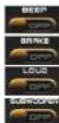
Touch to turn on or off beep sound when touching on screen for function control (Optional function may not be available in the unit).
Touch to turn on or off video during driving (when the brake – brown wire has not been connected).
Touch to turn on or off loudness control.
Touch to turn on or off sub-woofer control (when sub-woofer is connected).
SOUND SETUP MENU

Touch to go to SOUND SETUP MENU for various settings.
Touch the respective icon to enter to bass, treble, balance (BAL) and fader (FAD) adjust mode. In the selected mode, hold and slide the CONTROL BAR for your desired setting.
CONTROL BAR


Touch to go to DISPLAY SETUP MENU for various settings.
DISPLAY SETUP MENU

Touch to select your desired brightness of the screen. There are three preset mode for selection:
SOFT
BRIGHT
LIGHT


Touch to enter to the adjustment mode. At adjustment mode, touch the icon for respective setting:

Hold and slide the CONTROL BAR to adjust to desired
setting.
CONTROL BAR

(NOTE: You may not see the immediate changes in this page)
DISPLAY SETTING MENU

Repeatedly touch the control icon on screen to select brightness (BRIGHT), chroma (CHROMA), contrast (CONTRAST) and sharpness (SHARP) setting. When your desired mode is reached, hold & slide the SETTING BAR for setting.
Note: You may not see the immediate changes in the main menu, but in some modes such as disc, USB, SD, TV and AUX. The DISPLAY SETTING is disable in RADIO and BT mode.
ON SCREEN - SETUP OF UNIT
IN MAIN MENU, touch "SETTING" icon on screen to go to SETUP MENU for various setting up of the unit.
SETUP MENU (1 OF 9)
In the SETUP menu, hold and slide up/down on the SETUP ICONS to shift icons up or down. When you set your desired setting, touch the selected item icon to go to its setting menu.
SETUP ICONS


Touch to return to the previous operation mode.
Touch to go to MAIN MENU
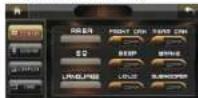
SYSTEM SETUP MENU
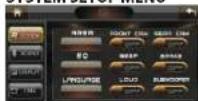

Touch to go to SYSTEM SETUP MENU for various settings.

Touch repeatedly to select the frequency range of the area that suite your region:
EUROPE / RUSSIA / AUSTRALIA (AUST) / MIDDLE EAST (MID EAST) / AMERICA 1 / AMERICA 2 / AMERICA 3 / AMERICA 4 / JAPAN / BRAZIL / CHINA.
Touch repeatedly to select the following equalization modes:
FLAT / CLASSIC / POP / ROCK / JAZZ / EO OFF
Touch repeatedly to select the default language that is show on screen.
Note: This unit comes with 3 languages for selection.
Touch to turn on or off from camera input. When FROM CAM is on, from video will be played for 5 seconds after rear video.
Touch to turn on or off rear camera input when back sight wire (pink) is connected.
- BLAUPUNKT
- 7" In Dash Touch Screen DVD Receiver Instruction Manual
- SIMPLE TROUBLESHOOTING
- Note
- IMPORTANT NOTICE & PRECAUTIONS
- INSTALLATION
- Mounting Method
- Remarks:
- SPECIFICATION
- GENERAL
- RADIO SECTION
- DISC SECTION
- Disc Play:
- VIDEO
- BLUETOOTH SECTION
- AUDIO SECTION
- ON SCREEN - AUXILIAR INPUT OPERATION
- AUDIO & VIDEO SETUP
- SOUND MUTING
- SCREEN DISPLAY
- BLUETOOTH OPERATION
- MAIN MENU
- No / Symbol / Function Operations & Controls
- DIAL OUT / CALL PICK UP / REDIAL
- HANG UP / REFUSE CALL
- SHIFT BETWEEN MOBILE PHONE & CAR UNIT
- NUMBER PAD
- DIAL OUT NUMBER
- DIAL IN NUMBER
- MISSING CALL NUMBER
- PAGE UP AND DOWN
- PLAY AND PAUSE
- TRACK FORWARD
- TRACK BACKWARD
- ON SCREEN - BLUETOOTH OPERATION
- LINK UP WITH MOBILE PHONE
- CONNECT / DISCONNECT WITH MOBILE PHONE
- Radio Mode
- Bluetooth Mode
- Radio Mode - Manual Tune
- Radio Mode - Auto Seek
- ON SCREEN DISPLAY
- MENU / PBC
- PLATBACK SELECTION
- SYSTEM SETUP
- ▶▶|/◀◀
- DISC / USB / SD / IPOD INPUT OPERATION
- ▶▶|/|◀◀
- Track Selection
- ON SCREEN - DISC / USB / SD INPUT OPERATION
- AUTO MEMORY STORE / SCAN
- AUTO SCAN
- AUTO SEARCH
- PRESET STATIONS SELECTION
- SEEK CONTROL
- MANUAL TUNING
- AF CONTROL ( ALTERNATIVE FREQUENCIES )
- TA CONTROL (TRAFFIC ANNOUNCEMENT)
- MONO / STEREO SELECTOR
- REP
- RDM
- INT
- SUB-T
- TITLE
- SETUP
- DVD Mode
- VCD Mode
- SYS
- ▲/▼/◄/►
- Directional Keys
- ON SCREEN - MAIN MENU OPERATION
- MANUAL TURING
- AF CONTROL (ALTERNATIVE FREQUENCIES)
- LOCAL / DISTAN CONTROL
- ON SCREEN - RADIO OPERATION
- ON SCREEN - AUDIO & VIDEO SETUP
- ON SCREEN - SETUP OF UNIT
Mærke : BLAUPUNKT
Model : Austin 440
Kategori : Hi-Fi System