Florida 250 - Telt Inaca - Gratis brugsanvisning og manual
Find enhedens vejledning gratis Florida 250 Inaca i PDF-format.

Brugerspørgsmål om Florida 250 Inaca
0 spørgsmål om dette apparat. Besvar dem du kender, eller stil dit eget.
Stil et nyt spørgsmål om dette apparat
Download vejledningen til din Telt i PDF-format gratis! Find din vejledning Florida 250 - Inaca og tag din elektroniske enhed tilbage i hånden. På denne side er alle dokumenter nødvendige for brugen af din enhed offentliggjort. Florida 250 af mærket Inaca.
BRUGSANVISNING Florida 250 Inaca
FLORIDA
INSTRUCCIONES DE MONTAJE · ERECTION INSTRUCTIONS · AUFBAUANLEITUNG · MONTERINGSANVISNING · INSTRUCTION DE MONTAGE

|
2
9
10
4
||
natural_image
Line drawing of a two-story building with a person sitting on the ground, no text or symbols present5
6
7
8
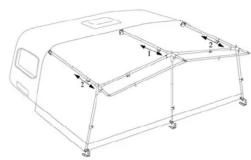
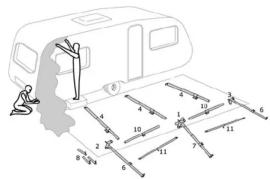
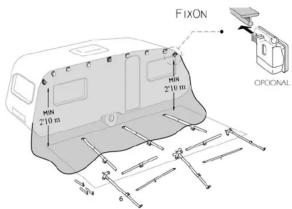
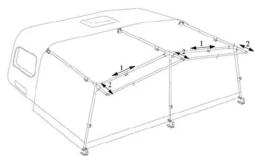
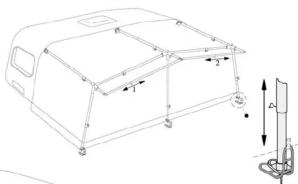
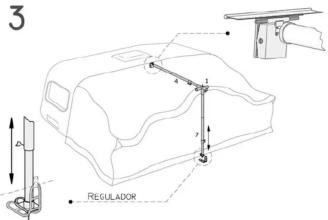
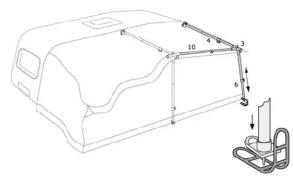
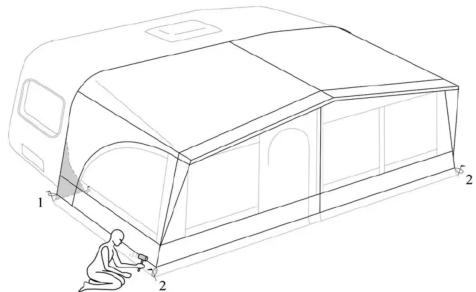
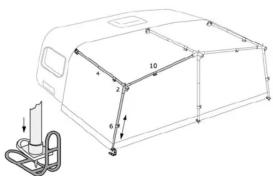
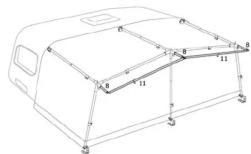
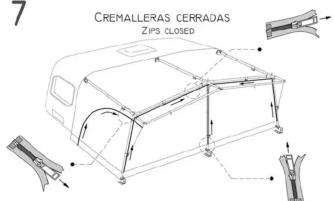
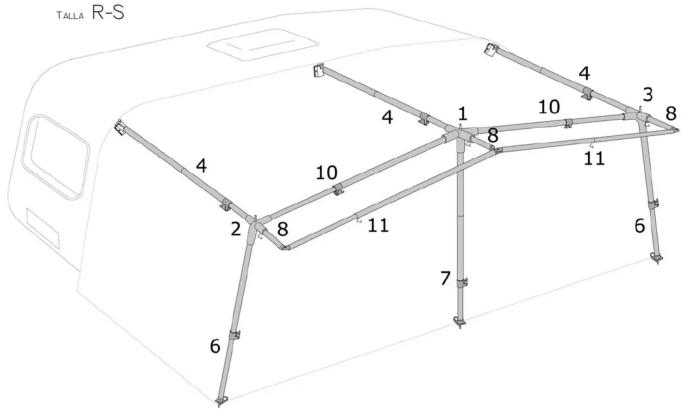
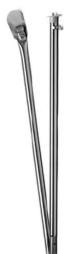
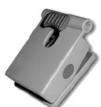
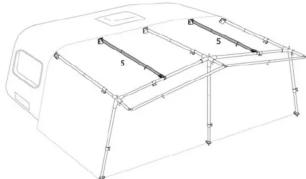
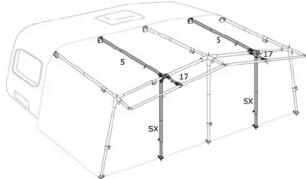
ESPAÑOL. 1. Distribuir la estructura en el suelo sobre una lona protectora frente a su caravana. 2. Desplegar la lona del avance. Pascarla cuidadosamente por la guía de su caravana. Asegúrese de que la lona queda al mismo nivel con respecto al suelo en ambos lados. 3. Coloque los sopartes Fix-On por la guía acorde al diagrama. Montar la estructura por la parte central. Primero el tubo del techo, la cruceta y la pata después. 4. Seguir por uno de los lados. Primero el tubo enlace centro-lado, después la pata con cruceta, y después el tubo lateral del techo. 5. Misma operación al otro lado. 6. Colocar los tubos de la visera antes de dar tensión. 7. Colocar los paneles. Cerrar las cremolleras completamente. 8. Tensar los tubos, primero el central del techo, luego los tubos laterales. 9. Subir la pata central y después las laterales, enganchando el tope de plástico sobre el segundo escalón de la goma escaleta cosida a la lona. 10. A continuación los tubos frontales hacia los lados. Repetir en ambos lados. 11. Clavar completamente el avance. Primero las esquinas traseras, y después las frontales y centro, asegurando una línea recta. Clavar el resto dando tensión adecuada.
ENGLISH 1. Lay out the components of the frame over a protective sheet. 2. Take the roof section of the awning and slide the beading around your caravan's awning channel. Ensure the canvas is equidistant from the ground at either side. Slide the Fix-Ons onto the secondary bead in accordance with the diagram. 3. Take the central roof pole ('4') and hook it into the Fix-On, then push the eyelet in the awning roof onto the spiked central leg ('7'). Lock the roof and leg poles together. Extend the roof pole for stability (set the leg at a height you can reach easily). 4. Take the front awning pole ('10') and connect the centre to the side joint. Then repeat the previous point with the roof and leg pole to assemble one side. 5. Repeat process on other side to finish frame on main body of awning. 6. Place short canopy poles ('8') into centre and side joints. Push the long canopy poles ('11') through corresponding sleeves on awning canvas. Connect the '8' and '11' poles (via plastic lugs on end of '11' poles), pushing the eyelets on the canvas over the hooks on the '8' poles. 7. Zip all of the awning panels into place. 8. Apply tension to the central roof pole. 9 & 10 Next, tension the front awning poles ('10'), then the remaining roof poles and canopy. Before extending the leg poles, place the feet onto the second step of the corresponding rubber ladders attached to the bottom of the awning. Apply tension. 11. Peg the awning on both sides at the rear, then the front corners. Working from the caravan outwards, peg the remainder of the side panels. Finally, peg the front edge, thus completing the assembly of your awning.
FLORIDA
FLORIDA

INACA
natural_image
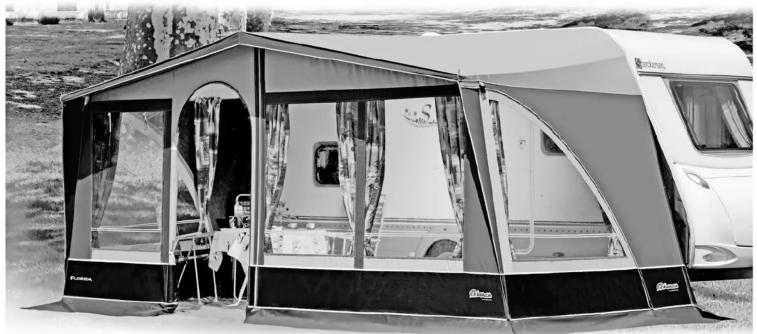
Black-and-white photo of a modern camping tent with open windows and a person sitting at the entrance (no visible text or symbols)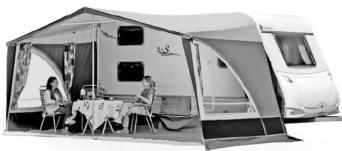
natural_image
Black-and-white photo of a two-wheeled camping setup with two people seated at tables, no visible text or symbols.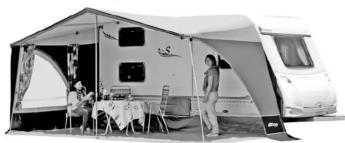
natural_image
Black-and-white photo of a modern camping tent with two people, one standing and one seated, in an open space (no visible text or symbols)25/22 Aluminio
Florida
TALLA R-S
Accesorios
natural_image
Exterior view of a modern office building (no signage)Set Cinchas UNI
UNI Storm straps
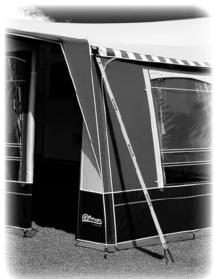
Patas de Refuerzo
Reinforcement leg poles
FixOn
TALLA T-U-V
natural_image
Technical line drawing of a vehicle chassis frame structure (no text or symbols)TALLA W-X
...
NARESCIOUS
www.inaca.com