
MC-E775 - Støvsuger PANASONIC - Gratis brugsanvisning og manual
Find enhedens vejledning gratis MC-E775 PANASONIC i PDF-format.


Brugerspørgsmål om MC-E775 PANASONIC
0 spørgsmål om dette apparat. Besvar dem du kender, eller stil dit eget.
Stil et nyt spørgsmål om dette apparat
Download vejledningen til din Støvsuger i PDF-format gratis! Find din vejledning MC-E775 - PANASONIC og tag din elektroniske enhed tilbage i hånden. På denne side er alle dokumenter nødvendige for brugen af din enhed offentliggjort. MC-E775 af mærket PANASONIC.
BRUGSANVISNING MC-E775 PANASONIC
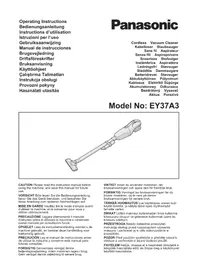
Operating Instructions
Vacuum Cleaner
MC-E770K, MC-E771K, MC-E773K, MC-E775K, MC-E776K
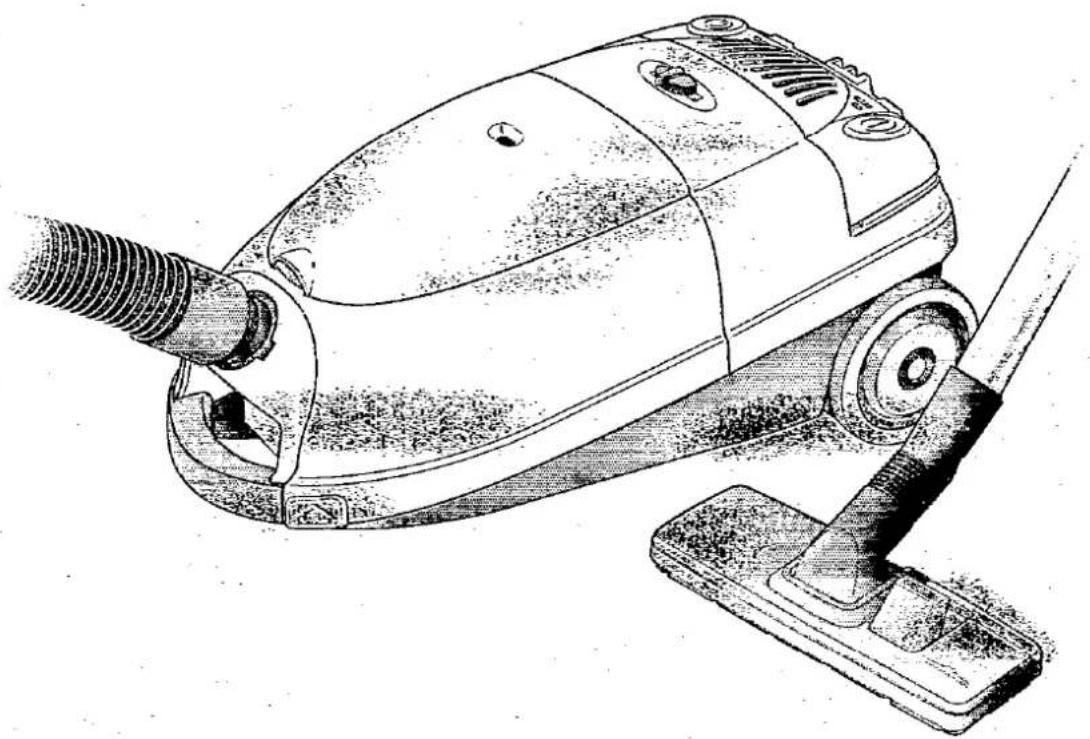
natural_image
Technical line drawing of a vacuum cleaner with attached pipe and base mount (no text or symbols)Panasonic
We would particularly advise that you carefully study these Operating Instructions before attempting to operate the unit, and that you note the Important Safety Instructions.
This product complies with the directives 73/23/EEC and 89/336/EEC.
TABLE OF CONTENTS
- Caution for AC Mains Lead ...... Page 2
- Important safety instructions for the user 3
• Cautions 3 - Identification of main parts 4
• A) How to assemble your cleaner.... 5
• B) How to operate your cleaner 5-7
• C) How to store your cleaner. 7
• D) Maintenance an servicing 7-8
• E) Accessory (Optional) 8
REMINDER FOR CUSTOMER
The model and serial number of this product may be found on the nameplate located at the back of your cleaner. You should note the model and serial number in the spaces provided and retain this book as a permanent record of your purchase.
Model Number:
Serial Number:
Date Purchased:
Where Purchased:

CAUTION FOR AC MAINS LEAD
FOR YOUR SAFETY PLEASE READ THE FOLLOWING TEXT CAREFULLY
This appliance is supplied with a moulded three pin mains plug for your safety and convenience.
A 13 amp fuse is fitted in this plug.
Should the fuse need to be replaced please ensure that the replacement fuse has a rating of 13 amps and that it is approved by ASTA or BSI to BS1362.
Check for the ASTA mark 📄 or the BSI mark 🌐 on the body of the fuse.
If the plug contains a removable fuse cover you must ensure that it is refitted when the fuse is replaced.
If you lose the fuse cover the plug must not be used until a replacement cover is obtained.
A replacement fuse cover can be purchased from your local Panasonic Dealer.
IF THE FITTED MOULDED PLUG IS UNSUITABLE FOR THE SOCKET OUTLET IN YOUR HOME THEN
THE FUSE SHOULD BE REMOVED AND THE PLUG CUT OFF AND DISPOSED OF SAFELY.
THERE IS A DANGER OF SEVERE ELECTRICAL SHOCK IF THE CUT OFF PLUG IS INSERTED INTO ANY 13 AMP SOCKET.
If a new plug is to be fitted please observe the wiring code as shown below.
If in any doubt please consult a qualified electrician.
IMPORTANT: The wires in this mains lead are coloured in accordance with the following code:
Blue : Neutral
Brown : Live
As the colours of the wire in the mains lead of this appliance may not correspond with the coloured markings identifying the terminals in your plug, proceed as follows:
The wire which is coloured BLUE must be connected to the terminal in the plug which is marked with the letter N or coloured BLACK.
The wire which is coloured BROWN must be connected to the terminal in the plug which is marked with the letter L or coloured RED.
Under no circumstances should either of these wires be connected to the earth terminal of the three pin plug, marked with the letter E or the Earth Symbol ±
How to replace the Fuse:
- There are two types of the supplied AC Mains Lead: A and B as shown below.
1 Open the fuse compartment with a screwdriver.
2 Replace the fuse and fuse cover if detachable.
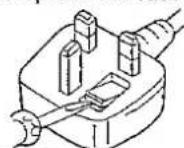
TYPE A
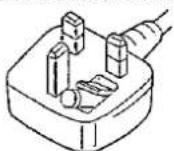

natural_image
Simple line drawing of a plug with a screwdriver inserted (no text or symbols)TYPE B
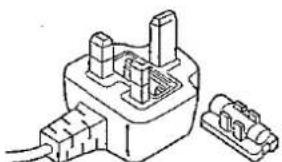
natural_image
Technical line drawing of a mechanical component with two connectors and wires (no text or symbols)Fuse cover Part No.: AMC6D48C0000.
IMPORTANT SAFETY INSTRUCTIONS FOR THE USER

When using this vacuum cleaner, please observe these basic precautions. WARNING: To reduce the risk of fire, electric shock, or injury:
- Do not leave the vacuum cleaner plugged in to mains outlet. Unplug from the outlet when not in use and before cleaning the appliance or undertaken maintenance operations.
• Electric shocks can occur if used outdoors or on wet surfaces. - Do not allow to be used as a toy. Close attention is necessary when being used near children.
- Do not use with damaged cord or plug. If the vacuum cleaner is not working as it should be, or has been dropped, damaged, left outdoors, or come into contact with water, consult an authorised Panasonic Service Centre.
- Do not pull or carry by cord, use cord as a handle, close a door on cord, pull cord around sharp edges or corners. Keep cord away from heated surfaces.
- Do not handle plug or vacuum cleaner with wet hands.
- Do not put any object into openings. Do not use with any opening blocked; keep free of dust, lint, hair and anything that may block or reduce air flow.
- Turn off all controls before unplugging.
- Do not use the vacuum cleaner without filters and/or dust bag in place. Never try to patch a broken dust bag.
- Keep hair, loose clothing, fingers, and all parts of body away from openings and moving parts.
- Do not use to pick up flammable or combustible liquids such as gasoline or use in areas where they may be present.
- This appliance should be serviced by an authorised Panasonic Service Centre, and only genuine Panasonic spare parts should be used.
- Use extra care when cleaning on stairs. Hold the handle of the cleaner in one hand to avoid overturned the vacuum cleaner.
NOTE: These vacuum cleaners are designed for household use only and are not suitable for use in a garage, garden or to suck up liquids.

CAUTIONS
This cleaner includes an automatic thermal safety device which automatically turns off the power if the suction inlet, hose or extension wand becomes clogged. If this occurs, disconnect from the mains, remove the material responsible for the clogging and then wait about 10 minutes, before operating your cleaner again.

1) Never let the vacuum cleaner pick up wet matter, mud or burning ashes or materials likely to damage the unit.

natural_image
Illustration of crossed tools and a cross symbol (no text or labels)2) Before using the vacuum cleaner, remove large or sharp objects from the floor to avoid damaging the machine or the dust bag.
natural_image
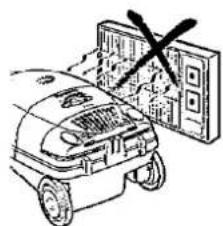
Line drawing of a car with a parking lot and a cross symbol (no text or labels)3) Keep the vacuum cleaner away from heat sources such as radiators, fires, direct sunlight, etc.
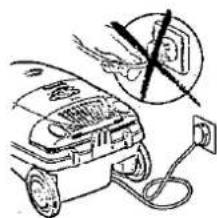
4) Do not pull on the cord when disconnecting the appliance from the mains, always pull on the plug body itself.
This appliance is provided with a flexible cord and if this becomes damaged, it must be repaired by Panasonic, or an Authorised Service Centre or a qualified person in order to avoid any hazard.
IDENTIFICATION OF MAIN PARTS


NOTE: Floor nozzle and extension tube are subjects to change without notice.
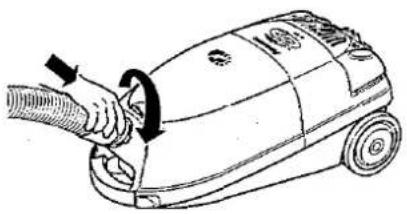
A) HOW TO ASSEMBLE YOUR CLEANER

natural_image
Line drawing of a hand using a hose to lift a vacuum cleaner (no text or symbols)B) HOW TO OPERATE YOUR CLEANER
B-3) ON/OFF Switch
B-1) Cord connection
B-2) Automatic cord rewind

natural_image
Line drawing of a portable electric vehicle with wheels and attached cable (no text or symbols)
natural_image
Line drawing of a hand pressing down on a small wheeled device (no text or symbols)
natural_image
Line drawing of a lawn mower with wheels and a handle (no text or symbols)Rewind the cord, pressing the pedal.
Start or stop the cleaner, pressing the pedal.
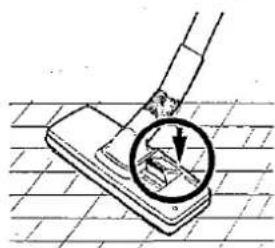
B-4) Floor nozzle selector pedal
natural_image
Diagram of a hand using a tool to press or install a component, with an arrow indicating the process (no text or symbols present)Hard floor / Parquet

natural_image
Illustration of a magnifying glass inspecting a small object on a textured surface (no text or symbols)Carpeted floor / Rugs
natural_image
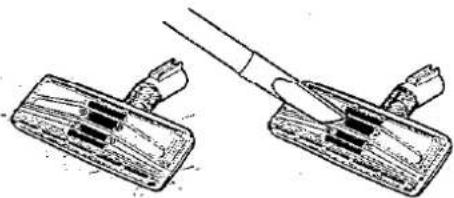
Technical line drawing of two mechanical components with a tool, no visible text or symbolsRegularly clean the vacuum cleaner head.

B-6) Variable power control (depending on model)
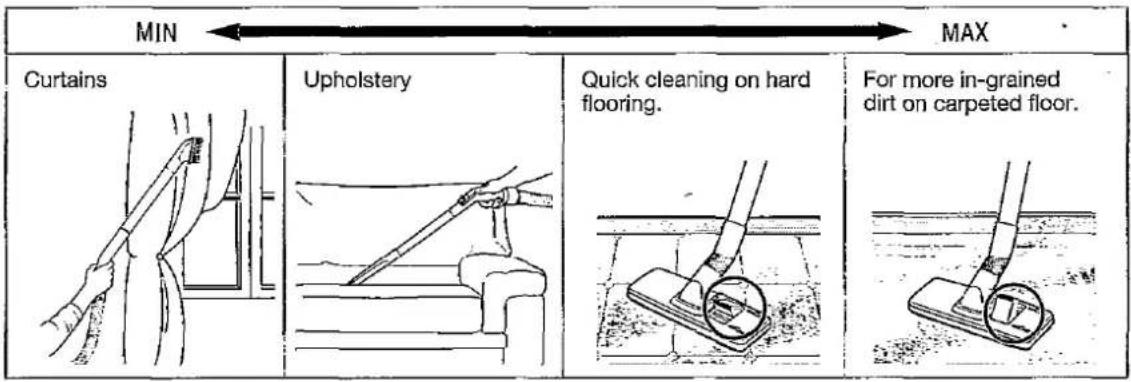
To select the power suction, slide the button to the appropriate position required, depending on your cleaning needs.

B-7) Manual suction control
To adjust to the right suction for any cleaning operation.
Closed

B-8) Park position
Located in the top rear side of the vacuum cleaner, there is a convenient clip for parking the floor nozzle during breaks when vacuuming.
NOTE: When in the park position, we suggest the appliance is switched off.

natural_image
Line drawing of a vacuum cleaner with control panel and mounted device (no text or symbols)B-9) Dust bag check indicator
The dust bag check indicator is a visual aid to advice you of the condition of the dust bag. A yellow mark will appear in the window when airflow through the bag is insufficient. When this happens, check the paper bag, it may be full or blocked with fine dust and needs to be replaced.
NOTE: If after having replaced the bag, the yellow mark continues appearing in the window, check to see if the hose or suction inlet is clooged.


C) HOW TO STORE YOUR CLEANER
For easy storage and transporting, the vacuum cleaner includes a clip system built onto the body of the cleaner, which will keep the extension wand, hose and nozzle in a vertical position.

natural_image
Line drawing of a vacuum cleaner with a circular arrow indicating motion (no text or symbols)D) MAINTENANCE AND SERVICING

IMPORTANT NOTE: Before servicing any part, always DISCONNECT the cleaner from the electricity supply.
D-1) How to replace the dust bag
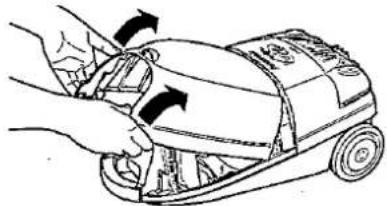
natural_image
Illustration of hands using a tool to adjust or install a car body panel (no text or symbols visible)1) Lift the dust cover up as shown.
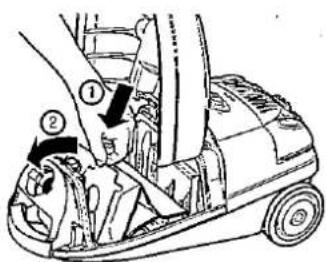
3) Insert a new dust bag by guiding cardboard into the guide slots and push forwards.
We recommend the use of genuine Panasonic bags Type C-2E.
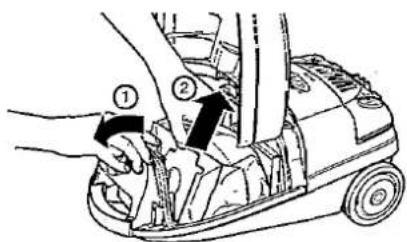
2) Push clamp forwards and take out dust bag pulling cardboard up.

natural_image
Line drawing of a hand using a vacuum cleaner to lift a car (no text or symbols)4) Close the dust cover.
IMPORTANT: When the dust bag is not in position or it has not been installed correctly, the dust cover will not close.
D-2) Filter care
Central Filter (Fig. 1) Part no. AMC8F03D1100
The central filter (foam filter), is installed in the dust bag compartment to protect the motor from dirt.
When it becomes dirty, simply rinse it out in warm water and dry it thoroughly before replacing.
To remove the central filter, hold the filter at the top (as illustrated) and pull it out.
Important: Ensure that the filter is completely dry before re-installing it into the cleaner.
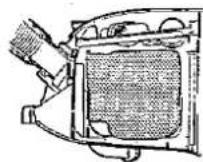
Clean Air Filter (Fig. 2) Part no. AMC8F28E1000
The clean air filter (electrostatic), is installed in the rear side of the cleaner. This filter retains any small dust particles which may be present in the expelled air.
It is advisable to change the clean air filter when it becomes dirty. As a guide, once or twice a year is usually sufficient depending on use.
To change the clean air filter, hold the exhaust cover (as illustrated) and pull it out.

natural_image
Line drawing of a hand using a tool to adjust or install a mechanical component (no text or symbols visible)Fig. 1

IMPORTANT: Never use the cleaner without the correct filters properly installed. Failure to do so may result in motor damaged.
E) ACCESSORY (Optional)
Re-usable cloth bag
Part no. AMC8F9931300

natural_image
Line drawing of a mechanical component with a central hole and dashed outline (no text or symbols)Panasonic España, S.A.
DIVISION DE ASPIRADORAS
Zona Industrial del Polígono de CELRÀ
17460 CELRÀ (Girona) SPAIN
Z07N00900
Printed in Spain
- Operating Instructions
- Panasonic
- TABLE OF CONTENTS
- REMINDER FOR CUSTOMER
- CAUTION FOR AC MAINS LEAD
- FOR YOUR SAFETY PLEASE READ THE FOLLOWING TEXT CAREFULLY
- How to replace the Fuse:
- IMPORTANT SAFETY INSTRUCTIONS FOR THE USER
- CAUTIONS
- IDENTIFICATION OF MAIN PARTS
- B-6) Variable power control (depending on model)
- B-7) Manual suction control
- B-8) Park position
- B-9) Dust bag check indicator
- C) HOW TO STORE YOUR CLEANER
- D) MAINTENANCE AND SERVICING
- D-2) Filter care
- Central Filter (Fig. 1) Part no. AMC8F03D1100
- Clean Air Filter (Fig. 2) Part no. AMC8F28E1000
- E) ACCESSORY (Optional)
Mærke : PANASONIC
Model : MC-E775
Kategori : Støvsuger