
CR-3303 - Radio LENCO - Gratis brugsanvisning og manual
Find enhedens vejledning gratis CR-3303 LENCO i PDF-format.


Brugerspørgsmål om CR-3303 LENCO
0 spørgsmål om dette apparat. Besvar dem du kender, eller stil dit eget.
Stil et nyt spørgsmål om dette apparat
Download vejledningen til din Radio i PDF-format gratis! Find din vejledning CR-3303 - LENCO og tag din elektroniske enhed tilbage i hånden. På denne side er alle dokumenter nødvendige for brugen af din enhed offentliggjort. CR-3303 af mærket LENCO.
BRUGSANVISNING CR-3303 LENCO
Lenco
CD RADIO ALARM CLOCK
CR-3303
natural_image
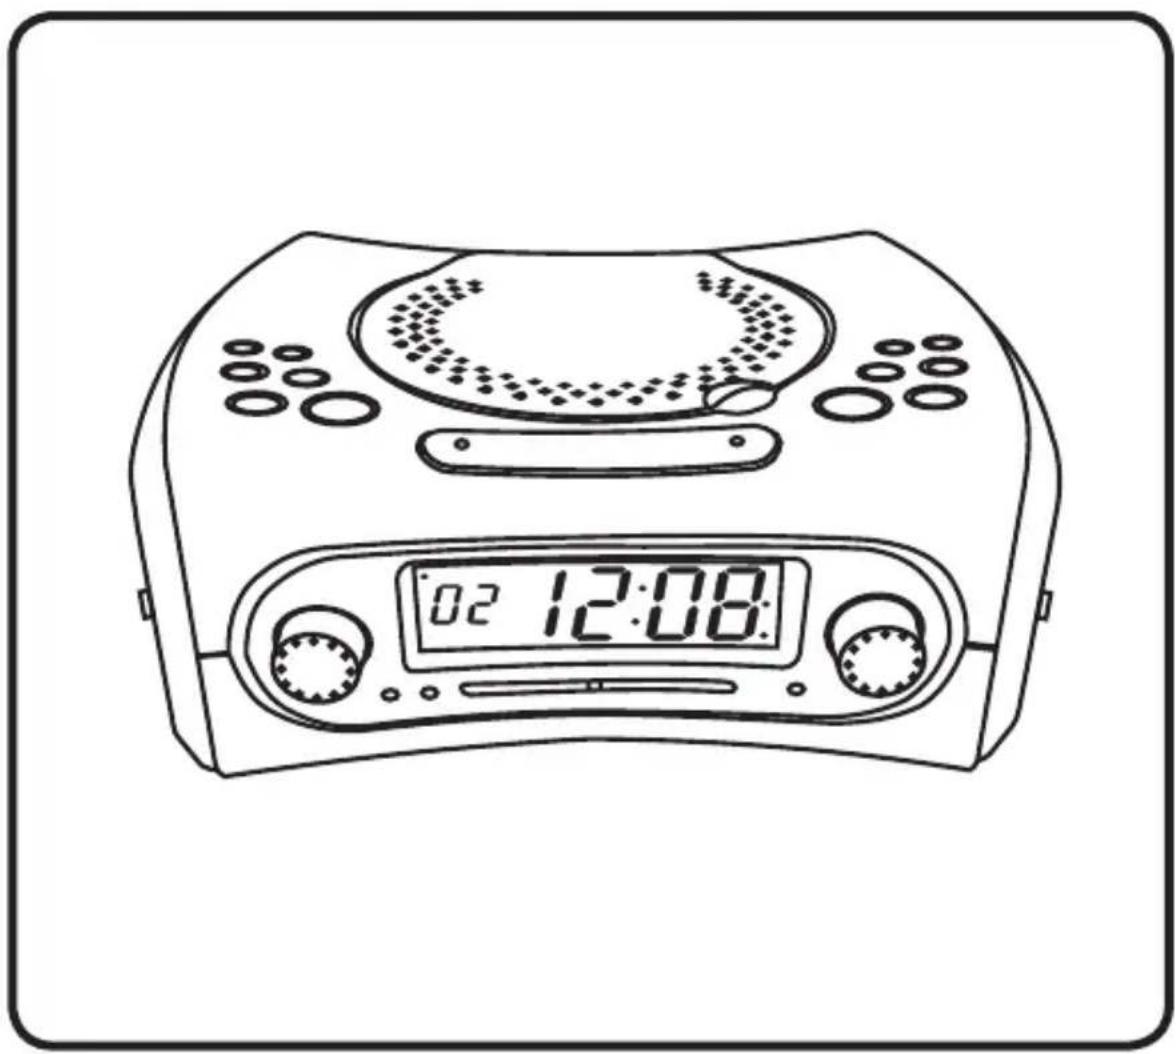
Line drawing of a digital alarm device with a digital display showing 02:12:08 (no text or symbols on the device itself)INSTRUCTION MANUAL
For information and support, www.lenco.eu
CE
WARNING
CLASS 1 LASER PRODUCT
CLASS 1 LASER PRODUCT APPAREIL Á LASER DE CLASSE 1 PRODUCTO LASER DE CLASE 1
This product contains a low power laser device.
CAUTION INVISIBLE LASER RADIATION WHEN OPEN AND INTERLOCKS DEFEATED. AVOID EXPOSURE TO BEAM

natural_image
Warning symbol with a black triangular triangle containing a central explosion or virus-like graphic (no text or numbers)Warning: Do not touch the lens. DO NOT THROW BATTERIES IN FIRE!
PRECAUTIONS
Follow the advice below for safe and appropriate operations.
ON PLACEMENT
- Do not use the unit in places which are extremely hot, cold, dusty, or humid.
Place the unit on a flat and even surface. - Do not restrict the air flow of the unit by placing it in a place with poor air flow, by covering it with a cloth, or by placing it on a carpet.
ON SAFETY
- When connecting and disconnecting the AC cord, grip the plug and not the cord itself. Pulling the cord may damage it and create hazard.
- When you are not going to use the unit for a long period of time, disconnect the AC power cord.
ON AC VOLTAGE
• Before use, check that the rated voltage of your unit matches your local voltage.
ON CONDENSATION
- When left in a heated room where it is warm and damp, water droplets or condensation may form inside the CD player.
- When there is condensation inside the unit, the unit may not function normally.
• Let it stand for 1 to 2 hours before turning the power on, or gradually heat the room up and dry the unit before use. - Ensure a minimum distance of 5 cm around the apparatus for sufficient ventilation.
- Ensure that the ventilation is not impeded by covering the ventilation openings with items, such as newspapers, table-cloths, curtains, etc..
- Do not place naked flame sources, such as lighted candles on the apparatus.
• Take attention to the environmental aspects of battery disposal.
- Use the apparatus only in moderate climates (not in tropical climates).
• Do not expose the apparatus to dripping or splashing.
- Do not place objects filled with liquids, such as vases, on the apparatus.
Should any trouble occur, disconnect the AC power cord and refer servicing to qualified personnel.
The light evening with arrowhead symbol within the triangle is warning sign alert i the user of "dangerous voltage" inside the unit
CAUTION
RISK OF ELECTRIC SHOCK DO NOT OPEN
ATTENTION: To reduce the risk of electric shock, do not remove the cover. There are no user serviceable parts inside the unit. Refer all servicing to qualified personnel.

The exclamation point within the triangle is a warning sign alerting the user of important instructions accompanying the product.
In case of malfunction due to electrostatic discharge, the apparatus has to be reset by disconnecting it from mains supply. THE MARKING INFORMATION IS LOCATED AT THE BOTTOM OF APPARATUS.
LOCATION OF CONTROLS
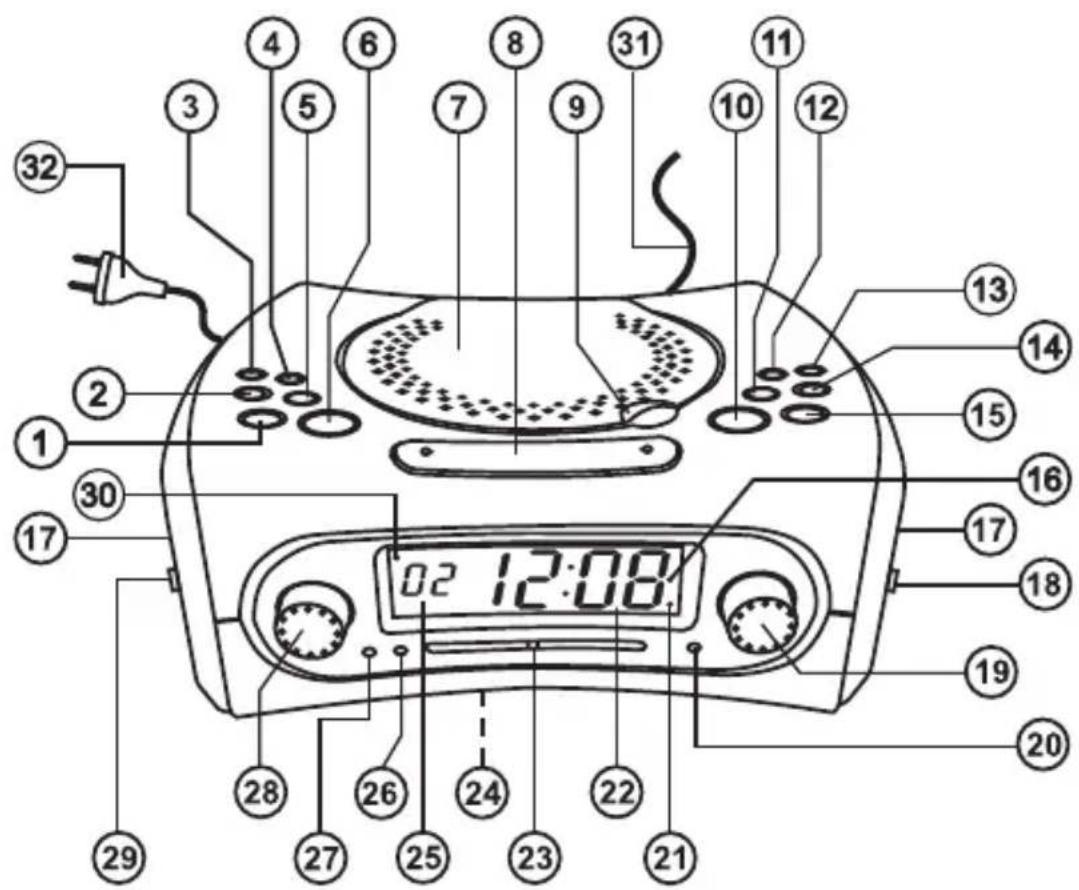
- Time button
- Slow-set button
- Sleep button
- Fast+ set button
- Slow+ set button
- Alarm set button
- CD Door
- Snooze button
- CD Door open close area
- Play / Pause button ▶
- Back button
- Play Mode button
- Program button
- Next button
- Stop button
-
Alarm indicator ( AL ) Lights when alarm is set
-
Speaker
- Power switch
- Tuning control
- FM Stereo indicator
- Sleep indicator
- LED alarm clock display
- Dial scale
- Battery compartment
- CD display
- Play mode indicator
- Program indicator
- Volume control
- Function switch
- Power indicator
- Wire Antenna
- 230V power supply cable
POWER SUPPLY
OPERATION WITH AC POWER
- PLEASE CAREFULLY CHECK THAT THE VOLTAGE INDICATED ON YOUR SET CORRESPONDS TO THE VOLTAGE OF YOUR LOCAL AREA.
- INSERT THE AC POWER CORD INTO AN AC OUTLET.
NOTE : WHEN INSERTED A BACK UP BATTERY THE UNIT WILL CONSERVE THE SETTINGS DURING POWER OUTAGE.
THE DISCONNECT DEVICE SHALL REMAIN READILY OPERABLE.
POWER ON AND OFF
SLIDE THE POWER SWITCH TO THE "ON" OR "OFF" POSITION TO TURN THE UNIT ON OR OFF.
ANTENNA
FOR FM RECEPTION LAY OUT THE EXTERNAL FM WIRE ANTENNA AND ADJUST DIRECTION, FOR OPTIMUM RECEPTION.
DO NOT CONNECT THIS WIRE TO ANY OUTDOOR ANTENNA.
PREPARATION
PLUG THE AC POWER CORD INTO AN AC OUTLET. THE CLOCK DISPLAY SHOWS FLASHING. THIS IS A NORMAL CONDITION THAT WARNS THE USER THE TIME SHOWN IS INCORRECT. FLASHING CLOCK DISPLAY ALSO APPEARS AFTER A POWER INTERRUPTION IF THE BACKUP BATTERY IS EXHAUSTED OR NOT INSTALLED.
FITTING THE BATTERIES
BATTERY BACKUP
THE CLOCK TIME AND ALARM SETTINGS CAN BE PROTECTED AGAINST POWER FAILURE BY A 9V BATTERY (NOT SUPPLIED). IN THE EVENT OF A POWER FAILURE, THE DISPLAY IS BLANK, BUT THE CLOCK TIME AND ALARM SETTINGS ARE HELD IN MEMORY. WHEN THE POWER INTERRUPTION ENDS, THE DISPLAY APPEARS AGAIN. (DURING A POWER INTERRUPTION, THE CLOCK TIME MAY GAIN OR LOSS A FEW MINUTES PER HOUR AND MAY REQUIRE RESETTING.)
BATTERY INSERTION
- REMOVE THE COVER OF THE BATTERY COMPARTMENT (ON THE BOTTOM OF THE UNIT).
- CONNECT A 9V BATTERY (AN ALKALINE-TYPE BATTERY IS RECOMMENDED) TO THE BATTERY TERMINAL INSIDE THE COMPARTMENT.
- PLACE THE CONNECTED BATTERY IN THE COMPARTMENT AND REPLACE THE COVER.
FOR OPTIMUM PERFORMANCE, THE BATTERY SHOULD BE REPLACED EVERY 6 MONTHS.
THE RADIO
RADIO OPERATION
- SET THE POWER SWITCH TO ON TO TURN THE RADIO ON.
( TO TURN THE RADIO OFF , SET THIS SWITCH TO OFF . ) - SET THE FUNCTION SWITCH TO SELECT THE FM BAND.
- ADJUST THE TUNING CONTROL TO SELECT THE DESIRED RADIO STATION.
- ADJUST THE VOLUME CONTROL TO SET THE VOLUME TO THE DESIRED LEVEL.
THE CLOCK
TO SET THE TIME
- PRESS AND HOLD BUTTON "TIME".
- PRESS "FAST+" FOR FAST INCREMENT MINUTE UP TO 59 AND THEN INCREMENT THE HOUR.
- PRESS "SLOW+" OR "SLOW-" FOR NORMAL MINUTE INCREMENT. IF MINUTES GOES TO 59 THEN HOUR WILL INCREMENT ONE STEP.
- RELEASE BUTTON"TIME",THE CORRECT TIME IS SHOWN ON THE DISPLAY.
TO WAKE TO THE MUSIC
SLIDE THE POWER SWITCH TO THE AUTO POSITION, AND ADJUST THE VOLUME CONTROL TO THE LISTENING LEVEL YOU WANT.
SELECT THE WAKE-UP SOURCE BY SLIDING THE FUNCTION SWITCH TO (FM ST. /FM MONO/CD).
- IN THE RADIO MODE, THE SELECTED RADIO STATION WILL PLAY.
- IN THE CD MODE, THE DISC LOADED IN THE CD COMPARTMENT WILL PLAY.
- IF NO BUTTON IS PRESSED, ALARM WILL LAST FOR 2 HOURS.
WAKE TO ALARM
TO AWAKEN BY ALARM, SET THE POWER SWITCH TO THE BUZZER POSITION.
SNOOZE (REPEAT ALARM)
WHEN THE ALARM SOUNDS (CD/RADIO/BUZZER) AT THE PRESET TIME, YOU CAN TURN OFF THE SOUND TEMPORARILY BY PRESSING THE SNOOZE BUTTON. THE ALARM WILL SOUND AGAIN WITHIN 9 MINUTES. THIS CYCLE CAN BE REPEATED FOR UP TO ONE HOUR.
TO STOP ALARM (CD / RADIO / BUZZER)
SIMPLY SET THE POWER SWITCH TO OFF OR PRESS THE ALARM BUTTON.
SLEEP TIMER (AUTOMATIC SHUT-OFF)
IF YOU WISH TO FALL ASLEEP WHILE LISTENING TO MUSIC, YOU CAN SET THE RADIO / CD TO TURN OFF AUTOMATICALLY AFTER A PRESET TIME (UP TO 1 HOUR 59 MINUTES).
- SET THE POWER SWITCH TO OFF, AUTO OR BUZZER POSITION. PRESS AND HOLD THE SLEEP BUTTON AND SLOW+ OR SLOW- BUTTON SIMULTANEOUSLY UNTIL THE DESIRED SLEEP TIMER SETTING APPEARS.
- AFTER THE PRE-SET TIME IS OVER, THE CD/RADIO WILL STOP AUTOMATICALLY.
- IF THE CD / RADIO IS LIKE TO BE SWITCHED OFF AT ANY TIME, PRESS THE SNOOZE BUTTON.
COMPACT DISC PLAYBACK
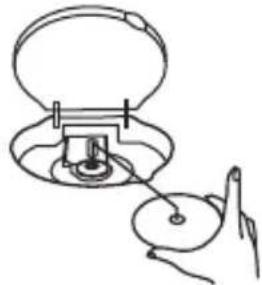
1. Set to CD
FUNCTION
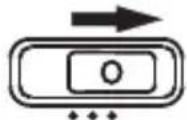
CD
- Insert a disc with the label side facing up.
- Close the CD door.
The disc will rotate and the total tracks of the disc will show on the display.
natural_image
Simple line drawing of a hand holding a small object with a circular base and pointer (no text or symbols)TO INTERRUPT PLAYBACK
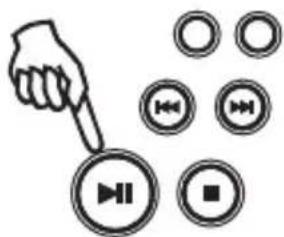
Press the Play/Pause ▶ button and the track number will be shown.
Press the button again to resume playback.
natural_image
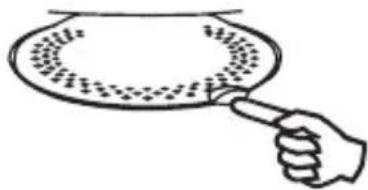
Hand pointing at a play button icon surrounded by circular icons (no text or symbols)- Lift the CD door up.
natural_image
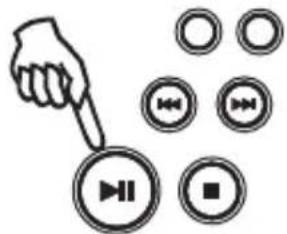
Simple line drawing of a hand pointing at a circular object with dots, no text or symbols present- Press the Play / Pause ▶ Button. Track number "1" will be shown.
natural_image
Icon showing a hand pointing at a play button with circular buttons and a play symbol (no text or labels)TO STOP PLAYBACK
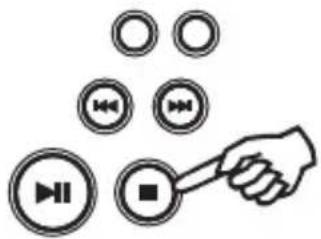
Press the STOP button and the display shows the total tracks of the disc.
natural_image
Illustration of a hand holding a megaphone next to circular icons with speaker symbols (no text or labels)TO SKIP TO THE BEGINNING OF A TRACK
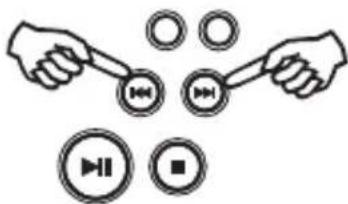
- Press either one of the |◀◀▶▶|skip buttons according to the desired skip direction.
- Play/back resumes from the selected track.
- When the ◀ button is pressed once during play, the previous track starts again.
- When the ▶ button is pressed once during play, the next track plays.
SEARCHING FOR A PASSAGE WITHIN A TRACK
- Keep the ◀◀◀ or ▶▶ button pressed during playback, and release the button as soon as you recognise the desired passage. Then normal CD playback will resume from this point.
natural_image
Illustration of hands holding circular buttons with play/pause icons below (no text or symbols)REPEAT PLAYBACK
This function allows a single track or all tracks on a disc to be played repeatedly.
TO REPEAT THE SAME TRACK
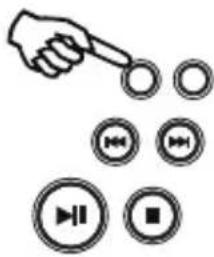
Press the PLAY MODE button once during playback, the Play mode indicator flashes on the front.
TO REPEAT THE WHOLE DISC
Press the PLAY MODE button twice during playback, the Play mode indicator lights up on the front.
TO CANCEL REPEAT PLAYBACK FUNCTION
Press the PLAY MODE button again until the Play mode indicator disappears.
natural_image
Hand pointing at circular icons with various play and audio buttons (no text or symbols)Note on CD-R/RW discs
- Because of non-standardized format definition/ production of CD-R/RW, playback quality and performance are not guaranteed.
- Manufacturer is not responsible for the playability of CD-R/RW due to recording conditions, such as PC performance, writing software, media ability, etc.
- Do not attach a seal or label to either side of the CD-R/RW disc. It may cause a malfunction.
- It is recommended to record only audio files on CD-R/RW discs for easy reading.
PROGRAMMED PLAYBACK
PROGRAMMED PLAYBACK
FOR NORMAL COMPACT DISC PLAYBACK
Programmed playback enables tracks on a disc to be played in a desired order. Up to 20 tracks can be programmed.
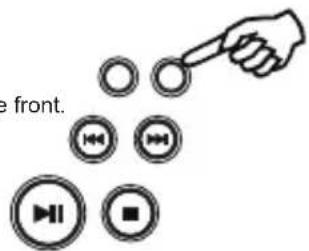
- Press the "PROGRAM" button.
- Press the "NEXT" and "BACK" buttons to select the desired track number.
- Press "PROGRAM" button again to memorize the track.
- Repeat steps 2 and 3 until all desired tracks are programmed.
- Press the "PLAY/PAUSE" button to start. "PROGRAM" LED indicator lights up on the front.
- Press "STOP" button to stop programmed playback.
- Press "PROGRAM" and "PLAY/PAUSE" buttons to resume programmed playback.
- Open the CD door or turn off the CD player to clear the programmed memory.
Note : Programming can only be made when the player is in stop mode.
MAINTENANCE
CLEANING A CD
If the CD skips or will not play, the disc may need cleaning. Before playing, wipe the disc from the centre out with a cleaning cloth. After playing, store the disc in its case.
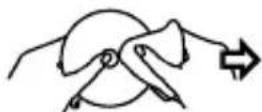
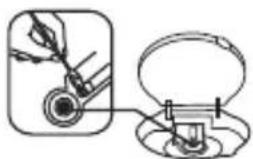
CLEANING THE CD LENS
If the CD lens is dusty, clean it with a brush-blower. Blow several times on the lens and remove the dust with the
brush. Finger prints may be removed with a cotton swab moistened with alcohol.
natural_image
Diagram showing a hand using a tool to interact with a device, no text or symbols presentCLEANING THE UNIT
Do not use volatile chemicals on this unit. Clean by lightly wiping with a soft cloth.
IMPORTANT NOTE
If an abnormal display indication or an operating problem occurs, disconnect the AC power cord and remove the batteries. Wait at least 5 seconds, then reconnect the AC power cord or reinstall the batteries.
WARNING
Should the CD door be opened before the reading of the CD is completed, a jamming noise may occur. This is resolved by closing the CD door.
SPECIFICATIONS
CD SECTION
Channels: 2 channels
S / N ratio: 60 dB
Wow & Flutter: undetectable
Sampling frequency: 44.1 kHz 8 x over sampling
Quantization: 1 bit DA converter
Pick up light source: Semi - conductor laser
Pick up wave length 790 nm
RADIO SECTION
Tuning ranges: FM 87.5 - 108 MHz
Antennas: FM Wire Antenna
GENERAL
Output power: 1 W + 1 W (RMS)
Power consumption: 12.5 W
Speaker: 2¼"8 OHM
Power source: AC : 230V \~ 50Hz
DC : 9V backup ( 1 x 006P )
Dimensions: 245(L) x 207(D) x 104(H)mm
Weight 1.37KGS
Due to continuing improvement, the features and the design are subject to change without notice.
Where to place the item :
Today's furniture is coated with a wide variety of lacquers and synthetic-coatings that are treated with an extensive range of cleaning products. Therefore, the possibility that some of these substances contain components that react adversely to the rubber feet of the item and soften them, cannot be completely excluded. The rubber feet of the appliance can cause discoloring to furniture surfaces. If necessary, place the appliance on a non-slide surface.
If at any time in the future you should need to dispose of this product please note that: Waste electrical products should not be disposed of with household waste. Please recycle where facilities exist. Check with your Local Authority or retailer for recycling advice. (Waste Electrical and Electronic Equipment Directive)
For information and support, www.lenco.eu
GB 6

- Lenco
- CD RADIO ALARM CLOCK
- CR-3303
- WARNING
- CLASS 1 LASER PRODUCT
- PRECAUTIONS
- ON PLACEMENT
- ON SAFETY
- ON AC VOLTAGE
- ON CONDENSATION
- CAUTION
- RISK OF ELECTRIC SHOCK DO NOT OPEN
- LOCATION OF CONTROLS
- POWER SUPPLY
- OPERATION WITH AC POWER
- ANTENNA
- PREPARATION
- FITTING THE BATTERIES
- BATTERY BACKUP
- BATTERY INSERTION
- THE RADIO
- RADIO OPERATION
- THE CLOCK
- TO SET THE TIME
- TO WAKE TO THE MUSIC
- WAKE TO ALARM
- SNOOZE (REPEAT ALARM)
- TO STOP ALARM (CD / RADIO / BUZZER)
- SLEEP TIMER (AUTOMATIC SHUT-OFF)
- COMPACT DISC PLAYBACK
- Set to CD
- TO INTERRUPT PLAYBACK
- TO STOP PLAYBACK
- TO SKIP TO THE BEGINNING OF A TRACK
- SEARCHING FOR A PASSAGE WITHIN A TRACK
- REPEAT PLAYBACK
- TO REPEAT THE SAME TRACK
- TO REPEAT THE WHOLE DISC
- TO CANCEL REPEAT PLAYBACK FUNCTION
- PROGRAMMED PLAYBACK
- FOR NORMAL COMPACT DISC PLAYBACK
- MAINTENANCE
- CLEANING A CD
- CLEANING THE CD LENS
- CLEANING THE UNIT
- IMPORTANT NOTE
- SPECIFICATIONS
- CD SECTION
- RADIO SECTION
- GENERAL
Mærke : LENCO
Model : CR-3303
Kategori : Radio