I-CASE TRAY-ORG800 - Tilbehør Techly - Gratis brugsanvisning og manual
Find enhedens vejledning gratis I-CASE TRAY-ORG800 Techly i PDF-format.

Brugerspørgsmål om I-CASE TRAY-ORG800 Techly
0 spørgsmål om dette apparat. Besvar dem du kender, eller stil dit eget.
Stil et nyt spørgsmål om dette apparat
Download vejledningen til din Tilbehør i PDF-format gratis! Find din vejledning I-CASE TRAY-ORG800 - Techly og tag din elektroniske enhed tilbage i hånden. På denne side er alle dokumenter nødvendige for brugen af din enhed offentliggjort. I-CASE TRAY-ORG800 af mærket Techly.
BRUGSANVISNING I-CASE TRAY-ORG800 Techly
INTRODUCTION
This rack cable management system is a smart solution for tidying up cables and neatly managing cabling inside a 19" rack.
Ideal for keeping the wiring tidy and clean, essential for checking and replacing the cables.
FUNCTION DESCRIPTION
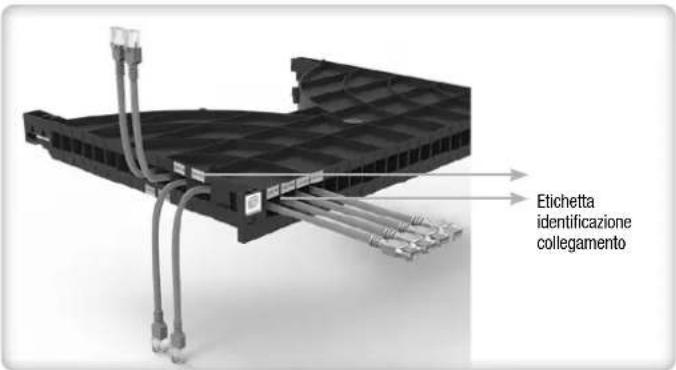
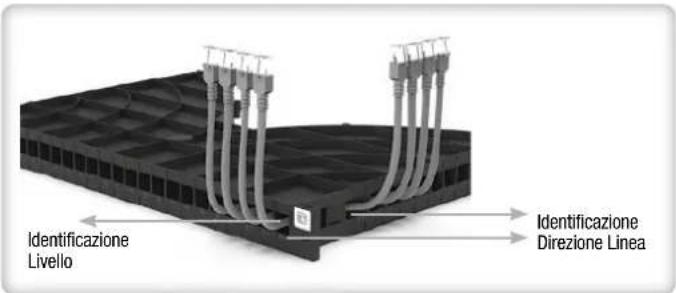
Clear identification:
With layer identification, connection relationship identification, line direction identification


Low cost of repeated cable management:
When a line is messy, it does not affect the overall line direction, convenient and quick recovery
Standardized and cost-effective construction
One-to-one channel routing, non-professional can achieve standardized wiring

natural_image
Stacked black server racks with coiled cable connectors, no visible text or labels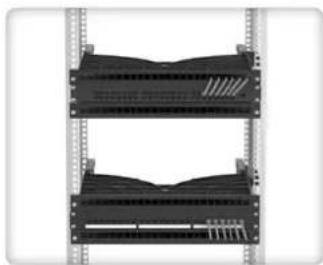
natural_image
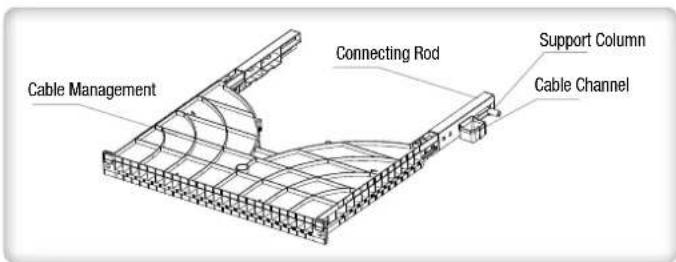
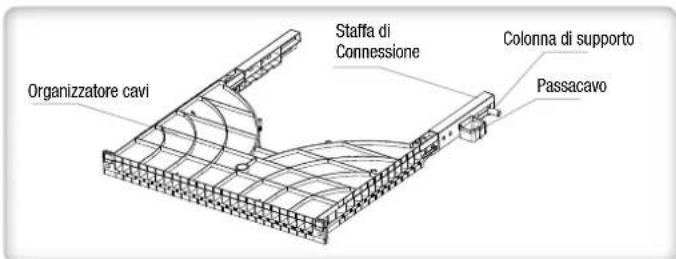
Diagram of two stacked server racks with visible internal components (no text or labels)PRODUCT STRUCTURE AND COMPONENT NAMES
INSTALLATION AND OPERATION INSTRUCTIONS
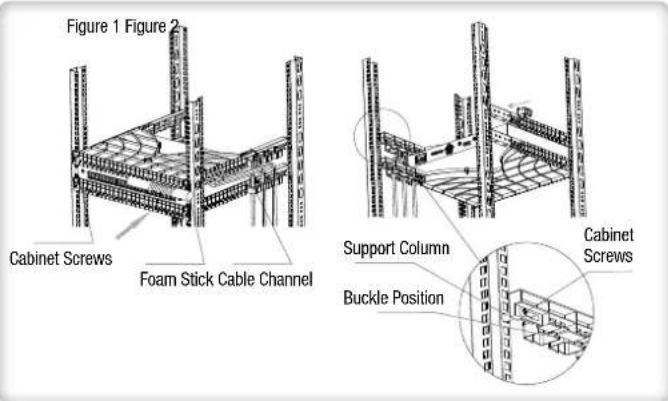
- Insert the cable management system into the rack cabinet in the direction indicated by the arrow in figure 1
- Fix to the front rails of the rack in the desired position using M6x16 screws
- Secure laterally to the rack using the M6x40 screws that will lock the cable management tray to the rear rails** (figure 2)
- Insert the cable in the desired position and slide it into the guide until it comes out on the other side of the panel; it is possible to insert the cable both from the front and from the side holes
- After cable installation, it is possible to block the cable by inserting the rubber cable clamp on the front hole of the organizer
- For more careful and precise cable management, you can use the supplied foam tube to create an even bend for all cables. After extracting the cable from the hole, pass it on the surface of the foam stick and connect it to the equipment to give the correct bending radius, once this step has been carried out for all the cables, remove the foam stick
- One or more organizers can be used within the same rack cabinet depending on the installation requirements
** For models with depths of 800 and 1000mm it is necessary to install the connection bracket using the 4 screws supplied; to fix the bracket to the rail, use the spacers and cable ties provided
PACKING LIST
| Item Name Picture Qty Remark | |||
| Cable Management | 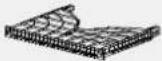 | 1 | |
| M6*16 Cabinet Screws |  | 2 | Used for fixing the front of the cable tray |
| M6*40 Cabinet Screws | 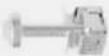 | 2 | Used for fixing the side of the cable tray |
| Spacers* |  | 2 | Used for fixing the side of the cable tray for 800 and 1000mm versions |
| Cable Channel* |  | 6 | For cables routing, only for 800 and 1000mm versions |
| Connecting Rod* | 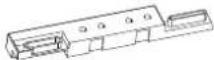 | 2 | Used for cabinets with a depth of 800mm / 1000mm |
| Foam Stick |  | 1 | Auxiliary tools to ensure that the bending radians of the network cables are consistent |
| Cable Tie |  | 2 | Used for cabinets with a depth of more than 800mm |
* Only for 800 and 1000mm deep version, not included for 600mm version
INTRODUZIONE
Questo sistema di gestione cavi per rack è una soluzione intelligente che consente di mantenere in ordine i cavi e di gestire accuratamente il cablaggio all'interno di un rack 19".
Ideale per mantenere ordinato e pulito il cablaggio, fondamentale per la verifica e la sostituzione dei cavi di collegamento.
DESCRIZIONE DELLA FUNZIONE
Identificazione chiara:
Consente l'identificazione del livello, l'identificazione della relazione di connessione, l'identificazione della direzione della linea
Riduzione dei costi di gestione periodica dei cavi:
Quando una linea è disordinata, l'intervento tecnico periodico sulla linea non è veloce e preciso
Costruzione standardizzata e conveniente
L'instradamento del cavo su singola corsia, consente una gestione professionale del cablaggio

natural_image
Stacked black server racks with coiled cable connectors, no visible text or labels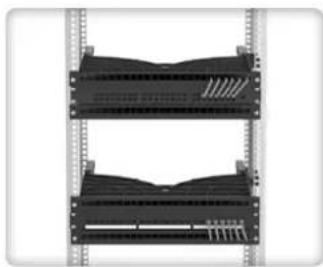
natural_image
Front view of a dual-chamber server rack unit with multiple slots and ventilation grilles (no text or symbols visible)PRODOTTO E SUE PARTI
INSTALLAZIONE E ISTRUZIONI DI FUNZIONAMENTO
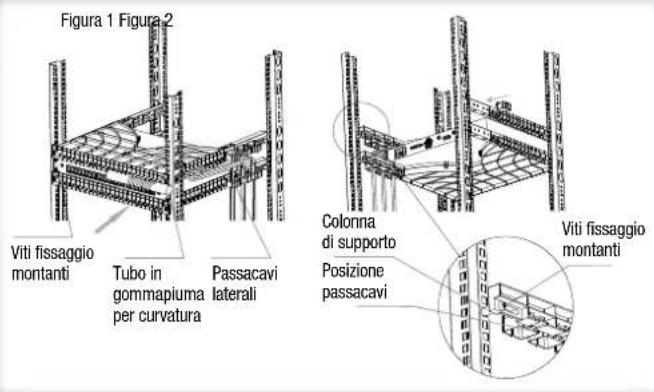
- Inserire il sistema di gestione dei cavi all'interno dell'armadio rack nella direzione indicata dalla freccia nella figura 1
- Fissare sui montanti frontali del rack nella posizione desiderata utilizzando le viti M6x16
- Fissare lateralmente al rack utilizzando le viti M6x40 che bloccheranno l'organizzatore ai montanti posteriori ** (figura 2)
- Inserire il cavo nella posizione desiderata e farlo scorrere nella guida fino alla sua fuoriuscita sull'altro lato del pannello; è possibile inserire il cavo sia dai fori frontali che da quelli laterali
- Dopo aver effettuato l'installazione del cavo è possibile bloccare il cavo inserendo il fermacavo in gomma sulla porta frontale dell'organizzatore
- Per gestire con maggiore cura a precisione i cavi è possibile utilizzare il tubo di gommapiuma fornito in dotazione per creare una curvatura omogenea per tutti i cavi. Dopo aver estratto dal foro il cavo, farlo passare sulla superficie del tubo e collegarlo all'apparecchiatura per dare il raggio di curvatura corretto, una volta effettuato questo passaggio per tutti i cavi rimuovere il tubo
- All'interno dello stesso armadio rack può essere usato uno o più organizzatori a seconda delle esigenze di installazione
** Per i modelli con profondità 800 e 1000mm è necessario installare la staffa di collegamento usando le 4 viti in dotazione; per fissare la staffa al montante utilizzare i distanziali e le fascette forniti
LISTA DELLE PARTI
| Nome della parte Immagine Quantità Uso | |||
| Organizzatore cavi |  | 1 | |
| Viti M6*16 |  | 2 | Utilizzare per fissare l'organizzatore ai montanti frontali dell'armadio |
| Viti M6*40 | 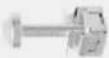 | 2 | Utilizzare per fissare l'organizzatore lateralmente ai montanti posteriori dell'armadio |
| Distanziale staffa di supporto* |  | 2 | Utilizzare per fissare il lato della staffa passacavi solo in versioni da 800 e 1000 mm di profondità |
| Passacavo* |  | 6 | Per il passaggio dei cavi, solo per versioni di 800 e 1000mm di profondità |
| Staffa di supporto* | 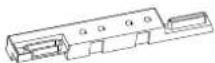 | 2 | Fornita in dotazione solo organizzatori con profondità 800 e 1000mm. Utilizzare per fissare la staffa posteriormente ai montanti |
| Tubo di gommapiuma |  | 1 | Strumento ausiliario per facilitare la curvatura del cavo di rete durante l'assemblaggio |
| Fascette |  | 2 | Utilizzare per armadi con profondità superiore agli 800mm |
* Solo per versione con profondità 800 e 1000mm, parti non incluse per verisone 600mm