FJ62NP-230V - Lyd/video konverter Eltako - Gratis brugsanvisning og manual
Find enhedens vejledning gratis FJ62NP-230V Eltako i PDF-format.

Brugerspørgsmål om FJ62NP-230V Eltako
0 spørgsmål om dette apparat. Besvar dem du kender, eller stil dit eget.
Stil et nyt spørgsmål om dette apparat
Download vejledningen til din Lyd/video konverter i PDF-format gratis! Find din vejledning FJ62NP-230V - Eltako og tag din elektroniske enhed tilbage i hånden. På denne side er alle dokumenter nødvendige for brugen af din enhed offentliggjort. FJ62NP-230V af mærket Eltako.
BRUGSANVISNING FJ62NP-230V Eltako

CE
30 200 535 - 3

Wireless shading element and roller shutter actuator FJ62NP-230V
Only skilled electricians may install this electrical equipment otherwise there is the risk of fire or electric shock!
Temperature at mounting location: -20°C up to +50°C. Storage temperature: -25°C up to +70°C. Relative humidity: annual average value <75%.
valid for devices from production week 14/22 (see bottom side of housing)
Wireless shading element and roller shutter actuator 1+1 NO contact, 4 A/250 V AC, not potential free, for a shading element motor 230 V AC. Standby loss only 0.6 watt.
For installation. 49x51 mm, 20 mm deep. The terminals are plug-in terminals for conductor cross-sections of 0.2 mm ^2 to 2.5 mm ^2 .
The convenient wireless technology permits the teach-in of up to 32 wireless universal pushbuttons, wireless direction pushbuttons and wireless central control pushbuttons.
Zero passage switching.
Bidirectional wireless switchable. Supply voltage, switching voltage and control voltage local 230 V. If supply voltage fails, the device is switched off in defi ned mode. In addition to the wireless control input via an internal antenna, this wireless actuator can also be controlled locally by a conventional control switch if fi tted previously. Control is either by separate local control inputs for Up and Down as direction pushbuttons or these two inputs are bridged and controlled by single pushbuttons as universal pushbuttons. A change in direction then takes place by interrupting activation. An incandescent lamp current is not permitted.
Wireless pushbuttons can be taught in with either the functions 'Up-Stop-Down-Stop' as universal pushbuttons or as local pushbuttons as well as a wireless pushbutton or roller shutter double pushbuttons can be taught in as direction pushbuttons with press top for 'Up' and bottom for 'Down'. Press briefly to stop the movement. In addition, the central control button can be taught in with static priority.
The static priority is only active as long as the radio button is pressed. With a control signal, e.g. B. a radio transmitter module FSM61 with switches that has been taught-in as a central control button, the switching position'Up' or 'Down' and the priority are specifi cally activated. With priority because these control signals cannot be overridden by other control signals until the central command is canceled again by the end of the control signal.
The tap reverse function can be activated: universal pushbuttons, direction pushbuttons and wired pushbuttons are initially in static mode so that the position of the blind can be adjusted.
With control via GFVS software, operating commands for 'up' and 'down' with the exact travel time information can be started. As the actuator reports the exact elapsed time after each activity, even when driving was triggered by a pushbutton, the position of the shading is always displayed correctly in the GFVS software. Upon reaching the end positions above and below the position is automatically synchronized.
When a wireless window contact is taught in, a lockout protection is set up for open windows or doors to disable the Central Down and GFVS Down commands.
Typical connection

Startup:
After power supply is switched on, the teach-in mode is activated automatically for 2 minutes if the memory is empty (as-delivered state) or if the teach-in mode was not blocked. Teach-in standby is alerted by a short 'Down, Stop' signal. If no action occurs for 2 minutes, teach-in mode ends automatically. This is signalled by a short 'Down, Stop'.
Teaching-in sensors
Universal pushbutton: tap briefl y 3 times;
Direction pushbutton: tap briefly 4 times; Top part of direction pushbutton as 'Up' and lower part as 'Down' and 'Stop' in each case; direction pushbuttons are fully taught in automatically when the top or bottom part is pressed.
Central control pushbutton Up: Tap briefl y 5 times;
Central control pushbutton Down: Tap briefl y 6 times;
Window contact FTK, FTKB: (EEP D5-00-01) as well as FTKE (EEP F6-10-00):
Close and open the window briefly 4 times; (Close window -> open -> close -> open -> close -> open -> close -> open)
Wireless window handle sensor FFG7B: (EEP A5-14-09)
Wireless window/door contact FTKB-hg, mTronic:(EEP A5-14-0A)
Wireless window door contact FFGB-hg: (EEP A5-14-01, -03, -0A)
Wireless window door contact eTronic: (EEP A5-14-01)
Wireless timer FSU55D, FSU65D: (EEP A5-38-08)
ON command = Up, OFF command = Down GFVS: (EEP A5-3F-7F)
Confirmation telegrams are switched on and sent automatically at teaching-in of the GFVS. It locks automatically the teach-in mode.
After a sensor is taught in, it is confirmed by a short 'Down, Stop'; the teach-in mode is active for a further 2 minutes.
To avoid teach-in by accident, the teach-in mode is blocked automatically 2 minutes after the last teach-in if a universal or a direction pushbutton was previously taught in. This is alerted by two short 'Down, Stop' signals.
Encrypted and unencrypted sensors can be taught in.
Teach in encrypted sensors:
-
Activate teach-in mode if necessary.
-
Activate sensor encryption within 2 minutes.
-
Then teach in the encrypted sensor as described under 'Teach in sensors'. With encrypted sensors, use the 'rolling code', i.e. the code changes in each telegram, both in the transmitter and in the receiver.
If a sensor sends more than 50 telegrams when the actuator is not active, the sensor is no longer recognised when the actuator is active and must be taught in again as 'encrypted sensor'. It is not necessary to teach in the function again.
Block teach-in mode immediately:
Tap the pushbutton or an already taught-in wireless pushbutton (but not a central control pushbutton) 3 times briefly and once long (>2 seconds). Lock is signalled by two short 'Down, Stop' signals.
Unlock teach-in mode:
Tap the rocker, a cable-bound push button or an already taught-in wireless push-button (but not a central control button) 4 times briefly and once long (>2 seconds). Teach-in mode is signalled by a short 'Down, Stop' signal.
Teach in confirmation telegrams from other actuators:
Unlock simplifi ed learning mode:
- Tap an already taught-in wireless pushbutton (not central control push-
button) or the local wired button 4 times briefl y plus 2 times long (> 2 seconds). The readiness for teching-in is signaled by a briefl y 'Down, Stop', this mode is active for 30 seconds.
- Switch the actuator, which its confirmation telegram has to be taught in, on or off with its wired button. The automatic locking is signaled immediately after teaching-in by a brief double 'Down, Stop'.
Confir rmation telegram 'ON' (0x70 and 0x30) is taught in as 'Central UP'. Confir rmation telegram 'OFF' (0x50 and 0x10) is taught in as 'Central DOWN'.
Clear memory content completely (restore as-delivered state):
- Switch power supply off/on.
- Tap the already taught-in wireless pushbutton (but not a central control button) 8 times briefly and once long (>2 seconds).
Clear is signalled by a brief 'Down, Stop'. - Apply on 'Teach in wireless push-button'.
Teach-in individual release delay time (Tap reverse function is here not allowed
- Start 'go down' by briefly tapping an already taught-in wireless pushbutton or the local pushbutton.
- When the shading element reaches the bottom end position, unlock the teach-in mode with an already taught-in wireless pushbutton (not a central control push-button) or the local pushbutton.
- Start 'go up' by pressing long (>2 seconds) on the already taught-in wireless pushbutton (not a central control pushbutton). After the shading element reaches the top end position, tap the pushbutton briefly, the travel time is saved as the new release delaytime.
After this procedure, the teach-in mode is automatically locked.
Tap reverse activation:
- Switch power supply off/on.
- Tap the already taught-in wireless push-button (but not a central control button) 5 times briefly and once long (>2 seconds). ON is signalled by two brief 'Down, Stop' signals.
Tap reverse deactivation (factory setting):
- Switch power supply off/on.
- Tap the already taught-in wireless push-button (but not a central control button) 6 times briefly and once long (>2 seconds). OFF is signalled by two brief 'Down, Stop' signals.
Switch on/off confirmation telegrams:
- Switch power supply off/on.
- Tap already taught-in wireless pushbutton (but not a central control button) 7 times briefly and once long (>2 seconds).
On is signalled by a two brief 'Down, Stop' signals.
Off is signalled by a brief 'Down, Stop'.
The release delay time in as-delivered state is 200 seconds.
Manuals and documents in further languages

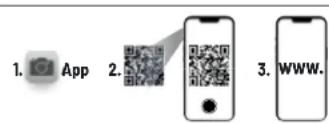
http://eltako.com/redirect/FJ62NP-230V

enocean®
THE UNIQUE WIRELESS PROFESSIONAL SMART HOME STANDARD
Frequency 868.3
Transmit power max. 10 mW
MHz
Hereby, Eltako GmbH declares that the radio equipment type FJ62NP-230V is in compliance with Directive 2014/53/EU. The full text of the EU declaration of conformity is available at the following internet address: eltako.com
Must be kept for later use!
Eltako GmbH
D-70736 Fellbach
Technical Support English:
+49 711 94350025
technical-support@eltako.de
eltako.com
28/2022 Subject to change without notice.