
CS-UV18XKF - Aircondition PANASONIC - Gratis brugsanvisning og manual
Find enhedens vejledning gratis CS-UV18XKF PANASONIC i PDF-format.


Brugerspørgsmål om CS-UV18XKF PANASONIC
0 spørgsmål om dette apparat. Besvar dem du kender, eller stil dit eget.
Stil et nyt spørgsmål om dette apparat
Download vejledningen til din Aircondition i PDF-format gratis! Find din vejledning CS-UV18XKF - PANASONIC og tag din elektroniske enhed tilbage i hånden. På denne side er alle dokumenter nødvendige for brugen af din enhed offentliggjort. CS-UV18XKF af mærket PANASONIC.
BRUGSANVISNING CS-UV18XKF PANASONIC
81101-013352
封面封底商标要求
技术要求
- 纸张边角应裁剪整齐;印刷字迹清晰整洁、内容正确,没有明显的拖墨和重影等缺陷;
- 版面为A5, 纸质为 70 ~g / m^2 , 未注公差按GB/T1804-c级;
- 装订要求; 封面、内容、封底;
- 颜色要求:黑色为BLACK;
- 在封底左下角印上采购下单的物料编码和(版本号),字体为Arial,字高为2.3mm(9号字);物料编码前增加供应商拼音缩写,例:锦美表示JM-XXXXXXXXXXXX。第一次更改JM-XXXXXXXXXXXX(A),第二次更改JM-XXXXXXXXXXXX(B)...依次往后推。
| 印刷专用件 | 81101-013352 | |||||||||
| 使用说明书 | 物料编码 | 质量 | 比例 | |||||||
| 标记 | 更改文件号 | 签字 | 日期 | |||||||
| 设计 | 黄春梅 | 2022.06.08 | 工艺 | 书写纸 | ||||||
| 校对 | 石丹丹 | 标准化 | TCL空调器(中山)有限公司 | |||||||
| 审核 | 陈炳文 | 批准 | 曾霞 | 共1张 | 第1张 | |||||
Panasonic®
Operating Instructions
Air Conditioner
natural_image
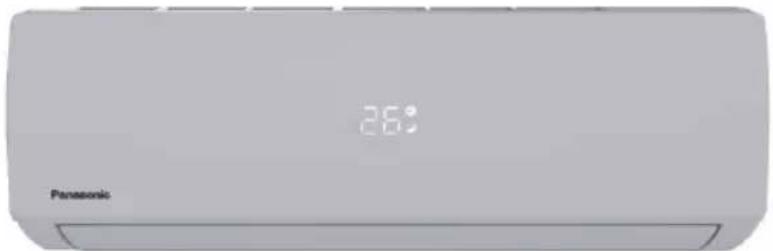
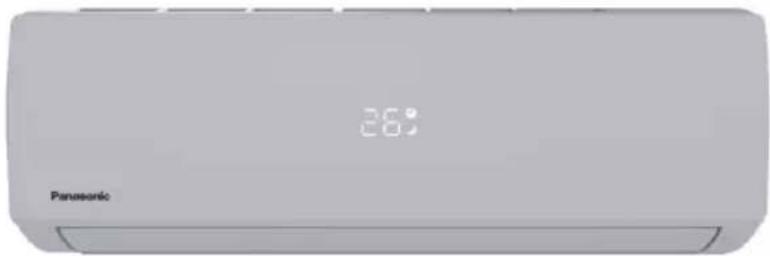
Front view of a Panasonic air conditioner unit with digital display showing 26°C (no text or symbols on device body)Model No.
Outdoor Unit Indoor Unit
CU-UV18XKF
CS-UV18XKF
CU-UV24XKF
CS-UV24XKF
CU-UV30XKF
CS-UV30XKF
دليل المستخدم مكيف هواء
. Panasonic شكرا لشرانك مكيف هواء
ستجد تليمات التشفيل مرفقة مع الجهاز
قم بقراءة تعليمات التركيب جيدا قبل تشغيل الوحدة، و اhfظ الكتاب
في حالة أردت مراجعة التعليمات مرة أخرى.
User Manual
Air Conditioner
Thank you for purchasing Panasonic Air Conditioner. operating instructions attached.
Before operating the unit, read these operating instructions thoroughly and keep them for future reference.
Name and Address of importer:
Panasonic Marketing Middle East & Africa FZE
P.O.Box No. 17985, Jebel Ali, Dubai, U.A.E
English
Quick guide
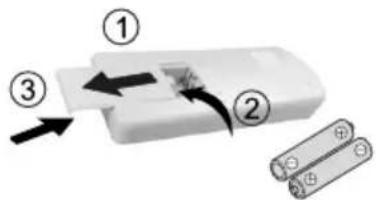
Inserting the batteries
① Pull out the back cover of remote control
② Insert AAA or R03 batteries (can be used \~ 1 year)
③ Close the cover
Basic operation
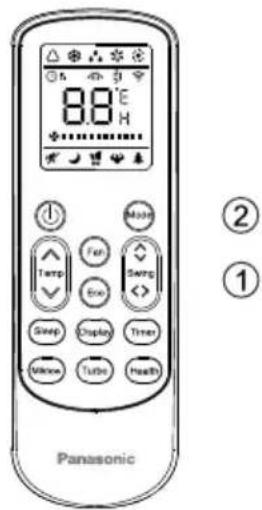
Select the desired temperature
- Selection range: 16^ C 28^ C .
- Operating the unit within the recommended temperature may save energy: 26^ 28^ .
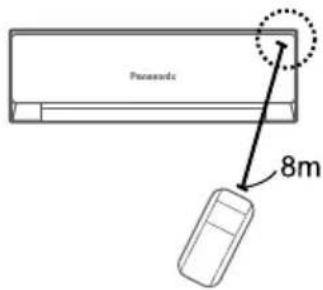
- Use remote control within 8 m from the remote control receiver of the indoor unit.
The illustrations in this manual are for explanation purposes only and may differ from the actual unit. They are subject to change without notice for future improvement.
English
Table of contents
Safety precautions.... 2-3
Cleaning instructions 4-15
Troubleshooting....16
Information......Back cover
Accessories
- Remote control
• AAA or R03 batteries × 2
To prevent personal injury, injury to others or property damage, please comply with the following: Incorrect operation due to failure to follow instructions below may cause harm or damage, the seriousness of which is classified as below:
 WARNING WARNING | This sign warns of death or serious injury. |
 CAUTION CAUTION | This sign warns of injury or damage to property. |
The instructions to be followed are classified by the following symbols:

This symbol denotes an action that is PROHIBITED.


These symbols denote actions COMPULSORY.
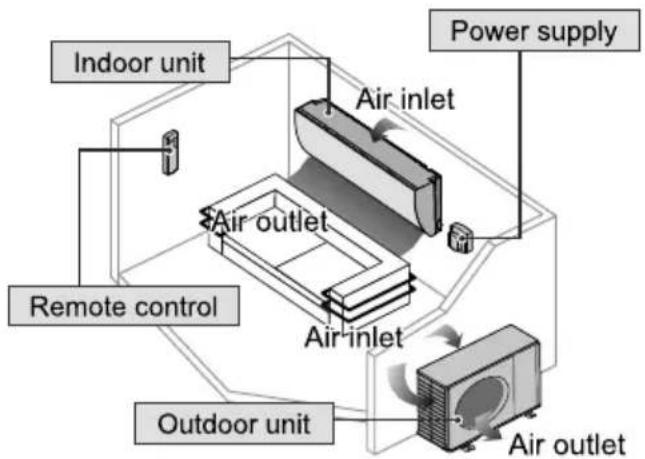

WARNING
Indoor unit and outdoor unit

This appliance is not intended for use by persons (including children) with reduced physical, sensory or mental capabilities, or lack of experience and knowledge, unless they have been given supervision or instruction concerning use of the appliance by a person responsible for their safety. Children should be supervised to ensure that they do not play with the appliance.
Please consult authorised dealer or specialist to clean the internal parts, repair, install, remove and reinstall the unit. Improper installation and handling will cause leakage, electric shock or fire.
Confirm with authorised dealer or specialist on usage of any specified refrigerant type. Using refrigerant type other than the specified may cause product damage, burst and injury etc.

Do not install the unit in a potentially explosive or flammable atmosphere. Failure to do so could result in fire.
Do not insert your fingers or other objects into the air conditioner indoor or outdoor unit, rotating parts may cause injury.

Do not touch the outdoor unit during lightning, it may cause electric shock.
Do not expose yourself directly to cold air for a long period to avoid excess cooling.
Do not sit or step on the unit, you may fall down accidentally.

Remote control

Do not allow infants and small children to play with the remote control to prevent them from accidentally swallowing the batteries.
Power supply

Do not use a modified cord, joint cord, extension cord or unspecified cord to prevent overheating and fire.


To prevent overheating, fire or electric shock:
- Do not share the same power outlet with other equipment.
- Do not operate with wet hands.
- Do not over bend the power supply cord.
- Do not operate or stop the unit by inserting or pulling out the power plug.

Use complete power supply cord without joining. In unavoidable circumstances that complete power supply cord without joining is impossible, use an approved connection means (for example: socket and plug).
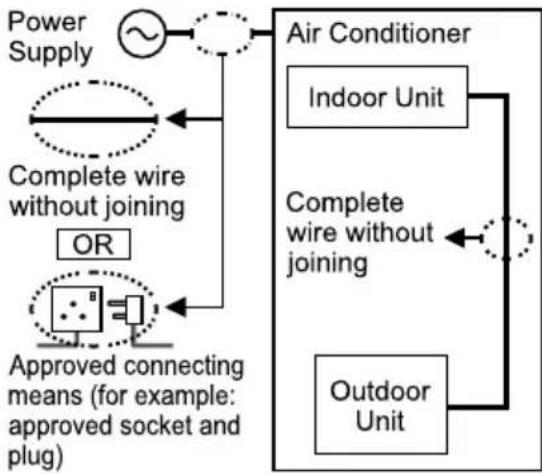
flowchart
graph TD
    A["Power Supply"] --> B["Air Conditioner"]
    B --> C["Indoor Unit"]
    B --> D["Outdoor Unit"]
    E["Complete wire without joining OR"] --> B
    F["Approved connecting means (for example: approved socket and plug)"] --> E
    F --> D
If the supply cord is damaged, it must be replaced by the manufacturer, service agent or similarly qualified persons in order to avoid a hazard.
It is strongly recommended to be installed with Earth Leakage Circuit Breaker (ELCB) or Residual Current Device (RCD) to prevent electric shock or fire.
To prevent overheating, fire or electric shock:
- Insert the power plug properly.
- Dust on the power plug should be periodically wiped with a dry cloth.
Stop using the product if any abnormality/failure occurs and disconnect the power plug or turn off the power switch and breaker.
(Risk of smoke/fire/electric shock) Examples of abnormality/failure
• The ELCB trips frequently.
- Burning smell is observed.
- Abnormal noise or vibration of the unit is observed.
• Water leaks from the indoor unit.
• Power cord or plug becomes abnormally hot.
• Fan speed cannot be controlled.
- The unit stops running immediately even if it is switched on for operation.
- The fan does not stop even if the operation is stopped.
Contact your local dealer immediately for maintenance/repair.

This equipment must be earthed to prevent electrical shock or fire.

Prevent electric shock by switching off the power supply and unplug:
- Before cleaning or servicing,
- When extended non-use, or
- During abnormally strong lightning activity.


CAUTION
Indoor unit and outdoor unit

Do not wash the indoor unit with water, benzine, thinner or scouring powder to avoid damage or corrosion at the unit.
Do not use for preservation of precise equipment, food, animals, plants, artwork or other objects. This may cause quality deterioration, etc.
Do not use any combustible equipment in front of the airflow outlet to avoid fire propagation.
Do not expose plants or pet directly to airflow to avoid injury, etc.
Do not touch the sharp aluminium fin, sharp parts may cause injury.

Do not switch ON the indoor unit when waxing the floor. After waxing, aerate the room properly before operating the unit.
Do not install the unit in oily and smoky areas to prevent damage to the unit.
Do not dismantle the unit for cleaning purpose to avoid injury.
Do not step onto an unstable bench when cleaning the unit to avoid injury.
Do not place a vase or water container on the unit. Water may enter the unit and degrade the insulation. This may cause an electric shock.
Do not open window or door for long time during COOL/DRY mode operation.

Prevent water leakage by ensuring drainage pipe is:
- Connected properly,
- Kept clear of gutters and containers, or
- Not immersed in water
After a long period of use or use with any combustible equipment, aerate the room regularly.
After a long period of use, make sure the installation rack does not deteriorate to prevent the unit from falling down.
Remote control

Do not use rechargeable (Ni-Cd) batteries. It may damage the remote control.

To prevent malfunction or damage of the remote control:
- Remove the batteries if the unit is not going to be used for a long period of time.
- New batteries of the same type must be inserted following the polarity stated.
Power supply

Do not disconnect the plug by pulling the cord to prevent electric shock.
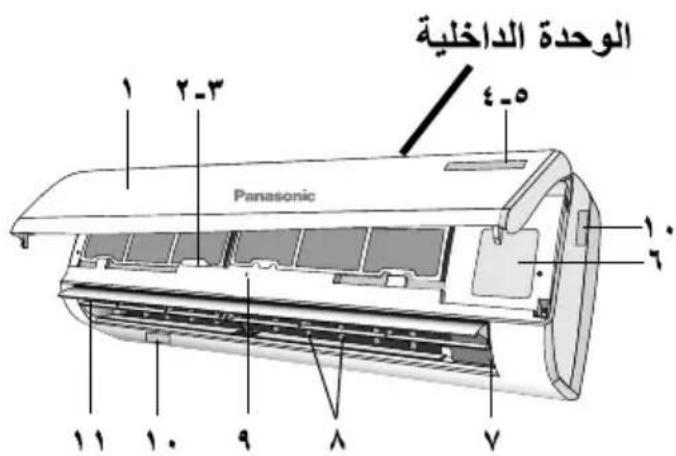
| INDOOR UNIT | |
| No. | Description |
| 1 | Front panel |
| 2 | Air filter |
| 3 | Optional filter (if installed) |
| 4 | LED Indicator |
| 5 | Signal receiver |
| 6 | Terminal block cover |
| 7 | Ionizer generator(if installed) |
| 8 | Vanes |
| 9 | Emergency button |
| 10 | Indoor unit rating label (Stick position optional) |
| 11 | Airflow direction louver |
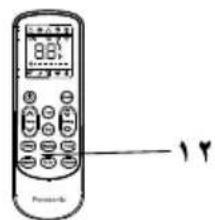
| 12 | Remote controller |
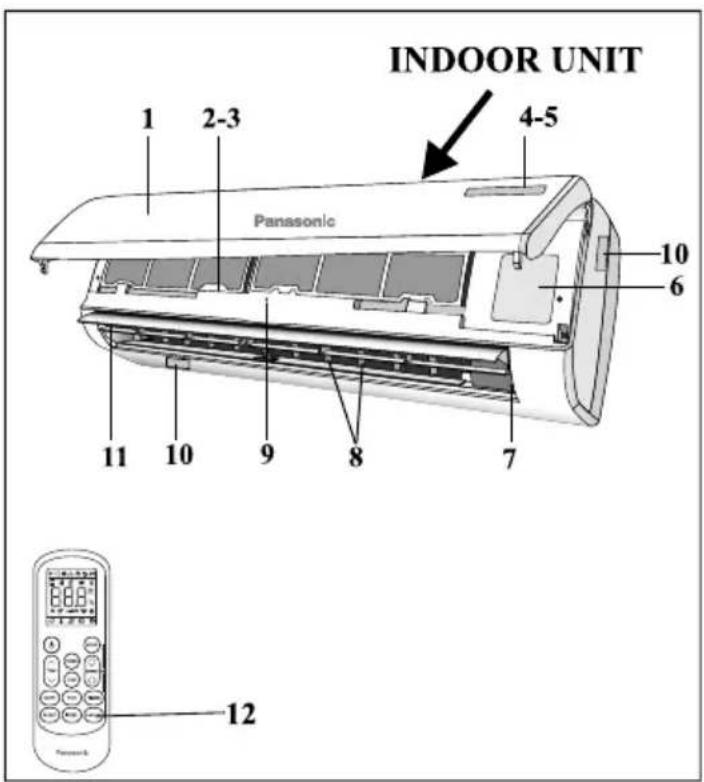
| OUTDOOR UNIT | |
| No. | Description |
| 13 | Air outlet grille |
| 14 | Outdoor unit rating label |
| 15 | Terminal block cover |
| 16 | Gas valve |
| 17 | Liquid valve |
| 18 | Caution lable (DO NOT STEP ON) |
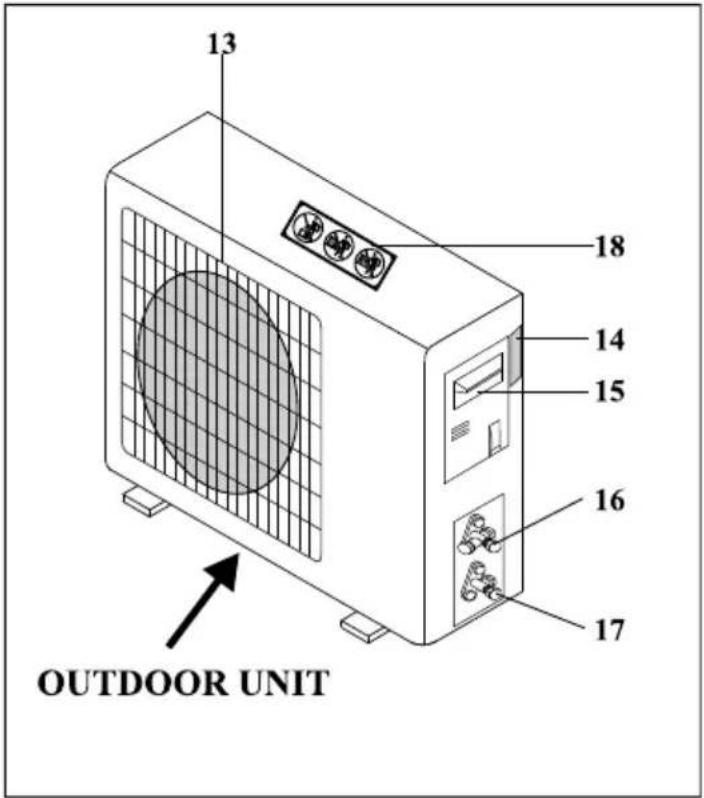
Note: the above figures are only intended to be a simple diagram of the appliance and may not correspond to the appearance of the units that have been purchased.
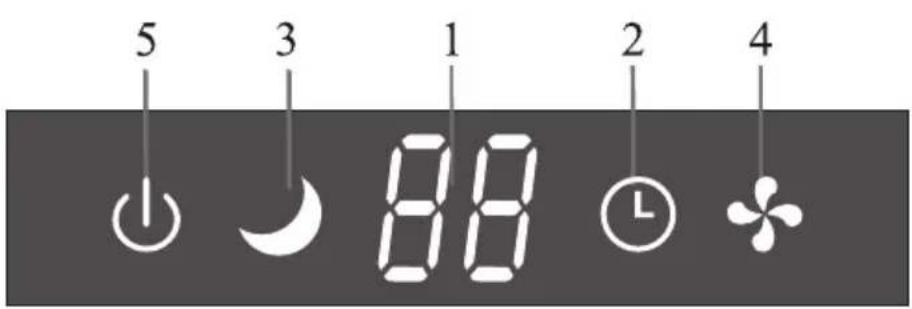
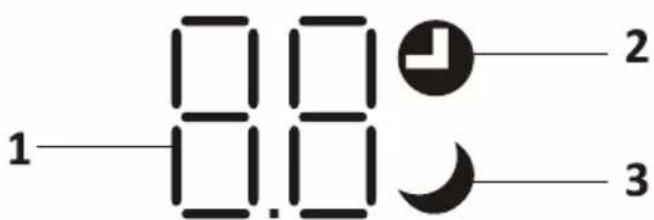
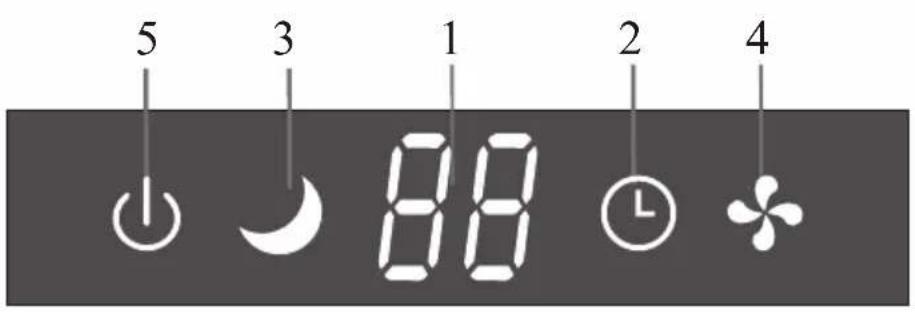
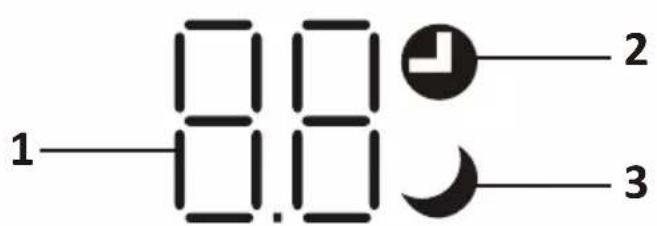
| No. | LED | Function |
| 1 |  | Indicator for Timer, temperature and Error codes. |
| 2 | [508Y] | Lights up during Timer operation. |
| 3 |  | SLEEP mode |
| 4 |  | The symbol appears when the unit is turned on, and disappear when the unit is turned off. |
| 5 | The symbol appears when power on. |

The shape and position of switches and indicators may be different according to the model, but their function is the same.
EMERGENCY FUNCTION & AUTO-RESTART FUNCTION
AUTO-RESTART FUNCTION
The appliance is preset auto - restart function by manufacturer. In case of a sudden power failure, the module memorizes the setting conditions before the power failure. when the power restores, the unit restarts automatically with all the previous settings preserved by the memory function.
To deactivate the AUTO-RESTART function ,proceed as follows:
- Switch the air conditioner off and plug it off.
- Press the emergency button meanwhile plug it in.
- Keep pressing the emergency button for more than 10 seconds until you hear four short beeps from the unit. The AUTO-RESTART function is deactivate.
- To activate the AUTO - RESTART function, follow the same procedure until you hear three short beeps from the unit.
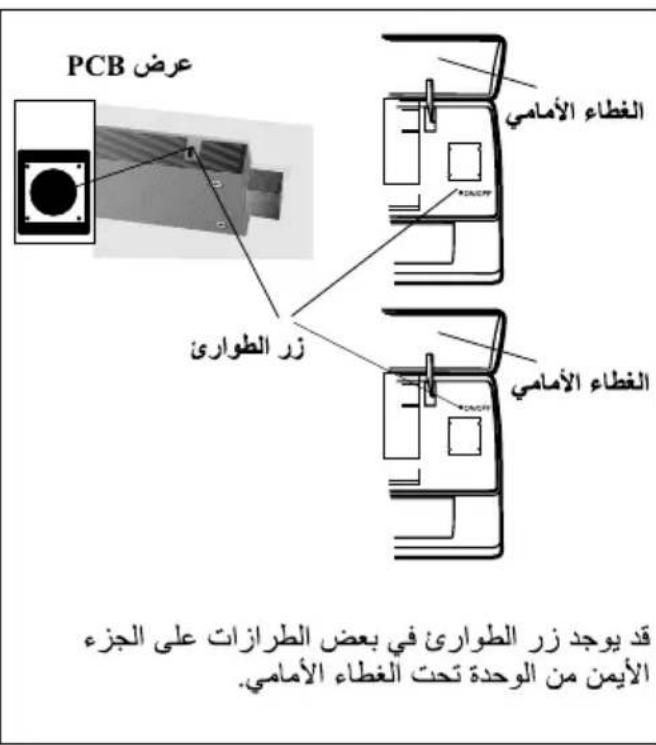
EMERGENCY FUNCTION
If the remote controller fails to work or maintenance necessary, proceed as follows:
Open and lift the front panel up to an angleto reach the emergency button.
- One press of the emergency button(one beep) will lead to the forced COOLING operation
- Two press of the emergency button within 3 sec (two beeps) will lead to the forced HEATING operation.
- To switch off the unit, you just need to press the button again (a single long beep).
- After 30 minutes in forced operation, the air conditioner will automatically start working in 23°C cooling mode, auto fan speed.
* The FEEL function is described in page 15.
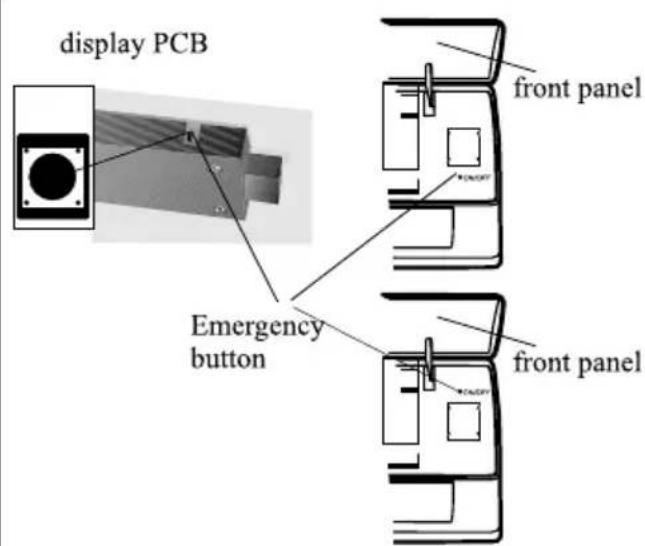
The emergency button in some models could be on the right part of the unit under the front panel.
⚠ The shape and position of the emergency button may be different according to the model, but their function is the same.
Remark: the external static pressure of heat pumps is 0 Pa for all models.
REMOTE CONTROL
Remote control DISPLAY
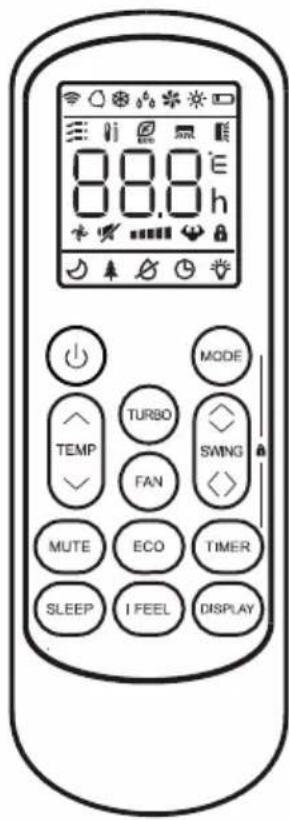
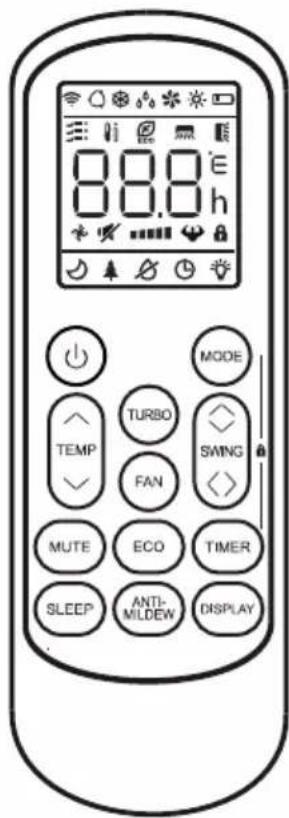
| No. | Symbols | Meaning |
| 1 |  | Battery indicator |
| 2 | [DSK3] | Auto Mode |
| 3 |  | Cooling Mode |
| 4 | [26TV] | Dry Mode |
| 5 |  | Fan only Mode |
| 6 |  | Heating Mode |
| 7 | [A6DV] | ECO Mode |
| 8 |  | Timer |
| 9 |  | Temperature indicator |
| 10 | [C4AT] | Fan speed:Auto/ low/ low-mid/ mid/ mid-high/ high |
| 11 | [D45T] | Mute function |
| 12 | [X06H] | TURBO function |
| 13 | [30AD] | Up-down auto swing |
| 14 |  | Left-right auto swing |
| 15 |  | SLEEP function |
| 16 |  | Health function |
| 17 |  | I FEEL function |
| 18 | [2XAA] | Signal indicator |
| 19 | [COKO] | Gentle wind |
| 20 | [7XOA] | Child-Lock |
| 21 | [SKOD] | Display ON/OFF |
| 22 | [COAT] | Anti-Mildew |
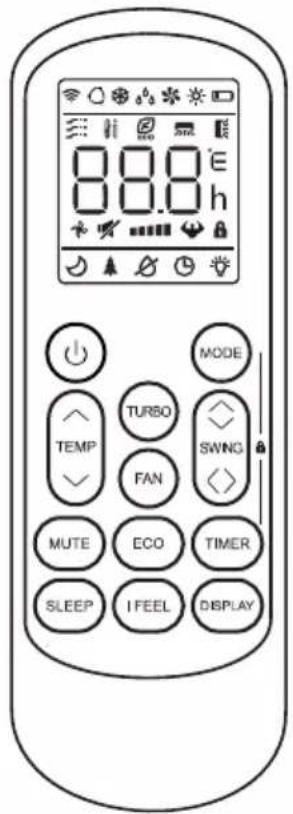
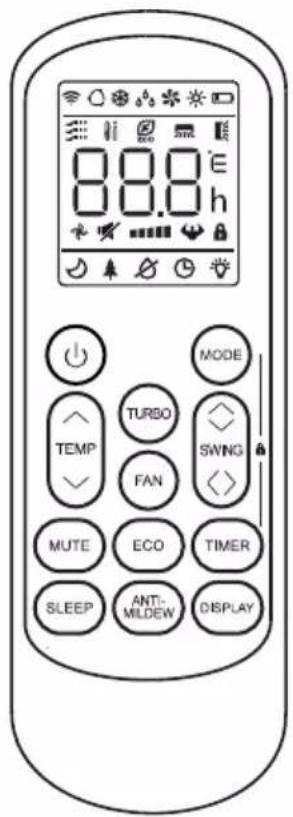

The display and some functions of the remote control may vary according to the model.
REMOTE CONTROL
| No. | Button | Function |
| 1 | To turn on/off the air conditioner . | |
| 2 | ^ | To decrease temperature, or Timer setting hours. |
| 3 | √ | To increase temperature, or Timer setting hours. |
| 4 | MODE | To select the mode of operation (AUTO, COOL, DRY, FAN, HEAT). |
| 5 | ECO | To activate/deactivate the ECO function. |
| Long press to activate/deactivate the 8°C heating function (depending on models). | ||
| 6 | TURBO | To activate/deactivate the TURBO function. |
| 7 | FAN | To select the fan speed of auto/low/mid/high. |
| 8 | TIMER | To set the time for timer on/off. |
| 9 | SLEEP | To switch-on/off the function SLEEP. |
| 10 | DISPLAY | To switch-on/off the LED display. |
| 11 | SWING ◇ | To stop or start horizontal louver movement or set the desired up/down air flow direction. |
| 12 | SWING <> | To stop or start horizontal louver movement or set the desired left/rightair flow direction. |
| 13 | I FEEL | To switch-on/off the I FEEL function. |
| 14 | MUTE | To switch-on/off the MUTE function. |
| Long press to activate/deactivate the GEN function (depending on models). | ||
| 15 | ANTI-MILDEW | To switch-on/off the ANTI-MILDEW function. |
| 16 | MODE + TIMER | To activate/deactivate the CHILD-LOCK function. |
| 17 | SWING ◇+SWING <> | To activate/deactivate the SELF-CLEAN function (depending on models). |
| 18 | FAN + MUTE | To activate/deactivate the GENTLE WIND function (depending on models). |
| 19 | SLEEP + DISPLAY | To activate/deactivate the HEALTH function (depending on models). |
⚠ The display and some functions of the remote control may vary according to the model.
The shape and position of buttons and indicators may vary according to the model, but their function is the same.
⚠ The unit confirms the correct reception of each button with the beep.
Replacement of Batteries
Remove the battery cover plate from the rear of the remote control, by sliding it in direction as the arrow.
Install the batteries according the direction (+ and -) shown on the Remote Control.
Reinstall the battery cover by sliding it into place.

Use 2 pieces LRO3 AAA (1.5V) batteries.
Do not use rechargeable batteries.
Replace the old batteries with new ones of the same type when the display is no longer legible.
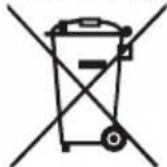
Do not dispose batteries as unsorted municipal waste.
Collection of such waste separately for special treatment is necessary.
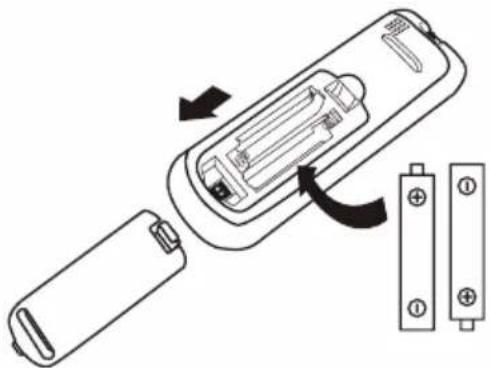
natural_image
Diagram of a remote control device showing battery, casing, and battery pack with internal components (no text or labels)
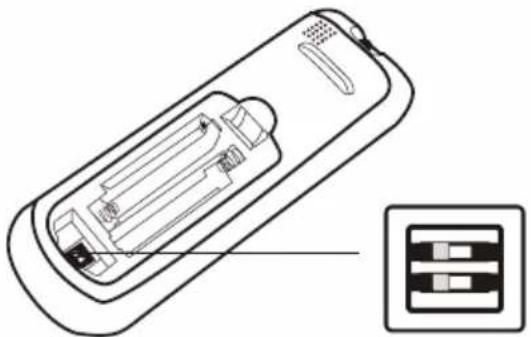
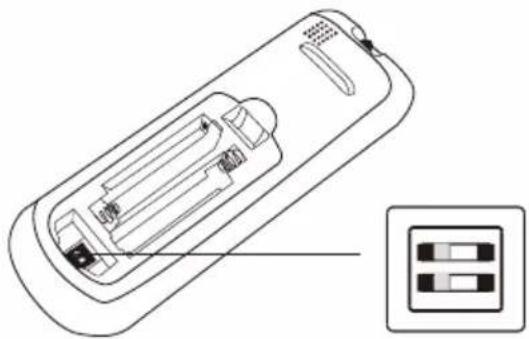
For some model of remote controller, open the battery cover, and you can see the manual switch at the bottom, then you can select the Cooling only or Heating pump, operate as below.
| DIP switch on position | Function |
| °C | The display is adjusted in degree celsius. |
| °F | The display is adjusted in degree fahrenheit. |
| Cool | The display is adjusted in only cooling mode |
| Heat | The display is adjusted in cooling and heating mode |
natural_image
Line drawing of a remote control device with internal components and an inset showing two battery cells (no text or symbols)
- Direct the remote control toward the Air conditioner.
- Check that there are no objects between the remote control and the Signal receptor in the indoor unit.
- Never leave the remote control exposed to the rays of the sun.
- Keep the remote control at a distance of at least 1m from the television or other electrical appliances.
REMOTE CONTROL
COOLING MODE
COOL

The cooling function allows the air conditioner to cool the room and reduce Air humidity at the same time.
To activate the cooling function (COOL), press the MODE button until the symbol ✿ appears on the display.
With the button √ or ∧ set a temperature lower than that of the room.
FAN MODE (Not FAN button)
FAN

Fan mode, air ventilation only.
To set the FAN mode, press MODE until ✿ appears on the display.
DRY MODE
DRY

This function reduces the humidity of the air to make the room more comfortable.
To set the DRY mode, Press MODE until _^ appears in the display. An automatic function of pre-setting is activated.
AUTO MODE
AUTO

Automatic mode.
To set the AUTO mode, press MODE until appears on the display. In AUTO mode the run mode will be set automatically according to the room temperature.
HEATING MODE
HEAT

The heating function allows the air conditioner to heat the room.
To activate the heating function (HEAT), press the MODE button until the symbol ✦ appears on the display.
With the button √ or ∧ set a temperature higher than that of the room.

In HEATING operation, the appliance can automatically activate a defrost cycle, which is essential to clean the frost on the condenser so as to recover its heat exchange function. This procedure usually lasts for 2-10 minutes. During defrosting, indoor unit fan stop operation. After defrosting, it resumes to HEATING mode automatically.

(For North American market)
If necessary, you can press ECO button 10 times within 8 seconds under heating mode to start the forced defrosting. It will defrost the outdoor ice much more fast.
FAN SPEED function (FAN button)
FAN

Change the operating fan speed.
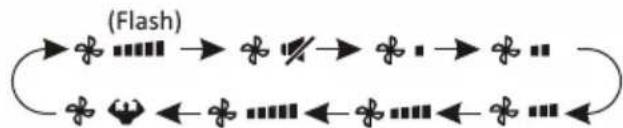
Press FAN button to set the running fan speed, it can be set to AUTO/ MUTE/ LOW/ LOW-MID / MID/ MID-HIGH/ HIGH/ TURBO speed circularly.
flowchart
graph LR
    A["Start"] --> B{Flash}
    B --> C["End"]
    C --> D["Continue"]
    D --> E["Next Step"]
    E --> F["Next Step"]
    F --> G["Next Step"]
    G --> H["Next Step"]
Child-Lock function
- Long press MODE and TIMER button together to active this function, and do it again to deactivate this function.
- Under this function, no single button will active.
REMOTE CONTROL
TIMER function ---- TIMER ON
TIMER
To automatic switch on the appliance.
When the unit is switch-off, you can set the TIMER ON.
To set the time of automatic switch-on as below:
- Press TIMER button first time to set the switch-on, ⏱ and [60h] will appear on the remote display and flashes.
- Press ^ or ▼ to button to set desired Timer-on time. Each time you press the button, the time increases/decreases by half an hour between 0 and 10 hours and by one between 10 and 24 hours.
- Press TIMER button second time to confirm.
- After Timer-on setting, set the needed mode (Cool/ Heat/ Auto/ Fan/ Dry), by press the MODE button. And set the needed fan speed, by press FAN button. And press^ or ∨ to set the needed operation temperature.
CANCEL it by press TIMER button.
TIMER function ---- TIMER OFF
TIMER
To automatic switch off the appliance.
When the unit is switch-on, you can set the TIMER OFF.
To set the time of automatic switch-off, as below:
- Confirm the appliance is ON.
- Press the TIMER button at first time to set the switch-off.
Press ^or ∨ to set the needed timer. - Press TIMER button at the second time to confirm.
CANCEL it by press TIMER button.
Note: All programming should be operated within 5 seconds, otherwise the setting will be cancelled.
SWING function
SWING
SWING <>
-
Press the button SWING to activate the louver,
1.1 Press SWING to activate the horizontal flaps to swing from up to down, the will appear on the remote display. Press again to stop the swing movement at the current angle.
1.2 Press SWING <> to active the vertical deflectors to swing from left to right, the ☑ will appear on the remote display. Press again to stop the swing movement at the current angle. -
If the vertical deflectors are positioned manually which placed under the flaps, they allow to move the air flow direct to rightward or leftward.
- For some inverter heating models, press horizontal SWING and vertical SWING together button at the same time, it will activate the Self-Clean function.
This adjustment must be done while the appliance is switched off.
⚠️ Never position “Flaps” manually, the delicate mechanism might seriously damaged!
Never put fingers, sticks or other objects into the air inlet or outlet vents. Such accidental contact with live parts might cause unforeseeable damage or injury.
TURBO function
TURBO
To activate turbo function, press the TURBO button, and 🤨 will appear on the display.
Press again to cancel this function.
In COOL/HEAT mode, when you select TURBO feature, the appliance will turn to quick COOL or quick HEAT mode, and operate the highest fan speed to blow strong airflow.
REMOTE CONTROL
MUTE function
MUTE
- Press MUTE button to active this function, and will appears on the remote display. Do it again to deactivate this function.
- When the MUTE function runs, the remote controller will display the auto fan speed, and the indoor unit will operate at lowest fan speed to be quiet feeling.
- When press FAN/ TURBO/ SLEEP button, the MUTE function will be cancel. MUTE function can not be activated under dry mode.
SLEEP function
SLEEP
Pre-setting automatic operating program.
Press SLEEP button to activate the SLEEP function, and 📋 appears on the display. Press again to cancel this function.
After 10 hours running in sleep mode, the air conditioner will change to the previous setting mode.
I FEEL function (Optional)
I FEEL

Press I FEEL button to active the function, the will appear on the remote display. Do it again to deactivate this function.
This function enables the remote control to measure the temperature at its current location, and send this signal to the air conditioner to optimize the temperature around you and ensure the comfort.
It will automatically deactivate 2 hours later.
ECO function
ECO

In this mode the appliance automatically sets the operation to save energy.
Press the ECO button, the K appears on the display, and the appliance will run in ECO mode. Press again to cancel it.
Note: The ECO function is available in both COOLING and HEATING modes.
DISPLAY function (Indoor display)
DISPLAY
Switch ON/OFF the LED display on panel.
Press DISPLAY button to switch off the LED display on the panel. Press again to switch on the LED display.
ANTI-MILDEW function (Optional)
ANTI-
MILDEW

Press ANTI-MILDEW button to activate the ANTI-MILDEW function, Ⓧ will appear on the display. Do it again to deactivate this function. After running COOL/DRY for more than 30 minutes, you can operate this function, the unit will blow airflow for about 15 minutes to dry the inner parts to avoid mildew, then shuts off the unit.
Note: ANTI-MILDEW function only available in DRY/COOLING mode.
REMOTE CONTROL
SELF-CLEAN function (Optional)
Only optional for some heating pump inverter appliance.
To active this function, turn off the indoor unit at first, then press SWING and SWING button at the same time toward the indoor unit, until hear a beep, and [AC] will appear on the remote controller display and the indoor LED display.
- This function helps carry away the accumulated dirt, bacteria, etc from the indoor evaporator.
- This function will run about 30 minutes, and it will return to the pre-setting mode. You can press ⏻ button to cancel this function during the process.
You will hear 2 beeps when it's finished or cancelled.

It's normal if there is some noise during this function process, as plastic materials expand with heat and contract with cold.

We suggest operating this function at the following ambient conditions to avoid certain safety protection features.
| Indoor unit | Temp < 86°F (30°C) |
| Outdoor unit | 41°F (5°C) < Temp < 86°F (30°C) |

It's suggested to utilize this function every 3 months.
8°C heating function (Optional)
- Long press ECO button over 3 seconds to active this function, and [8^] ( [46^] ) will appear on the remote display.
Do it again to deactivate this function. - This function will auto start the heating mode when the room temperature is lower than 8^ C ( 46^ F), and it will return to standby if the temperature reaches 9^ C ( 48^ F).
- If the room temperature is higher than 18^ C ( 64^ F), the appliance will cancel this function automatically.
Gentle Wind function (Optional)
- Turn on the indoor unit, and change to COOL mode, then long press FAN and MUTE button together 3 seconds to active this function, will appear on the display. Do it again to deactivate it.
- This function will auto close the vertical flaps, and give you the comfortable gentle wind feeling.
Health function (Optional)
-
Turn on the indoor unit at first, and long press SLEEP and DISPLAY button together 3 seconds to active this function, ↑ will appear on the display.
Do it again to deactivate it. -
When the HEALTH function is initiated, the Ionizer/ Plasma/ Bipolar Ionizer/ UVC Lights (depending on models) will be energized and running.
GEN function (Optional)
- Turn on the indoor unit at first, and long press MUTE button 3 seconds to active, and do it again to deactivate this function.
- Under this function, short press MUTE button to select the General type L3 - L2 - L1 - OF.
- Select OF and wait 2 seconds to exit it.
OPERATION INSTRUCTIONS
① Attempt to use the air conditioner under the temperature beyond the specified range may cause the air conditioner protection device to start and the air conditioner may fail to operate. Therefore, try to use the air conditioner in the following temperature conditions.
Fixed air conditioner:
| Temperature\MODE | Heating | Cooling | Dry |
| Room temperature | 0°C~27°C | 17°C~32°C | |
| Outdoor temperature | -7°C~24°C | T1 climate: 15°C~43°C | |
| T3 climate: 15°C~52°C | |||
Inverter air conditioner:
| Temperature\MODE | Heating | Cooling | Dry |
| Room temperature | 0°C~27°C | 17°C~32°C | |
| Outdoor temperature | -15°C~24°C(Low temperature heating: -20°C~24°C) | T1 climate: 15°C~50°C(Low temperature cooling: -15°C~50°C) | |
| T3 climate: 15°C~55°C | |||
With the power supply connected, restart the air conditioner after shutdown, or switch it to other mode during operation, and the air conditioner protection device will start. The compressor will resume operation after 3 minutes.
Characteristics of heating operation (applicable to Heating pump)
Preheating:
When the heating function is enabled, the indoor unit will take 2\~5 minutes for preheating, after that the air conditioner will start heating and blows warm air.
Defrosting:
During heating, when the outdoor unit frosted, the air conditioner will enable the automatic defrosting function to improve the heating effect. During defrosting, the indoor and outdoor fans stop running. The air conditioner will resume heating automatically after defrosting finish.
Emergency button:
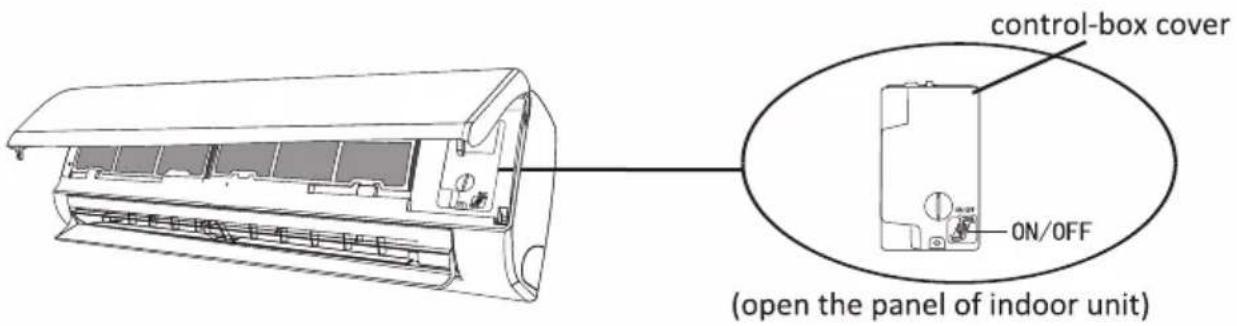
Open the panel and find the emergency button on the electronic control box when the remote controller fails. (Always press the emergency button with insulation material.)
| Current status | Operation | Respond | Enter mode |
| Standby | Press the emergency button once | It beeps briefly once. | Cooling mode |
| Standby(Only for heating pump) | Press the emergency button twice in 3 seconds | It beeps briefly twice. | Heating mode |
| Running | Press the emergency button once | It keeps beeping for a while | Off mode |
MAINTENANCE
| Warning | ·When cleaning, you must shut down the machine and cut off the power supply for more than 5 minutes.·Under no circumstances should the air conditioner be flushed with water.·Volatile liquid (e.g. thinner or gasoline) will damage the air conditioner, so only use soft dry cloth or wet cloth dipped with neutral detergent to clean the air conditioner.·Pay attention to cleaning the filter screen regularly to avoid dust covering which will affect the filter screen effect. When the operating environment is dusty, the cleaning frequency should be increased appropriately.·After removing the filter screen, do not touch the fins of the indoor unit to avoid scratching. | |
| Clean the unit | 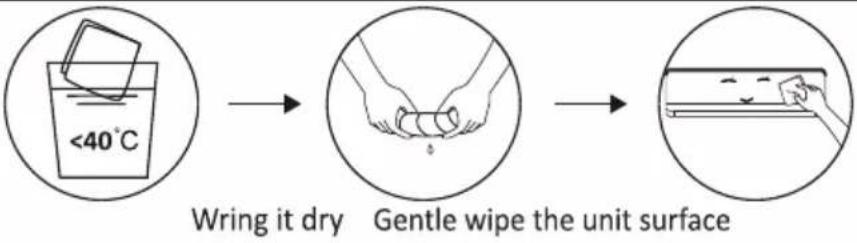 Tip: Wipe frequently to keep air conditioner clean and good appearance. Tip: Wipe frequently to keep air conditioner clean and good appearance. | |
| Clean the filter | 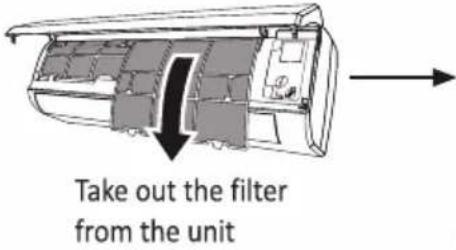 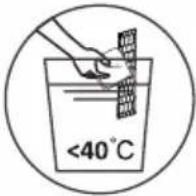 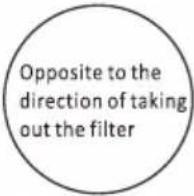 Clean the filter withsoapy water and air dry itReplace the filterTip: When you find accumulated dust in the filter, please clean the filter in time to ensure the clean, healthy and efficient operation inside the air conditioner. Clean the filter withsoapy water and air dry itReplace the filterTip: When you find accumulated dust in the filter, please clean the filter in time to ensure the clean, healthy and efficient operation inside the air conditioner. | |
| Service and maintenance | ·When the air conditioner is not in use for a long time, do the following work:Take out the batteries of the remote controller and disconnect the power supply of the air conditioner.·When starting to use after long-term shutdown:1. Clean the unit and filter screen;2. Check whether there are obstacles at the air inlet and outlet of indoor and outdoor units;3. Check whether the drain pipe is unobstructed;Install the batteries of the remote controller and check whether the power is on. | |
TROUBLESHOOTING
| MALFUNCTION | POSSIBLE CAUSES |
| The appliance does not operate | Power failure/plug pulled out. |
| Damaged indoor/outdoor unit fan motor. | |
| Faulty compressor thermomagnetic circuit breaker. | |
| Faulty protective device or fuses. | |
| Loose connections or plug pulled out. | |
| It sometimes stops operating to protect the appliance. | |
| Voltage higher or lower than the voltage range. | |
| Active TIMER-ON function. | |
| Damaged electronic control board. | |
| Strange odor | Dirty air filter. |
| Noise of running water | Back flow of liquid in the refrigerant circulation. |
| A fine mist comes from the air outlet | This occurs when the air in the room becomes very cold, for example in the “COOLING” or “DEHUMIDIFYING/DRY” modes. |
| A strange noise can be heard | This noise is made by the expansion or contraction of the front panel due to variations in temperature and does not indicate a problem. |
| Insufficient airflow, eitherhot or cold | Unsuitable temperature setting. |
| Obstructed air conditioner intakes and outlets. | |
| Dirty air filter. | |
| Fan speed set at minimum. | |
| Other sources of heat in the room. | |
| No refrigerant. | |
| The appliance does not respond to commands | Remote control is not close enough to indoor unit. |
| The batteries of remote control need to be replaced. | |
| Obstacles between remote control and signal receiver in indoor unit. | |
| The display is off | Active DISPLAY function. |
| Power failure. | |
| Switch off the air conditioner immediately and cut off the power supply in the event of: | Strange noises during operation. |
| Faulty electronic control board. | |
| Faulty fuses or switches. | |
| Spraying water or objects inside the appliance. | |
| Overheated cables or plugs. | |
| Very strong smells coming from the appliance. |
TROUBLESHOOTING
ERROR CODE ON THE DISPLAY
In case of error, the display on the indoor unit shown the following error codes:
| Display | Description of the trouble |
| E1 | Indoor room temperature sensor fault |
| E2 | Indoor pipe temperature sensor fault |
| E3 | Outdoor pipe temperature sensor fault |
| E4 | Refrigerant system leakage or fault |
| E6 | Malfunction of indoor fan motor |
| E7 | Outdoor ambient temperature sensor fault |
| E0 | Indoor and outdoor communication fault |
| E8 | Outdoor discharge temperature sensor fault |
| E9 | Outdoor IPM module fault |
| EA | Outdoor current detect fault |
| EE | Outdoor PCB EEPROM fault |
| EH | Outdoor fan motor fault |
| EF | Outdoor suction temperature sensor fault |
DISPOSAL GUIDELINE (European)
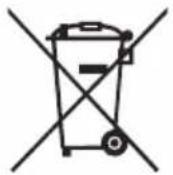
This appliance contains refrigerant and other potentially hazardous materials. When disposing of this appliance, the law requires special collection and treatment. DO NOT dispose of this product as household waste or unsorted municipal waste.
When disposing of this appliance, you have the following options:
- Dispose of the appliance at designated municipal electronic waste collection facility. - When buying a new appliance, the retailer will take back the old appliance free of charge.
• The manufacturer will also take back the old appliance free of charge.
- Sell the appliance to certifid scrap metal dealers.
- Disposing of this appliance in the forest or other natural surroundings endangers your health and is bad for the environment. Hazardous substances may leak into the ground water and enter the food chain.
Supplementary introduction
1.Name plate
Panasonic
AIR CONDITIONER
INDOOR UNIT
Model No: CS-UV18XKF
PHASE 1
VOLTAGE 220-240V\~
FREQUENCY 50Hz
REFRIGERANT R410A
SERIAL NO.
X
PRODUCTION MONTH/YEAR X
Panasonic Marketing Middle East & Africa FZE P.O. Box No. 17985, Jebel Ali, Dubai, U.A.E. MADE IN CHINA
R410A
Panasonic
AIR CONDITIONER
INDOOR UNIT
Model No: CS-UV24XKF
PHASE 1
VOLTAGE 220-240V\~
FREQUENCY 50Hz
REFRIGERANT R410A
SERIAL NO.
X
PRODUCTION MONTH/YEAR X
Panasonic Marketing Middle East & Africa FZE P.O. Box No. 17985, Jebel Ali, Dubai, U.A.E. MADE IN CHINA
R410A
Panasonic
AIR CONDITIONER
INDOOR UNIT
Model No: CS-UV30XKF
PHASE 1
VOLTAGE 220-240V\~
FREQUENCY 50Hz
REFRIGERANT R410A
SERIAL NO.
X
PRODUCTION MONTH/YEAR X
Panasonic Marketing Middle East & Africa FZE P.O. Box No. 17985, Jebel Ali, Dubai, U.A.E. MADE IN CHINA
R410A
Panasonic
AIR CONDITIONER
OUTDOOR UNIT
Model No: CU-UV18XKF
PHASE 1 VOLTAGE 220-240V\~ FREQUENCY 50Hz
MAXIMUM INPUT (IEC60335) 2300W
COOLING(T1) COOLING(T3) CAPACITY 18000Btu/h 16000Btu/h 4536kcal/h 4032kcal/h 5.28kw 4.69kw CURRENT 6.4A 7.6A POWER INPUT 1512W 1797W EER 11.91(Btu/h/W) 8.90(Btu/h/W)
REFRIGERANT R410A 0.720kg
MWP H.P 4.5 Mpa L.P 1.9 Mpa
IPX4
SERIAL NO.
X
PRODUCTION MONTH/YEAR X
Panasonic Marketing Middle East & Africa FZE P.O. Box No. 1798S, Jebel Ali, Dubai, U.A.E. MADE IN CHINA
R410A


Panasonic
AIR CONDITIONER
OUTDOOR UNIT
Model No: CU-UV24XKF
PHASE 1 VOLTAGE 220-240V\~ FREQUENCY 50Hz
MAXIMUM INPUT (IEC60335) 2900W
COOLING(T1) COOLING(T3) CAPACITY 22000Btu/h 19000Btu/h 5544kcal/h 4788kcal/h 6.45kw 5.57kw CURRENT 8.1A 9.4A POWER INPUT 1816W 2109W EER 12.10(Btu/h/W) 9.01(Btu/h/W)
REFRIGERANT R410A 1.000kg
MWP H.P 4.5 Mpa L.P 1.9 Mpa
IPX4
SERIAL NO.
X
PRODUCTION MONTH/YEAR X
Panasonic Marketing Middle East & Africa FZE P.O. Box No. 17985, Jebel Ali, Dubai, U.A.E. MADE IN CHINA
R410A


Panasonic
AIR CONDITIONER
OUTDOOR UNIT
Model No: CU-UV30XKF
PHASE 1 VOLTAGE 220-240V\~ FREQUENCY 50Hz
MAXIMUM INPUT (IEC60335) 4000W
CAPACITY COOLING(T1) COOLING(T3) 28000Btu/h 24500Btu/h 7056kcal/h 6174kcal/h 8.21kw 7.18kw CURRENT 10.1A 12.0A POWER INPUT 2312W 2762W EER 12.11(Btu/h/W) 8.87(Btu/h/W)
REFRIGERANT R410A 1.500kg
MWP H.P 4.8 Mpa L.P 1.2 Mpa
IPX4
SERIAL NO.
X
PRODUCTION MONTH/YEAR X
Panasonic Marketing Middle East & Africa FZE P.O. Box No. 17985, Jebel Ali, Dubai, U.A.E. MADE IN CHINA
R410A


- Dimension & Weight of units
| Model | CS/CU-UV24XKFCS | CUS/UBMKE0XKF | |||
| Indoor unit | Dimension(W*D*H) | mm | 1010×315×220 | 1010×315×220 | 1186×340×258 |
| Packing (W*D*H) | mm | 1096×390×297 | 1096×390×297 | 1332×437×360 | |
| Net/Gross weight | Kg | 13/16 | 13/16 | 21.5/27 | |
| Outdoor unit | Dimension(W*D*H) | mm | 920×380×699 | 920×380×699 | 978×421×803 |
| Packing (W*D*H) | mm | 949×392×732 | 949×392×732 | 1022×480×835 | |
| Net/Gross weight | Kg | 40.5/44.5 | 45/50 | 54/62 | |
| Model | CS/CU-UV30XKFCS/CU-UV24XKF | ||
| ANNUAL ENERGY CONSUMPTION | 4082.4kwh/year 490 | 8.6kwh/year 6242.4kwh/year |
Accessory List
| Indoor unit | |||||
Indoor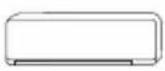 | Owner's manual | Remote control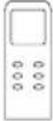 | Remote control holder | Battery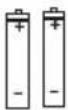 | Indoor and Outdoor Connecting Wiring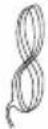 |
| 1 unit | 2 pieces | 1 piece 2 pieces | 1 set1 piece | ||
| Outdoor unit | |||||||
Outdoor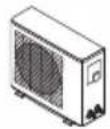 | Connecting Pipe | Installation binder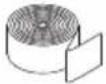 | Drainage Pipe | Insulating bushing[23DC] | 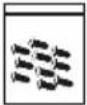 | Sealing MudScrew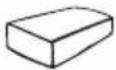 | |
(cooling) | (cooling and heating)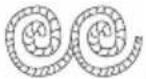 | ||||||
| 1 unit | 1 piece | 2 pieces | 1 piece1 piece2 pieces | 1 piece | 1 piece | ||
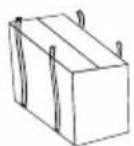
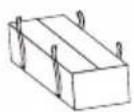
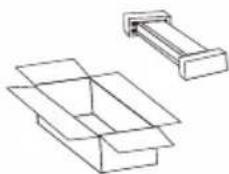
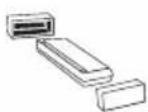
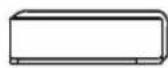
Disassembly Figure
Indoor unit
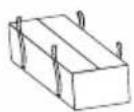
①
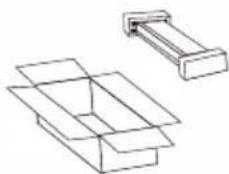
natural_image
Technical line drawing of two mechanical components with no visible text or symbols②
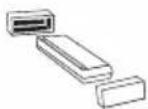
③
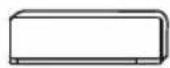
④
Outdoor unit
①
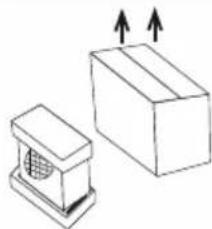
natural_image
Simple line drawing of a mechanical component with two blocks and an attached housing, no text or symbols present.②
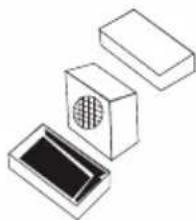
natural_image
Isometric line drawing of three rectangular blocks with internal patterns, no text or symbols present③
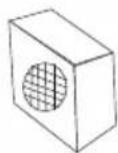
④
* Replacement cord instructions, type Y attachment.
If the supply cord is damaged, it must be replaced by the manufacturer or its service agent or a similarly qualified person in order to avoid a hazard.
عربي
معلومات المستخدم عن كيفية جمع والتخلص من الجهاز القيم والبطاريات المستخدمة
معلومات عن كيفية التخلص من الجهاز في دول لا تنمي لدول الاتحاد الأوروبي
Conversion هذه الرموز في دول الاتحاد الأوروبي ققط. في حال أردت التخلص من هذه المعدات فإنه ي Toyب علك التواصل مع السلطات المحلية أو وكيل الجهاز لمعرفة الطريقة önemli لذلك.
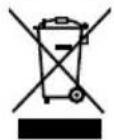
ملحوظة عن رمز البطارية (أمثلة الرمز الأدنى الثاني) :
قد يستخدم هذا الرمز مصحوبا برمز كيمياني. في هذه حالة فإنه يتوافق مع التوجيهات الخاصة بالمادة الكيميائية المعينية.
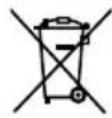
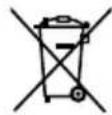
Pb
English
Information for Users on Collection and Disposal of Old Equipment and used Batteries
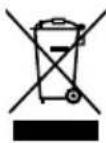
[Information on Disposal in other Countries outside the European Union]
These symbols are only valid in the European Union. If you wish to discard these items, please contact your local authorities or dealer and ask for the correct method of disposal.
Note for the battery symbol (bottom two symbol examples):
This symbol might be used in combination with a chemical symbol. In this case it complies with the requirement set by the Directive for the chemical involved.
Pb
| وحدة داخلية | |||||
داخلية | دليل مستخدم | ريموت[IMAGE] | 二十五ر ريموت | بطاريات[IMAGE] | اسلاك التوصيلالداخلية و الخارجية |
| ervesة 1 | 2 حبة | 1 حبة | 1 حبة | 2 حبة | 1 طقم |
 | |||||||
خارجية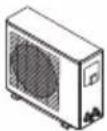 | توصيل الأ nbيب | تثبيت الموئق | انبوب الصرف | جلبة العازلة | مسمار | اغلاق الطين | |
التدفنة | التBERID والتدفنة | ||||||
| 1 حبة | 2 حبة | 1 حبة | 1 حبة | 2 حبة | 1 حبة | 1 شنط | 1 حبة |
وحدة داخلي
①
natural_image
Technical line drawing of two 3D mechanical components with no visible text or symbols②
③
④
وحدة خارجي
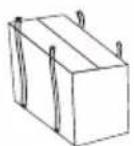
①
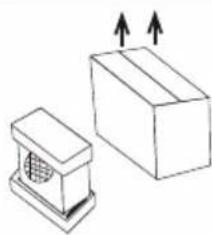
natural_image
Simple line drawing of a box and a mechanical component with upward arrows indicating motion (no text or symbols)②
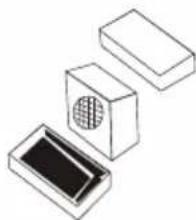
natural_image
Isometric line drawing of three rectangular blocks with internal patterns, no text or symbols present③
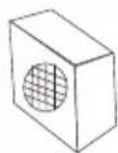
④
* في حال تلف capablefteغذية ramíسي, يجب استب ddاله من قبل الشركة المصنعة أو وكيل الصيانة المعتمد أو شخص بنفس درجة التأهيل و ذلك لتجب خطر الإصابة
في حالة الخطاً، تظهر الشاشة على الوحدة الداخلية رموز الخطا التالية:
| الشاشة | وصف لمتاعب |
| £1 | خطاً في مست Posting درجة حرارة الغرفة الداخلية |
| £2 | خطاً في مست Posting درجة حرارة الأ nbابب الداخلية |
| £3 | خطاً في مست Posting درجة حرارة الأ nbابب الخارجية |
| £4 | تسرب نظام التبريد أو خطؤه |
| £6 | عطل في محرك المروحة الداخلي |
| £7 | خطاً في مست Posting درجة حرارة المحيطة الخارجية |
| £8 | خطاً في الاتصال الداخلي والخارجي |
| £9 | خطاً في مست Posting درجة حرارة التفريع الخارجية |
| £A | خطاً وحدة IPM في الهواء subsequently |
| £B | خطاً في الكشف عن التيارات في الهواء subsequently |
| £C | في الهواء subsequently PCB EEPROM |
| £D | خطاً في محرك المروحة الخارجية |
| £E | خطاً في مست Posting درجة حرارة الشفط الخارجية |
المبادى التوجيهية للตลาด (أوروبية)
يحتوي هذا小微企业 علي المبرد وغيرها من有必要 الخطر المحتملة. عند التخلص من هذا小微企业، يتطلب القانون من الجمع
و中美عاجة الخاصة. لا تخلص من هذا المنتج كما هو نف ayات منزلية أو نف ayات بلدية غير مصنفة.
عند التخلص من هذا الجهاز، لديك-expيرات التالية:
• تخلص من الجهاز في مرفق البلدية الخاصة بجمع الف Viaيات الإلكترونية.
• عند شراء جهاز جديد، سوف يسترد بائع التجزنة الجهاز القيم مجائنا.
• ستسحب الشركة المصنعة الجهاز القيم مجالا'iضا.
• بيع الجهاز لتجار المعادن الخردة المعتمدين.
• التخلص من هذا الجهاز في الغابة أو في محيط طبيعي أخرى يعرض صحتك للخطر وبيضر بالبينة. قد تتسرب
المواد الخطرة إلى المياه الجوفية وتدخل في السلسلة الغذائية.

| عطل | الأسباب المحتملة |
| الجهاز لا يعمل | انقطاع التيار الكهرباني/ تم سحب التوصيل. |
| محرك مروحة الوحدة الداخلية / الخارجية متضرر. | |
| خطأ في قاطع الدائرة المغناطيسية الحRARYritic ASSاغط. | |
| خطأ في جهاز الحماية أو الصمارات. | |
| FKالاتصالات أو التوصيلات المسحوبة. | |
| في بعض الأحيان يتوفف عن العمل لHMاية الجهاز. | |
| الجهد العالي أو أجل من نطاق الجهد. | |
| تشغير وظيفة تشغير المؤقت | |
| لوحة التحكم الإلكترونية المتضررة. | |
| رانحة غريبة | مرشح الهواع القذر. |
| ضجيع мыاه الجارية | عودة تدفق السائل في دوران المبرد. |
| يأتي ضباب غرامة من منذّالهواء | يحدث هذا عندما يсобح الهواع في الغرفة بارذا جداً، على سبيل المثال في أنماط."DEHUMIDIFYING / DRY "أو" COOLING" |
| يمكن سماع ضوضاء غريبة | هذه الضوضاء ناتجة عن توسيع أو تقلص اللوحة Alamامية بسب ال-acetylafats في درجة الحRARYولا تشير إلى وجود مشكلة. |
| تدفق الهواع غير الكافي، سواءكان ساخنّا أو بارذا | إعداد درجة الحRARY غير المناسب. |
| مداخل مكيف الهواع ومن Afخز ه المسدودة. | |
| مرشح الهواع القذر. | |
| تم وضع سرعة المروحة في الحد الأدنى. | |
| مصادر أخرى للحرارة في الغرفة. | |
| لا يوجد مبرد. | |
| الجهاز لا يستجب للأوامر | جهاز التحكم عن بعد LISS قريبا كافيا إلى الوحدة الداخلية. |
| بحاجة إلى استبادال بطاريات جهاز التحكم عن بعد. | |
| العقبات بين جهاز التحكم عن بعد ومستقبل الإشارة في الوحدة الداخلية. | |
| تم إيقاف تشغير الشاشة | تشغير وظيفة العرض. |
| انقطاع التيار الكهرباني. | |
| أوقف مكيف الهواع فوزّا Mozطع التيار الكهرباني في حالة: | اصوات غريبة أثناء التشغير. |
| خطأ في لوحة التحكم الإلكترونية. | |
| خطأ في الصمارات أو المفاتيغ. | |
| رش الماء أو الأشياء داخل الجهاز. | |
| كابلات أو سدادات محمودة. | |
| روانج قوية جداً تأني من الجهاز. | |
| التحذير | • عند التنظيف، يجب إيقاف الجهاز وقطع التيار الكهرباني لأكثر من 5 دقائق.• لا ينبغي تحت أي ظرف من الظروف أن يكون مكيف الهواء مسوخا بال encryption.• السائل المتطابير (مثل الأرق أو الب CZIN) سوف يضر مكيف الهواء، للك استخدم ققط قمشاشا جافا ناعما• أو قمشاشا مبللا مغموسا مع المنظفات المحايدة ل DENظيف مكيف الهواء• انتبه إلى تنظيف شاشة Techسفية بانتظام لتجب تغ Quitة الغبار التي ستؤثر على تأثير شاشة Techسفية• عندما تكون بينة Techشigel مغيرة، ت Ningفي زيادة تردد DENظيف بشكل منسب• بعد إزالة شاشة Techسفية، لا تلمس زعانف الوحدة 달خلية لتجب الخدش. |
| PENظيف الوحدة | 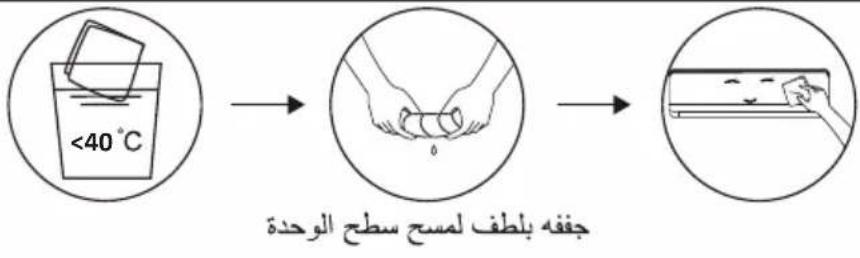 التصيحة: امسح بشكل مكرر للحقاظ على نظافة مكيف الهواء والمظهر الجيد. التصيحة: امسح بشكل مكرر للحقاظ على نظافة مكيف الهواء والمظهر الجيد. |
| PENظيف المرشج | 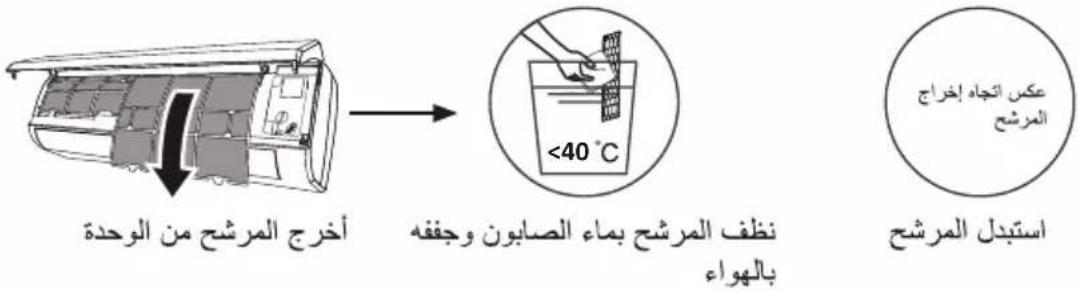 التصيحة: عندما تجد الغبار المتراكم في المرشج، يرجى تنظيف المرشج في الوقت المناسب لضمانالتشغيل النظيف والصحي والفعال داخل مكيف الهواء• عندما لا يكون مكيف الهواء قيد الاستخدام لفردة طويلة، قم بالعمل التالي: أخرج بطاريات جهاز التحكم• عن بعد وافصل التيار الكهرباني من مكيف الهواء• عند بدء الاستخدام بعد إيقاف Techشigel طويل الأجل:• 1. نظف الوحدة وشاهية المرشج;2. تحقق مما إذا كان هناك عقبات في مدخل الهواء ومنzens من الوحدات 달خلية والخارجية;3. تحقق مما إذا كان أنوب الصرف الصحي دون عوائق;4. قم بتركيب بطاريات جهاز التحكم عن بعد وتحفق مما إذا كان التيار موجودًا أم لا. التصيحة: عندما تجد الغبار المتراكم في المرشج، يرجى تنظيف المرشج في الوقت المناسب لضمانالتشغيل النظيف والصحي والفعال داخل مكيف الهواء• عندما لا يكون مكيف الهواء قيد الاستخدام لفردة طويلة، قم بالعمل التالي: أخرج بطاريات جهاز التحكم• عن بعد وافصل التيار الكهرباني من مكيف الهواء• عند بدء الاستخدام بعد إيقاف Techشigel طويل الأجل:• 1. نظف الوحدة وشاهية المرشج;2. تحقق مما إذا كان هناك عقبات في مدخل الهواء ومنzens من الوحدات 달خلية والخارجية;3. تحقق مما إذا كان أنوب الصرف الصحي دون عوائق;4. قم بتركيب بطاريات جهاز التحكم عن بعد وتحفق مما إذا كان التيار موجودًا أم لا. |
| الخدمات والصيانة |
قد تKnسب محAUOLة استخام مكيف الهواع في درجة حرارة تتجاززNLتاق المحدد في بده تشغيل جهاز حماية مكيف الهواع وقد
يفشل تشغيل مكيف الهواء. لذلك، حول استخدام مكيف الهواء في ظروف درجة الحرارة التالية.
تكيف الهواء الثالث:
| الوضع درجة الحرارة | التسخين | التبريد | جاف |
| درجة حرارة الغرفة | 0 درجة منوية ~ 27 درجة منوية | 17 درجة منوية ~ 32 درجة منوية | |
| درجة الحرارة الخارجية | - 7 درجة منوية ~ 24 درجة منوية | 43 درجة منوية مناخ 15 : T1 | |
| 52 درجة منوية مناخ 15 : T3 | |||
تكييف الهواء العاكس:
| الوضع درجة الحرارة | التسعMIN | التبريد | جاف |
| درجة حرارة الغرفة | 0 درجة منوية ~ 27 درجة منوية | 17 درجة منوية ~ 32 درجة منوية | |
| درجة الحرارة الخارجية | - 15 درجة منوية ~ 24 درجة منوية()- 20 درجة منوية ~ 24 درجة منوية | 15 : T1 مناخ تبريد بدرجة حرارة منخفضة: - 15 درجة منوية ~ 50 درجة منوية | |
| 15 : T3 مناخ تبريد بدرجة حرارة منخفضة: - 55 درجة منوية | |||
عند توصيل مصر الطاقة،)!赞成 تشفيل مكيف الهواء بعد إيقاف التشفيل، أو قيم بالleysيل إلى وضع أخر أثناء التشفيل، وسييداً تشغيل جهاز حماية مكيف الهواء. يستألف المكتف عمله بعد 3 دقائق.
① خصائص تشغيل التسخين (تنطبق على مضخة التسخين)
التسخين المسبق:
عند تمكين وظيفة التدفئة، ستتغرق الوحدة الداخلية من دقيقتين إلى 5 دقائق للتدفئة المسبقة،OBعد ذلك سيبدا مكيف الهواء في
التدفنة ويط Puzzle الهواء الدافى.
إزالة الصقيم:
أثناء التدفئة، إنما تتجمد الوحدة الخارجية، سيمكن مكيف الهواء وظيفة إزالة الصقيم التلقنية ل'Eحسين تأثير التدفئة. أثناء إزالة الصبيع، تتوقف المراوحInteriorية والخارجية عن الدوران. Yemen يستألف مكيف الهواء التدفئة تلقانياً بعد الانتهاه من إزالة
الصقيع.
# زر الطوارى:
affتح اللوحة وابحث عن زر الطوارى على صندوق التحكم الإلكتروني عند فشل وحدة التحكم عن بُعد. (اضغط دائمًا على زر
الطوارى بمادة عازلة.
| الحالة accesالية | التشغيل | الرد | ادخل إلى وضع |
| الاستعداد | (emergency) ا Forgط على زر (الطوارئ) مرة واحدة | تصدر إشارة صوتية مرة واحدة ل crudeة وجيزة. | وضع التبريد |
| الاستعداد (لمضخة التدفئة ققط) | (emergency) ا Forgط على زر (الطوارئ) مرتين خلال 3 ثوان | تصدر صوت تنبيه مرتين ل crudeة وجيزة. | وضع التدframe |
| الدوران | (emergency) ا Forgط على زر (الطوارئ) مرة واحدة | فهو يستمر في اصدار صوت تنبيه ل crudeة من الوقت | وضع إيقاف التشغيل |
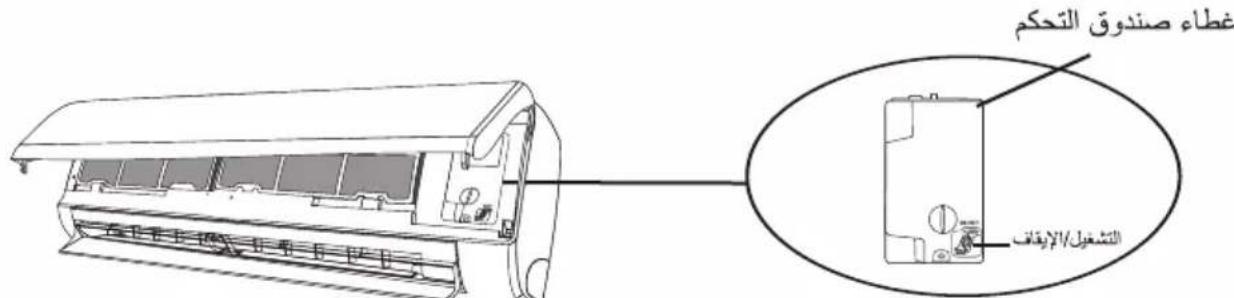
(افتتح لوحة الوحدة الداخلية)
وظيفة الهواء المنESS (-acwidارية)
- قم بتشغيل الوحدة الداخلية، ثم قم بال engrير إلى و + MODE FAN التبريد، ثم اضغط مطلاً على الزر و معً لمدة 3 ثوان لتشيط هذه الوظيفة، وستظهر نتّي على الشاه. قم بذلك مرة أخرى لإلغاء تنشيطه.
- ستعمل هذه الوظيفة على إغلاق المرفرفات الرأسية تلقائيها كما تمнак شعوزًا مريقا بالهواء المنESS.
وظيفة الصحة (-acwidارية)
- قم بتشغيل الوحدة الداخلية岁以下، ثم ا Compact مطولاً على الزر DISPLAY و SLEEP معاً لمدة 3 ثوان لتشغيل هذه الوظيفة، وست typير على شاشمة عرض جهاز التحكم عن بعد. قم.SECE مرة أخرى لإلغاء تنشيطه.
- عند دء وظيفة الصحة، سیتم تنشيط المؤن / البلازما / (وفقا للطرازات) ثاني القطب المؤن / أضواء UVC وتشغيلها.
(-acwidيرية) Gen ( stylistية Paulo)
- قم بتشغيل الوحدة الداخلية أولاً، واضغط مطولاً على الزر L-3 ثوان للتشيط، ثم قم.SEالك مرة أخرى إللغاء MUTE تنشيط هذه الوظيفة.
- تحت هذه الوظيفة، اضغط لوهلة على الزر L3 - L2 - L1 - OF . حدد إيقاف ثم انت typ لثانيتين للخروج منه.
وظيفة التنظيف الذاتي (-acztيرية)
-acختياري 값ط لبعض أجهزة محول مضخة التدفئة. لتشغيل هذه الوظيفة، أوف تشغيل الوحدة الداخلية أولاً، ثم SWING و في الوقت نفسه باتجاه [AC] و SWING الوحدة الداخلية، حتىarseم صوت صافرة، وستظهر LED على شاشة وحدة التحكم عن بُعْد وشاشة
- Tesla HDI. These Words on the World's Aposac International والبكتيريا، إله من الم breachesInterior.
- Testing that the World's Words made 30 words of a country, and to go into an important information. الإعداد المسبق. I’m because the government is also going behind in the United States. الunderlying about an international employment. ستسمح صافرتين عند انتهاها أو إلغهاها. من Capacity أن ي�建ّت بعض الضجيع أثناءعملية الunderlying Honduras، حيث تسوع Deutschland بالاستكية مع الحراية وتنكمش مع الbero دة. نقرح تREVILS. These Words in the World's Government's Ministry of Technology let建築 ميزات معينة لhinها، للاويّة،
| الوحدة الداخلية | درجة الحرارة > 86 درجة فهرنهايت(درجة مئوية)30 |
| الوحدة الخارجية | > 41 درجة فهرنهايت (5 درجات مئوية)30 درجة الحرارة > 86 درجة فهرنهايت(درجة مئوية) |
يَقترح استخدام هذه الوظيفة كل 3 أشهر.
وظيفة التدفة حتى 8 درجات منوية (的可能性)
- اضغط مطلواً على الزر للكثر من 3 ثوان لكي يتم EcO تشيط هذه الوظيفة، وC ^8 ستظهر (46°F) على شاشة عرض جهاز التحكم عن بُعد. قم بنّك مرة أخرى لإلغاء تشيط هذه الوظيفة.
- تبدأ هذه الوظيفة تشغيل وضع التدفئة تلقائيًا عندما تكون درجة حرارة الغرفة أقل من 8 درجات مئوية (46) درجة فهرنهايت، وتعود إلى وضع الاستعداد إذا وصلت درجة الحرارة إلى 9 درجات مئوية (48) درجة فهرنهايت.
- إذا كانت درجة حرارة الغرفة أعلى من 18 درجة مئوية (64) درجة فهرنهايت، فسiquement الجهاز باللغاء هذه الوظيفة телقائيا.
ECO وظيفة
في هذا الوضع، يقوم الجهاز تلقائياً بضبط التشغيل لتوفر الطاقة.
إ Forgط على الزر، سيظهر ECO على الشاشة، وسيتم تشغيل الجهاز في وضع توفير الطاقة. إ Forgط مرة أخرى لإلغاء الأمر. ملاحظة: تتوفر وظيفة توفير الطاقة في كل من وضعي التب Binary والتدفئة.
وظيفة الصامت
MUTE
- اضغط على الزر مUTE تنشيط هذه الوظيفة، وستظهر
على شاشة جهاز التحكم عن بُعد. queم.SEالك مرة أخري إلغاء تنشيط هذه الوظيفة. 2. عند تشغيل وظيفة كتم الصوت، تعرض وحدة التحكم عن بُعد سرعة المروحة التلقائية، وستعمل الوحدة 동اخليية باقل سرعة للمروحة لتشعر بالهدوء. FAN/ TURBO/ SLEEP 3. عند الضغط على زر (المروحة/ السرعة القصوى/ النوم) ، سيتم إلغاء وظيفة كتم الصوت. لا يمكن تنشيط وظيفة كتم الصوت في وضع إزالة الرطوبة.
وظيفة العرض (شاهste العرض الداخلية)
قم بتشغيل/إيقات تشغيل شاشة على LED الشاهية.
DISPLAY
LED إيقاف تشغيل م MSNBC Lightpurple DISPLAY إstructures على الشاشة العرض. اspecificة مرة أخرى لتشغيل شاشة LED
وظيفة النوم
الإعداد المスペق لبرنامج التشفيل التلقاني.
SLEEP
-store购物 على الزر لتشيط وظيفة النوم، وسيظهر على شاشة جهاز التحكم عن بعد. -store购物 مرة أخرى لإلغاء هذه الوظيفة.
بعد 10 ساعات من التشغيل في وضع النوم، سي retrieval مكيف الهواء إلى وضع الإعداد Lapainق.
وظيفة مقاومة العفن (-ac Mitsubishi)
ANTI-MILDEW
ANTI-MILDEW لتشيط وظيفة مقاومة التoseconds، فتظهر على شاشة العرض. قم.SEك مرة أخري لالغاء تتشيط هذه الوظيفة. BEOD تشغير وضع / (البتريد/التجفيف) للأكثر من 30 دقيقة يمكنك تشغير هده الوظيفة، حيث تقوم الوحدة بن遥控 الهواع لمدة 15 دقيقة تقريبا لتجفيف الأجزاء 동اخلية لتجب تكون العفي، ثم تقوم بايقات تشغير الوحدة.
ملاحظة: ت Winning وظيفية م Wilsonة التكن في وضع التجفيف/البريد فقط.
وظيفة أنا أشعر (-acztيارية)
I FEEL
IFEEL تنشيط الوظيفة، وستظهر على شاشة عرض جهاز التحكم عن بُعد. قم.SEKL مرة أخرى لإلغاء تنشيط هذه الوظيفة.
نتيّح هذه الوظيفة لجهاز التحكم عن بعد قياس درجة الحرارة الحالية في المكان وإرسال هذه الإشارة إلى مكيف الهواء لتحسين درجة الحرارة المحيطة بك وضمان الراحة. سيتم Buenos التنشيط تلقائيا بعد ساعتين.
وظيفة التارجح
SWING
SWING <>
- ا Compact على زر (التارج) لتشيط فتحة SWING
التهوية،
1.1 1.1 لتشيط المرفرات الأفقية للتأرج من SWING
أعلى إلى أسفل، سوف تظهر على شاشة عرض
جهاز التحكم عن بعد.
اضغط مرة أخرى لإيقاف حركة التارجح عند الزAOية
الحالية.
1.2 1.2 على تنشيط عاكسات الهواء الرأسية SWING <> اضغط
لل Tarajع من يسار إلى اليمين، سوف تظهر على
شاهة عرض جهاز التحكم عن بعد.
اضغط مرة أخرى لإيقاف حركة التارجح عند الزارية
الحالية.
- إذا تم وضع عاكسات الهواء الرأسية يدوياً، والتي تčeّ أسفل
المرفرفت، فإنها تتبيع تحريك تدفق الهواء مباشرة إلى
اليمين أو اليسار.
- بالنسبة إلى بعض طرازات محولات التدفئة، اضغط على
زر التارجح الأفقي والتأرجح الرأسي معا في الوقتHOUSE،
لتنشيط وظيفة التنظيف الذاتي.
يجب اجراء هذا الضبط عندما يكون الجهاز متوفقاً عن
التشغيل.
لا تضبط المرفرقات يدوياً plunged، فalcي يؤدي ذلك إلى
إتلاف الأجهزة الميكانيكية الحسامة!
لا تضع اpresابعك أو ع Pizza أو أي أشیاء أخرى في فتحات
تهوية مدخل الهواء أو مخرج الهواء. قد يتسبّ هذا
التلامس غير المقصود بالأجزاء الداخلية بحدود ثلف أو
إصابة غير متوقعة.
وظيفة السرعة القصوى
TURBO

,TURBO letstäط وظيفة السرعة القصوى، اضغط على الزر
وستظهر على الشاشة.
اضغط مرة أخرى لإلغاء هذه الوظيفة.
في وضع التبريد/الحرارة، عندما تحدد ميزة السرعة القصوى،
يتحول الجهاز إلى وضع التبريد السريع أو التسخين السريع،
وتشغيل أعلى سرعة للمروحة لنفخ تيار هواء قوي.
وظيفة الموقت ----{-}- مؤقت تشغيل المكيف
لتشغيل الجهاز تلقانياً.
TIMER
عند إيقاف تشفيل الوحدة، يمكنك ضبط
مُزْقَت تُشْغِيل المكِيف.
ل SXط و قت التشغيل التلقاني كما هو موضح أدناه:
- اضغط على زر (المؤقت) لأول مرة لإعداد مفتاح TIMER
التشغيل، وسيظهر Ⓤ [60h] على الشاشة البعيدة وikelمع.
- اضغط على زر ∧ أو ∨ ل SXBPالوقت في تشغيل المؤقت
المطلوب. في كل مرة تضغط فيها على هذا الزر، يزيد أو
بنقص الوقت بمقدار نصف ساعة بين 0 و 10 ساعات
وبواحدة بين 10 و 24 ساعة.
-
ا Forgط على زر (الم poukt) مرة ثانية للتأكيد. TIMER
-
بعد إعداد تشغيل المؤقت، إعداد الوضع المطلوب (الtbريد)
التسخين / التلقائي / المروحة / التجفيف) ، بال Forgط على زر
(الوضع). و إعداد سرعة المروحة المطلوبة باللغط MODE
(المرERICA). واضغط علي ∨ أو ∨ لإعداد على زر
درجة حرارة التشفيل المطلوبة.
(المؤقت)Timer قم بالغائها عن طريق الضغط على زر
وظيفة الموّقت ----{-}- مؤّقت إيقاف تشغيل المكيف
لإيقاف تشغيل الجهاز تلقانياً.
TIMER
عندما تكون الوحدة قيد التشغيل، يمكن ضبط مؤقت إيقاف
تشغيل المكيف.
لضبط وقت إيقاف التشفيل التلقاني، كما هو موضح أدناه:
-
تأكد من تشغيل الجهاز.
-
ا+\$غط على الزر في المرة الأولى لضبط إيقاف TIMER
التشغيل.
اضغط على √ أو ∧ اضبط الوقت المرغوب.
- ا Compact على الزر في المرة الثانية للتأكيد.
TIMER قم باللغانه بال ldغط على الزر
ملاحظة: يجب تشغيل جميع البرجمة في غضون 5 ثوان، إلا
فسيتم إلىغاء الإعداد.
وضع التدفة
تسمح وظيفة التدفئة لمكيف الهواء بتدفئة الغرفة.
HEAT
MODE letتشيط وظيفة التدفئة (HEAT) ، ا Compact على الزر حتي يظهر الرمز ※ على الشاشة. باستخدام الزر ∨ أو ∧ اضبط درجة حرارة أعلى من درجة حرارة الغرفة.
عند تشغيل التدفئة، يمكن للجهاز تش stylist دورة إزالة الجليد تلقانيا، wieي ضرورية ل-connectedيف الصقيع من على المكäft لاستعادة وظيفة تبديل الحرارة. Yemen ستمر هذا الإجراء عادة لمدة تتراوح من دقيّتين إلى 10 دقائق. أثناء إزالة الصقيع، تنوف مروحة الوحدة الداخلية عن التشغيل. بعد إزالة الصقيع، يتم استثماف التشغيل إلى)
وضع التدفئة تلقانيا.
(لسوق-amريكا الشمالية) ECO (ترشيد) إذا لزم الأمر، يمكنك الضغط على زر (استهلاك الوقود) 10 مرات في غضون 8 ثوان في
وضع التسخين لبده تشغيل إزالة الصقيع القسري.
سيعمل المكيف على إزالة الجليدHWARAJ بسرعة أكثر
(المرokoحة) وظيفة سرعة المروحة (زر)
قَم بُتغيير تُشغيل سرعة المروحة.
FAN لضبط سرعة مروحة التشغيل، ويمكن ضبطها على السرعة التقنية / كتم الصوت / منخفضة / نصف منخفضة / متوسطة / نصف عالية / عالية / السرعة القصوى وبشكل دانري.
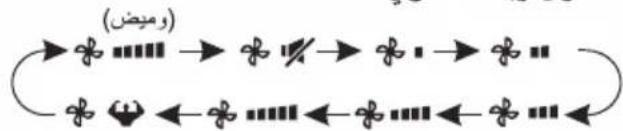
flowchart
graph LR
    A["→"] --> B["→"]
    B --> C["→"]
    C --> D["→"]
    D --> E["→"]
    E --> F["→"]
    F --> G["→"]
    G --> H["→"]
    H --> I["→"]
    I --> J["→"]
    J --> K["→"]
    K --> L["→"]
    L --> M["→"]
    M --> N["→"]
    N --> O["→"]
    O --> P["→"]
    P --> Q["→"]
    Q --> R["→"]
    R --> S["→"]
    S --> T["→"]
    T --> U["→"]
    U --> V["→"]
    V --> W["→"]
    W --> X["→"]
    X --> Y["→"]
    Y --> Z["→"]
وظيفة ققل الأطفال
- اضغط مطلًا وعلى الزر و MODE letتشيط هذه الوظيفة،而非لغاء تنشيط هذه الوظيفة قم بها مرة أخرى.
- ضمن هذه الوظيفة، لن يتم تنشيط أي زر.
وضع التبريد
تسمح وظيفة التبريد لمكيف الهواء بتبريد الغرفة وتقليل رطوبة الهواء في الوقت نفسه.
COOL
لتشيط وظيفة التبريد، ا+\$غط على الزر Hyضير الرمز على الشاشة. باستخدام الزر √ أو √ ا+\$بط درجة الحرارة أقل من درجة حرارة الغرفة.
وضع المروحة (Lyss زر) (المروحة)
وضع المروحة، التهوية بالهواء فقط.
FAN
✿ Hindi MODE : 关ضط نظهر ل SXÔD ب رمّد مزّر، لضبّط وضع المروحة،攪غط على شاشة العرض.
وضع إزالة الرطوبة
تقلل هذه الوظيفة من رطوبة الهواء لجعل الغرفة أكثر راحة.
DRY
لضبط وضع إزالة الروボة، اضغط MODE誌ي يظهر ه٥٥ على شاشة العرض. تم تنشيط الإعداد المسبق للوظيفة التلقائية.
الوضع تلقاني
الوضع teleczاني.
AUTO
لضبط وضع التلقاني، اضغط Ⓞ MODE orthي تظهر على شاشة العرض. في الوضع التلقاني، يتم ضبط وضع شغل تلقانيا وفقا لدرجة حرارة الغرفة.
استبideal الطاريات
قم بازالة لوحة غطاءprobability من الجزء الخلفي من جهاز التحكم عن بُعد، عن طريق تحريكها في اتجاه السهم. قم burdenskiبprobability وفقاً للاتجاه (+ -) الموضح على جهاز التحكم عن بعد. أعد تركيب غطاءprobability عن طريق تحريكه
إلى مkanه.
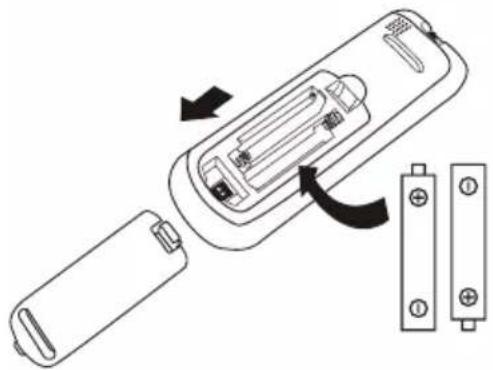
natural_image
Diagram of a remote control device showing battery, internal components, and external contacts (no text or labels)(1.5) LRO3 AAA استخدم قطعتين من بطاريات (فولت)

لا*tستخدم بطاريات قابلة لإعادة الشحن.
استبديل البطاريات القيمة باخرى جديدة من نفس النوع عندما تсобح غير
قادرا على قراءة الشاشة.
لا ت<tخلص من البطاريات كنفايات بلدية غير مصنفة. من الضروري جمع هذه
النفايات بشكل منفصل ومعالجتها بشكل خاص.
بالنسبة إلى بعض طرازات وحدة التحكم عن بُعد، افتح غطاء البطارية،
بعدها يمكنك رؤية المفتاح اليدوي في الأسفل، ثم يمكنك اختيار التبريد
فقط أو مضخة التدفئة، وشغله كما هو موضح أدناء.

| DIP | الوظيفة: |
| درجة الحرارة | يتم ضبط الشاشة بالدرجة المنوية. |
| درجة فهرنهايت | يتم ضبط الشاشة بدرجة فهرنهايت. |
| بارد | يتم ضبط شاشة العرض في و请问 التبريد 값ط |
| dafى | يتم ضبط شاشة العرض في و请问 التبريد والتدفنة |
natural_image
Line drawing of a remote control device with internal components and an inset showing two labeled slots (no text or symbols present)ملاحظة:
- وجَهْ جهاز التحكم عن بعد نحو مكيف الهواء.
2.تحفق من عدم وجود أي اجسام أو عوائق بين وحدة التحكم عن بُعد ومستقبل الإشارة في الوحدة الداخلية.
-
لا تترك جهاز التحكم عن بعد معرّض لأشعة الشمس المباشرة.
-
احتفظ بجهاز التحكم عن نُعد على مسافة لا تقل عن 1 متر من التلفاز أو الأجنبية الكهربائية الأخرى.
| الرقم | الزر | الوظيفة |
| 1 | ➀ | لتشغيل/إいかف تشغيل مكيف الهواء. |
| 2 | ^ | ل Aliض درجة الحراية، أو ساعات ض tight المؤقت. |
| 3 | ∨ | لزيادة درجة الحراية، أو ساعات ض tight المؤقت. |
| 4 | MODE | laختيار وضع تشغيل (telقاني، تبريد، إزالة ERPطوبة، مروحة، تدframeة). |
| 5 | ECO | لتشغيل/الغاء تشغيل وظيفة توفير الطاقة. |
| (товير الطاقة)TURBO | ||
| 6 | TURBO | لتشغيل/الغاء تشغيل وظيفة توفير الطاقة. |
| 7 | FAN | لREADY سرعة المروحة (telقاني/منخفض/mتوسط/مرتفع). |
| 8 | TIMER | لتشغيل/إいかف تشغيل ض tight وقت المؤقت. |
| 9 | SLEEP | لتشغيل/إいかف تشغيل وظيفة النوم. |
| 10 | DISPLAY | LETSHGIL/إいかف تشغيل شاشة |
| 11 | SWING ◊ | إいかف أو بده حركة فتحة التهوية الأفقية أو ض tight تدفق الهواء بالاتجاه المRGBوب لاعلى/الأسفل. |
| 12 | SWING <> | إいかف حركة فتحة التهوية الأفقية أو بده تشغيلها أو ض tight تدفقالهواء بالاتجاه المRGBوب الأISR/الأيمن. |
| 13 | I FEEL | لتشغيل/إいかف تشغيل وظيفة أنا أ COST. |
| 14 | MUTE | لتشغيل/إいかف تشغيل وظيفة كتم الصوت. |
| (GEN م (((وقيا للطرازات) | ||
| 15 | ANTI-MILDEW | لتشغيل/إいかف تشغيل وظيفة مقارمة التOPEN. |
| 16 | MODE + TIMER | لتشغيل/الغاء تشغيل وظيفة ققل الأ Specificال. |
| 17 | SWING ◊+SWING <> | لتشغيل/الغاء تشغيل وظيفة التنظيف الذاتي (وقيا للطرازات). |
| 18 | FAN + MUTE | لتشغيل/الغاء تشغيل وظيفة الهواء المنESS (حسب الطازات). |
| 19 | SLEEP + DISPLAY | لتشغيل/الغاء teenship وظيفة الصحة (وقيا للطرازات). |
قد تختلاف الشاشة وبعض وظانف جهاز التحكم عن بعد وفقاً للطراز.
أ! قد يختلف شكل وموضع الأزرار والم (^مشرات وفقا للطراز، ولكن وظيفتها هي نفسها.
يصدر جهاز الاستقبال صوت تأكیدي بعد كل ضغطة كدليل على استقبال الاشارة.
| الرقم | الرموز | المعنى |
| 1 | Yeشر البطارية | |
| 2 | الوضع teleczاني | |
| 3 | وضع التبريد | |
| 4 | وضع إزالة ERPوبة | |
| 5 | وضع المروحة ققط | |
| 6 | وضع التدفئة | |
| 7 | وضع توفير الطاقة | |
| 8 | الموقت | |
| 9 | 8.8°E | Yeشر درجة الحرارة |
| 10 | سرعة المروحة:الтелczانية/بطينة/ IOPS/ متوسطة/ IOPS/ عالية/ عالية | |
| 11 | وظيفة كتم الصوت | |
| 12 | وظيفة السرعة القصوى | |
| 13 | التارجح teleczاني لاعلى وأسفل | |
| 14 | التارجح teleczاني إلى يسCAR-اليمين | |
| 15 | وظيفة النوم | |
| 16 | وظيفة الصحة | |
| 17 | وظيفة arena أشعر | |
| 18 | Yeشر الإشارة | |
| 19 | هواء منعش | |
| 20 | ققل الأطفال | |
| 21 | تشغير/إيقاف تشغير شاشة العرض | |
| 22 | (مقارمة العكن) ANTI-MILDEW |
التشغيل بعد حدوث توقف مفاجى، وظيفة إعادة التشغيل التلقاني
وظيفة التشفيل التلقاني
الجهاز مُعَدَّ من قبل المصنع لتنفَيذ وظيفية إجادة تشغيل التلقاني. يقوم مكون جزئي في الجهاز بتدكر قيم الض tight أثناء عمل الجهاز، وفي حالة انقطاع التيار الكهربائي، يسترجع هذا المكون تلك القيم. عند استعادة التيار الكهربائي، تقويم الوحدة بععادة تشغيل أو TOMATIKÍKAً مع استعادة جميع الأوضاع المحتفظ بها بفضل وظيفية الذاكرة.
"AUTO-RESTART إعادة التشغيل الтелقاني، يتم اtbاع الخطوات التالية:
- افصل التيار الكهربائي عن جهاز التبريد وأنزع كابل الطاقة من القابس.
- ا Forgط زر الطوارى أثناء إعادة توصيل كابل الطاقة إلى القابس.
- استمر في ضغط زر الطوارى لمدة تزيد عن ١٠ ئواني إلى أن تم سمع أربع صافرات قصيرة صادرة من الوحدة. عندنذ يكون قد إلغاء تف girls وظيفة "إبعادة تشغيلagraي"
• لإعادة تنشيط وظيفية "إعادة التشفيل التقاني"، اtbع نفس الخطوات السابقة إلى أن تستمع إلى ثلاث صافرات قصيرة صادرة من الوحدة.
EMERGENNCY FUNCTION وظيفة "التشغيل بعد حدوث توقف مفاجى"
في حالة ف-led عمل وحدة التحكم عن بعد أو عند الحاجة إلى القيام بأعمال صيانة للجهاز، اtbع الخطوات التالية: affتح الغطاء الأمامي وأرفعه إلى على للوصول إلى زر الطوارى.
-
سوف تؤدي ضغطة واحدة على زر الطوارى (صافرة واحدة) إلى وضع الجهاز اجبارية في وضع "تبريد" COOLING
-
سوف ي Bü Dü ضغطتين على زر الطواری في خلال ٣ ثوانی (صافرّتین) إلى وضع الجهاز إجبارياً في وضع "تدفة" HEATING
-
لإي Microwave تشغيل الوحدة، يتم الضغط على الزر مرة أخرى (صافرة واحدة طويلة).
-
بعد ٣٠Dec Quantity من التشغير الإجباري، سوف يبدأ جهاز التبريد في العمل تلقانياً في وضع تبريد في درجة حرارة ٢٣م. مع دوران المروحة بسرعة أوтомاتيكية. * تم وصف وظيفة "FEEL" في صفحة ١٥.
قد ي Clubs PKI وضع زر الطواي باخترالهان، ولkin الوظيفة تبقي كما هي.

ملحوظة: الضغط الخارجية الساكن لمضخات الحرارة = صفر باskال لكافة الطرازات.
| الرقم | LED | الوظategic |
| 1 |  | مۇشر رەوز المۇقت ودرجة الحراリア والأخطاء. |
| 2 |  | يضى ء أثناء تشغيل المۇقت. |
| 3 |  | وStrong النوم. |
| 4 |  | الرمز يظهر عند تشغيل الوحدة ويعنتفي عند إيقف تشغيل الوحدة. |
| 5 | [2TZK] | يظهر الرمز عند التشغيل. |
قد يختلاف shockل وموضع المفاتيject والالمؤشرات وفقاً للطراز، ولكن وظيفتها هي نفsea.

| الوحدة الداخلية | |
| الوصف | الرقم |
| اللوحة autocمية | ١ |
| مرشح الهواه | ٢ |
| مرشح هواه اختياري (إن تم تركيبه) | ٣ |
| LED مؤشر | ٤ |
| مستقبل إشرارة | ٥ |
| غطاء للحاجز الطرفي | ٦ |
| مOLD أPythonي (إن تم تركيبه) | ٧ |
| ريش هواه | ٨ |
| زر الطواري | ٩ |
| tightقة تقييم الوحدة الداخلية (مكانها اختياري) | ١٠ |
| من Expected اتجاه تدفق الهواه | ١١ |
| جهاز التحكم عن بعد | ١٢ |
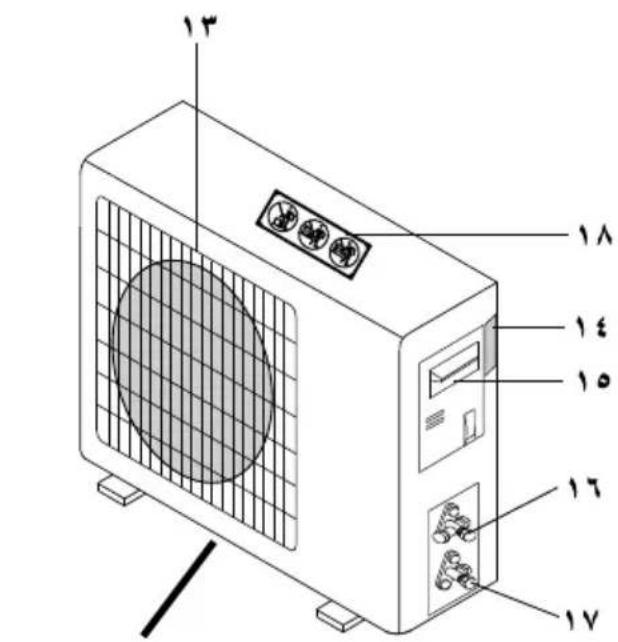
الوحدة الخارجية
| الوحدة الخارجية | |
| الوصف | الرقم |
| شiekة منذ الهواء | ١٣ |
| بطاقة تقييم الوحدة الخارجية | ١٤ |
| غطاء للحاجز الطرفي | ١٥ |
| صمام غاز | ١٦ |
| صمام للساتل | ١٧ |
| بطاقة تحذير (لا تخطو بقدمك على الجهاز) | ١٨ |
ملحوظة: الأشكال Satisfaction ما هي إلاṅشكل بيانى
مبسط للجهاز وقد لا تطابق مع شكل
الوحدات التي شرا Uzbekها.

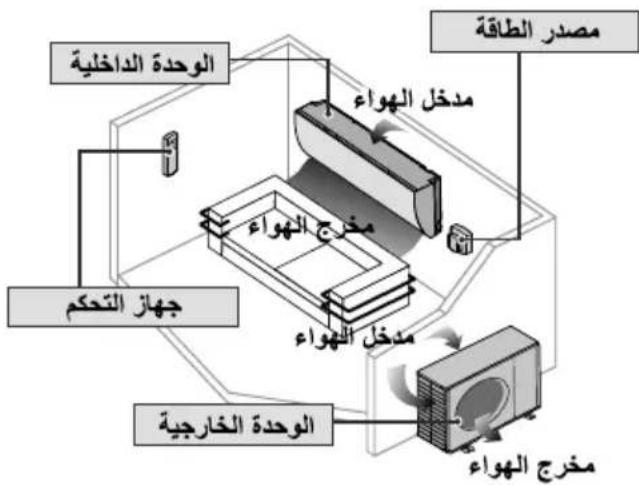
الوحدة الداخلية والوحدة الخارجية
لا تقم بغسل الوحدة الداخلية بالماء أو البنتزين أو المادة المرققة (الwid Niger) أو ال Bourderة المطهرة و ذلك لتجنب حدوث تأكل أو صداً للجهاز.

إل تستخدم الجهاز للحقاظ على معدات دقيقة أو أطعمة أو حيوانك أو نباتات أو اعمال قنية أو أي اغراض أخرى. قد يسبب ذلك تدهور جودة الجهاز... إلى أخرى.
لا تقم باسخدام أي معدات قابلة للإشتعال أمام منড خروج الهواء، وذلك لتجب حدوث هریق.
لا تعرض landingات أو الحيوانات المنزلية للهواء مباشرة لتجنب حدوث إصابة...إلى أخرى.

لا تلمس ريشة الأولومنيوم الحادة، الأجزاء الحادة قد تسب الإصدابة.
لا تقم بتشغيل الوحدة الداخلية أثناء تشميع الأرضية. بعد التشmitع، قيم بتهوية Bourفة جيدا قيل تشغيل الجهاز.
لا تشف الجهاز فيORKاكن بها زويت أو اborneة لتجنب تلف الجهاز.
لا تقم بتفكيك الجهاز بغرض التنظيف لتجب الإصابة.
لا تقم بالوقف على م Expected غير ثابت عند تنظيف الجهاز وذلك لتجب الاصابة.
لا تضع هرية أو وعاء ماء على الجهاز. قد تدخل المياه للجهاز و intertwined ذلك في تحلل المادة العازلة. قد يسب ذلك صدمة كهربائية.
لا ت Connectivity-Lower, أو النافدة لوقت-Optique àنتاءعملية التبريد الجاف.
امع تسرب المياء بتأكد أن أنوب التصريف يكون: - متصل جيدا،
- يبقي بعيدا عن المزاريب والحاويات، أو - ليس مغもりا بالمياء
يجبthéروية Quitérفة باتنظام بعد فترة طويلة من الإستخدام أو الإستخدام مع معدات قابلة للإنشتال.
يجب أن نتاكد بعد قترة wpويلة من الإستخدام أن حامل التركيب في حالة جيدة حتى تتجنب سقوط الجهاز.

التحم عن بعد
لا تستخدم بطاريات Ni-Cd carbابلة لاعادة الشحن، قد يسبب هذا النوع من البطاريات تلف جهاز التحكم عن يبعد.

ل launching تلف جهاز التحكم عن بعد:
• قم إIZالة البطاريات في حالة عدم استخدام الجهاز لفترة طويلة.
• قم ب إدخال بطاريات جديدة من نفس التوع بنفس اتجاء الأقطاب المقرر.

مصدر الطاقة
لا تفطع التيار عن طريق سحب الملك وذلك لتجب حدوش صدمة کهربائية.

اصل سلك الجهاز ي iseصر الكهرباء المAlphaش دون أي محول مشترك. في حال استحالة ذلك، فإنه من المحبذ استخدام الوصلة الموافق عليه مثل: محول الكهرباء و القابس.

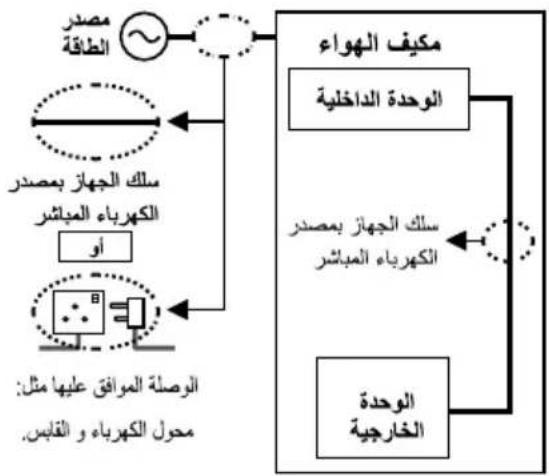
flowchart
graph TD
    A["الإستعمال"] --> B["الإستعمال"]
    B --> C["الإستعمال"]
    C --> D["الإستعمال"]
    D --> E["الإستعمال"]
    E --> F["الإستعمال"]
    F --> G["الإستعمال"]
    G --> H["الإستعمال"]
    H --> I["الإستعمال"]
    I --> J["الإستعمال"]
    J --> K["الإستعمال"]
    K --> L["الإستعمال"]
    L --> M["الإستعمال"]
    M --> N["الإستعمال"]
    N --> O["الإستعمال"]
    O --> P["الإستعمال"]
    P --> Q["الإستعمال"]
    Q --> R["الإستعمال"]
    R --> S["الإستعمال"]
    S --> T["الإستعمال"]
    T --> U["الإستعمال"]
    U --> V["الإستعمال"]
    V --> W["الإستعمال"]
    W --> X["الإستعمال"]
    X --> Y["الإستعمال"]
    Y --> Z["الإستعمال"]
إذا تعرض سلك الطاقة لل Profiles، يجب أن يتم استداله من قبل الشركة المصنعة أو الوكيل المعتمد أو شخص ذو كفاعة مقالة لم Honduras� لتجب الخطر.
ين扭曲 بشدة بتركيب الجهاز مع قاطع الدورة نو التسرب الأرضي (ELCB) أو مع جهاز التيار الفرقى أو القاطع التفاضلي (RCD) وذلك لتجنب الصدمات الكهربائية أو انداع حريق.
لمع ارتفاع درجة حرارة الجهاز أو اندلاع حريق أو الصندات الكهربائية: • أخخل قابس الكهراء بطرية سليمة. • يجب أن يتم مسع التراب من على القابس بصورة دورية بقماش جاف.
في حال حدownt أي أمر غير طبيعي أو فثل قم بفصل قابس الطاقة أو اطفيء الجهاز و قاطع الدائرة الكهربية.
أمتلة على الأ Motors الغير عادية (خطر الدخان/الحريق/الصدمة الكهربائية): • تعشر قاطع الدورة الكهربية ELCB باستمرار.
• ملاحظة رائحة اشتعال.
• ملاحظة ضوضاء أو اhetتاز غير طبيعي للجهاز.
• تسرب المياء من الوحدة الداخلية.
• سخOUNة قابس الكهرباء أو سلك الطاقة.
• عدم السطرة على سرعة المروحة.
• ت Winning الوحدة عن العمل فورا حتى في حال ضبطها على وضع التشغيل.
• عدم توقف المروحة حتى عند اطفاء الجهاز.
تو اصل مع الوكيل فورا للصيانة.
يجب وXPعههاز علی الأرط لتنب انداع خریق أو حدوب صدمة کهرباتية.

تجني حدownt صدمة كهرباتية عن طريق اطفاء مصر الطاقة و سحب القابس:
- قبل التنظيف أو الصيلة،
- في حال عدم الاستعمال للفرة طويلة، أو - في حالات البرق الشديدة بصورة غير طبيعية.


تحذير

الوحدة الداخلية و الوحدة الخارجية
ليس من المagtرض أن يستخدم هذا但他از من قبل الأشخاص (و Agricultural) الذين عاتون من انخفاض في قدرatheم الجسدية أو الحسية أو العقنية، أو ممن تنقصهم الخبرة والمعرفة الكافية. ويمكن لم استخدام但他از في حال håظوا بالإشراف المناسب و التعليمات الخاصة بالاستخدام من قبل Riال Shiخص المسوّل عن سلامthem. ويجب أن يتم مراقبة الأطفال جيدا حتى لا يعبثوا بال给他از.
纪录اء قم باستشاره الموزع المعتمد للジョاز أو أخصائي ل-connected الاجزاء الداخلية واصلاح وتركيب الوحدة وفي عملية نقلهاound إ Goalدة التركيب. التrekيب و التعامل الغير مناسب مع الجهاز ق يبدي لعملية تسريب أو حندوت صندمة كهربائية أو يبدي ل Conversion حريق.
تأ DKد من الموزع المعتمد للجهاز أو Riالخص المختص عند استخدام أي نوع محدد من أنواع التبريد. استخدام نوع مختلف من أنواع التبريد غير النوع المحدد قد يؤدي إلى تلف المنتج وانفجاره أو الإipsابة إلى أخرى.
لا تقوم بتركيب الجهاز في جو قابل للاشتعال أو الان negار. الفشل في فعل ذلك قد يؤدي لنشوب حريق.


لا تدخل اpresابك أو أي أجسام أخرى داخل أي من الوحدين الداخلية والخارجية من المكيف، Femاءازاء الدورة قد تكون سببا في إpresابك.
لا تلملا الوحدة الخارجية أثناء حدought البرقlsen يؤدي ذلك لصدمة كهربائية. لا تعرض نFKSL للهواء البارد بطرية مباشرة لمدة طويلة و ذلك لتنجب البرودة الزاندة.

لا تجنس أو تخطو على الجهاز فقد تسقط عن طريق الخطاً.
جهاز التحكم عن بعد

ل تسمح للر:string والأطقال الصغير بالعب بجهاز التحكم عن بعد، وذلك لمع ابلاعهم الطارات عن طريق excerpt.
محول الطاقة


لا تستخدم ملك معدل أو سلك مشترك أو للك للتمديد أو سلك غير محدد و ذلك التقيل من ارتفاع درجة حرارة الجهاز و منع حدوث حريق.

لممن ارتفاع حرارة الجهاز أو حدوث حريق أو التعرض لصدمة كهربائية: • لا تستخدم نفس المحول الكربائي الذي يمد المكيف بالطاقة مع جهاز أخرى.
• لا تستخدم الجهاز إذا كانت يدك مبيلة.
• لا تبالغ في ثني سلك المحول للطاقة.
• لا تدخل أو تسبب قابس الطاقة في حال أردت التعامل مع الجهاز أو إيقاقه.
لمنغ حدownt أي إ*pääات للك أو لغيرك أو أي دمار في الممتلكات، من فضلك أذ geen للاتي: أي خطأ في التشغيل ناتج عن فشل في اtbاع التعليمات الآتية قد يسب الأذي أو الدار الذي قد يبلغ من الخطورة كما هو موضع في أدناه:
| تحذر هذه العلامة من الموت أو التعرض Insertاية خطيرة. | (تحذير)  |
| تحذر هذه العلامة من الموت أو حدوي دمار للمعتلكات. | (احترس)  |
تم تصنيف التعليمات التي سيتم اtbاعها كالاتي:
هذا الرمز يعني أنه يمنع القيام بفعل معين.

هذه الرموز تعني أن القيام بسلوكيات معينة إجباري.


flowchart
graph TD
    A["الوحدة信息公开"] --> B["جهاز التحكم"]
    B --> C["الوحدة信息公开"]
    C --> D["مخرج الهواع"]
    D --> E["مioresج الهواع"]
    E --> F["الوحدة الحرفية"]
    F --> G["مصدر الطاقة"]
    G --> H["مخرج الهواع"]
    H --> I["مioresج الهواع"]
    I --> J["مioresج الهواع"]
    J --> K["مioresج الهواع"]
    K --> L["مioresج الهواع"]
    L --> M["مioresج الهواع"]
    M --> N["مioresج الهواع"]
    N --> O["مioresج الهواع"]
    O --> P["مioresج الهواع"]
    P --> Q["مioresج الهواع"]
    Q --> R["مioresج الهواع"]
    R --> S["مioresج الهواع"]
    S --> T["مioresج الهواع"]
    T --> U["مioresج الهواع"]
    U --> V["مioresج الهواع"]
عربي
الديل السريع
| إدخال البطاريات١ قم بسبح الغطاء الخلفي لجهاز التحكم عن بعد R03 ١ أدخل بطاريات من نوع AAA أو من نوع (يمكن استخدامها لمدة عام واحد) قم ياغلاق الغطاء | 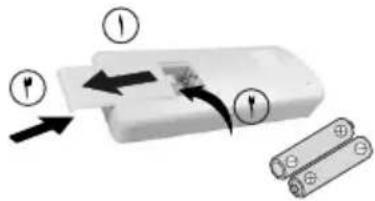 |
| عملية التشفيل الأساسية٢ قم باختياردرجة المطلوبة:٠cdot نطاق الاختيار:من ١٦ درجة سيليزية إلى ٢٨ درجة سيليزية.٣ تشفيل الوحدة فيDiscountات درجة الحرارة الموصى بها:من شأنه أن يفر الطاقة:من ٢٦ درجة سيليزية إلى ٢٨ درجة سيليزية.٤ استخدم جهاز التحكم عن بعد فيDiscount ٨Amتار من :مستقبل إشارة الجهاز للوحدة الداخلية. | 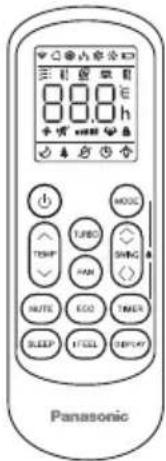 ١٠١ ١٠١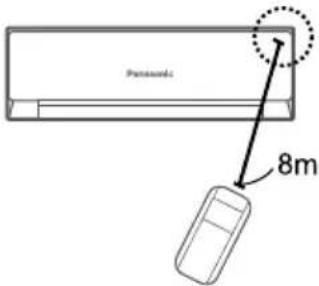 |
| الرسومات الابضاحية في هذا الكتب موجودة بغرض السرح فقط و يمكن أن تcontinental عن الوحدة proficiency.٥ هذه الرسمات خاضعة لل tangديل بدون سابق إنذار بغرض إضفاء تحسينات في المستقبل. |
عربي
فهرس المحتويات:
تклиمات الأمن .....
9-٤ دليل التشفيل
تعليمات التركيب 10-1.
17 ____صيانة
معلومات.... ظهر الغلاف الخلفي
ملحقات:
• جهاز تحكم عن بعد
R03 · زوج بطاريات من نوع AAA أو
Panasonic®
Operating Instructions
Air Conditioner
natural_image
Front view of a Panasonic air conditioner unit with digital display (no text or symbols on body)Model No.
Outdoor Unit Indoor Unit
CU-UV18XKF CS-UV18XKF
CU-UV24XKF CS-UV24XKF
CU-UV30XKF CS-UV30XKF
دليل المستخدم مكيف هواء
. Panasonic شكرا لشرانك مكيف هواء
ستجد تعليمات التشفيل مرفقة مع الجهاز
قم بقراءة تعليمات التركيب جيدا قبل تشغيل الوحدة، و اhfظ الكتاب
في حالة أردت مراجعة التعليمات مرة أخرى.
User Manual
Air Conditioner
Thank you for purchasing Panasonic Air Conditioner. operating instructions attached.
Before operating the unit, read these operating instructions thoroughly and keep them for future reference.
Name and Address of importer:
Panasonic Marketing Middle East & Afica FZE
P.O.Box No. 17985, Jebel Ali, Dubai, U.A.E
- 技术要求
- Panasonic®
- Operating Instructions
- Air Conditioner
- English
- Quick guide
- Inserting the batteries
- Basic operation
- Select the desired temperature
- Table of contents
- Accessories
- WARNING
- Indoor unit and outdoor unit
- Remote control
- Power supply
- CAUTION
- EMERGENCY FUNCTION & AUTO-RESTART FUNCTION
- AUTO-RESTART FUNCTION
- EMERGENCY FUNCTION
- Replacement of Batteries
- COOLING MODE
- COOL
- FAN MODE (Not FAN button)
- FAN
- DRY MODE
- DRY
- AUTO MODE
- AUTO
- HEATING MODE
- HEAT
- (For North American market)
- FAN SPEED function (FAN button)
- Child-Lock function
- TIMER function ---- TIMER ON
- TIMER
- TIMER function ---- TIMER OFF
- SWING function
- SWING
- TURBO function
- TURBO
- MUTE function
- MUTE
- SLEEP function
- SLEEP
- I FEEL function (Optional)
- I FEEL
- ECO function
- ECO
- DISPLAY function (Indoor display)
- DISPLAY
- ANTI-MILDEW function (Optional)
- ANTI-
- MILDEW
- SELF-CLEAN function (Optional)
- 8°C heating function (Optional)
- Gentle Wind function (Optional)
- Health function (Optional)
- GEN function (Optional)
- OPERATION INSTRUCTIONS
- Characteristics of heating operation (applicable to Heating pump)
- Preheating:
- Defrosting:
- Emergency button:
- TROUBLESHOOTING
- ERROR CODE ON THE DISPLAY
- DISPOSAL GUIDELINE (European)
- Supplementary introduction
- 1.Name plate
- Panasonic
- Accessory List
- Disassembly Figure
- Indoor unit
- Outdoor unit
- Information for Users on Collection and Disposal of Old Equipment and used Batteries
- المبادى التوجيهية للตลาด (أوروبية)
- وظيفة الهواء المنESS (-acwidارية)
- وظيفة الصحة (-acwidارية)
- (-acwidيرية) Gen ( stylistية Paulo)
- وظيفة التنظيف الذاتي (-acztيرية)
- وظيفة التدفة حتى 8 درجات منوية (的可能性)
- ECO وظيفة
- وظيفة الصامت
- وظيفة العرض (شاهste العرض الداخلية)
- وظيفة النوم
- وظيفة مقاومة العفن (-ac Mitsubishi)
- ANTI-MILDEW
- وظيفة أنا أشعر (-acztيارية)
- وظيفة التارجح
- وظيفة السرعة القصوى
- وظيفة الموقت ----{-}- مؤقت تشغيل المكيف
- وظيفة الموّقت ----{-}- مؤّقت إيقاف تشغيل المكيف
- TIMER قم باللغانه بال ldغط على الزر
- وضع التدفة
- (المرokoحة) وظيفة سرعة المروحة (زر)
- وظيفة ققل الأطفال
- وضع التبريد
- وضع المروحة (Lyss زر) (المروحة)
- وضع إزالة الرطوبة
- الوضع تلقاني
- التشغيل بعد حدوث توقف مفاجى، وظيفة إعادة التشغيل التلقاني
- وظيفة التشفيل التلقاني
- EMERGENNCY FUNCTION وظيفة "التشغيل بعد حدوث توقف مفاجى"
- الوحدة الداخلية والوحدة الخارجية
- التحم عن بعد
- مصدر الطاقة
- تحذير
- الوحدة الداخلية و الوحدة الخارجية
- جهاز التحكم عن بعد
- محول الطاقة
- عربي
- الديل السريع
Mærke : PANASONIC
Model : CS-UV18XKF
Kategori : Aircondition