
85346129 - Bevægelsesdetektor HAGER - Gratis brugsanvisning og manual
Find enhedens vejledning gratis 85346129 HAGER i PDF-format.


Brugerspørgsmål om 85346129 HAGER
0 spørgsmål om dette apparat. Besvar dem du kender, eller stil dit eget.
Stil et nyt spørgsmål om dette apparat
Download vejledningen til din Bevægelsesdetektor i PDF-format gratis! Find din vejledning 85346129 - HAGER og tag din elektroniske enhed tilbage i hånden. På denne side er alle dokumenter nødvendige for brugen af din enhed offentliggjort. 85346129 af mærket HAGER.
BRUGSANVISNING 85346129 HAGER
KNX radio confi guration quicklink
The radio configuration sets up the functional connection between commanding (transmitters) and function-executing (receivers) radio components. Thus, central, group, extension unit and time controls, for example, can be implemented in a wireless manner.
The following can be configured:
- The local operation of the load connected to the insert
- Radio commends to control other receivers
- Functions which are executed when the radio commands are received
▶ See Table 5
For configuration by means of Hager connection device TX100 or ETS, additional functions are available (see operating instructions for TX100 or application description for ETS).
| fct LED display | Confi gurable functions | Function resulting from transmitter operation, notes | ||
| On switch Insert | On dinner Insert | |||
| ON/OFF | ON/OFF | ON/OFF | Short button-press: Switch ON/OFF | |
| dim UP/ DOWN | Long button-press: Dimming, reverse dimming direction per duration | |||
| ON | + | ON, dim UP | Short button-press: Switch ON Long button-press: Dim UP to maximum brightness | |
| OFF | - | OFF, dim DOWN | Short button-press: Switch OFF Long button-press: Dim DOWN to minimum brightness | |
| Scene 1" | Receiver is allocated to a scene due to the conti guni-tion of the function. Short button-press: Short button press: Recall the saved state of the connected load for the scene | |||
| Scene 2" | ||||
| Timer" | Switch ON for the sat switch on time Factory setting = 3 min | |||
| ON/OFF (switch/passch-button) | Closing of the activating contact switches the load ON, opening of the contact switches the load OFF. | |||
| Forced mode ON | Switches the load with higher priority to the appropriate state. Execution of other commands is only possible after resetting the forced command. | |||
| Forced mode OFF | ||||
| Presence simulation" | Activates/disactivates execution of presence simula-tion (See Activating/disactivating presence simulation). | |||
| Master-Slave" | Is used to extend the detection area. Receives switch-on commands in case of motion detection in the detection area of the transmitter (Slave). Switches the lighting ON for the sat delay time. [The brightness evaluation only takes place on the master, the slave only detects motion. [Can only be conti gured between radio motion detectors. | |||
| Cancel | No function Assignment is transmitter is deleted | |||
^6 Execution of the receiver function and local motion detector function have the same priority:
- If the transmitter was test switched on/off and then motion was detected afterwards, then the motion detector will override the transmitter command. - If motion was detected and thereafter, during the delay time, the system is switched on/off via the transmitter, then the transmission was removed for motor detector.
^7 Only with KNX radio motion detector on power supply for KNX radio application module as transmitter
Table 5: Configurable functions
Configuration of KNX radio motion detector as a receiver
Conf guration to control the load connected to the insert via reception of a radio command.
As an example, the configuration of a wall-trans-miller and a radio-motion detector as receiver is described (Table 6).
| Operation | Result |
| Start configuration | |
Press the cfg button on the wall-transmitter before v. If there is no further activation, the configuration is automatically ended after 10 minutes. If there is no further activation, the configuration is automatically ended after 10 minutes. | The cfg LEDs on the wall-transmitter and the radio motion detector light up in red colour.All the receivers within radio range also display the configuration mode. |
| Select transmitter button | |
| Brief y press the press-activation point on the wall-transmitter, which should activate the function.ZCZD] | The cfg LED on the wall-transmitter flleshe for 1 second.If conti gured already felt LED of the motion detector indicates the currently conti gured function. |
| Select function on receiver | |
Releaterly apply short presses to the fot button on the motion detector until the desired function is displayed (Table 5). | After each operation, the felt LED indicates the function.If the transmitter button has already been conti gured with a function in a diff ernd receiver and/or the conti gured function is part of a group control, only this function can be conti gured.To change a function, the existing conti gured must be detector and the new one needs to be conti gured. |
| Conti no function on receiver | |
To confirm, keep the felt button pressed for more than 2 seconds. | The cfg LED flleshe during the setting process (approx. 5 s). The felt LED confi mss the function selection by displaying the corresponding colour.Raplo 5 setting of the cfg LED indicates a combination that is not possible or an error. |
| Completing the configuration | |
| Brief y press the cfg button on the wall-transmitter again.ZAZH] | The cfg LEDs on the wall-transmitter, on the motion defector and on all receivers within radio range go out. The function is conti gured. |
Configuration instructions

KNX radio motion detector comfort
1.1 m quicklink
Order no. 8534 51
KNX radio motion detector comfort
2.2 m quicklink Order no. 8534 \$1
(BN)
Berker GmbH & Co. KG
Zum Gunlersa
68440 Bieskassel, Germany
Tel.: - 49 8842 945 0
19c + 49 6542 845 4625 e-mail: info@barier.de
www.berker.com

040102 ELE007947A
Table 6: Configuration of the function for the KNX radio motion detector
Confi guration of KNX radio motion detector as a transmitter
If the radio motion detector is operated as a transmitter, it can support the following functions for receivers. The specific function can vary depending on the receivers used:
ON/OFF (delay time) Pracontl gured command in Automatic mode: Motion detection with simultaneous undershooting of the brightness threshold switches the load ON and, after the delay time has elapsed, it switches the load OFF. The delay time elapses in the motion detector and is permanently set (3 min).
E
Motion detection with simultaneous undershooting of the brightness threshold switches the load ON end, after the switch-on time has elapsed, it switches the load OFF. The switch-on time elapses in the receiver and can be adjusted through configuration.
(i) The radio motion detector must be attached to a switch insert or dimmer insert. If the radio motion detector is mounted on a power supply for KNX radio application modules, then it can only be configured as a transmitting extension unit (slave) (see Execuling a master-slave con fl guration).
As an example, there is a description of conti guring the radio motion detector with receivers below, for which the cfg LED and fit LED provides the supported displays (Table 7). Different conti guration displays, such as for receivers with a display, are provided in the instructions for the receiver.
| Operation | Result |
| Start configuration | |
| ■ Brief y press the cfg button on the radio motion detector. | The cfg LEDs on the radio motion detector and the receiver within radio range light up in radio colour. Radio motion detector (transmitter) and receiver are in configuration mode. |
| If there is no further operation, the config guration is automatically ended after 10 minutes. |   |
| Select function on receiver | |
| ■ Brief y press the fct button several times on the receiver to select the desired function (see the receiver operating instructions). | After each actuation, the fct LED displays a function. If the radio motion detector has already been confi gured with a function in a different receiver and/or the confi gured function is part of a group control, only this function can be configured. To change a function, the existing confi guration needs to be deleted and the new one confi gured. |
| Contin function on receiver | |
| ■ To save the allocation of command and function, press the fct button on the receiver for longer than 2 seconds. | The cfg LED 5 ashes. After a successful saving, the fct LED signals the saved function. If Read if ashing of the cfg LED indicates a combination that is not possible or an error. |
| Completing the configuration | |
| ■ Brief y press the cfg button on the radio motion detector. | The cfg LEDs on the radio motion detector and all receivers within radio range go out. The radio command for the radio motion detector has been confi gured. |
Table 7: Configuration of KNX radio motion detector as a transmitter
Executing the master-slave configuration
If the radio motion detector is attached to a power supply for radio application modules, then it can only be configured as a transmitting extension unit (sleeve) to a radio motion detector on switch or dimmer insert (Table 8).
The slave motion detector sends a pulse in case of motion detection in its detection area. Upon receiving this pulse, the master switches on for the delay time, if the set brightness threshold is undershot. Delay time and brightness threshold are determined by the master.
| Operation | Result |
| Start conti guration | |
Briefly press the ctfg button on the radio motion detector on the power supply (transmitter, slave).  | The ctfg LEDs on the radio motion detector (slave and master) light up in red colour. 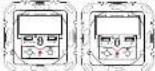 |
| If there is no further operation, the confi guration is automatically ended after 10 minutes. | All the receivers within radio range also display the confi guration mode. |
| Select function on receiver | |
Briefly press the ctfg button on the radio motion detector on the switch insert or Iush-mounted dinnmer (master) to select the master-slave function.  | The fot LED 6 ashes orange periodically (see Table 5).  |
| Only the master-slave function or devite can be selected in the conti guration. | |
| Conf re function on receiver | |
To save the allocation of command and function, keep the fot button on the receiver (master) pressed for more than 2 seconds.  | The ctfg LED 6 ashes. After successful saving, the fot LED signals the saved function. [Read it ashing of the ctfg LED indicates an error. |
| Completing the conti guration | |
Briefly press the ctfg button on the transmitter (slave).  | The ctfg LEDs on the radio motion detectors and all receivers within radio range go out. The master-slave conti guration has been executed. |
Table 8: Executing the master-slave configuration
Deleting a configuration
To delete a configured receiver or the local operation, perform the configuration again.
■ Start configuration (see Confl guration of radio motion detector as a receiver).
■ If necessary, select transmitter button.
The select transmitter button step does not apply for radio melon detectors or transmitters.
■ Select function on receiver. Select the Delete function on the receiver and confirm the function on the receiver.
■ Compacting the configuration: Brieli y press the etg button on the transmitter.
Configuration of group functions
By means of a group function, one transmitter, for example.
a radio motion detector, controls several receivers. To do so, the same functions must be configured on all receivers.
■ Start conti guration (see Conti guring radio motion detector as transmitter).
■ Select function on receiver: Select the group function as described above on each receiver to be integrated and confirm function on the receiver.
■ Complicating the configuration: Brief y press the cfg button on the transmitter.
Setting the switch-on time for the timer
The switch-on time on the receiver can be set in stages for the Timer function.
The factory setting is 3 min
■ Start configuration
■ If necessary, select transmitter button: Select the button with the timer.
The Select transmitter button step does not apply for radio motion detectors as transmitters.
- Select function or receiver. If the Timer function is displayed through the fct LED fl ashing rod (Table 5), keep the fct button on the receiver pressed for longer than 5 seconds, until the cfg LED fl ashes briefly.
The 11 ashing fct LED shows the currently set switch-on time - with a factory setting of 5x (Table 9).
| x number of flashes of the fot LED | Switch-on time |
| 1 | 1 s |
| 2 | 30 s |
| 3 | 1 min |
| 4 | 2 min |
| 5 | 3 min |
| 6 | 5 min |
| 7 | 15 min |
| 8 | 30 min |
| 9 | 1 h |
| 10 | 3 h |
Table 9: Settable switch-on lines
■ Press the fot button.
Each short press of the fet button increases the switch-on time by one step.
During the selling, the fact LED indicates the switch-on time (Table 9) for orientation.
■ Press the fot button for longer than 2 seconds to apply the desired switch-on time.
■ Completing the configuration: Briefly press the cfg button on the transmitter.
Resetting the KNX radio motion detector to factory settings
The device is not in configuration mode.
- Keep the cfg button pressed for longer than 10 seconds, until the cfg LED switches from being red to flashing.
■ Release the cfg button.
The cfg LED fl ashes rapidly in red. The device m-inhalas itself. In the meantime, the cfg LED turns red. After that, the LED goes out and fl ashes 5x to indicate the compatibility. The reset is has been completed. The process lasts about 20 s.
This process deletes the complete configuration of the radio motion detector. Settings of the insert (switch-on brightness level, load setting) are not reset.


Mærke : HAGER
Model : 85346129
Kategori : Bevægelsesdetektor