
5273 - Kontor Safco - Gratis bruksanvisning och manual
Hitta enhetens manual gratis 5273 Safco i PDF-format.

Användarfrågor om 5273 Safco
0 fråga om denna apparat. Svara på dem du kan eller ställ din egen.
Ställ en ny fråga om denna apparat
Ladda ner instruktionerna för din Kontor i PDF-format gratis! Hitta din manual 5273 - Safco och ta tillbaka ditt elektroniska enhet i hand. På denna sida publiceras alla dokument som behövs för att använda din enhet. 5273 av märket Safco.
BRUKSANVISNING 5273 Safco
natural_image
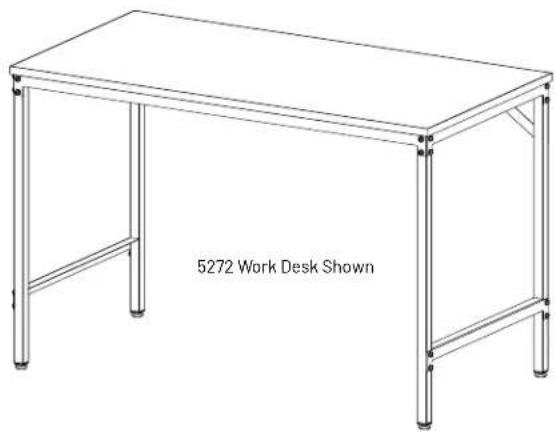
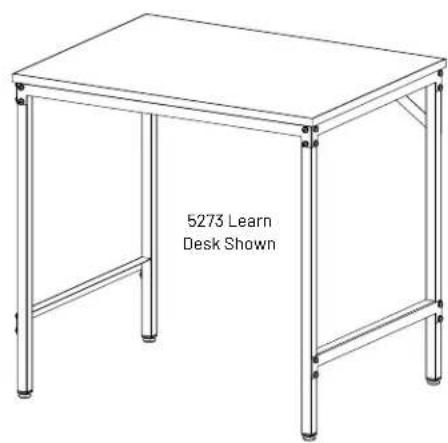
Line drawing of a workbench with four legs and a flat top, labeled '5272 Work Desk Shown' (no other text or symbols)Hardware Included:
900000383


Wood Screw Pan Head Screw Leveler
X5108
QTY:10
905000507
QTY:24
0444
DTY:4
Lock Washer
915000089
QTY:24
For questions or concerns, please call 1-888-971-6225
available Monday-Friday 7:30 AM to 5:00 PM CST
(English-speaking operators)
Product Warranty is available at:
safcoproducts.com
99000356, Page 1 of 2, Rev C, Rev Date 03-MAR-2021

1
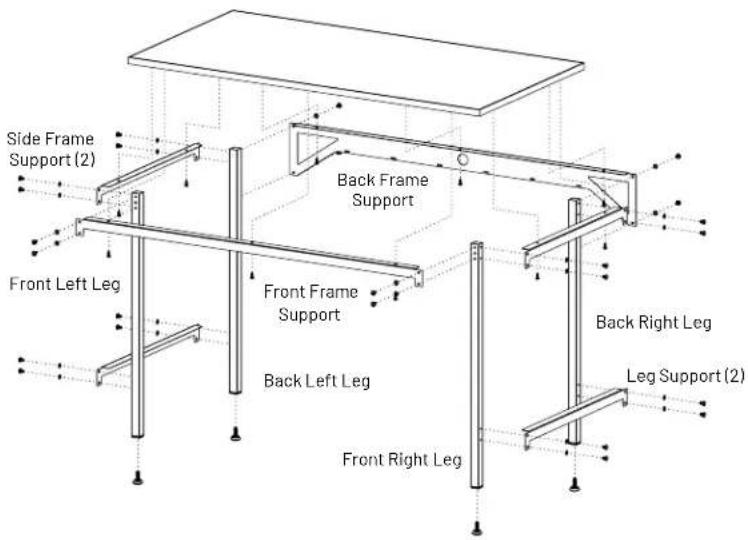
Attach Leg Support (no holes in flange) and Side Frame Support (with holes in flange) to Front Right Leg using 4 Pan Head Screws and 4 Washers (ensuring Washers are snug against the head of the screws).
2
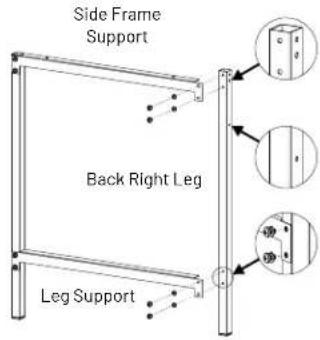
Attach Leg Support (no holes in flange) and Side Frame Support (with holes in flange) from Step 1 to Back Right Leg using 4 Pan Head Screws and 4 Washers (ensuring Washers are snug against the head of the screws).
3
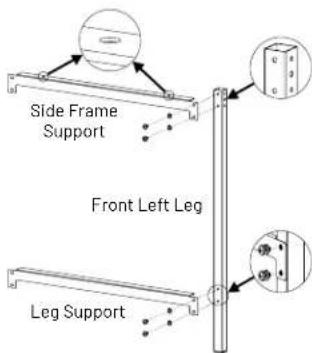
Attach Leg Support (no holes in flange) and Side Frame Support (with holes in flange) to Front Left Leg using 4 Pan Head Screws and 4 Washers (ensuring Washers are snug against the head of the screws).

4
Attach Leg Support (no holes in flange) and Side Frame Support (with holes in flange) from Step 3 to Back Left Leg using 4 Pan Head Screws and 4 Washers (ensuring Washers are snug against the head of the screws).

5
Attach Back Frame Support to Right and Left Leg Sub-Assemblies from Steps 2 and 4 using 4 Pan Head Screws and 4 Washers (ensuring Washers are snug against the head of the screws).

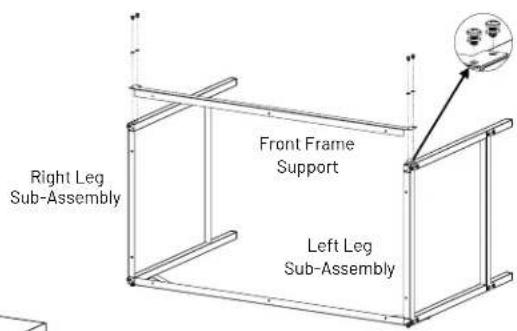
6
Attach Front Frame Support to Right and Left Leg Sub-Assemblies from Steps 2 and 4 using 4 Pan Head Screws and 4 Washers (ensuring Washers are snug against the head of the screws).
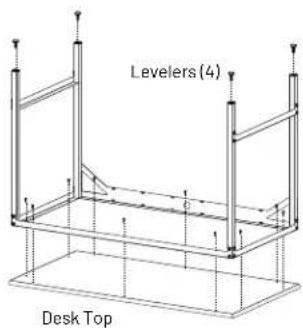
7
Attach Assembly from Step 6 to the Desk Top using 10 Wood Screws into the 10 pilot holes in the Desk Top. Screw 1 Leveler into each of the 4 Legs until tight
natural_image
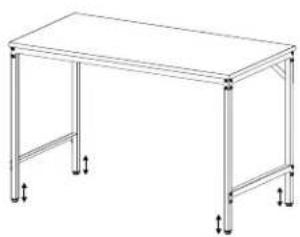
Line drawing of a simple rectangular table with four legs and two side supports (no text or symbols)8
Turn Desk over and ensure proper leveling by adjusting the Levelers.
For questions or concerns, please call 1-888-971-6225 available Monday-Friday 7:30 AM to 5:00 PM CST (English-speaking operators)
Product Warranty is available at:
safcoproducts.com
99000356, Page 2 of 2, Rev C, Rev Date 03-MAR-2021