VT-8095 - Lampa V-TAC - Gratis bruksanvisning och manual
Hitta enhetens manual gratis VT-8095 V-TAC i PDF-format.

Användarfrågor om VT-8095 V-TAC
0 fråga om denna apparat. Svara på dem du kan eller ställ din egen.
Ställ en ny fråga om denna apparat
Ladda ner instruktionerna för din Lampa i PDF-format gratis! Hitta din manual VT-8095 - V-TAC och ta tillbaka ditt elektroniska enhet i hand. På denna sida publiceras alla dokument som behövs för att använda din enhet. VT-8095 av märket V-TAC.
BRUKSANVISNING VT-8095 V-TAC
INSTRUCTION MANUAL
LED BULKHEAD
TECHNICAL DATA
| MODEL VT-8095 | |
| SKU 10195, 10196, 10197 | |
| POWER 12W | |
| LUMENS 1160 Lm | |
| INPUT POWER AC: 220-240V, 50/60Hz | |
| BEAM ANGLE 110° | |
| CRI ≥80 | |
| DF ≥0.7 | |
| LIFE SPAN 25,000 Hours | |
| ON/OFF CYCLE >15,000 | |
| OPERATING TEMPERATURE | -20°C to +40°C |
| DIMENSION | 151x38mm |
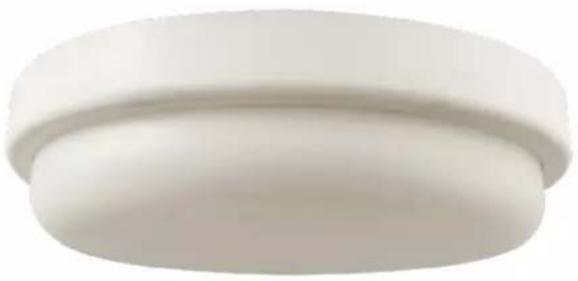
natural_image
White cylindrical object with a smooth, rounded top surface (no text or symbols visible)IP54 RATING
02 YEAR WARRANTY®
*This product contains a light source of energy efficiency class
INTRODUCTION & WARRANTY
Thank you for selecting and buying V-TAC product. V-TAC will serve you the best. Please read these instructions carefully before starting the installation and keep this manual handy for future reference. If you have any another query, please contact our dealer or local vendor from whom you have purchased the product. They are trained and ready to serve you at the best. The warranty is valid for 2 years from the date of purchase. The warranty does not apply to damage caused by incorrect installation or abnormal wear and tear. The company gives no warranty against damage to any surface due to incorrect removal and installation of the product. The products are suitable for 10-12 Hours Daily operation. Usage of product for 24 Hours a day would void the warranty. This product is warranted for manufacturing defects only.

text_image
QR code image containing encoded data, no visible human-readable textMULTI-LANGUAGE MANUAL QR CODE
Please scan the QR code to access the manual in multiple languages.
WARNING
- Please make sure to turn off the power before starting the installation.
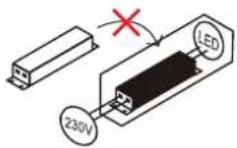
• Installation must be performed by a qualified electrician. - If the external flexible cable or cord of this luminaire is damaged, it shall be exclusively replaced by the manufacturer or his service agent or a similar qualified person in order to avoid a hazard.
• Terminal block not included. - The light source contained in this luminaire shall only be replaced by the manufacturer or his service agent or a similar qualified person.

This marking indicates that this product should not be disposed of with other household wastes.
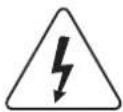
Caution, Risk of electric shock
Non-replaceable control gear
Replaceable (LED Only) light source by a professional
INSTALLATION INSTRUCTION
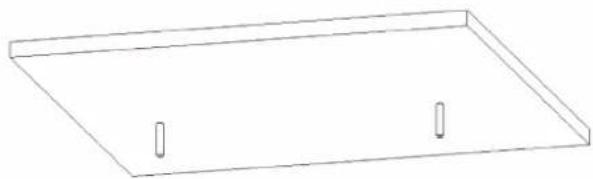
1
natural_image
Simple line drawing of a rectangular plate with two vertical slots (no text or symbols)- Drill holes on the wall, and plug the expansion sleeve into the holes
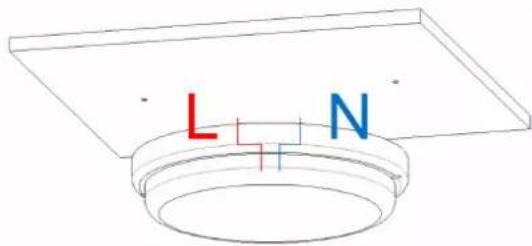
2
natural_image
3D diagram of a magnetic core with labeled poles (L and N) and colored wires, no text or symbols present.- Connect the two input cables to L/N
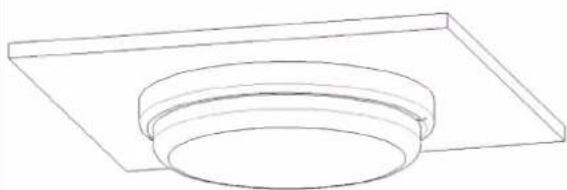
3

natural_image
Technical line drawing of a circular component mounted on a rectangular base with two mounting holes (no text or symbols)- Align with the hole position and fix the lamp body with screws
4
natural_image
Simple line drawing of a circular component mounted on a rectangular base (no text or symbols)- installed, turn on the light electricity, lamps and lanterns can normal use.
DISASSEMBLY INSTRUCTION

text_image
diffuser Light source for SLR testing 1.Disassemble the diffuser 2.Remove the screw 3.Weld and remove the input cableRoHS