LT-PCM - Fäste för platt skärm CTA Digital - Gratis bruksanvisning och manual
Hitta enhetens manual gratis LT-PCM CTA Digital i PDF-format.

Användarfrågor om LT-PCM CTA Digital
0 fråga om denna apparat. Svara på dem du kan eller ställ din egen.
Ställ en ny fråga om denna apparat
Ladda ner instruktionerna för din Fäste för platt skärm i PDF-format gratis! Hitta din manual LT-PCM - CTA Digital och ta tillbaka ditt elektroniska enhet i hand. På denna sida publiceras alla dokument som behövs för att använda din enhet. LT-PCM av märket CTA Digital.
BRUKSANVISNING LT-PCM CTA Digital

LT-PCM
Articulating Laptop Plate and Pole Clamp Mount
INSTRUCTION MANUAL
Thank you for choosing CTA Digital's product. We hope that you will enjoy using it. Please follow the guidelines and instructions as laid out in this instruction manual.
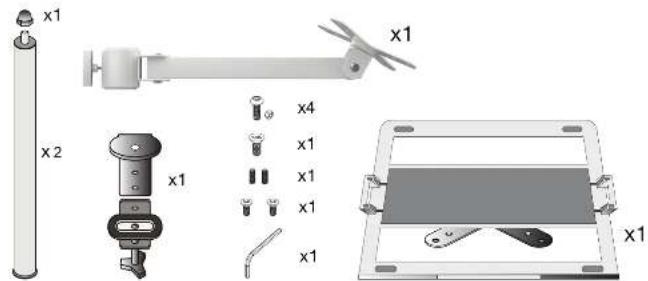
PACKAGE CONTENTS:
INSTRUCTIONS:
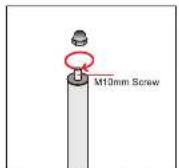
- Connecting the Clamp and the Poles
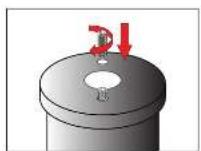
A. Screw up the small meter screws into the holes on the bottom of the pole.
B. Align and insert the Pole into the top round component of the Camp.
C. Screw in the screw to connect both the pole and clamp component securely.
SUPPORT@CTADIGITAL.COM
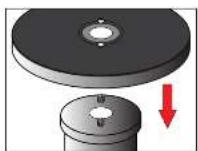
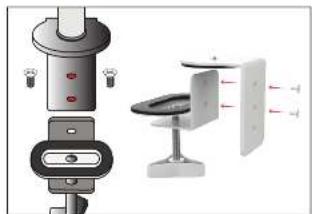
- Assemble Clamp Components Together
natural_image
Diagram of a smart device with labeled components and directional arrows (no text or symbols)A. Align the preferred (2) screw holes of both clamp components. Then screw in both screws until securely tightened.
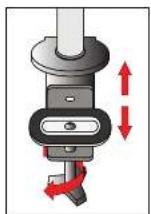
B. Adjust the clamp and tightening rod to fit with different tab surface thickness.
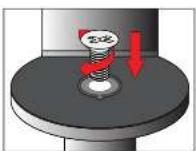
- Attaching adjustable VESA Plate onto Pole
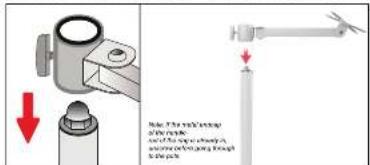
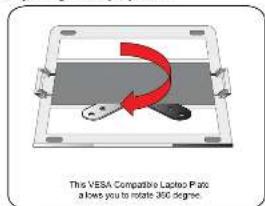
A. Lassen all VESA Plate pole grips. Slide down each VESA plate to desired position then, tighten pole grip. Adjust VESA angle and orientation as preferred. Repeat steps for other VESA plates.
B. Screw on clockwise metal endcap until securely tightened.
- Connecting VESA to VESA
natural_image
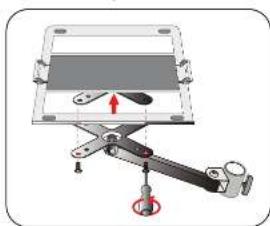
Mechanical assembly diagram showing a lever mechanism with a highlighted pivot point (no text or symbols)Adjusting the Laptop Plate
This VESA Compatible Laptop Plate allows you to connect with other VESA devices by screwing up the bolts with a screwdriver as shown.
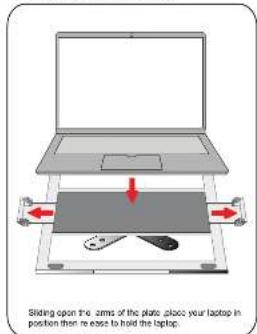
Installing Laptop into Plate
SUPPORT@CTADIGITAL.COM