843501 - I pakategorizuar Deko-Light - Manual falas për përdoruesin
Gjeni manualet e pajisjes falas 843501 Deko-Light në format PDF.

Pyetjet e përdoruesve rreth 843501 Deko-Light
0 pyetje rreth kësaj pajisjeje. Përgjigjuni atyre që njihni ose bëni tuajin.
Bëni një pyetje të re rreth kësaj pajisjeje
Shkarko udhëzimet për tuajin I pakategorizuar në format PDF falas! Gjeni manualin tuaj 843501 - Deko-Light dhe merrni pajisjen tuaj elektronike sërish në duar. Në këtë faqe janë publikuar të gjitha dokumentet e nevojshme për përdorimin e pajisjes suaj. 843501 e markës Deko-Light.
MANUAL I PËRDORUESIT 843501 Deko-Light
Elektronik-Vertriebs GmbH, Auf der Hub 2, D-76307 Karlsbad
KURZANLEITUNG
Artikel-Nr.: 843501
Starter-Set: LED-Dimmer 5in1 inkl.
Fernbedienung für Single/CCT-Stripes
VOLLSTÄNDIGE ANLEITUNG:

Inhaltsverzeichnis
Sicherheitshinweise 2
Produkt Besonderheiten.... 2
Technische Daten 3
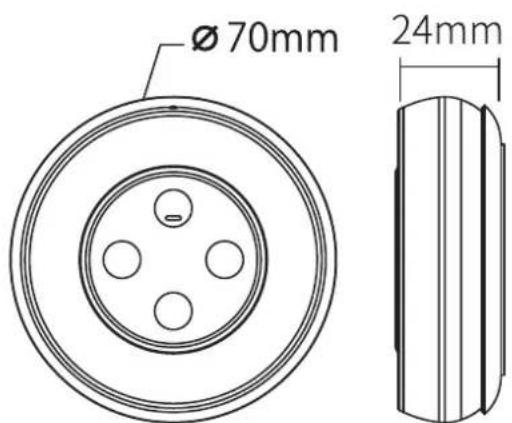
Montage und Einlegen der Batterien 4
Einstellen des Kanalmodus 5
Push-Dimmung 5
RF-Fernbedienung verbinden 6
RF-Fernbedienung trennen 7
Wissenswertes zu RF-Fernbedienungen 7
RF-Repeaterfunktionen 8
Automatikprogramme 9
Zigbee Verbindungsmodus/Pairing aktivieren....:.....10
1. Sicherheitshinweise
Sehr geehrter Kunde,
das Produkt erfüllt die geltenden Anforderungen der europä und nationalen Richtlinien. Technische Daten können ohne Vorankündigung geändert werden. Irrtümer vorbehalten. Die Installation darf ausschließlich von einer qualifizierten Elektrofachkraft ausgeführt werden. Schalten Sie die Stromversorgung vor der Installation aus und sichern Sie diese gegen wieder einschalten. Bei Sach- und Personenschäden durch Nichtbeachten der Produkt Hinweise und Montageanleitung, durch unsachgemäße Handhab oder vorgenommene Änderungen übernehmen wir keine Haft Installieren Sie RF-smart Komponenten nicht an Orten mit \ Metall oder starken elektromagnetischen Wellen, da dies di Funkreichweite beeinträchtigt.
Bitte beachten Sie hierfür die vollständige Bedienungsanleitur unter dem auf der Titelseite abgedruckten QR-Code/Link.
2. Produkt Besonderheiten
- geeignet für LED-Stripes/Leuchten mit Konstantsp. (CV) 12-48V DC
- 0\~100% stufenloses Dimmen
- flimmerfrei
- Last-State-Memory [letzte Einstellung wird gespeichert]
- einstellbarer 5-in1 Modus [Single/CCT/RGB/RGBW/RGB+CCT)]
- Intelli-Push Dim-Anschluss [Taster für An/Aus + Helligkeit]
- steuerbar mit RF-smart Funkfernbedienungen [2,4GHz, Reichweite ca. 30m, nicht im Lieferumfang enthalten]
- Fernbedienungssynchronisation beim Betrieb mehrerer RF-smart Dimmer [Repeater-Funktion]
- steuerbar mit allen Zigbee 3.0 kompatiblen Steuerungen / Apps wie Amazon Echo (Alexa), Google Assistant, Tuya [entspr. Gateway notwendig, Reichweite im Freien bis zu 100m]
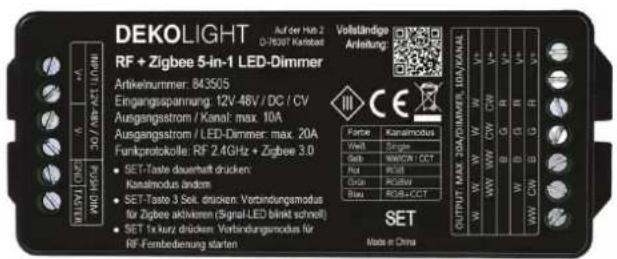
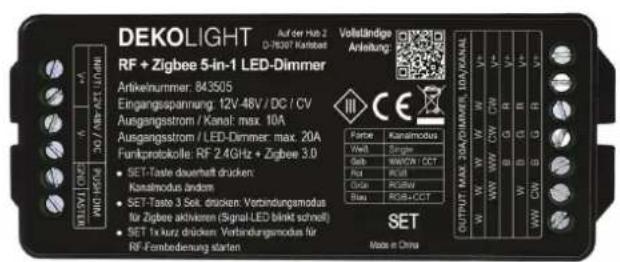
3.Technische Daten
| Eingangsspannung: | 12V - 48V DC (CV) |
| Ausgangsspannung: | 12V - 48V DC (CV) |
| Ausgangsleistung: | max. 20A Controller / max. 10A (Kanal) |
| Schutzklasse: | III |
| IP-Schutzklasse: | IP20 |
| Steuerbar mit: | RF-smart Fernbedienungen RF 2.4GHz + Zigbee 3.0 + Intelli-Push (Taster) |
| Arbeitstemperatur: | -10 bis +40°C |
| Reichweite im Freien: | RF-Fernbedienungen 2.4GHz bis 30mZigbee 3.0 bis 100m |
| Maße: | 120 x 47 x 23mm |
Betriebsspannung: 3V DC (2x AAA Batterie)
Sendeleistung/Standby-Verbr: 6dBm // 20uA
Modulationsmethode: GFSK
Reichweite: bis zu 30m
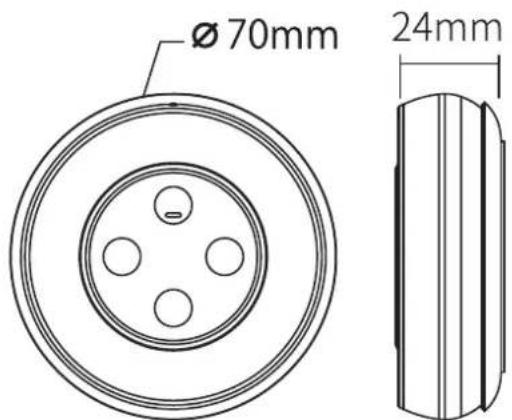
4. Montage / Einlegen der Batterien
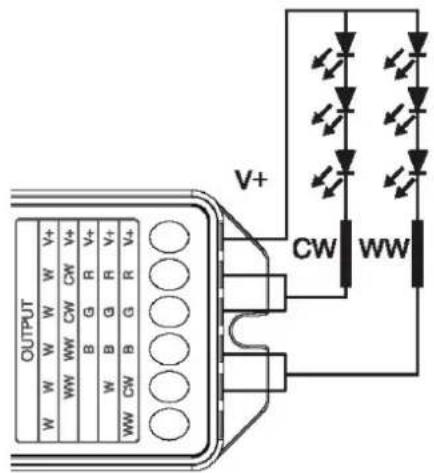
Achten Sie auf die Eingangsspannung des Dimmers. Diese muss mit der Spannung der LED-Stripes übereinstimmen. ACHTUNG: Verwenden Sie grundsätzlich KEINE (Triac-) dimmbaren Netzgeräte.
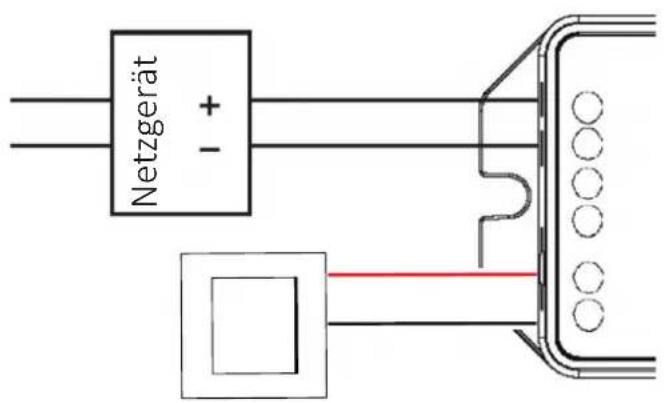
V+/V- Eingang / 12V-48V DC (CV)
Spannungsvers. für weitere Dimmer
PUSH-Taster (Potentialfrei)
Single Modus
(gebrückt) max. 20A
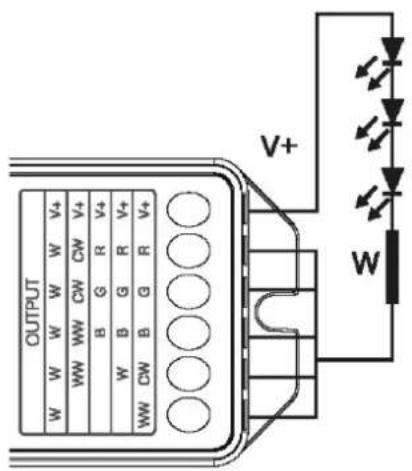
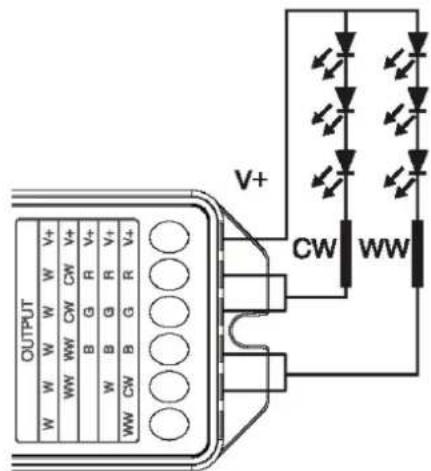
CCT/WW-CW Modus
max. 2 × 10 ~A
Einlegen der Batterien:
HINWEIS: Sie benötigen 2 Stück AAA Batterien (nicht im Lieferumfang)
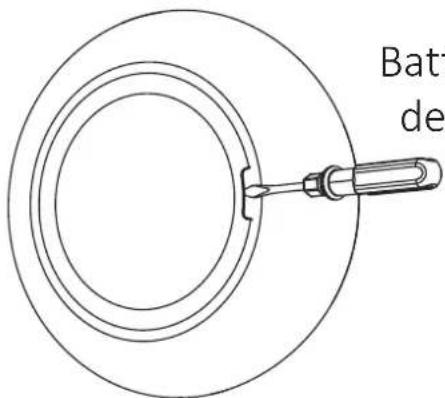
Batterieabdeckung auf der Rückseite öffnen
Batterien einlegen und Abdeckung schließen

natural_image
Technical line drawing of a mechanical component with concentric rings and internal rollers (no text or symbols)5. Einstellung des Kanalmodus
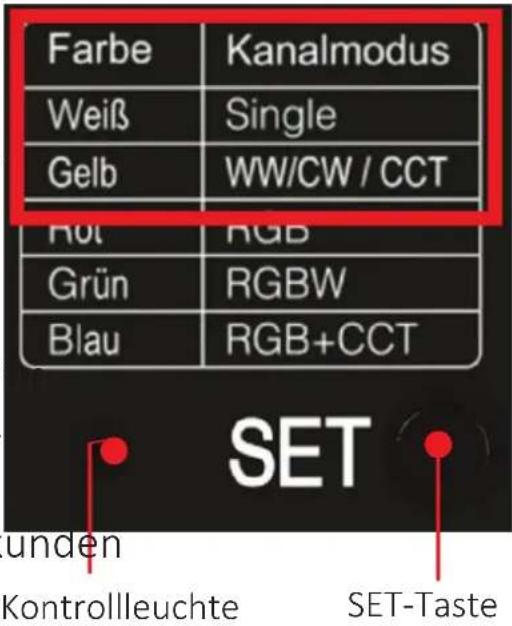
Dieses Setignet sich zum Steuern von Single oder CCT /WW-CW LED-Stripes. Abhängig hiervon müssen Sie den entsprechenden Kanalmodus einstellen. ACHTUNG: Beachten Sie die sich ändernde Belegung der Ausgangsklemmen.
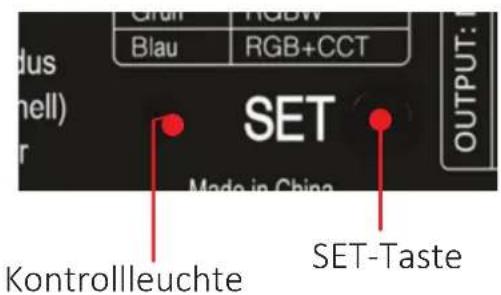
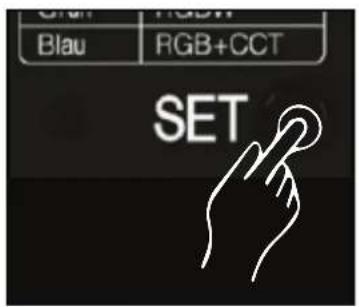
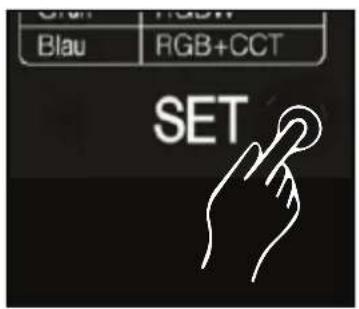
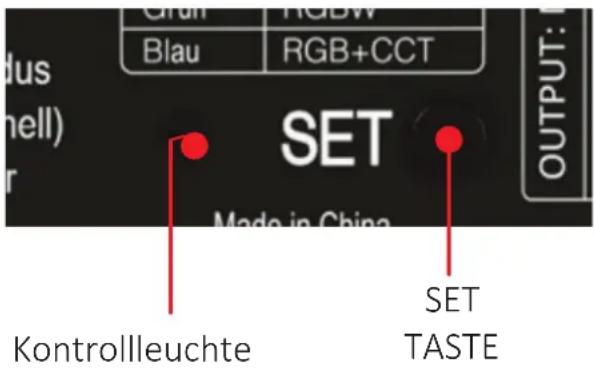
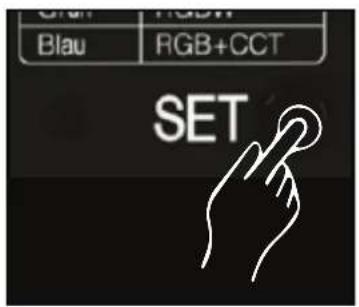
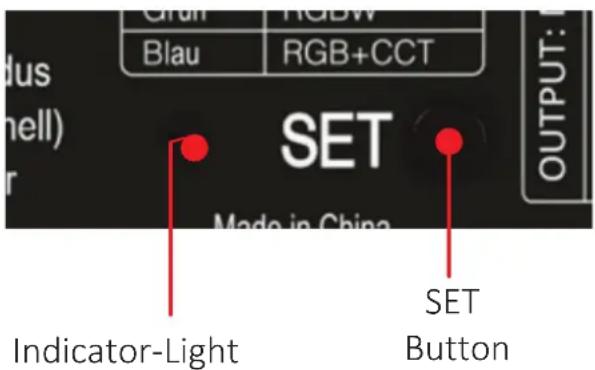
Kanalmodus ändern:
Drücken Sie die "SET"-Taste kontinuierlich, um den Kanalmodus umzuschalten. Der eingestellte Kanalmodus wird Ihnen durch Änderung der Farbe der Kontrollleuchte angezeigt. Sobald der gewschte Kanalmodus (siehe nebenstehende Tabelle/Dimmer) aktiv ist, lassen Sie die SET-Taste los. Nach 3 Sek ohne weitere Betätigung wird der Modus automatisch gespeichert.
6. PUSH-Dimmung
Push-Taster KURZ drücken:
- EIN-/AUSSCHALTEN
Push-Taster LANG drücken:
- HELLIGKEIT STUFENLOS DIMMEN (hell-dunkel-hell). Halten Sie den Taster bis zur gewünschten Helligkeit gedrückt. Wiederholen Sie ggf. den Vorgang erneut um die Helligkeit zu erhöhen oder zu verringern.
- INTELLI-PUSH
Wenn mehrere Dimmer mit einem Taster gesteuert werden und diese nicht den gleichen Status/Helligkeit zeigen, drücken Sie den Taster 20 Sekunden lang, bis alle Lichter die gleiche Helligkeit (100 %) zeigen. (Anzahl Dimmer, die mit dem gleichen Push-Taster verbunden werden können, max. 25 Stück / Kabellänge max. 20 m).
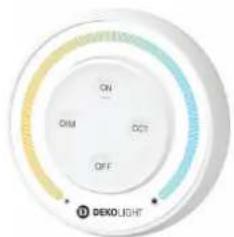
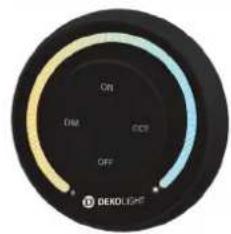
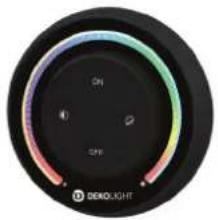
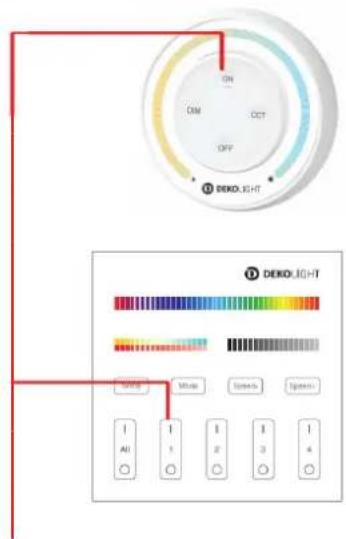
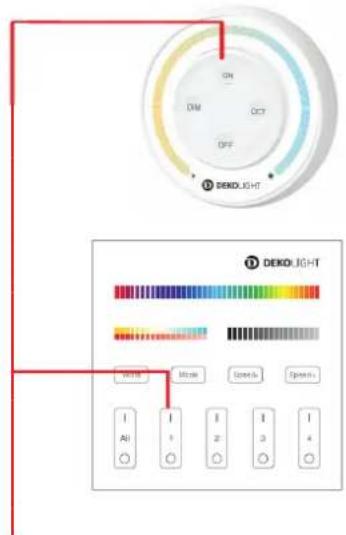
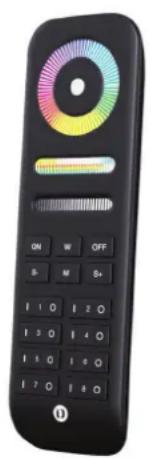
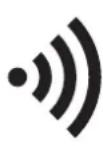
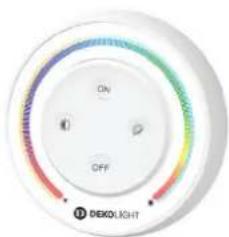
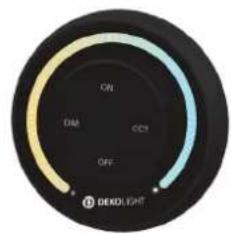
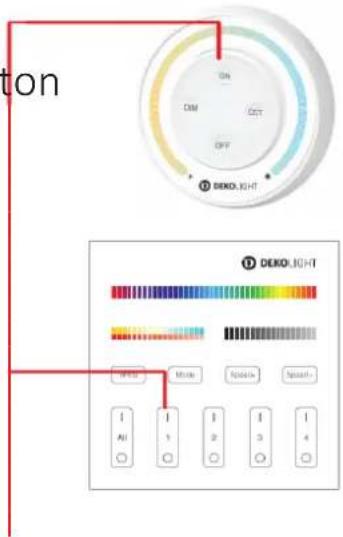
7. Fernbedienung verbinden
Zusätzlich zur mitgelieferten Fernbedienung können auch weitere Fernbedienungen des RF-smart Systems verbunden werden.
843508
843509
843510
843511
843512
843513
843514

natural_image
Circular black dial with gradient color scheme and 'DENOLIGHT' logo, no readable text or symbols beyond branding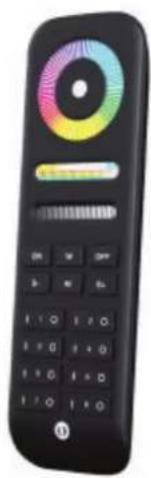
natural_image
Black remote control with a colorful circular dial and function buttons (no visible text or symbols)
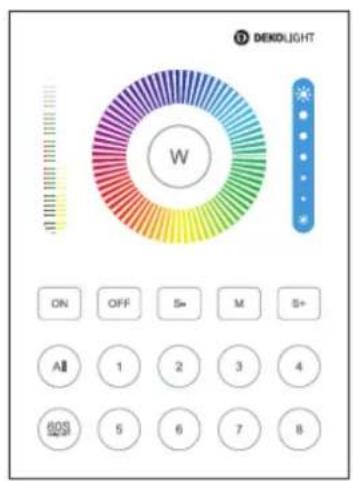
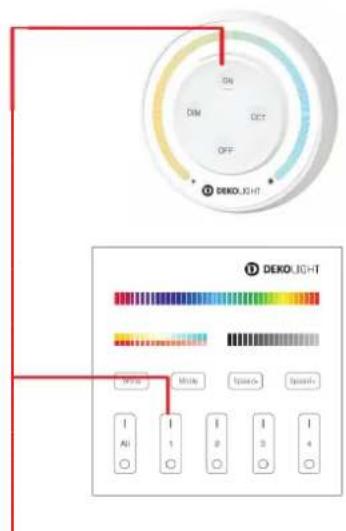
1. RF-Lernmodus aktivieren:
Möglichkeit 1: Drücken Sie 1x kurz die Taste "SET" am Dimmer
Möglichkeit 2: Dimmer 10 Sek. vom Strom trennen und danach wieder einschalten
2. Fernbedienung koppeln/verbinden:
Drücken Sie innerhalb von 3 Sek. 3x kurz die Taste "ON" an der jeweiligen Fernbedienung. Bei einer erfolgreichen Kopplung blinkt der angeschlossene LED-Stripe 3x langsam.
Bei Fernbedienungen mit mehreren Zonen wählen Sie die gewünschte Zone und drücken auch hier innerhalb 3 Sek. 3x kurz die entspr. Taste "ON".
Wenn der Vorgang nicht innerhalb von 10 Sek. erfolgreich war, beginnen Sie wieder bei Schritt 1.
"ON"-Taste innerhalb 3 Sek. 3x drücken!
8.Fernbedienung trennen
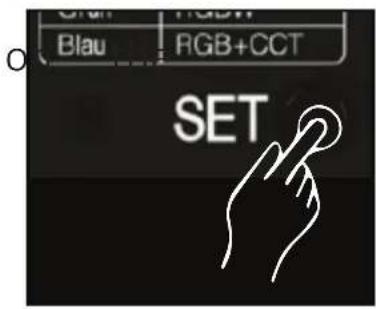
1. RF-Lernmodus aktivieren:
Möglichkeit 1: Drücken Sie 1x kurz die Taste "SET" am Dimmer
Möglichkeit 2: Dimmer 10 Sek. vom Strom trennen und danach wieder einschalten
2. Fernbedienung entkoppeln/trennen:
Drücken Sie innerhalb von 3 Sek. 5x kurz die Taste "ON" an der jeweiligen Fernbedienung. Bei einer erfolgreichen Trennung blinkt der angeschlossene LED-Stripe 10x langsam.
Bei Fernbedienungen mit mehreren Zonen wählen Sie die gewünschte Zone und drücken auch hier innerhalb 3 Sek. 5x kurz die entspr. Taste "ON".
Wenn der Vorgang nicht innerhalb von 10 Sek. erfolgreich war, beginnen Sie wieder bei Schritt 1.
"ON"-Taste innerhalb 3 Sek. 5x drücken!
9. Wissenswertes zu RF-Fernbedienungen
- Eine Fernbedienung kann mit mehreren RF-smart Geräten koppelt werden und somit mehrere Dimmer gleichzeitig steuer
- Mehrere Fernbedienungen können mit einem RF-smart Ger gekoppelt werden und somit kann ein Gerät von mehreren Stellen aus gesteuert werden.
- Es können unterschiedliche Fernbedienungstypen miteinander gemischt werden (z.B. 1, 4, 8 Zonen). Es werden jedoch immer nur die Funktionen unterstützt, welche die gekoppelte RF-smart Komponente auch zur Verfügung stellt.
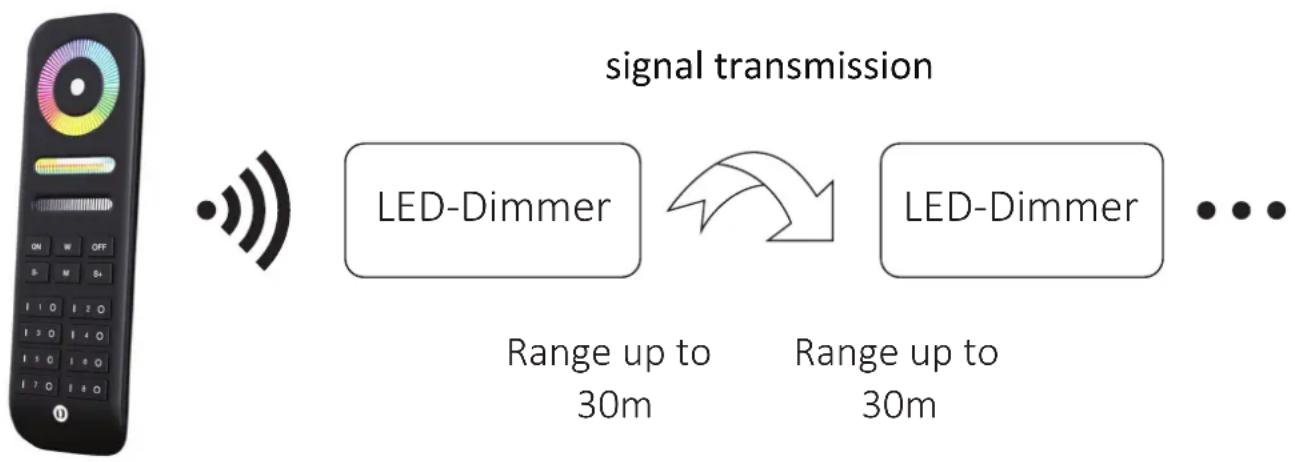
10.RF-Repeaterfunktionen
RF-Reichweite:
Ein RF-smart Dimmer kann die Steuersignale einer RF-Fernbedienung innerhalb von bis zu 30m an einen anderen Dimmer übertragen, wenn sich dieser ebenfalls in Reichweite befindet. Somit erweitert sich die
Reichweite einer Fernbedienung theoretisch unbegrenzt. Es kö gleichzeitig die Signale von bis zu 12 Fernbedienungen un werden.
RF-Programmsynchronisation:
Wenn identische Automatikprogramme (Farbfades etc.) in mehrere Dimmern gleichzeitig ablaufen, werden diese ebenfalls über Signal weiter gegeben und somit automatisch synchronisiert.
Signalübertragung
LED-Dimmer
LED-Dimmer

Entfernung bis 30m
Entfernung bis 30m
WICHTIG:
Für die ordnungsgemäße Funktion müssen alle Dimmer mit derselben Fernbedienung und innerhalb der gleichen Zone verbunden sein.
Für die automatische Programmsynchronisation muß zusätzlich gewährleistet sein, dass bei allen beteiligten RF-smart Leuch das gleiche Automatikprogramm eingestellt ist.
11. Automatikprogramme abspielen
Bei der Steuerung mit Fernbedienungen stehen je nach gewähltem Kanalmodus unterschiedliche Programme zur Verfügung und können durch mehrfaches drücken der Taste "M" bzw. der zugeordneten Taste abgespielt werden. Bei den Modis Single oder CCT stehen jedoch aktuell keine Automatikprogramme zur Verfügung.
| Nummer | Automatikprogramm | Helligk./Sättig./Geschw. |
| 1 | Zufälliger Farbwechsel | Einstellbar |
| 2 | Farbfade 5 Farben (B,P,R,G,Gr) | |
| 3 | Farbfade 4 Farben (W,Gr,B,P) | |
| 4 | Farbfade 3 Farben (Gr,B,P) | |
| 5 | Farbfade 3 Farben (B,R,G) | |
| 6 | Farbfade 3 Farben (B,R,W) | |
| 7 | Farbfade 3 Farben (B,W,P) | |
| 8 | Party | |
| 9 | Langsamer Farbfade 8 Farben |
12.Zigbee Verbindung
Zigbee Kopplung/Pairing aktivieren
Da sich die Kopplung des RF-smart Moduls zum entsprech Zigbee-Gateway je nach gewählter Steuerungsvariante (z.B. Amazon Echo (Alexa), Google Assistant, Tuya, Philips Hue) grundsätzlich unterscheidet, folgen Sie bitte den Anleitungen entsprechenden Anbieter bzw. des Zigbee 3.0 kompatiblen Gateways.
Nachfolgend zeigen wir Ihnen, wie Sie grundsätzlich den Kopplungs/ Pairing-Modus des RF-smart Geräts starten:
- Schritt: Das Zigbee Gateway muss vollständig installiert und eingerichtet sowie mit dem Internet verbunden sein.
- Schritt: Schließen Sie das RF-smart Gerät an die Stromversorgung an, bzw. verbinden Sie es mit dem Netzgerät
- Schritt: Drücken Sie die "SET-Taste" ca. 3 Sek. lang, bis die Kontrollleuchte schnell blinkt, welches Ihnen die Bereitschaft zur Kopplung mit einem Netzwerk signalisiert. ACHTUNG: Starten Sie danach umgehend die Kopplung in der APP, da der Pairingmodus aus Sicherheitsgründen nach ca. 20 Sek. automatisch deaktiviert wird.
14.07.2023
DEKOLIGHT Elektronik-Vertriebs GmbH Auf der Hub 2, D-76307 Karlsbad
www.deko-light.com deko@deko-light.com

Elektronik-Vertriebs GmbH, Auf der Hub 2, D-76307 Karlsbad
QUICK-MANUAL
Item-No.: 843501
Starter-Set: LED-Dimmer 5in1 incl.
Remote control for Single/CCT-Strips
FULL MANUAL:

contents
safety Instructions 2
product functions 2
specifications 3
installation/inserting the batteries 4
setting channel-mode 5
push-dim 5
LINK remote control 6
UNLINK remote control 7
"things to know" about remote-control 7
RF-repeater function 8
Automaticprograms 9
Zigbee pairing mode .... 10
1.SAFETY INSTRUCTION
Dear Customer,
the product meets the applicable requirements of European national directives. Technical Data can be changed without notice. Subject to errors. The installation may only be carried out by a qualified electrician. Switch off the power supply before installation and secure it against being switched on again. We accept no damage to property or personal injury caused by non-observance of the product information and assembly instructions, improper hand changes made.
Do not install RF-smart components in places with a lot strong electromagnetic waves, as this will affect the wireless range.
Please note the complete manual under the QR code / link printed on the front page.
2. PRODUCT FUNCTIONS
- suitable for LED strips/lights with constant voltage. (CV) 12-48VDC
- 0\~100% stepless dimming
- flicker-free
- Last state memory [last setting is saved]
- Adjustable 5-in1 mode [Single/CCT/RGB/RGBW/RGB+CCT)]
- intelli-Push-Dim connection [button for on/off + brightness]
- controllable with RF-smart radio remote controls [2.4GHz, range approx. 30m, not included]
- Remote control synchronization when operating several RF-smart dimmers [repeater function]
- Controllable with all Zigbee 3.0 compatible controls / apps such as Amazon Echo (Alexa), Google Assistant, Tuya [corresponds to Gateway required, outdoor range up to 100m]
3.SPECIFICATIONS
Input: 12V - 48V DC (CV)
Output: 12V - 48V DC (CV)
Output-current: max. 20A Controller / max. 10A (Ch.)
Protection-class: III
IP-protection: IP20
Controllable with: RF-smart remote-control RF 2.4GHz
+ Zigbee 3.0 + Intelli-Push (button)
Working temperature: -10 bis +40°C
Range outside: RF-remote control 2.4GHz up to 30m
Zigbee 3.0 up to 100m
Dimensions: 120 x 47 x 23mm

Working Voltage: 3V DC (2x AAA battery)
Transmitting Power:/Standby: 6dBm // 20uA
Modulationsmethod: GFSK
Control Distance: up to 30m
4. Installation/connection-diagramm
Pay attention to the input voltage of the dimmer. This must match the voltage of the LED strips. ATTENTION: Do NOT use any (Triac) dimmable power supplies.
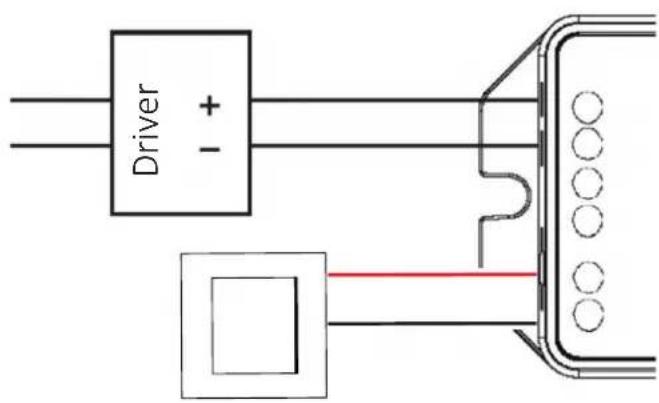
V+/V- Input / 12V-48V DC (CV) Power supply for other Dimmer PUSH-Button (Potential free)
Single Mode (gebrückt) max. 20A
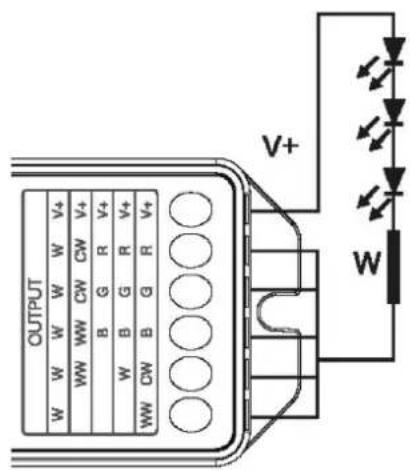
CCT/WW-CW Mode max. 2x 10A
Inserting Battery:
NOTE: 2 pcs. AAA Battery needed (not included)
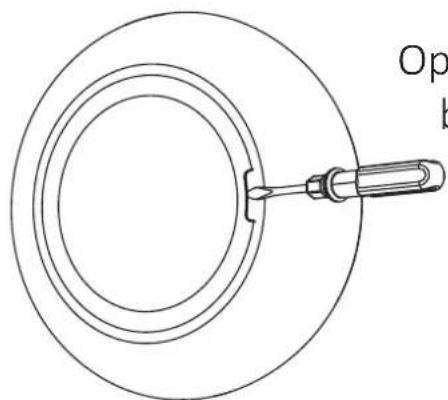
natural_image
Simple line drawing of a circular object with a central rod and a handle, no text or symbols present.Open battery cover behind remote
Install battery and close battery cover

natural_image
Technical line drawing of a mechanical component with concentric rings and internal rollers (no text or symbols)5. Setting channel-mode
This set is suitable for controlling single or CCT /WW-C/ Depending on this, you must set the appropriate channel
ATTENTION: Note the changing assignment of the output terminals.
Change channel-mode:
Press "SET" button continuously to switch channel mode. The set ch mode is indicated to you by a change in the color of the indicator light. As as the desired channel mode (se adjacent table/dimmer) is active, release the SET button. After 3 seconds without further operation, the mode is s automatically.

6. PUSH-DIM
Push-Button SHORT-PRESS:
- SWITCHIN ON/OFF
Push-Button LONG-PRESS:
- CONTINUOUSLY DIM BRIGHTNESS (light-dark-light)
Keep the button pressed until the desired brightness is reached. If necessary, repeat the process again to increase or decrease the brightness.
- INTELLI-PUSH
If multiple dimmers are controlled with one button and they do not show the same status/intensity, press the button for 20 seconds until all lights show the same intensity (100%). (Number of dimmers that can be connected to the same push button, max. 25 pieces / cable length max. 20 m).
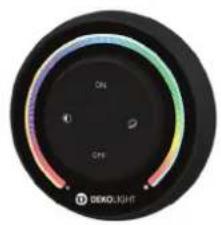
7. LINK REMOTE-CONTROL
In addition to the supplied remote control, other remote controls of the RF-smart system can also be connected.
843508
843509
843510
843511
843512
843513
843514
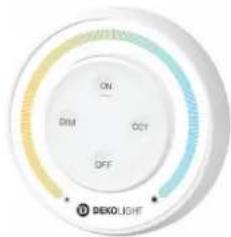
natural_image
Circular black dial with gradient color rings and 'DEKOLIGHT' branding at bottom (no readable text or symbols beyond labels)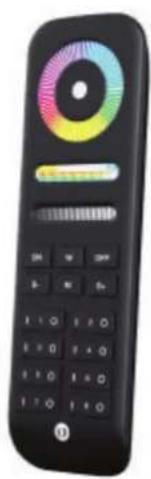
natural_image
Black remote control with colorful circular dial and navigation buttons (no readable text or symbols)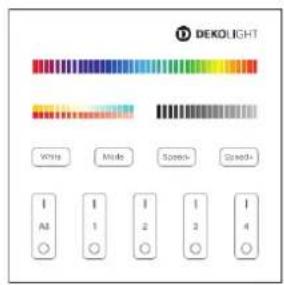

1. STEP: activate Link-Mode:
Option 1: SHORT-PRESS the "SET" button on the dimmer once
Option 2: Disconnect the dimmer from the power supply for 10 seconds and then switch it on again
2. STEP: link/connect remote-control:
Within 3 seconds, SHORT-PRESS the "ON" button 3 times on the respective remote control. If pairing is successful, the connected light flashes slowly 3 times.
In the case of remote controls with several zones, select the zone and press the corresponding "ON" button 3 times within 3 seconds.
If the process is not successful within 10 seconds, start again from step 1.
Press "ON"-Button within 3sec 3times.
8.UNLINK REMOTE-CONTROL
1. STEP: activate Link-Mode:
Option 1: SHORT-PRESS the "SET" button dimmer once
Option 2: Disconnect the dimmer from the power supply for 10 seconds and then switch it on again
2. STEP: unlink/disconnect remote-control:
Within 3 seconds, SHORT-PRESS the "ON" button 5times on the respective remote control. If unlinking is successful, the connected light flashes slowly 10times.
In the case of remote controls with several zones, select the zone and press the corresponding "ON" button 5 times within 3 seconds.
If the process is not successful within 10 seconds, start again from step 1.
Press "ON"-Button within 3sec 5times.
9. THINGS TO KNOW FROM RC
- a remote control can be coupled with several RF-smart devices and thus control several lights at the same time
- several remote controls can be paired with one RF-smart device and thus one device can be controlled from several places.
- Different remote control types can be mixed together (e.g. 1, 4, 8 zones). However, only those functions are supported that are also made available by the coupled RF-smart component.
10.RF-REPEATER FUNCTION
RF Range:
An RF-smart dimmer can transmit the control signals of an RF remote control to another dimmer within a range of up to 30 within range. Thus, the range of a remote control is t unlimited. The signals from up to 12 remote controls ca supported at the same time.
RF Program-Sync-Mode:
If identical automatic programs (color fades, etc.) are run several dimmers at the same time, these are also passed on via the RF signal and are therefore automatically synchronized.
flowchart
graph LR
    A["Radio System"] --> B["Wireless Signal"]
    B --> C["LED-Dimmer Signal"]
    C --> D["Range up to 30m"]
    C --> E["Range up to 30m"]
    D --> F["..."]
    E --> F
ATTENTION:
All dimmers must be connected to the same remote co within the same zone to function properly.
For automatic program synchronization, it must also be ensured that the same automatic program is set for all RF-smart lights involved.
11. Automaticprograms/Dynamic Modes
When controlling with remote controls, different programs are available depending on the selected channel mode and can be played back by repeatedly pressing the "M" button or the assign. However, there are currently no automatic programs available for the Single or CCT modes.
| Number | Dynamic Mode | Brightness / Saturation/Speed |
| 1 | Random color change | Adjustable |
| 2 | Colorfade 5 colors (b,p,r,y,g) | |
| 3 | Colorfade 4 colors (w,g,b,p) | |
| 4 | Colorfade 3 colors (g,b,p) | |
| 5 | Colorfade 3 colors (b,r,y) | |
| 6 | Colorfade 3 colors (b,r,w) | |
| 7 | Colorfade 3 colors (b,w,p) | |
| 8 | Party | |
| 9 | Slow Colorfade 8 colors |
12.ZIGBEE PAIRING MODE
Activate Zigbee pairing:
Since the coupling of the RF-smart module to the corresponding Zigbee gateway differs fundamentally depending on the selected cc variant (e.g. Amazon Echo (Alexa), Google Assistant, Tuya, Philips Hue), please follow the instructions of the respective manufacturer of the Zigbee 3.0 compatible gateway/app.
Following we will show you, how to start the pairing mode of the RF-smart device:
- STEP: The Zigbee Gateway must be fully installed and set up and connected to the internet.
- STEP: Connect the RF-smart device to the power supply or, if necessary, connect it to the power supply unit
- STEP: LONG-PRESS the "SET-Button" for 3 seconds until the indicator-light flashes quickly, which signals that you are ready to connect to a networkATTENTION: Then immediately start pairing in the APP, as the pairing mode is automatically deactivated after approx. 20 seconds for security reasons.
14.07.2023
DEKOLIGHT Elektronik-Vertriebs GmbH Auf der Hub 2, D-76307 Karlsbad
www.deko-light.com deko@deko-light.com

Dimmer must not be used in damp rooms