
CO565AGS0W - Pečica SIEMENS - Brezplačna navodila za uporabo
Brezplačno poiščite navodila za napravo CO565AGS0W SIEMENS v formatu PDF.


Vprašanja uporabnikov o CO565AGS0W SIEMENS
0 vprašanje o tej napravi. Odgovorite na tiste, ki jih poznate, ali zastavite svoje.
Zastavite novo vprašanje o tej napravi
Prenesite navodila za vaš Pečica v formatu PDF brezplačno! Poiščite svoja navodila CO565AGS0W - SIEMENS in vzemite svojo elektronsko napravo nazaj v roke. Na tej strani so objavljeni vsi dokumenti, potrebni za uporabo vaše naprave. CO565AGS0W znamke SIEMENS.
NAVODILA ZA UPORABO CO565AGS0W SIEMENS

[en]Instruction manual ....3
[zh]说明手册 43
Register your product online
Table of contents

Intended use....4

Important safety information 5
General information 5
Microwave 6
Steam 7

Causes of damage 7
General information 7
Microwave 7
Steam 8

Environmental protection 8
Saving energy 8
Environmentally-friendly disposal. 8

Getting to know your appliance. 9
Control panel
Function selector 9
Touch fields and display. 10
Rotary selector....11
Operating modes 1
Steam 1
Grill 1
Microwave 12
Cooking compartment 12
Tank cover.... 13
Water tank 13
Drip tray 13

Accessories 14
Accessories included 14
Additional accessories 14
Special accessories 14
Inserting accessories 14

Before using for the first time 15
Initial use 15
Set the water hardness range. 15
Cleaning the cooking compartment and accessories . . . 15

Operating the appliance. 16
Switching the appliance on and off. 16
Setting an operating mode 16
Automatic safety switch-off function 16

Microwave....17
Cookware 17
Microwave power settings 17
Setting the microwave 18
Setting the microwave to combined operation ..... 18

Grilling....19
Grill functions....19
Grill settings.... 19
Setting the grill....19

Steam....20
Noise 20
Cooking with steam 20
Setting the steam combination. 21
Filling the water tank 22
Refilling the water tank. 23
After every steam operation 23

Automatic programmes 24
Setting a programme 24
Programme table 25

Setting the time-setting options 26
Checking the time settings 26
Setting the timer.... 26
Setting the cooking time. 26
Setting the time 27
Changing the time on the clock 27

Childproof lock 27
Activating and deactivating 27

Basic settings....28
Changing the basic settings 28
List of basic settings. 28

Cleaning 29
Suitable cleaning agents 29
Keeping the appliance clean 30

Cleaning function 30
Descaling. 30
Rinsing. 31
Subsequent cleaning 31
Emptying the drip tray 31

Trouble shooting 32

Customer service 33
E number and FD number 33
Technical specifications 33

Tested for you in our cooking studio 33
General information 33
Defrosting 34
Heating frozen food 35
Warming 36
Cakes, small baked items and bread 37
Poultry, meat and fish 38
Vegetables and side dishes 40
Desserts 41
Acrylamide in foodstuffs. 41
Test dishes 41

Intended use
Read these instructions carefully. Only then will you be able to operate your appliance safely and correctly. Retain the instruction manual and installation instructions for future use or for subsequent owners.
This appliance is only intended to be fully fitted in a kitchen. Observe the special installation instructions.
Check the appliance for damage after unpacking it. Do not connect the appliance if it has been damaged in transport.
This appliance is intended for domestic use only. The appliance must only be used for the preparation of food and drink. The appliance must be supervised during operation. Only use this appliance indoors.
This appliance is intended for use up to a maximum height of 4000 metres above sea level.
This appliance may be used by children over the age of 8 years old and by persons with reduced physical, sensory or mental capabilities or by persons with a lack of experience or knowledge if they are supervised or are instructed by a person responsible for their safety how to use the appliance safely and have understood the associated hazards.
Children must not play with, on, or around the appliance. Children must not clean the appliance or carry out general maintenance unless they are at least 15 years old and are being supervised.
Keep children below the age of 8 years old at a safe distance from the appliance and power cable.
Manufacturer information:
Manufacturer: BSH Home Appliances (China) Co., Ltd.
Address: 20/21 / F, Zhongnan International Building, 129 Zhongshan Road, Nanjing
Standards conform to:
- GB 4706.1-2005 Safety of household and similar electrical appliances: General requirements
- GB 4706.21-2008 Safety of household and similar electrical appliances - Particular requirements for microwave ovens, including combined microwave ovens
- GB 4706.22-2008 Safety of household and similar electrical appliances - Particular requirements for stationed stoves, stoves, ovens and similar appliances
- GB19606-2004 Noise limits for household and similar electrical appliances
Important safety information
General information
⚠ Warning – Risk of fire!
- The appliance becomes very hot. If the appliance is installed in a fitted unit with a decorative door, heat will accumulate when the decorative door is closed. Only operate the appliance when the decorative door is open.
- Combustible items stored in the cooking compartment may catch fire. Never store combustible items in the cooking compartment. Never open the appliance door if there is smoke inside. Switch off the appliance and unplug it from the mains or switch off the circuit breaker in the fuse box.
- Loose food remnants, fat and meat juices may catch fire. Before using the appliance, remove the worst of the food remnants from the cooking compartment, heating elements and accessories.
- A draught is created when the appliance door is opened. Greaseproof paper may come into contact with the heating element and catch fire. Do not place greaseproof paper loosely over accessories during preheating. Always weight down the greaseproof paper with a dish or a baking tin. Only cover the surface required with greaseproof paper. Greaseproof paper must not protrude over the accessories.
⚠ Warning – Risk of burns!
- The appliance becomes very hot. Never touch the interior surfaces of the cooking compartment or the heating elements. Always allow the appliance to cool down. Keep children at a safe distance.
- Accessories and ovenware become very hot. Always use oven gloves to remove accessories or ovenware from the cooking compartment.
- Alcoholic vapours may catch fire in the hot cooking compartment. Never prepare food containing large quantities of drinks with a high alcohol content. Only use small quantities of drinks with a high alcohol content. Open the appliance door with care.
⚠ Warning – Risk of scalding!
- The accessible parts become hot during operation. Never touch the hot parts. Keep children at a safe distance.
- When you open the appliance door, hot steam can escape. Steam may not be visible, depending on its temperature. When opening, do not stand too close to the appliance. Open the appliance door carefully. Keep children away.
- Water in a hot cooking compartment may create hot steam. Never pour water into the hot cooking compartment.
⚠ Warning – Risk of injury!
Scratched glass in the appliance door may develop into a crack. Do not use a glass scraper, sharp or abrasive cleaning aids or detergents.
⚠ Warning – Risk of electric shock!
- Incorrect repairs are dangerous. Repairs may only be carried out and damaged power cables replaced by one of our trained after-sales technicians. If the appliance is defective, unplug the appliance from the mains or switch off the circuit breaker in the fuse box. Contact the after-sales service.
- The cable insulation on electrical appliances may melt when touching hot parts of the appliance. Never bring electrical appliance cables into contact with hot parts of the appliance.
- Do not use any high-pressure cleaners or steam cleaners, which can result in an electric shock.
- Penetrating moisture may cause electric shock. Never subject the appliance to intense heat or humidity. Only use this appliance indoors.
- A defective appliance may cause electric shock. Never switch on a defective appliance. Unplug the appliance from the mains or switch off the circuit breaker in the fuse box. Contact the after-sales service.
- When replacing the cooking compartment bulb, the bulb socket contacts are live. Before replacing the bulb, unplug the appliance from the mains or switch off the circuit breaker in the fuse box.
⚠ Warning – Hazard due to magnetism!
Permanent magnets are used in the control panel or in the control elements. They may affect electronic implants, e.g. heart pacemakers or insulin pumps. Wearers of electronic implants must stay at least 10 cm away from the control panel.
Microwave
⚠ Warning – Risk of burns!
- Using the appliance for anything other than its intended purpose is dangerous. You are not permitted to use it to dry food or clothing or to warm slippers, grain or cereal pillows, sponges, damp cleaning cloths or the like. This is because, for instance, overheated slippers, grain or cereal pillows, sponges and damp cleaning cloths, etc., may cause burns to the skin.
- Food may catch fire. Never heat food in heat-retaining packages. Do not leave food heating unattended in containers made of plastic, paper or other combustible materials.
Do not select a microwave power or time setting that is higher than necessary. Follow the information provided in this instruction manual.
Never use the microwave to dry food. Never defrost or heat food with a low water content, e.g. bread, at too high a microwave power or for too long.
- Cooking oil may catch fire. Never use the microwave to heat cooking oil on its own.
⚠ Warning – Risk of explosion!
Liquids and other food may explode when in containers that have been tightly sealed. Never heat liquids or other food in containers that have been tightly sealed.
⚠ Warning – Risk of burns!
- Foods with peel or skin may burst or explode during, or even after, heating. Never cook eggs in their shells or reheat hard-boiled eggs. Never cook shellfish or crustaceans. Always prick the yolk when baking or poaching eggs. The skin of foods that have a peel or skin, such as apples, tomatoes, potatoes and sausages, may burst. Before heating, prick the peel or skin.
- Heat is not distributed evenly through baby food. Never heat baby food in closed containers. Always remove the lid or teat. Stir or shake well after the food has been heated. Check the temperature of the food before it is given to the child.
- Heated food gives off heat. The ovenware may become hot. Always use oven gloves to remove ovenware or accessories from the cooking compartment.
-
Airtight packaging may burst when food is heated. Always observe the instructions on the packaging. Always use oven gloves to remove dishes from the cooking compartment.
-
The accessible parts become very hot when in operation. Never touch hot parts. Keep children at a safe distance.
- Using the appliance for anything other than its intended purpose is dangerous. You are not permitted to use it to dry food or clothing or to warm slippers, grain or cereal pillows, sponges, damp cleaning cloths or the like. This is because, for instance, overheated slippers, grain or cereal pillows, sponges and damp cleaning cloths, etc., may cause burns to the skin.
⚠ Warning – Risk of scalding!
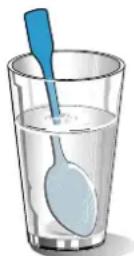
- There is a possibility of delayed boiling when a liquid is heated. This means that the liquid reaches boiling temperature without the usual steam bubbles rising to the surface. Even if the container only vibrates a little, the hot liquid may suddenly boil over and spatter. When heating, always place a spoon in the container. This will prevent delayed boiling.

natural_image
Blue X-shaped cross symbol crossed over a glass (no text or symbols)⚠ Warning – Risk of injury!
- Unsuitable ovenware may crack. Porcelain or ceramic ovenware can have small perforations in the handles or lids. These perforations conceal a cavity below. Any moisture that penetrates this cavity could cause the ovenware to crack. Only use microwave-safe ovenware.
- If using the appliance in microwave mode only, placing cookware and containers made of metal or featuring metal detailing inside the appliance may cause sparks when the appliance is operating. This may damage the appliance. Never use metal containers when using the appliance in microwave mode only.
Warning – Risk of electric shock!
The appliance is a high-voltage appliance.
Never remove the casing.
⚠ Warning – Risk of serious damage to health!
- The surface of the appliance may become damaged if it is not cleaned properly. Microwave energy may escape. Clean the appliance on a regular basis, and remove any food residue immediately. Always keep the cooking compartment, door seal, door and door stop clean. "Cleaning" on page 29
- Microwave energy may escape if the cooking compartment door or the door seal is damaged. Never use the appliance if the cooking compartment door, the door seal or the plastic door frame is damaged. Call the after-sales service.
- Microwave energy will escape from appliances that do not have any casing. Never remove the casing. For any maintenance or repair work, contact the after-sales service.
Steam
⚠ Warning – Risk of scalding!
- The water in the water tank may become very hot if you continue to operate the appliance. Empty the water tank after every operation with steam.
- Hot steam is generated in the cooking compartment. Do not reach into the cooking compartment during any operation with steam.
- Hot liquid may spill over the sides of the accessory when it is removed from the cooking compartment. Remove hot accessories with care and always wear oven gloves.
⚠ Warning – Risk of injury and risk of fire!
Flammable liquids can catch fire in the cooking compartment when it is hot (explosion). Do not fill the water tank with any flammable fluids (e.g. alcoholic drinks). Only fill the water tank with water or with the descaling solution that is recommended by us.
Causes of damage
General information
Caution!
- Water in the hot cooking compartment: Never pour water into the hot cooking compartment. This will cause steam. The temperature change can cause damage.
- Moisture in the cooking compartment: Over an extended period of time, moisture in the cooking compartment may lead to corrosion. Allow the cooking compartment to dry after use. Do not keep moist food in the closed cooking compartment for extended periods of time. Do not store food in the cooking compartment.
- Cooling with the appliance door open: Following operation at high temperatures, only allow the cooking compartment to cool down with the door closed. Do not trap anything in the appliance door. Even if the door is only left open a crack, the front of nearby furniture may become damaged over time. Only leave the cooking compartment to dry with the door open if a lot of moisture was produced whilst the oven was operating.
- Extremely dirty seal: If the seal is very dirty, the appliance door will no longer close properly during operation. The fronts of adjacent units could be damaged. Always keep the seal clean. "Cleaning" on page 29
- Appliance door as a seat, shelf or worktop: Do not sit on the appliance door, or place or hang anything on it. Do not place any cookware or accessories on the appliance door.
- Inserting accessories: depending on the appliance model, accessories can scratch the door panel when closing the appliance door. Always insert the accessories into the cooking compartment as far as they will go.
- Carrying the appliance: do not carry or hold the appliance by the door handle. The door handle cannot support the weight of the appliance and could break.
Microwave
Caution!
- Aluminium foil: Aluminium foil in the cooking compartment must not come into contact with the door glass. This could cause permanent discolouration of the door glass.
- Creation of sparks: Metal – e.g. a spoon in a glass – must be kept at least 2 cm from the cooking compartment walls and the inside of the door. Sparks can irreparably damage the glass on the inside of the door.
-
Microwave and microwave combination mode: The wire rack is not suitable for use in microwave mode or microwave mode combined with a type of heating. If you use either of these, this may create sparks, which may damage the cooking compartment.
-
Foil containers: Do not use foil containers in the appliance. They damage the appliance by producing sparks.
- Operating the microwave without food: Operating the appliance without food in the cooking compartment may lead to overloading. Never switch on the microwave unless there is food inside. The short crockery test is the exception to this rule.
→ "Microwave" on page 17

natural_image
Simple icon showing a speedometer above a boat with a checkmark (no text or symbols)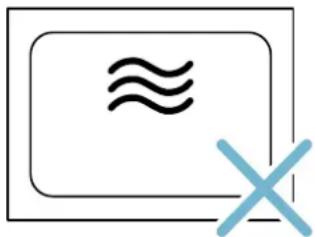
natural_image
Simple line drawing of a rectangular box with a wavy line and a blue 'X' symbol below it (no text or labels)- Microwave popcorn: Never set the microwave power too high. The door panel may crack if overloaded. Use a power setting no higher than 600 watts. Always place the popcorn bag on a glass plate.
Steam
Caution!
- Appliance care: Your appliance's cooking compartment is made from high-quality stainless steel. Improper care may lead to corrosion in the cooking compartment. Follow the care and cleaning instructions in the instruction manual. Remove food remnants from the cooking compartment surfaces as soon as the appliance has cooled down.
- Baking tins: Ovenware must be heat and steam resistant. Silicone baking tins are not suitable for combined operation with steam.
- Ovenware with areas of rust: Do not use any ovenware which displays areas of rust. Even the smallest spots of rust can lead to corrosion in the cooking compartment.
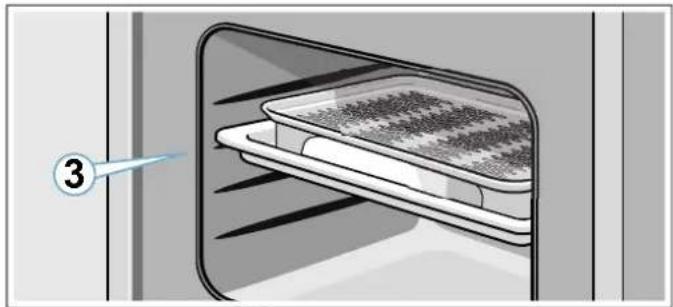
- Dripping liquids: During steaming, insert the glass tray into shelf position 3 and place the steam container onto the glass tray. Any dripping liquid is caught in the glass tray.
- Hot water in the water tank: Hot water can damage the pump. Do not pour hot water into the water tank.
- Risk of damage to the cooking compartment: Do not use the appliance if there is water on the cooking compartment floor. Before using the appliance, wipe away the water from the cooking compartment floor.
- Descaling solution: Do not allow any descaling solution to come into contact with the control panel or other surfaces on the appliance. This damages the surfaces. If this does happen, remove the descaling solution immediately with water.
- Cleaning the water tank: Do not clean the water tank in the dishwasher. Otherwise, the water tank will be damaged. Clean the water tank with a soft cloth and standard washing-up liquid.
- Frost protection: To prevent frost damage during transportation and storage, the appliance must be completely emptied beforehand.

Environmental protection
Your new appliance is particularly energy-efficient. Here you can find tips on how to save even more energy when using the appliance, and how to dispose of your appliance properly.
Saving energy
- Only preheat the appliance if this is specified in the recipe or in the tables in the operating instructions.
- Use dark, black lacquered or enamelled baking tins for baking. These absorb the heat particularly well.
- Open the appliance door as infrequently as possible when the appliance is in use.
- It is best to bake several cakes one after the other. The cooking compartment is still warm. This reduces the baking time for the second cake. You can place two cake tins next to each other in the cooking compartment.
- For longer cooking times, you can switch the appliance off 10 minutes before the end of the cooking time and use the residual heat to finish cooking.
Environmentally-friendly disposal
Dispose of packaging in an environmentally-friendly manner.
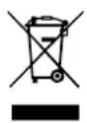
This appliance is labelled in accordance with European Directive 2012/19/EU concerning used electrical and electronic appliances (waste electrical and electronic equipment - WEEE). The guideline determines the framework for the return and recycling of used appliances as applicable throughout the EU.

Getting to know your appliance
In this section, we explain the display and controls. You will also find out about the various functions of your appliance.
Note: Depending on the appliance model, individual details and colours may differ.
Control panel
Use the function and rotary selector, as well as the touch fields, to set the various functions for your appliance via the control unit. The current settings are shown in the display.
The overview shows the control panel when the appliance is switched on with a selected operating mode.

1 Function selector
Use the function selector to set the type of heating or other functions.
You can turn the function selector clockwise or anti-clockwise from the "Off" position.
2 Touch fields
There are sensors behind the touch fields. Simply touch a symbol to select the function.
3 Display
The display shows symbols for active functions and the time-setting options.
4 Rotary selector
Use the rotary selector to set the temperature for the heating type or select the setting for other functions.
You can turn the rotary selector clockwise and anti-clockwise.
Notes
- On some appliances, the function or rotary selector can be retracted. To pop the function or rotary selector in or out, push it in in the "Off" position.
- If the function selector is in the "Off" position (energy-saving mode) and a function is selected, it will take a few seconds before the function becomes available (e.g. the microwave).
Function selector
Use the function selector to set the operating modes and other functions.
To make sure you always use the right operating mode to cook your food, we have explained the differences and applications below.
| Position Use | |
| ● "Off" position In this position, the appliance is switched off and is in energy-saving mode. | |
| Microwave Select microwave mode. | |
| Steam Hot steam is fed into the cooking compartment. | |
| Full-surface grill The whole area below the grill element becomes hot. | |
| Centre-area grill The centre part of the grill element becomes hot. | |
| Descaling Used to descale the evaporator and keep it operational. | |
| Rinse This function rinses the pipes in the steam unit with water. It is recommended to carry out the rinse function after each steam operation. | |
| Programmes This gives you access to preprogrammed settings for many dishes. | |
| Interior lighting Switches the interior lighting on. The appliance is not heating. | |
Touch fields and display
You can use the touch fields to set various additional functions for your appliance. You can see the values for these in the display.
Touch fields
Here you can find a short explanation of the various buttons and touch fields.
| Symbol | Meaning |
| ≈ | Microwave Select the microwave power levels or switch on the microwave function for grilling or steaming. |
| ≈ | Steam Select a steam level or switch on the steam function for a type of heating. |
| P | Programmes Call up the programme selection, use the rotary selector to select the programme number. |
| L | Time-setting options Select the "Time-setting options" symbol and use the rotary selector to set the time-setting options you require. |
| ∞ | Childproof lock Touch and hold to activate/deactivate the childproof lock |
| °C/kg | Temperature/weight Select and set the temperature/weight using the rotary selector. |
| ▷/□ | Start/stop Starts or pauses the operationNote:Pressing and holding ends the current operation and the settings for the operating mode selected are reset to the default values. |
Display
The display is structured so that the information can be read at a glance in any situation.
The value that you can currently set is highlighted. It is highlighted by two small arrows above and below the set value.
The value that is highlighted can be changed directly using the rotary selector.
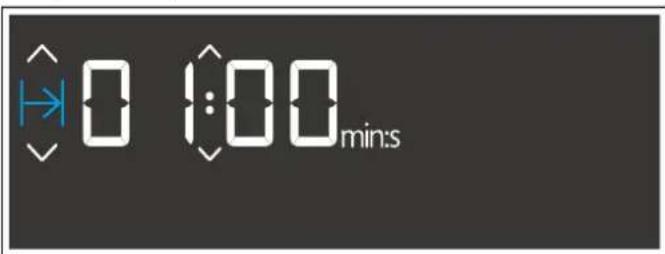
Display elements
Here you can find a short explanation of the various display elements.
| Symbol | Meaning | |
| Timer | If the symbol is highlighted, the timer will appear on the display. | |
| I→I | Cooking time | If the symbol is highlighted, the cooking time will appear on the c play. |
| Clock | If the symbol is highlighted, the clock will appear on the display. | |
| h:min | Hours/minutes | Cooking time in hours and minutes |
| min:s | Minutes/seconds | Cooking time in minutes and sec- onds |
| Childproof lock | If this symbol lights up, the child-proof lock is activated. | |
| Drip tray | Drip tray status display | |
| Water tank | Water tank status display | |
| Descaling | If the symbol lights up, the appli-ance must be descaled. | |
Drip tray and water tank status display
The status display only lights up when the rip tray or wa tank is required for the selected operating mode. It can display various statuses and informs the user when action is required.
Water tank status display
| Symbol | Meaning | |
| Symbol lights up, arrow flashes | Water tank is in the tank recess and needs filling. | |
| Symbol without arrow flashes | Water tank is not in the tank recess and needs fitting in place. | |
| Symbol without arrow lights up | Water tank is in the tank recess. No further action necessary. |
Drip tray status display
| Symbol | Meaning | |
| Symbol lights up, arrow flashes | Drip tray is in the tank recess and needs emptying. | |
| Symbol without arrow flashes | Drip tray is not in the tank recess. Insert the drip tray into the tank recess. | |
| Symbol without arrow lights up | Drip tray is in the tank recess. No further action necessary. | |
Temperature indicator
The blue thermometer to the right of the time display shows that the appliance is heating up.
If you are using the grill or steam mode, the entire thermometer lights up blue immediately.
The thermometer does not light up when the microwave function is in use.

Night mode
To save energy, the display brightness is automatically reduced to a lower level between 10 p.m. and 5.59 a.m.
Rotary selector
Use the rotary selector to change the adjustment values that are shown in the display and highlighted.
In most selection lists, e.g. programmes, the first selection follows the last.
For values, e.g. weight, you have to turn the rotary
selector back the other way when you reach the minimum or maximum value.
Operating modes
Your appliance has various operating modes which make your appliance easier to use.
You can find more precise descriptions of these in the corresponding sections.
| Operating mode Use | |
| Microwave→ "Microwave" on page 1 | You can use the microwave to cook, heat up or defrost your dishes more quickly. |
| Steam→ "Steam" on page 20 | There are various finely tuned steam levels for the optimal preparation of your food. |
| Full-surface grill→ "Grill" on page 12 | For grilling flat items, such as steaks or sausages, for making toast, and for au gratin dishes. |
| Centre-area grill→ "Grill" on page 12 | For grilling small amounts of steal sausages, toast and pieces of fish |
| Microwave combined operation→ "Setting the microwave to combined operation" on page 18 | This allows you to switch on the microwave function when steaming or grilling food. |
| Steam combination→ "Setting the steam combination" on page 21 | This allows you to switch on the steam function when microwaving or grilling food. |
| Cleaning→ "Cleaning function" on page 30 | Different cleaning functions are available: Descaling and rinsing. |
| Basic settings→ "Basic settings" on page 28 | You can change your appliance's basic settings to suit your needs. |
Steam
You can use the steam function on its own or in combination with all types of heating and the microwave function.
To ensure optimum use of the steam function, remove the wire rack. Insert the glass tray at shelf position 3 and insert the steam container into the glass tray.
natural_image
Diagram of a kitchen appliance with a tray and lid, showing interior structure (no text or symbols)Steam levels
Different intensity levels are available when using the steam function. The steam levels can be selected by touching ⚙. The selected steam level is shown in the display.
| Level | Intensity | Use | Display indicator |
| 1 | low | For defrosting vegeta-bles, meat, fish and fruit. |  |
| 2 | medium | For preparing des-serts, fish and sau-sages. |  |
| 3 | high | For cooking vegeta-bles, fish, side dishes, for extracting juice from fruit and for blanching. |  |
Grill
You can brown your food nicely using the grill.
You can use the grill function on its own or in combinatic with the microwave and steam functions.
To make the most of the grill function, insert the wire rac in shelf position 3 or 4.
Grill settings
There is a choice of three intensities for the full-surface grill function:
Setting 1: Low
■ Setting 2: Medium
Setting 3: High
Microwave
To ensure that you always use the correct microwave power setting, we have provided a general overview of what the different power settings can be used for below.
The microwave power settings are levels and do not always correspond to the exact wattage that the appliance uses.
| Micro-wave setting | Maximum cooking time | Use |
| 90 1 hour 30 mins | For defrosting | food that deteriorates easily in terms of quality. |
| 180 1 hour 30 mins | For defrosting | and continued cooking. |
| 360 1 hour 30 mins | For cooking | meat and for heating food that deteriorates easily in terms of quality. |
| 600 1 hour 30 mins | For heating and cooking food. | |
| 1000 30 minutes | For heating liquids. | |
Setting the microwave to combined operation
You can combine the microwave function with all types of heating and the steam function. The appliance heats up and the microwave is switched on at the same time. As a result, the food is ready in a much shorter time.
You can switch on all microwave power settings.
Exception: 1000 watts
Cooking compartment
Various functions in the cooking compartment make your appliance easier to use. For example, the cooking compartment is well lit and a cooling fan prevents the appliance from overheating.
Opening the appliance door
If you open the appliance door during an operation, the operation is paused. Close the door and touch the ▷/□ field to continue the operation.
Interior lighting
The interior lighting lights up while the appliance is operating. Once the oven has finished cooking the food, the lighting goes out.
The interior lighting switches on when the appliance door is opened. This makes it easier to clean your appliance, for example. After approximately 15 minutes, the interior lighting automatically switches itself off.
Cooling fan
Your appliance has a cooling fan. The cooling fan switches on during operation. The hot air escapes above the door.
The cooling fan continues to run for a certain time after operation.
Caution!
Do not cover the ventilation slots. Otherwise, the appliance may overheat.
Notes
- The appliance remains cool during microwave operation. Despite this, the cooling fan will still switch on. The fan may run on even when microwave operation has ended.
- Condensation may form on the door window, interior walls and floor. This is normal and does not adversely affect appliance operation. Wipe away the condensation after cooking.
Tank cover
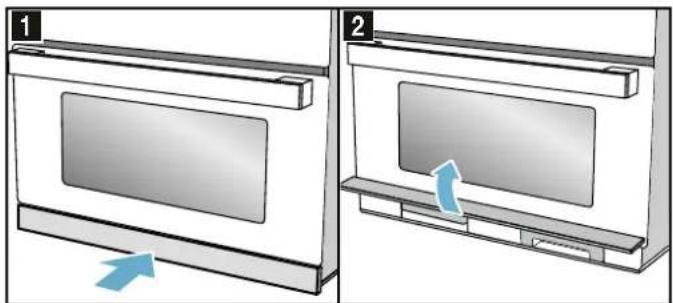
The tank cover is located below the appliance door and allows for access to the drip tray and water tank. Both of these are located behind the tank cover. Proceed as follows to open and close the tank cover:
Briefly press on the centre of the tank cover to open it. The tank cover folds upwards.
To close the tank cover, fold it downwards and briefly press the centre of the tank cover. The tank cover is locked.
natural_image
Two-panel diagram showing a device with a screen and a shelf, labeled 1 and 2, with arrows indicating motion (no text or symbols present)Water tank
The appliance is equipped with a water tank. The water tank is located to the right behind the tank cover. Fill the water tank with water to operate the appliance using steam modes. → "Filling the water tank" on page 22
If the arrow of the water tank symbol 📋 flashes on the display, the water in the water tank needs replacing.

1 Handle for removing and inserting the water tank
2 Opening for filling
3 Tank cover
Drip tray
The appliance is equipped with a drip tray. The drip tray is located to the left behind the tank cover. Empty the drip tray before and after carrying out the cleaning functions→ "Cleaning function" on page 30
If the arrow of the drip tray symbol 📄 flashes on the display, the drip tray needs emptying.

1 Handle for removing and inserting the water tank
2 Collection opening
3 Tank cover

Accessories
Your appliance is accompanied by a range of accessories. Here, you can find an overview of the accessories included and information on how to use them correctly.
Accessories included
Your appliance is equipped with the following accessories:
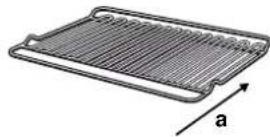
Wire rack
Use as a surface for setting down baking tins or for grilling and browning.
Use the wire rack for grilling at shelf positions 3 and 4.
The wire rack is not suitable for use when the appliance is operating purely in microwave mode or when you are cooking using steam.
Make sure that you insert the wire rack in direction a.

Glass tray
The glass tray can be used for cooking in all operating modes, including combination mode. In addition, it acts as a splash guard if you are grilling food directly on the wire rack.
Allow the glass tray to cool before you clean it or place it in cold water as this may damage the glass.

Steam container
The steam container is placed into the glass tray in order to cook with the Steam or Steam with microwave operating modes. The glass tray must be inserted in shelf position 3 for this. The food can be placed directly onto the steam container.
The steam container is dishwasher-safe.
Do not use the steam container in standard microwave operation or during grilling.
Only use original accessories provided by your appliance manufacturer. They are specially adapted for your appliance.
You can buy accessories from our customer service, from specialist retailers or online.
Additional accessories
Additional accessories may be enclosed depending on the appliance model.

Wire insert
For frying. Insert the wire insert into the glass tray with its feet to the bottom. This ensures that dripping grease and meat juices can be collected. The wire insert is not suitable for use in microwave operation or steam mode.
Special accessories
You can obtain further accessories from the after-sales service or from specialist retailers.
Special accessories
Glass roasting dish
For pot roasts and bakes that you prepare in the oven.
Inserting accessories
The cooking compartment has four shelf positions. The shelf positions are counted from the bottom up.

Insert the accessory into the guide and slide it in fully.
Note: The cooking compartment (position 0) is particularly suitable for microwave operation, as this is where the microwave power is optimum. Only use cookware that is suitable for use in microwaves.

Before using for the first time
Before you can use your new appliance, you must make some settings. You must also clean the cooking compartment and accessories.
The appliance must be fully installed and connected to the mains.
Initial use
After connecting the electricity supply or after a power cut, the display prompts you to set the time. It may take a few seconds for the instruction to appear.
Setting the time
During initial use, the time display is highlighted.
The 12:00 value flashes in the display and the ⏻ symbol lights up. Set the time.
- Use the rotary selector to set the time.
- Touch ⏻.
The time has now been set.
Changing the time on the clock
Note: To change the time on the clock, you will need to switch off the appliance.
- Touch the Ⓛ button twice.
The Ⓛ symbol and the clock time will appear on the display.
- Set the clock using the rotary selector.
- Touch the Ⓛ button.
The time has now been set.
Notes
- If you do not touch the ⏻ button after setting the time, the set value is automatically adopted after a few seconds.
- If the function selector has been moved to configure the settings, it must be returned to the "Off" position once you have finished. Only then can the appliance be used.
- In order to reduce the energy consumption of your appliance in standby, you can hide the clock.
Set the water hardness range.
So that the appliance can reliably remind you to descale it when required, you must set your water hardness range correctly.
The water hardness range is set to 4 (very hard) ex works.
Caution!
The appliance may become damaged due to the use of unsuitable liquids.
Do not use distilled water, highly chlorinated tap water (>40 mg/l) or other liquids.
Only use fresh, cold, non-carbonated tap water or softened water.
Notes
- If your water is very hard, we recommend that you use softened water.
- If you only use softened water, you can set the water hardness range to "softened" in this case.
If you use mineral water, set the water hardness range to "4 very hard". - If you use mineral water, you must only use non-carbonated mineral water.
Water hardness range Setting
| 0 | 0 softened |
| 1 | (up to 1.3 mmol/l) 1 soft |
| 2 | (1.3 - 2.5 mmol/l) 2 medium |
| 3 | (2.5 - 3.8 mmol/l) 3 hard |
| 4 | (above 3.8 mmol/l) 4 very hard |
You can change the water hardness in the basic settings.→ "Basic settings" on page 28
Cleaning the cooking compartment and accessories
Before using the appliance to prepare food for the first time, you must clean the cooking compartment and accessories.
Cleaning the cooking compartment
To eliminate the new-appliance smell, heat up the cooking compartment when it is empty and with the oven door closed. An hour at grill level 3 is ideal for this purpose. Make sure that there are no remnants of packaging in the cooking compartment.
- Use the function selector to set Full-surface grill ☐.
- Set to grill level 3 using the rotary selector.
- Touch ▷/□.
The appliance begins to heat up.
Switch off the appliance after one hour. To do so, touch ▷/□ and then turn the function selector to the off position.
Cleaning the accessories
Before you use the accessories for the first time, clean them thoroughly with hot soapy water and a soft dish cloth.

Operating the appliance
You have already learnt about the controls and how they work. Now we will explain how to set your appliance. You will learn about what happens when you switch the appliance on and off, and how to select the operating mode.
Switching the appliance on and off
Before you are able to set the appliance, you must switch it on.
Note: The childproof lock can only be set if the appliance is switched off. Some displays also remain visible in the display when the appliance has been switched off.
Switch off your appliance when it is not being used. If no settings are applied for a long time, the appliance switches itself off automatically.
Switching on the appliance
Turn the function selector to switch on the appliance.
A standard value is highlighted in the display. The appliance is ready to use.
You can find out how to select the operating modes in the individual chapters.
Switching off the appliance
Turn the function selector to the off position.
Any functions that may be running are cancelled.
The time appears in the display.
Note: You can set whether the clock should be displayed when the device is switched off in the basic settings.
Setting an operating mode
After selecting an operating mode, default values are shown in the display. You can start this setting immediately.
The following always applies:
-
Use the function selector to select the operating mode.
-
If necessary, apply other settings.
To do this, touch the appropriate field and use the rotary selector to change the value.
- Touch ▷/□.
The appliance starts the operation.
Setting the cooking time
-
Set the operating mode.
-
Touch ⏻ until the I→I symbol is highlighted.
-
Use the rotary selector to set the required cooking time.
-
Touch ▷/□.
The appliance begins to heat up. The ▷/□ LED lights up. The cooking time starts counting down.
Pausing the operation
m1. Touch the ▷/□ field or open the appliance door. The operation is suspended and the ▷/□ LED flashes.
-
Close the appliance door.
-
Touch the ▷/□ field.
The operation is continued and the ▷/□ LED lights up.
Stopping the appliance from heating
Turn the function selector to the "Off" position.
The appliance will stop heating and all the settings will be cleared.
Note: The fan may continue to run after the appliance has been paused or stopped.
Automatic safety switch-off function
The automatic safety switch-off function is activated if your appliance is operating for a long time with no cookir time having been set.
The appliance automatically switches off after nine hours.

Microwave
You can use the microwave to cook, heat up or defrost food quickly. You can use the microwave on its own or in combination with the grill or steam function.
To ensure optimum use of the microwave, please observe the notes on cookware and familiarise yourself with the data in the application tables at the end of the instruction manual.
To ensure optimum use of the microwave, place your cookware on the cooking compartment floor. Remove the wire rack. Observe the instructions on the cookware.
Cookware
Not all cookware is microwavable. So that your food is heated and the appliance is not damaged, only use microwavable cookware.
Suitable cookware
Heat-resistant cookware made of glass, glass ceramic, porcelain, ceramic or heat-resistant plastic are suitable. These materials allow microwaves to pass through.
You can also use serving dishes. This saves you having to transfer food from one dish to another. You should use cookware with decorative gold or silver trim if the manufacturer guarantees that they are suitable for use in microwaves.
Unsuitable cookware
Metal cookware is unsuitable. Metal does not allow microwaves to pass through. Food in covered metal containers will remain cold.
Caution!
Creation of sparks: Metal – e.g. a spoon in a glass – must be kept at least 2 cm from the cooking compartment walls and the inside of the door. Sparks can irreparably damage the glass on the inside of the door.
Cookware test
Never switch on the microwave unless there is food inside. The short cookware test is the only exception to this rule.
Perform the following test if you are unsure whether your cookware is suitable for use in the microwave.
-
Heat the empty cookware at maximum power for 12 to 1 minute.
-
Check the temperature of the cookware during this time.
The cookware should remain cold or warm to the touch. The cookware is unsuitable if it becomes hot or sparks are generated. In this case, stop the test.

Warning – Risk of burns!
The accessible parts become very hot when in operation. Never touch hot parts. Keep children at a safe distance.
Microwave power settings
The microwave power settings are levels and do not always correspond to the exact wattage that the appliance uses.
The following microwave power settings are available.
| Micro-wave setting | Maximum cooking time | Use |
| 90 1 hour 30 mins | For defrosting | food that deteriorates easily in terms of quality. |
| 180 1 hour 30 mins | For defrosting and continued cooking. | |
| 360 1 hour 30 mins | For cooking meat and for heating food that deteriorates easily in terms of quality. | |
| 600 1 hour 30 mins | For heating and cooking food. | |
| 1000 30 minutes | For heating liquids. |
Default values:
The appliance provides a default cooking time for each microwave setting. You can accept this value or change it in the appropriate area.
The maximum setting is designed for heating liquids only; it is not designed for heating food. After a certain period, the microwave's maximum power is gradually reduced to 600 W to protect the appliance. Full power is made available again after a cooling period.
Time setting intervals
The interval for setting the cooking time changes with the length of the cooking time.
| Cooking time Interval | |
| st - 1 minute 5 seconds | |
| s 1 - 3 minutes 10 seconds | |
| 3 - 15 minutes | 30 seconds |
| 15 minutes - 1 hour | 1 minute |
| 1 hour - 1 hour 30 minutes | 5 minutes |
Setting the microwave
Example: Microwave setting 600 W, cooking time 5 minutes.
- Use the function selector to select the microwave function ≈.
The appliance is now ready to use. The maximum microwave power output ≈ will be displayed as the default value on the display. You can change this at any time.
- Touch the microwave setting field to select the power setting you require.
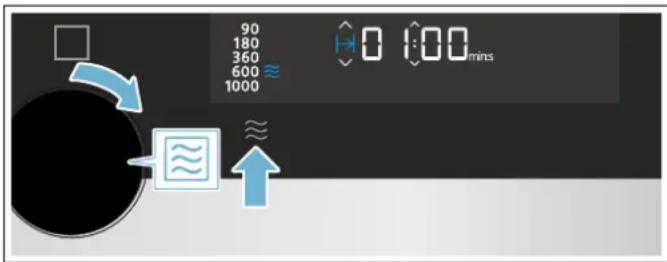
The microwave setting will be highlighted and a default cooking time will be shown on the display.
- Use the rotary selector to set the required cooking time.
Note: You can also set the cooking time first and then the microwave setting.
- Touch the ▷/□ button.
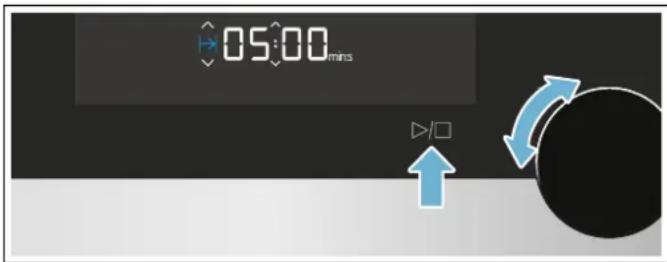

The time remaining will count down on the display. The ▷/□ LED will be lit.
The cooking time has elapsed
An audible signal sounds. Open the appliance door or touch any field.
Changing the cooking time
Use the rotary selector to change the cooking time. After few seconds, the change is applied.
Notes
- Touching it several times switches the power levels from the highest to the lowest level.
- If the microwave function is only added after the start, the appliance pauses. Press ▷/□ to start operation
Pausing the operation
- Touch the ▷/□ field or open the appliance door.
The operation is suspended and the ▷/□ LED flashes. - Close the appliance door.
- Touch the ▷/□ field.
The operation is continued and the ▷/□ LED lights up.
Stopping the appliance from heating
Turn the function selector to the "Off" position.
The appliance will stop heating and all the settings will be cleared.
Note: The fan may continue to run after the appliance has been paused or stopped.
Setting the microwave to combined operation
You can combine the microwave function with the grill and steam function. The appliance heats up and the microwave is switched on at the same time. As a result, the food is ready in a much shorter time.
Combination options
Steam
Grill
Exception:
Microwave setting 1000 W
Setting combined operation
Example in the picture: Full-surface grill ☐ at level 2 with microwave at 360 W, 17 minutes.
- Use the function selector to set the Full-surface grill ☐. Level 3 appears in the display as a default value.
- Use the rotary selector to set the required level.
- Touch the microwave power output field ≈ until the required level is selected in the display. A default cooking time appears.
- Set the cooking time using the rotary selector.
- Touch ▷/□.
The operation starts and the ▷/□ LED lights up. The cooking time starts counting down.
The cooking time has elapsed
A signal sounds and the ▷/□ symbol stops lighting up. Combination mode has finished. Touch any field to end the acoustic signal.
^a Changing the microwave power output
Touch ≈ until the required level is selected in the displ
Changing the microwave power output
Touch ≈ until the required level is selected in the display.
Notes
- Touching it several times switches the power levels from the highest to the lowest level.
- If the microwave function is only added after the start, the appliance pauses. Press ▷/□ to start operation
Pausing the operation
- Touch the ▷/□ field or open the appliance door. The operation is suspended and the ▷/□ LED flashes.
- Close the appliance door.
- Touch the ▷/□ field.
The operation is continued and the ▷/□ LED lights up.
Stopping the appliance from heating
Turn the function selector to the "Off" position.
The appliance will stop heating and all the settings will cleared.
Note: The fan may continue to run after the appliance has been paused or stopped.
Drying the cooking compartment
Dry the cooking compartment after operation to ensure that no moisture remains.
Heating up the cooking compartment
To dry the cooking compartment, it is heated up so that the moisture in the cooking compartment evaporates. You will then need to open the appliance door to allow the steam to escape from the cooking compartment.
- Allow the appliance to cool down.
- Remove the worst dirt from the cooking compartment immediately and wipe away moisture from the cooking compartment floor.
- Use the function selector to set Full-surface grill ☐
- Touch ⏱ twice.
The cooking time symbol is highlighted in the display. - Use the rotary selector to set a cooking time of 15 minutes.
- Press ▷/□ to start the operation. The drying function starts and ends automatically after 15 minutes.
- Open the appliance door and leave it open for 1 to 2 minutes so that the moisture in the cooking compartment can escape.
Drying the cooking compartment by hand
- Allow the appliance to cool down.
- Remove any food remnants from the walls of the cooking compartment.
- Dry the cooking compartment with a sponge.
- Leave the appliance door open for 1 hour so that the cooking compartment dries completely.

Grilling
You can brown your food nicely using the grill.
You can use the grill function on its own or in combination with the microwave and steam functions.
To make the most of the grill function, insert the wire rack in shelf position 3 or 4.
Grill functions
You can choose between two different grill functions, depending on the type and amount of food:
Function Food
| Full-surface grill | Use the full-surface grill to grill large pieces of meat and bread or to brown bakes. |
| Centre-area grill | Use the centre-area grill to grill small amounts of food. Only the centre part of the grill element becomes hot with this function. |
Grill settings
The following grill settings are available for the full-surface grill function:
| Setting | Food | |
| Full-surface grill | Setting 1 (low) | Soufflés and deep bakes |
| Setting 2 (medium) | Shallow bakes and fish | |
| Setting 3 (high) | Steaks, sausages and toast | |
| Centre-area grill | Setting 1 (low) | For small soufflés and deep bakes. |
Setting the grill
Example in the picture: Full-surface grill ☐ at setting 2, cooking time 12 minutes.
- Use the function selector to set the full-surface grill ☐ mode.

-
Use the rotary selector to select setting 2. The grill setting will be shown on the display.
-
Use the rotary selector to set the required cooking time.
- Touch ▷/□.

The appliance will start heating. The temperature indicator will be lit completely.
Note: Once the appliance has heated up, slight fluctuations in temperature are normal.
The cooking time has elapsed
An audible signal sounds. Open the appliance door or touch any field.
Setting the cooking time
- Set the operating mode.
- Touch ⏻ until the symbol is highlighted.
- Use the rotary selector to set the required cooking time.
- Touch ▷/□. The appliance begins to heat up. The ▷/□ LED lights up. The cooking time starts counting down.
Changing the grill setting
Once the grill function has been selected or the grill has been started, you can still change the grill setting at any point using the rotary selector.
The cooking time remains unchanged.
Pausing the operation
- Touch the ▷/□ field or open the appliance door. The operation is suspended and the ▷/□ LED flashes.
- Close the appliance door.
- Touch the ▷/□ field. The operation is continued and the ▷/□ LED lights up.
Stopping the appliance from heating
Turn the function selector to the "Off" position.
The appliance will stop heating and all the settings will be cleared.
Note: The fan may continue to run after the appliance has been paused or stopped.

Steam
You can use the steam function on its own or in combination with the grill and microwave function.
To ensure optimum use of the steam function, remove the wire rack. Insert the glass tray in shelf position 3 and insert the steam container into the glass tray.
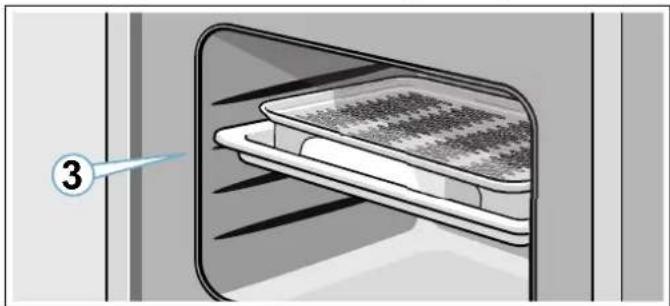
natural_image
Diagram of a kitchen appliance with a tray holding food, showing interior and exterior view (no text or symbols)Warning – Risk of scalding!
When you open the appliance door, hot steam can escape. Steam may not be visible, depending on its temperature. When opening, do not stand too close to the appliance. Open the appliance door carefully. Keep children away.
Noise
Pump
You will hear a humming noise during operation. This noise is caused by the pump. It is a normal operating noise.
Cooking with steam
Steam levels
Different intensity levels are available when using the steam function. The steam levels can be selected by touching ⚙. The selected steam level is shown in the display.
Level Intensity Use Display indicator
1 low For defrosting vegetables, meat, fish and fruit.

2 medium For preparing desserts, fish and sausages.

3 high For cooking vegetables, fish, side dishes, for extracting juice from fruit and for blanching.

Setting the steam
Note: If the appliance has not been used for an extended period, start by running a rinse cycle Ⓞ. → "Cleaning function" on page 30
Example: Steam setting 2: Medium, cooking time 10 minutes.
- Use the function selector to select the steam function ☑.

The appliance is ready to use. The maximum steam setting and a cooking time of 20 minutes are set default values. The arrow of the water tank symbol flashes.
- Remove the water tank, fill with fresh water up to the "max." mark and insert fully in the tank recess.→ "Filling the water tank" on page 22
- Touch and hold the 🔗 button until you reach the required setting.
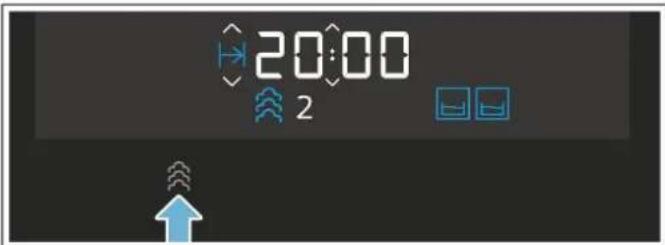
The selected steam setting will be shown on the display.
- Use the rotary selector to set the required cooking time.
Note: You can also adjust the cooking time first and then the steam setting.

- Touch the ▷/□ button.

The arrow of the water tank symbol 📄 will go out and the water tank symbol 📄 will be lit. The appliance will start. The ▷/□ LED will be lit. The cooking time will count down on the display. The amount of time a tankful of water will last varies depending on the steam setting. If the water tank runs out of water while the appliance is in operation, the appliance is paused and the arrow of the water tank symbol 📄 flashes. Fill the water tank with fresh water up to the "max." mark and touch the ▷/□ button to resume operation.
Notes
- The steam setting can be changed at any time when the appliance is in operation by pressing the 📐 button.
- After cooking with steam, wipe out the drip channel and the cooking compartment. → "After every steam operation" on page 23
Setting the steam combination
With some types of heating, you can switch on the steam function.
When you cook with steam assistance, steam is introduced into the cooking compartment at various intervals and with varying degrees of intensity. This gives you a better cooking result.
Your food
■ Becomes crispy on the outside
■ Achieves a glossy surface
■ Is succulent and tender on the inside
■ Only undergoes a minimum reduction in volume
Suitable types of heating
- ≈ Microwave
Grill
Setting combination mode
Example: Full-surface grill ☐ at setting 2 and steam setting 2.
- Use the function selector to set grill mode. Setting 3 will appear as the default value on the display.
- Use the rotary selector to set the required setting.
- Touch the Steam button ≈ until the required setting has been selected on the display. The water tank symbol ⏻ will appear on the display
- Refill water tank.
- Touch the ▷/□ button. The appliance will start and the ▷/□ LED will be lit. The cooking time will start counting down.
enSteam
Note: If the water tank runs out of water during cooking, the appliance will continue cooking, but without steam assistance. No indicator will appear on the display.
The cooking time has elapsed
A signal sounds and the ▷/□ symbol stops lighting up. Combination mode has finished. Touch any field to end the acoustic signal.
Changing the steam level
Touch the ≈ field until the required level is selected in display.
Note: Touch the field multiple times switches through the levels from the highest to the lowest level. After the lowest level, the steam function is deactivated. Touching again activates the steam function, starting with the highest level.
Pausing the operation
- Touch the ▷/□ field or open the appliance door. The operation is suspended and the ▷/□ LED flashes.
- Close the appliance door.
- Touch the ▷/□ field. The operation is continued and the ▷/□ LED lights up.
Stopping the appliance from heating
Turn the function selector to the "Off" position. The appliance will stop heating and all the settings will be cleared.
Note: The fan may continue to run after the appliance has been paused or stopped.
Filling the water tank
The water tank is located to the right behind the tank cover, below the appliance door. Before starting an operation with steam, open the tank cover and fill the water tank with water.
Ensure that the water hardness range has been set correctly. → "Basic settings" on page 28
Warning – Risk of injury and fire!
Only fill the water tank with water. Do not pour any flammable liquids (e.g. alcoholic drinks) into the water tank. Due to hot surfaces, vapours from flammable liquids may catch fire in the cooking compartment (explosion). The appliance door may spring open. Hot steam and jets of flame may escape.
Caution!
The appliance may become damaged due to the use of unsuitable liquids.
Do not use distilled water, highly chlorinated tap water (>40 mg/l) or other liquids.
Only use fresh, cold, non-carbonated tap water or softened water.
Notes
- If your water is very hard; we recommend that you use softened water.
-
If you use only softened water, you can set your appliance to the "softened" water hardness range.
-
Briefly press on the centre of the tank cover. The tank cover will open. The drip tray (left) and water tank (right) can now be accessed.
-
Remove the water tank from the tank recess.

natural_image
Illustration of a microwave oven with a blue arrow indicating airflow or movement (no text or symbols)
natural_image
Illustration of a monitor mounted on a base with a blue arrow indicating motion (no text or symbols)- Fill the water tank with cold water up to the "max." mark.

natural_image
Illustration of a pipette dispensing liquid into a rectangular container with a blue arrow indicating flow direction (no text or symbols)Place the water tank back into the tank recess and slide it in fully.
- Close the tank cover.

natural_image
Illustration of a monitor mounted on a stand with an arrow indicating motion (no text or symbols)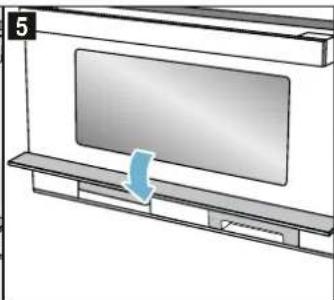
natural_image
Diagram of a monitor mounted on a shelf with a blue arrow indicating the motion direction (no text or symbols present)The steam function is ready to use.
Refilling the water tank
The way the appliance responds if the water tank runs dry when the appliance is in operation depends on what operating mode it is in:
- Steam mode: The appliance is stopped and a message appears on the display. At the highest steam setting, a tankful of water will last approx. 30-40 minutes; at the lower steam settings, it will last much longer.
- Steam with microwave: The appliance is stopped. A tankful of water will last approx. 50 minutes.
- Grill with steam: The appliance continues to run in grill mode; no message appears on the display. At the highest steam setting, a tankful of water will last approx. 3 hours; at the lower steam settings, it will last much longer.
Note: Actual times may vary from those specified.
Refill the water tank up to the "MAX" mark.
- Open the control panel.
- Remove and refill the water tank.
- Insert the filled water tank and close the control panel.
After every steam operation
Moisture remains in the cooking compartment. Carefully wipe out the drip channel and the cooking compartment. Each time you cook using steam, we recommend that you run the Rinse cleaning function ☐ afterwards. Then empty and dry the water tank and drip tray.
Note: Remove limescale marks with a cloth soaked in vinegar, then wipe with clean water and dry with a soft cloth.
Emptying the water tank
- Briefly press on the centre of the tank cover. The tank cover folds upwards.
- Remove the water tank.
- Carefully remove the lid for the water tank.
- Empty the water tank, clean it with detergent and then rinse it thoroughly with clean water.
- Dry all parts with a soft cloth.
- Rub the seal on the lid until dry.
- Allow the water tank to dry with the lid open.
- Place the lid on the water tank and push down on it.
- Slide the water tank in fully.
- Close the tank cover and briefly press on the centre it.
The tank cover is locked.
Caution!
- Do not dry the water tank in the hot cooking compartment. This will damage the water tank.
- Do not clean the water tank in the dishwasher. This will damage the water tank.
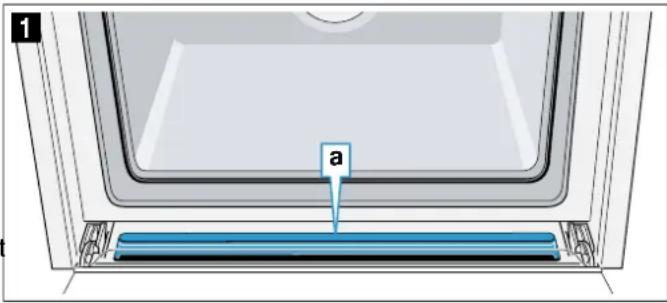
Cleaning the drip trough
y1. Allow the appliance to cool down.
2. Open the tank cover.
3. Remove the water tank and drip tray.
4. Wipe around the drip trough a underneath the cooking compartment with a sponge cloth (fig. 1).
Drying the cooking compartment
Dry the cooking compartment after operation to ensure that no moisture remains.
Heating up the cooking compartment
To dry the cooking compartment, it is heated up so that the moisture in the cooking compartment evaporates. You will then need to open the appliance door to allow the steam to escape from the cooking compartment.
- Allow the appliance to cool down.
- Remove the worst dirt from the cooking compartment immediately and wipe away moisture from the cooking compartment floor.
- Use the function selector to set Full-surface grill ☐
- Touch ⏻ twice.
The cooking time symbol is highlighted in the display. - Use the rotary selector to set a cooking time of 15 minutes.
- Press ▷/□ to start the operation.
The drying function starts and ends automatically after 15 minutes. - Open the appliance door and leave it open for 1 to 2 minutes so that the moisture in the cooking compartment can escape.
Drying the cooking compartment by hand
- Allow the appliance to cool down.
- Remove any food remnants from the walls of the cooking compartment.
- Dry the cooking compartment with a sponge.
- Leave the appliance door open for 1 hour so that the cooking compartment dries completely.

Automatic programmes
You can prepare food really easily using the automatic programmes. You select the programme and enter the weight of your food. The automatic programme then applies the most suitable settings. You can select from 15 programmes.
Notes
- Take the food out of its packaging and weigh it. If it is not possible to enter the exact weight, you should round it up or down.
- Place the food in the cold cooking compartment.
- For the programmes, always use microwaveable, heat-resistant cookware, for example made of glass or ceramic. Observe the accessories tips in the programme table.
- For an optimal cooking result, use food that is in good condition and chilled meat only. For frozen food, use food straight out of the freezer only.
Setting a programme
Example in diagram: Programme 3 with a weight of 1 kg.
- Set the function selector to P automatic programmes. The first programme number and weight suggestion are shown in the display.
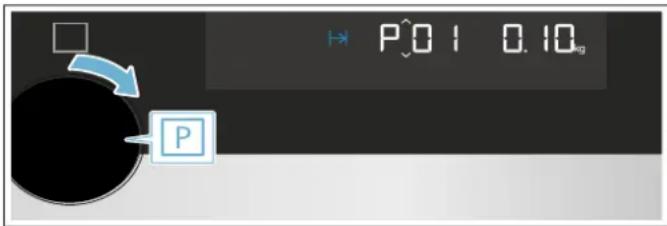
- Use the rotary selector to select programme number
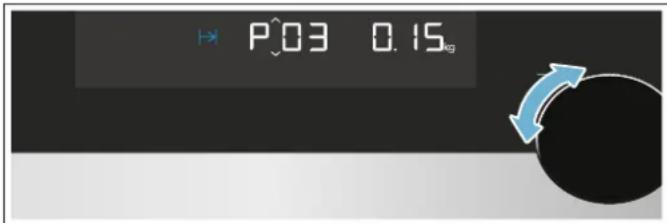
- Touch kg.
The weight setting is highlighted in the display.

- Use the rotary selector to set the weight to 1 kg. The appliance automatically sets the right cooking time for that weight.
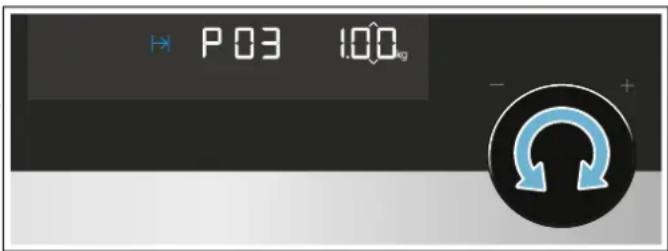
- Touch ▷/□.
The programme will start. The cooking time visibly counts down and the temperature bar and the ▷/□ LED light up.
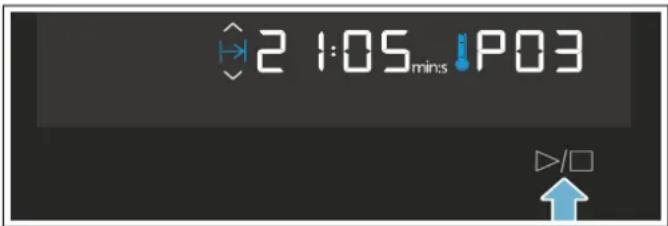
Notes
Before starting you can use P and °C/kg to switch between programmes and weight.
- Once you have started the programme, the programme number and weight cannot be changed. You can check the set weight by touching ^ C/kg.
The programme has ended
An audible signal sounds. The programme has finished; the appliance stops heating.
Turn the function selector to the off position.
Changing the programme
- Touch the ▷/□ field for approx. four seconds.
The programme is reset.
- Select a new programme.
Pausing the operation
- Touch the ▷/□ field or open the appliance door. The operation is suspended and the ▷/□ LED flashes.
- Close the appliance door.
- Touch the ▷/□ field. The operation is continued and the ▷/□ LED lights up.
Stopping the appliance from heating
Turn the function selector to the "Off" position.
The appliance will stop heating and all the settings will be cleared.
Note: The fan may continue to run after the appliance has been paused or stopped.
Programme table
| Pro-gramme | Meal | Weight in kg | Cookware/accessories, shelf height | Note | Specific details | |
| Defrost-ing | ||||||
| P 01 | Minced meat* | 0.10 - 1.20 | Flat, shallow cookware without lid | Use microwave-safe cookware only. | Minced beef, lamb, pork; after turning, remove any minced meat that has already defrosted. | |
| Cooking compartment floor | ||||||
| P 02 | Defrost ribs* | 0.10 - 1.10 | Flat, shallow cookware without lid | Use microwave-safe cookware only. | Use microwave-safe cookware only. | |
| Cooking compartment floor | ||||||
| P 03 | Defrost chicken portions on the bone* | 0.15 - 1.20 | Flat, shallow cookware without lid | Use microwave-safe cookware only. | Skin side down. | |
| P 04 | Defrost whole chicken* | 0.20 - 0.50 | Shallow cookware without lid | Use microwave-safe cookware only. | Breast side down. | |
| P 05 | Defrost fish fillet* | 0.10 - 1.00 | Flat, shallow cookware without lid | Use microwave-safe cookware only. | Fillet of pike, cod, ocean perch, pol-lock, pike-perch | |
| Cooking compartment floor | ||||||
| Poultry, Meat, Fish | ||||||
| P 06 | Whole fish, fresh | 0.20 - 1.20 | Steaming tray + glass tray Position 3 | Fill the water tank. | Drizzle the inside with lemon juice | |
| P 07 | Fish fillet, fresh | 0.20 - 0.50 | Steaming tray + glass tray Position 3 | Fill the water tank. | ||
| Vegetables and side dishes | ||||||
| P 08 | Broccoli, fresh | 0.10 - 1.00 | Steaming tray + glass tray Position 3 | Fill the water tank. | ||
| P 09 | Sliced carrots, fresh | 0.10 - 0.75 | Steaming tray + glass tray Position 3 | Fill the water tank. | The thicker the slices, the firmer the result. | |
| P 10 | Unpeeled boiled potatoes | 0.20 - 1.00 | Steaming tray + glass tray Position 3 | Fill the water tank. | Baby potatoes or standard potatoes, in slices approx. 2 cm thick | |
| P 11 | Eggs, soft-boiled | x 2 - 10 | Steaming tray + glass tray Position 3 | Fill the water tank. | Hen's eggs, chilled | |
| P 12 | Rice** | 0.10 - 0.50 | Cookware with lid | Use microwave-safe cookware only. | Long-grain rice; do not use boil-in-the-bag rice. Add two-three parts water to one part rice. Allow to stand for 5-10 minutes after the programme has ended. | |
| P 13 | Steam bread rolls | 0.30 - 0.60 | Steaming tray + glass tray Position 3 | Fill the water tank. | Medium size | |
| P 14 | Steam bread rolls, frozen | 0.10 - 0.40 | Steaming tray + glass tray Position 3 | Fill the water tank. | Max. 36 g per bread roll | |
| Convenience | ||||||
| P 15 | Reheat plated meal, chilled | 0.20 - 0.50 | Shallow cookware on glass tray Position 3 | Use microwave-safe cookware only. Fill the water tank. | ||
*Turn when the turn signal prompts you **Stir when the stir signal prompts you

Setting the time-setting options
Your appliance has various time-setting options. You can use the ⏻ touch field to call up the menu and switch between the individual functions. The symbols for the available functions light up in the display and the function that you just selected is highlighted.
| Time-setting option | Use |
| Timer The timer functions like an egg timer. It runs independently of the appliance when it is heating and of other time-setting options and does not affect the appliance. | |
| Cooking time Once the set cooking time has elapsed, the appliance automatically stops heating. | |
| Time When no other function is running in the foreground, the appliance shows you the time of day in the display. | |
You can only call up the cooking time using the ⏻ field after setting a type of heating. The timer can be set time.
An audible signal sounds once the cooking time or timer duration has elapsed. You can cancel the signal early by touching the ⏻ field.
Note: You can change how long the audible signal sounds for in the basic settings. → "Basic settings" on page 28
Checking the time settings
If several time-setting options are set, the corresponding symbols light up in the display. The cooking time starts counting down.
To check the timer ☐, cooking time I→I or time ☐, touch ☐ repeatedly until the relevant symbol is highlighted. During operation, only the timer and cooking time are available. In standby, only the timer and time are available. The value for this appears in the display for a few seconds.
Setting the timer
You can use the timer as a kitchen timer. It runs independently of the appliance. The timer has its own audible signal. In this way, you can tell whether it is the timer or a cooking time which has elapsed.
- Touch the Ⓛ field.
The ⚠ symbol and the time symbols light up again.
- Use the rotary selector to set the timer duration.
After a few seconds, the time setting is adopted. The timer starts. The 🔔 symbol lights up in the display and the timer counts down. The other time symbols go out.
The timer duration has elapsed
An audible signal sounds. - - : - - i s shown in the display. Touch any field to switch off the timer.
Changing the timer duration
Use the rotary selector to change the timer duration. The change is applied after a few seconds.
Cancelling the timer duration
Use the rotary selector to reset the timer duration to - - : - -. The change is applied after a few seconds. The timer now switched off.
Setting the cooking time
You can set the cooking time for your food on the appliance. Once the cooking time has elapsed, the appliance will automatically switch itself off. The cooking time cannot be accidentally exceeded.
Example in the picture: Full-surface grill function, grill setting 2, cooking time 45 minutes.
- Use the function selector to set the full-surface grill function.
- Use the rotary selector to select grill setting 2.
- Touch the ⏻ button twice.
-
- : - - will be shown on the display and the time symbols will be lit.

Note: Depending on the heating function, a different default value may be displayed.
- Use the rotary selector to set a cooking time of 45 minutes.

- Touch the ▷/□ button.
The oven will start. The cooking time will count down on the display and the ▷/□ LED will be lit. The other time symbols will go out.
The cooking time has elapsed
An audible signal sounds. The appliance stops heating. - : - - is shown in the display.
- Touch the Ⓛ field.
The audible signal stops.
- Turn the function selector to the off position.
The appliance is switched off.
Changing the cooking time
Use the rotary selector to change the cooking time. After few seconds, the change is applied.
Cancelling the cooking time
If the timer function has been set, first touch the ⏻ buttonNotes
You will now be able to adjust the cooking time.
Use the rotary selector to reset the cooking time to - - : - -
. After a few seconds, the change will be applied.
Setting the time
During initial use, the time display is highlighted.
The 12:00 value flashes in the display and the ⏻ symbol lights up. Set the time.
- Use the rotary selector to set the time.
- Touch ⏻.
The time has now been set.
Changing the time on the clock
Note: To change the time on the clock, you will need to switch off the appliance.
- Touch the ⏻ button twice.
The ⏻ symbol and the clock time will appear on the display.
- Set the clock using the rotary selector.
- Touch the Ⓛ button.
The time has now been set.
Notes
- If you do not touch the ⏻ button after setting the time, the set value is automatically adopted after a few seconds.
- If the function selector has been moved to configure the settings, it must be returned to the "Off" position once you have finished. Only then can the appliance be used.
- In order to reduce the energy consumption of your appliance in standby, you can hide the clock.
Childproof lock
Your appliance is equipped with a childproof lock so that children cannot switch it on accidentally or change any settings.
Activating and deactivating
- Turn the function selector to the off position.
-
Touch ≈⑨ for approx. 4 seconds. The ≈⑩ symbol will appear on the display. The childproof lock is activated or deactivated.
-
If a timer duration 🔒 has been set, this will continue to count down. While the childproof lock is active, the timer duration cannot be changed.
- Acoustic signals, e.g. once the timer duration has elapsed, can be ended by touching any field.

Basic settings
There are various settings available to you in order to help use your appliance effectively and simply. You can change these settings as required.
Changing the basic settings
The appliance must be switched off.
- Touch the= button for a few seconds.
The first basic setting will appear on the display. - Use the rotary selector to change the basic setting.
-
Touch the= button.
The next basic setting will appear on the display. You can go through all of the basic settings using the ⏻ button and make changes using the rotary selector. -
Touch the=① button for a few seconds.
This applies all the settings.
If the appliance is in standby mode, you can change the settings at any time.
Cancelling
If you do not want to save the changes, turn the function selector. The basic settings are ended without being saved.
List of basic settings
| Basic setting | Options | Explanation |
| c01 Audible signal duration2==medium===30 seconds | 1=short=10 seconds3=long=2 minutes | Audible signal sounds after a set cooking time or duration elapses or when the timer reaches zero |
| c02 Button tone*1=On | 0=Off=Tone=when-touching touch fields | |
| c03 Display brightness*2=medium | 1=low3=high | Allows you to set the display brightness |
| c04 Time display1=On | 0=Off=Allows you to display the clock time | |
| c05 Interior lighting1=On | 0=Off=Allows you to switch the interior lighting on or off | |
| c06 Water hardness4=very hard | 0=softened1=soft2=medium3=hard | The water hardness affects the appliance's cleaning cycles |
| c07 Factory setting0=Off | 1=On=Allows you to reset appliance factory settings | |
| c08 Demo mode0=Off | 1=On=Allows you to switch demo mode on and offNote: Demo=mode is=only=visible=in=the first 5 minutes after connecting=the=appliance to the mains. | |
*The change is applied immediately.

Cleaning
With good care and cleaning, your appliance will retain its recommended descaling agent to do this. Other descaling appearance and remain fully functioning for a long time to agents may damage the appliance.
come. We will explain here how you should correctly care for and clean your appliance.
Warning – Risk of burns!
The appliance becomes very hot. Never touch the interior surfaces of the cooking compartment or the heating elements. Always allow the appliance to cool down. Keep children at a safe distance.
Warning – Risk of electric shock!
Do not use any high-pressure cleaners or steam cleaners, which can result in an electric shock.
Warning – Risk of injury!
Scratched glass in the appliance door may develop into a crack. Do not use a glass scraper, sharp or abrasive cleaning aids or detergents.
Note: Unpleasant odours, for example after fish has been prepared, can be removed very easily. Add a few drops of lemon juice to a cup of water. Always place a spoon in the container to prevent delayed boiling. Heat the water for 1 to 2 minutes at maximum microwave output.
Suitable cleaning agents
To ensure that the different surfaces are not damaged by using the wrong cleaning agent, observe the information in the table. Depending on the appliance model, not all of the areas listed may be on/in your appliance.
You can buy other accessories for your appliance from our customer service. Please specify the relevant product number.
Wash new sponge cloths thoroughly before use.
Microfibre cloth
The microfibre cloth is especially suitable for cleaning easily damaged surfaces, such as glass, glass ceramic, stainless steel or aluminium. It removes liquid and greasy deposits in one go.
Order no. 00466148
Conditioning cloth for stainless steel surfaces
You can treat surfaces with a tested, recommended oil-impregnated conditioning cloth (available from us), which will make the surface more resistant to fingerprints and scratches.
Order no. 00311134
Conditioning oil for modern stainless steel surfaces
This is the same conditioning oil that is used in the cloths inside of the door and can be ordered from us in a bottle. and door seal
Order no. 00311567
Degreaser
For intensive removal of stubborn grease deposits from surfaces.
Order no. 00311781
Descaling agent
To ensure that your appliance continues to operate correctly, it must be descaled regularly. Only use a
Recommended descaling agent to do this. Other descaling agents may damage the appliance.
Liquid descaling agent: Order no. 00311 680
Descaling tablets: Order no. 00311864
Caution!
Surface damage
Do not use any
- harsh or abrasive cleaning agents,
■ cleaning agents with a high alcohol content,
■ hard scouring pads or cleaning sponges,
■ high-pressure cleaners or steam cleaners,
■ special cleaners for cleaning the appliance while it is hot.
Area Cleaning
Appliance exterior
| Stainless steel front | Hot soapy water: |
| the | Clean with a dish cloth and then dry with a soft cloth.Remove flecks of limescale, grease, starch and albumin (e.g. egg white) immediately.Corrosion can form under such flecks.Special stainless steel cleaning products suitable for hot surfaces are available from our after-sales service or from specialist retailers. Apply a very thin layer of the cleaning product with a soft cloth. |
| Control panel Hot soapy water: | |
| Clean with a dish cloth and then dry with a soft cloth.Do not use glass cleaner or a glass scraper. | |
| Door panels Hot soapy water: | |
| Clean with a dish cloth and then dry with a soft cloth.Do not use a glass scraper or a stainless steel scouring pad. | |
| Door handle Hot soapy water: | |
| Clean with a dish cloth and then dry with a soft cloth.If descaler comes into contact with the door handle, wipe it off immediately. Otherwise, any stains will not be able to be removed. | |
| Appliance interior | |
| Inside of the door and door seal | Hot soapy water:Clean with a dishcloth.Do not remove the door seal.Do not scour.Check the position of the door seal after cleaning it. |
| Stainless-steel surfaces | Hot soapy water:Clean with a dishcloth.Do not scour.Check the position of the door seal after cleaning it. |
| Accessories Hot soapy water:Soak and clean with a dish cloth or brush. | |
| Drip tray and water tank | Hot soapy water:Clean with a dish cloth and rinse thoroughly with clean water to remove residue detergent.Dry with a soft cloth. Leave to dry with lid open. Rub the seal on the lid until dry.Do not clean in the dishwasher. |
| Tank recess Rub dry after every use. | |
| Steam outlet in cooking compartment | Hot, soapy water: Use a cleaning sponge or a soft washing-up brush. |
Notes
- Slight differences in colour on the front of the appliance are caused by the use of different materials, such as glass, plastic and metal.
- Shadows on the door panels, which look like streaks, are caused by reflections made by the interior lighting.
Keeping the appliance clean
Always keep the appliance clean and remove dirt immediately so that stubborn deposits of dirt do not build up.
Tips
- Clean the cooking compartment after each use. This will ensure that dirt cannot be baked on.
■ Always remove flecks of limescale, grease, starch and albumin (e.g. egg white) immediately.
■ Use the glass tray for baking very moist cakes. - Use suitable cookware for roasting, e.g. a roasting dish.

Cleaning function
Descaling
To ensure that your appliance continues to operate correctly, it must be descaled regularly.
Caution!
- Risk of damage to the appliance: Only use the descaler recommended by us for descaling, either in liquid or tablet form. The time the descaler needs to be left to work depends on the product used. Other descalers may damage the appliance. You can order descaler from our after-sales service. Liquid descaler: Order no. 00311 680 Descaling tablets: Order no. 00311864
- Descaling solution: Do not allow any descaling solution or descaler to come into contact with the control panel or other surfaces on the appliance. This may damage the surfaces. If this does happen, remove the descaling solution immediately with water.
Descaling consists of two automated steps. For hygiene reasons, the descaling program must be run through completely before the appliance is ready for operation again. Descaling will take around 32 minutes in total.
- Descale the appliance (approx. 31 minutes), then empty the drip tray and fill the water tank with fresh water.
- Run a rinse cycle after descaling the appliance (approx. 1 minute), then empty the drip tray.
If descaling is interrupted (e.g. due to a power failure, because the appliance is switched off or because the descaling process is cancelled), you will be prompted to run a rinse cycle once the appliance is switched back on. The appliance cannot be used until the rinse cycle comes to an end.
The frequency with which the appliance must be descaled depends on the hardness of the water used. When only five more steam-assisted operations are possible (or fewer), the symbol appears on the appliance display, reminding you to descale it. You can therefore prepare for the descaling in good time.
The steam mode is then only possible after the descaling process has been completed.
Starting
- Use the function selector to select Descale calc. The duration of the descaling process will be displayed. It cannot be changed.
- Open the tank cover.
- Remove and empty the drip tray.
- Slide the empty drip tray in fully.
- Remove the water tank.
- Mix water and descaler to create a descaling solution. Note: Observe the mixing ratio of the descaling agent. Descaling liquid (Order no. 00311 680): Mixing ratio 1:5, mix 50ml descaling liquid with 250ml water. Descaling tablets (Order no. 00311864): Add one descaling tablet (18g) to 250ml water and let dissolve for five minutes.
-
Pour the descaling solution into the water tank and slide the water tank in fully.
-
Close the tank cover.
- Touch the ▷/□ button.
The appliance will now be descaled. The remaining time counts down on the display. An audible signal will sound once descaling has finished. The appliance pauses.
- Open the tank cover.
- Remove the drip tray, empty it and slide it back in.
- Remove the water tank, rinse it thoroughly, fill it with fresh water and slide it back in.
- Close the tank cover.
- Touch the ▷/□ button.
The appliance will now be rinsed twice automatically.
An audible signal will sound once the rinse cycles have? finished. Empty the drip tray.
Rinsing
To ensure that your appliance stays clean, you can pump water through the pipe system. The water is then drained to the drip tray.
Starting
- Use the function selector to select the rinse cycle ☐. The duration of the programme will be displayed. It cannot be changed.
- Open the tank cover.
- Remove and empty the drip tray.
- Slide the empty drip tray in fully.
- Remove water tank and drain any residual water. Rinse out water tank thoroughly and fill with fresh water.
- Slide the water tank in fully.
- Close the tank cover.
- Touch the ▷/□ button.
Water is pumped through the pipes. The time remaining will count down on the display. An audible signal will sound once this time has elapsed. Empty the drip tray.
Subsequent cleaning
Carry out the following steps after every descaling programme or rinse cycle:
- Open the tank cover.
- Empty, clean and dry the drip tray and water tank.
- Turn the function selector to the off position.
The process is complete and the appliance is ready for use again.
Emptying the drip tray
With the cleaning functions, the residual water is collected in the drip tray. Then empty and dry the drip tray.
Caution!
- Do not dry the drip tray in the hot cooking compartment. This will damage the drip tray.
-
Do not clean the drip tray in the dishwasher. This will damage the drip tray.
-
Briefly press on the centre of the tank cover. The tank cover opens. The drip tray and water tank can now be accessed.
e2. Remove the drip tray from the tank recess.

natural_image
Illustration of a microwave oven with a blue arrow indicating airflow or movement (no text or symbols)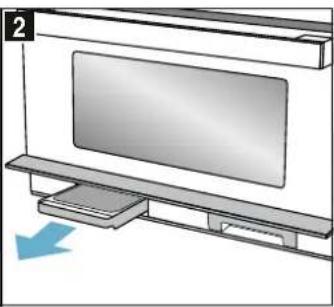
natural_image
Illustration of a flat-screen TV mounted on a shelf, with a blue arrow indicating compression or disassembly (no text or symbols present)- Open the lid for the drip tray.
- Empty the drip tray.

natural_image
Illustration of a device with an open lid and a blue upward arrow indicating flow or direction (no text or symbols)
natural_image
3D illustration of a rectangular object with a gradient fill and a small blue tip, no text or symbols present- Insert the drip tray back into the tank recess and slide it in fully.
- Close the tank cover.
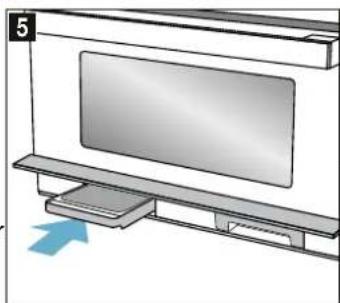
natural_image
Illustration of a flat-screen TV mounted on a stand with an arrow indicating motion (no text or symbols present)
natural_image
Diagram of a monitor mounted on a shelf with a blue arrow indicating the motion (no text or symbols present)The appliance is ready to use.

Trouble shooting
If a fault occurs, there is often a simple explanation. Before calling the after-sales service, please refer to the fault table and attempt to correct the fault yourself.
Warning – Risk of electric shock!
Incorrect repairs are dangerous. Repairs may only be carried out and damaged power cables replaced by one of our trained after-sales technicians. If the appliance is defective, unplug the appliance from the mains or switch off the circuit breaker in the fuse box. Contact the after-sales service.
You can take remedial action yourself for some error messages.
Troubleshooting
| Error message Possible cause Remedy/Note | ||
| The appliance does not work The plug is not plugged into the mains Plug the plug in | ||
| Power failure Check whether the kitchen light works | ||
| The fuse is faulty Check in the fuse box to make sure that the fuse for the appliance is OK | ||
| Faulty operation Switch off the fuse in the fuse box. Switch it back on after approx. 10 seconds | ||
| Although the appliance is switched on, it cannot be operated; the ⇌ symbol is in the display | The childproof lock is activated | Press and hold ⇌ until the ⇌ symbol goes out |
| The interior lighting has failed. The LED bulb is defective Call our customer service. | ||
| 12:00 flashes in the display and the symbol lights up. | Power failure Reset the clock | |
| The appliance is not operating. A cooking time is shown in the display. | ▷/□ was not touched after the setting was made. | Touch ▷/□ or delete the setting by using the function selector to select another function. |
| The microwave is not working. | The door has not been properly closed. | Check whether food residue or debris is trapped in the door |
| ▷/□ was not touched. | Touch ▷/□ | |
| It is taking longer than usual for food heat up | The microwave power output has been set low. | Select a higher microwave power output |
| A larger amount of food than usual has been placed in the appliance. | Double the amount – double the time | |
| The food was colder than usual. | Stir or turn the food during cooking | |
| Microwave operation has been cancelled for no apparent reason. | The microwave has a fault. | If this fault recurs, call our customer service. |
| The appliance can be set, but does heat up. The colon flashes. | The appliance is in demo mode. | Deactivate demo mode in the basic settings.Note: Demo mode is only visible in the first 5 minutes after connecting the appliance to the mains. |
| The water tank and drip tray symbols are flashing continuously. | Technical problem. | Make sure that the water tank and drip tray are fully inserted in the relevant tank recess.If the symbols continue to flash, call our customer service.You may continue to use the appliance, except for the steam function. |
| E0532. | Dirt on the control panel is creating a touch field that is permanently active. | Switch off the appliance and clean the control panel. Switch the appliance on again.If this fault recurs immediately after switching back on, call our customer service. |
| E5005. | The steam function has been activated multiple times with an empty water tank. | Before next use, make sure that the water tank is filled with cold water and fully inserted in the tank recess.If this fault recurs, call our customer service. |

Customer service
Our after-sales service is there for you if your appliance needs to be repaired. We will always find an appropriate solution, also in order to avoid after-sales personnel having to make unnecessary visits.
E number and FD number
When calling us, please give the product number (E no.) and the production number (FD no.) so that we can provide you with the correct advice. The rating plate bearing these numbers can be found on the right-hand side when you open the appliance door. To save time, you=can=make=a=note=of=the=number=of=your=appliance=and the telephone number of the after-sales service in the space below, should it be required.
E no. FD no.
After-sales service

Please=note=that=there=will=be=a=fee=for=a=visit=by=a=serviq technician in the event of a malfunction, even during the warranty period.
Please find the contact data of all countries in the enclosed customer service list.
To book an engineer visit and product advice CN=400 889 9999
Rely=on=the=professionalism=of=the=manufacturer.=You=can therefore be sure that the repair is carried out by trained service=technicians=who=carry=original=spare=parts=for=your appliances.
Technical specifications
| Power supply=220=V~, 50=Hz | |
| Max. total connected load=3000=W | |
| Noise level=49db | |
| Microwave output power=1000=W (IEC 60705) | |
| Microwave input power=1200=W | |
| Microwave frequency | 2450=MHz |
| Max. steam output power | 2700=W |
| Max. grill output power | 2000=W |

Tested for you in our cooking studio
Here, you can find a selection of dishes and the ideal settings=for=them.=We=will=show=you=which=type=of=heating and=temperature=are=best=suited=to=your=dish.=You=will=get information on suitable cooking accessories and the height at which they should be placed in the oven. You will also get tips about cookware and preparation methods.
Note: A lot of steam can build up in the cooking compartment when cooking food. Your appliance is very energy-efficient and radiates very little heat to its surroundings during operation. Due to the high difference in temperature between the appliance interior and the external parts of the appliance, condensation may build up on the door, control panel or adjacent=kitchen=cabinet=panels.=This=is=a=normal=physical phenomenon. Condensation can be reduced by preheating the oven or opening the door carefully. When steaming or during operation with steam assistance, it is desirable that there is a significant build-up of steam in the cooking compartment. Wipe the cooking compartment clean after cooking, once it has cooled off.
General information
Recommended setting values
The table lists the optimum function for various types of food. The temperature/settings and duration depend on the cookware used and the quantity, quality, temperature and=consistency=of=the=food.=Settings=ranges=are=indicated for this reason. Try using the lower values to start with. You can use a higher setting next time if necessary.
When using the microwave, always set the longest specified time but check your meal after the shortest specified time.
Before cooking with steam, ensure that the water tank is full.
It may be that you have different quantities from those specified in the tables. There is a rule of thumb for operating=the=microwave=on=its=own:=Double=the=amount==almost double the time, half the amount = half the time.
The setting values apply to food that is placed into a cold cooking compartment.
If you wish to follow one of your own recipes, you should use the settings listed in the table for similar food as reference. Additional information can be found in the baking tips listed after the settings tables.
Remove=any=accessories=that=are=not=being=used=from=the cooking compartment.
Accessories
Only use genuine accessories for your appliance. These have been tailored to the cooking compartment and the operating modes of your appliance.
Ensure that you always use suitable cookware and accessories, and that they are placed in the oven the right way around.
Also observe the notes on using cookware suitable for microwave cooking and cooking with steam in the relevant sections.→ "Microwave" on page 17→ "Steam" on page 20
Always use an oven cloth or oven gloves when taking ho accessories or cookware out of the cooking compartment.
Baking tins and cookware
For optimal cooking results, we recommend using glass baking tins.
If you would like to use silicone moulds, check the manufacturer's specifications regarding the suitability for use with steam and microwaves, and follow the manufacturer's specifications and recipes.
Silicone moulds are often smaller than normal baking tins. Quantity and recipe specifications may vary.
The following applies in general:
- Grill on the wire rack at shelf position 3 or 4. Insert the glass tray underneath.
- Microwave-only mode: Cookware on the base of the cooking compartment, shelf position 0.
- Steam-only mode: Glass tray with steaming tray at shelf position 3.
Defrosting
Place the frozen food in an uncovered container on the bottom of the cooking compartment.
Delicate parts such as the drumsticks and wings of
chicken or fatty outer layers of roasts can be covered with small pieces of aluminium foil. The foil must not touch th
twalls of the appliance. You can remove the foil half way through the defrosting time.
Liquid will be produced when defrosting meat or poultry.
Drain off this liquid when turning meat and poultry and under no circumstances use it for other purposes or allow it to come into contact with other foods.
Turn or stir the food once or twice during the process.
Large pieces of food should be turned several times.
Leave defrosted items to stand at room temperature for a further 10 to 60 minutes so that the temperature can
stabilise. You can remove the giblets from poultry at this point.
The meat can also be processed further when a small part of the core is frozen.
Notes
- Use an uncovered item of cookware and place it on the bottom of the cooking compartment.
- Please note that a setting can comprise several steps.
- Always set the maximum specified time but check your meal after the minimum specified time.
| Dish Cook-ware | Shelf position | Heating function | Weight | Steps | Microwave setting | Cooking time in min | Notes |
| Whole pieces of beef,pork or veal (on the bone or boned) | 0 | ≈ | 800 g 1 | 180 | 15 | Turn frequently. | |
| 2 | 90 | 25 | |||||
| 1000 g 1 | 180 | 15 | |||||
| 2 | 90 | 25 - 35 | |||||
| 1500 g 1 | 180 | 25 | |||||
| 2 | 90 | 25 - 30 | |||||
| Meat in pieces or slices of beef, veal or pork | 0 | ≈ | 200 g 1 | 180 | 5 | Turn during cooking. Sepa-rate any defrosted parts. | |
| 2 | 90 | 4 - 6 | |||||
| 500 g 1 | 180 | 10 | |||||
| 2 | 90 | 5 - 10 | |||||
| 800 g 1 | 180 | 10 | |||||
| 2 | 90 | 10 - 15 | |||||
| Minced meat, mixed Cook-ware,uncovered | 0 | ≈ | 200 g 1 | 90 | 15 Freeze food flat if possible. | ||
| 500 g 1 | 180 | 5 | Turn frequently during defrosting and remove any minced meat that has already defrosted. | ||||
| 2 | 90 | 10 - 15 | |||||
| 800 g 1 | 180 | 10 | |||||
| 2 | 90 | 15 - 20 | |||||
| Dish | Cook-ware | Shelf position | Heating function | Weight | Steps | Microwave setting | Cooking time in min | Notes |
| Poultry or poultry pieces | Cook-ware, uncovered | 0 | 600 g | 1 | 180 | 5 | Turn during cooking. | |
| 2 | 90 | 10 - 15 | ||||||
| 1200 g | 1 | 180 | 10 | |||||
| 2 | 90 | 20 - 25 | ||||||
| Duck Cook-ware, uncovered | 0 | 2000 g | 1 | 180 | 20 | Turn several times. | ||
| 2 | 90 | 30 - 40 | ||||||
| Goose Cook-ware, uncovered | 0 | 4500 g | 1 | 180 | 30 | Turn every 20 minutes.Remove any liquid that results from defrosting. | ||
| 2 | 90 | 60 - 80 | ||||||
| Fish fillet, fish steak slices | oCook-ware, uncovered | 0 | 400 g | 1 | 180 | 5 | Turn during cooking. Sepa-rate any defrosted parts. | |
| 2 | 90 | 10 - 15 | ||||||
| Whole fish Cook-ware, uncovered | 0 | 300 g | 1 | 180 | 3 | Turn several times. | ||
| 2 | 90 | 10 - 15 | ||||||
| 600 g | 1 | 180 | 8 | |||||
| 2 | 90 | 15 - 25 | ||||||
| Vegetables, e.g. peas | Cook-ware, uncovered | 0 | 300 g | 1 180 10 - 15 | Stir during cooking. | |||
| 600 g | 1 | 180 | 10 | |||||
| 2 | 90 | 9 - 15 | ||||||
| Fruit, e.g. raspberries | Cook-ware, uncovered | 0 | 300 g | 1 | 180 | 7 - 10 | Stir several times. Seper-ate any defrosted parts. | |
| 500 g | 1 | 180 | 8 | |||||
| 2 | 90 | 5 - 10 | ||||||
| Butter, defrosting | Cook-ware, uncovered | 0 | 125 g | 1 | 90 | 6 - 8 | Remove all packaging. | |
| 250 g | 1 | 180 | 2 | |||||
| 2 | 90 | 3 - 5 | ||||||
| Bread, loaf | Cook-ware, uncovered | 0 | 500 g | 1 | 180 | 3 | Turn during cooking. | |
| 2 | 90 | 10 - 15 | ||||||
| 1000 g | 1 | 180 | 5 | |||||
| 2 | 90 | 15 - 25 | ||||||
| Cakes, plain, e.g. sponge cake | Cook-ware, uncovered | 0 | 500 g | 1 | 90 | 10 - 15 | Only for cakes without icing, whipped cream or crème pâtissière, seperate the pieces of cake. | |
| 750 g | 1 | 180 | 3 | |||||
| 2 | 90 | 10 - 15 | ||||||
| Cakes, moist, e.g. flan, cheesecake | fruitCook-ware, uncovered | 0 | 500 g | 1 | 180 | 5 | Only for cakes without icing, whipped cream or gelatine. | |
| 2 | 90 | 15 - 25 | ||||||
| 750 g | 1 | 180 | 7 | |||||
| 2 | 90 | 15 - 25 | ||||||
Heating frozen food
Take ready meals out of the packaging. They will heat up more quickly and evenly in microwaveable cookware. The speed at which different components of the meal heat up may vary.
Food which lies flat will cook more quickly than food which is piled high. You should therefore distribute the food so that it is as flat as possible in the cookware. Food should not be placed in layers on top of one another.
Stir or turn the food 2 or 3 times during the process.
After heating, leave the food to stand for a further 2 to 5 minutes to allow the temperature to stabilise.
Always wear oven gloves or use a pot holder when removing cookware from the appliance.
Notes
Place the cookware on the bottom of the cooking compartment.
- Always cover the food. If you do not have a dedicated lid for your cookware, use a plate or special microwave film.
■ Always set the maximum specified time but check your meal after the minimum specified time.
| Dish Cookware Shelf posi- | tion | Heating function | Weight | Microwave setting | Cooking time in min | Notes | ||
| Soup, frozen Cookware, covered | 0 | 400 g | 600 8 - 15 | |||||
| Stew, frozen Cookware, covered | 0 | 500 g | 600 8 - 13 | |||||
| 1000 g | 600 10 - 15 | |||||||
| Menu, plated meal, ready meal (2-3 components), fro-zen | 0 | 300 - 400 g | 600 11 - 15 | |||||
| Slices or pieces of meat in sauce, e.g. goulash, frozen | 0 | 500 g | 600 12 - 17 | Separate the pieces of meat when stirring. | ||||
| 1000 g | 600 25 - 30 | |||||||
| Bakes, e.g. lasagne, cannel loni, frozen | 0 | 450 g | 600 10 - 15 | |||||
| Side dishes, e.g. rice, pasta frozen | 0 | 250 g | 600 | 2 - 5 Add liquid | ||||
| 500 g | 600 8 - 10 | |||||||
| Vegetables, e.g. peas, broc- coli, carrots, frozen | 0 | 300 g | 600 8 - 10 | Add enough water to cover the base | ||||
| 600 g | 600 14 - 17 | |||||||
| Creamed spinach, frozen | 0 | 500 g | 600 11 - 16 | Cook without adding water, stir occasionally | ||||
Warming

Warning – Risk of scalding!
- There is a possibility of delayed boiling when a liquid heated. This means that the liquid reaches boiling temperature without the usual steam bubbles rising to the surface. Even if the container only vibrates a little, the hot liquid may suddenly boil over and spatter. When heating, always place a spoon in the container. This will prevent delayed boiling.

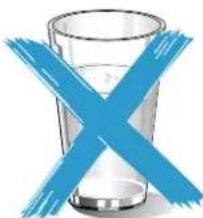
natural_image
Blue X-shaped crossed-out glass cup symbol (no text or labels)Caution!
Metal, e.g. a spoon in a glass, must be kept at least 2 from the oven walls and the inside of the door. Sparks is could irreparably damage the glass on the inside of the door.
Notes
Take ready meals out of the packaging. They will heat up more quickly and evenly in microwaveable cookware. The speed at which different components of the meal heat up may vary.
- Stir or turn the food frequently during the process. Check the temperature.
■ After heating, leave the food to stand for a further 2 to 5 minutes to allow the temperature to stabilise.
■ Always wear oven gloves or use a pot holder when removing cookware from the appliance.
- Cover the food if this is specified in the table. Place the cookware on the bottom of the cooking compartment. If you would like to activate the steam function, place your cookware on the glass tray in shelf position 3. F the water tank.
| Dish | Cookware | Shelf position | Heating function | Weight/quantity | Microwave setting | Steam setting | Cooking time in min | Notes |
| Baby food, e.g. baby bottles | Cookware, uncovered | 0 | 150 ml | 360 | 0.5-1.5 | No teats or lids. Always shake well after heating. Always check the temperature. | ||
| Beverages | Cookware, uncovered | 0 | 200 ml | 1000 | 1-2 | Place a spoon in the glass; do not overheat alcoholic drinks; check occasionally | ||
| 500 ml | 1000 | 4-5 | ||||||
| Soup, 2 cups, 175 g each | Cookware, uncovered | 0 | 350 g | 600 | 3-4 | |||
| Soup, 4 cups, 175=g each | Cookware, uncovered | 0 | 700=g=600=-6-8 | |||||
| Meat=or=pieces=of=meat in sauce | Cookware, covered | 0 | 500=g=600=-7-10=Separate the slices of meat | |||||
| Menu, plated meal, ready meal (2-3 components) | Cookware, uncovered | 3 | 400=g=360=3=9-14 | |||||
| Stew=Cookware, covered | 0 | 400=g=600=-6-8 | ||||||
| 800=g=600=-8-11 | ||||||||
| Vegetables=Cookware, uncovered | 3 | 150=g=360=3=3-5 | ||||||
| 3 | 300=g=360=3=4-7 | |||||||
Microwave tips
| You cannot find any information about the settings for the quantity of food you have prepared. | Lengthen or shorten the cooking time according to the following rule of thumb: Double the amount = double the time, half the amount = half the time |
| The food has become too dry. | Next time set a shorter cooking time or select a lower microwave power setting. Cover the food and add more liquid. |
| The time has elapsed but the food is not defrosted, not hot or not cooked. | Set a longer time. Large quantities and food which is piled high require longer times. |
| Time has elapsed and the food is overheated at not done in the middle. | the tire edge co buttonally=and=next=time=select=a=lower=microwave=power=setting and a longer cooking time. |
| After defrosting, the poultry or meat is cooked on the outside but not defrosted in the middle. | Next time select a lower microwave power setting. If you are defrosting a large quantity of food, turn it frequently. |
Cakes, small baked items and bread
You can find the ideal settings for many baked items in the settings tables.
Frozen products
Carefully take the food out of the packaging. Do not use frozen products that are covered with a thick layer of ice. Remove any ice on the food.
Some frozen products may be unevenly pre-baked. Uneven browning may remain even after baking.
Bread and rolls
| Meal | Cookware | Shelf position | Heating function | Steps | Grill setting | Microwave setting | Steam level | Duration in min. | Notes |
| Bread for toasting, 12 slices | Wire rack=3 | 2 | 3 | - | - | 3 - 5 | |||
| 3 | - | 2 - 3 | |||||||
| Bread for toasting, 4 slices | Wire rack=3 | 2=3 | - | - | 5-6 | 3-4 | Place the slices of bread next to each other in the centre of the wire rack. | ||
| Toast with topping, 2-4 slices | Wire rack + glass tray | 3+1 | 1=3 | - | - | 8-10 |
Poultry, meat and fish
Your appliance offers different methods of cooking poultry, meat and fish. The settings tables list the optimum settings for numerous meals. Some dishes turn out best if they are cooked in multiple stages. These are indicated in the table.
Cooking in the cookware
Warning – Risk of injury due to shattering glass!
Place hot glass cookware on a dry mat after cooking. If the surface is damp or cold, the glass may crack.
Only use cookware which is suitable for the purpose you intend to use it for. Glass cookware is best. Check whether the cookware fits in the cooking compartment.
Polished roasting dishes made of stainless steel or aluminium are not suitable for use in a microwave.
Observe the manufacturer's instructions for your roasting cookware.
Uncovered cookware
To cook poultry, meat and fish, it is best to use a deep roasting tin. Place the tin on the bottom of the cooking compartment. If you would like to use steam-assisted cooking, use an uncovered item of cookware. If you do not have any suitable cookware, use the glass tray.
Covered cookware
Ensure that the lid fits well and closes properly. Place the Use tongs to turn the pieces of food you are grilling. If a cookware onto the wire rack. pierce the meat with a fork, the juices will run out and it
Warning – Risk of scalding!
Very hot steam may escape when opening the lid after cooking. Lift the lid at the rear so that the hot steam can escape away from you.
Cooking in combination with a microwave
This considerably reduces the cooking time. Unlike in conventional operation, when roasting in combination with a microwave the cooking time is based on the total weight.
Note: If you have different quantities to those indicated in the settings tables, the following basic rule applies: double the quantity equates to roughly double the cooking time.
Always use heat-resistant cookware that is suitable for microwave use. Metal roasting dishes or earthenware pots are only suitable for roasting without using the microwave. Observe the notes on cookware suitable for microwaves.→ "Microwave" on page 17
Steam-assisted cooking
Certain foodstuffs will become crispier during steam-assisted cooking. Their surface becomes glossier and they dry out less.
Use cookware without a lid. Cookware must be heat- and steam-resistant. Use steam-assisted cooking if it is indicated in the settings table. Fill the water tank up to "max." mark. If the appliance runs out of water, it will continue to cook your meal with the selected heating function but without adding steam.
Steaming using the steaming tray
In contrast to steam-assisted cooking, the steaming function cooks the meat particularly gently but it does not become crispy on the outside. It remains very succulent.
You can also sear pieces of meat before steaming, which will reduce their cooking time and give them a slightly different flavour. Larger pieces require a longer cooking time. Pieces of meat do not need to be turned.
To steam poultry, meat or fish, place the item to be cooked in the steaming tray in the glass tray and then place this in the cooking compartment at shelf position 3.
Fill the water tank up to "max." mark. If the water tank runs out of water while the appliance is in operation, the appliance is paused. You will be alerted to this by a message on the display.
Grilling
Keep the appliance door closed when using the grill. Never grill with the appliance door open.
Place the food to be grilled on the wire rack. Place the glass tray underneath the wire rack to collect any dripping fat.
Try to use pieces of food of a similar thickness and weight. This will allow them to brown evenly and remain succulent and juicy. Place the food to be grilled directly onto the wire rack.
Use tongs to turn the pieces of food you are grilling. If a pierce the meat with a fork, the juices will run out and it will become dry.
Do not add salt to the meat until it has been grilled. Salt draws water from the meat.
Notes
- The grill elements continuously switch on and off; this is normal. The grill setting determines how frequently this occurs.
■ Smoke may be produced when grilling.
Recommended settings
The settings are based on the assumption that unstuffed, chilled, ready-to-roast poultry, meat or fish is placed into cold cooking compartment.
The table lists specifications for poultry, meat and fish with default values for the weight. If you wish to prepare heavier poultry, meat or fish, always use the lower temperature. If cooking more than one piece, use the weight of the heaviest piece as a basis for determining the cooking time. The individual pieces should be approximately the same size.
The larger the poultry, meat or fish, the lower the cookin temperature and the longer the cooking time.
Turn poultry, meat and fish if specified in the settings table.
Poultry
If cooking duck breast, score the skin. Do not turn duck breasts.
When you turn poultry, ensure that the breast side or the skin side is underneath at first.
Fish
If you would like to cook fish on the wire rack, coat the
Whole fish does not need to be turned. You can tell when wire rack with a little oil beforehand as this will make it the fish is cooked because the dorsal fin can be removed easier to remove the fish later. easily.
Poultry
| Dish | Cookware | Shelf position | Heating function | Temperature | Grill setting | Microwave setting | Steam setting | Cooking time in min | Notes |
| Chicken, whole, 1.3 kg, boil | Cookware, covered | 0 | - - 600 | - 25-35 | Turn halfway through. | ||||
| Duck breast, 500 g | Wire rack + glass tray | 3+2 | - 3 180 | 3 10-12 | Place with the skin | side up. Do not turn. | |||
| Goose breast, goose legs, 700-900 g | Cookware, uncovered | 0 | - 2 180 | - 30-40 | Deep cookware without a lid. | Deep cookware without a lid. | No not turn. |
Meat
| Meal | Cookware | Shelf position | Heating function | Steps | Grill setting | Microwave setting | Steam level | Duration in min. | |
| Beef steaks 2-3 cm thick, 2-3 pieces, 200 g each | Wire rack + glass tray | 3+1 | 1 | 3 | - | - | 10-15 | ||
| 2 | 3 | - | - | 5-10 | |||||
| Pork neck steaks, 2-3 cm thick, 2-3 pieces, 120 g each | Wire rack + glass tray | 3+1 | 1 | 2 | - | - | 15-20 | ||
| 2 | 2 | - | - | 10-15 | |||||
| Barbecue sausages, 4-6 pieces of 150 g | Wire rack + glass tray | 3+1 | 1 | 3 | - | - | 10-15 | ||
| 2 | 3 | - | - | 5-10 | |||||
Fish
| Dish | Cookware | Shelf position | Heating function | Temperature in °C | Grill setting | Microwave setting | Steam setting | Cooking time in min |
| Fish fillet, fresh, 400 g | Glass tray + steaming tray | 3 | - | - | - | 3 | 15-17 | |
| Fish fillet pieces, frozen, Cookware, covered 400 g | 0 | - | - | 600 | - | 10-15 | ||
| Fish fillet pieces, frozen, Glass tray + steaming 800 g | 3 | - | - | - | 3 | 23-25 | ||
| Fish fillet, au gratin, 500 g | Cookware, uncovered | 0 | - | 3 | 600 | - | 10-15 | |
| Fish steaks x 2-3, 150 g each | Wire rack + glass tray | 3+1 | - | 3 | - | - 8-12 | ||
| Fish, whole, e.g. trout, x 2-3, 300 g each | Glass tray + steaming tray | 3 | - | - | - | 3 | 18-22 |
Vegetables and side dishes
Here you can find information about how best to cook different types of vegetables, rice, potatoes and frozen potato products quickly.
Microwave
Always cook vegetables in a suitable item of cookware and keep them covered. Cook rice in a deep pot with a and add the quantity of liquid indicated in the table.
Steaming
Use the glass tray and the steaming tray to steam food.
Use the portion sizes listed in the settings table. Larger pieces will take longer to cook and smaller ones will cook
more quickly. The cooking time also depends on the quality and the ripeness of the food. The settings indicated are therefore intended as a guide only.
Always distribute the food evenly in the cookware. It will not cook evenly if the food is piled up to varying heights. Do not stack pressure-sensitive food too high in the steaming tray.
Ifd fill the water tank up to the "max." mark. If the water ta runs out of water while the appliance is in operation, the appliance is paused. You will be alerted to this by a message on the display.
| Dish | Cookware | Shelf position | Heating function | Steps | Temperature | Microwave setting | Steam setting | Cooking time in min |
| Eggplant in pieces, 500 g | Glass tray + steaming tray | 3 | 1 - - 3 25-30 | |||||
| Pumpkin in cubes, 300 g | Glass tray + steaming tray | 3 | 1 - - 3 30-40 | |||||
| Spinach leaves, fresh, 250 g | Glass tray + steaming tray | 3 | 1 - - 3 5-7 | |||||
| Cauliflower, whole, fresh | Glass tray + steaming tray | 2 | 1 - - 3 28-35 | |||||
| Broccoli, whole, fresh, 500 g | Glass tray + steaming tray | 2 | 1 - - 3 20-23 | |||||
| Broccoli florets, frozen, 500 g | Glass tray + steaming tray | 3 | 1 - - 3 14-16 | |||||
| Vegetables, fresh, 250 g* | Cookware, covered 0 | 1 - | 600 | - | 6-10 | |||
| Vegetables, fresh, 500 g* | Cookware, covered 0 | 1 - | 600 | - | 10-15 | |||
| Mixed vegetables, frozen, 250 g | Glass tray + steaming tray | 3 | 1 - - 3 12-15 | |||||
| Carrots in slices, 500g | Glass tray + steaming tray | 3 | 1 - - 3 18-20 | |||||
| Green beans, fresh, 500 g | Glass tray + steaming tray | 3 | 1 - - 3 18-20 | |||||
| Asparagus, green, 250 g | Glass tray + steaming tray | 3 | 1 - - 3 15-18 | |||||
| Courgettes in slices, 500g | Glass tray + steaming tray | 3 | 1 - - 3 12-14 | |||||
| Potatoes, quartered, 250 g | Glass tray + steaming tray | 3 | 1 - - 3 28-30 | |||||
| Potatoes, quartered, 500 g | Glass tray + steaming tray | 3 | 1 - - 3 30-32 | |||||
| Potatoes, quartered, 750 g** | Glass tray + steaming tray | 3 | 1 - - 3 32-35 | |||||
| 125 g rice + 300 ml water | Cookware, covered 0 | 1 - | 600 | - | 4-6 | |||
| 2 - | 180 | - | 12-15 | |||||
| 250 g rice + 500 ml water | Cookware, covered 0 | 1 - | 600 | - | 6-8 | |||
| 2 - | 180 | - | 15-18 | |||||
| *Stir occasionally**Water tank may need to be refilled during cooking | ||||||||
Desserts
You can use your appliance to quickly prepare delicious desserts.
Observe the notes in the settings table.
Rice pudding
Add milk in the indicated ratio. For example, with a ratio of 1:2.5, use 250 ml of milk for every 100 ml of pudding rice.
| Dish Cookware Shelf position Heating | function | Microwave setting | Steam setting | Cooking time in min | |
| Crème caramel Glass tray 3 | - 3 40-50 | ||||
| Yeast dumplings Glass tray 3 | - 2 20-25 | ||||
| Rice pudding 1:2.5 Cookware, covered 3 | - 3 30-40 | ||||
| Fruit, compote, 500 g Cookware, covered 3 | - 3 | 9-12 | |||
| Microwave popcorn, 1 x 100 g bag | Cookware, covered 0 | 600 - 3-5 | |||
| Desserts, e.g. blancmange (instant) 500 ml* | Cookware, covered 0 | 600 - 6-8 | |||
*Stir occasionally
Acrylamide in foodstuffs
Which foods are affected?
Acrylamide is mainly produced in grain and potato
products that are heated to high temperatures, such as crisps, chips, toast, bread rolls, bread, fine baked goods (biscuits, gingerbread, cookies).
| Tips for keeping acrylamide to a minimum when preparing food | |
| General | Keep cooking times as short as possible. Cook food until it is golden brown, but not too dark. Large, thick pieces of food contain less acrylamide. |
| Baking | Use hot air at no higher than 180 °C; egg or egg yolk reduces the production of acrylamide. |
| Biscuits | Use hot air at no higher than 180 °C; egg or egg yolk reduces the production of acrylamide. |
| Oven chips | Spread out a single layer evenly on the accessory. Cook at least 400 g each time so that the chips do not dry out. |
Test dishes
These tables have been produced for test institutes to facilitate inspection of the appliance.
In accordance with IEC 60350-1 and IEC 60705.
Preparing food with a microwave
When preparing food in a microwave, always use heat-resistant cookware that is suitable for microwave use.
Observe the notes on cookware suitable for microwaves.→ "Microwave" on page 17
Microwave defrosting
| Dish | Cookware | Shelf position | Heating function | Weight | Steps | Microwave setting | Cooking time in min |
| Defrosting meat | Cookware, uncovered | 0 | 500 g | 1 | 180 | 7 | |
| 2 | 90 | 8-12 |
Microwave cooking
| Dish | Cookware | Shelf position | Heating function | Weight | Steps | Microwave setting | Cooking time in min |
| Custard | Cookware, uncovered | 0 | 1000 g | 1 | 360 | 18-20 | |
| 2 | 180 | 18-22 | |||||
| Sponge cake | Cookware, uncovered | 0 | 475 g | 1 | 600 8-10 | ||
| Meatballs | Cookware, uncovered | 0 | 900 g | 1 | 600 20-25 |
Combined microwave cooking
| Dish | Cookware | Shelf position | Heating | function | Grill setting | Microwave setting | Duration in min |
| Potato gratin | Cookware, uncovered | 0 | + ≈ | 1 360 | 25 - 32 |
Steaming
Place the glass tray with steamer basket on shelf position 3.
| Dish | Cookware | Shelf | posi- | tion | Heating function | Steam setting | Cooking time in min | Notes |
| Peas, frozen | Glasstray+steaming tray | 3 | 3 - | The test is complete once the coldest area has reached 85 °C. | ||||
| Broccoli, fresh, 300 g | Glasstray+steaming tray | 3 | 11 - 13 | |||||
| Broccoli, fresh, one con-tainer | Glasstray+steaming tray | 3 | 18 - 20 | |||||
Grilling
The values in the table apply to food placed in a cold
Place the glass tray underneath the wire rack to catch the oven. liquid and keep the cooking compartment cleaner.
| Dish | Cookware | Shelf tion | posi-Heating function | Grill setting | Cooking in min | timeNotes |
| Toasting bread | Wire rack | 3 | 3 | 4-5 | ||
| Beefburgers, x 12 | Wire rack + glass tray | 3+1 | 3 | 35-45 | Turn halfway through |
目录

主要用途 44

重要安全信息 44
常规信息 44
微波 45
蒸制 46

损坏原因....46
常规信息 46
微波 46
蒸制 47

环境保护....47
节能 47
环保处理 47

了解您的电器 48
控制面板 48
功能选择钮.... 48
触控区和显示屏 48
旋转选择钮.... 49
操作模式 49
蒸制 49
烧烤 50
微波 50
烹饪箱 50
水箱盖 51
水箱 51
滴水盘 51

附件 52
随附附件 52
附加附件 52
专用附件 52
插入附件 52

首次使用之前 53
首次使用 53
设置水硬度范围。 53
清洁烹饪箱和附件 53

操作电器....54
打开和关断电器 54
设置 操作模式 54
自动安全关断功能 54

微波 55
烹饪容器 55
微波功率设置....55
设置微波 55
设置微波组合操作 56

烧烤 57
烧烤功能 57
烧烤设置 57
设置烧烤 57

蒸制 58
噪音 58
使用蒸汽烹饪....58
设置蒸制组合....59
加注水箱 59
重新加注水箱....60
在每次蒸汽操作之后 60

自动程序....61
设置程序 61
程序表 62

时间设定....63
检查时间设置....63
设置定时器.... 63
设置烹饪时间....63
设置时间 64
更改时钟时间....64

儿童锁....64
启用和停用.... 64

基本设置....65
更改基本设置....65
基本设置列表....65

清洁 65
合适的清洁剂 65
保持电器清洁....66

清洁功能....66
除垢 66
冲洗 67
后续清洁 67
排空滴水盘....67

故障检修....68

客户服务....69
E 编号和 FD 编号 69
技术参数 69

经由我们烹饪工作室测试过的菜谱 69
常规信息 69
除霜 70
加热冷冻食物....71
加热 72
蛋糕、小份烘焙食品和面包 73
家禽、肉和鱼: 73
蔬菜和配菜 74
甜食 75
食品中的丙烯酰胺 76
测试菜谱 76

主要用途
请认真阅读本手册。只有这样才能安全正确地使用电器。请保管好说明手册和安装说明,以备日后使用或供下一任所有者使用。专
本电器仅适合整体安装在厨房内。请遵守用的安装说明。
拆开包装后请检查电器是否有损坏。如果电器在运输过程中损坏,请勿连接电器。
本电器仅供家庭使用。本电器只能用于制备食物和饮料。电器工作时必须有人看管。本电器仅限室内使用。
本电器最高可在海拔 4000 米的高度使用。
8 岁以上儿童以及身体、感官或精神有缺陷的人员或缺乏相关经验和知识的人员,必须在有人监督的情况下或在其安全责任人给予电器使用安全指导并了解相关危险的情况下,方可使用本电器。
严禁儿童玩耍本电器及在电器周围玩耍。儿童除非年满15岁并有人监督,否则不得清洁本电器或执行一般维护操作。
8岁以下儿童请远离本电器和电源线。
制造商信息:
制造商:博西家用电器(中国)有限公司
地址:南京市中山路129号中南国际大厦20、21楼
执行标准:
- GB 4706.1-2005 家用和类似用途电器的安全 第1部分:通用要求
- GB 4706.21-2008家用和类似用途电器的安全微波炉,包括组合型微波炉的特殊要求
- GB 4706.22-2008家用和类似用途电器的安全驻立式电灶、灶台、烤箱及类似用途器具的特殊要求
GB19606-2004家用和类似用途电器噪声限值

重要安全信息
常规信息
警告 - 有着火危险!
- 电器会变灼热。如果电器安装在有装饰门的固定橱柜中,装饰门关闭时会聚集热量。只能在装饰门打开时才能操作电器。
- 易燃物品保存在烹饪箱中可能导致着火危险。切勿将易燃的物品保存在烹饪箱中。切勿在内部起烟时打开电器门。关断电器,拔下电源插头,或关断熔断器盒中的断路器。
- 松散的食物残渣、脂肪和肉汁可能会着火。在首次使用电器制备食物之前,去除烹饪箱、加热元件和附件上的食物残余物。
- 电器门打开时会产生一股气流。防油纸可能会与加热元件接触并着火。在预热期间,切勿将防油纸散铺在附件上。请务必用烤盘或烤模压住防油纸。防油纸应仅覆盖需要覆盖的表面。切勿伸出附件。
警告 - 有灼伤危险!
- 电器会变灼热。切勿触摸烹饪箱的内表面或加热元件。必须让电器冷却下来。请将小孩留在安全距离以外。
- 附件和烹饪容器会变得十分灼热。从烹饪箱中取出附件或烹饪容器时必须戴上烤箱手套。
- 酒精蒸汽可能会在热烹饪箱内着火。切勿烹饪混合了大量高浓度酒类的食物。只能使用少量高浓度酒类。打开电器门时需小心。
警告 - 有烫伤危险!
- 可接触的部位在使用期间可能会变得很烫。切勿触碰灼热部位。请将小孩留在安全距离以外。
- 在打开电器门时,可能会有热蒸汽逸出。由于温度原因,蒸汽可能不可见。开门时,不要站得离电器太近。打开电器门时要小心。不要让儿童靠近。
- 将水倒入高温烹饪箱会产生热蒸汽。切勿将水倒入高温烹饪箱中。
警告 - 有受伤危险!
电器门玻璃如果有刮伤,可能会导致裂开。请不要使用玻璃刮刀、剧烈或腐蚀性的清洁用品或洗涤剂。
警告 - 有电击危险!
- 修理不当是很危险的。只能由我们经过培训的售后服务人员来维修电器和更换损坏的电源线。如果电器发生故障,请拔下电器电源插头,或断开熔断器盒中的断路器。联系售后服务部门。
- 如果接触到电器的灼热部件,电器的电线绝缘层会熔化。切勿使电器电源线接触电器的灼热部件。
-
请勿使用高压清洁器或蒸汽清洁器,以防触电。
湿气渗入会导致电击危险。切勿让电器处于过热或潮湿的环境中。本电器仅限室内使用。 -
故障电器会导致电击危险。切勿接通发生故障的电器。拔下电器的电源插头或断开保险丝盒中的断路器。联系售后服务部门。
- 更换烹饪箱灯泡时,灯泡插座触点是带电的。更换灯泡前,拔下电器电源插头或断开熔断器盒中的断路器。
警告-磁性引起的危险!
控制面板或控制元件中带有永久磁铁。它们可能影响电子植入式器件,如心脏起搏器或胰岛素泵。佩戴电子植入式器件的人必须与控制面板保持至少10 cm的距离。
微波
警告 - 有灼伤危险!
- 将本电器用于预定用途以外的其他目的非常危险。
不允许以下行为:烘干食物或衣物,加热拖鞋或谷物枕头、海绵、湿的清洁布或类似物品。这是因为过热的拖鞋、谷物枕头、海绵、湿的清洁布等类似物品可能导致烧伤皮肤。 - 食物可能着火。切勿在蓄热包装内加热食物。在无人看管的情况下,请勿将食物放在塑料、纸或其它易燃材料制成的容器中加热。所选择的微波功率或时间设置不要高于实际需要。请遵循本说明手册中提供的信息。切勿使用微波干燥食物。
解冻或加热含水量低的食物。如面包时,切勿选择过高的功率或过长的时间。 - 食用油有着火危险。切勿使用微波单独加热食用油。
警告 - 有爆炸危险!
将液体或其它食物放在密封的容器中有爆炸危险。切勿将饮品或其它食物放在密封的容器中加热。
警告 - 有灼伤危险!
- 带壳或带皮的食物在加热过程中或甚至在加热后都有可能爆裂或爆炸。切勿加热带壳的鸡蛋或重新加热白煮蛋。切勿烹饪贝类或甲壳类。在煎蛋或水煮蛋时,一定要刺破蛋黄。带壳或带皮的食物表皮会爆裂,如苹果、番茄、土豆和香肠。加热前,应先刺破表壳或表皮。
- 婴儿食品中热量分布不均。切勿在封闭的容器中加热婴儿食品。一定要取下盖子或奶嘴。食物经过加热后,要搅拌或摇晃均匀。在喂孩子食物之前要先检查食物的温度。
- 经过加热的食物会散发热量。烹饪容器会变热。从烹饪箱中取出烹饪容器或附件时必须戴上烤箱手套。
-
给食物加热时,密封的包装可能会爆炸。请遵守产品包装上的说明。将容器从烹饪箱中取出时一定要戴上烤箱手套。
-
可触及部件在电器运转时会变得灼热。切勿触碰灼热部件。请将小孩留在安全距离以外。
- 将本电器用于预定用途以外的其他目的非常危险。
不允许以下行为:烘干食物或衣物,加热拖鞋或谷物枕头、海绵、湿的清洁布或类似物品。这是因为过热的拖鞋、谷物枕头、海绵、湿的清洁布等类似物品可能导致烧伤皮肤。
警告 - 有烫伤危险!
- 加热的液体有可能延时沸腾。即液体达到沸腾温度后,却没有常见的蒸汽气泡冒上液面。即使容器只是稍微振动,滚烫的液体也会突然沸腾溢出和飞溅。在加热时,一定要在容器内放一把汤匙。这会防止延时沸腾。

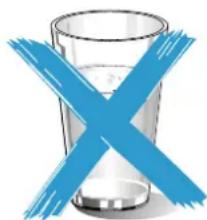
natural_image
Illustration of a glass with a blue X symbol crossed over it, representing a warning or rejection (no text present)警告 - 有受伤危险!
- 不合适的烹饪容器可能会开裂。瓷质或陶质烹饪容器在手柄或盖上会有小孔。这些小孔下方隐藏着空穴。渗入这些空穴的液体可能导致烹饪容器破裂。仅限使用耐微波烹饪容器。
- 若本电器仅在微波模式下运作,使用金属或含金属装饰的容器会导致电火花。这可能会导致电器损坏。在仅有微波运作的情况下切勿使用金属容器。
警告 - 有电击危险!
本电器为高压电器。切勿拆除外壳。
警告 - 有严重损害健康的危险!
- 如果清洁不当,电器表面可能会损坏。微波能可能会逸出。定期清洁电器,并即时除去食物积垢。时刻保持烹饪箱、门封、门和门碰清洁。→ "清洁"第 65 页
- 如果烹饪箱门或门封损坏,微波能可能会逸出。在烹饪箱门、门封或塑料门框损坏时,切勿使用本电器。致电售后服务部门。
- 如果电器没有配备任何外壳,微波能将会逸出。切勿拆除外壳。如有任何维护或维修工作,请联系售后服务部门。
蒸制
警告 - 有烫伤危险!
- 如果连续使用本电器,水箱中的水可能会变得非常热。在每次蒸制操作之后排空水箱。
- 烹饪箱内产生高温蒸汽。在任何蒸制操作过程中,切勿将手伸进烹饪箱。
- 将附件从烹饪箱中取出时,灼热的液体可能会从附件的四周溢出。取出灼热的附件时应小心,且必须戴上烤箱手套。
警告 - 有着火危险,有受伤危险!
可燃液体受热会在烹饪箱内着火(爆炸)。不要向水箱内加注任何可燃液体(例如酒类饮料)。仅可向水箱中加注清水或我们推荐的除垢溶剂。
损坏原因
常规信息
注意!
- 将水倒入高温烹饪箱:切勿将水倒入高温烹饪箱中。这将产生蒸汽。温度变化会导致损坏。
- 烹饪箱中的水分:烹饪箱中长期有水分可能会导致腐蚀。让烹饪箱在使用后充分干燥。不要将潮湿的食物长期存放在密闭的烹饪箱内。不要将食物存储在烹饪箱内。
- 打开电器门进行冷却:高温操作之后,烹饪箱必须关门冷却。不要将任何东西夹在电器门中。否则,即使电器门只是略微开启,长时间下来,附近的橱柜表面也可能会损坏。 如果烤箱运行时产生大量水分,则只能打开电器门让烹饪箱干燥。
- 门封极为脏污:如果门封非常脏,电器门在操作过程中将无法正确关闭。附近橱柜的表面可能会损坏。应始终保持门封清洁。→ "清洁"第65页
- 把电器门当作座椅、搁架或工作台:请勿坐在电器门上,也不要在电器门上放置或悬挂任何物品。不要将任何烹饪容器或附件放在电器门上。
- 插入附件:根据电器型号,在关闭电器门时,附件可能会刮伤门板。将附件插入烹饪箱时使其尽可能靠里。
- 搬运电器:不要抓着门把手搬运电器。门把手不能承受电器的重量,可能会断开。
微波
注意!
- 铝箔:烹饪箱内的铝箔不得与门玻璃接触。否则会导致门玻璃永久褪色。
- 产生火花:金属 (例如玻璃杯内的汤匙) 必须距离烹饪箱内壁和门内壁至少 2 ~cm 。否则,火花会损坏门内壁的玻璃。
- 微波和微波组合模式:烤架不适用于微波模式或组合了某种加热类型的微波模式。若使用这两种模式,可能会产生火花,并对烹饪箱造成伤害。
- 箔制容器:不要在电器中使用箔制容器。它们产生的火花会损坏电器。
- 在未放食物的情况下操作微波:烹饪箱中未放食物就操作电器会导致电器过载。除非烹饪箱内放有食物,否则切勿开启微波。对于此规则,唯一的例外是进行下面的简短的容器测试。→ "微波"第 55 页

natural_image
Simple icon showing a speedometer above a boat, with a checkmark below (no text or symbols)
natural_image
Simple icon showing a rectangular frame with a wavy line and a blue X mark (no text or symbols)- 微波爆米花:微波功率切勿设置过高。过载可能引起门面板破损。功率设置不要超过 600 W。爆米花袋必须放在玻璃盘上。
蒸制
注意!
- 打理电器:电器烹饪箱采用高质量不锈钢制作。不正确的维护可能导致烹饪箱腐蚀。请遵守说明手册中的保养和清洁说明。在电器冷却后立即去除烹饪箱表面的食物碎屑。
- 烤模:烹饪容器必须耐热和蒸汽。硅胶烤模不适合使用蒸汽组合操作。
有生锈部分的烹饪容器:不要使用出现生锈部分的任何烹饪容器。即使一个最小的锈点都会导致烹饪箱中出现腐蚀。 - 液体滴落:在蒸制期间,将玻璃烤盘插入烹饪层3,然后将蒸制容器放入玻璃烤盘。玻璃烤盘会接住滴流的液体。
- 水箱中的热水:热水可能会损坏泵。不要将热水倒入水箱内。
有损坏烹饪箱的风险:如果烹饪箱底板上有水,切勿使用电器。操作电器之前,擦去烹饪箱底板上的水。 - 除垢溶液:任何除垢溶液都不得与控制面板或其他电器的表面接触。这会损伤表面。如果发生这种情况,立即用水去除除垢溶液。
- 清洁水箱:不要在洗碗机中清洁水箱。否则,水箱将会损坏。用软布和标准清洁液清洁水箱。
- 防冻:在运输和存储时,为防止因霜冻而损坏电器,必须先完全排空电器的水路系统。

环境保护
您的新电器属于特别节能款。您可以在本章节找到关于在使用电器时如何节约更多能源和如何正确处置报废电器的提示。
节能
仅在菜谱有要求或操作说明表中有明确指示的情况下才预热电器。
- 烘焙时使用涂深黑色漆的烤模或搪瓷烘烤模。吸热效果会特别好。
- 在烹饪食物时,尽可能不要频繁地打开电器门。
- 烤制多份糕点时最好一份接一份地烤。烹饪箱有余温。这可减少第二份糕点的烤制时间。您可以将两个蛋糕模挨着放在烹饪箱中。
- 对于长时间的烹饪,您可以在烹饪时间结束前 10 分钟关断电器,用剩余的热量完成烹饪。
环保处理
按照环保要求处理包装材料。

本电器已经根据欧盟有关废弃电气和电子设备的法令2012/19/EU (waste electrical and electronic equipment - WEEE)进行了标记。该指令是在全欧盟范围内关于废弃设备回收处理和再生利用的有效法律依据。

了解您的电器
本节对指示符和控件进行说明。此外,您还会了解到电器的各种功能。
提示:根据电器型号,个别细节和颜色可能不同。
控制面板
您可通过控制单元,使用功能和旋转选择钮以及触控区来设置电器的各种功能。当前设置出现在显示屏上。
该概述展示了在所选操作模式下打开电器时的控制面板。

1 功能选择钮
使用功能选择钮设置加热类型或其它功能。
可从关断位置顺时针或逆时针转动功能选择钮。
2 触控区
在触控区后面有传感器。只需触摸符号即可选择功能。
3 显示
显示屏显示激活的功能所对应的符号以及时间设置选项。
4 旋转选择钮
使用旋转选择钮设置加热类型的温度或选择其它功能的设置。
可以顺时针和逆时针转动旋转选择钮。
提示
- 在一些电器上,功能选择钮或旋转选择钮可伸缩。如要将功能或旋转选择钮弹出或按入,可将其按入“关”位置。
- 如果功能选择钮位于“关”位置 (节能模式),且选择了一个功能,可能需要过几秒才可以使用该功能 (如微波)。
功能选择钮
使用功能选择钮设置操作模式和其它功能。
为了确保始终使用正确的操作模式烹饪食物,关于它们的差异及其应用请参见下文说明。
位置 用途
| ●“关”位置 在该位置下,电器关断,处于节能模式。 | |
| 微波 选择微波模式。 | |
| 蒸制 选择蒸汽模式。 | |
| 大面积烧烤 烧烤加热元件整个区域变热。 | |
| 小面积烧烤 烧烤元件中心区域变热。 | |
| 除垢 用于为蒸发盘除垢。 | |
| 冲洗 该功能用水冲洗蒸制单元的管道。建议在每次蒸汽操作后都执行冲洗功能。 | |
| 程序 选择预设菜式程序。 | |
| 内部照明 单独打开内部照明灯,电器未加热。 | |
触控区和显示屏
您可使用触控区来设置电器的各种附加功能。您可在显示屏上看到这些功能的值。
触控区
您可以在此找到各种按键和触控区的简要说明。
| 符号 | 含义 | |
| ≈ | 微波 选择微波功率级别或开启微波功能。 | |
| ≈ | 蒸制 选择蒸汽级别或开启某一类加热模式下附加蒸汽功能。 | |
| P | 程序 调用预设菜式程序选择,使用旋转选择钮选择程序号。 | |
| ∅ | 时间设置选项 选择不同的时间设置选项,然后使用旋转选择钮调节设定时间。 | |
| ∞ | 儿童锁 触摸并按住可启用/停用童锁 | |
| °C/kg | 温度 / 重量 | 选择进入温度/重量设置,然后使用旋转选择钮调节设定。 |
| ▷/□ | 开始/停止 | 开始或暂停操作提示:长按结束当前操作,所选操作模式的设置回复到默认值。 |
显示
显示屏结构清晰,在任何情况下都可以对其中信息一目了然。
当前可以设置的值高亮显示。高亮显示方式为设置值上方和下方的两个小箭头。
可以通过旋转选择钮直接更改高亮显示的数值。
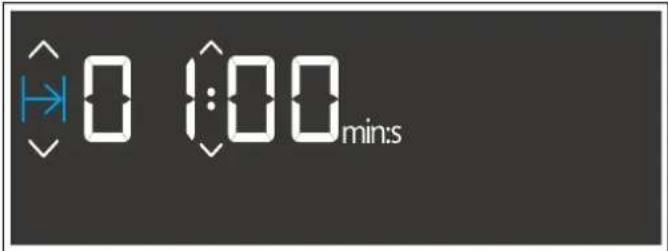
显示信息
您可以在此查看不同显示信息的简短说明。
符号 含义
| 定时器 如果符号高亮显示,定时器将出现在显示屏上。 | |
| → | 烹饪时长 如果符号高亮显示,烹饪时间将出现在显示屏上。 |
| 时钟 如果符号高亮显示,时钟将出现在显示屏上。 | |
| h:min 小时/分钟 烹饪时间(单位:小时/分钟) | |
| min:s 分钟/秒 烹饪时间(分钟和秒) | |
| 儿童锁 如果该信号亮起,则儿童锁启用。 | |
| 滴水盘 滴水盘状态显示 | |
| 水箱 水箱状态显示 | |
| 除垢 如果该符号亮起,电器必须除垢。 | |
滴水盘和水箱状态显示
只有在需要将滴水盘或水箱用于所选操作模式时,状态显示灯才亮起。它可以显示多种状态,并通知用户什么时候需要操作。
水箱状态显示
| 符号含义 | ||
| 符号亮起,箭头闪烁 | 水箱位于水箱槽中,需要加注。 | |
| 不带箭头的符号闪烁 | 水箱不在水箱槽中,需要安装到位。 | |
| 不带箭头的符号亮起 | 水箱位于水箱槽中。无需采取进一步措施。 | |
滴水盘状态显示
| 符号含义 | ||
| 符号亮起,箭头闪烁 | 滴水盘位于水箱槽中,需要排空。 | |
| 不带箭头的符号闪烁 | 滴水盘不在水箱槽中。将滴水盘装回水箱槽。 | |
| 不带箭头的符号亮起 | 滴水盘位于水箱槽中。无需采取进一步措施。 | |
温度指示器
时间显示屏右边的蓝色温度计指示电器正在升温。
如果您正在使用烧烤或蒸制模式,整个温度计立即全亮蓝色。
使用微波功能时温度计不亮。

夜间模式
为了节约能量,显示屏亮度在晚上10点到早上5:59之间自动调至较低水平。
旋转选择钮
使用旋转选择钮更改高亮显示在显示屏中的调整值。
在大多数选项列表中(例如程序),第一个选项紧跟在最后一个选项之后。
设置某些数值 (例如重量) 时,当旋转选择钮达到最小值或最大值时,您需要反方向旋转该选择钮。
操作模式
您的电器具有多种操作模式,方便您选择使用。
您可以在相应章节了解这些模式的详细说明。
| 操作模式 用途 | |
| 微波→"微波"第55页 | 您可以使用微波快速烹饪、加热和解冻菜式。 |
| 蒸制→"蒸制"第58页 | 电器提供多种精心设计的蒸制级别,供您实现最佳食物烹饪效果。 |
| 大面积烧烤→"烧烤"第50页 | 用于烧烤薄块食物,如肉排、香肠,或烤吐司及焗烤类食物。 |
| 小面积烧烤→"烧烤"第50页 | 用于烤少量肉排、香肠、面包和鱼块。 |
| 微波组合操作→"设置微波组合操作"第56页 | 这允许您在蒸制或烧烤食物时开启微波。 |
| 蒸制组合→"设置蒸制组合"第59页 | 这允许您在微波烹饪或烧烤食物时开启蒸制功能。 |
| 清洁→"清洁功能"第66页 | 可以使用不同的清洁功能:除垢和冲洗。 |
| 基本设置 您可以更改电器的基本设置来满足您的需求。 | |
蒸制
您可以单独使用蒸制功能,也可以和烧烤和微波功能组合使用。
为了确保蒸制功能的最佳效果,应取出烤架。将玻璃烤盘插入烹饪层3,然后将蒸制容器放在玻璃烤盘上。

natural_image
Diagram of a kitchen appliance with a tray and lid, showing a numbered label (3) pointing to the interior area.蒸汽等级
使用蒸制功能时可采用不同的强度等级。触摸 可选择蒸汽等级。所选的蒸汽等级显示在显示屏上。
级别 强度 用途 显示指示符
| 1 低 用于解冻蔬菜、肉、鱼和水果。 |  |
| 2 中 用于制备甜品、鱼和香肠。 |  |
| 3 高 用于烹饪蔬菜、鱼、配菜,用于水果榨汁和热烫。 |  |
烧烤
您可以通过烧烤让您的食物很好地上色。
您可以单独使用烧烤功能,也可以组合使用微波和蒸制功能。
为了最好地利用烧烤功能,应将烤架插入烹饪层3或4。
烧烤设置
大面积烧烤功能有三种强度选项:
- 设置 1: 低
- 设置 2: 中
- 设置 3: 高
微波
为了确保您始终使用正确的微波功率设置,我们给出下列功率设置一览表。
微波功率设置为分级设置,并不总是与电器实际使用的功率完全对应。
微波设置 最大烹饪时长 用途
| 90 | 1小时30分钟 | 用于解冻容易变质的食物。 |
| 180 | 1小时30分钟 | 用于解冻和连续烹饪。 |
| 360 | 1小时30分钟 | 用于烹饪肉和加热容易变质的食物。 |
| 600 | 1小时30分钟 | 用于加热和烹饪食物。 |
| 1000 | 30分钟 | 用于加热液体。 |
设置微波组合操作
您可以将微波和各种加热类型以及蒸制功能组合起来使用。电器加热与开启微波可以同时进行。因此,食物可在更短的时间内烹制完成。
您可以打开所有微波功率设置。
例外: 1000 W
烹饪箱
烹饪箱中的各种功能可以使您的电器更易于使用。例如,烹饪箱内照明功能,而冷却风扇则可防止电器过热。
打开电器门
如果在操作期间打开电器门,则操作暂停。关闭电器门,触摸 ▷/□ 按键,继续操作。
内部照明
电器运作时,内部照明亮起。电器停止烹饪食物时,照明熄灭。
打开电器门时,内部照明打开。例如,可便于清洁烹饪箱。约 15 分钟后,内部照明自动关断。
冷却风扇
您的电器有一个冷却风扇。冷却风扇在工作期间开启。热风从门上方逸出。
使用后,冷却风扇会继续运转一段时间。
注意!
不要覆盖通风槽。否则可能会导致电器过热。
提示
- 在微波操作过程中,电器保持冷却。尽管如此,冷却风扇仍将开启。在微波工作结束时,风机还会持续运转一段时间。
- 电器门内壁、烹饪箱内壁和底板上可能会形成冷凝液。这是正常现象,不影响电器工作。请在烹饪后擦去这些冷凝水。
水箱盖
水箱盖位于电器门下方,打开可拿取滴水盘和水箱。二者都位于水箱盖后面。如下操作,打开和关闭水箱盖: 短暂按下水箱盖中央,将其打开。水箱盖向上翻。 如要关闭水箱盖,将其向下翻,然后短暂按下水箱盖中央。水箱盖锁定。

natural_image
Two-step diagram showing a device with a screen and a shelf, labeled 1 and 2, with blue arrows indicating motion (no text or symbols present)水箱
电器装有水箱。水箱位于水箱盖后方右侧。向水箱内加水,以便在蒸制模式下使用电器。→ "加注水箱"第 59 页如果水箱符号的箭头 在显示屏上闪烁,表示需要为水箱注水。
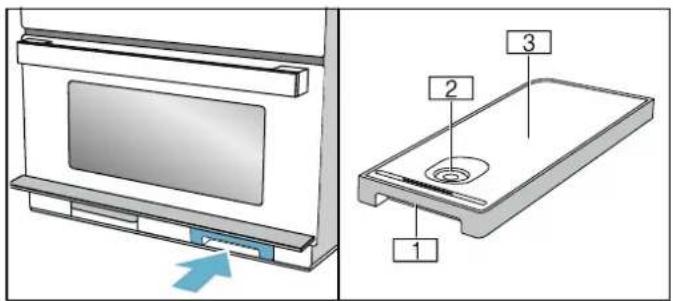
□1用于取出和插入水箱的把手
2 加注孔
3 水箱盖
滴水盘
本电器装有滴水盘。该滴水盘位于水箱盖后方左侧。在执行清洁功能之前和之后清空滴水盘→“清洁功能”第66页如果滴水盘符号的箭头 在显示屏上闪烁,表示需要清空滴水盘。

□1用于取出和插入水箱的把手
2 收集口
3 水箱盖

附件
电器随附一系列附件。您可以在本章节找到有关随附附件的概览以及正确使用附件的信息。
随附附件
您的电器配备下列附件:

烤架
用作放置烘焙模具或用于烧烤和着色。
烤架适用于在烹饪层 3 和 4。 仅使用微波模式或使用蒸汽烹饪时,烤架不适用。
确保沿着方向 a 插入烤架。
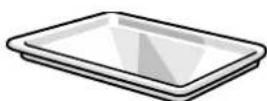
玻璃烤盘
玻璃烤盘可用于任何操作模式,包括组合模式。此外,如果直接在烤架上烧烤食物,可以作为防溅板。
在清洁玻璃烤盘或将其放入冷水之前应先待其冷却,否则会损坏玻璃。

蒸制容器
蒸制容器放在玻璃烤盘中,以便使用“蒸制”或“带微波蒸制”操作模式进行烹饪。为此,必须将玻璃烤盘插入烹饪层3。食物可以直接放在蒸制容器中。
蒸制容器可以用洗碗机洗。
蒸制容器不可用于标准微波操作或烧烤。
专
只能使用电器制造商提供的原始附件。这些附件是门为本电器定制的。
您可以在售后服务部、专卖店或在线商店购买附件。
附加附件
根据电器型号,可能配有附加附件。
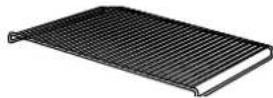
插入式烤架
用于煎烤。将烤架插入玻璃烤盘,撑脚在下。这可确保滴下的油脂和肉汁都收集在盘中。烤架不适用于微波操作或蒸汽模式。
专用附件
您可以在售后服务部、专卖店购买更多附件。
专用附件
玻璃烤盘
用于在电器中制备焖烧肉和烘焙食品。
插入附件
烹饪箱有四个烹饪层。烹饪层自下而上计数。
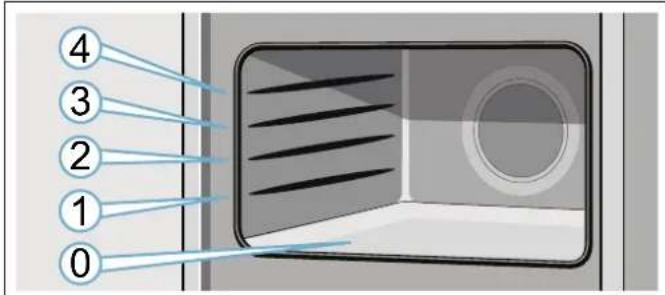
将附件插入导轨,将其完全滑入。
提示:烹饪箱 (位置 0) 尤其适用于微波操作,因为这里的微波效果最佳。仅使用适合于微波的烹饪容器。
首次使用之前
您必须先进行一些设置,才可使用新电器。您还必须清洁烹饪箱和附件。
电器必须完全安装并连接至电源。
首次使用
接通电源或断电后,显示屏提示设置时钟。说明可能需要几秒钟时间才会出现。
设置时间
在首次使用时,时间高亮显示。12:00 值在显示屏中闪烁,①符号亮起。设置时间。
- 使用旋转选择钮设置结束时间。
- 触摸 ①。 现在时钟已经设置好了。
更改时钟时间
提示:如要更改时钟时间,需要关断电器。
- 触摸两下 ⏱ 按键。
① 符号和时钟时间将出现在显示屏上。 - 使用旋转选择钮设置时钟。
- 触摸 ⏻ 按键。 现在时钟已经设置好了。
提示
- 如果设置时间后未触摸 ⏻,设置值会在几秒后自动被采用。
- 如果移动功能选择钮,使其与设置相符,结束后必须将其转到“关”位置。只有此时可使用电器。
- 为了降低电器待机时的能耗,您可以隐藏时钟。
设置水硬度范围。
为了让电器在必要时可靠地提醒您进行除垢,必须正确设置水硬度范围。
水硬度范围在出厂时被设置为 4 (极硬)。
注意!
使用不适当的液体会损坏电器。
不要使用蒸馏水、高氯自来水 (> 40 mg/L) 或其它液体。
只能使用冷的、新鲜的、不含碳酸的自来水或软化水。
提示
- 所在地水质硬度高,建议使用软化水。
- 如果仅使用软化水,那么可将水硬度范围设置为“软化水”。
- 如果使用的是矿泉水,请将水硬度范围设置为“4极硬”
- 如果使用的是矿泉水,您必须仅使用不含碳酸盐的矿泉水。
水硬度范围 设置
| 0 | 0 | 软化 | |
| 1 | (最高 | 1.3 mmol/l) | 1 软 |
| 2 | (1.3 - 2.5 mmol/l) | 2 中 | |
| 3 | (2.5 - 3.8 mmol/l) | 3 硬 | |
| 4 | (高于 | 3.8 mmol/l) | 4 极硬 |
您可在基本设置中更改硬度设置。→ "基本设置"第 65 页
清洁烹饪箱和附件
在第一次使用电器制备食物之前必须清洁烹饪箱和附件。
清洁烹饪箱
为了去除新电器的味道,可清空烹饪箱并关上电器门来加热烹饪箱。用时 1 小时、烧烤设置 3 可很好地实现这一目的。确保没有包装残留物留在烹饪箱中。
- 使用功能选择钮设置大面积烧烤 ☐。
- 使用旋转选择钮设置到 3。
- 触摸 ▷/□。 电器开始加热。
1 小时后关断电器。为此,触摸 ▷/□,然后将功能选择钮转到关断位置。
清洁附件
在第一次使用附件前,请用热肥皂水和软洗碗布彻底清洁附件。

操作电器
您已经了解了各个控件及其工作原理。现在,我们将说明如何设置您的电器。您将了解打开和关断电器时的状态以及如何选择操作模式。
打开和关断电器
必须先接通电器电源,才可设置电器。
提示:只能在关断电器时设置童锁。在关断电器后,某些显示信息在显示屏上仍然可以看到。
不使用时,请关断您的电器。如果长期不应用设置,则电器将自动关断。
开机
转动功能选择钮,开启电器。
标准值在显示屏中高亮显示。电器准备就绪。
您可以在单独的章节中查看操作模式选择方式。
关断电器
将功能选择钮转到关断位置。
任何可能正在运行的功能都会被取消。
时间出现在显示屏上。
提示:您可以在基本设置中设置在设备关断时是否显示时钟。
设置 操作模式
在选择操作模式后,默认值显示在显示屏中。您可以立即启动该设置。
以下始终适用:
-
使用功能选择钮选择操作模式。
-
如有必要,可以应用其他设置。 如要执行此操作,触摸相应的区域,然后使用旋转选择钮更改值。
-
触摸 ▷/□。 电器启动操作。
设置烹饪时间
- 设置操作模式。
- 触摸 ⏻,直到高亮显示 I→I 符号。
- 使用旋转选择钮设置所需烹饪时长。
- 触摸 ▷/□。 电器开始加热。▷/□ LED 亮起。烹饪时间开始倒计时。
暂停操作
- 触摸 ▷/□ 按键或打开电器门。操作暂停, ▷/□ LED 闪烁。
- 关闭电器门。
- 触摸 ▷/□ 按键。 电器继续运行,▷/□ LED 亮起。
停止加热电器
将功能选择钮转到“关”位置。
电器将停止加热,所有设置将被清除。
提示:电器暂停或停止后,风扇可能继续运行。
自动安全关断功能
如果电器某一模式进行设置后长时间未启动,安全关断功能会被激活。
电器在 9 小时后自动关断。

微波
您可以使用微波快速烹饪、加热和解冻食物。您可以单独使用微波,也可以组合使用烧烤或蒸制功能。
要确保微波使用的最佳效果,请遵循有关烹饪容器的说明并熟悉指导手册后面的应用程序表中的数据。
为了确保微波使用的最佳效果,请将烹饪容器放入烹饪箱底部。取出烤架。请遵守烹饪容器随附的说明。
烹饪容器
并非所有烹饪容器都适用于微波。因此为了确保您的食物已被正确加热并电器未被损坏,请仅使用适合微波的烹饪容器。
合适的烹饪容器
用玻璃、玻璃陶瓷、陶瓷或耐热塑料制成的耐热烹饪容器。这些材料可使微波穿透。
也可以使用餐盘。这样就不用将食物从一个盘换到另一个盘。如果烹饪容器带有金饰边或银饰边,只有在制造商保证它们适用于微波时才能使用。
不适合的烹饪容器
金属烹饪器皿不适合。微波无法穿透金属容器,因此放在金属容器中的食物仍是冷的。
注意!
产生火花: 金属 (例如玻璃杯内的汤匙) 必须距离烹饪箱内壁和门内壁至少 2 ~cm 。否则, 火花会损坏门内壁的玻璃。
烹饪容器测试
除非烹饪箱内放有食物,否则切勿开启微波。唯一的例外是进行下面的简短的烹饪容器测试。
如果您不能确定自己的烹饪容器是否适合在微波中使用,则进行以下测试。
-
以最大功率加热空烹饪容器 12 到 1 分钟。
-
在这期间检查烹饪容器的温度。
烹饪容器摸起来应该仍是冷的或温的。
如果烹饪容器变热或产生火花,则不适用。
此时,请停止测试。
警告 - 有灼伤危险!
可触及部件在电器运转时会变得灼热。切勿触碰灼热部件。请将小孩留在安全距离以外。
微波功率设置
微波功率设置为分级设置,并不总是与电器实际使用的功率完全对应。
以下微波功率设置可供选择。
| 微波设置 最大烹饪时长 用途 |
| 90 1 小时 30 分钟 用于解冻容易变质的食物。 |
| 180 1 小时 30 分钟 用于解冻和连续烹饪。 |
| 360 1 小时 30 分钟 用于烹饪肉和加热容易变质的食物。 |
| 600 1 小时 30 分钟 用于加热和烹饪食物。 |
| 1000 30 分钟 用于加热液体。 |
默认值:
电器为每种微波功率设置都提供了默认的烹饪时长。您可以接受该值或进行适当更改。
最高设定仅用于加热液体。不适合加热食物。一定时间后,微波最大功率逐渐减少到 600 W 以下,从而保护电器。冷却一段时间后,会恢复到全火力状态。
时间设置间隔
设置烹饪时间的最小增/减量随着烹饪时间长度发生变化。
| 烹饪时长 | 时间设定最小增/减量间隔 |
| 0 - 1 分钟 | 5 秒 |
| 1-3 分钟 | 10 秒 |
| 3-15 分钟 | 30 秒 |
| 15 分钟 - 1 小时 | 1 分钟 |
| 1 小时 - 1 小时 30 分钟 | 5 分钟 |
设置微波
实例:微波功率设置 600 W,烹饪时间 5 分钟。
- 使用功能选择钮选择微波功能 ≅。
电器准备就绪。最大微波功率输出 ≈ 将在显示屏上显示为默认值。您可以随时更改数值。
- 触摸微波设置域,选择所需要的功率设置。
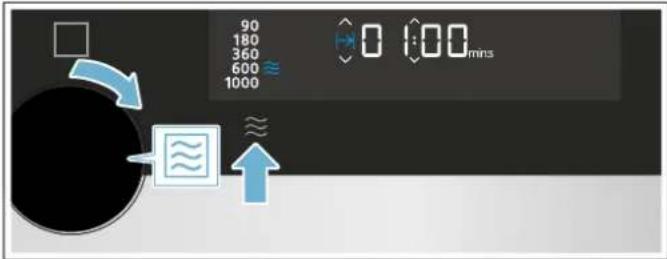
微波设置将高亮显示,默认烹饪时间将显示在显示屏上。
- 使用旋转选择钮设置所需烹饪时长。
提示: 还可以先设置烹饪时间, 然后设置微波。
- 触摸 ▷/□ 按键。
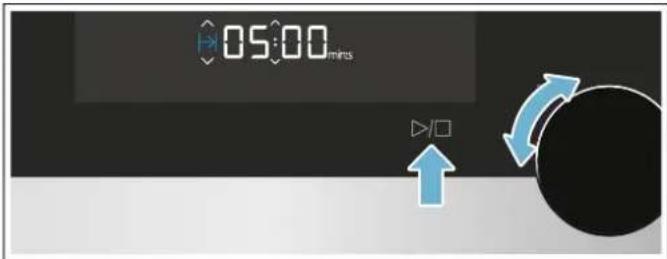
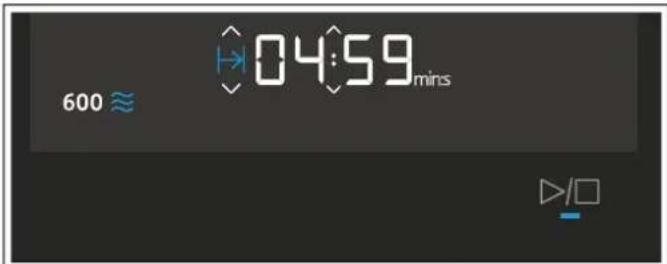
剩余时间将在显示屏中倒计时。▷/□ LED 将亮起。
烹饪时间正常结束
响起一声信号音。打开电器门或触摸任何区域。
更改烹饪时间
使用旋转选择钮可以更改烹饪时长。几秒钟之后,所更改的时间将被采用。
改变微波输出功率
触摸 ≈,直到选中显示屏中的所需级别。
提示
- 通过触摸微波功率按键若干次可从高到低设置微波等级
- 如果仅在启动后增加微波功能,电器暂停。按下 ▷/□,开始运行
暂停操作
- 触摸 ▷/□ 按键或打开电器门。
操作暂停,▷/□ LED 闪烁。 - 关闭电器门。
- 触摸 ▷/□ 按键。
电器继续运行,▷/□ LED 亮起。
停止加热电器
将功能选择钮转到“关”位置。
电器将停止加热,所有设置将被清除。
提示:电器暂停或停止后,风扇可能继续运行。
设置微波组合操作
您可以将微波和烧烤、蒸制功能组合起来使用。电器加热与开启微波可以同时进行。因此,食物可在更短的时间内烹制完成。
组合选项
蒸制
烧烤
例外:
微波设置 1000 W
设置组合操作
图中实例:大面积烧烤 ☐,等级 2,微波 360 W,烹饪时间为 17 分钟。
- 使用功能选择钮设置大面积烧烤 ☐。显示屏上出现缺省值等级 3。
- 使用旋转选择钮可以设置所需级别。
- 触摸微波功率 ≈,直到选中显示屏中的所需级别。显示默认烹饪时间。
- 使用旋转选择钮设置烹饪时间。
- 触摸 ▷/□。 操作开始,▷/□ LED 亮起。烹饪时间开始倒计时。
烹饪时间正常结束
响起信号声,▷/□ 符号停止点亮。组合模式烹饪完成。触摸任何区域可结束声音信号。
改变微波输出功率
触摸 ≈,直到选中显示屏中的所需级别。
提示
- 通过触摸微波功率按键若干次可从高到低设置微波等级
- 如果仅在启动后增加微波功能,电器暂停。按下 ▷/□,开始运行
暂停操作
-
触摸 ▷/□ 按键或打开电器门。
操作暂停,▷/□ LED 闪烁。 -
关闭电器门。
-
触摸 ▷/□ 按键。 电器继续运行,▷/□ LED 亮起。
停止加热电器
将功能选择钮转到“关”位置。
电器将停止加热,所有设置将被清除。
提示:电器暂停或停止后,风扇可能继续运行。
烘干烹饪箱
请在操作之后干燥烹饪箱,确保没有水分残留。
加热烹饪箱
烘干烹饪箱需要进行加热,使箱中的水分蒸发。然后您需要打开电器门,以便烹饪箱中的水分能够逸出。
- 让电器冷却下来。
- 立即清除烹饪箱中的严重污垢,擦去烹饪箱箱底的水分。
- 使用功能选择钮设置大面积烧烤
- 触摸 ⑤ 两次。 烹饪时间符号 I→I 在显示屏中高亮显示。
- 使用旋转选择钮设置 15 分钟的烹饪时间。
- 按下 ▷/□ 开始运行。 干燥功能启动并在 15 分钟后自动结束。
- 打开电器门并保持打开状态 1 至 2 分钟,以便烹饪箱中的水分能够逸出。
手动干燥烹饪箱
- 让电器冷却下来。
- 去除烹饪箱中的食物碎屑。
- 用海绵擦干烹饪箱。
- 让电器门保持打开 1 小时,这样烹饪箱可以完全干燥。
烧烤
您可以通过烧烤让您的食物很好地上色。
您可以单独使用烧烤功能,也可以组合使用微波和蒸制功能。
为了最好地利用烧烤功能,应将烤架插入烹饪层3或4。
烧烤功能
根据食物类型和分量,您可以选择两种烧烤功能之一:
功能 食物
| 大面积烧烤 | 使用大面积烧烤来烧烤大块肉类、面包或给蛋糕成色。 |
| 小面积烧烤 | 使用小面积烧烤来烧烤小份食物。使用此功能时,仅烧烤元件中心区域变热。 |
烧烤设置
下列烧烤设置可用于烧烤功能:
设置 食物
| 大面积烧烤 | 设置1(低)蛋奶酥和厚点心 |
| 设置2(中)薄点心和鱼 | |
| 设置3(高)肉排、香肠和吐司 | |
| 小面积烧烤 | 设置1(低)小份蛋奶酥和厚点心。 |
设置烧烤
图中实例:大面积烧烤☐,设置2,烹饪时间为12分钟。
- 使用功能选择钮设置全幅烧烤 ☐ 模式。

- 使用旋转选择钮选择设置 2。
显示屏中将显示烧烤设置。 - 使用旋转选择钮设置所需烹饪时长。
- 触摸 ▷/□。

电器将开始加热。温度指示器将全亮。
提示: 电器预热后, 略有温度波动是正常情况。
烹饪时间正常结束
响起一声信号音。打开电器门或触摸任何区域。
设置烹饪时间
- 设置操作模式。
- 触摸 ⏻,直到高亮显示 |→| 符号。
- 使用旋转选择钮设置所需烹饪时长。
- 触摸 ▷/□。
电器开始加热。▷/□ LED 亮起。烹饪时间开始倒计时。
更改烧烤设置
选择烧烤功能或启动烧烤功能后,仍可随时使用旋转选择钮更改烧烤设置。
烹饪时长保持不变。
暂停操作
- 触摸 ▷/□ 按键或打开电器门。
操作暂停,▷/□ LED 闪烁。
2. 关闭电器门。
3. 触摸 ▷/□ 按键。
电器继续运行,▷/□ LED 亮起。
停止加热电器
将功能选择钮转到“关”位置。
电器将停止加热,所有设置将被清除。
提示:电器暂停或停止后,风扇可能继续运行。

蒸制
您可以单独使用蒸制功能,也可以组合使用烧烤和微波功能。
为了确保蒸制功能的最佳效果,应取出烤架。将玻璃烤盘插入烹饪层3,然后将蒸汽容器插入玻璃烤盘。

natural_image
Diagram of a kitchen appliance with a tray holding food, showing interior and exterior views (no text or symbols)警告 - 有烫伤危险!
在打开电器门时,可能会有热蒸汽逸出。由于温度原因,蒸汽可能不可见。开门时,不要站得离电器太近。打开电器门时要小心。不要让儿童靠近。
噪音
水泵
运行过程中您会听到嗡嗡的噪音。该噪音由水泵引起。此为正常工作噪声。
使用蒸汽烹饪
蒸汽等级
使用蒸制功能时可采用不同的强度等级。触摸 ⚪ 可选择蒸汽等级。所选的蒸汽等级显示在显示屏上。

设置蒸制
提示:如果电器长期未使用,首先运行一个冲洗周期 ☐。 → "清洁功能"第 66 页
实例:蒸制设置2,中等强度,烹饪时间10分钟。
- 使用功能选择钮设置蒸制功能。
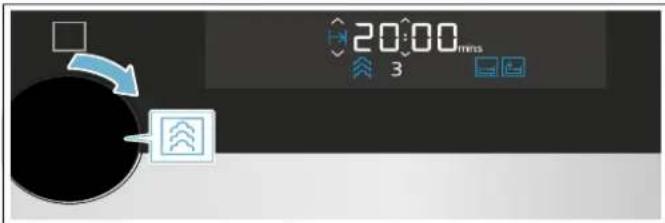
电器准备就绪。最大蒸制设置和烹饪时间 20 分钟被设置为默认值。水箱符号的箭头 ☐ 闪烁。
- 取出水箱,向其中添加清水,直至“max.”(最大)标记,然后完全插入水箱槽。→ "加注水箱"第 59 页
- 触摸并按住 ⚙️ 按键,直到所需蒸制设置。
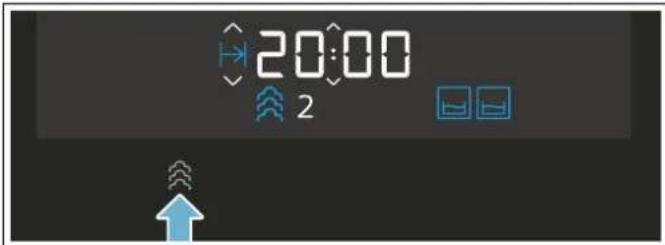
所选的蒸制设置将显示在显示屏上。
- 使用旋转选择钮设置所需烹饪时长。
提示:还可以先调节烹饪时间,然后设置蒸制设置。

- 触摸 ▷/□ 按键。

水箱符号的箭头 ☐ 将熄灭,水箱符号 ☐ 将亮起。电器将启动。▷/□ LED 将亮起。烹饪时间将在显示屏中倒计时。装满水的水箱的连续使用时间根据蒸汽设置发生变化。如果水箱在电器使用过程中缺水,电器暂停,水箱符号的箭头 ☐ 闪烁。向水箱内加注清水,最多加到“max.”(最大)标记处,然后触摸 ▶/□ 按键恢复运行。
提示
- 在电器使用过程中按下 ☐ 按键可随时改变蒸制设置。
- 使用蒸汽烹饪后,擦净排水管和烹饪箱。→"在每次蒸汽操作之后"第 60 页
设置蒸制组合
使用某些加热类型时,可以开启蒸制功能。
当使用蒸汽辅助进行烹饪时,不同强度的蒸汽将按不同的时间间隔引入烹饪箱。这可带给您更好的烹饪效果。
您的食物
外部变脆
形成光泽的表面
- 内部鲜嫩多汁
- 体积仅发生最小程度的收缩
合适的加热类型
≈ 微波
烧烤
设置组合模式
实例:大面积烧烤 ☐,设置 2,蒸制设置 2。
- 使用功能选择钮设置烧烤模式。
显示屏中将显示默认值:设置 3。 - 使用旋转选择钮选择所需设置。
-
触摸蒸制按键,直到选中所需设置。
水箱符号 ☐ 将出现在显示屏上。 -
为水箱补充水。
-
触摸 ▷/□ 按键。
电器将启动,▷/□ LED 将亮起。烹饪时间将开始倒计时。
提示:如果水箱在烹饪过程中缺水,电器将继续烹饪,但不使用蒸汽辅助。显示屏上将不显示指示符。
烹饪时间正常结束
响起信号声,▷/□ 符号停止点亮。组合模式烹饪完成。触摸任何区域可结束声音信号。
更改蒸汽等级
触摸 ⚙️ 按键,直到选中显示屏中的所需设置。
提示:通过触摸蒸制按键若干次可从高到低设置蒸汽等级。到低设置蒸汽等级后蒸制功能停用。继续触摸则恢复到最高蒸制设置。
暂停操作
- 触摸 ▷/□ 按键或打开电器门。
操作暂停,▷/□ LED 闪烁。
-
关闭电器门。
-
触摸 ▷/□ 按键。
电器继续运行,▷/□ LED 亮起。
停止加热电器
将功能选择钮转到“关”位置。
电器将停止加热,所有设置将被清除。
提示:电器暂停或停止后,风扇可能继续运行。
加注水箱
水箱位于水箱盖后方右侧、电器门下方。在开始蒸汽操作前,打开水箱盖,给水箱注水。
确保已正确设置水硬度范围。→ "基本设置"第 65 页
警告 - 有着火危险,有受伤危险!
仅向水箱内加水。不要向水箱内倒入任何可燃液体(例如酒类饮料)。由于灼热表面,可燃液体的蒸汽可能会在烹饪箱内着火(爆炸)。电器门可能弹开。可能会有热蒸汽和火焰逸出。
注意!
使用不适当的液体会损坏电器。
不要使用蒸馏水、高氯自来水 (> 40 mg/L) 或其它液体。
只能使用冷的、新鲜的、不含碳酸的自来水或软化水。
提示
- 所在地水质硬度高,建议使用软化水。
-
如果您仅使用软化水,那么您可将电器的水硬度范围设置为“软化水”。
-
短暂按下水箱盖中央。
水箱盖将打开。现在可以处理滴水盘(左)和水箱(右)。
- 从水箱安装槽取出水箱。

natural_image
Illustration of a computer monitor with an arrow pointing to it (no text or symbols present)
natural_image
Illustration of a monitor mounted on a base with a device inside, showing a blue arrow indicating motion (no text or symbols present)- 向水箱内加注冷水,最多加到“max.”(最大)标记处。
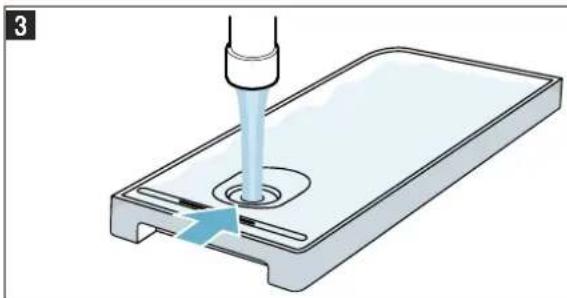
natural_image
Illustration of a pipette dispensing liquid into a tray with a blue arrow indicating flow direction (no text or symbols)-
将水箱放回水箱槽,将其完全滑入。
-
盖上水箱盖。

natural_image
Illustration of a monitor mounted on a base with an arrow indicating motion (no text or symbols)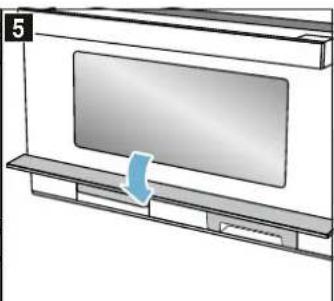
natural_image
Diagram of a TV set with a monitor and a blue arrow indicating rotation (no text or symbols)蒸制工作准备就绪,可以使用。
重新加注水箱
如果水箱中的水在电器运行中消耗完毕,电器的响应方式取决于操作模式:
- 蒸制模式:电器停止运行,显示屏上出现一条消息。在最高蒸制设置下,一箱水将会持续约30 - 40分钟;在较低的蒸制设置下,会持续更长时间。
- 蒸汽辅助微波模式:电器停止。一箱水将持续约50分钟。
- 蒸汽辅助烧烤模式:电器继续在烧烤模式下运行,显示屏上不显示消息。在最高蒸制设置下,一箱水将会持续约3小时;在较低的蒸制设置下,会持续更长时间。
提示:实际时间可能与规定数值有差别。
向水箱内加水,最多加到“max.”(最大)标记处。
- 打开控制面板。
- 取出并重新加注水箱。
- 装入加注的水箱,关闭控制面板。
在每次蒸汽操作之后
水分留在烹饪箱中。小心擦净排水管和烹饪箱。我们建议每次使用蒸制功能后运行冲洗清洁功能 ☐。然后排空、晾干滴水盘和水箱。
提示:使用浸醋软布去除水垢标记,然后用清水擦去,用软布擦干。
排空水箱
- 短暂按下水箱盖中央。水箱盖向上翻。
- 取下水箱。
- 小心取下水箱盖。
- 清空水箱,使用清洁剂清洗,再用水彻底冲洗。
- 使用软布擦干所有部件。
- 擦拭盖子上的密封垫,直至干燥。
- 敞开盖子让水箱晾干。
- 将水箱盖放在水箱上,然后将其按下。
- 完全滑入水箱。
- 关闭水箱盖,短暂按下水箱盖中央。水箱盖锁定。
注意!
- 不要在灼热的烹饪箱中干燥水箱。这会损坏水箱。
- 不要在洗碗机中清洁水箱。这会损坏水箱。
清洁盛水盘
- 让电器冷却下来。
- 打开水箱盖。
- 拆下水箱和滴水盘。
- 使用清洁海绵擦净烹饪箱下方的盛水盘a,(图.1).

烘干烹饪箱
请在操作之后干燥烹饪箱,确保没有水分残留。
加热烹饪箱
烘干烹饪箱需要进行加热,使箱中的水分蒸发。然后您需要打开电器门,以便烹饪箱中的水分能够逸出。
- 让电器冷却下来。
- 立即清除烹饪箱中的严重污垢,擦去烹饪箱箱底的水分。
- 使用功能选择钮设置大面积烧烤
- 触摸 ⑤ 两次。 烹饪时间符号 I→I 在显示屏中高亮显示。
- 使用旋转选择钮设置 15 分钟的烹饪时间。
- 按下 ▷/□ 开始运行。 干燥功能启动并在 15 分钟后自动结束。
- 打开电器门并保持打开状态 1 至 2 分钟,以便烹饪箱中的水分能够逸出。
手动干燥烹饪箱
- 让电器冷却下来。
- 去除烹饪箱中的食物碎屑。
- 用海绵擦干烹饪箱。
- 让电器门保持打开 1 小时,这样烹饪箱可以完全干燥。
自动程序
您可以通过自动程序轻松制备食物。选择程序,然后输入食物的重量。然后,自动程序即会应用最合适的设置。您可以有 15 种程序选择。
提示
- 将食物从包装内取出并称重。如果无法输入精确的重量,应四舍五入。
- 将食物置于冷的烹饪箱中。
- 对于这些程序,务必使用适合微波的耐热烹饪容器,例如用玻璃或陶瓷制成的容器。请遵循程序表中的附件提示。
- 为了达到最佳的烹饪效果,请仅使用状况良好的食物和冷冻肉。对于冷冻食物,请仅使用直接取自冷冻柜的食物。
设置程序
图中实例:程序 3,重量 1 kg。
- 将功能选择钮设置为 ☐ 自动程序。 第一个程序号和重量建议出现在显示屏上。

- 使用旋转选择钮选择程序号 3。

- 触摸 kg。 重量设置在显示屏中高亮显示。

- 使用旋转选择钮将重量设置为 1 kg。 电器自动为该重量设置正确的烹饪时间。
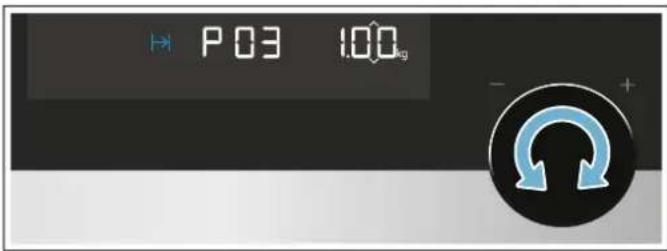
- 触摸 ▷/□。
程序将启动。烹饪时间显示倒计时,温度光柱和 ▷/□ LED 亮起。
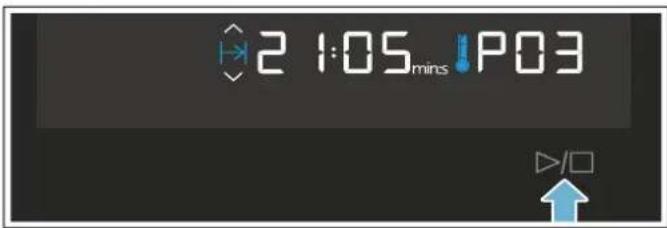
提示
- 在启动前,您可以使用 P 和 ^ C/kg 在程序和重量之间切换。
一旦启动了程序,就不能更改程序号和重量。您可以触摸 ℃/kg 检查重量。
程序结束
响起一声信号音。程序已结束,电器停止加热。将功能选择钮转到关断位置。
更改程序
- 触摸 ▷/□ 区约 4 秒钟。 程序复位。
- 选择一个新程序。
暂停操作
- 触摸 ▷/□ 按键或打开电器门。操作暂停, ▷/□ LED 闪烁。
- 关闭电器门。
- 触摸 ▷/□ 按键。 电器继续运行,▷/□ LED 亮起。
停止加热电器
将功能选择钮转到“关”位置。
电器将停止加热,所有设置将被清除。
提示:电器暂停或停止后,风扇可能继续运行。
程序表
| 程序 | 食物 | 重量(kg) | 烹饪容器/附件,烹饪层 | 说明 | 特别详细说明 | |
| 除霜 | ||||||
| P 01 | 肉糜* | 0.10 - 1.20 | 扁平浅炊具,不盖盖子 | 仅使用微波安全型烹饪容器。 | 绞碎的牛肉、羊肉、猪肉;翻转后,要将已解冻的肉糜取出。 | |
| 烹饪箱箱底 | ||||||
| P 02 | 解冻肋排* | 0.10 - 1.10 | 扁平浅炊具,不盖盖子 | 仅使用微波安全型烹饪容器。 | 仅使用微波安全型烹饪容器。 | |
| 烹饪箱箱底 | ||||||
| P 03 | 将带骨鸡块解冻* | 0.15 - 1.20 | 扁平浅炊具,不盖盖子 | 仅使用微波安全型烹饪容器。 | 带皮的一面朝下。 | |
| P 04 | 将整鸡解冻* | 0.20 - 0.50 | 浅炊具,不盖盖子 | 仅使用微波安全型烹饪容器。 | 胸肉朝下。 | |
| P 05 | 解冻鱼块* | 0.10 - 1.00 | 扁平浅炊具,不盖盖子 | 仅使用微波安全型烹饪容器。 | 梭鱼片、鳕鱼片、海鲈鱼片、青鳕鱼片、梭鲈鱼片 | |
| 烹饪箱箱底 | ||||||
| 家禽、肉类、鱼类 | ||||||
| P 06 | 新鲜全鱼 | 0.20 - 1.20 | 蒸盘+玻璃烤盘位置3 | 加注水箱。 | 在鱼身内外撒上柠檬汁。 | |
| P 07 | 新鲜鱼块 | 0.20 - 0.50 | 蒸盘+玻璃烤盘位置3 | 加注水箱。 | ||
| 蔬菜和配菜 | ||||||
| P 08 | 新鲜西兰花 | 0.10 - 1.00 | 蒸盘+玻璃烤盘位置3 | 加注水箱。 | ||
| P 09 | 胡萝卜片,新鲜 | 0.10 - 0.75 | 蒸盘+玻璃烤盘位置3 | 加注水箱。 | 胡萝卜片越厚,结果越坚固。 | |
| P 10 | 未去皮熟土豆 | 0.20 - 1.00 | 蒸盘+玻璃烤盘位置3 | 加注水箱。 | 小土豆或普通土豆,切片,约2cm厚 | |
| P 11 | 半熟水煮蛋 | x2 - 10 | 蒸盘+玻璃烤盘位置3 | 加注水箱。 | 冷冻鸡蛋 | |
| P 12 | 米饭** | 0.10 - 0.50 | 带盖烹饪容器 | 仅使用微波安全型烹饪容器。 | 长粒米:不要使用糙米或速煮米。向一份大米中加入两到三份的水。程序结束后等待静置5-10分钟。 | |
| P 13 | 蒸制面包卷 | 0.30 - 0.60 | 蒸盘+玻璃烤盘位置3 | 加注水箱。 | 中等大小 | |
| P 14 | 蒸制面包卷,冷冻 | 0.10 - 0.40 | 蒸盘+玻璃烤盘位置3 | 加注水箱。 | 每个面包卷最多36g | |
| 便捷菜单 | ||||||
| P 15 | 加热冷藏盘餐 | 0.20 - 0.50 | 放在玻璃烤盘中的浅烹饪容器位置3 | 仅使用微波安全型烹饪容器。加注水箱。 | ||
| *按照翻转提示信号进行翻转**按照搅拌提示信号进行搅拌 | ||||||

时间设定
您的电器具有多种时间设置选项。您可以用 ⏻ 触控区调用菜单,在各种功能之间进行切换。可用功能的符号在显示屏中亮起,您刚才选择的功能高亮显示。
时间设置选项 用途
| 定时器 定时器功能与煮蛋定时器类似。使用其他时间设置选项加热时,它独立于电器运行,不影响电器。 | |
| → | 烹饪时长 设置的烹饪时间到时后,电器会自动停止加热。 |
| 5 | 时间 当前台不再运行其它功能时,电器将在显示屏上显示时间。 |
设置加热类型后,您只能使用 ☐ 区调用烹饪时间。定时器可随时设置。
烹饪时间或定时器持续时间到时后,将发出声音信号。您可以通过触摸 ☐ 区提前取消信号。
提示: 可以在基本设置中更改信号音响起的时长。→ "基本设置"第 65 页
检查时间设置
如果设置了多个时间设置选项,则显示屏中相应的符号将点亮。烹饪时间开始倒计时。
如要检查定时器 ⚠、烹饪时间 I→I 或时钟 ⏱,反复触摸 ⏱,直到相应符号高亮显示。在操作过程中,只有定时器和烹饪时间可用。在待机状态中,只有定时器和时钟可用。其数值在显示屏中显示几秒钟。
设置定时器
您可以将定时器作为厨房定时器,定时器独立于电器运行。定时器有自己的信号声。您可以据此判定所指示的是定时器时间还是烹饪时间。
- 触摸 ⏻ 按键。
符号和时间符号再次亮起。
- 使用旋转选择钮设置定时器持续时间。
几秒钟之后,时间设置将被采用。定时器启动。符号在显示屏中亮起,定时器倒计时。其它时间符号熄灭。
定时器持续时间到时
响起一声信号音。---显示在显示屏上。触摸任意区,关断定时器。
更改定时器持续时间
使用旋转选择钮更改定时器持续时间。几秒钟之后,所更改的时间将被采用。
取消定时器持续时间
使用旋转选择钮将定时器持续时间重设为 - - : - 几秒钟之后,所更改的时间将被采用。定时器现已被关断。
设置烹饪时间
可以在电器上设置食物的烹饪时间。烹饪时间到时后,电器会自动关断。烹饪时间不会意外超时。
图中实例:大面积烧烤,烧烤设置 2,烹饪时间为 45 分钟。
- 使用功能选择钮设置大面积烧烤功能。
- 使用旋转选择钮选择烧烤设置 2。
- 触摸 ⏻ 按键两下。
--:-- 将出现在显示屏上,时间符号将亮起。

提示:根据加热功能,可能显示不同的默认值。
- 使用旋转选择钮设置 45 分钟的烹饪时间。
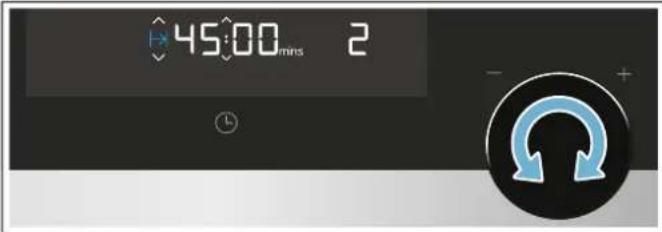
- 触摸 ▷/□ 按键。
烤箱将启动。烹饪时间将在显示屏上倒计时。▷/□ LED 将亮起。其他时间符号将熄灭。
烹饪时间正常结束
响起一声信号音。电器停止加热。---:-- 显示在显示屏上。
- 触摸 ⏻ 按键。
信号声停止。
- 将功能选择钮转到关断位置。
电器关断。
更改烹饪时间
使用旋转选择钮可以更改烹饪时长。几秒钟之后,所更改的时间将被采用。
取消烹饪时间
如果已设置了定时器,先按下 ⏻ 按键。您现在可以调节烹饪时间。
使用旋转选择钮重设烹饪时长为 - - : - 。几秒钟后将执行更改。
设置时间
在首次使用时,时间高亮显示。12:00 值在显示屏中闪烁,① 符号亮起。设置时间。
- 使用旋转选择钮设置结束时间。
- 触摸 ⏱。
现在时钟已经设置好了。
更改时钟时间
提示:如要更改时钟时间,需要关断电器。
- 触摸两下 ⏱ 按键。 ① 符号和时钟时间将出现在显示屏上。
- 使用旋转选择钮设置时钟。
- 触摸 ⏻ 按键。 现在时钟已经设置好了。
提示
- 如果设置时间后未触摸 ⏻,设置值会在几秒后自动被采用。
- 如果移动功能选择钮,使其与设置相符,结束后必须将其转到“关”位置。只有此时可使用电器。
- 为了降低电器待机时的能耗,您可以隐藏时钟。
儿童锁
您的电器均配备儿童锁,使儿童无法意外开启或更改任何设置。
启用和停用
- 将功能选择钮转到关断位置。
- 触摸 ≈ 大约 4 秒钟。
符号将出现在显示屏上。儿童锁启用或停用。
提示
- 如果已设置定时器持续时间,该时间将继续倒计时。启用儿童锁后,无法再更改定时器持续时间。
- 声音信号 (如定时器持续时间到时) 可通过触摸任何区域停止。
基本设置
为了帮助您有效地使用电器,我们为您提供了各种设置。您可以根据需要更改这些设置。
更改基本设置
必须关断电器。
-
触摸=①按键几秒。
第一个基本设置将显示在显示屏中。 -
使用旋转选择钮更改基本设置。
-
触摸=①按键。
下一个基本设置将显示在显示屏中。您可使用=①按键浏览所有基本设置,并使用旋转选择钮进行更改。
- 触摸=①按键几秒。
这会应用所有设置。
如果电器处于待机模式,您可随时更改设置。
取消
如果您不想保存更改,转动功能选择钮。基本设置在未保存的情况下结束。
基本设置列表
| 基本设置 选项 说明 | ||
| c01信号音持续时间2=中=30秒 | i=短=10秒3=长=2分钟 | 设定的烹饪时间或持续时间到时后,或定时器达到零后,将发出声音信号 |
| c02按键声音*1=开 | 0=关=触摸触控区时的声音 | |
| c03显示亮度*2=中 | i=低3=高 | 可设置显示亮度 |
| c04时间显示i=开 | 0=关=可显示时钟 | |
| c05内部照明i=开 | 0=关=可开启或关断内部照明 | |
| c06水硬度4=极硬 | 0=软化1=软2=中等3=硬 | 水硬度对电器的清洁周期有影响 |
| c07出厂设置0=关 | i=开=可重设电器出厂设置 | |
| c08演示模式0=关 | i=开=可开启或关断演示模式式提示: 演示模式仅在电器连接到电源后的前5分钟内可见。 | |
*更改会立即应用。
清洁
只要精心保养和清洁,您的电器将在未来的很长一段时间内保持其外观,并能正常工作。以下说明应如何正确保养和清洁电器。
警告 - 有灼伤危险!
电器会变灼热。切勿触摸烹饪箱的内表面或加热元件。必须让电器冷却下来。请将小孩留在安全距离以外。
警告 - 有电击危险!
请勿使用高压清洁器或蒸汽清洁器,以防触电。
警告 - 有受伤危险!
电器门玻璃如果有刮伤,可能会导致裂开。请不要使用玻璃刮刀、剧烈或腐蚀性的清洁用品或洗涤剂。
提示:微波炉若有异味,例如在烹制鱼等食物之后,这很容易清除。将几滴柠檬汁滴入一杯水中。务必在容器中放一把汤匙,以防延时沸腾。以最大微波功率将水加热1至2分钟。
合适的清洁剂
为了防止因清洗剂使用不当而损坏各种表面,请遵守下表中的信息。并非所列所有区域均可见于您的电器,具体取决于电器型号。
您可以从我们的售后服务部购买电器的其他附件。请指定相关产品号。
新海绵布使用前要彻底清洗。
微纤维布
微纤维布特别适用于清洁易受损的表面,例如玻璃、玻璃陶瓷、不锈钢或铝表面。汁液和油污一擦即可。
订货号:00466148
用于不锈钢表面的清洁布
您可使用经过测试的推荐油浸清洁布 (可向我们订购) 处理表面,这将使表面更加耐指纹和耐刮擦。
订货号:00311134
用于现代不锈钢表面的清洁油
这种瓶装清洁油与衣物所用的清洁油相同,您可向我们订购。
订货号:00311567
去污剂
用于强力去除表面上的顽固油渍残留。
订货号:00311781
除垢试剂
为了确保您的电器继续正确操作,必须定期除垢。仅可使用推荐除垢剂进行除垢。其他除垢剂可能会导致电器受损。
液体除垢剂:订货号.00311=680
除垢片剂 订购号:00311864
注意!
表面损坏
请勿使用
强烈的或腐蚀性的清洁剂,
- 高酒精含量的清洁剂,
- 粗糙的擦洗片或清洁海绵,
- 高压清洁器或蒸汽清洁器
- 适合清洁灼热电器的用清洁剂。
区域 清洁
| 电器外部 | |
| 不锈钢前面板 热肥皂水:用洗碗布清洁,然后用软布擦干。立即清除水垢、油脂、淀粉和蛋白(例如蛋清)形成的斑点。这类污渍可能会形成斑点。适用于灼热表面的不锈钢清洁用品可从我们的售后服务部或从卖店购买。使用软布涂抹一薄层清洁产品。 | |
| 控制面板 热肥皂水:用洗碗布清洁,然后用软布擦干。不要使用玻璃清洁剂或玻璃刮刀。 | |
| 门面板 热肥皂水:用洗碗布清洁,然后用软布擦干。不要使用玻璃刮刀或不锈钢擦洗片。 | |
| 门把手 热肥皂水:用洗碗布清洁,然后用软布擦干。如果除垢工具接触到门把手,请立即擦掉。否则,将产生无法去除的污斑。 | |
| 电器内部 | |
| 电器门内侧和门封 | 热肥皂水:用洗碗布清洁。不要拆下门封。不要冲洗。清洁后检查门封的位置。 |
| 不锈钢表面 热肥皂水:用洗碗布清洁。不要冲洗。清洁后检查门封的位置。 | |
| 附件 热肥皂水:浸泡并用洗碗布或刷子清洁。 | |
| 水箱和滴水盘 热肥皂水:用洗碗布清洁,然后用干净的水彻底冲洗,去除残留洗涤剂。用软布擦干。敞开盖子让水箱晾干。擦拭盖子上的密封垫,直至干燥。不要用洗碗机清洗。 | |
| 水箱凹槽 在每次使用后擦干。 | |
| 烹饪箱中的蒸汽出口 热肥皂水:使用清洁海绵或清洗软刷。 | |
提示
由于使用不同的材料,例如,玻璃、塑料和金属等,电器正面的颜色会稍微有点偏差。
- 门面板上看起来像条纹的阴影是由内部照明的反光造成的。
保持电器清洁
始终保持电器清洁并立即清除污垢,以防形成顽固积垢。
建议
每次使用后清洁烹饪箱。这将确保不会烘烤污垢。
- 一定要立即清除水垢、油脂、淀粉和蛋白 (例如蛋清) 形成的斑点。
- 使用玻璃烤盘烤制非常湿软的蛋糕。
- 使用适用的烤箱器皿进行烘烤,例如烤肉盘。

清洁功能
除垢
为了确保您的电器继续正确操作,必须定期除垢。
注意!
- 有损坏电器的风险:仅采用我们推荐的液体或片状除垢剂用于除垢。需要除垢剂起作用的时间取决于所使用的产品。其它除垢剂可能会损坏电器。您可向我们的售后服务部门订购除垢剂。 液体除垢剂:订货号 00311 680 除垢片剂:订货号 00311864
- 除垢溶液:任何除垢溶液或除垢剂都不得与控制面板或其他电器的表面。这可能会损坏表面。如果发生这种情况,立即用水去除除垢溶液。
除垢包括两个自动化步骤。出于卫生原因,必须彻底完成除垢程序,电器才可再次使用。除垢总共需要约32分钟。
- 为电器除垢 (约 31 分钟),然后清空滴水盘,再为水箱注水。
- 为电器除垢狗运行冲洗周期 (约 1 分钟),然后清空滴水盘。
如果除垢过程中断(例如,由于断电、电器关断或除垢程序取消),电器重新开启后,将提示用户运行一次冲洗周期。冲洗周期结束后,电器方可使用。
电器必须进行除垢的频率取决于所用水的硬度。当只可再实施五次(或更少)蒸汽辅助操作时,电器显示屏上将显示符号,提醒您除垢。从而使您可以及时做好除垢准备。
此时,只有在完成除垢程序后,才能使用蒸制模式。
启动
- 使用功能选择旋钮选择除垢 ☐。 将显示除垢过程的持续时间。持续时间无法更改。
- 打开水箱盖。
- 取出滴水盘、排空滴水盘。
- 将空滴水盘完全滑入。
- 取下水箱。
-
将水和除垢剂混合,配成除垢溶液。
提示:请遵守除垢剂的混合比例。 除垢液 (订货号:00311 680):混合比例:1:5,将50ml 的除垢液与 250ml 的水混合。 除垢片剂 (订货号:00311864):将一片除垢片剂 (18g) 加入到 250ml 的水中,使其溶解五分钟。 -
将除垢溶液倒入水箱,然后将水箱完全滑入。
- 盖上水箱盖。
- 触摸 ▷/□ 按键。
电器将开始完成除垢。剩余时间在显示屏中倒计时。除垢程序完成后,将会响起一声信号音。电器暂停工作。
-
打开水箱盖。
-
取出滴水盘,排空,然后再次插入。
- 取下水箱,彻底冲洗,加入清水后重新插入。
- 盖上水箱盖。
- 触摸 ▷/□ 按键。
现在将自动冲洗电器两次。冲洗周期完成后,将会响起一声信号音。排空滴水盘。
冲洗
为了确保电器清洁,您可以通过管道系统将水泵出。随后水被排至滴水盘。
启动
- 使用功能选择钮设置冲洗周期 ☐。
将显示程序的持续时间。无法对其进行更改。
- 打开水箱盖。
- 取出滴水盘、排空滴水盘。
- 将空滴水盘完全滑入。
- 取出水箱并排出任何残留的水。彻底清洗水箱,注入清水。
- 完全滑入水箱。
- 盖上水箱盖。
- 触摸 ▷/□ 按键。
水在水泵作用下通过管道。剩余时间将在显示屏上倒计时。冲洗完成后就会发出一个声音信号。排空滴水盘。
后续清洁
在每一次除垢程序或冲洗周期后执行下列步骤:
- 打开水箱盖。
- 排空、清洁并晾干滴水盘和水箱。
- 将功能选择钮转到关断位置。
该过程已经完成,电器做好准备,可以再次使用。
排空滴水盘
使用清洁功能时,剩余的水收集在滴水盘中。然后清空、晾干滴水盘。
注意!
- 不要在灼热的烹饪箱中干燥滴水盘。这会损坏滴水盘。
-
不要用洗碗机清洁滴水盘。这会损坏滴水盘。
-
短暂按下水箱盖中央。
水箱盖打开。现在可以处理滴水盘和水箱。 - 从水箱安装槽取出滴水盘。
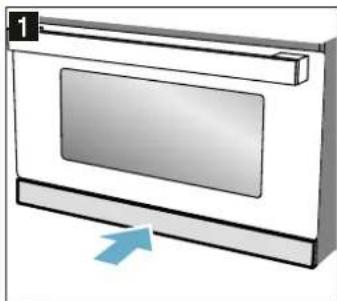
natural_image
Illustration of a microwave oven with a blue arrow indicating airflow or movement (no text or symbols)
natural_image
Illustration of a monitor mounted on a stand with a blue arrow indicating motion (no text or symbols)- 打开滴水盘盖子。
- 排空滴水盘。
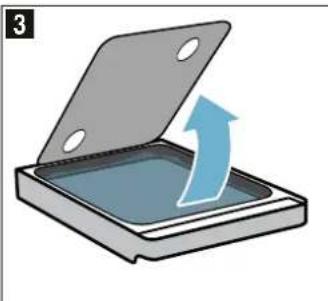
natural_image
Illustration of a device with an open lid and a blue upward arrow indicating growth (no text or symbols)
natural_image
3D illustration of a rectangular object with a gradient fill and a small blue liquid droplet inside (no text or symbols)- 将滴水盘放回水箱槽,将其完全滑入。
- 盖上水箱盖。
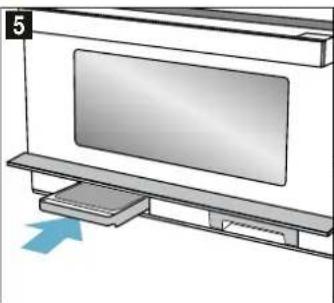
natural_image
Illustration of a computer monitor mounted on a base with a blue arrow indicating motion (no text or symbols)
natural_image
Diagram of a monitor mounted on a shelf with a blue arrow indicating the blade (no text or symbols present)电器准备就绪。

故障检修
如果发生故障,原因往往很简单。在给售后服务部打电话前,请阅读故障表,尝试自行解决故障。
警告 - 有电击危险!
修理不当是很危险的。只能由我们经过培训的售后服务人员来维修电器和更换损坏的电源线。如果电器发生故障,请拔下电器电源插头,或断开熔断器盒中的断路器。联系售后服务部门。
对于某些出错信息,您可以自己采取补救措施。
故障检修
| 错误消息 可能的原因 纠正措施/说明 | ||
| 电器不工作=插头没有插入电源=插入插头 | ||
| 电源故障=检查厨房灯是否正常 | ||
| 熔断器出现故障=检查保险丝盒,确保电器保险丝正常 | ||
| 操作故障=切断保险丝盒内的保险丝。约10秒后再次将其接通 | ||
| 虽然电器已打开,但却无法操作;⇔符号出现在显示屏中 | 儿童锁启用=按下并按住=⇔,直到=⇔符号熄灭 | |
| 内部照明发生故障。=LED灯泡损坏=致电客户服务部门。 | ||
| 12:00在显示屏中闪烁,⊙符号亮起。 | 电源故障 | 复位时钟 |
| 该电器不运作。烹饪时间出现在显示屏中。 | 进行设置后未触摸=D/□。=触摸=D/□,或使用功能选择钮选择其他功能来删除设置。 | |
| 微波不工作。 | 门未正确关闭。=检查门内是否有食物残余物或碎屑 | |
| D/□未触摸。 | 触摸=D/□ | |
| 食物加热时间比往常长 | 微波功率输出设置的过低。=选择较高的微波功率输出 | |
| 在电器中放置了比正常值更多的食物。 | 双倍的食物量=双倍的烹饪时间 | |
| 食物比往常要冷。=在烹饪期间搅拌或翻转食物 | ||
| 由于不明原因,微波操作已取消。 | 电器发生故障。=如果再次出现该故障,致电客户服务部门。 | |
| 电器可以设置,但是不能加热。冒号闪烁。 | 电器处于演示模式。 | 在基本设置中停用演示模式。提示:演示模式仅在电器连接到电源后的前5分钟内可见。 |
| 水箱和滴水盘符号连续闪烁。 | 技术问题。=确保水箱和滴水盘完全插入水箱的相应插槽中。 | |
| E0532. | 控制面板上如果有脏污,会激活触控区。 | 关断电器,清洁控制面板。重新开启电器。如果重新接通电源后立即再次出现该故障,致电客户服务部门。 |
| E5005. | 在水箱无水的情况下多次启用蒸汽功能。 | 在下一次使用之前,确保水箱已经注水,并完全插入水箱的相应插槽中。如果再次出现该故障,致电客户服务部门。 |
客户服务
如果您的电器需要修理,我们为您提供售后服务。我们会找出合适的解决方法,并尽量避免售后人员不必要的上门服务。
E 编号和 FD 编号
来电时,请提供产品号(E编号)和生产号(FD编号),以便我们为您提供正确的建议。打开电器门时,可以在右侧看到写有这些编号的铭牌。您可以在下面的空白处记下电器编号和售后服务部的电话号码,以便在需要这些号码时不用花时间去找。
E 编号。=FD 编号
售后服务
请注意,发生故障时,如果电器不在质保期内,维修技师上门会收取费用。
请在随设备提供的客户服务列表中查找所有国家的联系信息。
预约工程师上门及产品咨询
中国=400 889 9999
专
专
制造商的业水平值得您信赖。因此,将由受过业训练
的技术服务人员使用原装电器零件为您维修。
技术参数
| 电源=220 V~,50 Hz |
| 额定功率=3000=W |
| 噪音=49db |
| 微波输出功率=1000=W (IEC 60705) |
| 微波输入功率=1200=W |
| 微波频率=2450=MHz |
| 最大蒸制输出功率=2700=W |
| 最大烧烤输出功率=2000=W |
经由我们烹饪工作室测试过的菜谱
这里提供了各种备选食谱及其理想设置。我们将向您展示,哪种加热类型和哪种温度最适合您的菜肴。您将了解关于合适的烹饪附件及其在电器中放置高度的信息。您还将了解关于烹饪容器和制备方法的一些提示。
提示:在烹饪食物时,烹饪箱内会蓄积大量的蒸汽。
在工作期间,您的电器非常节能,同时向其周围环境辐射的热量也很小。由于电器内部和电器外部部件之间的温差较大,因此电器门、控制面板或相邻的橱柜面板上可能会积聚冷凝液。这是一种正常的物理现象。可通过预热微波炉或小心地打开电器门减少冷凝液。
在蒸制时或在使用蒸汽辅助的操作过程中,烹饪箱中聚集大量的蒸汽。烹饪后,一旦烹饪箱冷却,就将其擦干净。
常规信息
建议设定值
表中列出了各种食物的最适用功能。温度/设置和持续时间取决于所使用的烹调容器和食物的数量、质量、温度和一致性。为此指示了各种设置范围。从较低的值开始尝试。必要时,可在下次使用更高的设置。
使用微波时,必须设置最长指定时间,但要在最短指定时间后检查您的食物。
使用蒸汽烹饪之前,要确保水箱是满的。
实际情况可能是,您要烹饪的食物量与表格中规定的不同。使用微波有一个经验法则:两倍量 = 几乎两倍时间,一半量 = 一半时间。
设定值适用于放在冷烹饪箱内的食物。
如果想在烘培时按照自己的某个菜谱操作,应使用表中类似食物的设定值作为参考。更多信息请参见设置表格后面所列的烘焙技巧一节。
从烹饪箱中取出不使用的所有附件。
附件
专
只能为电器使用原厂附件。这些附件门针对电器的烹饪箱和操作模式而定制。
确保始终使用合适的烹饪容器和附件,并以正确方式放置在电器中。
必须遵守相关章节中关于使用适用于微波烹饪和蒸汽烹饪的烹饪容器的说明。→ "微波"第=55=页→ "蒸制"第=58=页
在从烹饪箱中取出灼热附件或烹饪容器时,一定要使用烤箱布或烤箱手套。
烤模和烹饪容器
要实现理想的烹饪效果,我们建议使用玻璃烤模。
如果您想使用硅树脂模具,请查看制造商的规格说明,了解是否适用于蒸汽和微波,并按照制造商规格和配方操作。
硅树脂烤模通常比普通的烤模要小。数量和菜谱规范可能会有所不同。
通常下列做法适用:
- 使用烤架在第 3 层或第 4 层烧烤。下面插入玻璃烤盘。
- 仅微波模式:将烹饪容器放入烹饪箱底部,烤层0。
- 仅蒸制模式:玻璃烤盘和蒸盘一起放在烤层3。
除霜
将冷冻食品放在不盖盖子的容器中,然后放在烹饪箱底。鸡腿和翅膀等细嫩的部位或烤肉脂肪多的外层可以用小片铝箔包裹。切勿让铝箔接触电器内壁。在解冻时间经过一半时,可以去除铝箔。
在解冻肉块、家禽时会有汁液产生。在翻转肉和家禽时要将这些汁液倒干净;禁止将这些汁液用作其它用途或让汁液接触其它食物。
在操作期间翻转或搅拌食物一次或两次。大块食物应多翻转几次。
将解冻过的食物继续在室温下放置 10 到 60 分钟,让温度稳定下来。此时,可以去除家禽的内脏杂碎。
即使肉类中心有一小部分处于冷冻状态,也可以进行下一步加工。
提示
用一个不盖盖子的烹饪容器,将它放入烹饪箱底部。
- 请注意,设置可分为多个步骤。
- 必须设置最长指定时间,但要在最短指定时间后检查食物。
| 菜式 | 烹饪容器 | 烹饪层 | 加热功能 | 重量 | 步骤 | 微波设置 | 烹饪时长 | 注意 | ||||
| (单位:分钟) | ||||||||||||
| 整块牛肉、猪肉或小牛肉(带骨或去骨) | 烹饪容器,不盖盖子 | 0 | ≈ | 800 g 1 | 180 | 15 | 经常翻转。 | |||||
| 2 | 90 | 25 | ||||||||||
| 1000 g 1 | 180 | 15 | ||||||||||
| 2 | 90 | 25 - 35 | ||||||||||
| 1500 g 1 | 180 | 25 | ||||||||||
| 2 | 90 | 25 - 30 | ||||||||||
| 肉块或肉片(牛肉、小牛肉或猪肉) | 烹饪容器,不盖盖子 | 0 | ≈ | 200 g 1 | 180 | 5 | 在烹饪过程中翻转。将已解冻的部分分开。 | |||||
| 2 | 90 | 4 - 6 | ||||||||||
| 500 g 1 | 180 | 10 | ||||||||||
| 2 | 90 | 5 - 10 | ||||||||||
| 800 g 1 | 180 | 10 | ||||||||||
| 2 | 90 | 10 - 15 | ||||||||||
| 五花肉糜 烹饪容器, | 不盖盖子 | 0 | ≈ | 200 g 1 90 | 15 尽量平放冷冻食品;在解冻期 | 间翻转几次,并将已解冻的肉糜取出。 | ||||||
| 500 g 1 | 180 | 5 | ||||||||||
| 2 | 90 | 10 - 15 | ||||||||||
| 800 g 1 | 180 | 10 | ||||||||||
| 2 | 90 | 15 - 20 | ||||||||||
| 家禽或家禽块 | 烹饪容器,不盖盖子 | 0 | ≈ | 600 g 1 | 180 | 5 | 在烹饪过程中翻转。 | |||||
| 2 | 90 | 10 - 15 | ||||||||||
| 1200 g 1 | 180 | 10 | ||||||||||
| 2 | 90 | 20 - 25 | ||||||||||
| 鸭 | 烹饪容器,不盖盖子 | 0 | ≈ | 2000 g 1 | 180 | 20 | 翻转几次。 | |||||
| 2 | 90 | 30 - 40 | ||||||||||
| 鹅 | 烹饪容器,不盖盖子 | 0 | ≈ | 4500 g 1 | 180 | 30 | 每20分钟后翻转。去除解冻产生的液体。 | |||||
| 2 | 90 | 60 - 80 | ||||||||||
| 鱼块、鱼排或鱼片 | 烹饪容器,不盖盖子 | 0 | ≈ | 400 g 1 | 180 | 5 | 在烹饪过程中翻转。将解冻的部分分开。 | |||||
| 2 | 90 | 10 - 15 | ||||||||||
| 全鱼 烹饪容器, | 不盖盖子 | 0 | ≈ | 300 g 1 | 180 | 3 | 翻转几次。 | |||||
| 2 | 90 | 10 - 15 | ||||||||||
| 600 g 1 | 180 | 8 | ||||||||||
| 2 | 90 | 15 - 25 | ||||||||||
| 蔬菜,例如豌豆 | 烹饪容器,不盖盖子 | 0 | ≈ | 300 g | 1 | 180 | 10 - 15 | 烹饪过程中搅拌。 | ||||
| 600 g 1 | 180 | 10 | ||||||||||
| 2 | 90 | 9 - 15 | ||||||||||
| 水果,例如覆盆子 | 烹饪容器,不盖盖子 | 0 | ≈ | 300 g 1 | 180 | 7 - 10 搅拌 几次。将解冻的部分分开。 | ||||||
| 500 g 1 | 180 | 8 | ||||||||||
| 2 | 90 | 5 - 10 | ||||||||||
| 菜式 | 烹饪容器 | 烹饪层 | 加热功能 | 重量 | 步骤 | 微波设置 | 烹饪时长(单位:分钟) | 注意 |
| 黄油,解冻 烹饪容器, | 不盖盖子 | 0 | 125 g 1 | 90 6 - 8 | 去除所有包装。 | |||
| 250 g 1 | 180 | 2 | ||||||
| 2 | 90 | 3 - 5 | ||||||
| 条形面包 烹饪容器, | 不盖盖子 | 0 | 500 g 1 | 180 | 3 | 在烹饪过程中翻转。 | ||
| 2 | 90 | 10 - 15 | ||||||
| 1000 g 1 | 180 | 5 | ||||||
| 2 | 90 | 15 - 25 | ||||||
| 清蛋糕,例如海绵蛋糕 | 烹饪容器,不盖盖子 | 0 | 500 g 1 | 90 10 - 15 | 仅用于不加糖衣、生奶油或 | |||
| 750 g 1 | 180 | 3 | 奶黄酱的蛋糕,分离蛋糕块。 | |||||
| 2 | 90 | 10 - 15 | ||||||
| 湿蛋糕,例如水果馅饼、干酪蛋糕 | 烹饪容器,不盖盖子 | 0 | 500 g 1 | 180 | 5 | 仅适用于不加糖衣、生奶油或白明胶的蛋糕。 | ||
| 2 | 90 | 15 - 25 | ||||||
| 750 g 1 | 180 | 7 | ||||||
| 2 | 90 | 15 - 25 | ||||||
加热冷冻食物
将熟食从包装内取出。放入可以微波加热的烹饪容器,加热过程会更快、更均匀。食物不同组成部分的加热速度可能不同。
平摊食物的烹饪速度比堆放食物的烹饪速度快得多。因此,应摊开食物,使其在烹饪容器内尽量摊平。不应将食物相互叠放在一起。
在操作期间翻转或搅拌食物 2 或 3 次。
在加热后,继续让食物静置 2-5 分钟,以便温度稳定。 当从电器中取出烹饪容器时,一定要戴烤箱手套或使用锅垫。
提示
- 将烹饪容器放在烹饪箱底部。专
- 一定要盖上食物。如果烹饪容器没有用的盖子,请用盘子或用微波薄膜盖上。
- 必须设置最长指定时间,但要在最短指定时间后检查食物。
| 菜式 | 烹饪容器 | 烹饪层 | 加热功能 | 重量 | 微波设置 | 烹饪时长(单位:分钟) | 注意 |
| 冷冻汤 | 烹饪容器,盖盖子 | 0 | 400 g | 600 | 8 - 15 | ||
| 冷冻炖汤 | 烹饪容器,盖盖子 | 0 | 500 g | 600 | 8 - 13 | ||
| 1000 g | 600 | 10 - 15 | |||||
| 冷冻套餐、点餐、即食餐(2-3种成份) | 烹饪容器,盖盖子 | 0 | 300 - 400 g | 600 | 11 - 15 | ||
| 带调味料的肉条或肉片,冷冻,例如菜炖牛肉 | 烹饪容器,盖盖子 | 0 | 500 g | 600 | 12 - 17 | 搅拌时将肉块分开。 | |
| 1000 g | 600 | 25 - 30 | |||||
| 冷冻烘焙食品,例如意式烤宽面和意式烤碎肉卷 | 烹饪容器,盖盖子 | 0 | 450 g | 600 | 10 - 15 | ||
| 冷冻配菜,例如米饭、意大利面 | 烹饪容器,盖盖子 | 0 | 250 g | 600 | 2 - 5 | 添加汁液 | |
| 500 g | 600 | 8 - 10 | |||||
| 冷冻蔬菜,如豌豆、椰菜、胡萝卜 | 烹饪容器,盖盖子 | 0 | 300 g | 600 | 8 - 10 | 添加足够的水,淹没盘底 | |
| 600 g | 600 | 14 - 17 | |||||
| 冷冻菠菜奶油沙司 | 烹饪容器,盖盖子 | 0 | 500 g | 600 | 11 - 16 | 不加水烹饪,不时搅拌 |
加热

警告 - 有烫伤危险!
- 加热的液体有可能延时沸腾。即液体达到沸腾温度后,却没有常见的蒸汽气泡冒上液面。即使容器只是稍微振动,滚烫的液体也会突然沸腾溢出和飞溅。在加热时,一定要在容器内放一把汤匙。这会防止延时沸腾。
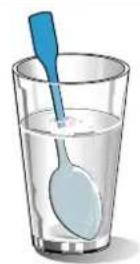

natural_image
Illustration of a glass with a blue X symbol crossed over it, representing a warning or rejection (no text present)注意!
金属 (例如玻璃杯内的汤匙) 必须距离烹饪箱内壁和门内壁至少 2 cm。否则,火花会损坏门内壁的玻璃。
提示
- 将熟食从包装内取出。放入可以微波加热的烹饪容器,加热过程会更快、更均匀。食物不同组成部分的加热速度可能不同。
- 在操作期间经常搅拌或翻转食物。检查温度。
- 在加热后,继续让食物静置 2-5 分钟,以便温度稳定。
- 当从电器中取出烹饪容器时,一定要戴烤箱手套或使用锅垫。
如果表格中规定要盖上食物,则盖上。将烹饪容器放在烹饪箱底部。如果您打算启用蒸制功能,将烹饪容器放在玻璃烤盘中,放在烹饪层3。给水箱加水。
| 菜式 | 烹饪容器 | 烹饪层 | 加热功能 | 重量/数量 | 微波设置 | 蒸制设 | 置 | 烹饪时长(单位:分钟) | 注意 | ||
| 婴儿食品,例如奶瓶=烹饪容器,不盖盖子 | 0 | ≈ | 150=ml=360=-0.5-1.5=没有盖子。加热后要摇匀。必须检查温度。 | ||||||||
| 饮品=烹饪容器,不盖盖子 | 0 | ≈ | 200 ml | 1000 | - | 1-2 | 在玻璃杯中放入一把汤匙;不要让酒类饮品过热;在加热期间不时检查 | ||||
| 500 ml | 1000 | - | 4-5 | ||||||||
| 2 杯汤,每杯 175=g=烹饪容器,不盖盖子 | 0 | ≈ | 350 g | 600=- | 3-4 | ||||||
| 4 杯汤,每杯 175=g=烹饪容器,不盖盖子 | 0 | ≈ | 700 g | 600=- | 6-8 | ||||||
| 酱肉或肉块 | 烹饪容器,盖盖子 | 0 | ≈ | 500 g | 600 | - | 7-10 | 分开肉块 | |||
| 套餐、点餐、即食餐 (2-3 种成份) | 烹饪容器,不盖盖子 | 3 | ≈+图 | 400 g | 360 | 3 | 9-14 | ||||
| 炖肉=烹饪容器,盖盖子 | 0 | ≈ | 400 g | 600=- | 6-8 | ||||||
| 800 g | 600=- | 8-11 | |||||||||
| 蔬菜=烹饪容器,不盖盖子 | 3 | ≈+图 | 150 g | 360 | 3 | 3-5 | |||||
微波使用技巧
| 您无法找到准备烹饪的食物量的相应设置信息。 | 根据以下经验法则,延长或缩短烹饪时长:两倍量 = 两倍时间,一半量 = 一半时间 |
| 食物变得太干。 | 下一次,缩短烹饪时间或选择较低的微波功率设置。给食物盖上盖子,并加入更多的汁液。 |
| 到达时间,但是食物没解冻、没热或没熟。 | 设置更长的时间。量大、堆放的食物需要更长的时间。 |
| 到达时间,食物的边缘过热,但中部没熟。 | 在烹饪过程中不时搅拌,下次选择一个较低的微波功率设置和较长的烹饪时间。 |
| 在解冻之后,家禽或肉外部已解冻,但中部没解冻。 | 下一次,选择一个较低的微波功率设置。如果解冻大量食物,应经常翻转。 |
蛋糕、小份烘焙食品和面包
设定表中为许多烘焙食品提供了理想设置。
冷冻产品
小心地从包装中取出食物。不要使用覆盖着厚厚一层冰的食物。除去食物上的冰。
某些冷冻产品可能不均匀地预烘焙过。着色不均可能会在烘焙之后依然存在。
面包和面包卷
| 食物 | 烹饪容器 | 烹饪层 | 加热功 | 能 | 步骤 | 烧烤设置 | 微波设置 | 蒸制级别 | 持续时间(分钟) | 注意 |
| 吐司,12片 烤架 3 | 2 | 3 | - | -3-5 | ||||||
| 3 | - | 2-3 | ||||||||
| 吐司,4片 烤架 3 | 2 | 3-- | 5-6 | 将面包片一片接一片地放在烤架中央。 | ||||||
| 3-4 | ||||||||||
| 带配料的吐司,2-4片 烤架 + 玻璃烤盘 | 3+1 | 1 | 3-- | 8-10 | ||||||
家禽、肉和鱼:
您的电器提供家禽、肉和鱼的不同烹饪方法。设定表中列出了各种菜式的理想设置。某些食物分几个阶段进行烹饪效果更好。这些在表中有所指示。
装入烹饪容器烹饪
警告-碎玻璃有造成伤害的风险!
烹饪后,请将高温玻璃烹饪容器放在干燥的垫子上。如果放在冷的或湿的表面上,玻璃可能会裂开。
仅使用适合用于烹饪目的的烹饪容器。玻璃烹饪容器最佳。检查烹饪容器尺寸与烹饪箱是否相称。
不锈钢抛光烤盘或铝烤盘不适用于微波。
请遵守烧烤烹饪容器的制造商说明。
烹饪容器,不盖盖子
如要烹饪禽类、肉和鱼,最好使用较深的烤模。将烤模放在烹饪箱底部。如果希望使用蒸汽辅助烹饪,使用不盖盖子的烹饪容器。如果您没有任何合适的烹饪容器,请使用玻璃烤盘。
烹饪容器,盖盖子
确保盖子大小适合,能够正好盖上。将烹饪容器放在烤架上。
警告 - 有烫伤危险!
烹饪之后,在打开盖子时,会有高温蒸汽逸出。从后面抬起盖子,使高温蒸汽从远离用户的一端逸出。
微波组合烹饪
这可以大大缩短烹饪时间。与常规操作不同,使用微波组合烤制时的烹饪时间取决于总重量。
提示:如果需要制备的数量在设置表中没有给出,请遵循以下基本规则:双倍的量需要大约双倍的烹饪时间。一定要使用适用于微波的耐热烹饪容器。金属烤盘或陶器仅适合在不开启微波功能时用于烧烤。请遵循适用微波烹饪容器的说明。→ "微波"第 55 页
蒸汽辅助烹饪
某些食材在蒸汽辅助烹饪过程中会变得更酥脆。其表面光滑,不太干透。
使用无盖烹饪容器。烹饪容器必须耐热和蒸汽。如果设定表中要求使用蒸汽辅助烹饪,请使用。向水箱内加水,最
多加到“max.”(最大)标记处。如果电器的水耗尽,电器将使用选定加热功能继续烹饪,但不使用蒸汽辅助。
使用蒸盘蒸制
与蒸汽辅助功能相比,蒸制功能将特别温和地烹饪肉类,但肉的外部不会变得酥脆。肉将保持非常鲜美滑嫩。
您还可以在蒸制之前煎一煎肉块,这会减少烹饪时间,使口味略有不同。大块食品需要较长的烹饪时间。烹制肉块时不需要翻转。
如要蒸制家禽、肉或鱼,将要烹饪的食物放在玻璃烤盘中的蒸盘中,然后一起放入烹饪箱第3层。给水箱加水至“max.”(最大)标记处。如果水箱在电器使用过程中缺水,电器暂停。显示屏上将出现一条提醒消息。
烧烤
使用烤架时,保持电器门关闭。切勿在电器门打开时进行烧烤。
将要烧烤的食物放在烤架上。将玻璃烤盘放在烤架下,接住滴落的油脂。
尽量使用厚度和重量相等的食物块。这样才能着色均匀,湿润多汁。直接将食物放在烤架上烧烤。
用夹钳翻转正在烧烤的食物。如果用叉子刺穿烤肉,肉汁会流出来烤干。
烧烤结束前不要在肉上洒盐。盐会吸收肉中的水分。
提示
- 烧烤元件会自动断续工作;这属正常现象。烧烤设置决定了断续频率。
- 烧烤时可能会产生烟雾。
推荐设置
设定值的假设使用情况是:冷的、未填馅料的待烤家禽、肉或鱼放在冷的烹饪箱中。
在表中,您可以找到用于默认重量的家禽、肉和鱼的规范。如果想烹饪更重的家禽、肉或鱼,必须使用更低的温度。如果烹饪多块食物,请以最重的一块食物的重量为基础确定烹饪时间。每一块食物的大小应大致相同。
家禽、肉或鱼越大,烹饪温度越低,烹饪时间越长。
按照设置表的要求翻转家禽、肉或鱼。
家禽
如果烹饪鸭胸肉,请划开肉皮。不要翻转鸭胸肉。 翻转家禽时,请首先确保胸肉侧或肉皮侧位于下面。
鱼
烹制全鱼时不需要翻转。以背鳍是否可被很容易的去除确定鱼何时烤熟。
如果想用烤架烤鱼,要事先在烤架上抹一点儿油,使鱼容易在烤后取出。
家禽
| 菜式 | 烹饪容器 | 烹饪层 | 加热功能 | 温度 | 烧烤 | 设置 | 微波设置 | 蒸制设置 | 烹饪时间(单位:分钟) | 注意 | |
| 煮整鸡,1.3 kg 烹饪容器,盖盖子 | 0 | - - 600 | -25-35 | 烹饪中途翻转。 | |||||||
| 鸭胸肉,500 g 烤架 + 玻璃烤盘 | 3+2 | ++ | - | 3 | 180 | 3 | 10-12 | 将肉块带皮的一侧朝上。不翻转。 | |||
| 鹅胸,鹅腿,700-900 g 烹饪容器,不盖盖子 | 0 | + | - | 2 | 180 | - | 30-40 | 深烹饪容器,不盖盖子。不翻转。 | |||
肉
| 食物 | 烹饪容器 | 烹饪层 | 加热功能 | 步骤 | 烧烤设置 | 微波设置 | 蒸制级别 | 持续时间(分钟) |
| 牛排2-3 cm厚,2-3份,每份200 g | 烤架+玻璃烤盘 | 3+1 | 1 | 3 | - | - | 10-15 | |
| 2 | 3 | - | - | 5-10 | ||||
| 猪颈排,2-3 cm厚,2-3份,每份120 g | 烤架+玻璃烤盘 | 3+1 | 1 | 2 | - | - | 15-20 | |
| 2 | 2 | - | - | 10-15 | ||||
| 烤肠,4-6份,每份150 g | 烤架+玻璃烤盘 | 3+1 | 1 | 3 | - | - | 10-15 | |
| 2 | 3 | - | - | 5-10 |
鱼
| 菜式 | 烹饪容器 | 烹饪层 | 加热功能 | 温度(单位:°C) | 烧烤设置 | 微波设置 | 蒸制设置 | 烹饪时长(单位:分钟) |
| 新鲜鱼块,400 g | 玻璃烤盘+蒸盘 | 3 | - | - | - | 3 | 15-17 | |
| 冷冻鱼块,400 g | 烹饪容器,盖盖子 | 0 | - | - | 600 | - | 10-15 | |
| 冷冻鱼块,800 g | 玻璃烤盘+蒸盘 | 3 | - | - | - | 3 | 23-25 | |
| 鱼块,焗烤,500 g 烹饪容器,不盖盖子 | 0 | - | 3 | 600 | - | 10-15 | ||
| 鱼排 2-3 份,每份 150 g | 烤架+玻璃烤盘 | 3+1 | - | 3 | - | - | 8-12 | |
| 全鱼 2-3 条,如鳟鱼,每份 300 g | 玻璃烤盘+蒸盘 | 3 | - | - | - | 3 | 18-22 | |
蔬菜和配菜
下面说明如何以最佳方式迅速烹饪各种蔬菜、米饭、土豆和冷冻土豆食物。
微波
必须用合适的烹饪器皿烹饪蔬菜,并要将其盖住。大米放在深锅里盖上盖子烹饪,按照表格中的参考数字加入液体。
蒸制
使用玻璃烤盘和蒸盘蒸制食物。
使用设置表中列出的份大小。较大块的食物将需要较长烹饪时间,较小块食物烹饪速度更快。烹饪时间还受食物质量和成熟度的影响。因此,所给出的设置仅供参考。
在烹饪容器中食物一定要均匀分布。如果食物堆放高度不等,烹饪效果将会不均匀。不要将对压力敏感的食物在蒸盘中堆放得太高。
向水箱内加水,最多加到“max.”(最大)标记处。如果水箱在电器使用过程中缺水,电器暂停。显示屏上将出现一条提醒消息。
| 菜式 | 烹饪容器 | 烹饪层 | 加热功能 | 步骤 | 温度 | 微波设置 | 蒸制设置 | 烹饪时长 | (单位:分钟) | |||||
| 茄子片,500 g 玻璃烤盘+蒸盘 3 | 图 | 1 - - | 3 | 25-30 | ||||||||||
| 南瓜块,300 g | 玻璃烤盘+蒸盘 3 | 图 | 1 - - | 3 | 30-40 | |||||||||
| 新鲜菠菜叶,250 g | 玻璃烤盘+蒸盘 3 | 图 | 1 - - | 3 | 5-7 | |||||||||
| 新鲜花椰菜,整个 | 玻璃烤盘+蒸盘 2 | 图 | 1 - - | 3 | 28-35 | |||||||||
| 新鲜西兰花,整个,500 g | 玻璃烤盘+蒸盘 2 | 图 | 1 - - | 3 | 20-23 | |||||||||
| 冷冻西兰花小块,500 g | 玻璃烤盘+蒸盘 3 | 图 | 1 - - | 3 | 14-16 | |||||||||
| 新鲜蔬菜,250 g* | 烹饪容器,盖盖子 | 0 | 图 | 1 | - | 600 | - | 6-10 | ||||||
| 新鲜蔬菜,500 g* | 烹饪容器,盖盖子 | 0 | 图 | 1 | - | 600 | - | 10-15 | ||||||
| 冷冻混合蔬菜,250 g | 玻璃烤盘+蒸盘 3 | 图 | 1 - - | 3 | 12-15 | |||||||||
| 胡萝卜片,500g | 玻璃烤盘+蒸盘 3 | 图 | 1 - - | 3 | 18-20 | |||||||||
| 新鲜青豆,500 g | 玻璃烤盘+蒸盘 3 | 图 | 1 - - | 3 | 18-20 | |||||||||
| 绿色芦笋,250 g | 玻璃烤盘+蒸盘 3 | 图 | 1 - - | 3 | 15-18 | |||||||||
| 西葫芦片,500g | 玻璃烤盘+蒸盘 3 | 图 | 1 - - | 3 | 12-14 | |||||||||
| 四等分土豆,250 g | 玻璃烤盘+蒸盘 3 | 图 | 1 - - | 3 | 28-30 | |||||||||
| 四等分土豆,500 g | 玻璃烤盘+蒸盘 3 | 图 | 1 - - | 3 | 30-32 | |||||||||
| 四等分土豆,750 g** | 玻璃烤盘+蒸盘 3 | 图 | 1 - - | 3 | 32-35 | |||||||||
| 125 g大米+300 ml水 | 烹饪容器,盖盖子 | 0 | 图 | 1 | - | 600 | - | 4-6 | ||||||
| 2 | - | 180 | - | 12-15 | ||||||||||
| 250 g大米+500 ml水 | 烹饪容器,盖盖子 | 0 | 图 | 1 | - | 600 | - | 6-8 | ||||||
| 2 | - | 180 | - | 15-18 | ||||||||||
* 不时搅拌
**烹饪过程中可能需要加注水箱
甜食
您可以使用电器快速烹饪美味甜品。 遵守设置表中的说明。
米饭布丁
按照指示的比例加牛奶。例如,如果比例为 1: 2.5 , 则用 250 ml 牛奶配 100 ml 软短米。
| 菜式 | 烹饪容器 | 烹饪层 | 加热功能 | 微波设置 | 蒸制设置 | 烹饪时长(单位:分钟) |
| 焦糖布丁 | 玻璃烤盘 | 3 | - | 3 | 40-50 | |
| 德式馒头 | 玻璃烤盘 | 3 | - | 2 | 20-25 | |
| 米饭布丁 1:2.5 | 烹饪容器,盖盖子 | 3 | - | 3 | 30-40 | |
| 糖渍水果,500 g | 烹饪容器,盖盖子 | 3 | - | 3 | 9-12 | |
| 微波爆米花,1袋,每袋 100g | 烹饪容器,盖盖子 | 0 | 600 - | 3-5 | ||
| 甜品,例如牛奶冻 (即食)500 ml* | 烹饪容器,盖盖子 | 0 | 600 - | 6-8 |
* 不时搅拌
丙
食品中的烯酰胺
土豆条、土豆片、烤面包、面包卷、面包、精烘焙食物(饼干、姜饼、曲奇)。
哪些食物受影响?
丙烯酰胺主要产生于高温加热的谷类和土豆产品中,例如
制作食物时使烯酰胺降至最少的技巧
| 概述 | 保持烹饪时间尽量短。烹饪时食物颜色变为金黄褐色即可,颜色不要太深。又大又厚的食品包含的丙烯酰胺较少。 |
| 烘焙 | 使用热风,温度不要超过180°C;蛋或蛋黄可减少丙烯酰胺的产生。 |
| 饼干 | 使用热风,温度不要超过180°C;蛋或蛋黄可减少丙烯酰胺的产生。 |
| 烤薯片 | 在附件上均匀地铺开一层。每次至少烤400g,这样薯片不会烧干。 |
测试菜谱
编制这些表格是为了供测试学会使用,方便他们对电器进行检查。
符合标准 IEC 60350-1 和 IEC 60705。
使用微波制备食物
用微波制备食物时,一定要使用适用于微波的耐热烹饪容器。请遵循适用微波烹饪容器的说明。→ "微波"第 55 页
微波解冻
| 菜式 | 烹饪容器 | 烹饪层 | 加热功能 | 重量 | 步骤 | 微波设置 | 烹饪时长 | (单位:分钟) | ||||
| 解冻肉 | 烹饪容器,不盖盖子 | 0 | 500 g | 1 | 180 | 7 | ||||||
| 2 | 90 | 8-12 |
微波烹饪
| 菜式 | 烹饪容器 | 烹饪层 | 加热功能 | 重量 | 步骤 | 微波设置 | 烹饪时长(单位:分钟) |
| 卡仕达酱 | 烹饪容器,不盖盖子 | 0 | 1000 g 1 | 360 | 18-20 | ||
| 2 | 180 | 18-22 | |||||
| 海绵蛋糕 | 烹饪容器,不盖盖子 | 0 | 475 g | 1 | 600 | 8-10 | |
| 肉丸 烹饪容器,不盖盖子 | 0 | 900 g | 1 | 600 20-25 |
组合微波烹饪
| 菜式 | 烹饪容器 | 烹饪层 | 加热功能 | 烧烤设置 | 微波设置 | 持续时间(分钟) |
| 法式焗烤土豆 | 烹饪容器,不盖盖子 | 0 | 1 | 360 | 25 - 32 |
蒸制
将带蒸笼的玻璃烤盘放在烹饪层3。
| 菜式 | 烹饪容器 | 烹饪层 | 加热功能 | 蒸制设置 | 烹饪时长(单位:分钟) | 注意 |
| 冷冻豌豆 | 玻璃烤盘+蒸盘 | 3 | 图 | 3 | - | 最冷区域达到85°C后,测试完成。 |
| 西兰花,新鲜,300g | 玻璃烤盘+蒸盘 | 3 | 图 | 3 | 11-13 | |
| 西兰花,新鲜,一个容器 | 玻璃烤盘+蒸盘 | 3 | 图 | 3 | 18-20 |
烧烤
将玻璃烤盘放在烤架下方,既可承接汁液,又可令烹饪箱更清洁。
表格中的数值适用于放在冷电器内的食物。
| 菜式 | 烹饪容器 | 烹饪层 | 加热功能 | 烧烤设置 | 烹饪时长(单位:分钟) | 注意 |
| 烤吐司 | 烤架 | 3 | 3 | 4-5 | ||
| 牛肉汉堡排,12份 | 烤架+玻璃烤盘 | 3+1 | 3 | 35-45 | 烹饪中途翻转 |
产品中有害物质的名称及含量
| 部件名称 | 有害物质 | |||||
| 铅(Pb) | 汞(Hg) | 镉(Cd) | 六价铬(Cr(VI)) | 多溴联苯(PBB) | 多溴二苯醚(PBDE) | |
| 印制电路组件 | × | ○ | ○ | ○ | ○ | ○ |
| 显示单元 | ○ | ○ | ○ | ○ | ○ | ○ |
| 电源线及连接线 | × | ○ | ○ | ○ | ○ | ○ |
| 电机、驱动部件及风扇 | ○ | ○ | ○ | ○ | ○ | ○ |
| 外壳组件 | ○ | ○ | ○ | ○ | ○ | ○ |
| 隔热组件 | ○ | ○ | ○ | ○ | ○ | ○ |
| 热腔体组件 | ○ | ○ | ○ | ○ | ○ | ○ |
| 照明组件 | ○ | ○ | ○ | ○ | ○ | ○ |
| 门体组件 | ○ | ○ | ○ | ○ | ○ | ○ |
| 微波发生部件 | ○ | ○ | ○ | ○ | ○ | ○ |
| 本表格依据SJ/T 11364的规定编制。○:表示该有害物质在该部件所有均质材料中的含量均在GB/T 26572规定的限量要求以下。×:表示该有害物质至少在该部件的某一均质材料中的含量超出GB/T 26572规定的限量要求。 | ||||||
注意:上表包含了本公司生产的此类产品的全部部件,本产品的部件以实际配置为准。如您对此有任何疑问,请拨打本产品所提供的公司客服电话。
产品环信保息提示性说明
请按照产品说明书的要求用和维护本产品,不当利用或者处置本产品可能会对环境和人类健康造成影响。使
依照国家《废弃电器电子产品回收处理条例》的有关规定,当您计划将此产品废弃时,请将其交给具有废弃电器电子产品处理资格的处理企业进行处理。产品中有毒有害物质含量信息参照上表。
食品接触用材料及制品信息
本产品中下列预期或可能与食品接触用材料及制品,符合GB 4806.1-2016 及相应食品接触材料及制品的食品安全国家标准要求。
| 食品接触用材料 用途 执行标准 备注 | ||||
| 玻璃 玻璃盘等 | GB 4806.5-2016 | 可用于烹饪,可微波炉使用 | ||
| 塑料 | 聚苯硫醚(PPS) | 解冻皿等 | GB 4806.7-2016 ---- | |
| 丙烯腈-苯乙烯共聚物(AS) | 水箱等 | GB 4806.7-2016 | 只接触非酸性水性食品(乙醇含量≤10%(体积分数)) | |
| 聚苯硫醚(PPS) | 导水管等 | GB 4806.7-2016 | 只接触非酸性水性食品(乙醇含量≤10%(体积分数)) | |
| 聚丙烯(PP) 进水管等 | GB 4806.7-2016 | 只接触非酸性水性食品(乙醇含量≤10%(体积分数)) | ||
| 金属 | 钢 FNiCrM3 基材(镀铬/镍/铜) | 烤架等 | GB 4806.9-2016 | 不得接触酸性食品 |
| 铝合金 ADC3 | 蒸气热器等加 | GB 4806.9-2016 | 只接触水性食品(乙醇含量≤10%(体积分数)) | |
| 硅橡胶 软管等 | GB 4806.11-2016 | 只接触非酸性水性食品(乙醇含量≤10%(体积分数)) | ||
注1: 上表包含了本公司生产的此类产品的预期或可能与食品接触的全部部件,本产品的部件以实际配置为准。
注 2: 请根据说明书要求正常用本产品,限制用条件见上表备注栏。
使 使 未按上述要求用本产品所造成的食品污染以及相应的人身损害由用人自行承担相应法律责任。
如您对此有任何疑问,请拨打本产品所提供的公司客服电话。
SIEMENS
西门子家用电器产品保修指南

natural_image
Monochrome illustration of the Earth globe showing continents and oceans (no text or labels)博西家用电器(中国)有限公司
南京市中山路129号中南国际大厦20、21楼
全国统一客户服务热线:4008899999
客户服务电子信箱:careline.china@bshg.com
公司网站:www.siemens-home.bsh-group.cn
本资料内容如有变更,恕不另行通知
产品保修指南
友情提示
- 如果您的机器出现异常现象,在联系客户服务之前,请先阅读机器说明书中的《故障检修》进行排除。
- 如果维修人员上面后发现机器并无故障,即使在包修期内,您也将承担相关费用。
- 您可以在本指南中找到客户服务的联系方式。
在上门服务前请提供下列信息:
详细地址和电话号码、故障描述、购机及收货日期、产品型号(E-Nr)、生产日期(FD)。
上述信息有助于更好地为您提供服务,同时也可以为您省去不必要的开支。产品型号请参见铭牌。
友情提示
- 根据《中华人民共和国消费者权益保护法》和《部分商品修理更换退货责任规定》,本机作为家用电器,自购买收货之日起整机包修1年,主要部件包修2年。用于生产经营目的、商用、公司集体使用等用途所购买的家电,其整机及主要零配件自收货之日起包修期为3个月,除非购销合同中另有规定。法律法规另有规定的,按照其规定执行。
- 产品存在瑕疵但不影响产品的性能、功能,也不违反国家强制性规定,长方、商业单位作降价处理的,其包修条件同上,但因此而降价的部件不予包修。
- 包修期内,用户修理时必须提供修理产品的有效收货凭证、购买发票和厂方指定的相关三包凭证,三包包修期自购买收货之日算起。如果收货凭证遗失,按照购买发票日期顺延7日作为三包开始日期。如果收货凭证和购买发票同时遗失且不能提供有限信息,按照出厂日期顺延45日作为包修开始日期。
-
除另有规定外,下列项目不属于免费包修范围,应实行收费修理。
-
用户搬运,安装,使用,维护,保管不当而损坏的;
- 使用电源电压低于187伏或高于240伏而损坏的;
- 自行或非厂方特约维修点拆修的;
- 无有效购买发票和三包凭证的;
- 购买发票或三包凭证型号与产品型号不符或涂改的;
- 因不可抗据力造成产品损坏的;
- 过了免费包修期的。
- 由于产品使用环境条件,例如:电源、水源、温度、湿度等非本公司所控制的因素引起的一切损坏及损失,不在包修范围内。
服务保障措施
-24小时热线
- 原厂配件
- 全程服务
- 延保计划
联系方式
全国统一客户服务热线:4008899999
客户服务传真:025-84701672
客户服务电子邮箱:careline.china@bshg.com
公司网址:www.siemens-home.bsh-group.cn
SIEMENS
| 顾客姓名 联系 | 电话 | ||
| 联系地址 | |||
| 购买日期 | |||
| 产品型号 | 发票号码 | ||
| 维修点名称 | 维修点电话 | ||
结算第五联
| 顾客姓名 联系电话 | |||
| 购买日期 | 发票号码 | ||
| 产品型号 | 出厂年月 | ||
| 维修日期 | 出厂序号 | ||
| 顾客姓名 联系电话 | |||
| 购买日期 | 发票号码 | ||
| 产品型号 | 出厂年月 | ||
| 维修日期 | 出厂序号 | ||
结算第四联
| 顾客姓名 联系电话 | |||
| 购买日期 | 发票号码 | ||
| 产品型号 | 出厂年月 | ||
| 维修日期 | 出厂序号 | ||
| 顾客姓名 联系电话 | |||
| 购买日期 | 发票号码 | ||
| 产品型号 | 出厂年月 | ||
| 维修日期 | 出厂序号 | ||
 |
BSH Hausgeräte GmbH
Carl-Wery-Str. 34, 81739 München
GERMANY

西门子家电官方微信公众号
siemens-home.bsh-group.com
由BSH家用电器有限公司根据西门子股份公司的商标许可制造
- Table of contents
- Intended use
- Manufacturer information:
- Standards conform to:
- Important safety information
- General information
- ⚠ Warning – Risk of fire!
- ⚠ Warning – Risk of burns!
- ⚠ Warning – Risk of scalding!
- ⚠ Warning – Risk of injury!
- ⚠ Warning – Risk of electric shock!
- ⚠ Warning – Hazard due to magnetism!
- Microwave
- ⚠ Warning – Risk of explosion!
- Warning – Risk of electric shock!
- ⚠ Warning – Risk of serious damage to health!
- Steam
- ⚠ Warning – Risk of injury and risk of fire!
- Causes of damage
- Caution!
- Environmental protection
- Saving energy
- Environmentally-friendly disposal
- Getting to know your appliance
- Control panel
- Function selector
- Touch fields
- Display
- Rotary selector
- Notes
- Function selector
- Touch fields and display
- Touch fields
- Display
- Display elements
- Drip tray and water tank status display
- Temperature indicator
- Night mode
- Rotary selector
- Operating modes
- Steam levels
- Grill
- Grill settings
- Setting the microwave to combined operation
- Cooking compartment
- Opening the appliance door
- Interior lighting
- Cooling fan
- Tank cover
- Water tank
- Drip tray
- Accessories
- Accessories included
- Wire rack
- Glass tray
- Steam container
- Additional accessories
- Wire insert
- Special accessories
- Glass roasting dish
- Inserting accessories
- Before using for the first time
- Initial use
- Setting the time
- Changing the time on the clock
- Set the water hardness range.
- Cleaning the cooking compartment and accessories
- Cleaning the cooking compartment
- Cleaning the accessories
- Operating the appliance
- Switching the appliance on and off
- Switching on the appliance
- Switching off the appliance
- Setting an operating mode
- Setting the cooking time
- Pausing the operation
- Stopping the appliance from heating
- Automatic safety switch-off function
- Cookware
- Suitable cookware
- Unsuitable cookware
- Cookware test
- Warning – Risk of burns!
- Microwave power settings
- Default values:
- Time setting intervals
- Setting the microwave
- The cooking time has elapsed
- Changing the cooking time
- Combination options
- Setting combined operation
- a Changing the microwave power output
- Changing the microwave power output
- Drying the cooking compartment
- Heating up the cooking compartment
- Drying the cooking compartment by hand
- Grilling
- Grill functions
- Setting the grill
- Changing the grill setting
- Warning – Risk of scalding!
- Noise
- Pump
- Cooking with steam
- Level Intensity Use Display indicator
- Setting the steam
- Setting the steam combination
- Your food
- Suitable types of heating
- Setting combination mode
- Changing the steam level
- Filling the water tank
- Warning – Risk of injury and fire!
- Refilling the water tank
- After every steam operation
- Emptying the water tank
- Cleaning the drip trough
- Automatic programmes
- Setting a programme
- The programme has ended
- Changing the programme
- Setting the time-setting options
- Checking the time settings
- Setting the timer
- The timer duration has elapsed
- Changing the timer duration
- Cancelling the timer duration
- Cancelling the cooking time
- Childproof lock
- Activating and deactivating
- Basic settings
- Changing the basic settings
- Cancelling
- Cleaning
- Warning – Risk of injury!
- Suitable cleaning agents
- Microfibre cloth
- Conditioning cloth for stainless steel surfaces
- Conditioning oil for modern stainless steel surfaces
- Degreaser
- Descaling agent
- Surface damage
- Area Cleaning
- Keeping the appliance clean
- Tips
- Cleaning function
- Descaling
- Starting
- Rinsing
- Subsequent cleaning
- Emptying the drip tray
- Trouble shooting
- Customer service
- E number and FD number
- To book an engineer visit and product advice CN=400 889 9999
- Tested for you in our cooking studio
- Recommended setting values
- Baking tins and cookware
- Defrosting
- Heating frozen food
- Warming
- Cakes, small baked items and bread
- Frozen products
- Poultry, meat and fish
- Cooking in the cookware
- Warning – Risk of injury due to shattering glass!
- Uncovered cookware
- Covered cookware
- Cooking in combination with a microwave
- Steam-assisted cooking
- Steaming using the steaming tray
- Recommended settings
- Poultry
- Fish
- Vegetables and side dishes
- Steaming
- Desserts
- Rice pudding
- Acrylamide in foodstuffs
- Which foods are affected?
- Test dishes
- Preparing food with a microwave
- 目录
- 主要用途
- 制造商信息:
- 执行标准:
- 重要安全信息
- 常规信息
- 警告 - 有着火危险!
- 警告 - 有灼伤危险!
- 警告 - 有烫伤危险!
- 警告 - 有受伤危险!
- 警告 - 有电击危险!
- 警告-磁性引起的危险!
- 微波
- 警告 - 有爆炸危险!
- 警告 - 有严重损害健康的危险!
- 蒸制
- 警告 - 有着火危险,有受伤危险!
- 损坏原因
- 注意!
- 环境保护
- 节能
- 环保处理
- 了解您的电器
- 控制面板
- 功能选择钮
- 触控区
- 显示
- 旋转选择钮
- 提示
- 功能选择钮
- 触控区和显示屏
- 触控区
- 显示
- 显示信息
- 滴水盘和水箱状态显示
- 温度指示器
- 夜间模式
- 旋转选择钮
- 操作模式
- 蒸汽等级
- 烧烤
- 烧烤设置
- 设置微波组合操作
- 烹饪箱
- 打开电器门
- 内部照明
- 冷却风扇
- 水箱盖
- 水箱
- 滴水盘
- 附件
- 随附附件
- 烤架
- 玻璃烤盘
- 蒸制容器
- 附加附件
- 插入式烤架
- 专用附件
- 插入附件
- 首次使用之前
- 首次使用
- 设置时间
- 更改时钟时间
- 设置水硬度范围。
- 清洁烹饪箱和附件
- 清洁烹饪箱
- 清洁附件
- 操作电器
- 打开和关断电器
- 开机
- 关断电器
- 设置 操作模式
- 以下始终适用:
- 设置烹饪时间
- 暂停操作
- 停止加热电器
- 自动安全关断功能
- 烹饪容器
- 合适的烹饪容器
- 不适合的烹饪容器
- 烹饪容器测试
- 微波功率设置
- 时间设置间隔
- 设置微波
- 烹饪时间正常结束
- 更改烹饪时间
- 改变微波输出功率
- 组合选项
- 设置组合操作
- 烘干烹饪箱
- 加热烹饪箱
- 手动干燥烹饪箱
- 烧烤功能
- 设置烧烤
- 更改烧烤设置
- 噪音
- 水泵
- 使用蒸汽烹饪
- 设置蒸制
- 设置蒸制组合
- 您的食物
- 合适的加热类型
- 设置组合模式
- 更改蒸汽等级
- 加注水箱
- 警告 - 有着火危险,有受伤危险!
- 重新加注水箱
- 在每次蒸汽操作之后
- 排空水箱
- 清洁盛水盘
- 自动程序
- 设置程序
- 程序结束
- 更改程序
- 时间设定
- 检查时间设置
- 设置定时器
- 定时器持续时间到时
- 更改定时器持续时间
- 取消定时器持续时间
- 取消烹饪时间
- 儿童锁
- 启用和停用
- 基本设置
- 更改基本设置
- 取消
- 清洁
- 合适的清洁剂
- 微纤维布
- 用于不锈钢表面的清洁布
- 用于现代不锈钢表面的清洁油
- 去污剂
- 除垢试剂
- 表面损坏
- 保持电器清洁
- 建议
- 清洁功能
- 除垢
- 启动
- 冲洗
- 后续清洁
- 排空滴水盘
- 故障检修
- 客户服务
- E 编号和 FD 编号
- 预约工程师上门及产品咨询
- 经由我们烹饪工作室测试过的菜谱
- 建议设定值
- 烤模和烹饪容器
- 除霜
- 加热冷冻食物
- 加热
- 蛋糕、小份烘焙食品和面包
- 冷冻产品
- 家禽、肉和鱼:
- 装入烹饪容器烹饪
- 微波组合烹饪
- 蒸汽辅助烹饪
- 使用蒸盘蒸制
- 推荐设置
- 家禽
- 鱼
- 蔬菜和配菜
- 甜食
- 米饭布丁
- 丙
- 食品中的烯酰胺
- 哪些食物受影响?
- 测试菜谱
- 使用微波制备食物
- 产品环信保息提示性说明
- 食品接触用材料及制品信息
- SIEMENS
- 西门子家用电器产品保修指南
- 产品保修指南
- 友情提示
- 服务保障措施
- 联系方式
Znamka : SIEMENS
Model : CO565AGS0W
Kategorija : Pečica