DS35 - Lornetki PARD - Bezpłatna instrukcja obsługi
Znajdź bezpłatnie instrukcję urządzenia DS35 PARD w formacie PDF.

| Typ produktu | Lornetka termowizyjna |
| Model | DS35 |
| Producent | PARD |
| Detektor termiczny | 384 x 288 pikseli |
| Powtórzenie optyczne | 3,5x - 14x (zmienne) |
| Pole widzenia | 7,5° x 5,6° |
| Zasięg detekcji | Do 1000 m |
| Wyświetlacz | OLED 0,39 cala, 1024x768 pikseli |
| Nagrywanie wideo | Tak, do 30 kl/s |
| Pamięć | Karta microSD (max 64 GB) |
| Zasilanie | Akumulator litowo-jonowy 18650, 3,7 V |
| Czas pracy na baterii | Do 6 godzin |
| Wymiary (dł. x szer. x wys.) | 200 mm x 70 mm x 60 mm |
| Waga | 350 g (bez baterii) |
| Zakres temperatur pracy | -20°C do +50°C |
| Materiał obudowy | Stop magnezu i tworzywo sztuczne |
| Tryby kolorów | Biały gorący, czarny gorący, czerwony, itp. |
| Pomiar odległości | Za pomocą wbudowanego dalmierza laserowego |
| Gwarancja | 2 lata |
| Zgodność z normami | IP67 (pyło- i wodoszczelność) |
Często zadawane pytania - DS35 PARD
Pytania użytkowników dotyczące DS35 PARD
0 pytanie dotyczące tego urządzenia. Odpowiedz na te, które znasz, lub zadaj własne.
Zadaj nowe pytanie dotyczące tego urządzenia
Pobierz instrukcję dla swojego Lornetki w formacie PDF za darmo! Znajdź swoją instrukcję DS35 - PARD i weź swoje urządzenie elektroniczne z powrotem w ręce. Na tej stronie opublikowane są wszystkie dokumenty niezbędne do korzystania z urządzenia. DS35 marki PARD.
INSTRUKCJA OBSŁUGI DS35 PARD
PARD

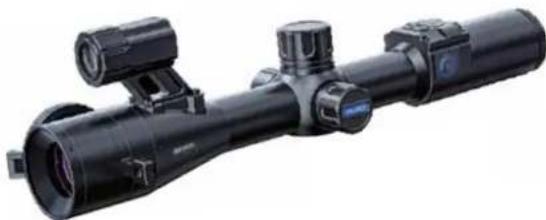
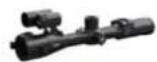
natural_image
Close-up of a black optical optical system with multiple lenses and a mounted camera (no visible text or symbols)USA
User Manual
Digital night vision
DS35
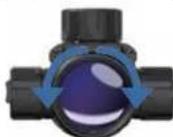
natural_image
Black optical optical system with multiple lenses and a cylindrical lens (no visible text or symbols)IR Version
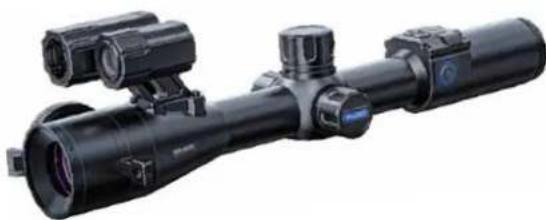
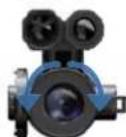
natural_image
Close-up of a black optical optical system with dual lenses and a scope (no visible text or symbols)IR &RangefinderVersion
Scan To Enjoy Privilege

Scan The QR Code To Join Our Membership
① Extend warranty
2 Enjoy 1 on 1 expert service
③ Get the product experience officer opportunity
CONTENTS
-
To Users 02
-
Precautions 02
-
Package Contents 03
-
Description & Key Features 04
-
Specifications 05
-
Components & Controls 09
-
Installation 10
-
Operation Instruction 15
8.1 Shortcut Made 16
8.2 Menu Note 20
* Statement 37
TO USERS
Thank you for your continued support and for choosing PARD 2535 series night vision advice. Please read this manual carefully before using the device for the first time. Please follow the instructions in this manual to avoid any damage caused by improper use and to ensure that your device operates properly.
After reading, please keep this manual in a safe place, for future reference. This manual provides step7a7step instructions on how to use your night vision advice and is intended for your reference only.
PARD reserves the right to amend this manual at any time without prior notice to individual users. For the most up7a7date instruction, we recommend visiting PARD's social website. PARD reserves the final right of interpretation of this manual.
PRECAUTIONS
- Please remove the insulating tape before using the battery for the first time. It is recommended to use a fully charged lithium-ion battery with a rated voltage of 3.7V.
- When not in use, always turn off the device. If you are not going to use the device for more than 10 days, please remove the battery and store it in a safe place.
- Use eBreme caution and care when using or transporting the device. It is recommended that original packaging be used during transportation.
- Co avoid eye damage, avoid staring directly into the infrared fill light from a close distance
- When this product's IR infrared light is turned on, it will use a large amount of energy. Aiming at Hammable objects up close is absolutely prohibited because doing so could start a fire. Please go into sleep mode or turn off the IR
- Avoid scratches and damage to the lens caused by oil or chemical contamination. When not in use, keep the lens cap
-
The device should be stored in a cool, dry, ventilated environment free of strong electromagnetic fields, with temperatures no lower than 175^ / 120^ and no higher than 1120^ / 50^ .
-
Do not disassemble the device without authorization. If you encounter any problems, please contact our after-sales
team and report them on our official website. Failure to do so will render the warranty service null and void. - Attention I: All PARD night-vision and thermal imaging devices require a license when exported to outside your country.
PACKAGE CONTENTS
| Content silicon Quantity | ||
| Night vision device 1 | ||
| 3.7V 18650 Rechargeable lithium ion battery 1 | ||
| Protective case 1 | ||
| Type C cable 1 | ||
| 30mm Standard mount rings 2 | ||
| Allen wrench | 3 | |
| 10K replacement | ||
| 2Cinch | ||
| Rubber eye cup 1 | ||
| Quick start guide/User's manual 1 | ||
| After sales card 2 | ||
DESCRIPTION & KEY FEATURES
One D635 has a traditional day scope efferior, but it is a multifunctional day and night scope with cutting/derige technology. D635 stays one step ahead of the competition by being the first to use a new 800 B-800 Circular LCPS display. This results in higher picture resolution when combined with a highly sensitive CMOS 0.001 low/low image sensor. Users can select a resolution of 2560 B 1440 (2K). With a ballistic calculator and 1000m/1200yds LRF, users can improve their accuracy and hunt smarter with smart technology.
Key features
1 800*800 Circular LCPS display, first in the world
7 Image shiN Pero
1 Bellistic calculator
5 Patented focus/free lens cap
Long eye7relief display system JLEDS
500m adjustable IR fill light
1000m/1200yds laser rangefinder
Self/activated recording
1 Completely new UI
4 Image modes Joolar, black and white, green and yellow
⑪ Multifunctional control knob
12 50/70mm oational obactive lens
- WEL
IP67 rating
由 600Ω recoil resistance
SPECIFICATIONS
| Model | DS35 |
| Sensor | |
| Resolution(pixel) | 2560°±440 |
| Pixel size(um) | 2.5 |
| Sensitivity(lux) | 0.001 |
| Frame rate(Hz) | 30 |
| Image engine | PARD VLEA |
| Optics | |
| Objective lens(mm) | 50 F2.4 / 70 F2.4 |
| Optical magnification(x) | 4/5.6 |
| Digital zoom(x) | 2 |
| Field of view (horizontal) | 4.8°/8.4° |
| Field of view (vertical) | 4.8°/8.4° |
| Field of view (diagonal) | 6.8°/4.8°5m-Focus range |
| 100Eye relief(mm) | |
| 10Exit pupil(mm) | |
| IR Illuminator | |
| VCSEUR type | |
| 5IR power(W) | |
| 3 levelsIR Illuminating level | |
| IR distance(m) | 500 |
| IR wavelength(nm) | 850/940 |
| Display | |
| UPS LCDType | |
| 800*800Resolution(pixel) | |
| 6Reticle style | |
| White/Yellow/GreenReticle color | |
| Color mode Color/Mono 8W/Mono Green/Mono Yellow | |
| Model DS35 | |
| Photo / Video | |
| Photo resolution(pixel) | 256D*1440 |
| Photo format | JPG |
| Video resolution(pixel) | 1970*1080 |
| Video format MP4 | |
| Storage(GB) TF card max(128) | |
| Main Function | |
| LRF detection range(m/yds) | 1000/1200 |
| Power Supply | |
| Battery type | Lithium Ion18050 |
| Output voltage(V) | 3.7 |
| Operating time(h,max) | B |
| External power supply | USB Type-C |
| Environmental Characteristic | |
| Degree of protection | IP67 |
| Operating temp(°C/°F) | -20°C - 50°C ~ -5°F-120°F |
| Recall power(J) | 6000 |
| Material | |
| Housing | Aluminium Alloy |
| Measurement | |
| Product dimension(L * W * H, mm) | 350*88~95(without, long eyepiece)410*88*95(with long eyepiece) |
| N.W./pcs(with battery, g) | 680 |
COMPONENTS & CONTROLS
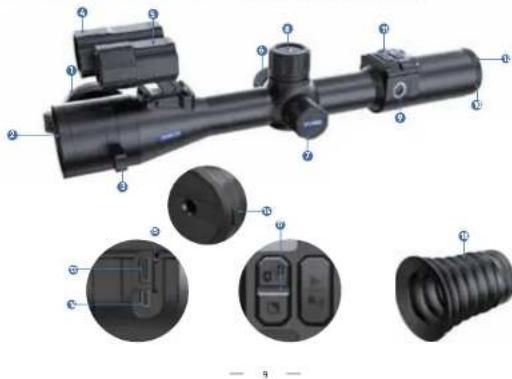
natural_image
Technical diagram of a firearm with labeled parts and internal components (no text or symbols present)| NO. | Name | No. | Name No. Name | |
| 1 | Lens cap | 7 | Battery compartment | 8 |
| 2 | Objective lens | 8 | Control knob | 9 |
| 3 | Focus lever | 9 | Power/Sleep button | 10 |
| 4 | Laser rangefinder (only for 10 inches) | 11 | Diopter adjustment ring | 11 |
| 5 | at night (only for 10 inches) | 12 | Button panel | 12 |
| 6 | Battery cap | 13 | Eyeliece lens | 13 |
INSTALLATION
1.Unboxing
Before using this device, please do the following:
- Open the box and remove the device. - Check to ensure that the package contents listed above are all included in the box.
Check the device for any damage to the display, body, lens, buttons, etc.
③ Make sure that the objective lens and everywhere are clean & functioning properly.
Note: If any accessories are missing or damaged, please contact our after sales service at once.
2. Battery installation and startup
The battery installation steps are as follows:
2.1 Unscrew the battery cap counterclockwise and remove the battery
2.2 Remove the insulating tape.

2.3 Insert the battery ensuring that the positive J+ side goes in first and tighten the battery cap clockwise.
2.4 Go turn on the device, press and hold the power button for about 3 seconds. /When the power light illuminates and the PARD Logo appears on the screen, the device is ready for use.)

Note:
① Please use a single 18650 rechargeable lithium-ion battery rated 3.7V voltage.
Do not put battery into fire.
③ Do not put device into water when the battery cap is open.
Do not disassemble the device without authorization.
Do not pierce the device with sharp objects.
Battery should be kept out of reach of children, and the positive and negative terminals of the battery should be installed correctly.
3. Mount installation
Co ensure the best user experience, we highly recommend using our original mount included in the product packaging.

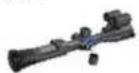
natural_image
Mechanical optical device with threaded filament and mounted components (no visible text or symbols)Take out the night vision device, two scope rings and an alien wrench out of the box.
Use the Allen wrench to unscrew the ring tops, and loosen the screws on the bottom half of the mount.
⑤ Attach the bottom half of your rings to the rail.
① Cighten the screw on the rear mount to your rail to the desired position.
5 Place the scope in the scope rings. One scope should side with minimum resistance.
B. Install the ring tops and tighten down the screws and make sure the scope stays level.
4. Diopter focusing
Diopter focusing is used to address users with different levels of connected vision to clearly see the content displayed on the screen as shown in picture 1.
① After powering the device, rotate the diopter focusing wheel so that you can see the screen clearly.
As long as you can clearly see the crosshair and teBt on the display, the dioster focusing setting has been completed.
Note: Che image may not seem clear after diopter adjustment, as the objective lens still needs to be focused.
Picture 1
Picture 2
5. Objective lens focusing
Before you focus the objective lens, ensure that the diopter focusing has been completed. Aim at the target and adjust the objective focusing wheel until you can see the target image clearly as shown in picture 2.
6. Compass calibration
ANer the eyepiece is focused, please use the pfigure 8 pattern method to calibrate the electronic compass. Users are required to tilt and move the device in a figure 8 motion until the compass is calibrated as shown below in picture 3.

Picture 3
7. Image shift zero
Set the target at the Percing distance so that the device can obtain a good image as shown.
2 Select the Pero setting submenu. 7 please refer to the remote adjustment option in the menu operation made for specific steps.
Fire a 1st shot after focusing on the image, ensuring that you can see a clear point of impact on the screen after the shot has been taken.
Keep the scope in a stable position after shooting, and then press the [knab] to move the cursor to the pup and pYp items. Rotate the [knob] to freePe the screen and adjust the values of pup and pYp until the point of impact on the display screen is moved to the center point of the reticle.
5 To save and exit - sat the "Save" item to "Y", after the setting is completed, press and hold [Key 1] to save and exit. The actual point of impact is moved to the center point of the roticle (the roticle is always at the center of the screen, which can maximize the use of the whole observation field).
Note: The first item in the sub-menu represents the saved "zero" setting, there are five profiles A-E. The "X" and "Y" values represent the corresponding display positions of the crosshairs. "Style" represents the corresponding reticle type. "Color" represents the corresponding color of the reticle.
OPERATION INSTRUCTION
1. Shortcut Mode

natural_image
Technical diagram of a mechanical optical component with labeled parts (no text or symbols present)| Knob(Key2) | Rotate counterclockwise | Rotate clockwise | |
| down/ /hidshomescreen icons | up/~/zoom | ||
| Single press | Press and hold | Double press | |
| quick menu/ok | Fall menu | PIP | |
| Single press | Press and hold | Double press | |
| Key2 IR light adjustment | switch black &white/color mode | - | |
| take a photo fileskey3 | record video | ||
| Key4 | IRF/balistic calculator/back | WIFI | - |
Explanation
Key 1
- Single press:
① Home screen modem press [Key 1] to enter the shortcut menu to access the following functions: ballistic calculator, range unit selection, reticle adjustment, default magnification, default color and display brightness. ② Menu modem press [Key 1] means confirm.
- Press and hold:
Home screen modern press and hold [Key 1] to enter the full menu.
- Double press:
Home screen modern double press [Key 1] to turn on/off the picture/in/picture function.
- Rotate counterclockwise:
Home screen modem turn the [knob] counterclockwise to hide/show homescreen icons. Menu modem rotate the [knob] counterclockwise to scroll down between menu options. In the parameter setting interface under the sub menu, rotate [knob] counterclockwise to decrease the values.
- Rotate clockwise;
① Home screen mode, rotate [knob] clockwise to switch the magnification. ② Rotate the [knob] clockwise in the menu option interface to switch menu options upward. In the parameter setting interface under the sub menu, rotate [knob] clockwise to increase the values. Note: The knob has slow rotate (Step 1)/fast rotate (Step 2).
Key 2
- Single press:
Home screen modern press [Key 2] to turn on the first, second and third level of brightness of the IR light (you need to enter the black and white mode before you can perform this operation). - Press and hold:
Home screen modern press and hold [Key 2] to switch between black and white/color mode.
Key 3
- Single press:
Home screen modem press [Key 3] to take a photo. - Press and hold:
Home screen modern press [Key 3] to record a video. Press and hold [Key 3] again to save the video and eBit. - Double press:
Home screen modem double press [Key 3] to enable the playback function. ANer entering this interface, the video and picture files in the memory card will be displayed.
Rotate the [knob] to switch between files. - Press [Key 1] to play/pause the sealed videos.
① When playing videos, rotate the [lmab] to fast forward or rewind 28/48/38 times.
④ Press [Key 4] to access the following settings.
1)Delete
- Delete Current
- Delete All
2|File Protectionm
* Lock Current
- Unlock Current
* Lock All
* Unlock All
3|Slide Showm
* Two seconds
• Five seconds
• Eight securos
© Press and hold the [Key 4] to return
Key 4
- Single press:
① Home screen modern
*Press [Key 4] to start the range detection function JFor LRF version, the distance will be measured and displayed
automatically. For non LRF version, the distance is not measured automatically and will display p[0]m or [0]ydsp.
You need to manually input the target distance value by rotating the knob.
*Press [Key 4] a second time to turn on the ballistic indicator when the ballistic calculator is turned off, the range
indicator is turned off!
*Press [Key 4] a third time to turn off the ballistic indicator: (when the ballistic calculator is turned on).
(2) In menu mode, press [key 4] to return to the previous page.
- Press and hold:
Home screen mode, press and hold Key 41 to turn or volt the Wifi function.
Please note: When the WIFI is turned on, you cannot access the menu. Press and hold the [Key 4] to turn off the WiFi
and then enter the menu interface.
2. Menu Mode
Home screen mode: press [Key 1] to enter the shortcut menu mode and press and hold [Key 1] to enter the full menu setting mode to set various function options (the shortcut key function is invalid at this time).


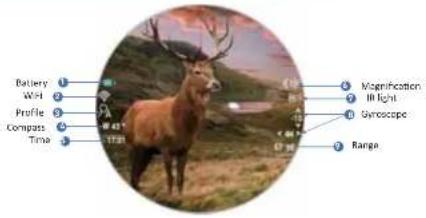
pie
| Category | Value | |---|---| | Remission | 100% | | Other | 5% |Figure 8 Picture 7
1. Ballistic calculator:
The ballistic algorithm can quickly calculate Quick bullet trajectories and give you a precise aiming point enabling you
to accurately place your shot. The device supports five profiles allowing you to use the scope on multiple nHas.
① Rotate the [knab] to move the cursor to the ballistic calculator setting option, press [Key 1] to enter the sub7menu.
- Notate the [kho] to move the cursor to select "parameters" or "on/off" and then press [key 1] to save or enter.
① Never entering the ballistic calculator parameters sub/menu, press [key 1] to scroll up or down and select the parallelers option you want to change.
① Rotate the [kno] to adjust the value of the corresponding parameter.
Parameter settings guide:
- Ballistic datam. There are 5 sets of ballistic data profiles IA7EI that can be saved.
- Velocity is the measurement of bullet travel speed after it is fired from your rifle, abpressed in pineters par
seconds Jm/s) or pleet per seconds Jf/s), which can be measured by using professional testing equipment.
- Bullet Wtm refers to the weight of the bullet, expressed in pgramsp Jg) or pgrainsp Jg), which can be obtained from
the manufacturer's specifications of the bullets purchased.
* Bullet ballistic coeOcientm is a measure of the bullet's ability to overcome air resistance in Hight. Data can be
obtained from the manufacturer's specifications of the bullets purchased.
* Altudam refers to the altitude of the location, expressed in pmetersp Jm) or plectp JN), which is one of the
important indicators affecting air density in ballistic calculation, which can be measured by using professional
testing eEquipment.
• Compexation results in thermal temperature, depression in p-valinize 2 °C or prerenion: P _1 , which is also noted.
the important indicators affecting air density in ballistic calculation, which can be measured by using professional
- Scope HTM refers to the height difference between the optical abits of the sight and the barrel, ePressed in millimetersp. (mm) or pinchesp. (inch), which can be measured by using professional testing eEquipment.
- Zero range refers to the unit distance (expressed in pmeterp 1m) or pyardp Jyard), usually set to 100m or 100yds, users can adjust according to their own preferences.
* Point Shape and Colorm rotate the [knob] clockwise to enter the shape and color setting interface. Press [Key 1] to switch between shape options and color suboptions. Rotate the [knob] to select the desired shape and color. Here are three shape options as well as yellow/green/blue color options. Press [Key 4] to confirm and return to the previous page.
⑤ After adjusting your preferred settings, press and hold [Key 1] to save and return to the home screen. Press and hold [Key 4] to edit without saving.
Note: By setting the omterp or pyardp in the range unit selection sub7menu, the metric or imperial units of the parameters related to the ballistic calculator will be updated automatically.
2. Range unit selection:
Users can switch between pmeterp or pyardp and the range unit can be updated instantly to meet the user's preference. © Rotate the [knoo] counterclockwise to move the cursor range unit selection option, and press [Key 1] to enter the sub/menu.
② Rotate the [inab] to choose between ametarp or pyardp, then press [Key 1] to save and return to the previous page.
3.Picture in picture :
One top center of the display can show a 2D magnified picture to improve aiming visibility, allowing you to see magnified target details without losing the field of view.
① Rotate the [knob] counterclockwise to move the cursor to the PIP setting option, and press [Key 1] to enter the sub7menu.
② Rotate the [knob] to move the cursor to select "PIP OFF" or "PIP ON".
② Press [Key 1] to save and return to the previous page.
4. Reticle adjustment
① Reticle Adjustment refers to aligning the reticle with the point of impact at a Percing distance, so that the position of the reticle is well aligned with the point of impact. Let the object
of the aiming point at this specific distance corresponds with the point of impact of the bullet. Go Rotate the livnol count/sclockwise to move the cursor to the reticle adjustment setting option. Pass [Key 31]
to enter the sub7menu interlace.
Press [Key 1] to switch sub7menu options. Rotate the [knab] to adjust the value of the corresponding item.
• Che first letter represents the crosshair storage type J(there are 5 profiles A7E).
• U represents the B balls of the cross line.
• Y represents the y-axis of the cross line.
• Style corresponds to the crosshair type 16 options available).
• Color corresponds to the color of the cross line red/white/yellow/green). • Under the same option, nPn means to 50% and nPn means D1 NDC 50%
(3) After selecting your preferred settings, press and hold [Key 1] to confirm, save and return to the home screen.
5. Gyroscope:
This function measures the orientation of the device so that the yaw and pitch angles of the device can be displayed and calibrated.
① Rotate the [knob] counterclockwise to move the cursor to the gyroscope setting option, and press [Key 1] to enter the sub7menu.
② Rotate the [know] to select pDisplayp or pCalibrationp, and then press [Key 1] to enter.
④ aDisplan indicates whether for not to display the saw and pitch angle of the piece on the home screen. Flotate
[2] (Jahara) indicates whether the help to display the prior main feature of the data on the same direction. In particular, the [knob] to select nP/fp or nOsp, and press [Key 1] to save and return to the menu.
The [know] ta smooth pump of pons, and private [key] to save into return to the media.
(3) Calibrate: Means to enter the calibration state. After selecting, please place the device on a horizontal plane
surface, and press [Key 1] to perform automatic calibration. After calibration, the device will automatically return to
the home screen.
6. Default magnification:
ANer turning on the device, users can use this function to select the default magnification ratio.
© Rotate the livrabl counterlnckwise to move the cursor to the default magnification setting option, and press LYou
☐ Model E16 [H3E] is otherwise to move the control to the action. Limitation setting option, and press [h2],
1) to enter the sub/menu.
② Rotate the [knob] to select the default magnification you want, and then press [Key 1] to save and return to the
previous page.
7. Default color:
Charts are 4 built Tin color shades. "Color" ("Black & White") "Yellows" and "Green". Users can choose their preferred
there are a color in color thickness, color = black or white, = blue and green. Objects can choose the color effect color settings
- Rotative (fiscal) counterweights to move the current default order setting orders and now [tivo 3] to enter
(2) Rotate the [know] counterclockwise to move the cursor to default color setting option, and press [Key 1] to enter
the sub/menu.
② Rotate the [knob] to select "Color"/"Black & White"/"Yellow" and "Green", and then press [Key 1] to save and
return to the previous page.
8. Brightness of IR:
Users can choose the level of brightness of IR settings.
(1) Rotate the [knab] counterclockwise to move the cursor to the brightness or IR setting option, and press [Key 1] to enter the sub-menu. (2) Rotate the [knab] to select 'Off', '1', '2', '3' and then press [Key 1] to save and return to the previous page.
9. Display brightness:
Users can choose their preferred brightness settings.
① Rotate the (knoh) counterclockwise to move the cursor to brightness setting option, and press (Key 1) to enter the sub-menu.
② Rotate the [knob] to select form "Level 0" to "Level 6", and then press [Key 1] to save and return to the previous page.
10. Auto power off:
The auto power off function allows the device to automatically power down after being idle. This setting will still be enabled after the next startup.
(1) Rotate the [knoop] counterclockwise to move the cursor to select the auto power off setting, and press [Key 2] to enter the sub-menu.
② Rotate the [knab] to select "Off", "One minute", "Ten minutes" or "Thirty minutes" duration options. After selection, press [Key 1] to confirm and save, and return to the previous page.
Note: After selecting your preferred time duration, the device will sense the last point of operation before beginning the shutdown. Shutdown will not start immediately after imputing the time, but will start after the device has been
Idle then it automatically triggers the shutdown command.
11. Auto recording:
After auto recording is on, device will start recording and continue to record after the next startup.
© Rotate the [knob] counterclockwise to move the cursor to the auto recording setting option and press [Key 1] to enter the sub7 menu.
② Rotate the [knob] to select "Off" or "On" options, press [Key 1] to save and return to the previous page.
12. Loop recording:
Users can customize the segment recording duration. This can be set up under loop recording. When the capacity of the memory card is full, the non-encoding will automatically navigate the system sound files. When we select
the memory card is full, the new recording will automatically overwrite the previous saved files. When you select "Off" the recording will stop when the memory card is full, and the oldest video file will not be overwritten.
① Rotate the [knob] counterclockwise to move the cursor to the loop recording setting option, and press | Key 1| to enter the sub7menu.
⑤ Rotate the [knob] to move the cursor to select preferred loop time duration p0ffp, pThree minutesp, pFive minutesp or pCon minutesp. ANer selection, press [Key 1] to save and return to the previous page.
13. Self-activated recording:
When the device detects recall, the whole shooting process will be recorded in 20 second intervals. The increment to 207second video footage will be saved on the CF card.
① Rotate the [knob] counterclockwise to move the cursor to the self-activated recording setting, and press [Key 1] to enter the sub7menu.
③ Rotate the [knab] to select "OFF", "ON" and "Impact Sensitivity" options.
② After selecting "OH" or "On", press [Key 1] to save and return to the previous page.
② ANer selecting pimpact Sensitivity, press [Kay 1] to enter the suboption menu of sensitivity level. Rotate the [knob] to select "Off", "Low", "Medium" or "High" mode. Press [Kay 1] to save and return to the previous page.
14. Date stamp:
Users can set whether to display the time stamp in the lower right corner of photos and videos taken.
(1) Rotate the [knob] counter otherwise to move the cursor to the date stamp setting option, and press [Key 1] to enter
the sub7menu
○ Rotate the [knob] to move the cursor to select "Off" or "On" options. After selection, press [Key 1] to save and
return to the previous page.
15. Record audio:
User can set whether to record audio synchronously in the video.
(1) Rotate the [knob] counterclockwise to move the cursor to the recording audio setting option, press [Key 1] to
enter the sub7menu.
② Rotate the [know] to move the cursor to select "Off" or "On" option, other selection, press [Key 1] to save and
return to the previous page.
16. Beep sound:
Users can enable or disable the device key sound when an eBternal HDMI display is connected.
① Rotate the [kneb] counterclockwise to move the cursor to the beep sound setting option, press [Key 1] to enter the
sub7menu.
(2) Rotate the [knob] to move the cursor to select "Off" or "On" option, aNor selection, press [Key 1] to save and
return to the previous page
17.WIFI:
Through the WiFi connection, you can use your phone, PC or tablet as an eBternal viewfinder enabling users to
synchronously see the photos and videos on a larger screen.
⑤ Rotate the [knoa] counterclockwise to move the cursor to the WIFI setting option, and press [Key 1] to enter the sub7menu.
② Rotate the [knob] to move the cursor to select "On" or "Off" option. Select pOffp, and return to the previous page. Select pOnp to enable WiFi and return to the home screen.
Steps to connect to your mobile device:
©Download PardVision app from the Apple App Store or the Google Play Store.
② Cum on the WiFi on your device and on your mobile device.
① Search the WiFi on your mobile device Jthe device WiFi network is a string of characters starting with PARD, which is a uniQue string of numbers). Please enter the password 12345678 to connect.
④ Enter the application to operate and use.
Notes: After the WiFi is turned on, you cannot access the menu. Press and hold [Key 4] to disable the WiFi and then enter the menu interface.
18. Exposure:
Users can choose their preferred exposure setting.
C. Rotate the [knob] counterclackwise to move the cursor to the eBacquare setting and press [Key 1] to enter the sub/menu.
② Rotate the [knob] to select your preferred option. Press [Key 1] to confirm your selection.
19. Language:
Users can choose their preferred language.
Rotate the [knob] counterclockwise to move the cursor to the language setting option, press [OK] to enter the sub7menu.
② Rotate the [knab] to move the cursor to select the desired language. After selecting, press [Key 1] to switch the
system language and return to the previous page.
20. Date/time:
The user can set the system data and time of the device.
① Rotate the [knob] counterclockwise to move the cursor to the date/time setting option, press [Key 1] to enter the
sub7menu.
② Rotate the [knob] to adjust the setting date and time value, press [Key 1] to switch options, press [Key 4] to save
21. Format:
if users want to reformat the CF Card, it will delete all the data on the CF card permanently. Data cannot be recovered
after reformatting. Please operate with caution!
① Rotate the [knob] counterclockwise to move the cursor to the format setting option, and press [Key 1] to enter the
sub/menu.
(3) Initialize the [InIO] to have the career to select public or public system. ANY selection, press (http://12/10/1086), to confirm the relevant operation and return to the previous page.
22. Default settings:
If users decide to reset the device, it will restore the device to the device's original operating system and delete all of the user data and all personalPad settings in the device will be restored to the factory default settings. Please operate with caution!
① Rotate the [knob] counterclockwise to move the cursor to restore default setting option, press [Key 1] to enter the sub7menu.
(3) Rotate the [knob] to move the cursor to select pCancelp or pOKp option. After selection, press [Key 1] to confirm the relevant operation and return to the previous page.
23. Version:
This function displays the device's version.
(i) Rotate the [knoh] counterclockwise to move the cursor to the version option, press [Key 1] to enter the sub7menu to
view.
② Press [Key 1] again to e8it and return to the previous page.
Statement:
FCC WARNING
This device complies with part 15 of the FCC Rules. Operation is subject to the following two conditions:
(1) This device may not cause harmful interference.
[12] this device must accept any interference received, including interference that may cause undesired operation.
Note: This eQulipment has been tested and found to comply with the limits for a Class 0 digital device, pursuant to part 15 of the FCC Rules. These limits are designed to provide reasonable protection against harmful interference in a residential installation. This eQulipment generates, uses and can radiate radio frequency energy and, if not installed and used in accordance with the instructions, may cause harmful interference to radio communications. However, there is no guarantee that interference will not occur in a particular installation. If this eQulipment does cause harmful interference to radio or television reception, which can be determined by turning the eQulipment off and an, the user is encouraged to try to correct the interference by one or more of the following measures
—Reorient or relocate the receiving antenna.
—Increase the separation between the eEquipment and receiver.
—Connect the equipment into an outlet on a circuit different from that to which the receiver is connected.
—Consult the dealer or an experienced radio/CV technician for help.
Note: The Grantee is not responsible for any changes or modifications not eExpressly approved by the party responsible for compliance, such modifications could void the user's authority to operate the eEquipment. This device has been evaluated to meet general RF eExposure requirement. This eEquipment complies with FCC's RF radiation eExposure limit(s) set forth for an uncontrolled environment. This device end its antennas must not be co-located or conjunction with any other antenna or transmitter.
Follow Us


YdnFudgram

Website
e view card.com
Business Cooperation
sales support@aptrastechnologik.com
Service Center
aftersales@optmaxtechnology.com
PARD USA
Optimax Technology LLC
+1 000 986 4370
3500 Lakes de Court Suite 200, Reno, NY 89509, US


