MLP1WW - Suszarka do ubrań Element - Bezpłatna instrukcja obsługi
Znajdź bezpłatnie instrukcję urządzenia MLP1WW Element w formacie PDF.

| Typ produktu | Suszarka bębnowa wentylowana |
| Model | MLP1WW |
| Marka | Element |
| Pojemność bębna | 7 kg |
| Wymiary (wys. x szer. x gł.) | 85 cm x 60 cm x 60 cm |
| Waga urządzenia | 40 kg |
| Zasilanie | 230 V, 50 Hz |
| Moc przyłączeniowa | 2000 W |
| Klasa energetyczna | C |
| Programy suszenia | Bawełna, Syntetyki, Delikatne, Suszenie czasowe, Suszenie na sucho |
| Filtr kłaczków | Tak, do czyszczenia po każdym cyklu |
| Zabezpieczenie przed przegrzaniem | Tak, automatyczne wyłączenie |
| Blokada przed dziećmi | Nie |
| Poziom hałasu | 65 dB |
| Długość przewodu zasilającego | 1,5 m |
| Kolor obudowy | Biały |
| Typ otwierania drzwiczek | Na bok, lewa strona |
| System wentylacji | Wymaga odprowadzenia powietrza na zewnątrz |
| Czyszczenie skraplacza | Nie dotyczy (wentylowany) |
| Dostępność części zamiennych | Tak, pasek napędowy, grzałka, filtr |
Często zadawane pytania - MLP1WW Element
Pytania użytkowników dotyczące MLP1WW Element
0 pytanie dotyczące tego urządzenia. Odpowiedz na te, które znasz, lub zadaj własne.
Zadaj nowe pytanie dotyczące tego urządzenia
Pobierz instrukcję dla swojego Suszarka do ubrań w formacie PDF za darmo! Znajdź swoją instrukcję MLP1WW - Element i weź swoje urządzenie elektroniczne z powrotem w ręce. Na tej stronie opublikowane są wszystkie dokumenty niezbędne do korzystania z urządzenia. MLP1WW marki Element.
INSTRUKCJA OBSŁUGI MLP1WW Element
Installation Instructions
Pedestal MLP1WW
BEFORE YOU BEGIN
Read these instructions completely and carefully.
- IMPORTANT — Save these instructions for local inspector's use.
- IMPORTANT — Observe all governing codes and ordinances.
- Note to Consumer – Keep these instructions with your Owner's Manual for future reference.
• Completion time – 1 to 2 hours - Proper installation is the responsibility of the installer.
- Product failure due to improper installation is not covered under the Warranty.
CAUTION — Due to the size and weight of these products, and to reduce the risk of personal injury or damage to the product, TWO PEOPLE ARE REQUIRED FOR PROPER INSTALLATION.
- See washer and dryer installation instructions for additional installation requirements and guidelines.
TOOLS YOU WILL NEED
Phillips Head Screwdriver
17mm Open End Wrench or Adjustable Wrench
8mm Socket Wrench

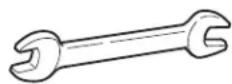
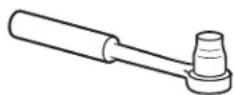
OR
8mm Socket
Electric Screwdriver

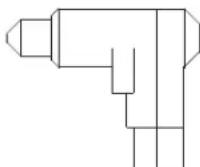
NOTE: Use Electric screwdriver matching with 8mm Socket.
KIT CONTENTS
4 Support Pads
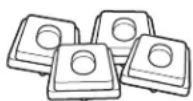
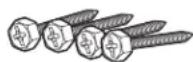
4 Mounting Screws
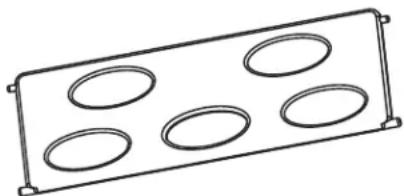
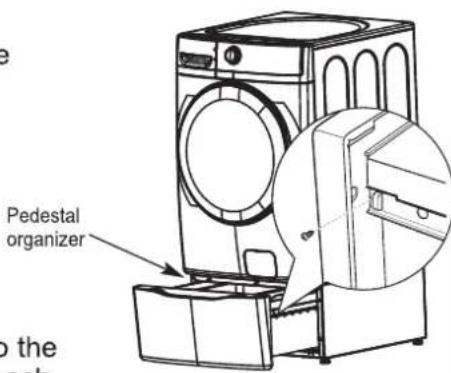
Pedestal Organizer
natural_image
Simple line drawing of a rectangular tray with six circular cutouts (no text or symbols)INSTALLATION PREPARATION
Remove the packaging.
The pedestal organizer is taped at the top of the shipping carton. Remove the organizer and set aside for final installation.
Flatten the product carton to use as a pad to lay the washer or dryer down on its side. Continue using the carton to protect the finished floor in front of the installation location.
1 REMOVE THE LEVELING LEGS
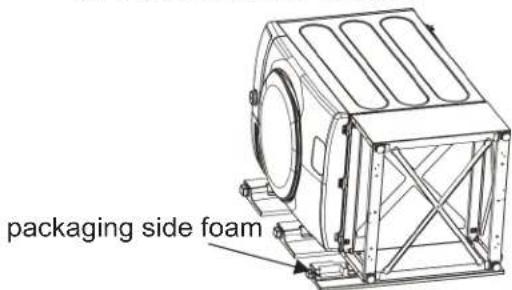
A Carefully lay the washer or dryer on its side to access the leveling legs on the bottom of the appliance.
IMPORTANT: Do not lay the washer or dryer on its back! Do not remove the shipping bolts on the back side of the washer. The bolts must remain in place until the washer is returned to an upright position.
NOTE: When laying the washing machine on its side, two packaging side foam must be placed on the side to protect the washing machine.
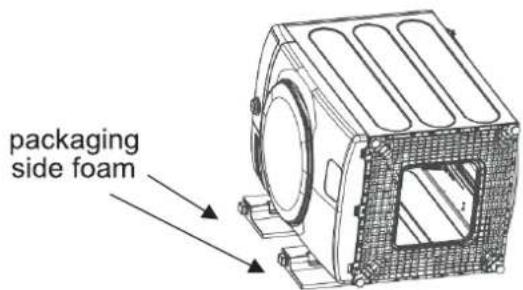
B Use an open-end wrench to remove the washer or dryer leveling legs.
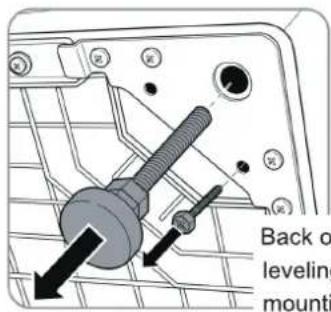
Back out and remove all 4 leveling legs and the 4 mounting screws
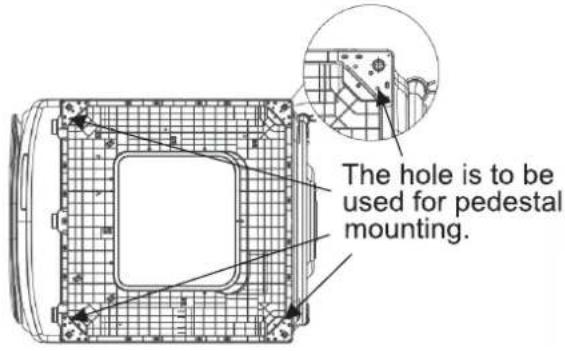
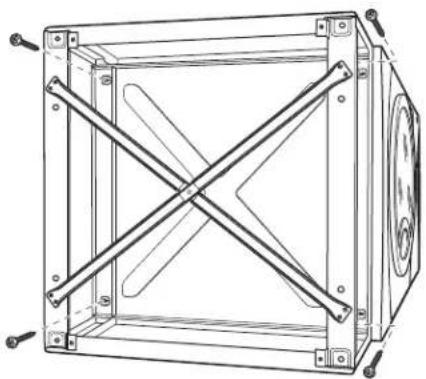
C Start and remove all 4 pedestal mounting screws prior to putting the pedestal in place. Use an 8mm socket wrench or electric driver to start and remove screws.
2 PREPARE THE PEDESTAL
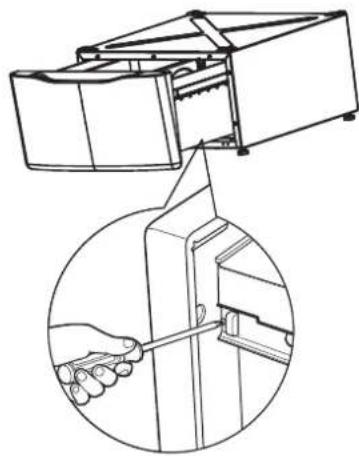
A Pull the drawer out as far as it will go.
B Remove screws from drawer slides. Slide drawer out of the base and set aside.
natural_image
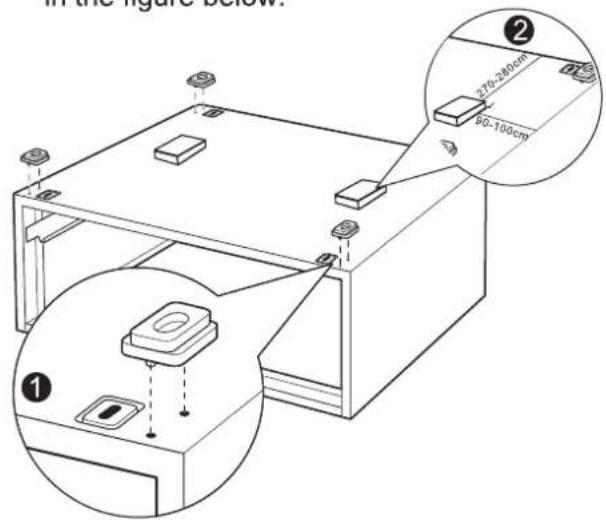
Technical line drawing showing a mechanical assembly with a magnified inset of a hand using a tool to adjust or install a component (no text or symbols present)C1. Locate the 4 support pads from the parts package. Each pad has 2 protrusions that fit into the holes on top of the pedestal. Press the rubber pads into each set of corner holes on the top of the pedestal as shown.
- Paste two sponges in the position as shown in the figure below.
3 INSTALL THE PEDESTAL TO THE WASHER OR DRYER
A Place the pedestal against the bottom of the unit. Check to be sure the drawer front is at the front of the unit.
NOTE: For easier alignment of screw holes, one packaging side foam should be placed under the pedestal.
Make sure that the front and back of the Cabinet and pedestal are aligned, and that the screw holes are aligned.
B Align the holes in the pedestal with the holes in the bottom of the unit. Use a Phillips screwdriver to install the 4 screws through the pedestal and into the unit—do not tighten.
natural_image
Technical line drawing of a mechanical enclosure with mounting holes and internal blades (no text or symbols)C Slide the pedestal toward the unit, until it is aligned front to back. Use an 8mm socket wrench to securely tighten the screws.
4 LEVEL THE WASHER OR DRYER
A Locate the 4 legs from the parts package and install.
B Stand the washer or dryer upright. Move it close to its final location.
C Make sure that the washer or dryer is level by placing a spirit level on top. Check side to side and front to back.
D Use an open ended wrench to adjust the legs in and out. Tighten the lock nut against the bottom of the pedestal.

natural_image
Technical line drawing of a mechanical clamp or bracket with a bolt and nut (no text or symbols)NOTE:
- To minimize vibration, the locking nuts must be tight.
- To reduce vibration, ensure that all four rubber leveling legs are firmly touching the floor. Push and pull on the back right and then the back left of your washer or dryer.
5 REINSTALL THE DRAWER
A Check to be sure the slides are closed.
B Slide the drawer into the opening. Align the drawer supports to the slides on each side.
C Reinstall the original screws into each drawer slide. Tighten both screws.
D Open the drawer fully. Place the pedestal organizer in the drawer. The drawer should slide smoothly when you push it closed.
Element, the Element Logo, and Bring it home are trademarks of Element Brand Holding, LLC. All other trademarks are the property of their respective owner, who has not sponsored, endorsed, or approved this product. ©2024 Element Appliance Company, LLC. All rights reserved.
Distributed by Element Appliance Company, LLC Augusta, GA 30909
For service, support and warranty information: Call 888.842.3577, email us at customerservice@elementelectronics.com or visit www.elementetelectronics.com
6 REMOVE SHIPPING SCREWS
Remove the 4 shipping screws on the back side of the unit.
7 FINALIZE THE INSTALLATION
Refer to the washer or dryer Installation Instructions to complete the installation.