ADX432T - Wyłącznik HAGER - Bezpłatna instrukcja obsługi
Znajdź bezpłatnie instrukcję urządzenia ADX432T HAGER w formacie PDF.

Pytania użytkowników dotyczące ADX432T HAGER
0 pytanie dotyczące tego urządzenia. Odpowiedz na te, które znasz, lub zadaj własne.
Zadaj nowe pytanie dotyczące tego urządzenia
Pobierz instrukcję dla swojego Wyłącznik w formacie PDF za darmo! Znajdź swoją instrukcję ADX432T - HAGER i weź swoje urządzenie elektroniczne z powrotem w ręce. Na tej stronie opublikowane są wszystkie dokumenty niezbędne do korzystania z urządzenia. ADX432T marki HAGER.
INSTRUKCJA OBSŁUGI ADX432T HAGER

text_image
:hager6LE003161Aa

natural_image
Technical line drawing of an electrical circuit breaker (no text or symbols)AU
Miniature circuit breakers residual current devices RCBO 6 to 40A

This device is to be installed only by a professional electrician fitter according to local applicable installation standards. For use with neutral on the right only.

Protection against dust

In case of work activities nearby, make sure that the electrical installation is protected against dust if the enclosure is not IP5x.
Electrical connection Earth leakage fault indication
text_image
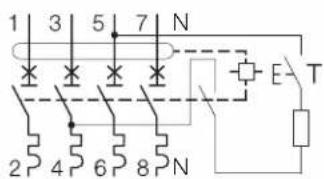
1 3 5 7 N 2r 4 6 8 N E TPlease note the following:
1- If RCBO trips OFF after installation,
2 possibilities:
- overloads/short-circuits → MCB trips.
- fault to earth → RCD trips.
2- The "main neutral" and "main earth" should be checked to ensure good connection.
3- If test button test fails, check for a presence of voltage on line side terminals.
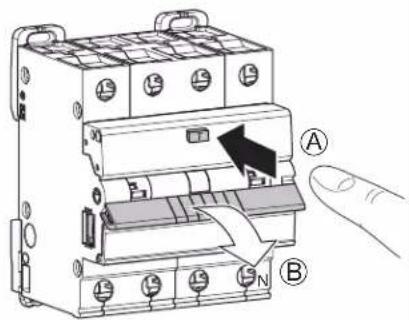
text_image
Diagram of an electrical circuit breaker with labeled components and a hand pointing to the component.Test the Safety Switch periodically (approximately every three months) by pressing Test button marked "T".
Positive contact indication

natural_image
Technical line drawing of an electrical circuit breaker with mounting holes and a switch (no text or symbols)If the RCBO trips OFF, the yellow window indicates an earth fault.

text_image
Three phase connection KDN380A KDN380G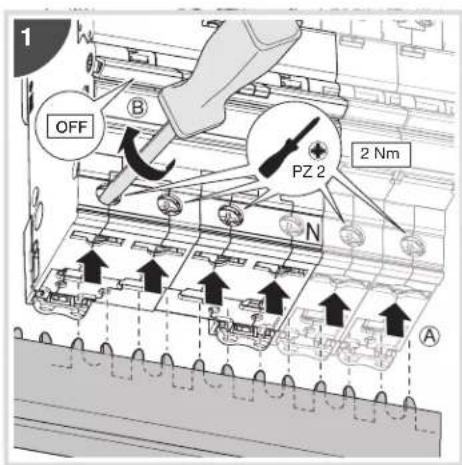
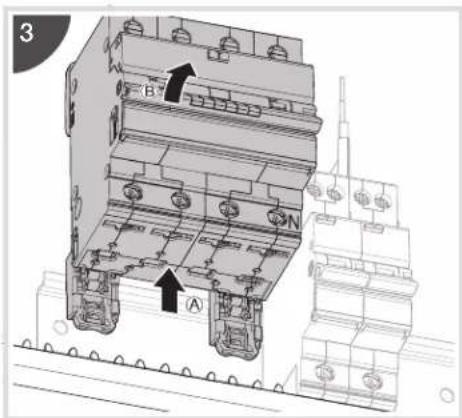
text_image
1 OFF B PZ 2 2 Nm N A
text_image
2 D PZ 2 2 Nm C N 1,5 mini 16 maxi 1,5 mini 25 maxi 1 2 mmEasy device removal with the DIN rail clip

text_image
OFF PZ 2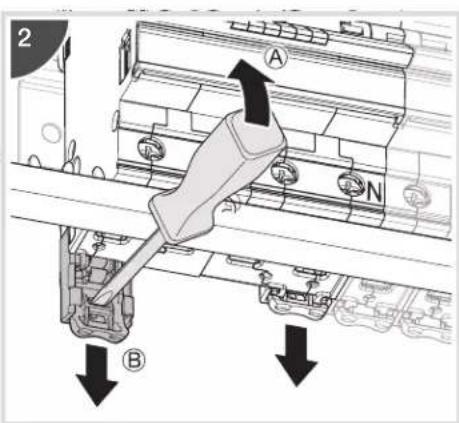
text_image
2 A B