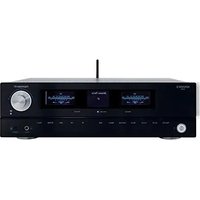
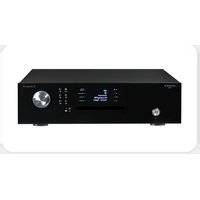
X-11100 - Amplificateur stéréo ADVANCE ACOUSTIC - Notice d'utilisation et mode d'emploi gratuit
Retrouvez gratuitement la notice de l'appareil X-11100 ADVANCE ACOUSTIC au format PDF.
| Type de produit | Amplificateur stéréo intégré |
| Marque | Advance Acoustic |
| Modèle | X-11100 |
| Puissance (estimation) | 2 x 100 W (8 Ω) en classe AB, mode High Bias (classe A sur premiers watts) |
| Impédance d'enceintes recommandée | 4 Ω minimum |
| Réponse en fréquence | Non spécifiée |
| Entrées analogiques | 5 x RCA stéréo (dont Phono MM), 1 x XLR symétrique (Balanced CD) |
| Entrées numériques | 2 x coaxiales (RCA), 4 x optiques (Toslink), 1 x AES/EBU (XLR), 1 x USB B (compatible PC/Mac) |
| Sorties | 1 x PRE OUT (préampli), 1 x AMP IN (ampli puissance), 1 x REC OUT (fixe), 1 x casque (jack 6,35 mm stéréo), 2 paires d'enceintes (A/B) sur bornes à vis |
| Fonctions spéciales | High Bias (classe A réglable), BYPASS (signal direct), balance, dimmer écran, sélection A/B, déconnexion préampli/ampli, reset |
| Alimentation | Auto-détection 115/230 V AC, interrupteur général ON/OFF, cordon secteur détachable |
| Consommation | Non spécifiée |
| Dimensions (L x H x P) | Non spécifiées |
| Poids | Non spécifié |
| Nettoyage | Chiffon sec et doux ; ne pas utiliser de produits abrasifs ou acides |
| Sécurité | Ne pas exposer à l'eau ou à l'humidité ; assurer une ventilation suffisante ; ne pas ouvrir l'appareil ; confier les réparations à un technicien qualifié |
| Réparabilité | Pièces détachées disponibles via service après-vente agréé ; réparation par personnel qualifié |
| Accessoires fournis | Cordon secteur, notice d'utilisation |
| Conformité | Directives EMC 2014/30/EU, LVD 2014/53/EU, RoHS 2 2011/65/EU |
| Garantie | 2 ans (selon législation en vigueur) |
FOIRE AUX QUESTIONS - X-11100 ADVANCE ACOUSTIC
Questions des utilisateurs sur X-11100 ADVANCE ACOUSTIC
0 question sur cet appareil. Repondez a celles que vous connaissez ou posez la votre.
Poser une nouvelle question sur cet appareil
Téléchargez la notice de votre Amplificateur stéréo au format PDF gratuitement ! Retrouvez votre notice X-11100 - ADVANCE ACOUSTIC et reprennez votre appareil électronique en main. Sur cette page sont publiés tous les documents nécessaires à l'utilisation de votre appareil X-11100 de la marque ADVANCE ACOUSTIC.
MODE D'EMPLOI X-11100 ADVANCE ACOUSTIC
Ce symbole figurant sur le produit ou son emballage signifié que votre équipement électrique etlectronique doit être mis au rebut séparément de vos déchets menagers lorsqu'il atteint la fin de sa durée de vie.II existe des systèmes de coilecte séparée pour le recyclage dans l'UE. Pour pius d'informations, veuiliez prendre contact avec les autorités locales ou le revendeur auquel vous avez acheté ce produit.
German
ATTENTION: afin de réduire tout risques de chocs électriques ou de feu, ne pas exposer votre apparéil à l'humidité ou à toutes sortes de liquides
Pour prévenir tout risques de chocs électriques, ne pas ouvrir l'appareil. Si un problème apparait, faites réparer vous appareil par un technicien qualifié.
LE POINT D'EXCLAMATION vous indiquera la présence d'informations importantes, tant au niveau utilisation que maintenance de votre apparéil.
Si vous souhaitez déplacer ou transporter votre apparéil, nous vous conseillons dans le cas d'un déménagement, d'un return pour réparation, etc...de réemballer dans son emballage d'origine votre apparéil.
Toutes les consignes de sécurité et instructions quand à l'utilisation de notre produit doivent faire l'objet d'une lecture attentive.
Les consignes de sécurité et instructions doivent être retenues pour un usage futuroi de leur produit
TENEZ COMPTE DES ALERTES
Les mises en garde inscrites sur votre apparéil ou imprimées dans ce manuel doivent être respectées.
SUIVRE LES INSTRUCTIONS
Toutes les instructions concernant l'utilisation et le fonctionnement de votre apparèils doivent être suivies.
EAU ET MOISISSURE
Votre apparéil ne doit pas être utilisé prés d'un point d'eau ou dans un environnement trop humide.
VENTILATION
Votre apparéil doit être installé de telle façon que sa ventilation ne soit enaucun cas entravée. Il ne faut pas l'utiliser sur un lit, un sofa ou une surface similaire qui obstrurait ses grilles de ventilation. Dans tous les cas, il convient de vérifier que votre apparéil puisse être ventilé naturellement. Ne pas l'encastrer.
SOURCES DE CHALEUR
Il est conseilé d'éloigner votre apparéil d'une source de chaleur type radiateur ou autres sources produitant une source de chaleur.
ALIMENTATION ELECTRIQUE
Le branchement de votre apparéil doit se faire en respectant les indications contenues dans ce manuel. Notre installation électrique doit être en conformité afin de permettre une utilisation en toute sécurité de votre apparéil.
MASSÉ ET POLARITÉ
Des précautions doivent être prises afin de respecter la polarité et la mise à la terre de votre apparéil.
PROTECTION DU CORDON SECTEUR
Votre cordon d'alimentation doit etre correctement installee afin qu'il ne soit pas piétiner ou arracher.
NETTOYAGE
Votre apparéil doit être nettoyée seulement avec les produits préconisés par le fabricant. Des produits trop agressifs contenant des acides peuvent endommages les différentes surfaces de votre apparéil.
AUTRES SOURCES D'ALIMENTATION
Dans le cas d'une utilisation d'une antennae externe, vous nevez I'elsoigner d'une ligne electrique.
PERIODE D'INUTILISATION
Si vous quittez votre domicile pour une longue période, nous vous conseillons de débrancher votre apparéil.
PENETRATION D'OBJECTS OU DE LIQUIDE
Des précautions doivent être prises afin d'empêcher la déténération d'objets ou de liquide à l'intérieur de votre apparéil.
SERVICE
Votre apparéil doit être impérativement dépanné par du personnel compétent et qualifié. Afin de connaître la station technique la plus proche, merci de contacter votre distributeur national.
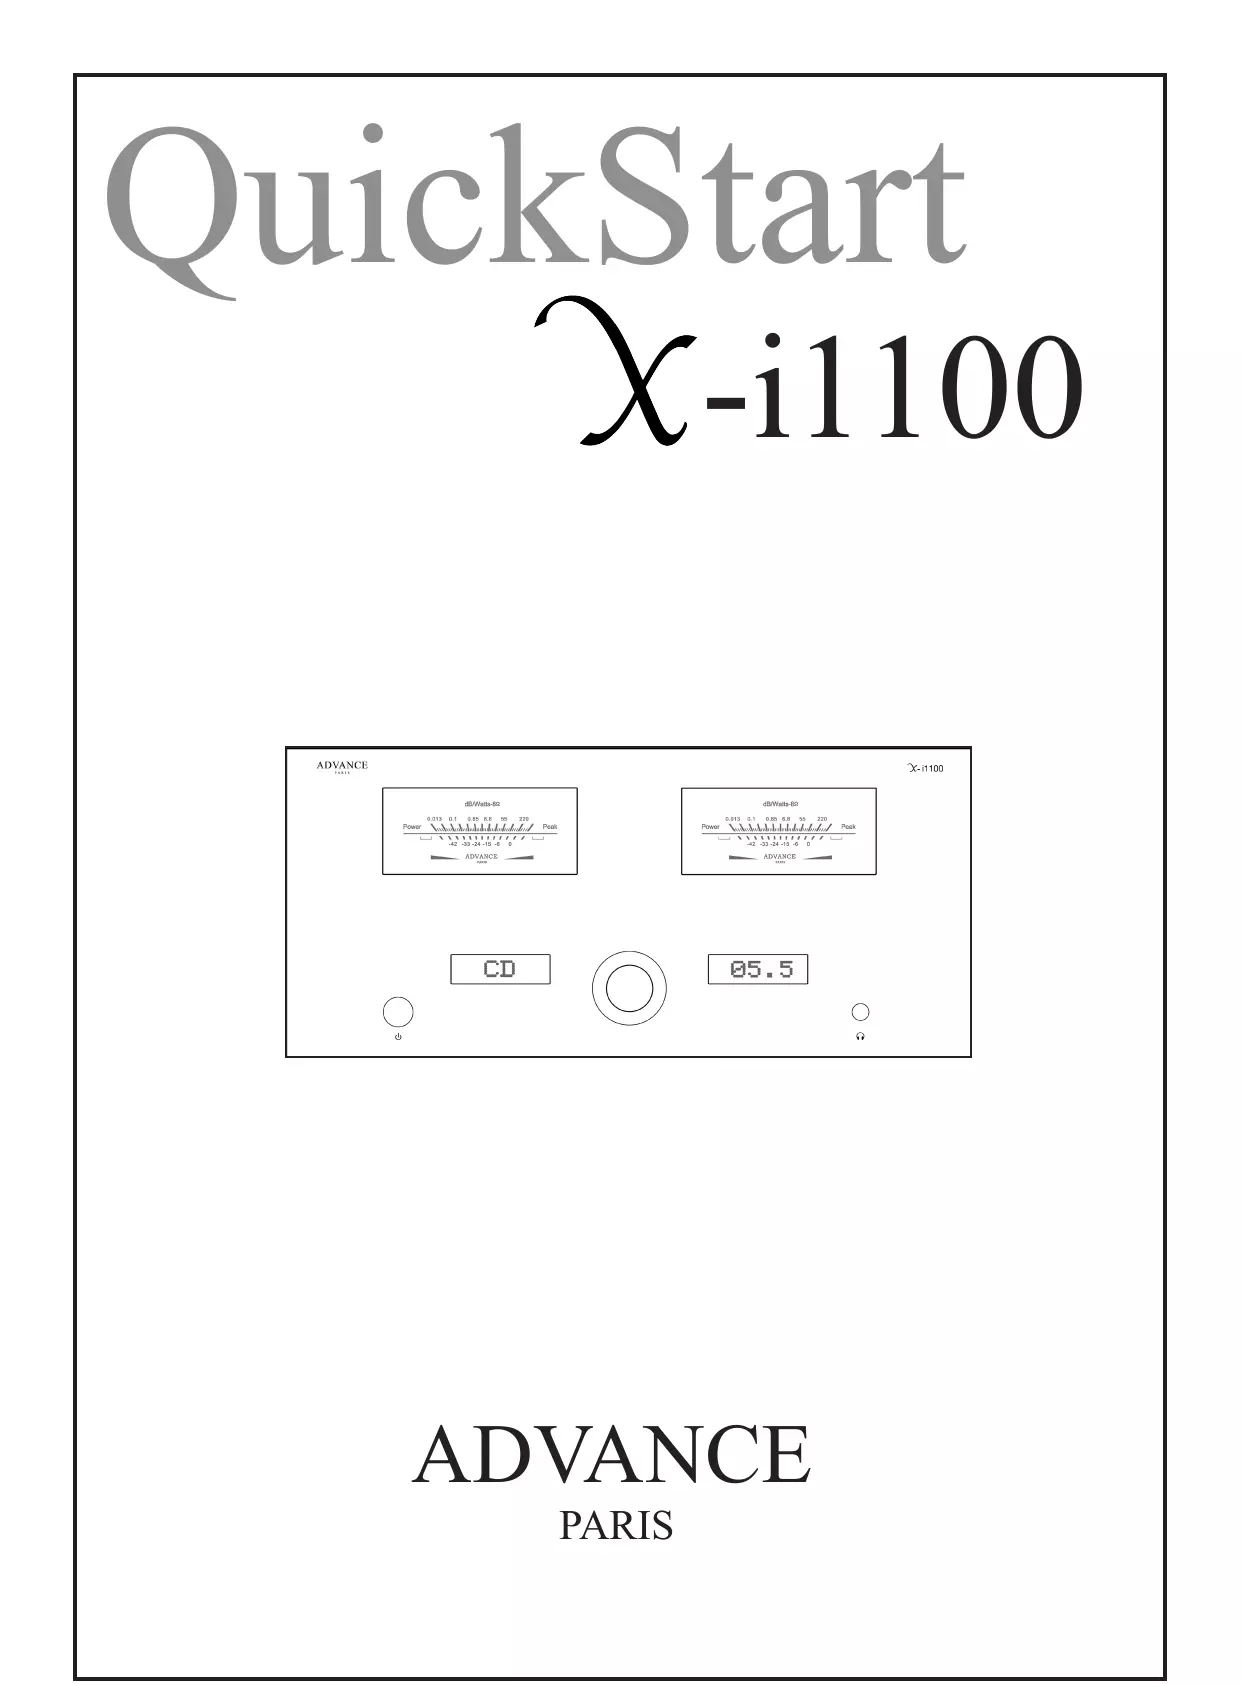
Appuyez sur ce bouton pourmettre en marcheYOUR appareil (eclairage blanc deyer bouton apres sa temporisation).La mise en marche deyer appareil ne peut se faire que si le bouton Marche/ Arret general situé sur la face arriere est en position ON.En mode STANDBY OFF, l'alimentation principale est coupée a I'exception du micro-controleur servant a activer I'etat de veille de I'appareil. Le bouton est allumé en rouge.
Ces afficheurs vous indiqueront plusieurs informations en fonction du menu sélectionné. Par défaut, il affichera le dernier niveau du volume et la dernière source sélectionnée. Les informations sont: INPUT, BALANCE, BY-Pass (réglage de tonalité ON ou OFF ou signal direct), DIMMER (luminosité des afficheurs), SPEAKER (seLECTION paire A ou B), AMPLIFIER (déconnexion ampli du préampli), HIGH BIAS (ON ou OFF), INFO (Version du logiciel) et RESET (Remise à zéro de l'appareil).
DISPLAY
La sortie casque de votre amplificateur permet d'alimenter un casque stéréophonique conventionnel (non fourni) disposant d'une prise de type jack 6,35mm stéréophonique. Le niveau de sortie de cette prise ne permet pas l'utilisation d'un casque electrostatique.
6,35MM STEREO JACK HEADPHONES
Après avoir brancher electriquement votre amplificateur,mettre l'interrupteur principal ON/OFF situé sur la face arriere en position ON. Le bouton de standby situé sur la façade avant de votre amplificateur s'allume en rouge. Appuyer sur ce bouton pourmettre en marche l'appareil,le standby s'allume alors en blanc,l'afficheur indique le niveau sonore.
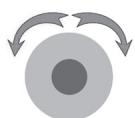
Votre X-i1100 affiche alors sur l'affichage ② la derniere source écoutee et sur l'affichage ③ le dernier volume sonore selectionné que vous pouze augmenter ou diminuer en tournant ce bouton. Un appui successif sur ce bouton indiquera dans l'afficheur ② les différents menus auxquels vous pouze acceder. Lorsque vous etes sur le menu choisi, tourner le bouton pour changer le réglage. Prenons un exemple, appuyez sur le bouton successivement jusqu'à ce qu'apparaisse sur l'affichage ② le mot INPUT (entree), tournez alors ce bouton et les différentes sources s'afficheront. Sélectionner en appuyant à nouveauau sur ce bouton ou attendre 3 secondes la validation automatique. Le principe est identique pour toutes les fonctions.
MULTIFUNCTIONS BUTTON
- Only when BY PASS is Off / Uniquement quand BY PASS est Off /Nur wenn BY PASS Off
DIMMER ADJUSTMENT
D
DIM2
Dm3

GO TO SPEAKER
FEEFF
GO TO AMPLIFI
IFI

GO TO HIGH BIAS
HIGH EIA
GO TO INFO
INF

GO TO RESET
F F T F F

SPEAKER SELECTION
PAIR R OR PAIR B

AMPLIFIER SEPARATE
OFF OR ON

* SELECTION BY SWITCH ON THE REAR PANEL ONLY
VEF: 1. E

RESET SELECTION
YES OR NO
CONNEXIONS FACE ARRÈRE REAR PANEL CONNECTIONS RÜCKSEITIGE ANSCHLUSSE PANNELLO POSTERIORE COLLEGAMENTI
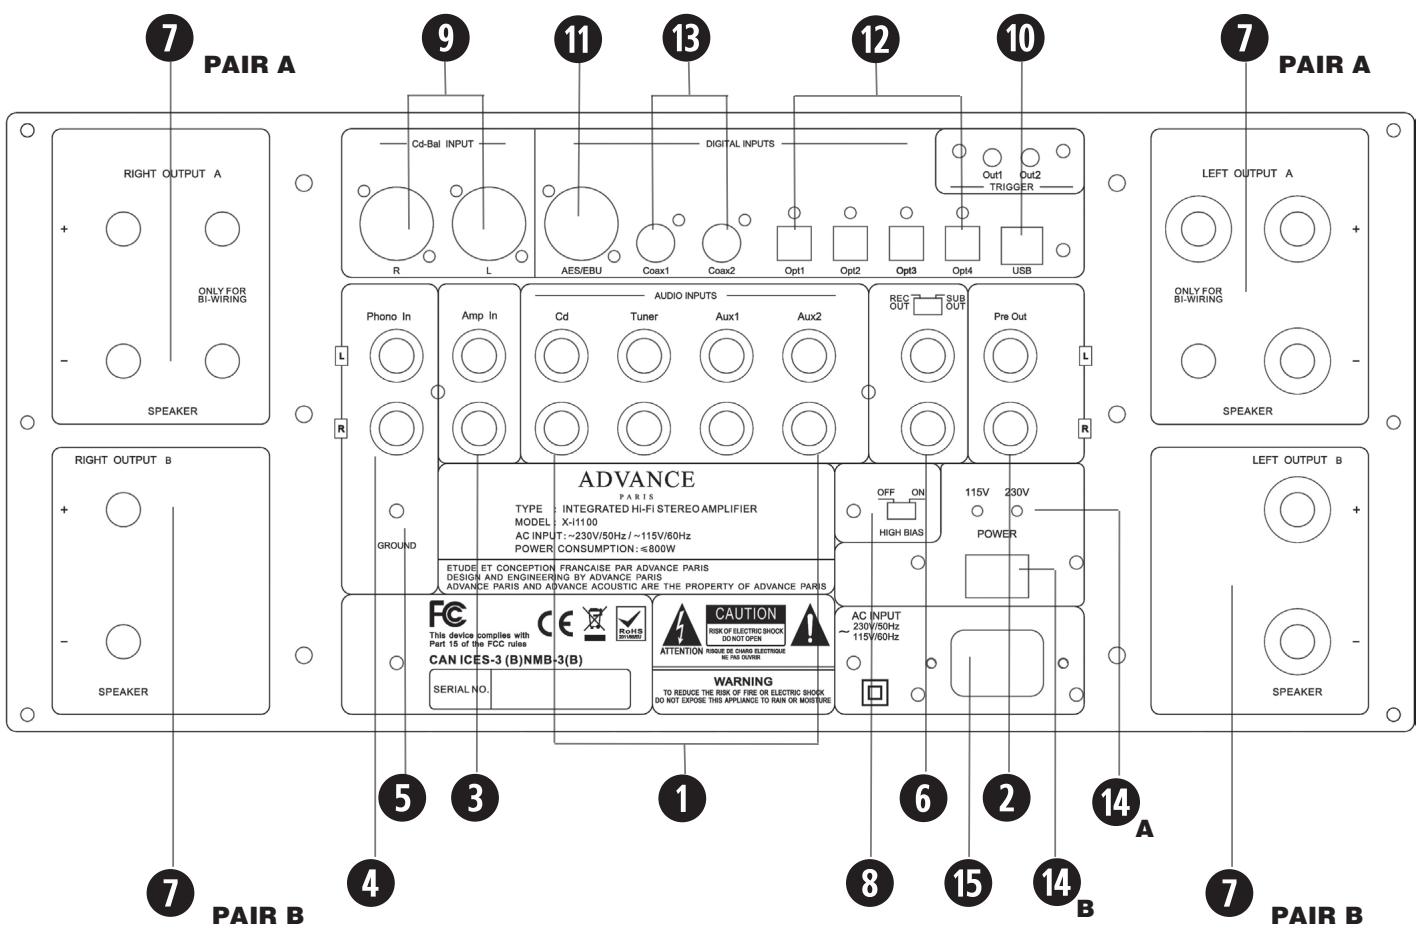
ENTRÉES DES SOURCES
Vou dece connecter vos sources sur les entrées stéréophoniques correspondantes. Toutes ces entrées sont normalisées, elles conviennent à toutes sources standards comme des tuners, des lecteurs CD, des lecteurs MP3, des lecteurs DVD, etc...
Remarque: Ces entrées conviennent uniquement à des signaux audio analogiques. Elles ne doivent pas être raccordées à la sortie numérique d'un lecteur de CD ou d'un autre apparéil à sortie numérique.
INPUTS
Vous doivent connecter avec la plaine disque sur les prises RCA gauche (L) et droite (R). Les platines disque incluent en général un petit fil de masse qu'il faut relier à la vis de masse PHONO GROUND. Dévisser le connecteur de masse, insérer le fil de masse dans la tige du connecteur puis revisisser afin que le fil de masse soit maintainu.
PHONO INPUT AND GROUND TERMINAL
Si vous souhaitez utiliser un amplificateur de puissance plus puissant et utiliser le X-i1100 comme préamplificateur, branchez-le aux prises PRE OUT et connectez toutes les enceintes et le caisson de grave à l'amplificateur de puissance.
PRE OUT / PREAMPLIFIER OUTPUTS
Si vous souhaitez utiliser uniquement la section amplificateur de puissance de votre X-i1100, connecter sur les prises L/R AMP IN votre autre préamplificateur ou table de mixage audio.
AMP. IN / POWER AMPLIFIER IN
6 SORTIE REC Il s'agit d'une
Il s'agit d'une sortie ligne fixe analogue (le signal ne varie pas avec le potentiomètre de volume). Permet de raccorder un enregistrateur de type cassette, MD, etc...
REC OUTPUT
Paire d'enceinte A: Brancher des enceintes ayant une impédance minimale de 4 ohms. Brancher l'enceinte droite aux bornes repérées 'R +' et 'R- ' en s'assurant que 'R+ ' est reliée à la borne '+ ' de l'enceinte et 'R- ' est reliée à la borne '- ' de cette même enceinte. Brancher le haut-parleur gauche aux bornes repérées 'L+ ' et 'L- ' en procédant de la même manière.
Pour la deuxième paire d'enceinte (B) procéder de la même façon que la paire B.
On peut utiliser les bornes serre-fils pour courants élevés comme bornes à vis pour les câbles comptant des cosses plates, des broches, des prises "banane", ou pour des câbles相对较ient des fils nus.
Les fils nus et les broches s'inserent dans le trou diamétral perché dans la tige de la borne.
Desserrer la bague en plastique jusqu'à ce que le trou dans la tige soit visible. Insérer la broche ou le fil nu dans le trou, puis fixer le cable en vissant la bague de la borne.
Eviter tout risque que le métal nu des câbles de haut-parleurs ne touche la face arrrière ou un autre connecteur. S'assurer que la longueur dénudée ou la longueur de la broche ne dépasse pas 1/2" (1 cm) et qu'il n'y a aucun brin libre.
SPEAKER TERMINALS
En mode High Bias (ON), votre amplificateur est assimilable à un amplificateur en Classe A sur les premiers watts d'utilisation. L'utilisation de ce mode se traduit par un échauffement important, aussi votre amplificateur doit rester correctement ventilé.
HIGH BIAS SELECTOR
ENTRÉE SYMétrIQUE CD
Si vous disposez d'un lecteur CD possédant une sortie symétrique (ou autre source), vous pouvez raccorder cette sortie stéreo à l'entrée symétrique stéreo BAL.R et BAL.L de votre X-i1100.

BALANCED CD INPUT
Note: Ne pas allumer votre amplificateur avant que la connexion USB ait eté faite.
A partir de votre ordinateur fixe ou portable, vous pouze dire ces fichiers audio sur votre amplificateur par l'intermédiaire de la prise USB. Compatible avec Window 2000 / Win XP / Vista / 7, Linux, et Mac OS X. Certains systèmes d'exploitation n'intègrent pas le driver nécessaire à l'utilisation de la prise USB B, dans ce cas, vous pouze le télécharger sur notre site www.advance-acoustic.com.
USB B INPUT
La norme AES/EBU définit la méthode de transfert pour l'audio numérique professionnelle. Cette norme a vu le jour dans les années 80 (AES3-1985, AES3-1992). Elle est survenue suite à la collaboration entre l'Audio Engineering Society (AES) et de l'European Broadcasting Union (EBU) permettant un échantillonnage de 32, 44,1 et 48 kHz en 16 bits de quantification qui a évolué par la suite jusqu'à 96 et 192 kHz en 20 et 24bits. Les signaux à la norme AES/EBU sont transmis par câbles XLR - dont l'impédance fait 110 ohms - qui permettent le transport du signal symétrique sur des grandes
longueurs. Cette norme est aussi appelé AES3. Si votre source est équipé de cette sortie, alors connectez la sur cette entrée.
AES/EBU INPUT
Votre amplificateur est équipé de deux entrées coaxiales et de quatre entrées optique. Vous pouvez connecter sur ces entrées, la sortie numérique de votre lecteur Cd, MD, etc... et profiter de l'excellente qualité du convertisseur intégré.
Votre amplificateur X-i1100 est equipoé d'un dispositif qui détermine la tension d'alimentation utilisée (115 ou 230V). La tension active est indiquée par la led bleu allumée (115 ou 230V).
Après avoir brancher votre cordon secteur sur la prise de votre X-i1100, mettez votre X-i1100 sous tension en commutant l'interrupteur général sur ON.
Pourmettre en marchevoireX-i1100,appuyez sur le bouton marche/arrêt situated sur la face avant.
POWER CORD / VOLTAGE INFORMATION LED / GENERAL ON OFF SWITCH
Nous déclarons sous notre seule responsabilité que l'appareil, auquel se refère cette déclaration, est conforme à la réglementation européen concernant les directives EMC 2014/30/EU, LVD 2014/53/EU et RoHS 2 2011/65/EU.
Pour une déclaration complète, merci de voir sur « www.advanceparis.com/doc »
Advance Paris Sarl, 13 rue du coq gaulois - 77170 Brie Comte Robert - France
www.advanceparis.com
NOTES
ADVANCE
PARIS