
PC3200 - Mémoire RAM PROGRESS - Notice d'utilisation et mode d'emploi gratuit
Retrouvez gratuitement la notice de l'appareil PC3200 PROGRESS au format PDF.

| Type de produit | Aspirateur traîneau |
| Modèle | PC3200 |
| Marque | PROGRESS |
| Puissance variable | Non (modèle PC3200 sans contrôle de puissance variable) |
| Capacité du sac | Sac à poussière Menalux T183 (jetable) ou sac textile réutilisable |
| Filtres | Filtre de protection moteur et filtre d'évacuation (lavables) |
| Longueur du câble | Enrouleur automatique, repère jaune pour longueur idéale |
| Accessoires inclus | Flexible, tubes métalliques, buse sol (PC3200), buse pour tissus (PC3201/3205), buse fente (PC3201/3205) |
| Stationnement | Vertical et horizontal |
| Indicateur de sac plein | Fenêtre indicatrice rouge lorsque le sac est plein |
| Entretien | Sac à remplacer régulièrement ; filtres à rincer sous l'eau et sécher complètement |
| Sécurité | Arrêt automatique en cas de blocage ou filtre obstrué ; ne pas utiliser sur surfaces humides |
| Pièces détachées | Sacs Menalux T183, filtres disponibles |
| Utilisation prévue | Domestique uniquement |
FOIRE AUX QUESTIONS - PC3200 PROGRESS
Questions des utilisateurs sur PC3200 PROGRESS
0 question sur cet appareil. Repondez a celles que vous connaissez ou posez la votre.
Poser une nouvelle question sur cet appareil
Téléchargez la notice de votre Mémoire RAM au format PDF gratuitement ! Retrouvez votre notice PC3200 - PROGRESS et reprennez votre appareil électronique en main. Sur cette page sont publiés tous les documents nécessaires à l'utilisation de votre appareil PC3200 de la marque PROGRESS.
MODE D'EMPLOI PC3200 PROGRESS
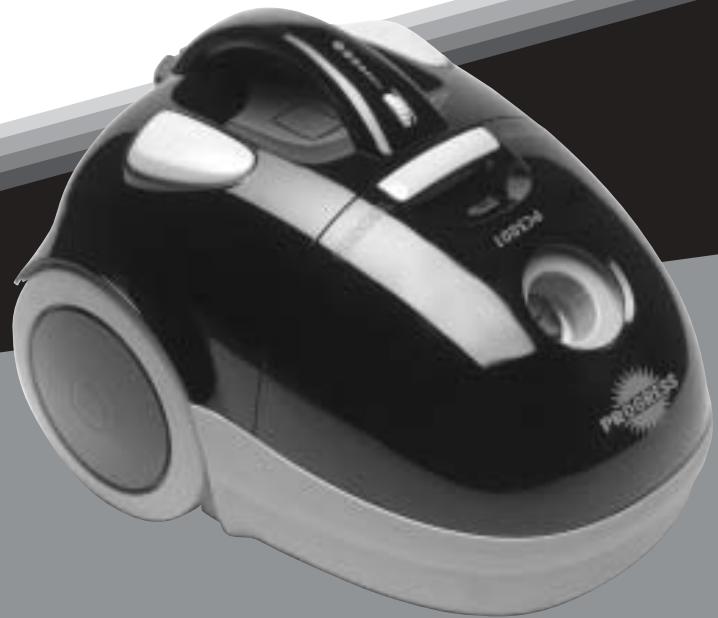
natural_image
Black and white photo of a vacuum cleaner with visible branding (no text or symbols on body)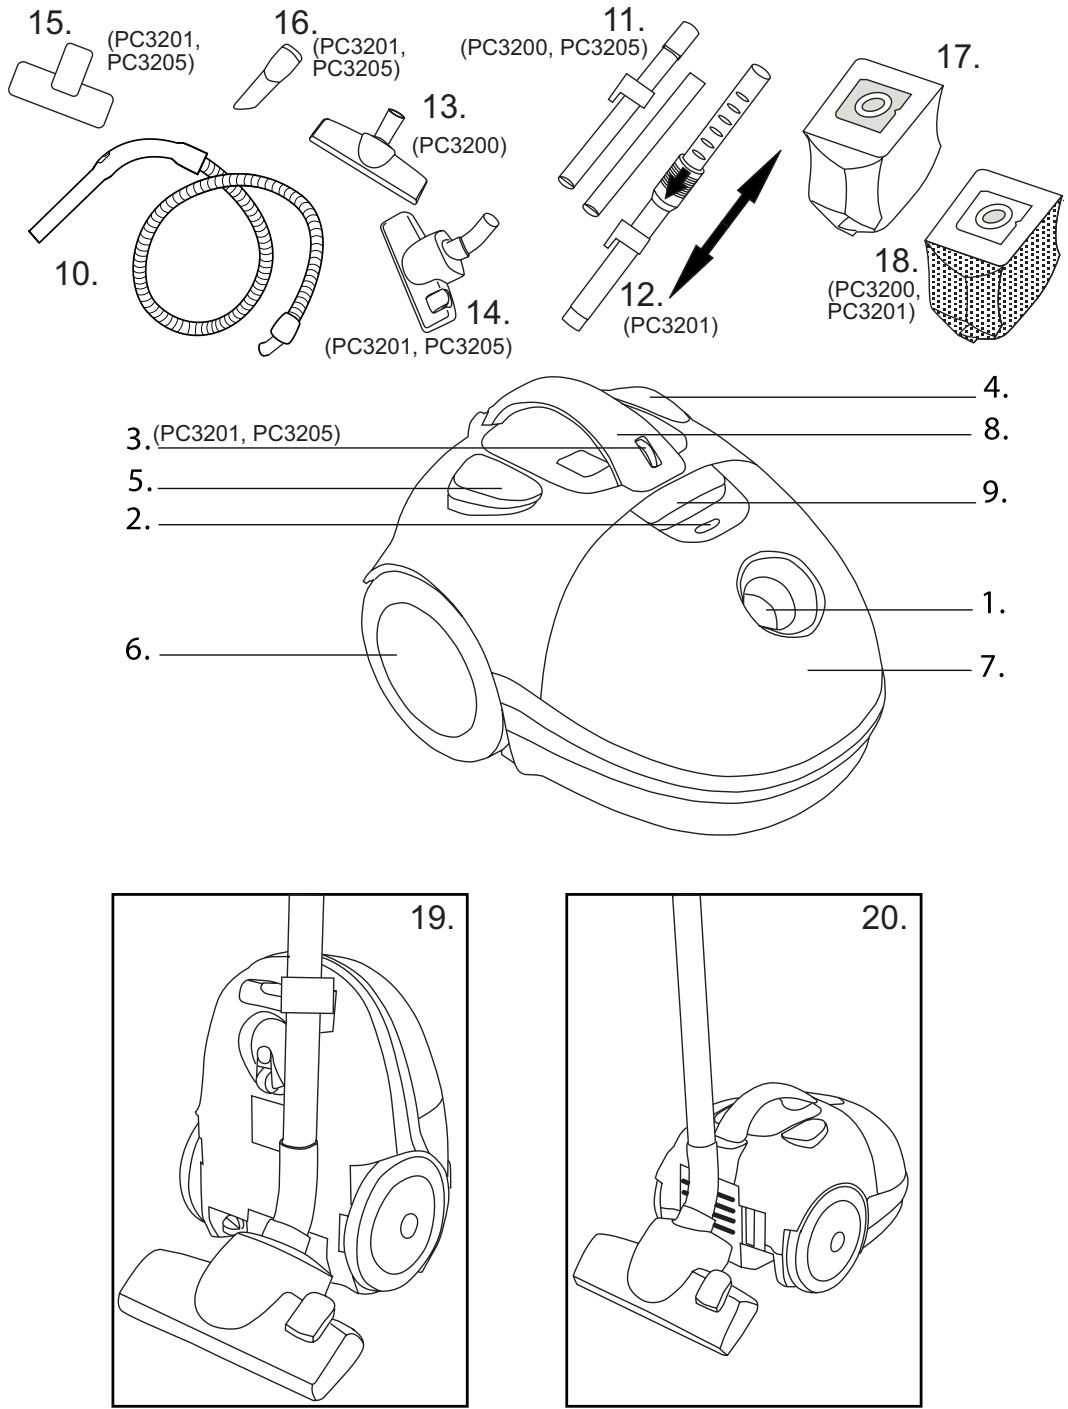
natural_image
Line drawing of a hand using a vacuum cleaner to lift or remove air (no text or symbols)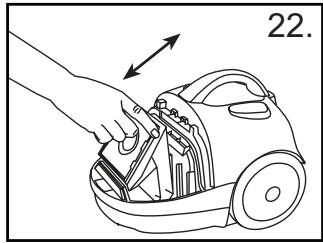
natural_image
Line drawing of a hand using a vacuum cleaner to cut the airway (no text or symbols present)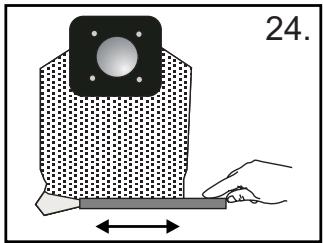
natural_image
Diagram of a mechanical component with a square top and a rectangular base, showing a hand interacting with it (no text or symbols)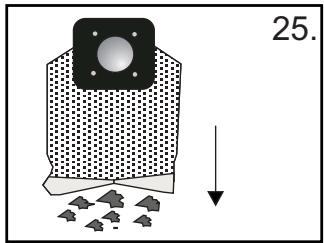
natural_image
Two black-and-white diagrams showing a container with liquid droplets and a small object, separated by a diagonal line (no text or symbols)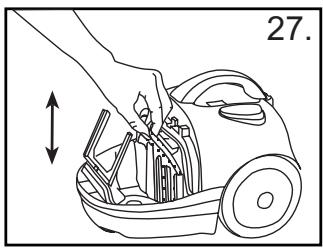
natural_image
Line drawing of a hand placing a component into a vacuum cleaner's airbag, with no text or symbols present.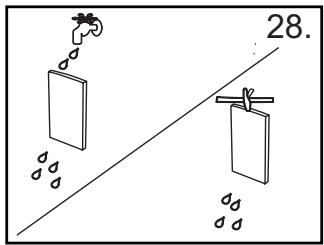
natural_image
Line drawing of a hand holding a small mechanical component, no text or symbols present
natural_image
Line drawing of a hand using a vacuum cleaner to adjust components (no text or symbols)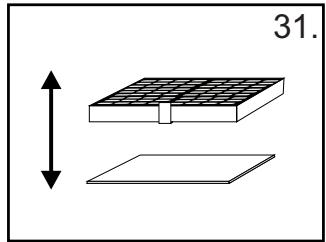
natural_image
Diagram showing a grid-patterned structure with a vertical double-headed arrow and a flat base, labeled '31.' (no text or symbols on the diagram itself)English
Français
Italiano
Español
Portugues
Magyar
Polski
Hrvatski
Slovensky
Česky
DESCRIPTION
| 1. | Suction inlet | 11. | Metal tubes (PC3200, PC3205) |
| 2. | Dustbag full indicator | 12. | Telescopic tube (PC3201) |
| 3. | Variable power control (PC3201, PC3205) | 13. | Floor nozzle (PC3200) |
| 4. | On/off switch | 14. | Dual purpose floor nozzle (PC3201, PC3205) |
| 5. | Cable rewind button | 15. | Upholstery nozzle (PC3201, PC3205) |
| 6. | Wheel | 16. | Crevice nozzle (PC3201, PC3205) |
| 7. | Dustbag compartment | 17. | Dustbag |
| 8. | Carrying handle | 18. | Clothbag (PC3200, PC3201) |
| 9. | Compartment open button | 19. | Vertical parking |
| 10. | Hose | 20. | Horizontal parking |
IMPORTANT SAFEGUARDS
Read this instruction booklet carefully.
Before using the appliance, check that the mains power voltage corresponds to the voltage shown on the rating plate.
Do not switch the appliance on if it appears to be faulty in any way or it has a damaged cord or plug. Do not try to repair the appliance by yourself. For repairs or accessories, contact Electrolux Customer Services on 08706 055 055.
➢ Always remove the plug from the power socket when the appliance is not in use and before carrying out any cleaning or maintenance operations.
➢ Never leave the appliance unattended when it is switched on. Keep the appliance out of reach of children.
This appliance is for domestic use only. Use as described in this instruction booklet.
Do not pull the appliance by the cord. Do not unplug by pulling on the cord.
Do not use appliance on wet surfaces or to vacuum liquids, mud, ash and burning cigarette butts. Do not vacuum up any highly flammable or explosive substances or gases.
Do not unplug the vacuum cleaner with wet hands.
Do not operate the vacuum cleaner too close to heaters and radiators, stoves etc.
Before you start using the vacuum cleaner, please remove large or sharp objects from the floor to prevent damage to the cloth dustbag.
INSTRUCTIONS FOR USE
Before placing into operation make certain that the filters are in the proper position.
Before using the appliance, unwind a sufficient length of cable and insert the plug into the power socket. A YELLOW mark on the power cable shows the ideal cable length. Do not extend the cable beyond the RED mark.
➢ Press the ON/OFF button to switch the appliance on. It is advisable to set the power control to MIN before switching on the appliance (PC3201, PC3205).
To rewind the power cable, press the rewind button with foot, and guide the cable with hand to ensure that it does not whip causing damage.
By moving the variable power control, the suction power can be adjusted (PC3201, PC3205).
MAINTENANCE
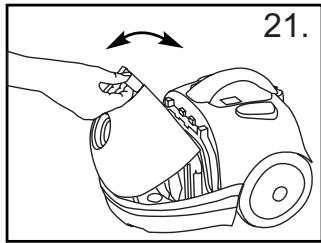
REPLACING THE DUSTBAG
- Always operate the cleaner with the dustbag installed.
If you forget to attach the dustbag or attach it in the wrong manner, the dust cover may not close completely.
➢ After removing the flexible hose, open the front cover (fig. 21).
Remove the support of the bag.
Remove the dustbag and insert a new one (fig. 22).
➢ Close the cover by pressing down until it clicks (fig. 21).
Dustbag reference number Menalux T183.
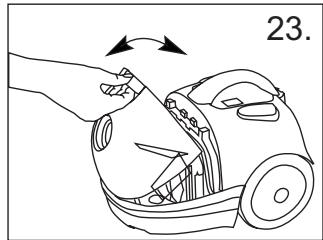
Textile dustbag (PC3200, PC3201)
Remove the textile bag from the holder (fig. 23).
➢ Slide the plastic clip away from the bag to open and empty it (fig. 23-24).
➢ Replace the plastic clip ensuring that both sides of the bag are parallel (fig. 23).
➢ Replace the bag into the holder (fig. 23).
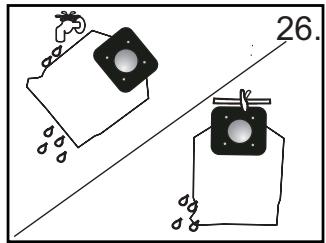
Note: The bag may be washed in luke warm water and dried completely. It should not be washed in washing machine (fig. 26).
➢ Close the cover by pressing down until it clicks (fig. 21).
REPLACING THE FILTERS
The dustbag must be replaced if the window of the dustbag full indicator is completely red when the cleaner is operating at maximum power and the nozzle is raised from the floor.
Filters should be replaced at least twice a year or when they become visibly soiled.
- Always operate the cleaner with filters installed to avoid reduced suction.
➢ Disconnect from electrical outlet before changing the filters.
Do not use a washing machine to rinse filters.
➢ Pull dustbag upward and remove the motor protection filter (fig. 27).
➢ Rinse the filter under tap water and dry it completely (fig. 28).
➢ Place the filter back into the cleaner (fig. 27).
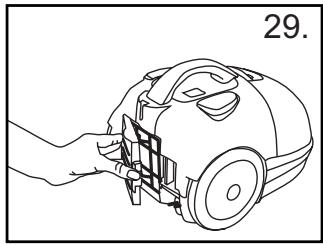
➢ Open the filter cover to remove the exhaust filter with grill (fig. 29, 30).
▶ Take the filter out of the grill (fig. 31).
➢ Rinse the filter under tap water and dry it completely (fig. 28).
➢ Place the filter back into the grill and put it back into the cleaner (fig. 30, 31).
▶ Close the filter cover (fig. 29).
PROTECTING THE ENVIRONMENT
- Attempt to recycle packaging material and old appliances.
The cardboard packaging can be placed in the waste paper collection.
➢ Deposit the plastic bag made of polyethylene (PE) at the PE collection point for recycling.
Recycling the Appliance at the end of its life:
The plastic components all carry a material identification marking so that, like the other materials, they can be recycled at the end of the life of the appliance.
➢ Please inquire with your local authority.
Blocked air flow and dirty filters:
The cleaner stops automatically if a blockage occurs in the nozzle/tube/hose or if the filters are blocked with dirt.
➢ Disconnect from mains and allow the cleaner to cool for 20-30 minutes. Remove blockage and/or clean filters.
▶ Restart the cleaner.
Marque : PROGRESS
Modèle : PC3200
Catégorie : Mémoire RAM