MODE D'EMPLOI 707 BERNINA
My
BERNINA
Guide
| Page | Page | Page |
| Adjusting motor model 707 | 5 | Flat joining seam | 23 |
| Adjusting motor model 717 | 4 | Flat seam | 17 |
| Adjusting stitch length | 10 | Gathering | 20 and 37 |
| Applique work | 38-39 | Gathering of Material | 20 |
| Automatic Stitches | 14 | Gusset Seam | 17 |
| Basting | 24 | Hemmer | 34 |
| Cind-hems | 21 | Hems in Jersey Material | 15 |
| Bobbin and bobbin case model 717 | 4 | Hemstitching | 44 |
| Bobbin and bobbin case model 707 | 6 | Hemstitch needle | 44 |
| Breakdowns | 45-47 | Inserting the bobbin | 7 |
| Buttonholes | 25 | Inserting zips | 31 |
| Buttonholes with cord | 26 | Jersey repairs | 16 |
| Changing Presser feet | 9 | Jersey seams | 17 |
| Cleaning and Oiling model 707 | 48 | Lace on Jersey | 18 |
| Cleaning and Oiling model 717 | 50 | Lace in material | 19 |
| Cored Buttonholes | 26 | Lap hemmer | 36 |
| Earning | 27-29 | Lowering drop feed control | 8 |
| Earning Fine Socks | 28 | Lycra seams | 23 |
| Earning Sleeves | 28 | Monograms | 46 |
| Earning Terry Cloth | 29 | Neatening seams | 13 |
| Earning with Wool | 29 | Needle Position | 12 |
| Double hemstitch needle | 43 | Oiling Model 707 | 48 |
| Double needle | 42 | Oiling Model 717 | 50 |
| Holdings - Fancy | 18 | Patching | 22 |
| Holding with gimp | 39 | Patching Jersey | 16 |
| Embroidery Designs | 14 | Patching Material | 22 |
| Plastic seams | 23 | Pintucking | 43 |
| Plastic Thread | 20 | Pre-embroidered applique | 44 |
| Plastic Waistband | 18 | Quick seam | 17 |
| Electrical connections model 717 | 4 | Reverse Sewing | 12 |
| Electrical connections model 707 | 5 | Reverse stitching | 12 |
| Finishing of Seams | 13 | Ruche | 44 |
Name:
Address:
Date of delivery: Machine No.
Dear Bernina Customer,
You are now the happy owner of a new Bernina. We greatly appreciate the confidence you have placed in us and
you that you will not be disappointed.
We have deliberately chosen the title, "My Bernina Guide".
because we are certain that this tuition book will become
Together with your book you will receive instruction from you
Bernina dealer. Your samples of work can then be mounted
on the red printed spaces providedherefore
Special attachments are required for some of the jobs described
in this book. These can be supplied against extra charge.
Your Bernina dealer will be glad to advise you.
As soon as you have mastered the sewing techniques taught
to you during your instruction period you will discover that
sewing with a Bernina is a pleasure.
We wish you every success.
Fr. Gegauf Ltd., Manufacturers of Bernina Sewing Machines
Stockborn TG / Switzerland
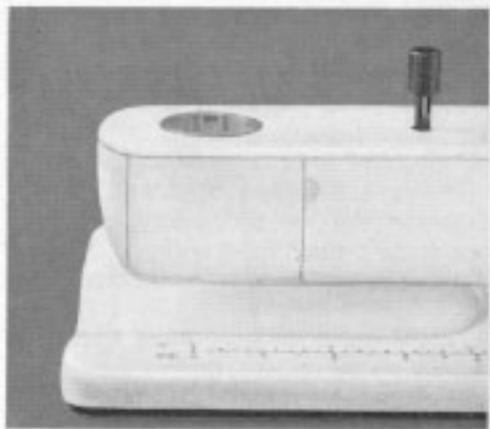
Model 707
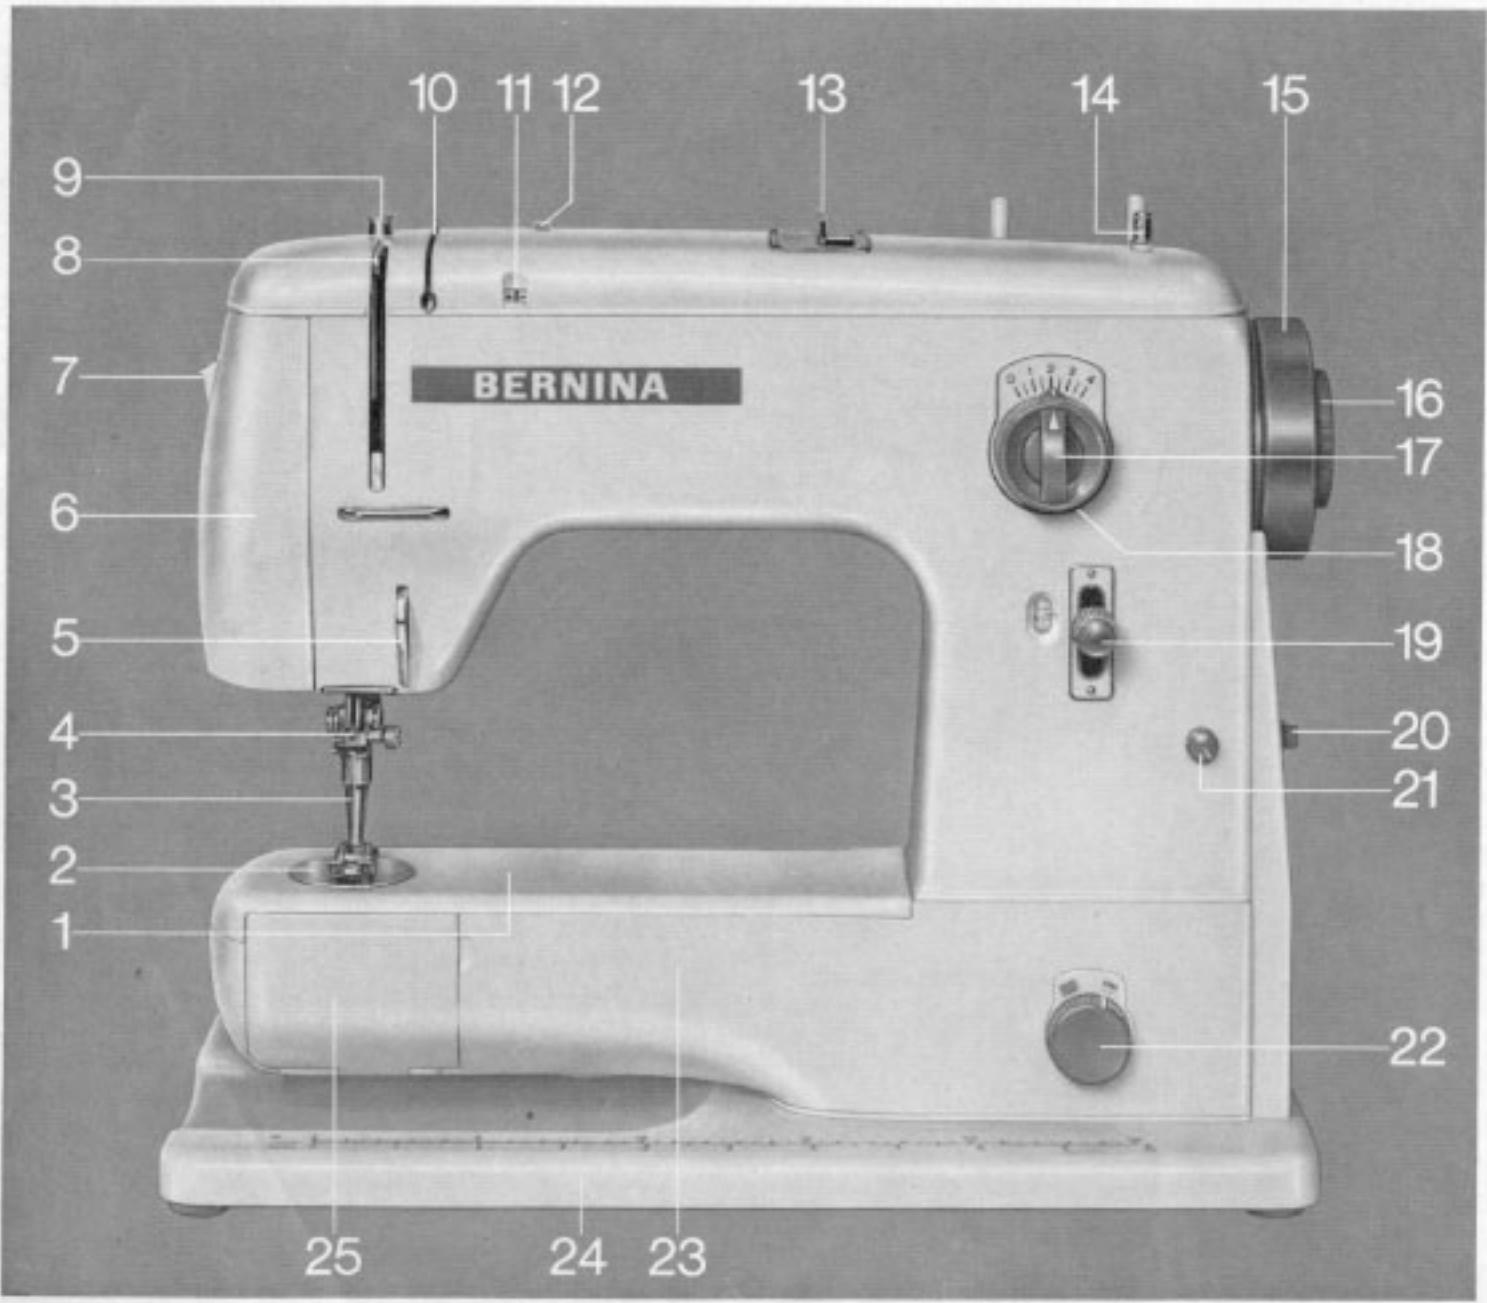
1 Free Arm Cover Plate
2 Needle Plate
3 Sewing Foot
4 Needle Clamp
5 Thread Guide
6 Light Cover
7 Light Switch
8 Take-up Lever
9 Bobbin winder tension
10 Thread Tension Discs and Slots
11 Tension Indicator Window
12 Tension Centering Wheel
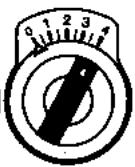
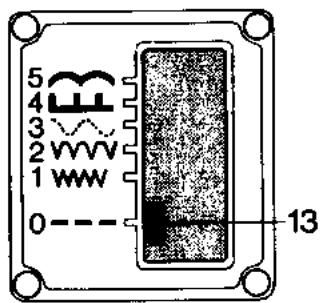
13 Pattern Selector
14 Bobbin Winder Spindle
15 Handwheel
16 Handwheel Release
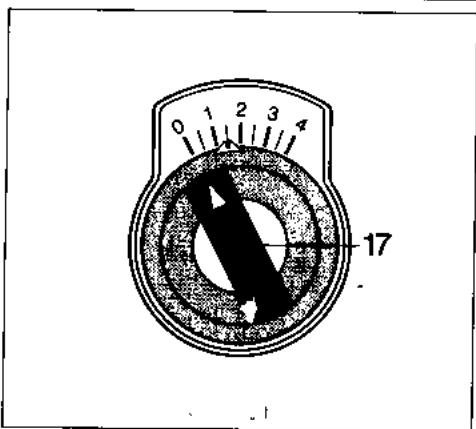
17 Needle Position Control Knob
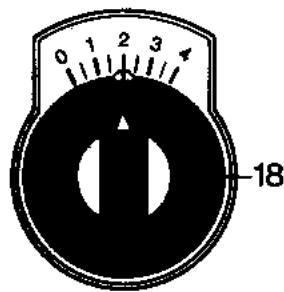
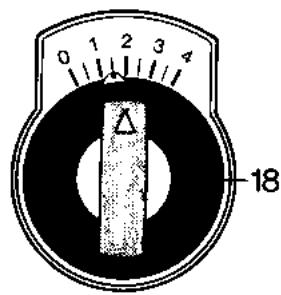
18 Knob for Setting Zigzag
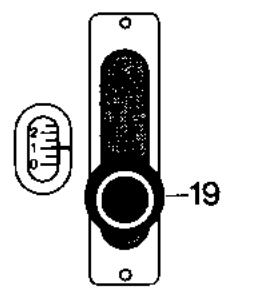
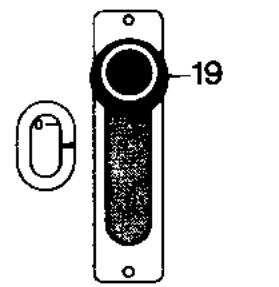
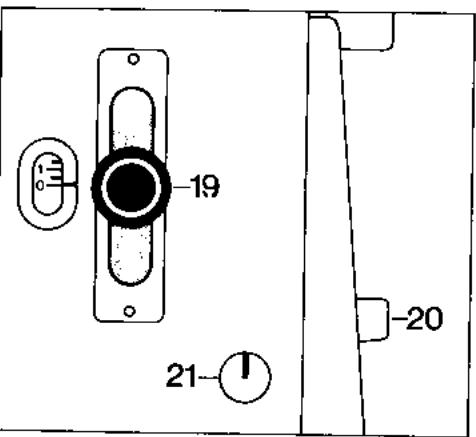
19Stitch Length Regulator
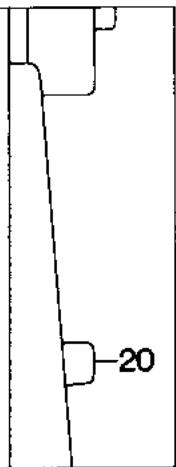
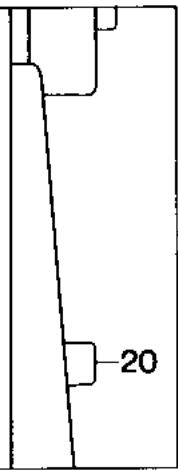
20 Satin Stitch Stop Lever
21 Satin Stitch and Buttonhole Regulator
22 Control Knob for Drop Feed
23 Free Arm
24 Base Plate
25 Bobbin case cover
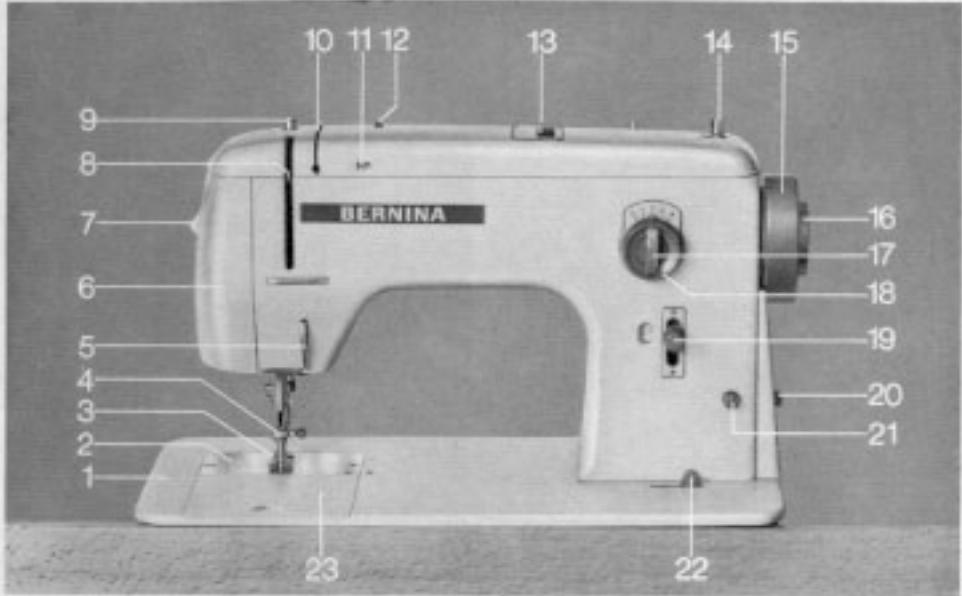
1 Base Plate 13 Pattern Selector
2 Needle Plate 14 Bobbin Winder Spindle
3 Sewing Foot 15 Handwheel
4 Needle Clamp 16 Handwheel Release
5 Thread Guide 17 Needle Position Control Knob
6 Light Cover 18 Knob for Setting Zigzag
7 Light Switch 19 Stitch Length Regulator
8 Take-up Lever 20 Satin Stitch Stop Lever
9 Bobbin winder tension 21 Satin Stitch and Buttonhole
10 Thread Tension Discs and Slot
11 Tension Indicator Window 22 Control Knob for Drop Feed
12 Tension Centering Wheel 23 Needle Plate Slide
Model 717
Model 717
Connecting up. Compare the voltage indicated on the machine plate with that of your main voltage.
Connect foot starter to the machine. Foot starter and flex are connected by a special plug. When this plug is attached to the machine there remains only the flex plug to be connected to a power point. By pressing lightly on the foot starter the machine is set in motion.
Adjustable motor. It is an advantage with many kinds of sewing to be able to reduce the speed of the machine. Push the switch. Now the machine runs with half the number of revolutions and the speed can easily regulated.
Light switch. By pressing switch (7) the dazzle-free light can be switched on and off. Pull out light cover sideways to change the bulb. Press bulb upwards, turn anti-clockwise and draw downwards. To insert bulb, turn it clockwise.
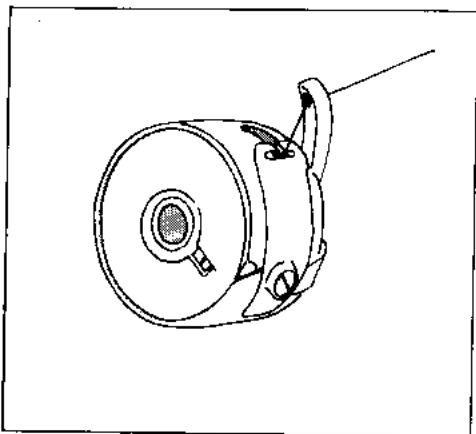
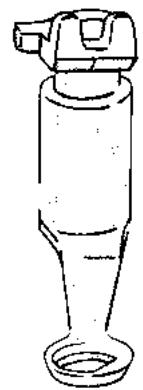
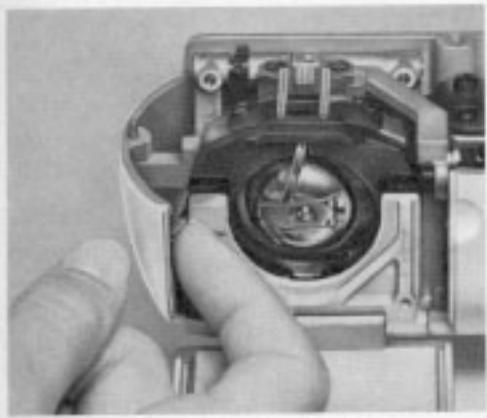
Removing the bobbin case
Open stitch plate slide. Turn handwheel towards you, until needle reaches highest point.
Open the hinged latch with thumb and forefinger of the left hand and remove the bobbin case. The insertion of the bobbin case is carried out in the same manner.
Model 707
Model 707
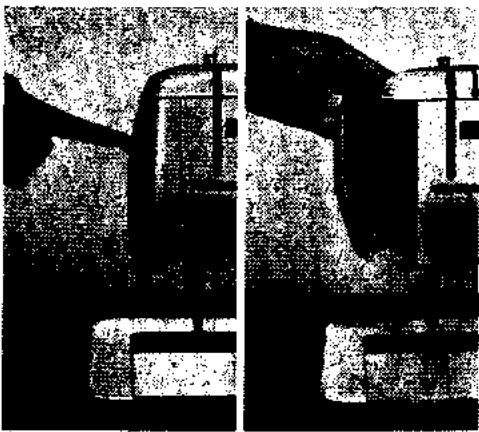
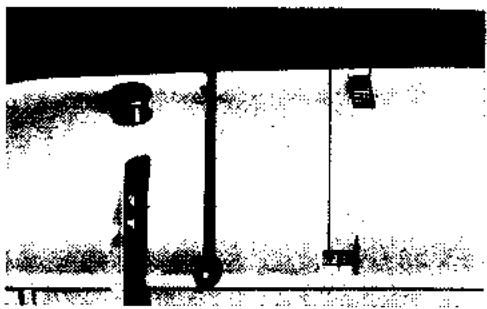
Sewing machine, foot control and table are mounted in the case.
To take the machine out of the case, place it upright on a table. When locks are opened, one side of the case can be pulled down. The machine can now be placed without difficulty wherever it is needed.
When replacing the machine after use, make sure that the hand wheel is next to the compartment for the foot starter.
Connecting up. Compare the voltage indicated on the machine plate with that of your main voltage.
Remove foot starter from case and connect it to the machine. Foot starter and flex are connected by a special plug. When this plug is attached to the machine there remains only the flex plug to be connected to a power point. By pressing lightly on the foot starter the machine is set in motion.
Adjustable motor. It is an advantage with many kinds of sewing to be able to reduce the speed of the machine. Push the switch. Now the machine runs with half the number of revolutions and the speed can easily regulated.
Light switch. By pressing switch (7) the dazzle-free light can be switched on and off. Pull out light cover sideways to change the bulb. Press bulb upwards, turn anti-clockwise and draw downwards. To insert bulb, turn it clockwise.
| Removing the bobbin case | Needle and thread table
very fine | fine | medium | strong | large |
| Needle system 705 B | 60 | 70 | 80 | 90 |
| Mercerised sewing thread (3 ply) | 50 | 50 | 40 |
| Darning thread (2 ply) | 50 | 30-50 | 50 | |
| 100% polyester mettose, thendane used
total of single braid with # 60-70-75/145
and gredan in 100/6 H J needles. |
| Open hinged bobbin case cover. Turn
hand wheel towards you until the needle
is in its highest position. | Winding of thread on bobbin
Loosen hand wheel: Hold hand wheel
with the left hand. Loosen the hand
wheel release with the right hand by
turning anti-clockwise. |
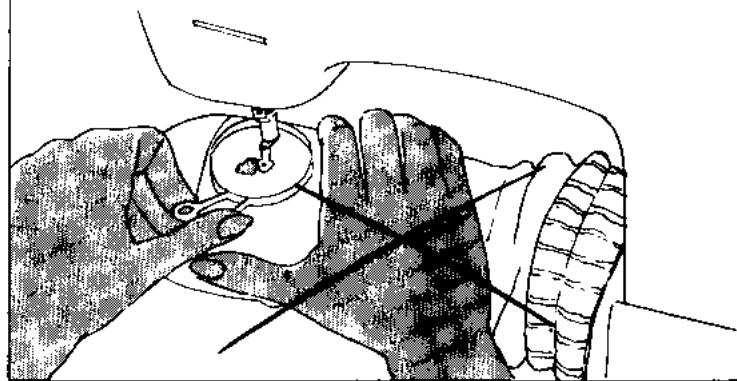
| Open the hinged latch with thumb and
forefinger of the left hand and remove
the bobbin case. The insertion of the
bobbin case is carried out in the same
manner. | Push the bobbin winder spindle on the
top cover to the right and mount the
bobbin case. Bobbin winder is now
switched on.
Correct choice of needle and thread
Use only needle system 705 B for the
Bernina machine class 707 and 717.
Make sure that both needle and thread
correspond to the sewing table given
above. The usual needle numbers for
sewing are 80, 90 and 100. For darning,
needle numbers 70 and 80. |
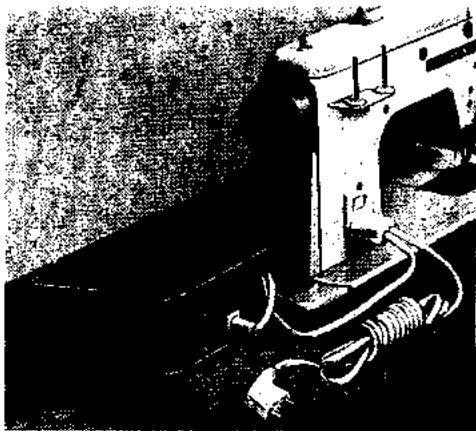
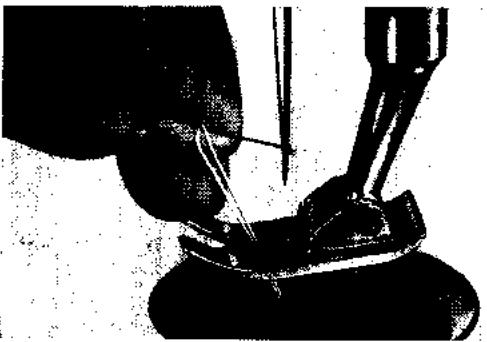
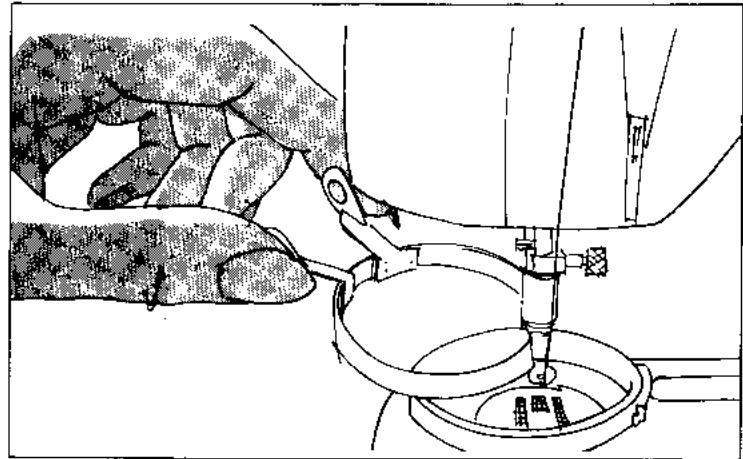
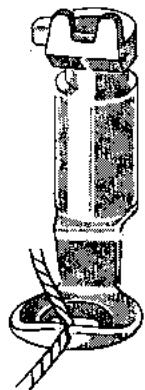
Draw the thread from the spool round tension (9) and from there - as shown in picture - guide it to the mounted bobbin case. Start the motor by pressing on the foot starter. As soon as there is enough thread wound, stop motor, remove the bobbin case and push the bobbin winder spindle again to the left. Re-tighten release screw on the hand wheel.
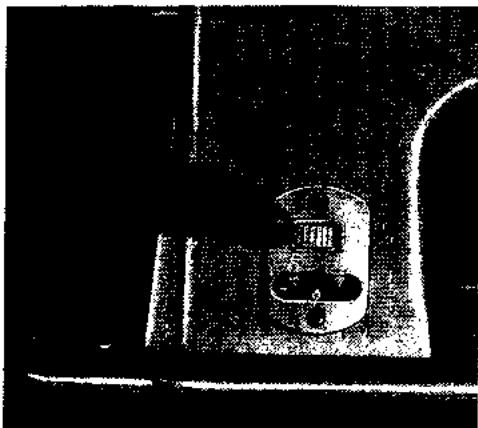
Insertion of bobbin into the bobbin case. When the bobbin is in the case make sure that the thread unwinds in the direction of the arrow.
Draw thread through slot and then under tension spring. Do not hold the bobbin. The bobbin must turn in the direction of the arrow when unwinding.
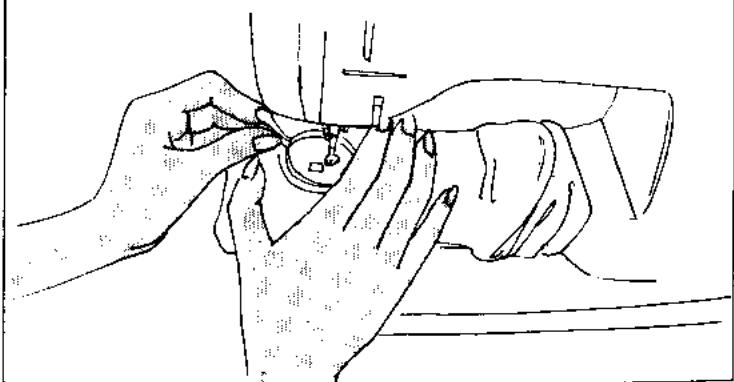
Insertion of the bobbin case into the hook. Raise needle to top position by turning the handwheel. As when removing the bobbin case hold it by the hinged latch with thumb and forefinger of the left hand. Hold bobbin case in such a way that the extension arm is directed upwards and fits into the niche of the hook race cover. Check-up: Pull end of thread.


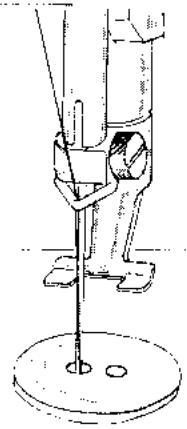
Fixing the needle. Loosen the needle clamp screw half a turn. Push the needle upwards as far as it will go with the flat side at the back and facing away. Tighten needle clamp screw.
Threading the machine. The thread is led from the spool to the needle in one movement. Presser foot and take-up lever must be in their highest positions. Place spool on pin. Lead the thread with the left hand through the eyelet then pull it through the slot of the tension disc. With the right hand hold the spool steady.
Now draw thread through the thread guide (5) up to the slot of the take-up lever (8) and again down to the needle eye. Thread the needle from the front to the back leaving a loose end of approximately 10 cm (4 ins.).

The thread tension discs. Bernina has the unique advantage that during normal sewing the thread tension does not have to be altered. The tension centering wheel (12) can be regulated for special purposes. For your guidance: Normal tension = Black line in centre of window. + in centre = Tighter tension. - in centre = Looser tension.
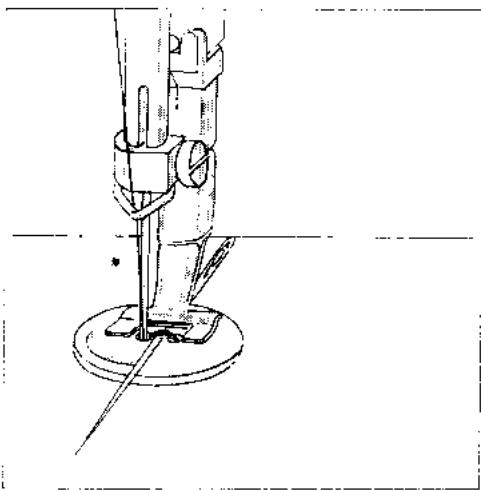
Bringing up the bottom thread. Hold needle thread loosely. Now turn the hand wheel towards you until the take-up lever is in its highest position. Pull the needle thread slightly and the bobbin thread will come up through the needle hole. Pull both threads under the presser foot and lay them there sideways.
Lowering the feed dog. For certain types of sewing, in particular darning, the feed dog must be lowered.
Model 707
Darning. Turn control knob (22) to the left as far as it will go towards the darning sign. For normal sewing turn knob to right as far as it will go towards the zigzag and straight stitch sign.
Model 717
Darning. Lower feed dog by setting the lever (22) to the right upon "darning" symbol. For all other tasks lever has to be set upon "sewing".
Only model 707
Removing work. It is essential to bring the take-up lever (8) into its highest position by use of the handwheel when pulling is finished. Raise pressor foot by means of the lever at the back of the machine; this will release the top thread tension and the material can be removed easily by pulling to the rear.
Thread cutter. The lever on the presser foot bar is made in such a way that it can be used as a thread cutter. This small device helps to save time, especially when scissors are not close at hand.
Only model 707 Fitting the sewing table. The sewing table is secured to the back of the case by a wing-nut which when turned releases the table.
When sliding the table on the free arm, make sure that the locking lever is turned to the left. To secure the sewing table the lever must be turned to the right in the direction of the arrow.
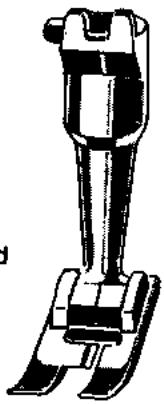
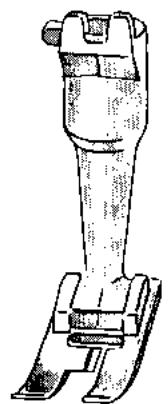
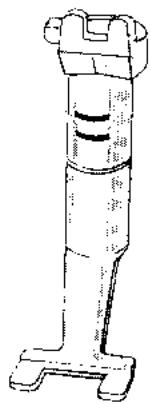
Use the correct presser foot for each type of work. Only in this way will you achieve easy and perfect work. The patented Bernina presser foot clamping lever permits quick and easy changes. The Bernina principle: "Just clip it on!" The work is done in no time.
Raise presser foot by using lifting lever
Loosen clamping lever and release presser foot
Fix the required presser foot on and push lever downwards. The presser foot is secured and the machine is ready for sewing. Only Bernina has this advantage.

Stitch length :
close to 0
Needle position: centre
Zigzag width:
1
Zigzag sewing
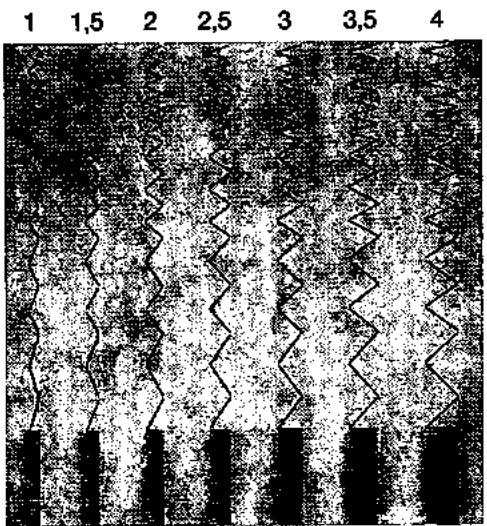
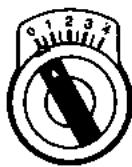
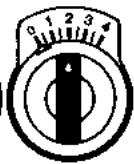
Setting the machine for the zigzag width: use knob 18. The pointer on zigzag knob (18) indicates the zigzag width on the dial behind. For straight stitching the pointer on the knob is set to 0. Turning the knob to the right from 0-4 increases the width of the stitch. The larger the number the wider the stitch. While sewing, the knob may be moved freely. But never turn the knob when the needle is still in the fabric.
We recommend the following method: Practice first on a sample with the desired thread and material (back with paper). If the satin stitch becomes too open or too close (fabric does not move) adjust in the following manner:
If the satin stitch is too dense or too open...
Bring stitch length lever down, turn dial (21) either to the left or to the right. Bring lever (20) up and set the stitch length lever up until you feel it meet the stop.
When the indication mark on dial (21) points downwards the satin stitch is at its densest. When the indication mark points upwards the satin stitch is at its most open. A density between the two extremes can be chosen according to requirements.
The satin stitch stop lever serves as a rapid transition from normal stitch to satin stitch (closely sewn stitches). To set for satin stitch move lever 20 up and then push up lever 19 as far as it will go. The knob is set for sewing thread No.30. If a different thread is used then knob 21 may have to be adjusted.


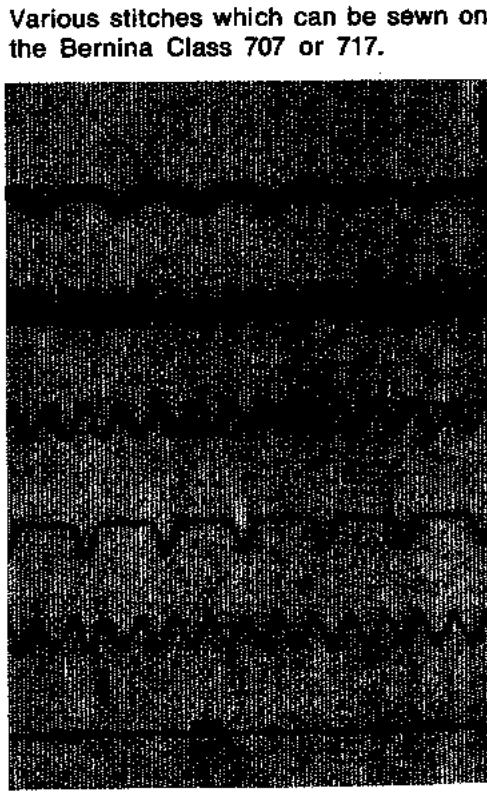
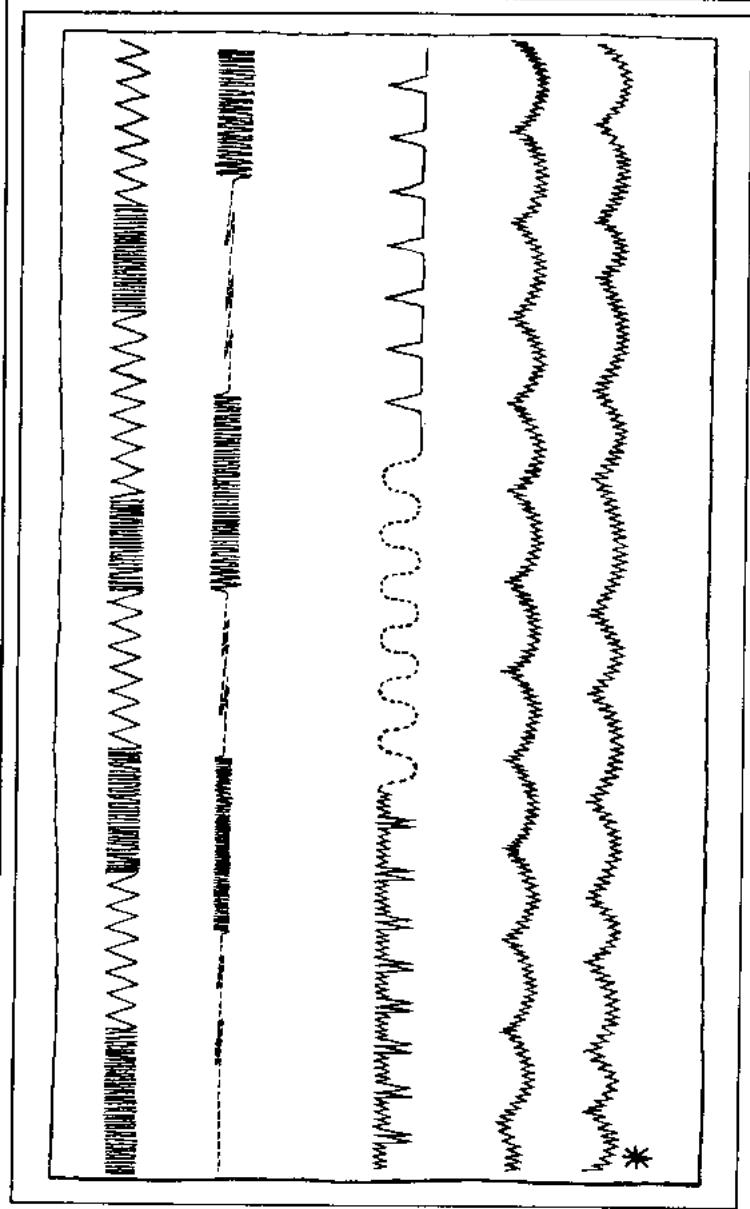
Scallop pattern
Stretch seam
Running stitch
Blind stitch
Zigzag stitch
Straight stitch
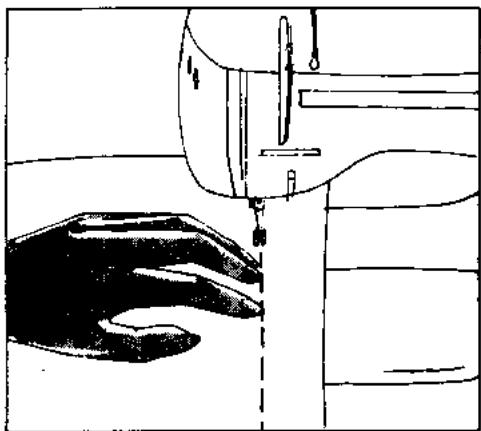
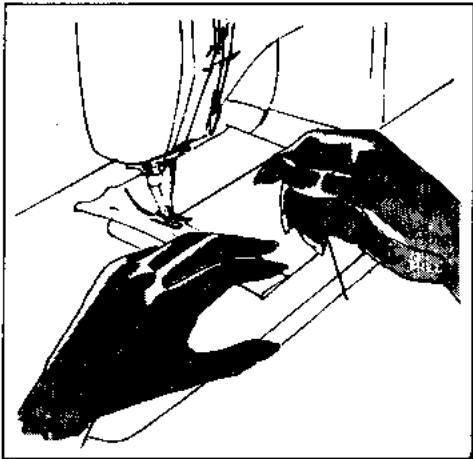
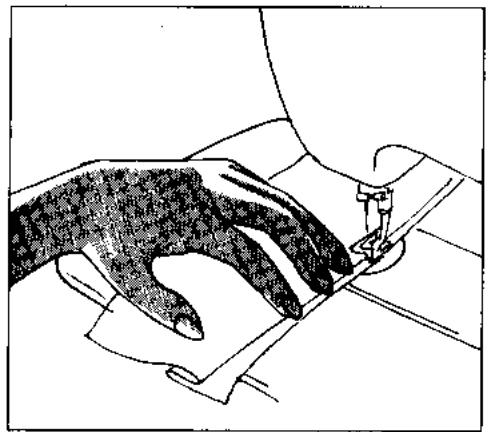
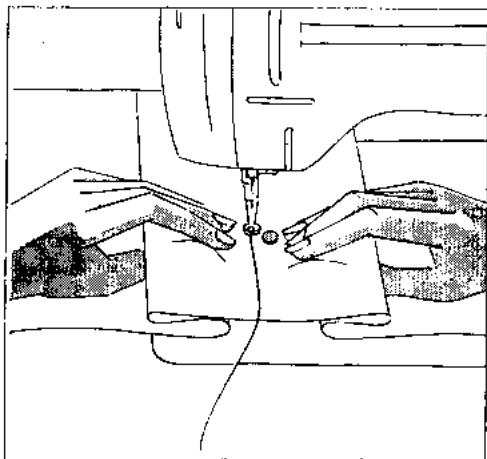
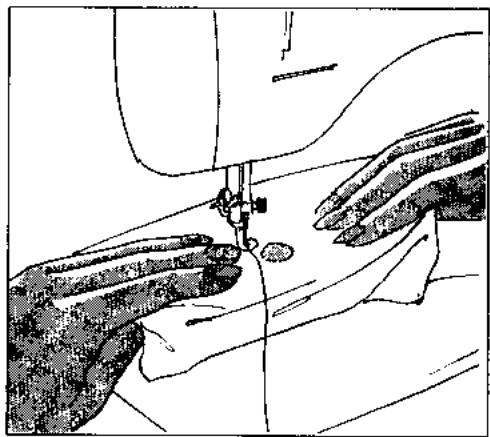
If you like to work as comfortably as possible we would advise you to observe the following points:
Place your Bernina far enough from the table edge (about 6 inches) for you to lean your left elbow on the table even when using the slide-on sewing plate which makes sewing easier.
Sit exactly in front of the needle bar. The mastering of your sewing depends only on how you guide the material.
The basic rules are therefore:
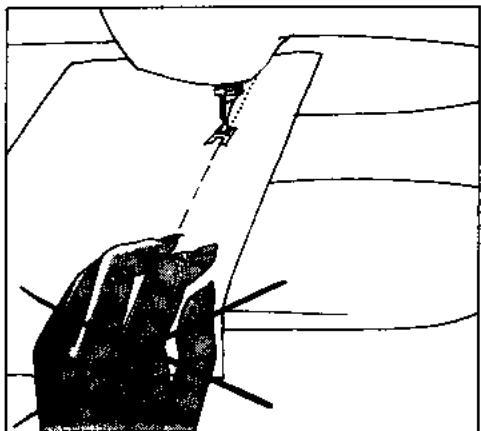
-
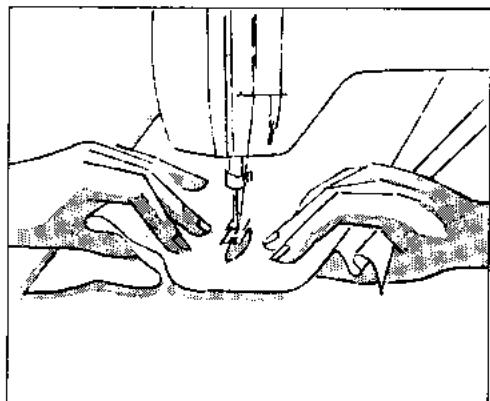
Guide the material as close as possible from the side, and near the presser foot
-
... not from the front
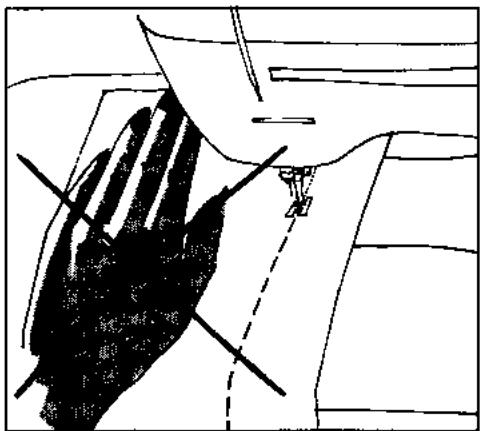
- ... and not with the hand flat. Nor must the material be pulled to the rear.
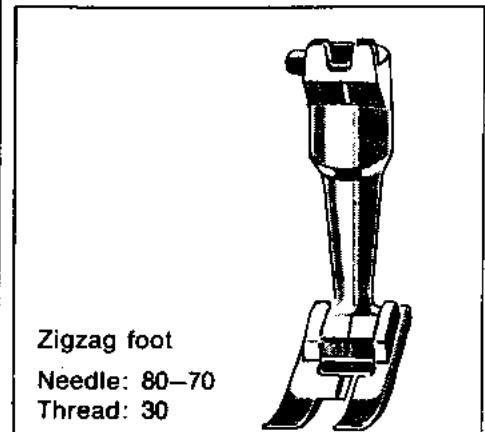
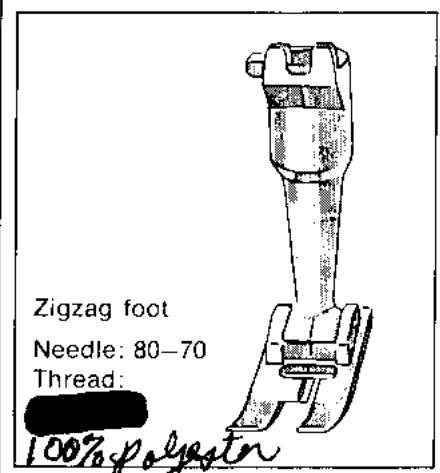
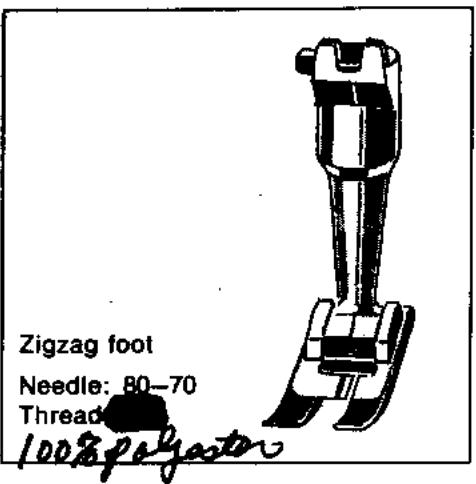
Zigzag foot
Needle:
normally 80
at times 70-100
depending on the
material and thread
Thread:
adapted to the
fabric sewn


left
centre
right
Needle Position
With the needle position knob the needle can be set at right or at left for buttonholes, blind hemming, zips, etc.
For normal sewing the needle remains in the centre.
Straight stitch
Zigzag: 0
Stitch length: 1-4
Needle position: centre
Drop feed control: sewing
Automatic: straight stitch---are marked).
Reverse sewing
(Satin Stitch lever (20) must be in down position.)
For reverse stitching push stitch length lever (19) upward (where no numbers
are marked).
Set stitch length lever at desired length.
Normal stitch length: about 112 - 2
Securing threads, etc.
Select a stitch length for normal sewing and turn knob on stitch length lever to right. Screw in as far as it will go. If the lever is raised above 0 for reverse sewing it will then select the same stitch length as for forward. When stitch length lever is returned below 0 the stitch length is the same as it was before.
Securling in thick seams
(Stitch length not too short.)
Before stitching in reverse always leave the needle completely down in the material, then move lever to reverse sewing. The same applies when sewing forward again.

Zigzag foot
Needle:
normally 80
at times 70-100
depending on the
material and thread
Thread:
adapted to the
fabric sewn
if possible 50
Zigzag sewing
Set zigzag width according to work and material.
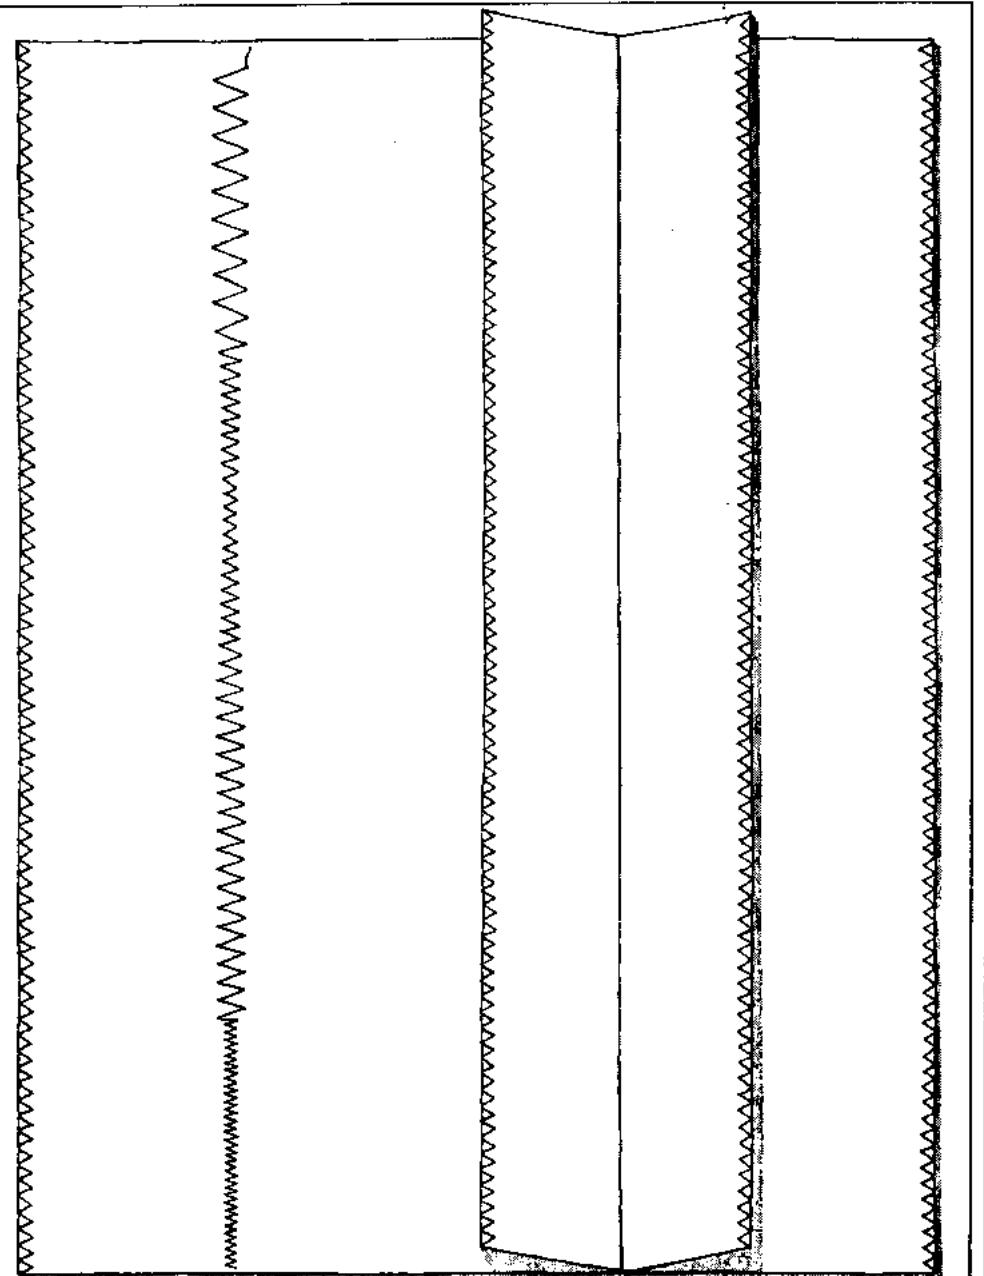
Finishing Edges
Zigzag: 2^1/2-4
Stitch length: 1-2
Needle position: centre
Automatic: zigzag WWW
Drop feed control: sewing
Guide the cut edge under the centre of the foot so that the needle actually goes once into the material and once outside.
As a general rule the following is valid: zigzag not too wide, stitch length not too long. First trim the edge neatly.
If you guide the work like this: From the front, close to the foot, fingers on the edge, you will easily get a neat finish.
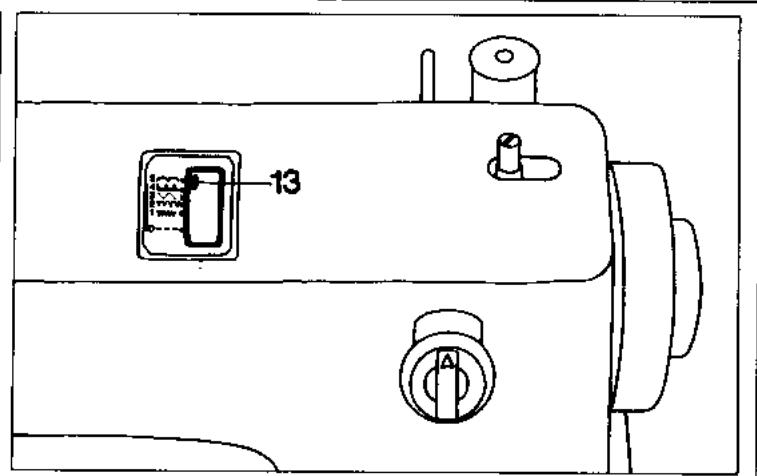

Automatic
Pull lever 13 to right and set it next to desired pattern. When doing this do not leave the needle down in the material.
Zigzag: 4
Stitch length: Satin Stitch
Needle position: centre
Drop feed control: sewing
Paper underlay when needed
When embroidering it is advisable to lay paper underneath to prevent the material from puckering. (Do not use tissue paper, as this is too soft. Typewriting paper is excellent.)
Satin Stitch (Close zigzag)
Zigzag: 4-1'
Stitch length: Satin Stitch stop lever up
Stitch length regulator up as far as stop
Needle position: centre
Automatic: zigzag WWWW
Drop feed control: sewing
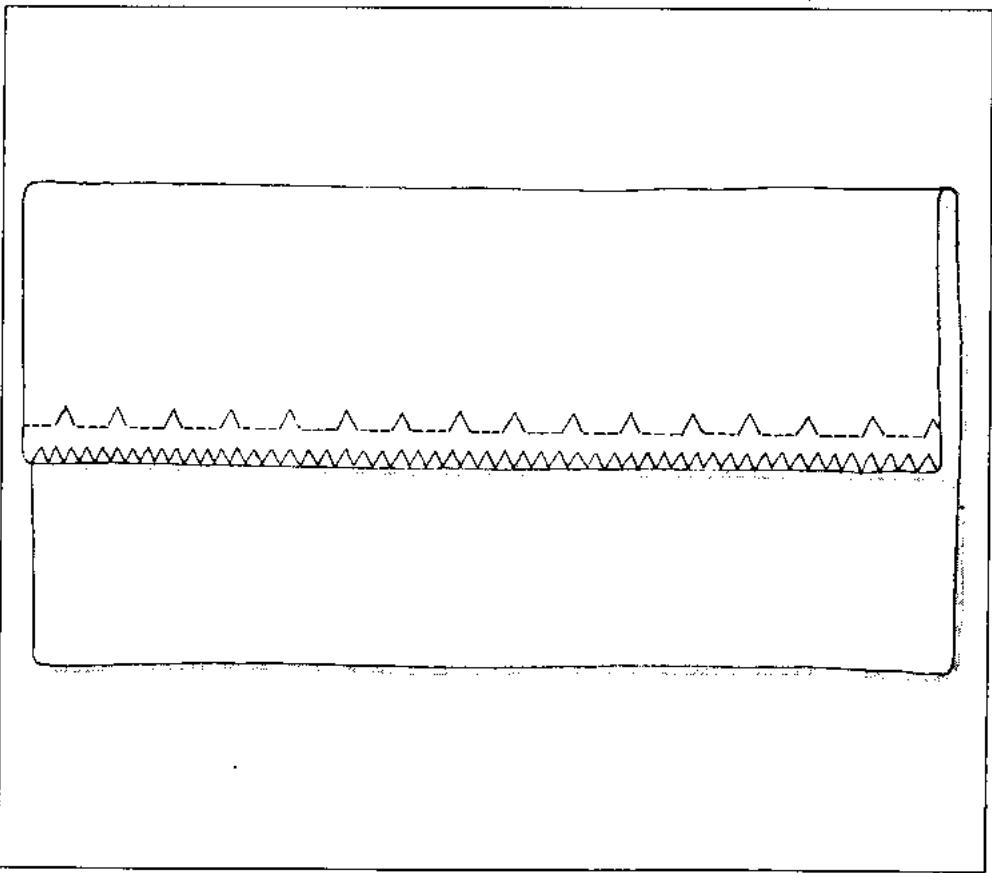
Hems for Jersey underwear
Needle position: centre
Automatic: zigzag WWW
Drop feed control: sewing
Single turned-in home
Zigzag: 3
Stitch length: 1^1/2
Double turned-in hems
Zigzag: 2^1/2
Stitch length: 112
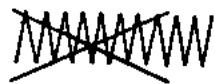
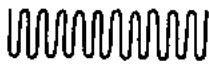
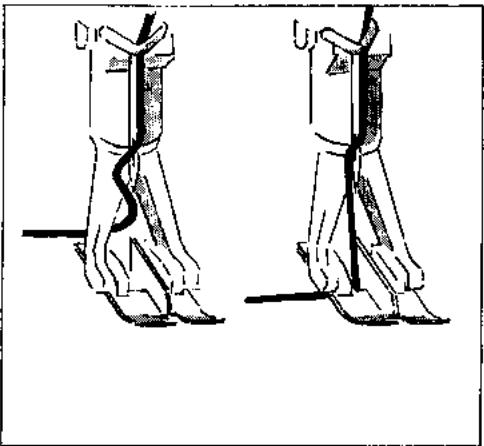
The Waving of Jersey
To prevent the Jersey from waving, guide an extra thread inside the zigzag. (Not only for hems but whenever jersey stretches, e.g. patching, oversewing, etc.)
Press with a damp cloth before removing the extra thread.
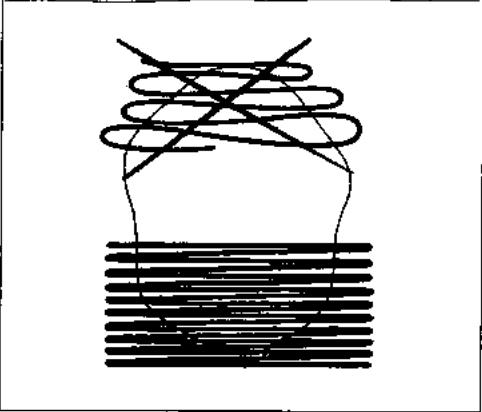
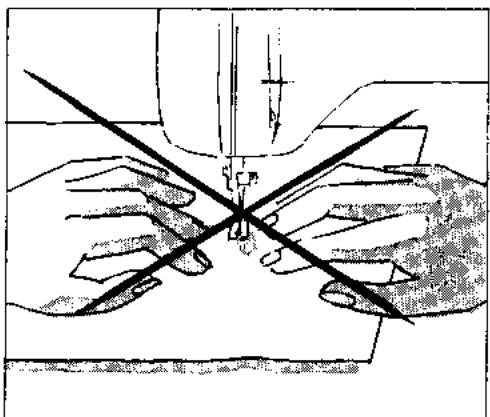
Not like this, because you obscure your view of the work.
But like this: This way the view is clear and the work can be guided easily.
Important
Hold the thread slightly taut while sewing and the Jersey will not stretch so much.
The thread can also be guided through the hole in the needle plate like pintuck cord. (Especially useful for a large patch.)
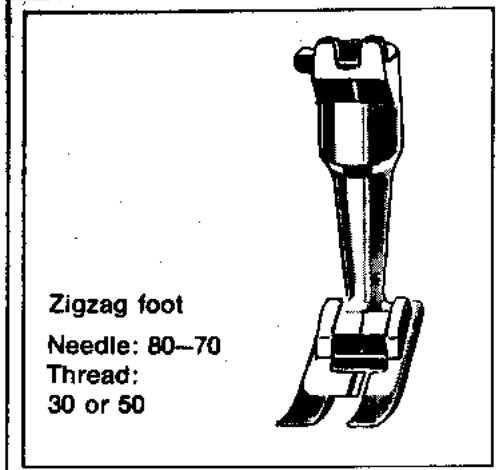
Zigzag foot
Needle: 80-70
Thread:
30 or 50
Patching Jersey
Zigzag: about 3
Stitch length: 1 - 1^1 / 2
Needle position: centre
Automatic: zigzag WWWW
Drop feed control: sewing
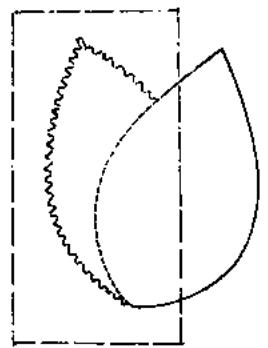
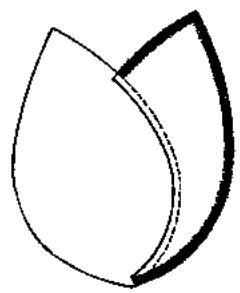
Baste the new piece on to the right side of the work, then sew it on, first with the zigzag just covering the edge, then a second time one presser foot width from the first seam. For cotton Jersey use the extra thread to avoid waving.
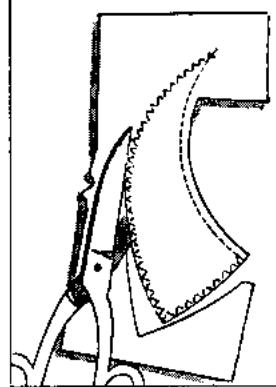
Afterwards cut the damaged piece out on the wrong side. (Hold the scissors correctly.)
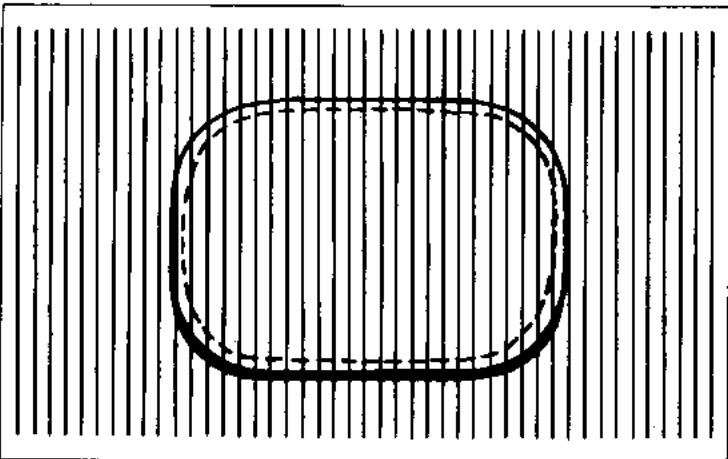
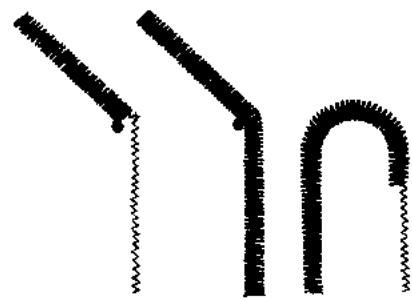
Whenever possible make the patches in round shapes.
When square patches are unavoidable at least the corners should be rounded.
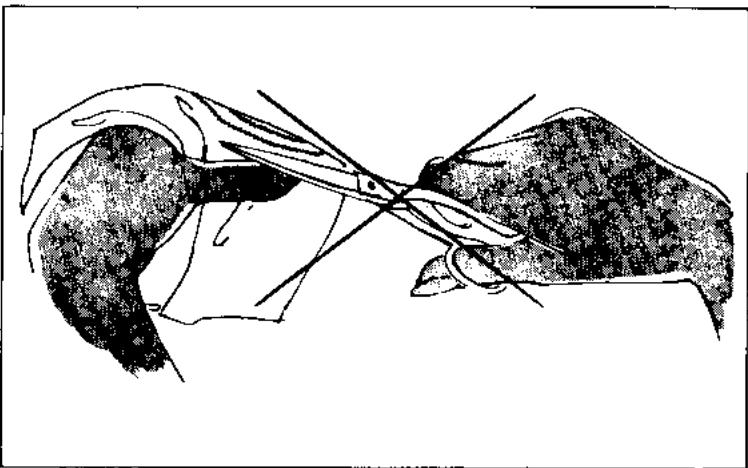
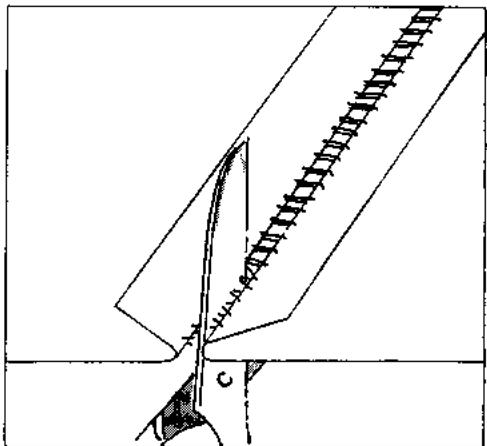
How to hold the scissors
Whenever you have to trim close to a zigzag the scissors should not be held like this (with the backs of the hands towards you). There is a risk that you might cut into the stitches.
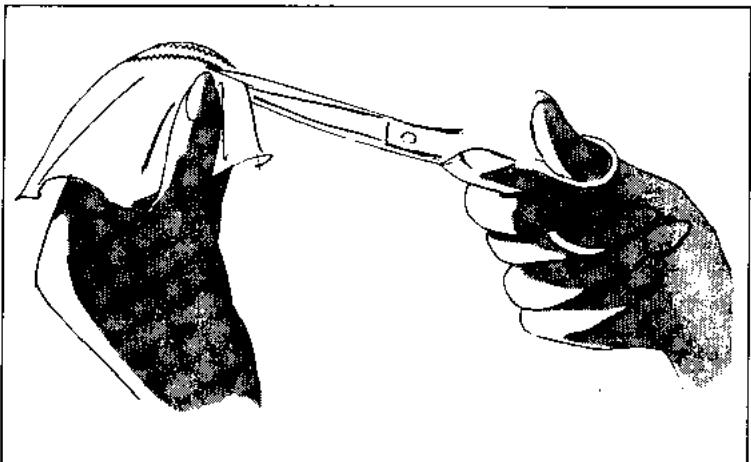
This way is much easier. Palm of the hand towards you holding the scissors quite flat!! Cut only with the tips of the scissors.
The thumb of the left hand should be close to the seam just where the scissors are cutting.
Four important points when sewing Jersey
- Baste always with darning thread.
- Use only a perfect needle. A blunt needle leaves holes.
- Use fine 'mercerised thread.
- Press each seam after sewing and not all seams together when the work is completed.
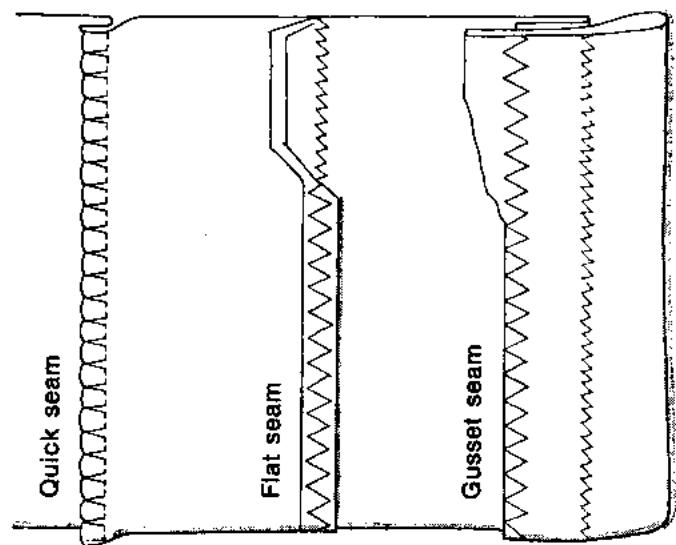
Seams on Jersey
Needle position: centre
Drop feed control: sewing
Automatic: zigzag WWW
except for quick seam
Quick seam
Zigzag: 3-4
Stitch length: 1 / 2 - 1
Automatic: Blindstitch
Joins up and oversees simultaneously.
Important! Cut edges must be on left.
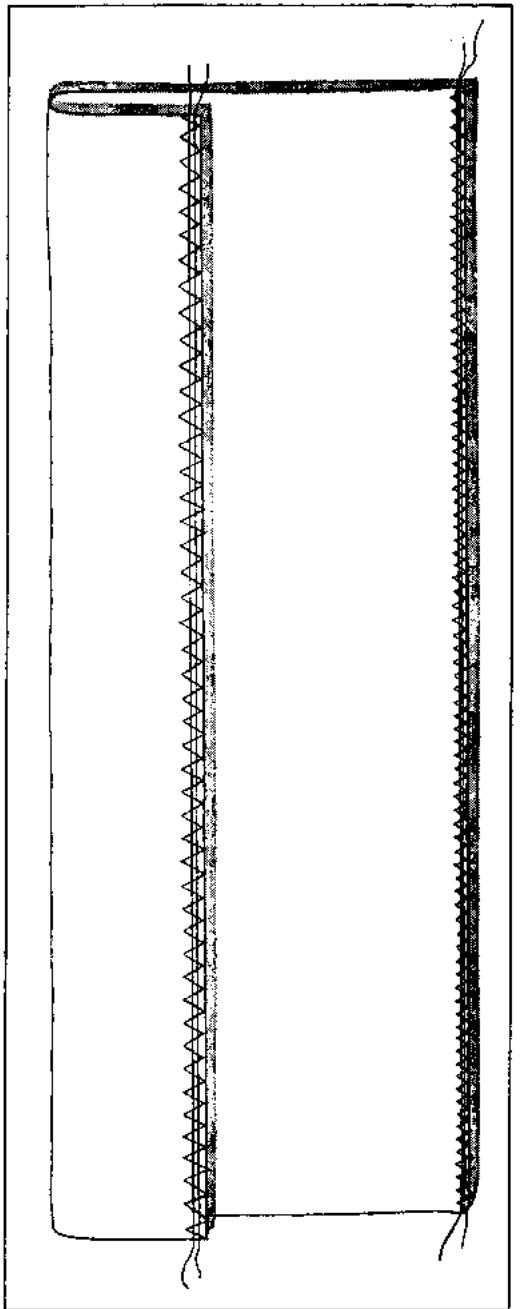
Flat Seam - Cotton Jersey Underwear
1st run: join up at one presser foot width.
Zigzag: 1
Stitch length: 1 - 112
2nd run: press seam open and sew over it on right side.
Zigzag: 3
Stitch length: 1 - 112
To finish off cut the remaining material. Hold the scissors correctly.
Gusset Seam
1st run
Zigzag: 1
Stitch length: 1 - 1^1/2
Pin the pieces together leaving the double layer (gusset) protruding about 14 inch. Sew at one presser foot width from the inner edge.
2nd run
Zigzag: 3
Stitch length: 1 - 112
Press the whole seam towards single layer of Jersey and sew at one presser foot width along first seam on right side. Trim off turnings. Hold scissors correctly.
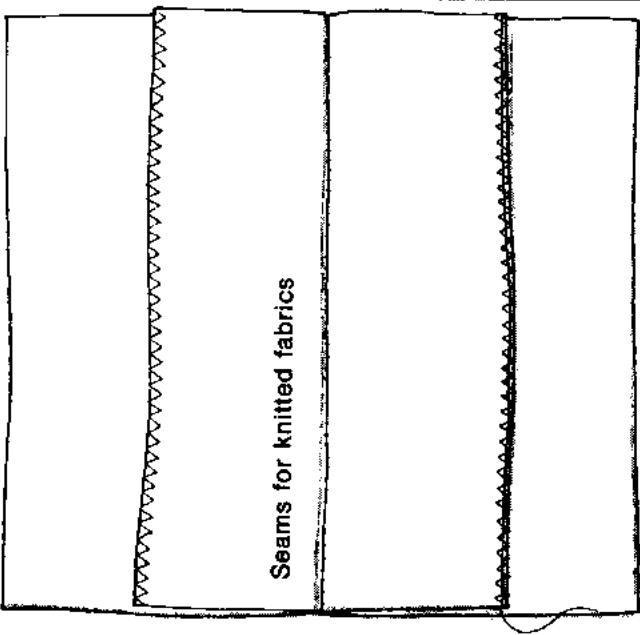
Seams for Knitted Fabrics:
Dresses - Skirts - Sweaters
Zigzag: 1
Stitch length: 1
Knitted fabrics can be joined up like other materials. Seams are pressed open but remain stretchy.
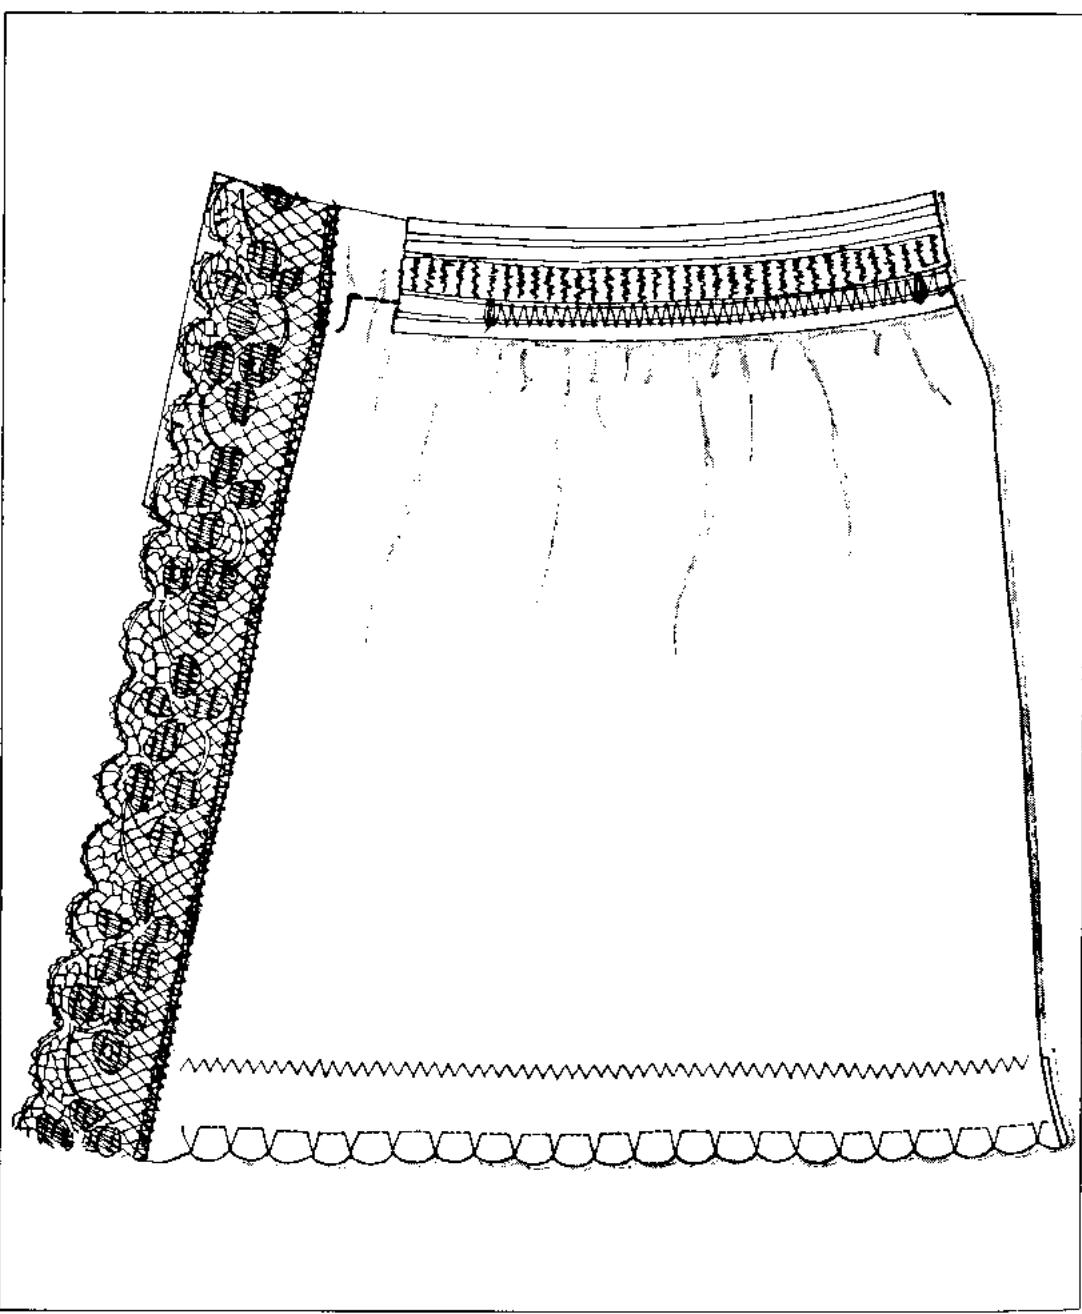
Elastic Band
Zigzag: 3
Stitch length: 1 - 112
Needle position: centre
Drop feed control: sewing
Do not pull the elastic while sewing. The zigzag stitch stretches as much as the elastic.
The easiest way when sewing Jersey is to gather it up first, sewing long straight stitches, then draw the under thread and pull work up to desired length.
After this, pin on the elastic and sew it with zigzag. Trim off surplus material on the wrong side. (Hold the scissors correctly.)
Shell Edging
Zigzag: 4
Stitch length: 1
Needle position: centre
Automatic: Blindstitch
Drop feed control: sewing
Place folded edge to the left as for quick seam.
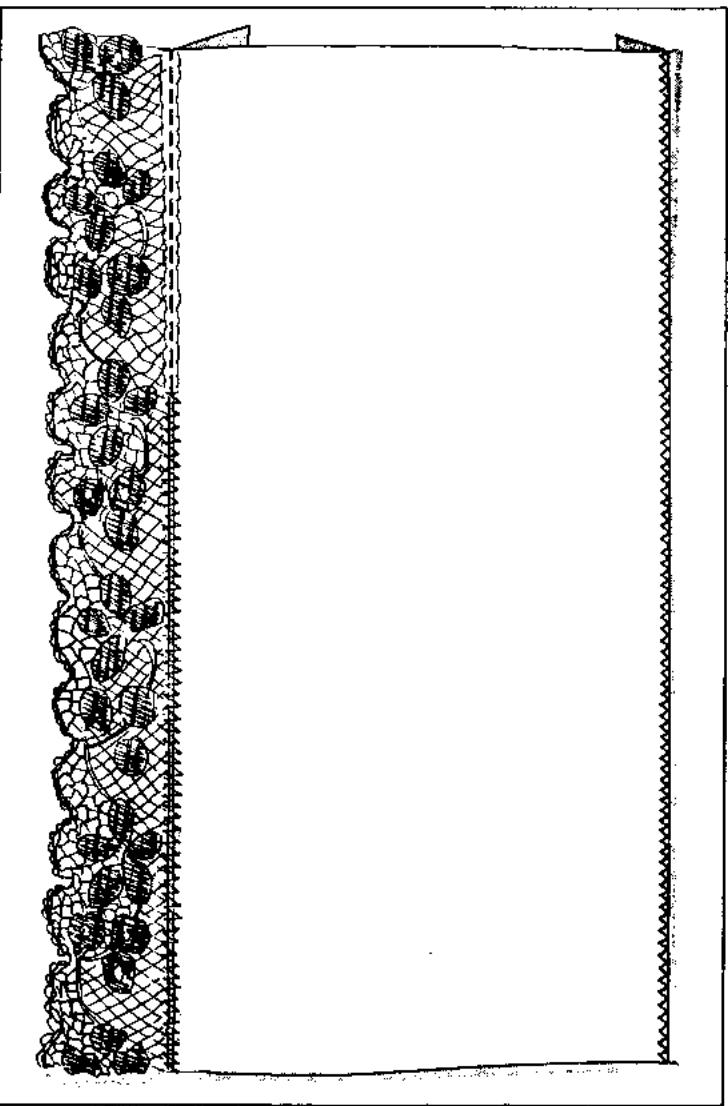
Lace on Jersey
Zigzag: 1^1/2 - 2
Stitch length: 1 / 4 - 1 / 2
Needle position: centre
Automatic: zigzag WWW
Drop feed control: sewing
Pin or baste lace on and sew straight on with zigzag. Trim off surplus on wrong side along zigzag. Hold the scissors correctly.
Lace (and insertion) in material
Needle position: centre
Automatic: zigzag WWWW
Drop feed control: sewing
1st run
Zigzag: 0
Stitch length: about 1
Pin in lace, baste it and sew on with straight stitch
2nd run
Zigzag: 1^1/2 - 2^1/2
according to lace
Stitch length: about 1/4 - 1/2
Fold turning to wrong side against straight stitch and press. Sew a zigzag seam over the straight stitch. Then cut off the turnings along the zigzag seam. Hold the scissors correctly.
Narrow edging
Zigzag: about 112 - 2
Stitch length: about 14 -12
Needle position: centre
Automatic: zigzag WWW
Drop feed control: sewing
Prepare and press turnings. Sew zigzag over this pressed edge as for oversewing. (Guide work as for oversewing.)
Finally trim away turnings. Hold scissors correctly.
Embroidery foot
Needle: 80
Thread:

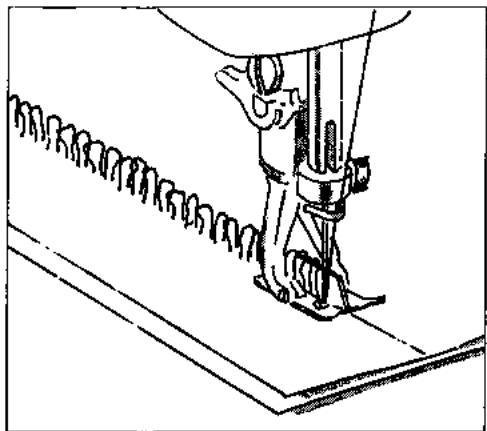
Applying elastic thread
Zigzag: 2
Stitch length: 2
Needle position: centre
Automatic: zigzag WWWW
Drop feed control: sewing
Thread the elastic through the hole in the embroidery foot and pull it while sewing. The more you pull the more it gathers. For a second row (one presser foot width) pull material straight while sewing.
When doing it on socks do not pull the elastic too much.

Gathering material
Zigzag: 2
Stitch length: 2 (for heavy fabrics up to 4)
Needle position: centre
Drop feed control: sewing
Automatic: zigzag WWW
Pearl Cord
The pearl cord is threaded through the hole of the embroidery foot (as with elastic thread) and oversewn with zigzag. Contrary to elastic, the cotton is not pulled while sewing but only afterwards. (Hold both yarns and gather material.) Always sew two rows at a distance of 2 mm ( 1/2 inch.).
Normal gathering
Short pieces or sheer fabrics can also be gathered in this way:
Zigzag: 0
Stitch length: 4
Sew two rows of straight stitch, then hold both bottom threads and gather up to the desired width.
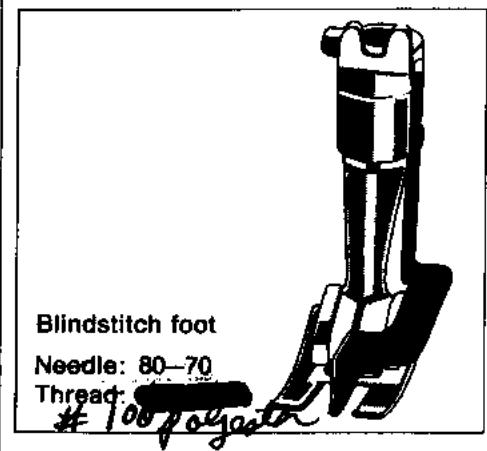
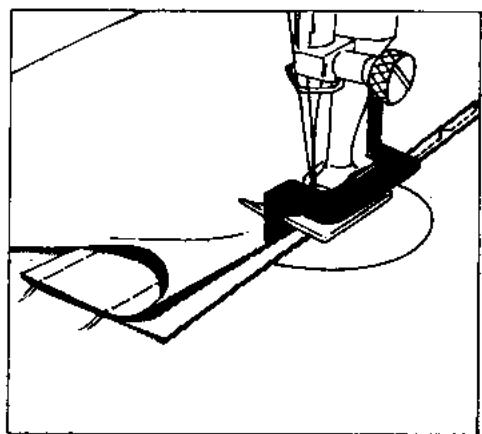
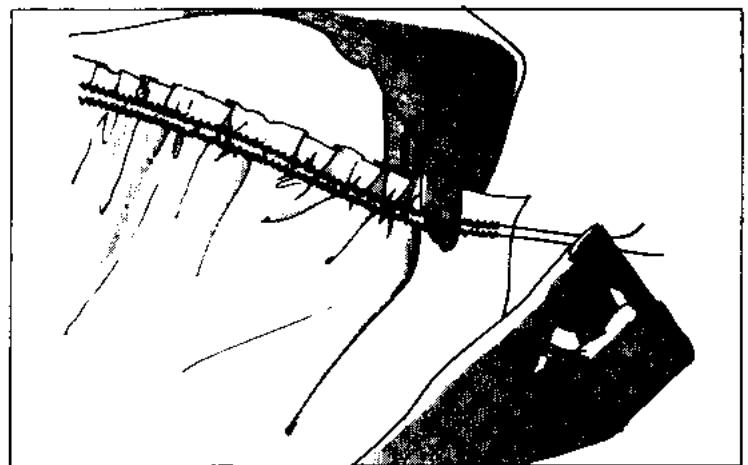
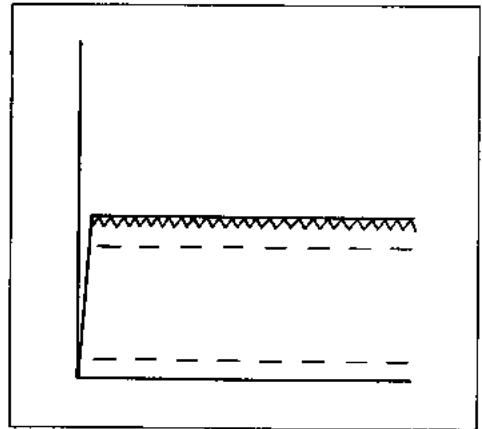
This is how the work is placed under the foot. Adjust the zigzag so that the needle just catches the edge of the fold.
Basic Setting
Zigzag: about 2^1/2
Stitch length: about 2^1/2
Needle position: right
Drop feed control: sewing
Automatic: Blindstitch
Setting for sheer fabric
Zigzag: about 1^1/2
Stitch length: about 112
Needle position: centre
Oversew and prepare the hem as diagram, baste with machine or by hand 1 / 4 from edge and press.
Very poor position.
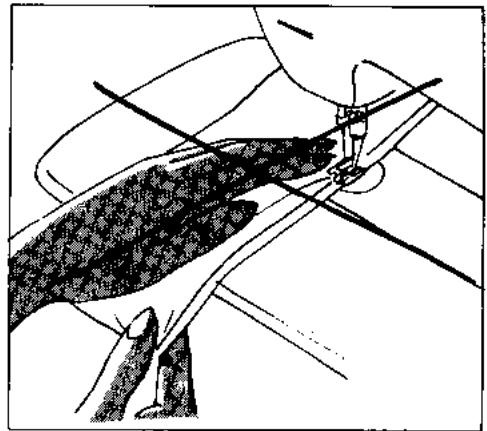
This is the correct way. Fingers of left hand must lie on the folded edge so that they can "feel" the regular feeding of the work. Hold the work very lightly while sewing.
Zigzag foot
Needle: 80-70
Thread: 50

Modern "Darning" with running stitch
Zigzag: 4
Stitch length: close to 0
Needle position: centre
Automatic: Running stitch
Drop feed control: sewing
Always underlay a fine fabric. Sew 2-5 rows of running stitch (according to the type of material).
Patching with running stitch
Needle position: centre
Drop feed control: sewing
1st run
Zigzag: 1^1 / 2 - 2
Stitch length: 1-1½
Automatic: zigzag www
Do not cut off damaged part but baste the new patch on right side of work, and sew it on with a small zigzag.
2nd run
Zigzag: 4
Stitch length: close to 0
Automatic: Running stitch
Now sew over patch edge with running stitch. Take care to oversew edges correctly.
3rd run
Zigzag: 0
Stitch length: 1
Automatic: straight stitch
Along inner edge of running stitch sew a straight stitch. Cut away damaged part.(Straight stitch makes the trimming much more easy.)
Oversew edges correctly: See diagram. Running stitch should not overlap the edges.

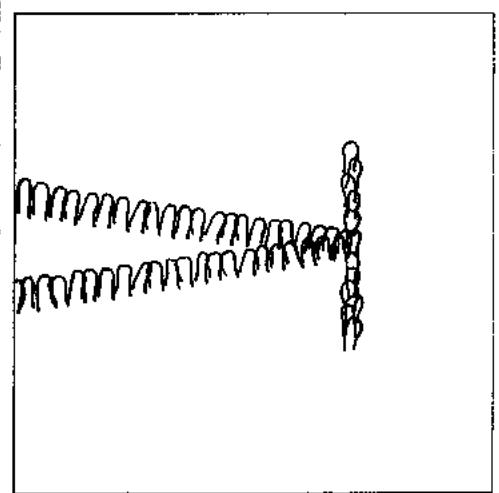
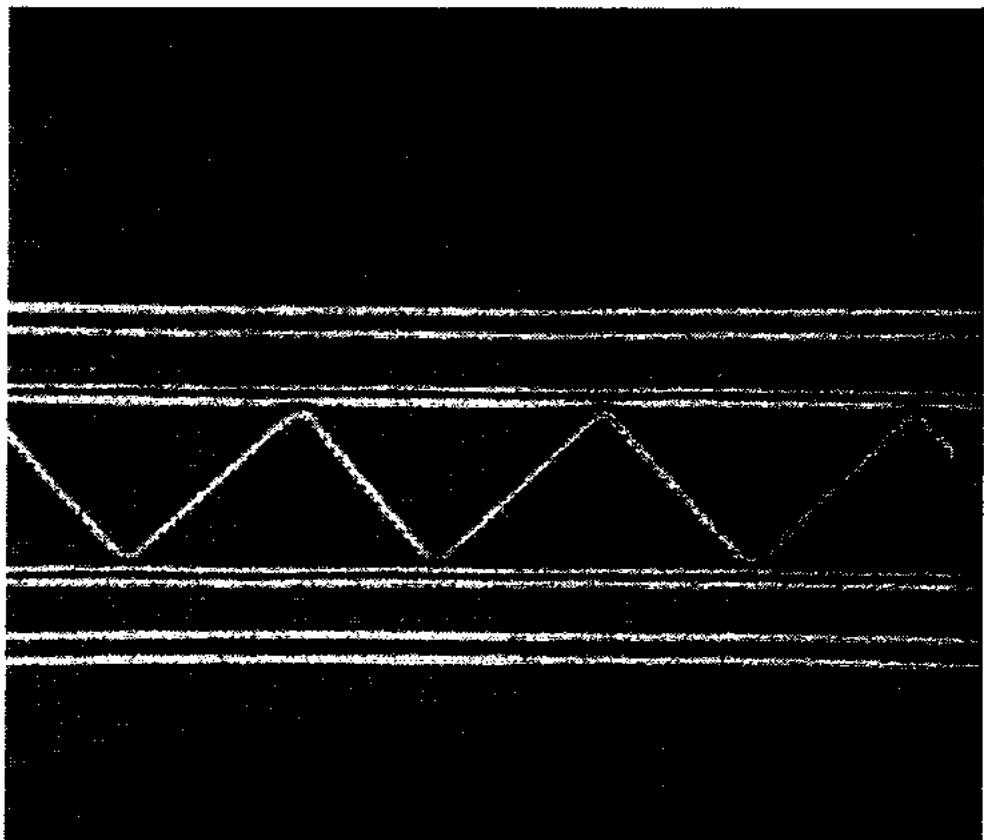
Stretch seam
for ski trousers and very elastic fabrics like Helanca®, Crimplene, etc.
Ziqzag: 1 - 112
Stitch length: 1 / 2 - 1 / 3
Automatic: Stretch seam
Needle position: centre
Drop feed control: On sewing
Sew tacked seam. (Lay the work under the presser foot in such a way that the somewhat wider zigzag stitch is directed towards the cut edge.) Press seam open and if necessary neaten.
Stretch seam as hem
only for Jersey underwear.
Zigzag: 3-4
Stitch length: approx. 3/4
Automatic: Stretch seam
Needle position: centre
Drop feed control: On sewing
Iron hem. (Do not turn under the edge.) Measure depth of hem and then sew. (Lay the work under the presser foot so that the somewhat wider zigzag stitch is directed towards the edge of the hem.) Finish by cutting away surplus fabric on the sewn edge.
Zigzag foot
Magic needle
Thread: 30
Basting
Zigzag: 4
Stitch length: 112 - 4
Needle position: left
Automatic: Blindstitch
Drop feed control: sewing
This is how the material is placed under the foot.
Important! The basting stitches do not form in the centre of the foot but only at the left hand swing of the needle.
Place the basting line at the left side of the foot. (Holding the work taut from the front and rear ensures correct guiding.)
The magic needle has two eyes, one above the other. The lower eye is threaded for regular sewing. For bast ing, thread the upper eye.
Choose stitch length according to material and work, not too short or the bastng may not easily be removed..
It is important to pin first, especially for cross stripes that have to match up exactly.
To secure the threads
Sew a few stitches with zz on Q . at the beginning and end of seam.
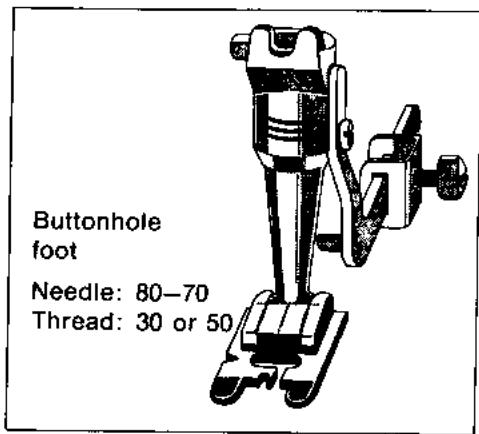
Two mechanical spring settings have been built-in for the buttonhole: one for zigzag 1,75 satin stitch for the beads of the buttonhole, the other for zigzag 3 - 312 width for the bar tacks at each end of the buttonhole. By turning the zigzag knob slightly the spring settings can easily be felt.
For sewing a buttonhole, thread bottom cotton through hole in finger of bobbin case.
Zigzag 1,75 (Spring setting)
Needle Position: left
Set lever (20) for satin stitch at top position and push stitch length lever (19) up to the stop.
Set the required buttonhole length with the guide on the buttonhole foot. Move needle downwards to foot level and check that needle comes to middle of foot opening. If not do one stitch, turning handwheel by hand. But never change zigzag or needle position.
- Satin Stitch: Sew first bead of buttonhole to required length. Set needle in work in the middle of the foot. Lift foot. Turn work completely clockwise. Lower foot again.
- Bar Tack: Lift needle out of work. Set zigzag to approx. 3 width (using spring setting). Hold work firmly. Sew stitches for bar tack.
- Satin Stitch: Lift needle out of work. Set zigzag back on to 1,75 (using spring setting) and sew satin stitch for second bead.
- Bar Tack: Lift needle out of work. Adjust zigzag again to width approx. 3 (using spring setting). Hold work firmly. Sew stitches for bar tack.
Finishing off: Set zigzag on 0 and sew a few stitches, still holding work firmly.

Set the buttonhole satin stitch
With knob (21) the stitch density can easily be regulated to suit the material. It is recommended to make a trial buttonhole on a remnant of the material to be used. The method of adjusting is the same as for the satin stitch. (Page 8.)

So that the loop of the inserted cord will reinforce the buttonhole where the button will pull, place the work to be sewn so that the edge of the material lies in front of the sewing foot and not behind.
Lay the cord to be inserted to the left of the needle, so that when the sewing foot is lowered it will be in the left hand groove of the foot. Sew satin stitch for the first bead. Finish first bead with needle in work and to right of the cord and lift foot.
Set machine. Lower needle to the raised foot and make sure that it is in the centre. If not do one stitch by turning the hand wheel towards you, bringing the needle to the centre. Under no circumstances should the zigzag or needle position be changed. Place the work to be sewn under the foot and set the needle exactly at the beginning of the buttonhole. Do not lower the foot yet.

Hold cord in left hand and turn work clockwise with right hand until cords are parallel. Lower foot so that first bead now lies under right hand groove of foot. Continue sewing as described.
Small darning foot
Needle: 80-70
Thread: 50
Darning material
Zigzag: 0
Stitch length: 0
Automatic: straight stitch
Drop feed control: lowered


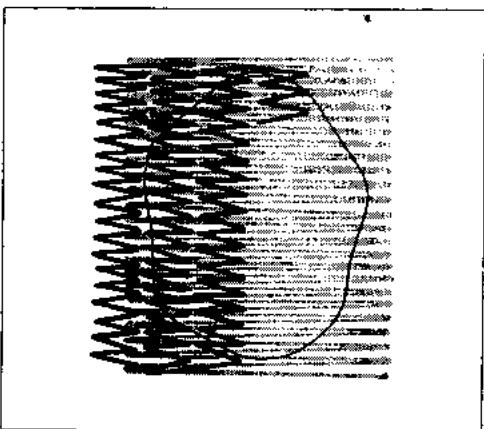
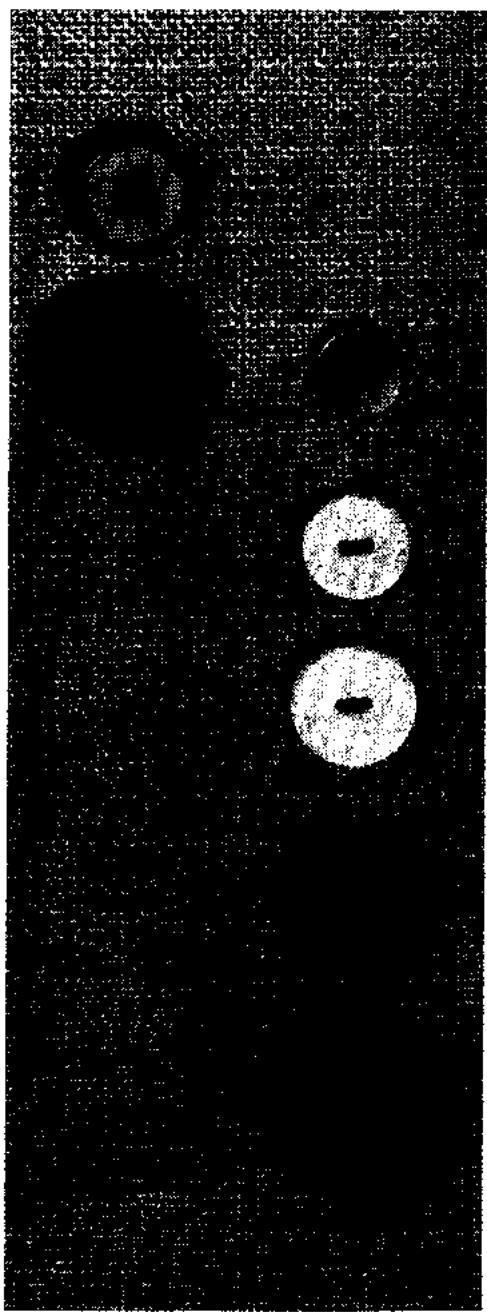
How to darn correctly
Make the turning points of each row blunt or the stitching will draw little holes at the ends. Beginners may prefer the L or M movement.
Take care not to get circles.
The quick mastering of this work depends on regular guiding.
Therefore:
- Hold the hoop correctly.
- Always work from left to right (as when writing).
- Move work lengthways (not sideways) for Selvedge and weftway.
1
2
3
A careful darn is done in 3 runs
- Weftway.
- Selvedgeway. (Not too dense or it becomes too thick around the hole.
- Same way as 2nd run but only over hole itself losing threads in 2nd run of stitching.
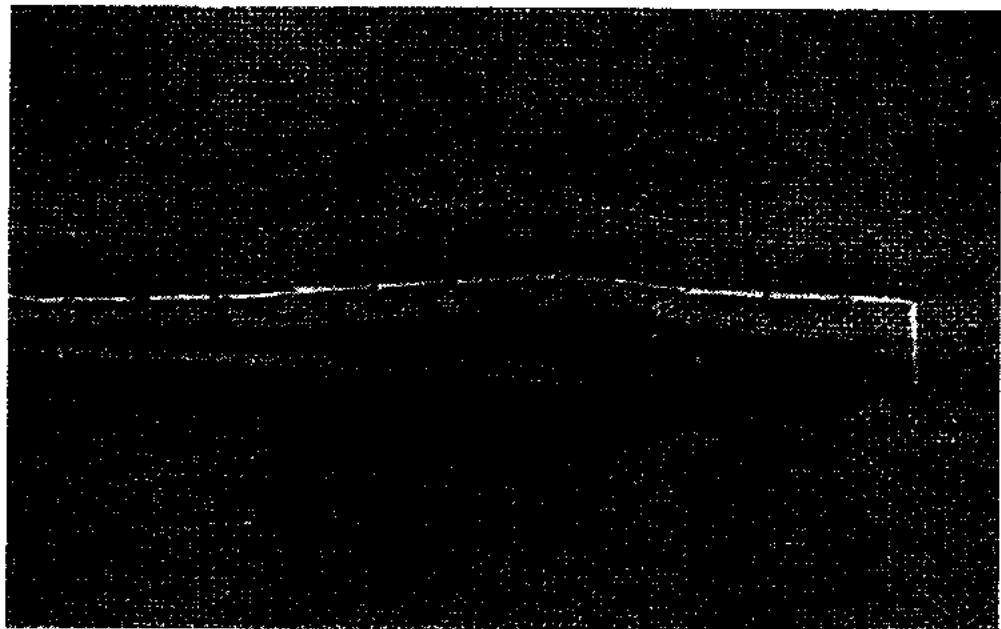
Main faults when darning
Frequent thread breaking - work guided irregularly.
Poor stitch (looping on top) - work moved too quickly.
When wrong side of work is "grainy" work moved too slowly.
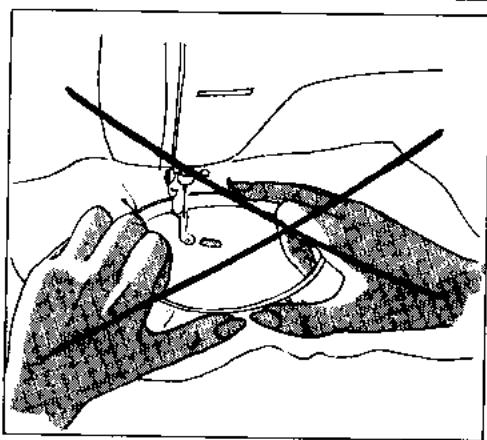
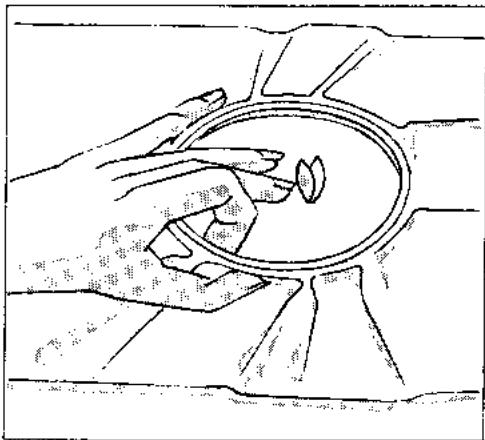
How to hold hoop correctly
Not like this ...
this would produce irregular guiding with frequent thread breaks.
... but like this.
What is to be guided must be firmly held.
Thumb facing the frame (slightly bent) side of little finger to the frame.
Starting position of the fingers as in the picture - opposite one another.
Then pulled back a little.
The frame is guided however by the outer fingers.
Model 707 only
Small
darning foot
Needle: 80-70
Thread: 50
Darning fine socks (also sleeves)
Zigzag: 0
Stitch length: 0
Automatic: straight stitch
Needle position: centre
Drop feed control: lowered
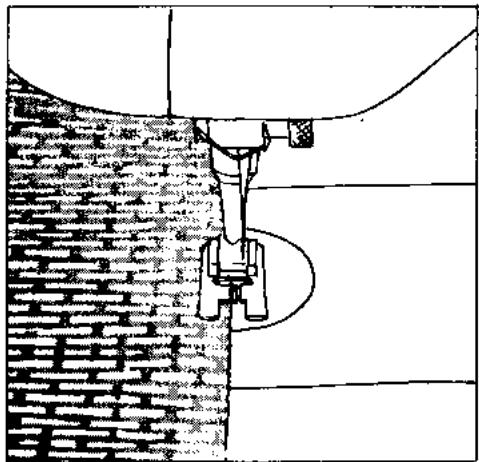
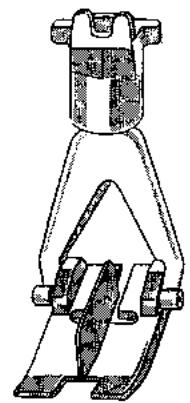
Place the darning ring on the free arm (stud of its shank in hole on right of cover plate), then pull work over ring (not ring over the work) stretch it to its maximum and insert the spring. Remembering the following points: After sliding the sock over the ring stretch it to its maximum and insert the spring clip so that the area to be darned is in the centre. It is obvious here that we do the 1st stitch run sideways and the 2nd run lengthways as we cannot turn the frame to another angle.
Wrong
Correct
With the right hand keep the area of the hole taut over the hoop. Thumb on extreme point of free arm.
Wool darning foot Needle:80-
Thread: 50 (For Terry Cloth use 4 strands of untwisted thread instead of wool)
Darning of Woollens and Terry Cloth (towels)
Zigzag. 3-4
Stitch length: 0
Automatic: zigzag WWWW
Drop feed control: lowered
Thread machine with matching thread. Lay the wool in the slot of the presser foot. The wool will then be guided automatically.
1st run: Applying the wool
Start the work on the left, a little above the hole. Stitch down the wool with one or two stitches, and leave the needle down.
Hold the area to be mended correctly. Do not push the work to and fro on the machine, but hold it taut while you guide.
When applying the wool bear the following points in mind:
- Do not make too deep a curve at the ends or the threads will be too far apart.
- Apply the wool threads close together over the hole (they may even lie slightly over one another). Always move work sideways (left to right and vice versa).
2nd run: Oversewing the threads
Cut the wool at the presser foot. Hold work again as before. Now sew across the new wool threads with a zigzag. The zigzag rows should not overlap nor lie apart from one another.

Model 707 only
Model 707 only
Button pressor foot
Needle: 80
Mercerised sewing
thread: 50
or
embroidery
thread: 30
Zigzag: 3-4
Stitch length: 0
Needle position: left
Automatic: zigzag WWWW
Drop feed control: lowered
Every zigzag presser foot can be used for button sewing. However, those who sew buttons on often will find the button presser foot superior. The wide gap in front allows a clear view.
Slide piece of work under the presser foot. Place button on marked spot and let needle into the left hole. Then lower presser foot.
Turn hand wheel until needle is in its highest position. Adjust zigzag width and make a trial stitch turning hand wheel by hand. You will then see whether the width of the zigzag is correct. If necessary, adjust zigzag. Now sew the button on. Less stitches are needed for light weight materials. To finish raise needle.
Set zigzag to 0 and sew some fastening stitches.
The zigzag width is nearly always 3-4 as the distance between the holes is usually the same, with the exception of decorative buttons.
If a shank is required, lay a darning needle on the button and sew over it. (Add a few more stitches than usual.)

Zigzag: 0
Stitch length: 11/2-2
Automatic: straight stitch
Needle position: according to side set left or right
Drop feed control: sewing
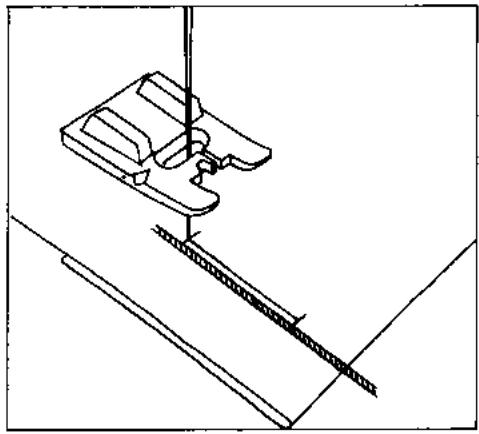
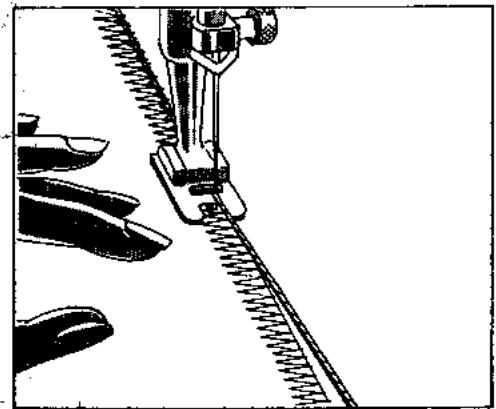
The zip is basted in by short stitches so that the teeth are entirely covered by the material. Open the zip before you sew it in.
Sew down each side from top to bottom, once with the needle position right and once with the needle position left.
Hint: The easiest way to insert a zip
Sew seam first with a very long straight stitch or basting stitch, then press open. (Damp if necessary.) Finish the edges then unpick the seam. (When stitches are very long they are easy to remove.)
When inserted like this both sides remain even and are not distorted.
Tailor tacking foot Needle thread: according to material and colours
Automatic: zigzag WWWW
Needle position: centre
Drop feed control: sewing
Tailor tacking with sewing thread
Needle: 80
Zigzag: 112 - 2
Stitch length: 4
Tailor tackling with blasting thread (especially for wool materials)
Use basting thread for top thread only; and normal sewing thread for the bobbin.
Needle: 90
Zigzag: 2
Stitch length: 4
Tallor tackling with damning thread (for thin materials)
Needie: 70
Zigzag: 1^3/4
Stitch length: 4
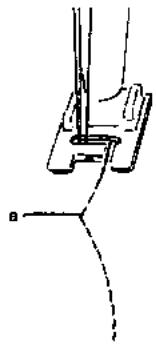
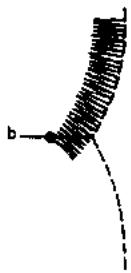
Important preparation
- First set zigzag and put needle in its highest position. Presser foot is to be attached only after this procedure, in order to avoid damaging the needle.
- Loosen top tension so that big, loose loops are formed or remove top thread from tension slot altogether and pass round pattern lever 13. When work is finished tighten tension again or replace in the tension slot.
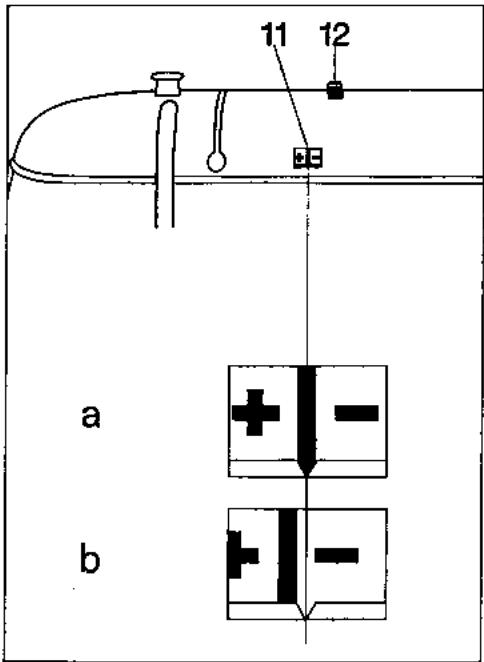
a Position of tension indicator for normal sewing
b Position of tension indicator for tailor tacking
Draw thread to the rear under the presser foot. Before starting to sew always lay the thread sideways under the presser foot.
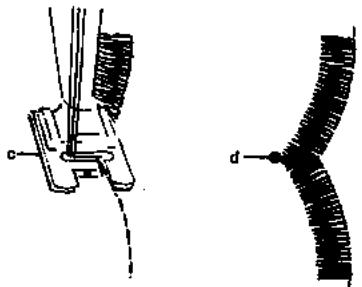
A pattern can be transferred onto the fabric with the aid of the tailor tacking foot, this forms the necessary loops.
Pull both sides of the material gently apart and cut through the threads.
When tacking by hand one works directly alongside the pattern. It is to be recommended when working by machine (saves time) to transfer the pattern onto the material with chalk and then remove the pattern. It is understood that the pieces of material should be pinned down first before basting to prevent slipping.
Mark the corners this way ..
... and the darts like this
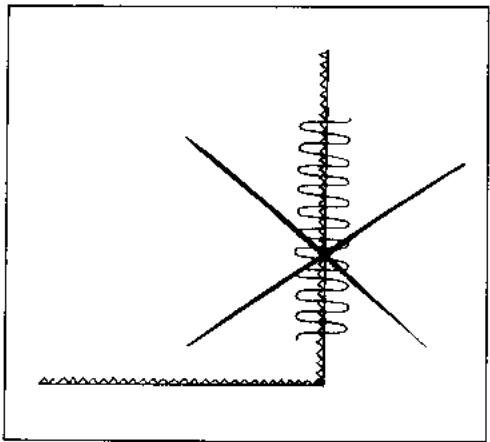
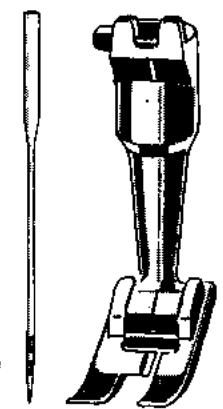
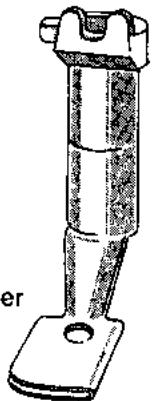
Hemmer
Needle: 80-70
Mercerised sewing
thread No.50
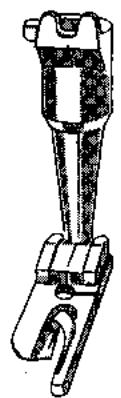
Zigzag: 0
Stitch length: 1^1/2 - 2
Automatic: straight stitch
Needle position: centre
Drop feed control: sewing
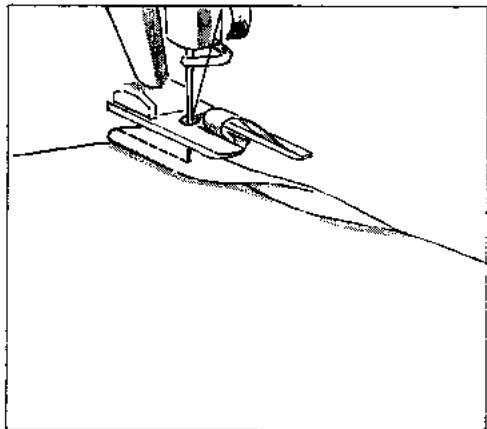
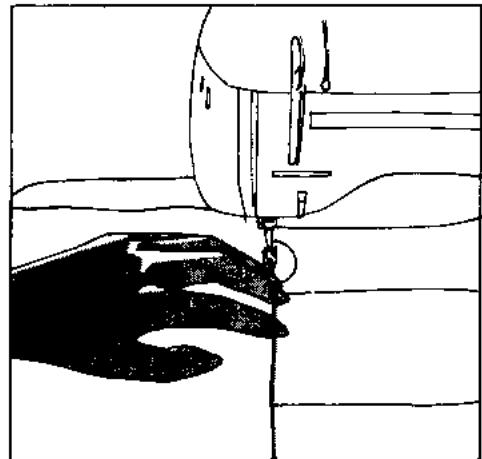
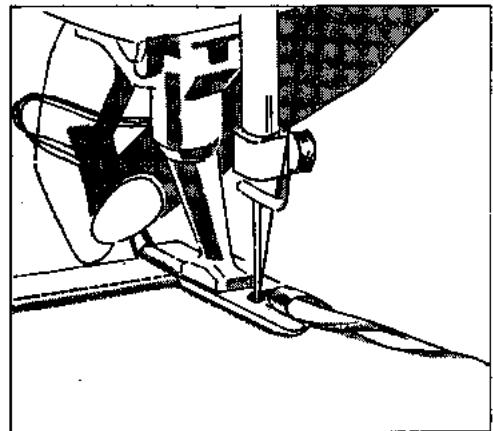
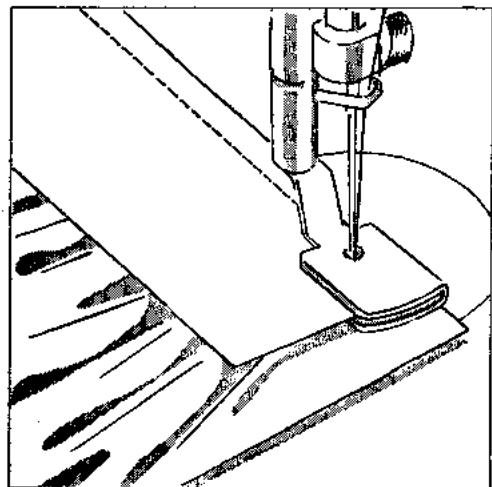
To begin sewing: Fold edge of fabric twice (not too wide). Lay work under the presser foot and sew a few stitches.
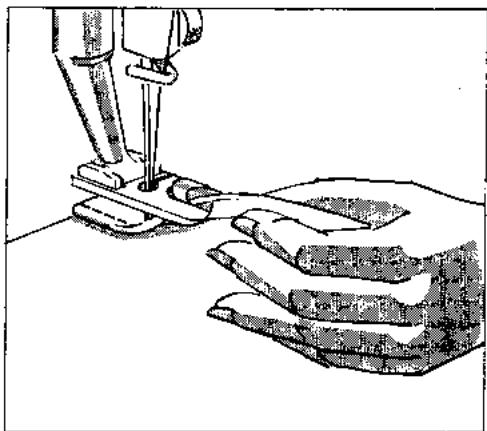
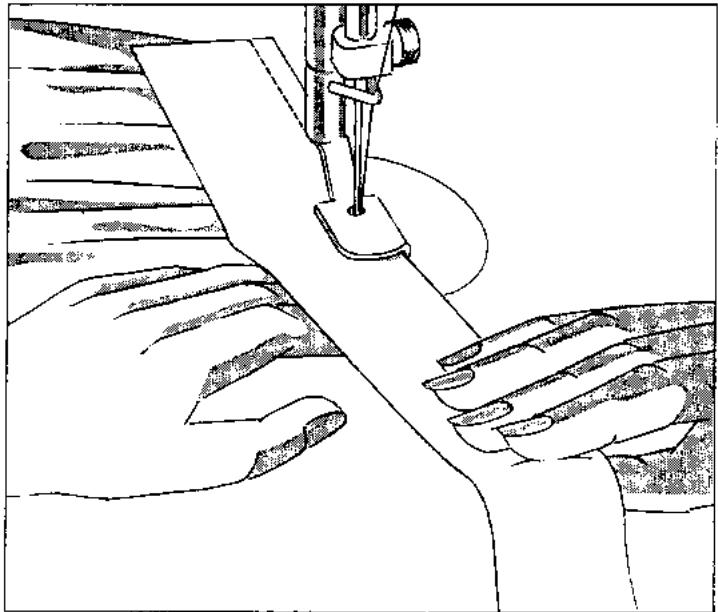
How to guide the work
When guiding fabric hold it taut and lift it slightly. The edge of the fabric must be vertical and run through the machine in a straight line.
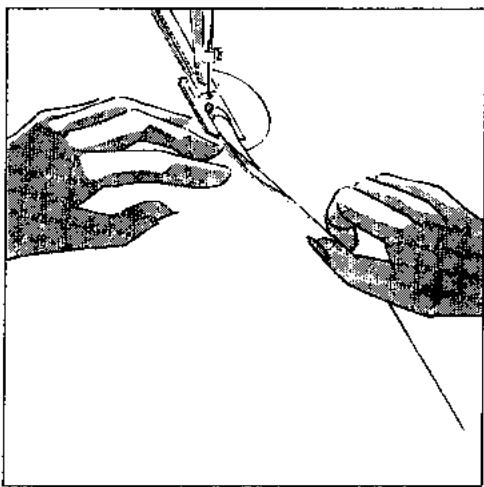
Leave needle in the fabric and lift presser foot. Tautly hold the first fold under the presser foot with the left hand and draw it through the spiral on the presser foot.
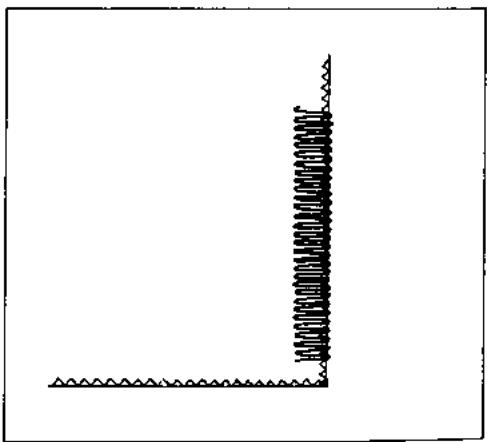
The corners: These are sewn in two stages as follows:
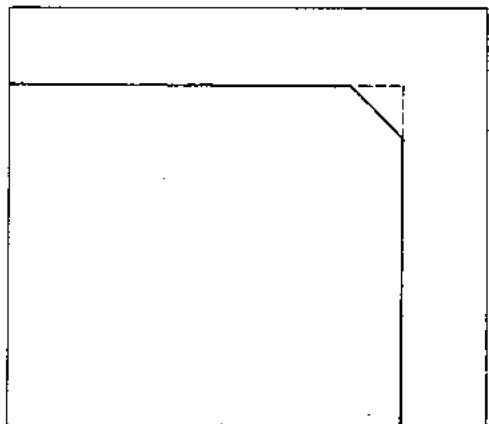
First cut a little off (not too much otherwise they will pull apart). Sew first seam.
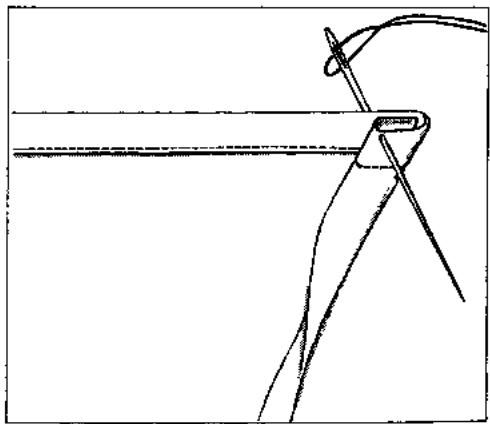
Fold edge of fabric twice and draw a strong thread through by hand.
Hold corner (together with thread) with thumb and forefinger of the right hand and lay the work near the presser foot.
With the left hand hold the first fold near the presser foot and draw through the spiral on the foot. Still holding the fabric taut draw it towards you and lay the end under the needle. Stick the needle in and lower foot.
To facilitate sewing on the corner one should hold the tacked thread together with the sewing thread and pull gently until the presser foot no longer lies on the corner.

Zigzag: 4
Stitch length: 2^1/2 - 3
Automatic: zigzag WWWW
Needle position: centre
Drop feed control: sewing
Use the same method as for normal hemming.
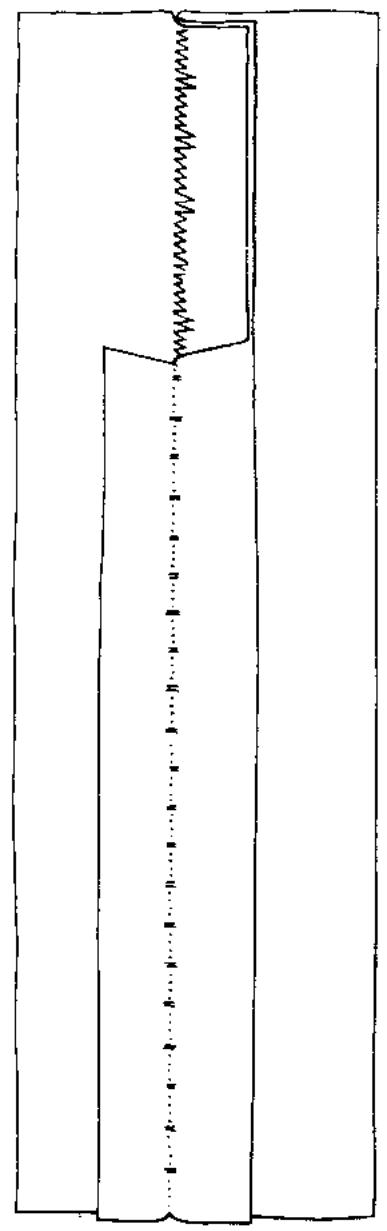
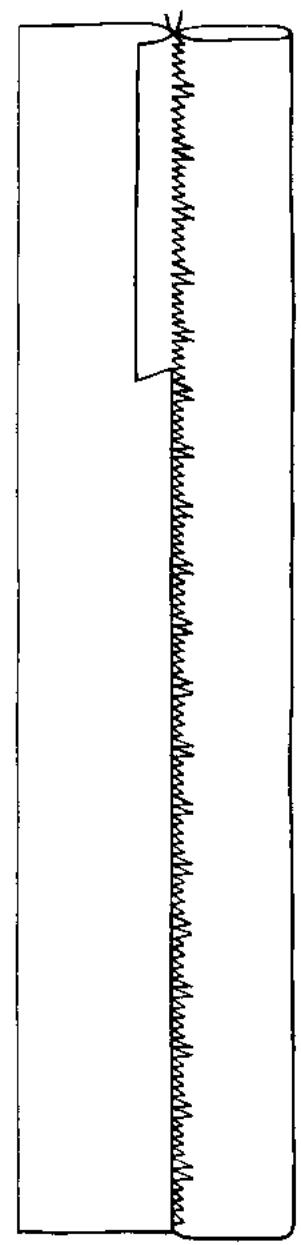
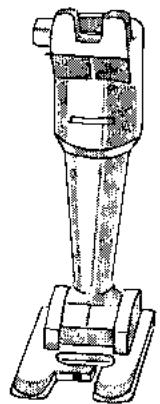
The Lap Hemmer (Feller)
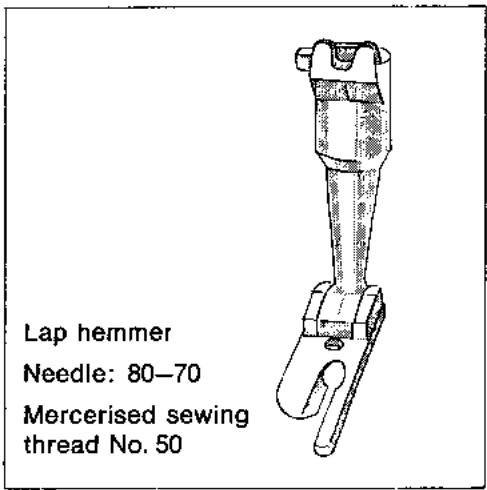
Zigzag: 0
Stitch length: 1^1/2 - 2
Automatic: straight stitch
Needle position: centre
Drop feed control: sewing
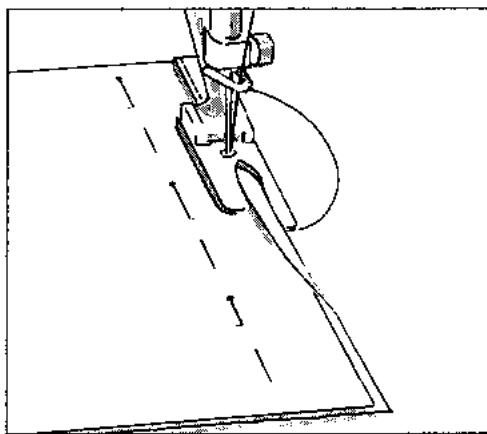
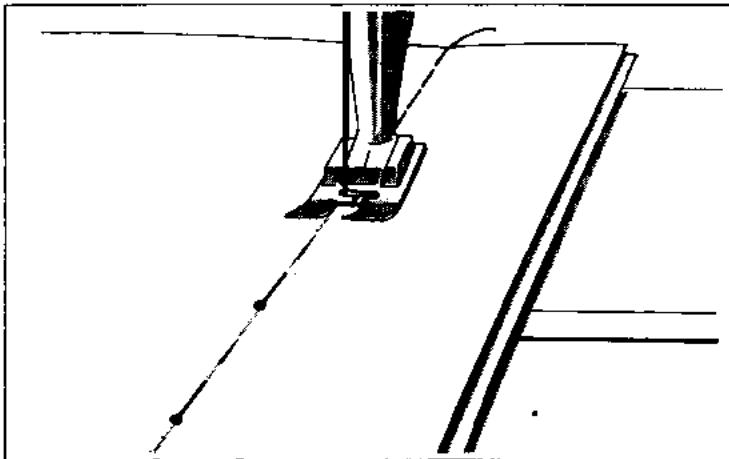
First operation:
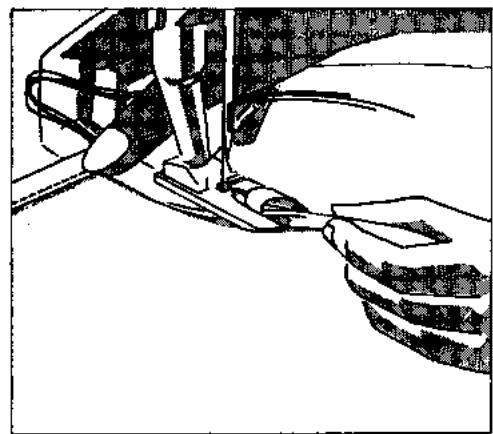
Pin both pieces of fabric together so that the piece underneath projects by 3mm(18^ ) . Fold overlapping piece over the top piece and slide it under the presser foot. Sew a few stitches. Leave needle in the fabric, lift presser foot and guide fabric into the foot.
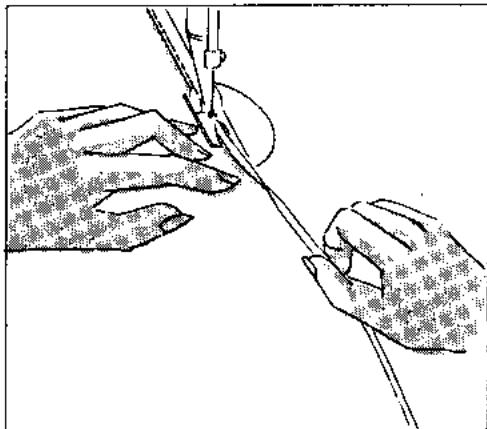
When sewing make sure that the same width of material enters the feller all the time. Guide the fabric as you do when sewing a hem.
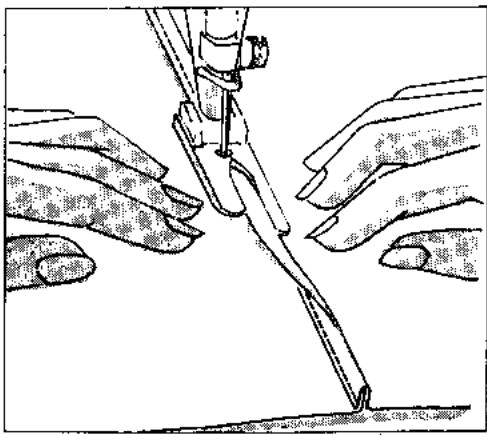
Second operation:
Now iron seam well, guide it again into the feller and sew the second row of stitches. Pull fabric slightly sideways on both sides of the feller.
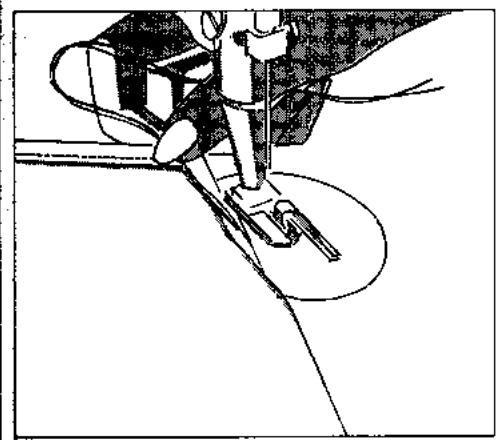
Presser foot: Gatherer
Needle: 80-70
Mercerised sewing
thread: 50
Zigzag: 0
Stitch length: 112 - 4
Automatic: straight stitch
Needle position: centre
Drop feed control: sewing
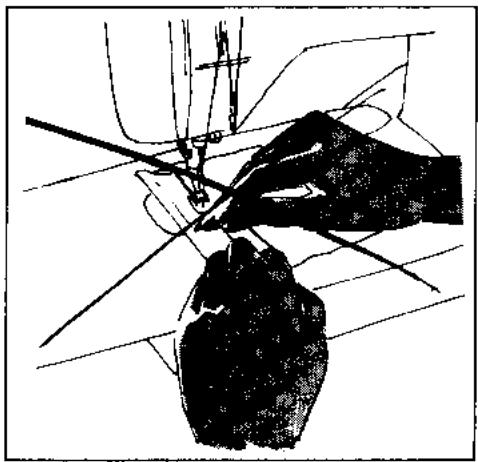
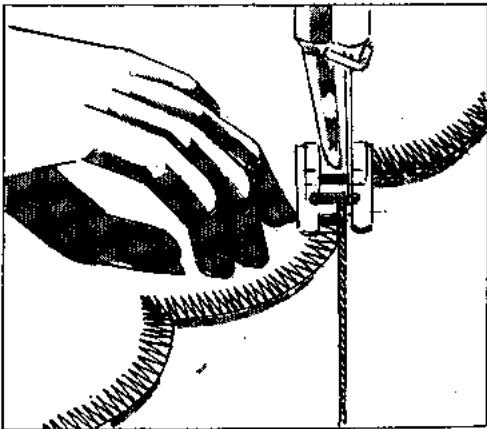
The material to be gathered always lies under the foot and the flat piece in the slot.
The flat piece of material is inclined to slip out of the slot. In order to avoid this the work should be guided as shown in the illustration, by holding the lower piece with the left hand and the upper piece with the right hand. Always pull slightly towards the right hand corner of the presser foot.
Calculation: The amount of gather depends on the length of the stitch. The longer the stitch the tighter the gather.
For tight gathering the upper piece of material can be pulled a little.
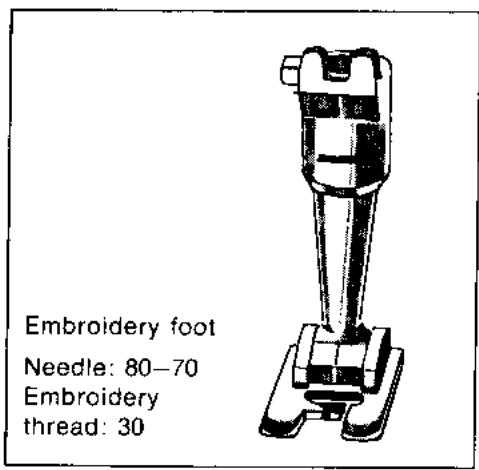
Embroidery foot
Needles: 80-70
Thread:
Embroidery thread
No.50
Automatic: zigzag WWWW
Needle position: centre
Drop feed control: sewing
Guiding the work
You may work with or without the frame; however, taut material can be guided more easily.
Important: The machine feeds automatically but only in a straight line. For curves the work must be guided by hand i.e. the frame or the material must be lightly held by one or both hands and should not be pressed onto the sewing table.
Guiding with the frame: The left hand must hold the frame steady, because often the frame is guided during sewing with this hand only.
Guiding without frame: "You can only guide the work if it is held lightly." Nevertheless, it is essential to hold the material itself rather taut. This is the only way the work can be turned as the design requires.
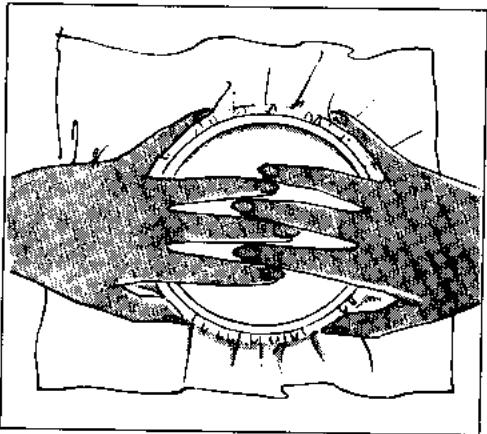
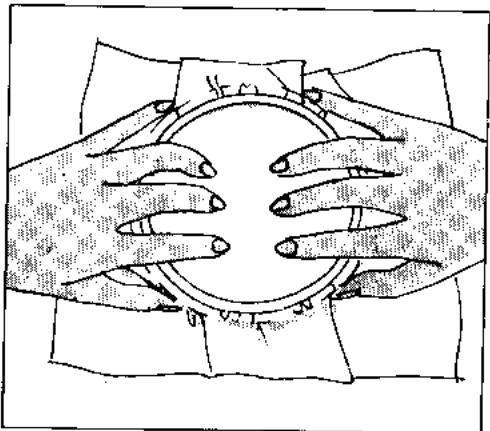
Working sequence
First put your hand in the position as when darning. Then draw forefinger back to the inner edge of the frame. Extend the middle and ring fingers. Your hand now has complete control of the frame and the best possible freedom of movement.
Notice: Do not place the forefinger parallel to the thumb, otherwise the movement of your hand will be restricted.
Correct: Place thumbs under the material. Make a fold if the piece of work is large (see diagram). Guide near the presser foot.
Incorrect: This way is incorrect as pressure on the work will result.
Preparation: Trace design on the wrong side of the material with the aid of special tracing paper. See that the motive is in reverse. The design can also be traced onto iron-on Vilene and the Vilene ironed on to the wrong side of the material. (Especially recommended for rough and irregularly woven fabrics are difficult to draw on.) If a design that is to be used often trace on thin Vilene and then transfer it onto the material. Vilene can be tacked on to a garment to stiffen it if desired.
1st run:
Zigzag: 1/2-1
Stitch length: 14 - 12
Tack material for applique onto the right side.
- Sew along the traced lines on the wrong side.
- Turn to right side and cut away neatly along the sewn lines any surplus applique material. (At the same time remove the frame.) Hold scissors correctly.
2nd run:
Zigzag: 11/2
Stitch length: Satin Stitch
Cover the cut edge on the right side with Satin Stitch. Sew corners and small curves, stitch by stitch (using hand wheel).
Finish by tracing the lines through that were not appliqued and sew from the right side.
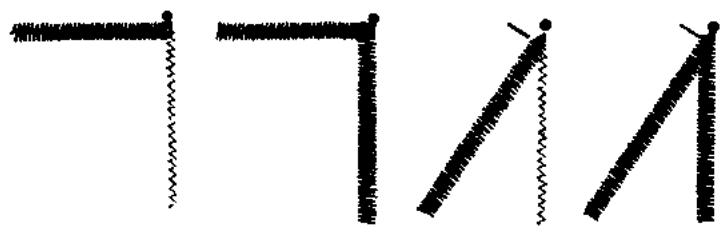
Sewing the corners
-
Rectangular corner: Put the needle on the outer edge, turn the work and continue sewing. The corner will now be oversewn.
-
Pointed corner: Stop sewing 12 cm ( 13 ) in front of the corner. Then turn back zigzag while sewing on 0. Raise presser foot and turn the material. Set zigzag onto 1 12 again and carefully continue sewing.
- Blunt corner: Sew until the needle is in the middle of the angle. Then sew out from centre, replacing the needle In the middle after every stitch, raising the presser foot and turning the work slightly. Curves: Using the same method as for blunt corners.
Multi-coloured applique work
The lower part:
- Only this part of the applique material should be tacked on. Sew around: Where the colours overlap use straight stitch and zigzag the other contours.
- Trim away surplus applique material, cutting as closely as possible to zigzag stitches. Where a straight stitch has been used leave 12 cm (1/a^) beyond stitches.
- When covering the contours leave the straight stitched edge uncovered. This will be covered again by the next part.
Top part: Complete in the usual manner for applique work.
Embroidery foot
Needle: 80
Thread:
Embroidery
thread No. 30

Zigzag: 4
Stitch length: Satin Stitch
Automatic: zigzag WWWW
Needle position: centre
Drop feed control: sewing
Remember the following
when embroidering over satin stitch and ornamental stitch seams :
The stitch length for embroidery is to be adjusted to a short length. The material may block progress when the foot moves over a seam already embroidered. By guiding the work close to the foot and assisting its movement the difficulty can be removed.
If the foot is almost over the edge of the seam, hold the material back a little otherwise the foot will glide away and this will result in a long stitch (which will look as if a mistake has been made).
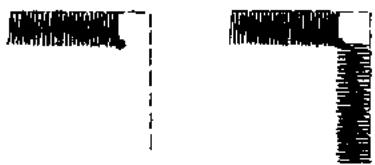
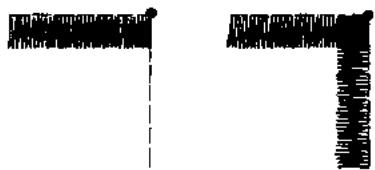

Satin Stitch corners
-
Open corner: Sew until a space the width of the stitch is left in the corner. Place needle on the inside edge. Turn work and continue sewing.
-
Closed, oversown corner: Sew to the corner. Put needle on the outer edge, lift presser foot and turn work. Lower foot again and continue sewing (help a little by placing finger near the foot, see embroidery over satin stitch or embroidery seams).
-
Corner with diagonal design (rectangular): Sew to the corner. Place needle on the outer edge. Lift foot, turn sewing work. Needle position, left or right (according to design) sew zigzag on 0. Lower foot. Now whilst sewing slowly turn zigzag onto 4 again; sewing slowly!
-
Corner with diagonal design (for festoonery). Needle position left!
a) Lay the work under the foot so that the design can be seen in the slot that runs lengthwise. b) Sew to the corner, i.e. till the needle is about to make a stitch from the left on the line drawn to assist you. c) Raise foot, turn work and turn zigzag to 0. Lower foot again. Make sure that the design appears once again in the slot that runs lengthwise. d) During sewing turn the zigzag again slowly onto 4; sew slowly!
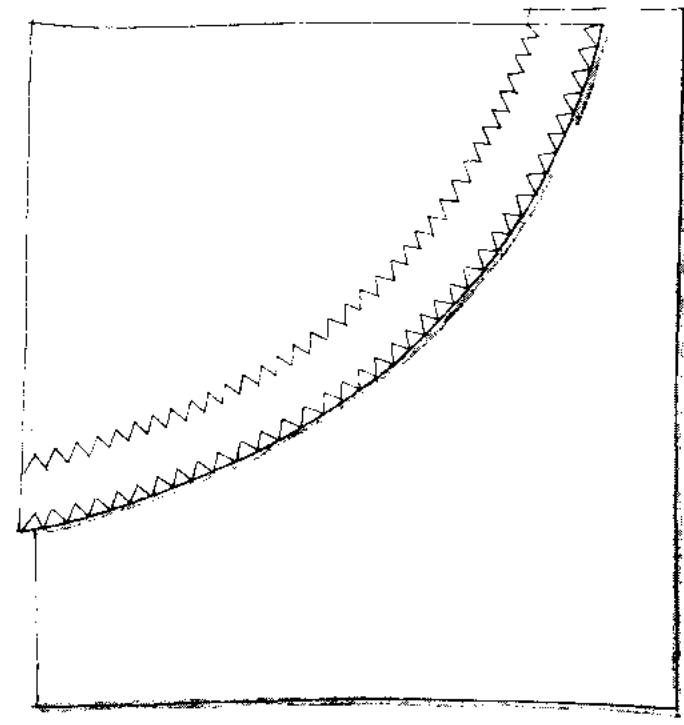
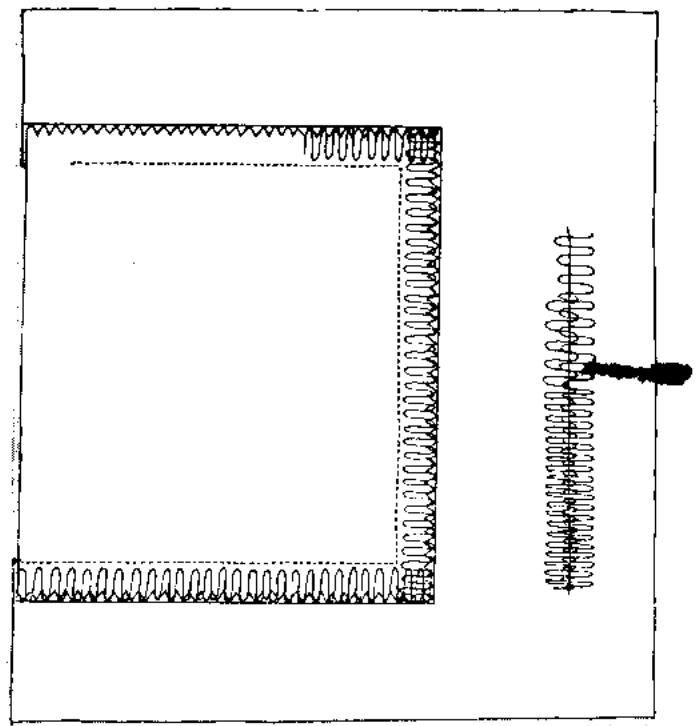
Borders for table-cloths, table-napkins, doilies, etc.
Border scallops
Preparation: Draw the scallops with the aid of a cardboard stencil onto the material. Mark all the corners with white crayon. Underlay with paper.
1st run :
Zigzag: 4
Stitch length: Satin Stitch
Sew satin stitch seam. Remove paper and carefully cut round the scallops.
2nd run:
zigzag: 2^1 / 2 - 3
Stitch length: 1 - 112
Oversew edge with zigzag. At the same time guide a pearl cord along the edge making sure that it does not slide over or under it.
Note: The machine feeds in a straight line and not in curves. The border cord must therefore be held straight and the scallop edge must be guided on this straight line. Guide slowly and near the foot.
Straight border
Preparation :
Draw border line, underlay with paper.
1st run:
Zigzag: 4
Stitch length: Satin Stitch
Sew satin stitch seam. Remove paper and cut away surplus material.
2nd run:
Zigzag: 2^1 / 2 - 3
Stitch length: 1 - 112
Overseew edge with zigzag. At the same time guide through pearl cord (No. 8 three- to five-ply) taking care that it neither slides over nor under the edge.
Corner: Sew to the corner. Lower drop feed control. Sew three stitches using the hand wheel. Leaving the needle in the work at the inside edge, raise foot, turn work. Make a loop with the cord, lower foot and sew further three stitches. Raise drop feed control and continue sewing carefully. Pull on the loop until the foot no longer lies on the corner. To make loop disappear pull the ends of the cord. (See diagram.) Push corner stitch over the corner and continue sewing.
Narrow border

1st run :
Foot: Embroidery foot
Zigzag: 1^1 / 2
Stitch length: 1/4
Needle position: centre
Draw pearl yarn No. 5 or 8 (according to material) through the hole of the embroidery foot. Sew seam with satin stitch. Cut surplus material away carefully.
2nd run :
Foot: Small buttonhole foot
Zigzag: 2-3 (according to material)
Stitch length: Satin Stitch
Needle position: centre
Now completely cover the first satin stitch seam with a second. Lay the work under the foot in such a way that the satin stitch seam is in the left groove of the foot. Place the cord (mostly 1-ply) into the right hand groove of the foot. In this way the yarn is joined exactly to the edge. Make the corner in the same way as with the wide border.
Double and treble needle
Embroidery foot
Thread:
Embroidery thread
No. 30 or 50
Treble needle
only 50
Double and treble needle
These special needles produce very beautiful effects on delicate materials, whether shades of one colour or different colours.
Adjustment
Automatic: As desired
Needle position: centre
Drop feed control: Sewing
When threading through the thread tension, make sure that one of the threads goes left and the other right of the tension disc. When threading the treble needle, the threads for the two outside needles go on one side of the tension disc and the middle thread on the other. (Wind third thread on a bobbin and place it on the left hand upper thread pin beneath other spoole.)
Double needle
Zigzag: 2^1/2
Stitch length: 1/4 - 1
(according to pattern)
Treble needle
Zigzag: 1^1 / 2
Stitch length: 1/4 - 1
(according to pattern)
Sewing Pintuck Corners
Because of the double needle, corners cannot be turned at right angles in one stitch, as with a single needle.
You should therefore proceed thus: Bring the points of the needles into the work. Lift presser foot. Half turn work. Lower presser foot. Turn balance wheel by hand to do one stitch leaving needle points in work. Lift presser foot. Complete the turn. Lower presser foot and continue.
Fancy Patterns with double needle (Remove the cord)
Zigzag: 0 - 2^1 / 2
Stitch length: about 1 / 4
Needle position: centre
Automatic: as desired
Drop feed control: sewing
Thread: 30 or 50
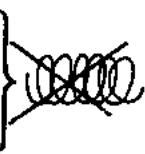
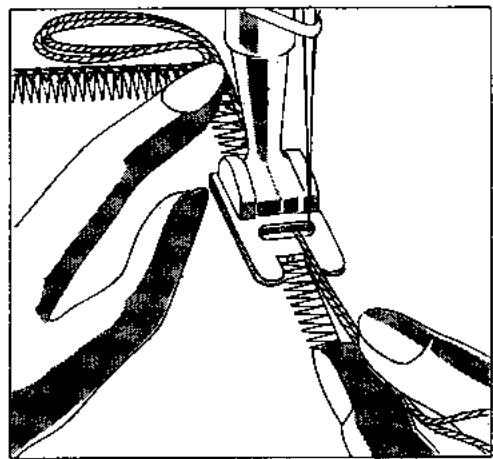
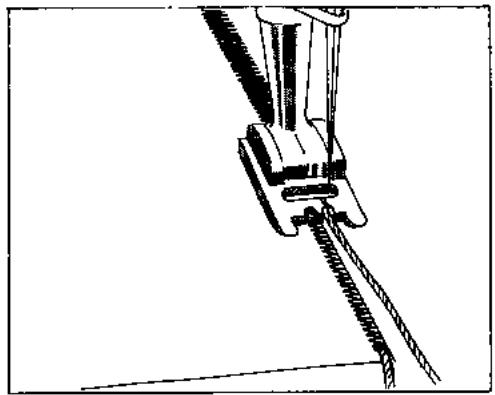
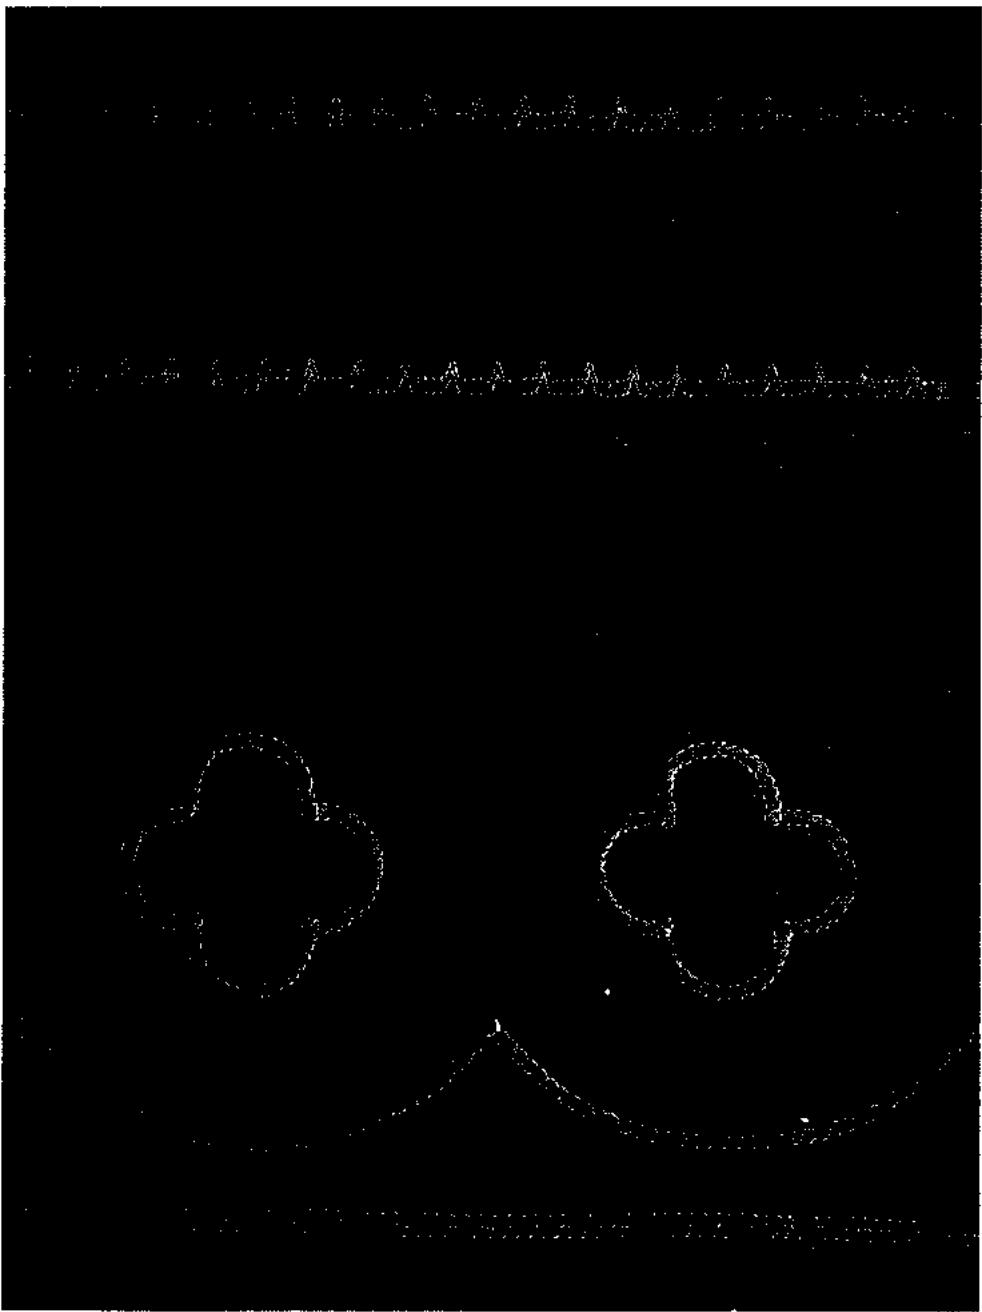
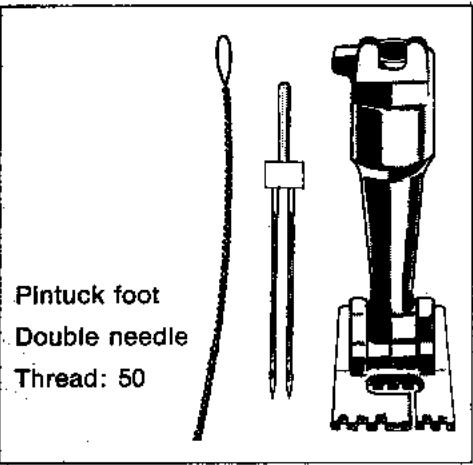
Sewing Pintucks
Ziazaq: 0
Stitch length: about 1^1/2
Automatic: straight stitch
Needle position: centre
Drop feed control: sewing
To sew pintucks, 2 top threads are needed (for double needle). When threading the machine take care that the two threads are not twisted together, but bring them singly from take-up lever to the needles.
The quickest way to set up the machine for pintucking
Insert bobbin case. (Do not bring up lower thread yet.) Insert and thread the twin needle.
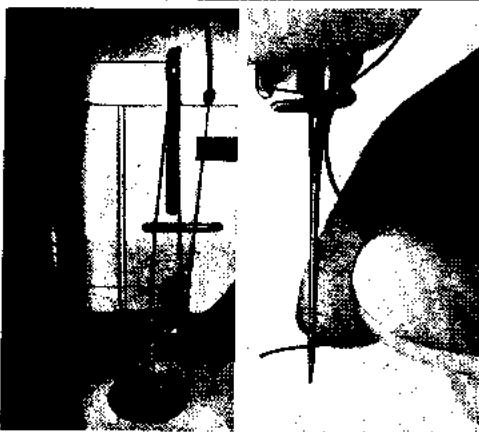
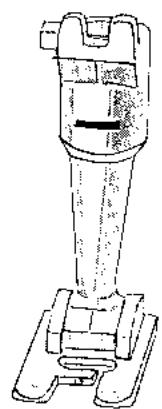
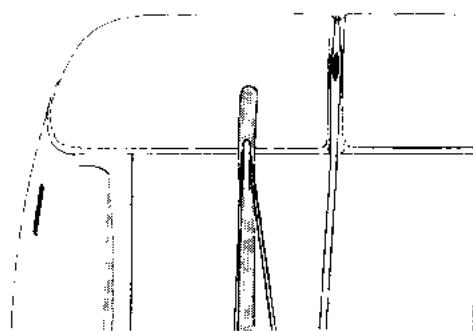
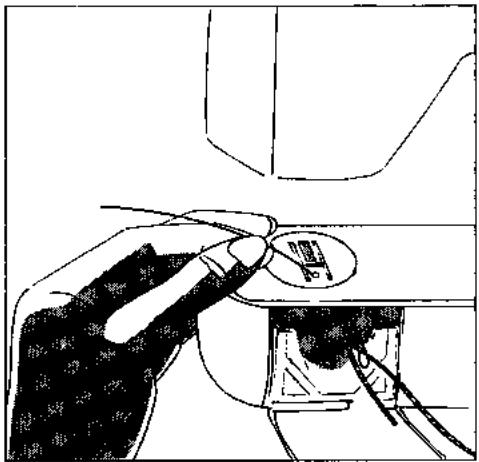
Thread the gimp through the hole in the needle plate (the free arm cover can be removed for this) and finally bring up the bottom thread and clip on the plntuck foot.
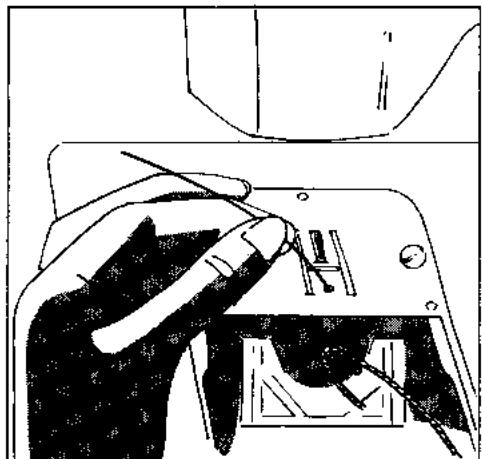
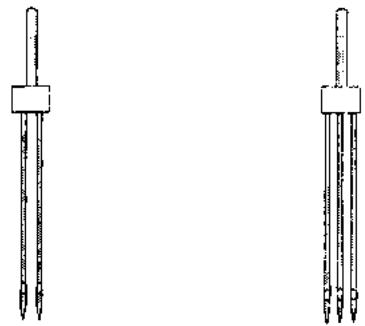
The gimp is threaded like this: model 707
The gimp is threaded like this: model717
The glmp is threaded like this:
The regular spacing between the tucks is controlled automatically by the grooves on the underside of the foot. (When embroidery is eventually to be sewn between tucks, then a width of exactly 1 presser foot is required.)
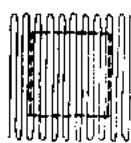
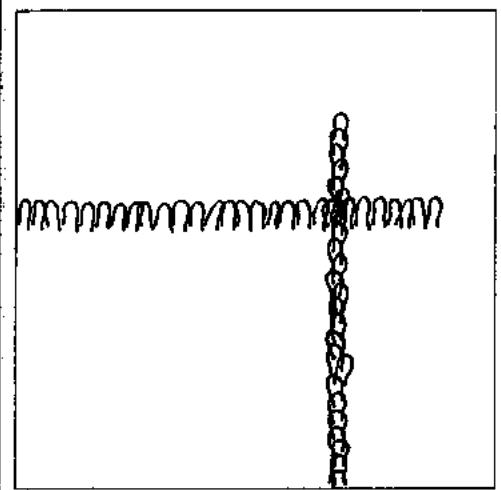
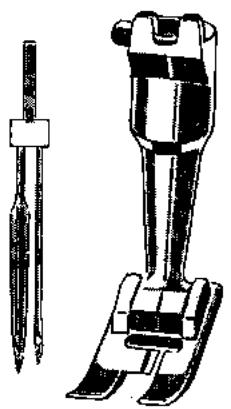
Hemstitching (for fine fabrics)
Embroidery foot
Needle: Single hemstitch needle
Thread: Embroidery thread No.30 or 50
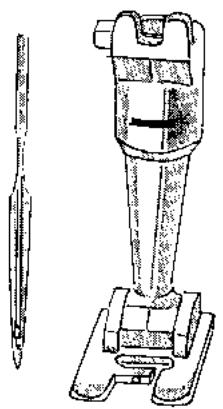

Single hemstitch needle
Adjustment
Zigzag: 2
Stitch length: 1
Needle position: centre
Automatic: zigzag WWW
Drop feed control: Sewing
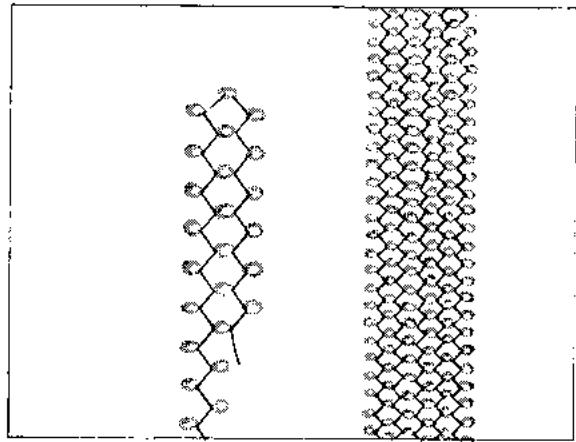
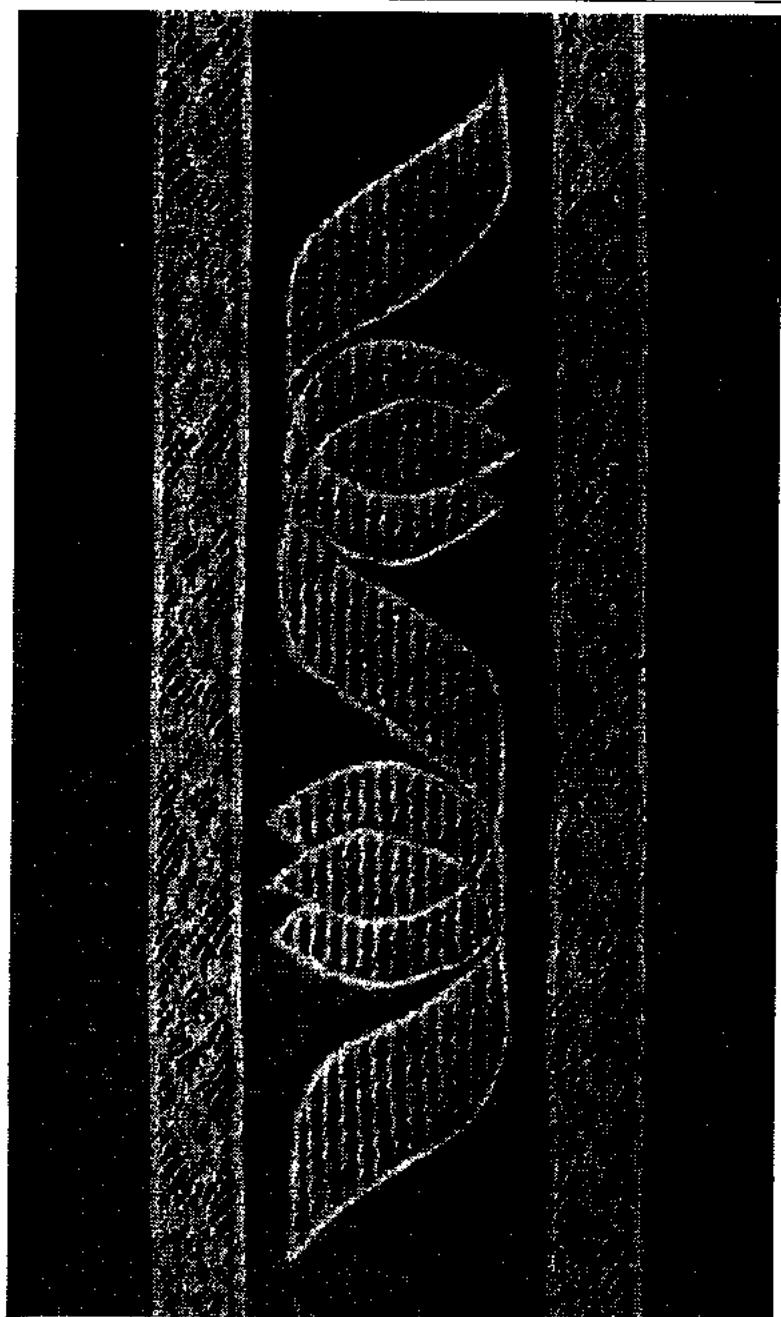
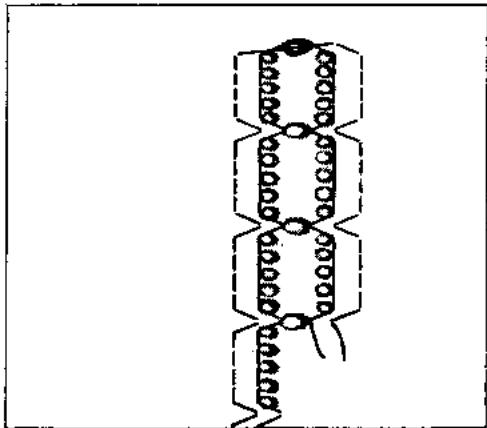
Ruche
Iron bias strip of organdy in two. Sew hem stitches at the desired distance over the folded edge. Sew the ornamental stitch in between with a normal needle.
An Entre-deux (insertions) is worked in the same way.
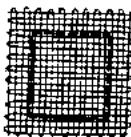
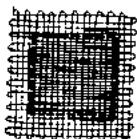
Applique with Pre-Embroidered Material
(use Organdie double)
Hemstitch a piece of fine material in the manner described until you get a trellis effect. With this trellis make a normal applique. Finish by cutting away background material from under trellis.
Can be used as a border (e.g. for a stole). A very attractive effect is brought about if a double metallic thread is led through the hole in the embroidery foot.
Method
Sew first row of stitching. Leave tip of needle in work, turn and sew second row (the needle will then pierce holes of first row on one side).
Sewing foot
Needle: Double hemstitch needle
Thread: Embroidery
thread No. 50
Double hemstitch needle
Automatic: 0
Needle position: centre
Drop feed control: Sewing
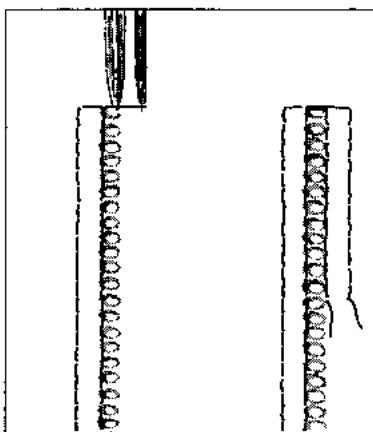
Ordinary Hematitching
Zigzag: 0
Stitch length: 1^3/4
Automatic: straight stick
Sew first hemstitch row of embroidery, raise needle and foot, turn work. Put wide needle in the first hole of the previously sewn row and resume sewing. In order that the hemstitch needle can sew exactly into the holes of the first seam, do not hold back work.
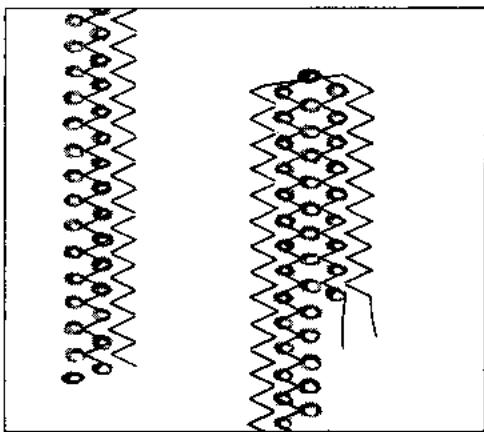
Zigzag Hemstitching
Zigzag: 13/4
Stitch length: 1^3/4
Automatic: zigzag WWWW
Sew the first side of the hemstitch row of embroidery. Just pierce the last left stitch, then turn back the hand wheel again and raise the presser foot. Turn work. With the wide needle stitch through the previously pierced hole and continue sewing. Do not hold the sewing work back.
Fancy Hemstitching
Zigzag: 1^3 / 4
Stitch length: 1^3/4
Automatic: Blindstitch
Worked in the same way as the zigzag hemstitching.
Without foot
Needle: 80-70
Thread:
Embroidery
thread 50
Zigzag: 4-2
Stitch length: 0
Automatic: zigzag WWWW
Needle position: centre
Drop feed control: Lowered
Stretch the material tightly in the frame as the work is to be carried out without a foot. Important: Lower the foot lever just the same as usual, otherwise the top thread tension will remain open and unattractive work will result.
If the bottom thread is drawn through the finger of the bobbin case the work will run more smoothly (as with button-hole sewing).
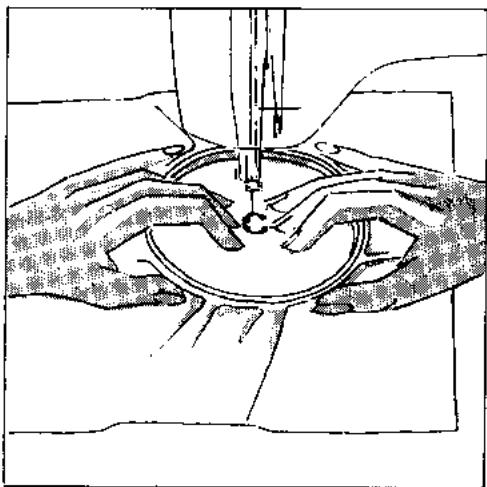
Method
Bring up the bottom thread through the material, sew a few straight stitches and cut the thread ends. Set zigzag. Place needle ready to begin and make a test stitch. The drawn line must be in the middle of the zigzag.
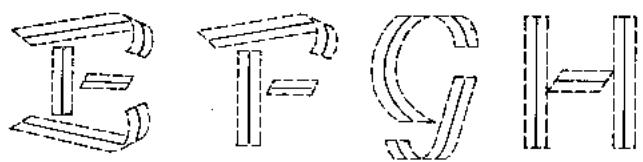
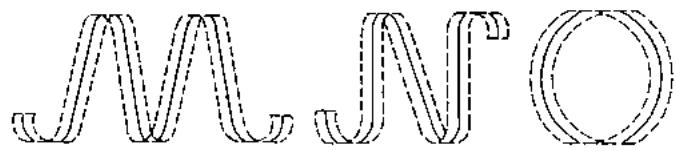
Move the frame as though wanting to write with it. Do not stop turning frame until the monogram is complete.
Guldng the work
Hold frame as when darning. Do not move fingers while working, as jerky movements produce uneven monograms.
To produce a perfect monogram a great deal depends on how the frame is held. The more securely the work is held the better the result.
Important: Allow the machine to run rather quickly; however, the frame should be guided slowly and steadily.


- Generally, most breakdowns are caused by incorrect handling of the machine. If breakdowns do occur then examine whether:
a) the needle is inserted properly (the flat side of the needle must be at the back);
b) the correct needle is being used (see needle and thread table);
c) the machine is cleaned properly. Lift free arm cover plate and remove sewing lint;
d) the hook race is clean and oiled;
e) there are pieces of thread caught between the thread tension discs or under the bobbin case spring;
f) hand wheel is secured properly.
- If the upper thread breaks. Can have the following causes:
a) top thread is too tight;
b) use of inferior needles (buy them preferably from a Bernina dealer);
c) needle inserted wrongly. Flat side must be at the back;
d) the needle is blunt or crooked;
e) Poor quality or knotted thread.
Thread has dried out due to long storage;
f) the needle plate hole is pitted by needle and needs repolishing. (Bring free arm cover plate, resp. needle plate to authorized Bernina dealer.)
g) hook point is damaged (call authorized Bernina dealer).
- If bottom thread breaks. Can have the following causes:
a) the bottom thread tension is too tight; b) bobbin is crushed and jammed in the bobbin case;
c) Needle hole in throat plate is damaged by the needle and needs repolishing
(call authorized Bernina dealer to change needle plate).
- Faulty stitches. Can have the following causes:
a) wrong needle. Use system 705B only; b) needle is crooked or not inserted correctly (push needle right up in the needle bar!);
c) low quality needle, roughly polished.
- Needle breaks. Can have the following causes:
a) needle clamp screw is not sufficiently tightened;
b) the material was withdrawn towards the operator and needle bent (material should always be withdrawn to the rear);
c) when sewing over thick part material was pushed whilst the needle was still in, therefore it bent, touched the throat plate and broke.
d) when cheap cotton, irregularly twisted or even containing knots is used.
- Seam Irregularities. A bad uneven seam results:
a) if thread remnants are between the thread tension discs;
b) if thread remnants are under the bobbin case tension spring.
- Machine runs slowly
a) Motor does not function properly (call authorized Bernina dealer);
(b) foot starter does not function properly (call authorized Bernina dealer);
c) use of low quality oil can block the movement. The machine must be dismantled and cleaned. Call Bernina dealer;
d) machine has been standing in a cold room.
When you bring your machine to an expert, please take along accessories and foot starter.
Model 707
Oil the machine frequently but not too heavily (1-2 drops). If too much oil is applied the excess will drain off unused and stain machine and material.
Always oil the machine before use and not afterwards. Use clear sewing machine oil only, free from resin and acid. Obtainable at all Bernina dealers.
Proper oiling of the machine assures its free running and long life.
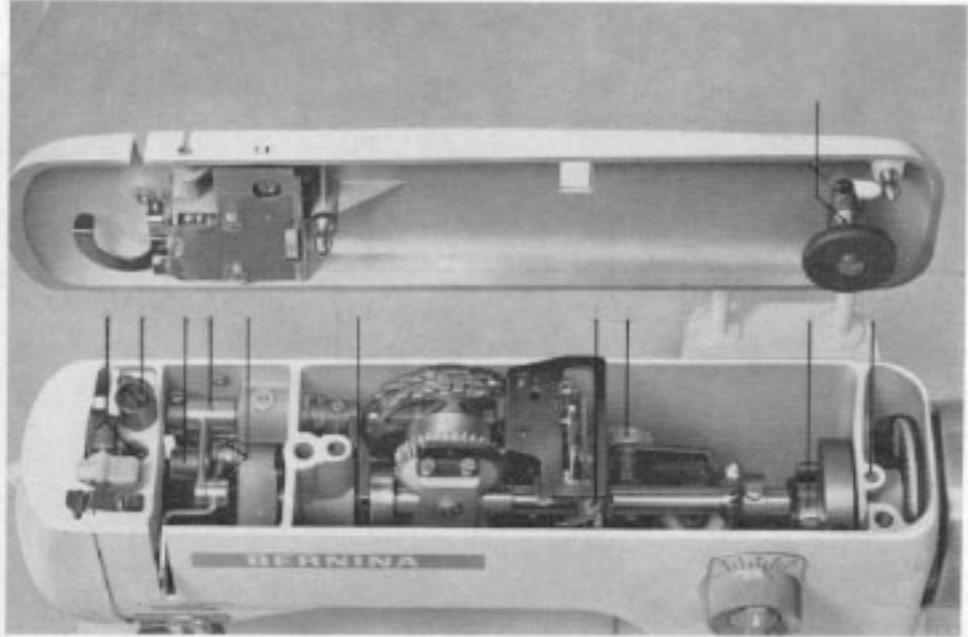
All the oiling points on the machine are marked in red.
Unmarked points are provided with self-oiling bushings and thus need no oiling.
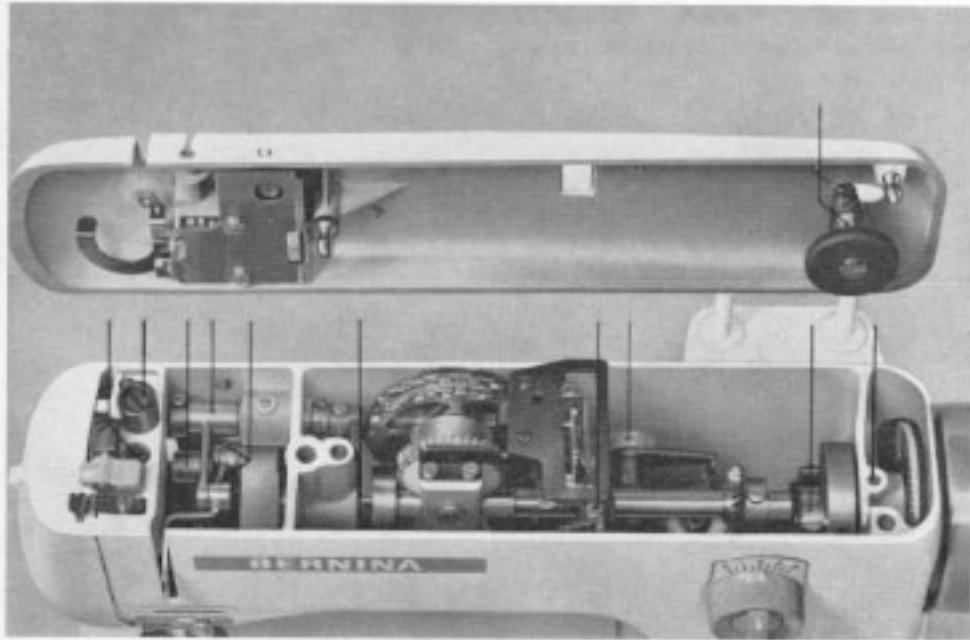
The main oiling points under the top cover of the machine.
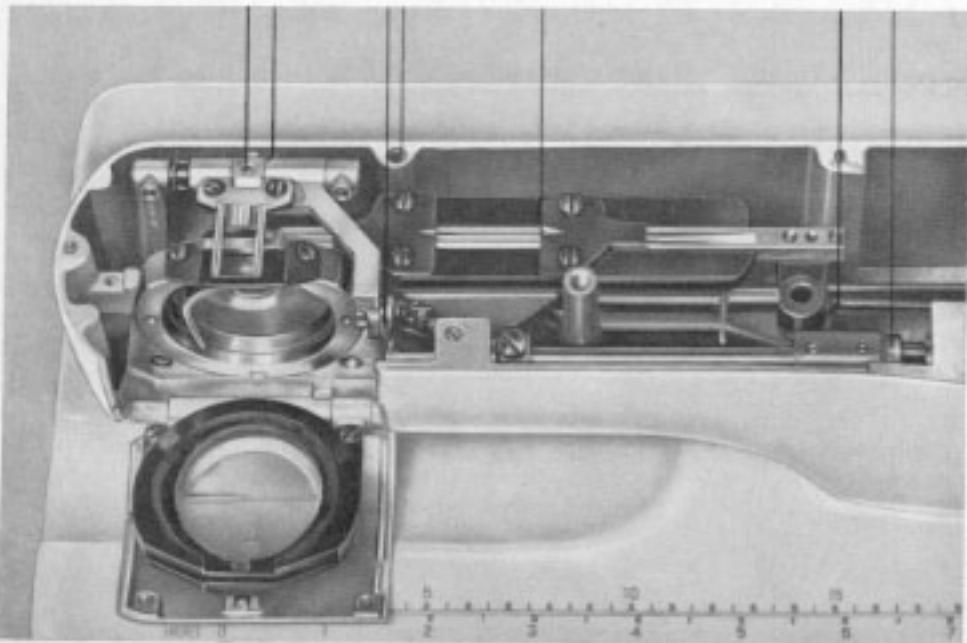
The main oiling points under the free arm cover.
If the machine has been standing in a cold room, it should be brought into a warm room about an hour before use, so that it can warm up to room temperature and the oil in the bearings will again become fluid.
Cleaning the machine. During sewing pieces of thread and fluff collect under the needle plate and around the hook. The cover plate of the free arm should be removed from time to time so that the sewing fluff can be cleaned away.
To take off the open arm cover
Remove sewing foot and needle. Open hinged shuttle cover. Loosen screw with the special screw driver.

After removal of the cover the feed dog is exposed and can be easily cleaned. The under side of the needle plate can be cleaned at the same time.
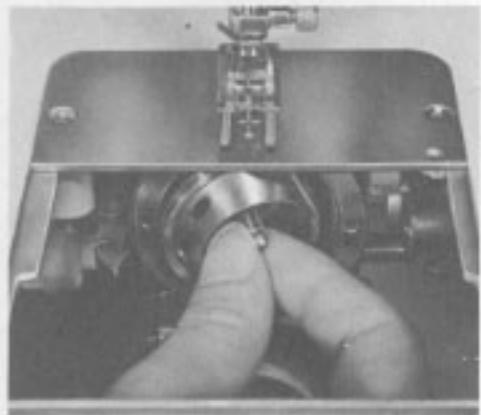
Cleaning and oiling the hook. Remove bobbin case. With the forefinger of the right hand press latch to the left. The locking bridge together with the hook race cover can now be turned down.
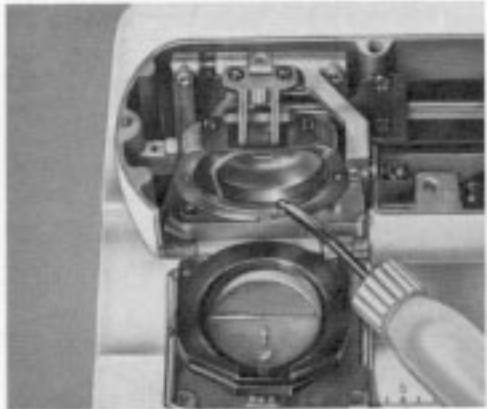
After cleaning pour a few drops of oil into the shuttle race. Insert the shuttle again with the left hand. Lock the bridge together with the shuttle race cover, making sure that the spring snaps back into position. Test by turning the hand-wheel as a precautionary measure. Replace arm cover and re-screw tightly. When the bobbin case is inserted the hinged shuttle cover can be closed.
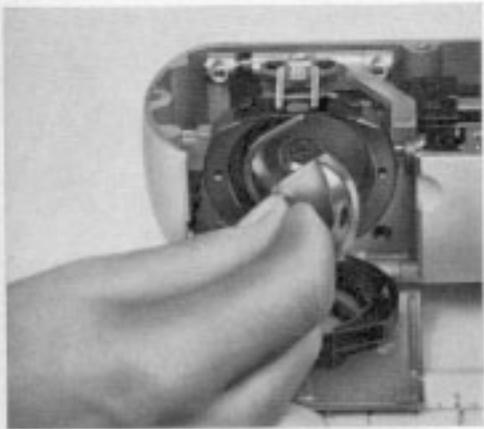
Now the hook can be taken out and the hook race cleaned with a small brush and cotton duster. Never use hard tools such as screwdrivers and scissors for removing thread particles.
Oil the machine frequently but not too heavily (1-2 drops). If too much oil is applied the excess will drain off unused and stain machine and material.
Always oil the machine before use and not afterwards. Use clear sewing machine oil only, free from resin and acid. Obtainable at all Bernina dealers.
Proper oiling of the machine assures its free running and long life.
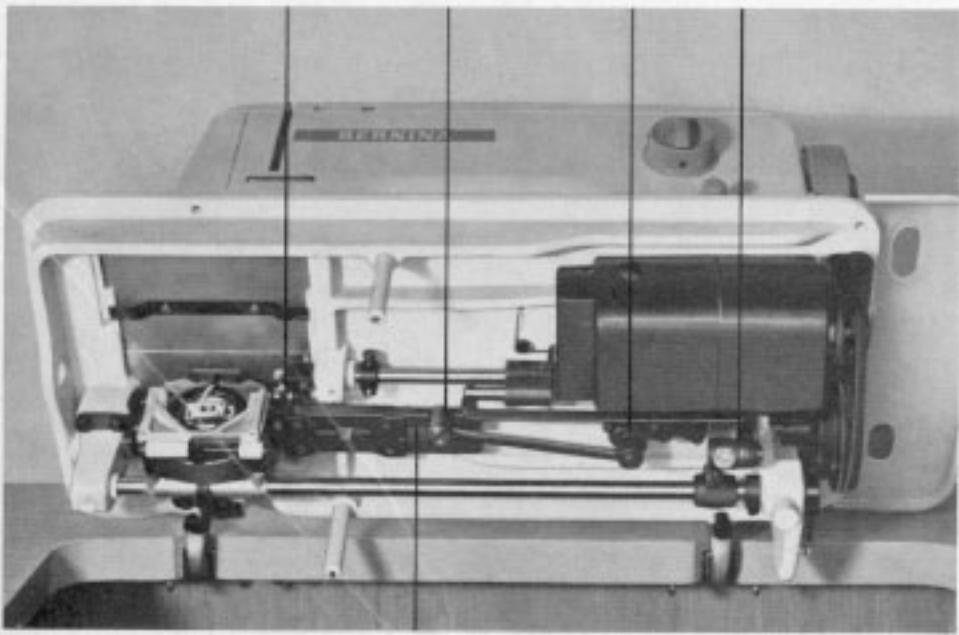
All the oiling points on the machine are marked in red.
Unmarked points are provided with self-oiling bushings and thus need no oiling.
The main oiling points under the top cover of the machine.
The main oiling points under the base plate.
If the machine has been standing in a cold room, it should be brought into a warm room about an hour before use, so that it can warm up to room temperature and the oil in the bearings will again become fluid.
Cleaning the machine. During sewing pieces of thread and fluff collect under the needle plate and around the hook. The needle plate slide plate should be removed from time to time so that the sewing fluff can be cleaned away.
Model 717
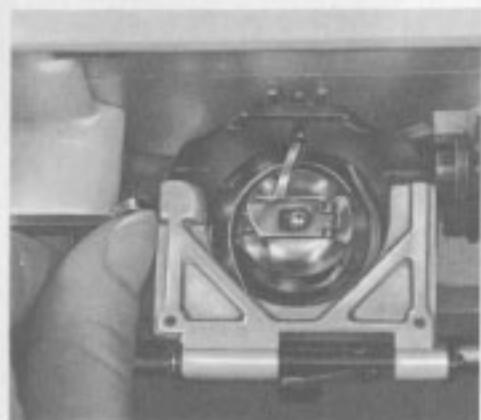
Cleaning and oiling the hook. Tilt head of machine to the back. Remove bobbin case. With thumb of left hand press latch to the left. The locking bridge together with the hook race cover can now be turned down.
Now the hook can be taken out and the hook race cleaned with a small brush and cotton duster. Never use hard tools such as screwdrivers and scissors for removing thread particles.

After cleaning pour a few drops of oil into the shuttle race. Insert the shuttle again with the left hand. Lock the bridge together with the shuttle race cover, making sure that the spring snaps back into position. Test by turning the hand-wheel as a precautionary measure. Replace arm cover and re-screw tightly. When the bobbin case is inserted the hinged shuttle cover can be closed.
Insert bobbin case and close needle plate slide. Machine can be put in its proper position again.
Bermina Dealer's notes regarding instructions, home calls and possible guarantee work
Address of my Bernina agency:

