P0268 - Belysning Vaxcel - Gratis bruksanvisning og manual
Finn enhetens veiledning gratis P0268 Vaxcel i PDF-format.

Brukerspørsmål om P0268 Vaxcel
0 spørsmål om dette apparatet. Svar på dem du kjenner, eller still ditt eget.
Still et nytt spørsmål om dette apparatet
Last ned instruksjonene for din Belysning i PDF-format gratis! Finn veiledningen din P0268 - Vaxcel og ta den elektroniske enheten tilbake i hendene. På denne siden er alle dokumenter som er nødvendige for bruken av enheten din publisert. P0268 av merket Vaxcel.
BRUKSANVISNING P0268 Vaxcel
ASSEMBLY AND INSTALLATION INSTRUCTIONS
P0242 / P0243 / P0244 / P0268
WARNING:
TO AVOID RISK OF ELECTRICAL SHOCK, BE SURE TO SHUT OFF POWER BEFORE INSTALLING OR SERVICING THIS FIXTURE.
NOTES: 1. Before installing, consult local electrical codes for wiring and grounding requirements. 2. READ AND SAVE THESE INSTRUCTIONS.
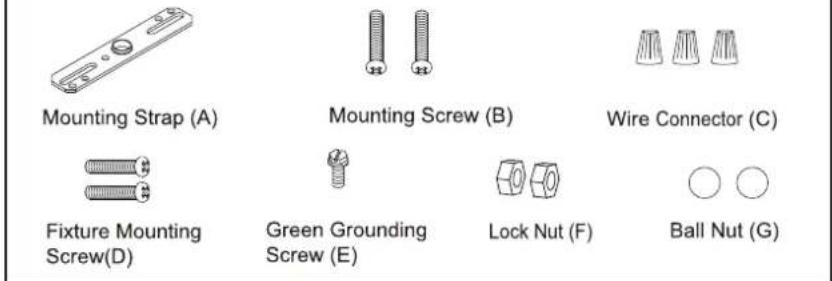
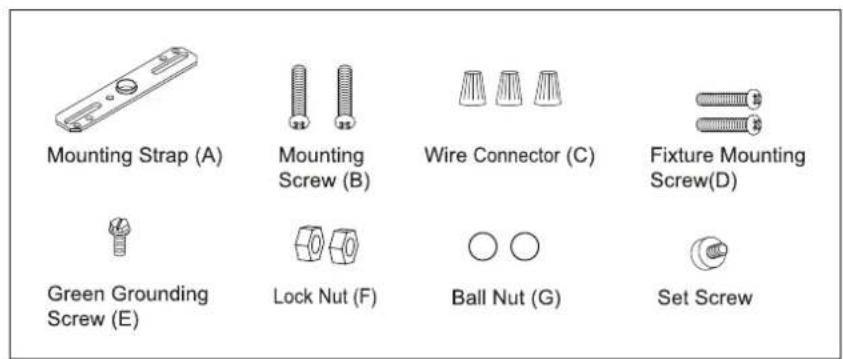
Hardware Package (included):
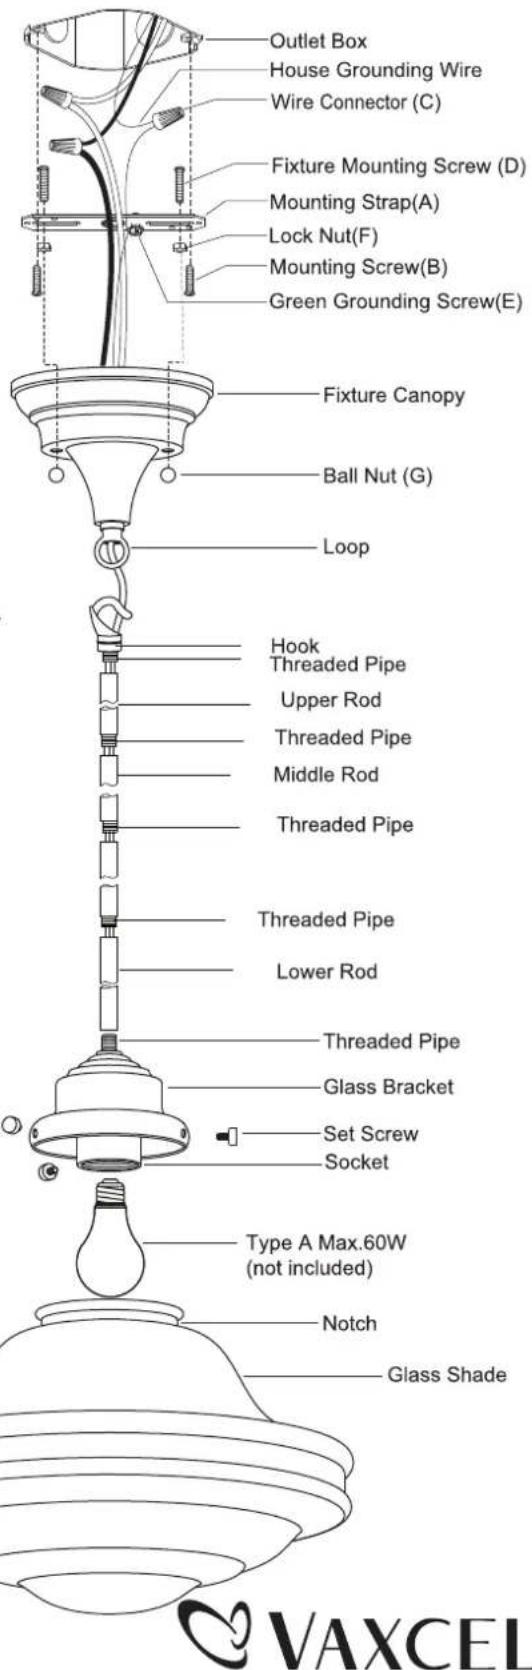
Installation Steps
Turn off the power at fuse or circuit box
- Thread two fixture mounting screws through the mounting strap, and then secure with two lock nuts. Adjust the length of the fixture mounting screws if necessary.
- Attach the mounting strap to the outlet box by using two mounting screws.
- Rod Connections:
a. Thread the fixture wire from the fixture through the lower rod, and then secure the lower rod onto fixture using the threaded pipe.
b. Thread the fixture wire through the middle rod, and then secure the middle rod onto the lower rod using the threaded pipe.
c. Thread the fixture wire through the upper rod, and then secure the upper rod onto the middle rod using the threaded pipe.
d. Thread the fixture wire through the hook and fixture canopy, and then secure the hook onto the upper rod using the threaded pipe.
Note: Length adjustable from 14-3/4" to 59-3/4". Use fewer rods if shorter length is desired.
- Hang the hook to the loop of the fixture canopy.
- Pull out the source wires from the outlet box. Make wire connections using wire connectors as follows:
---Connect the hot wire (usually black insulation) from the fixture to the black wire from the power source.
---Connect the neutral wire (usually white insulation) from the fixture to the white wire from the power source.
---Attach the fixture grounding wire (usually green insulation or bare wire) to the mounting plate with the green grounding screw. Then connect it to the house grounding wire with the wire connector.
Carefully put the wires back into the outlet box.
- Attach the fixture canopy to the mounting strap by inserting the fixture mounting screws, and then secure it with two ball nuts.
- Install 1x60W Max medium base bulb (not included) to the socket. Check relamping label at socket area or packaging for maximum allowed wattage.

VAXCEL
- Attach the glass shade to the glass bracket by threading set screws onto the glass notches. (Do not over tighten.)
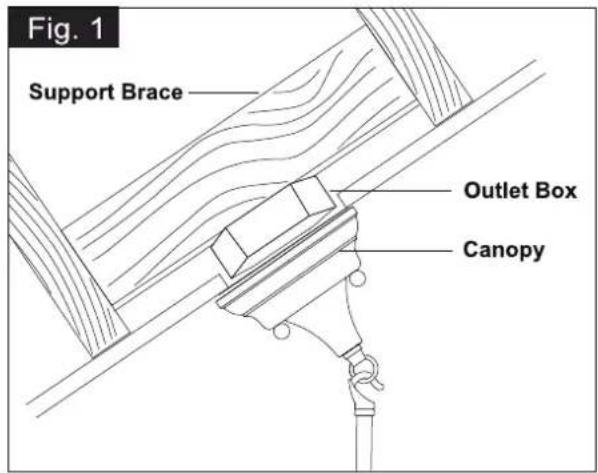
- Angled mounting recommended for a vaulted or angled ceiling. (See Fig. 1)
Turn on the power at fuse or circuit bo
The following parts are available for re-order if damaged or missing.
Spare Parts List:
Assembly Kit 5773MM for P0242 / P0243 6008MM for P0244 / P0268
natural_image
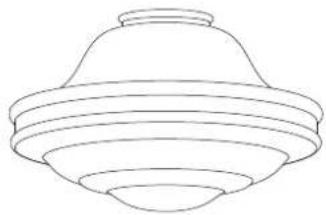
Line drawing of a conical lampshade with concentric ridges (no text or symbols)Glass Shade
9920CG FOR P0242 / P0268
9919MG FOR P0243 / P0244

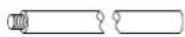
3"Rod
3050RD FOR P0242 / P0243
4646RR FOR P0244 / P0268
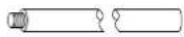
12"Rod
3052RD FOR P0242 / P0243
4644RR FOR P0244 / P0268
6"Rod
3051RD FOR P0242 / P0243
4645RR FOR P0244 / P0268
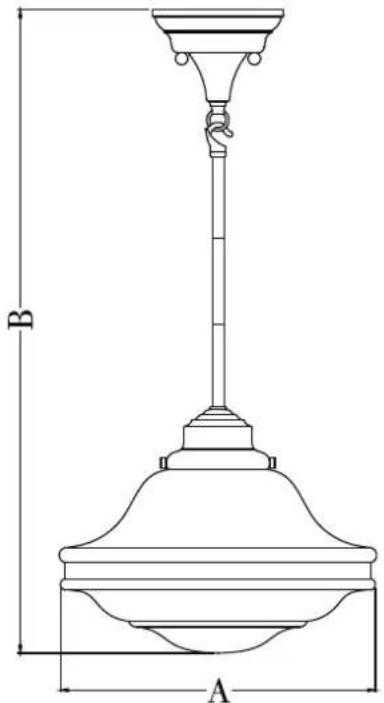
A: 12"
B: 14-3/4\~59-3/4"